Admin User Guide
Link to IMS Platform https://internships.np.edu.sg.
Table of Contents
- Manage Students
- Batch Management
- Reverse Placement for Applications
- Add Employer Account on behalf of Company
- Email Templates
- Notifications
- Analytics
- Rejection Status
- Deactivating Inactive Employer Accounts
- Export Placement Data
- Export Student Data
- Export Job Data
- Export Applicant Data
- Export Offer Data
- System Owner Actions (Change OTP Options, Change Terms of Use, Modify Email Templates)
- Miscellaneous Features
- Adding/Configuring User Accounts
- Student Onboarding
- Administrative Actions
- Job Management (Viewing, Filtering, Approval, Visibility)
- Job Visibility (Mass)
- Create Job on behalf of Company
- On-The-Job Training (OJT)
- Archive Student
- Student Assessment
- Assessment Page:
- Create New Assessments:
- Assessment Dashboard:
- Edit Assessment (Before Published):
- Filters (Assessment Page):
- Question Bank Section Tab:
- Add Question:
- Edit Question:
- Clone Question:
- Delete Question:
- Question Bank Filters:
- Question Tags Section Tab:
- Add Question Tag:
- Edit Question Tag:
- Delete Question Tag:
- Assessment Setup Page:
- Edit Assessment Details from Assessment Setup Page (Before Assessment Published):
- Assessment Setup Section tab:
- Settings Section:
- Questions Section:
- Add Custom Question:
- Edit Questions:
- Delete Question:
- Add From Question Bank:
- Publish Assessment:
- Edit Assessment (After Assessment Published):
- Company Supervisor Section Tab:
- Import Company Supervisors:
- Send Assessment invite to Company Supervisors (Individually):
- Send Assessment invite to Company Supervisors (Bulk):
- Send Assessment Reminder Mail (Individually):
- Send Assessment Reminder Mail (Bulk):
- Filters:
- Assessment Applicants Section Tab:
- Filters:
- Export:
- Clone Assessment:
- Close Assessment:
- Re-Open Assessment:
- Assessment Applicants:
- Assessment Applicants Page:
- Filters:
- Assessment Section Tab (Application Information Page):
- Start Assessment (Interim/Final):
- Continue Assessment (Interim/Final):
- Edit Assessment (Interim/Final):
- View Assessment (Interim/Final):
- Allow students to view interim & final assessment results? Toggle Button (School Settings):
- Internship Visitation Logs
- Internship Visitation Logs Page
- Visit Log Section Tab
- Schedule Internship Visitation Log
- Edit Visit Log
- Delete Visit Log
- Make Visit Record as Completed
- Export Visit Logs
- Filters
- Internship Supervisors Section Tab
- Internship Supervisors Table
- Internship Supervisor Tagged Interns Details Page
- Tagged Interns Details Table
- Visitation Log Section Tab in Applicant Information Page
- Survey
- Survey Page
- Create Survey
- Survey Dashboard
- Edit Survey (Before Survey Published)
- Question Bank Section Tab
- Add Questions
- Edit Question
- Clone Question
- Delete Question
- Question Bank Filters
- Question Tags Section Tab
- Add Question Tag
- Edit Question Tag
- Delete Question Tag
- Survey Setup Page
- Edit Survey Details from Survey Setup Page (Before Survey Published)
- Survey Setup Section tab
- Settings Section
- Questions Section
- Add Custom Question
- Edit Questions
- Delete Question
- Add From Question Bank
- Publish Survey
- Edit Survey (After Survey Published)
- Respondents Section Tab
- Add Respondents to the Survey
- Send Invitation to Respondents
- Resend Invite to Respondent
- Status
- Survey Templates
- Send Email to Respondent
- Delete Respondent
- Export
- Filters
- Respondents Page
- Add Notes to Responses
- Edit Notes
- Delete Notes
- All Responses Section Tab
- Analytics Section Tab
- Clone Survey
- Close Survey
- Re-Open Survey
- Survey (Respondent)
Manage Students
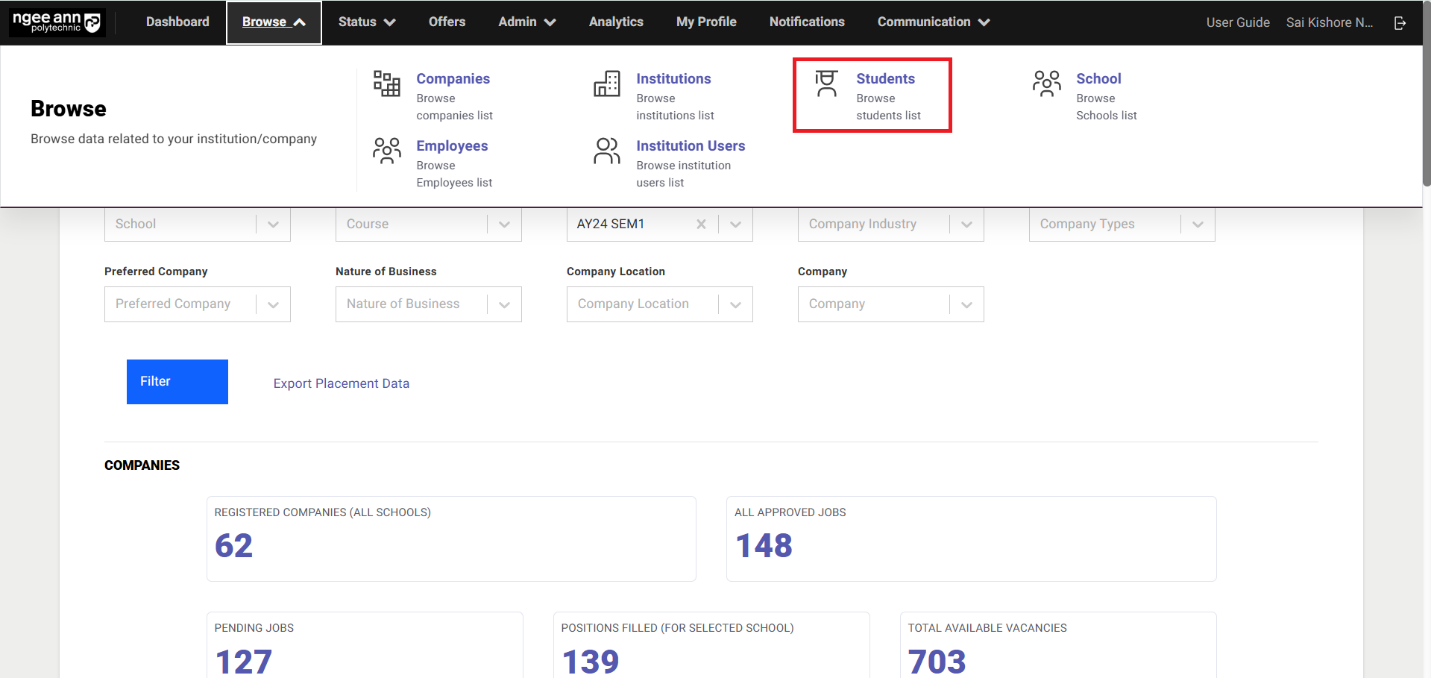
Click on "Browse", followed by "Students".
Filtering
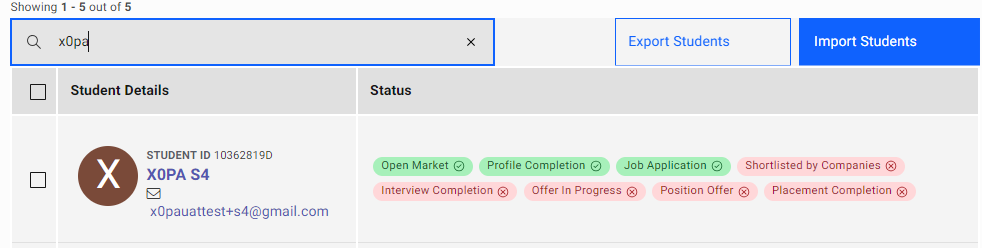
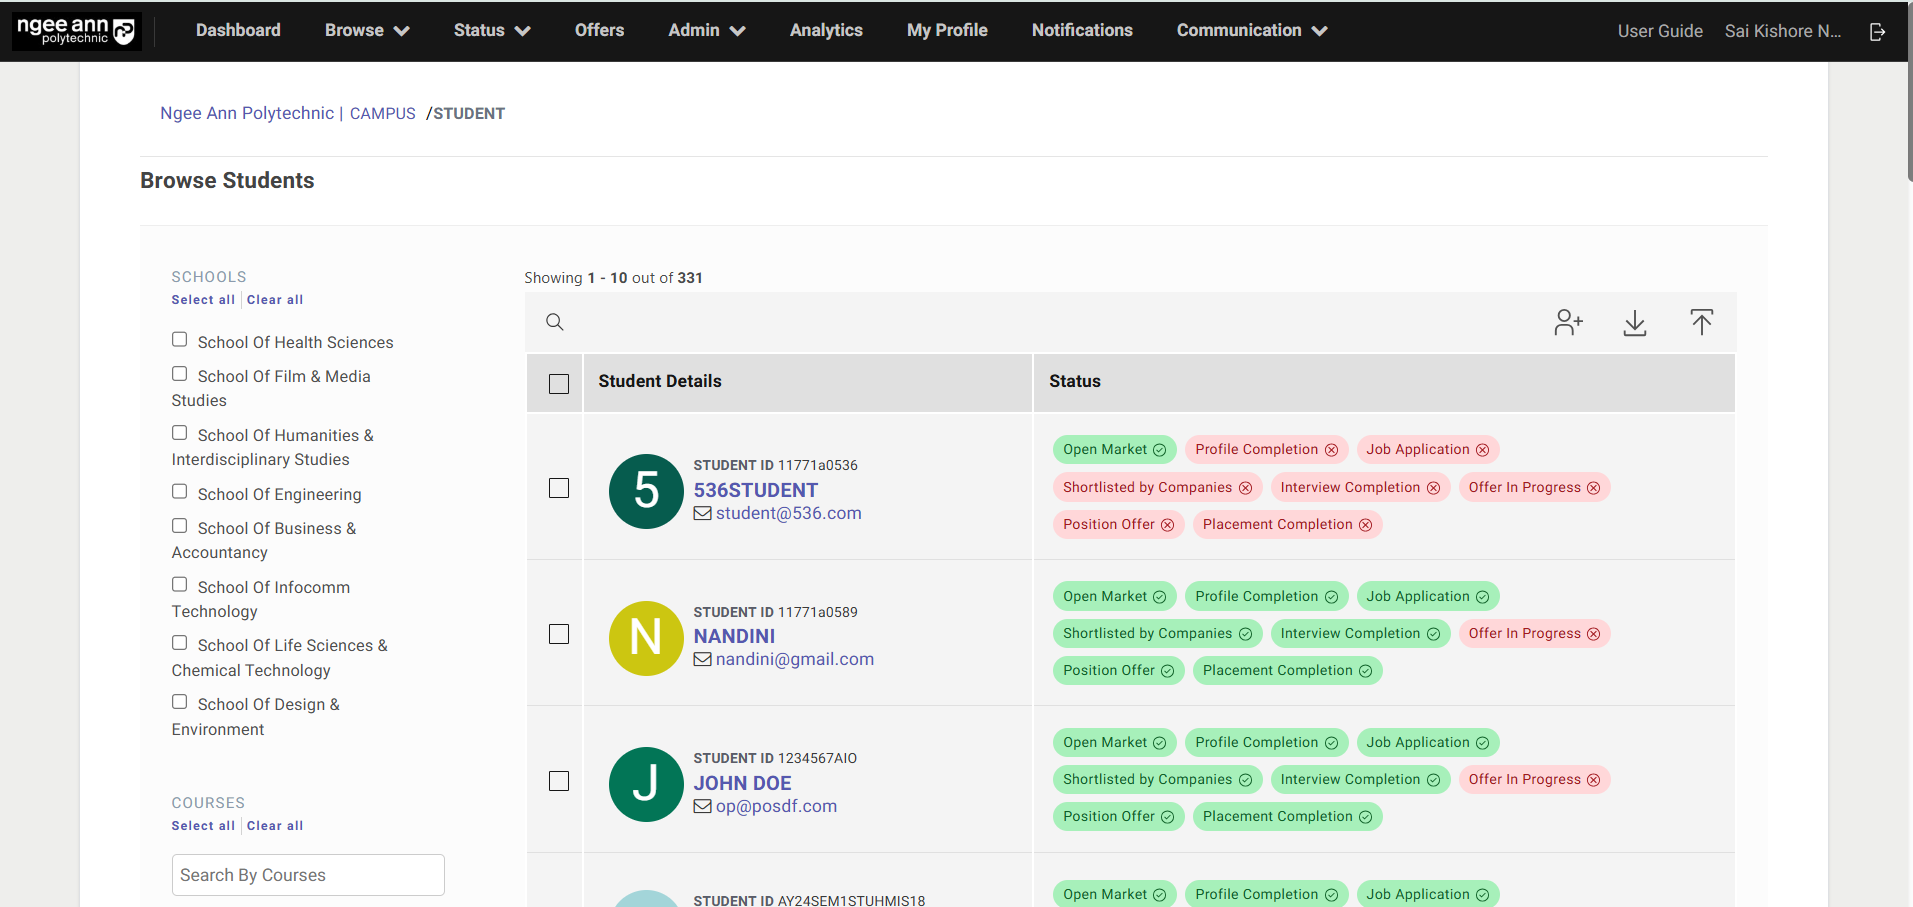
Using the "Search" Function
Admins are able to filter the student by typing the name, student ID, and email of the student in the search bar.

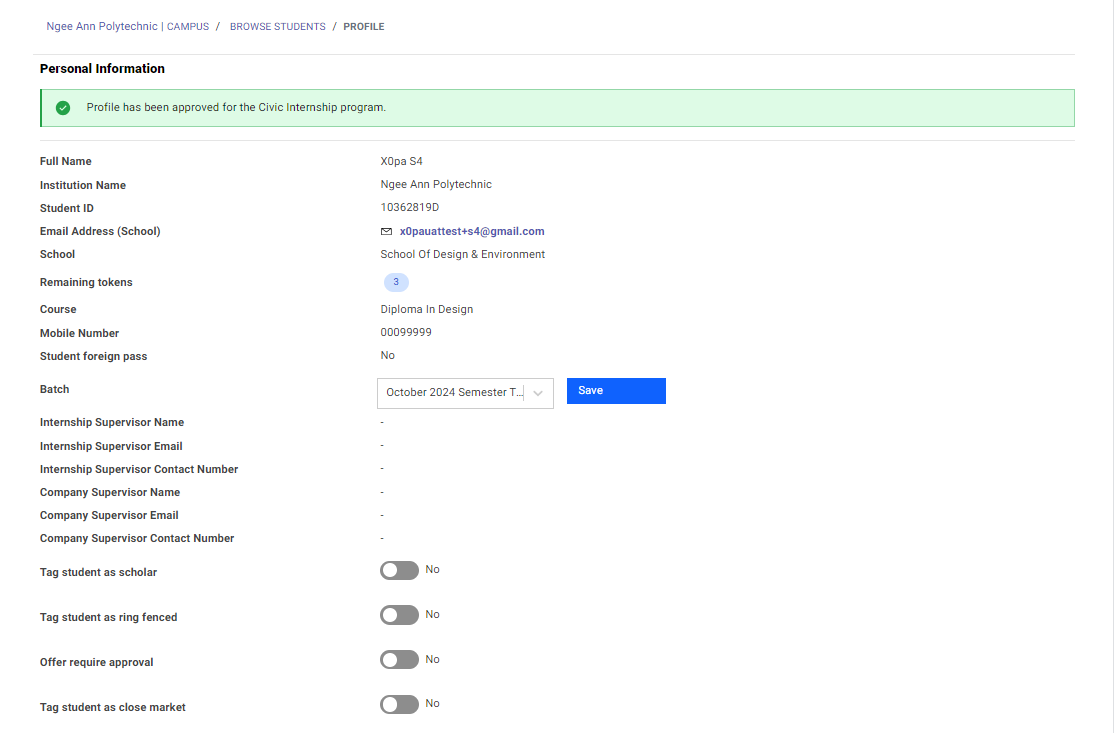
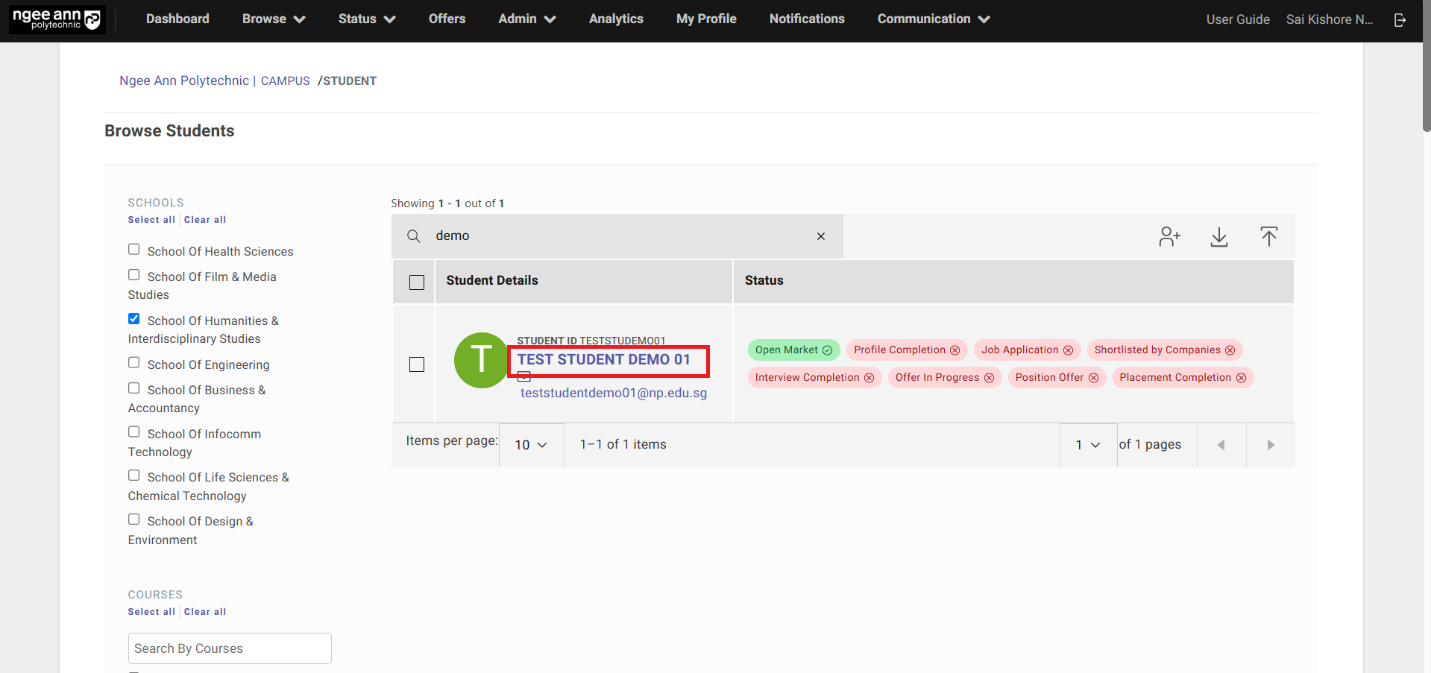
View Student Application and Tag Student as Scholar
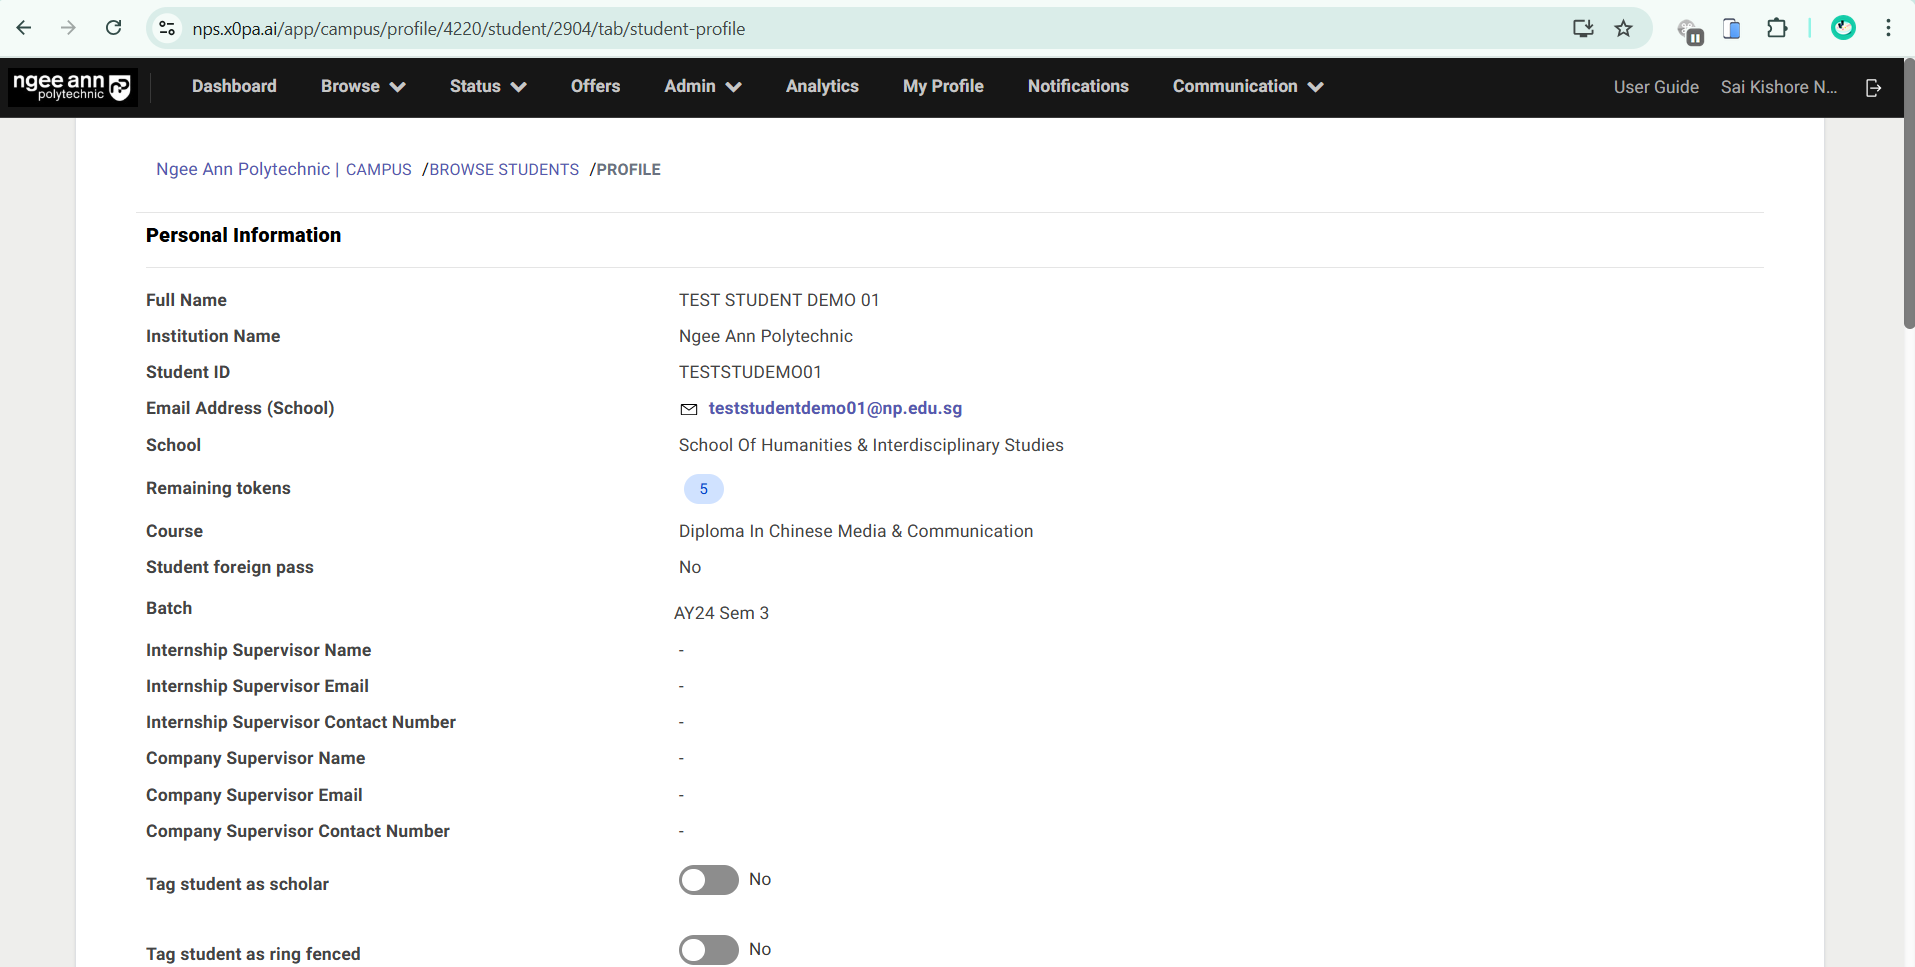
Click on the student's name to go into the student profile.

To tag the student as a scholar, click on the toggle indicated by the red box.
Under applications, click on the company's name to assess the company details as indicated by the orange box.
Click on the job title to assess the job details as indicated by the purple box.
Click on fields indicated by the green box to assess the application details.

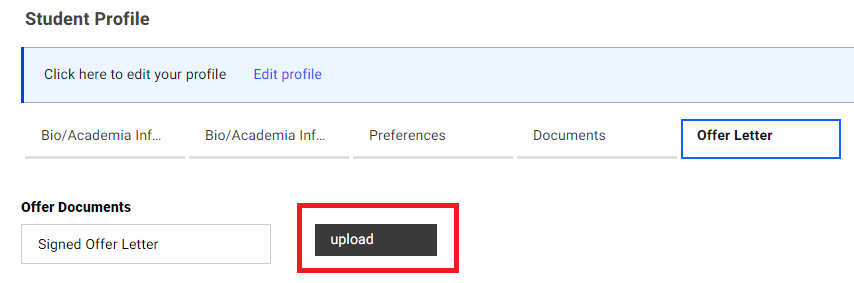
Upload Offer Letter on behalf of Student
You may also assist to upload an offer letter on behalf of a student. Click on "Offer Letter", followed by "upload".

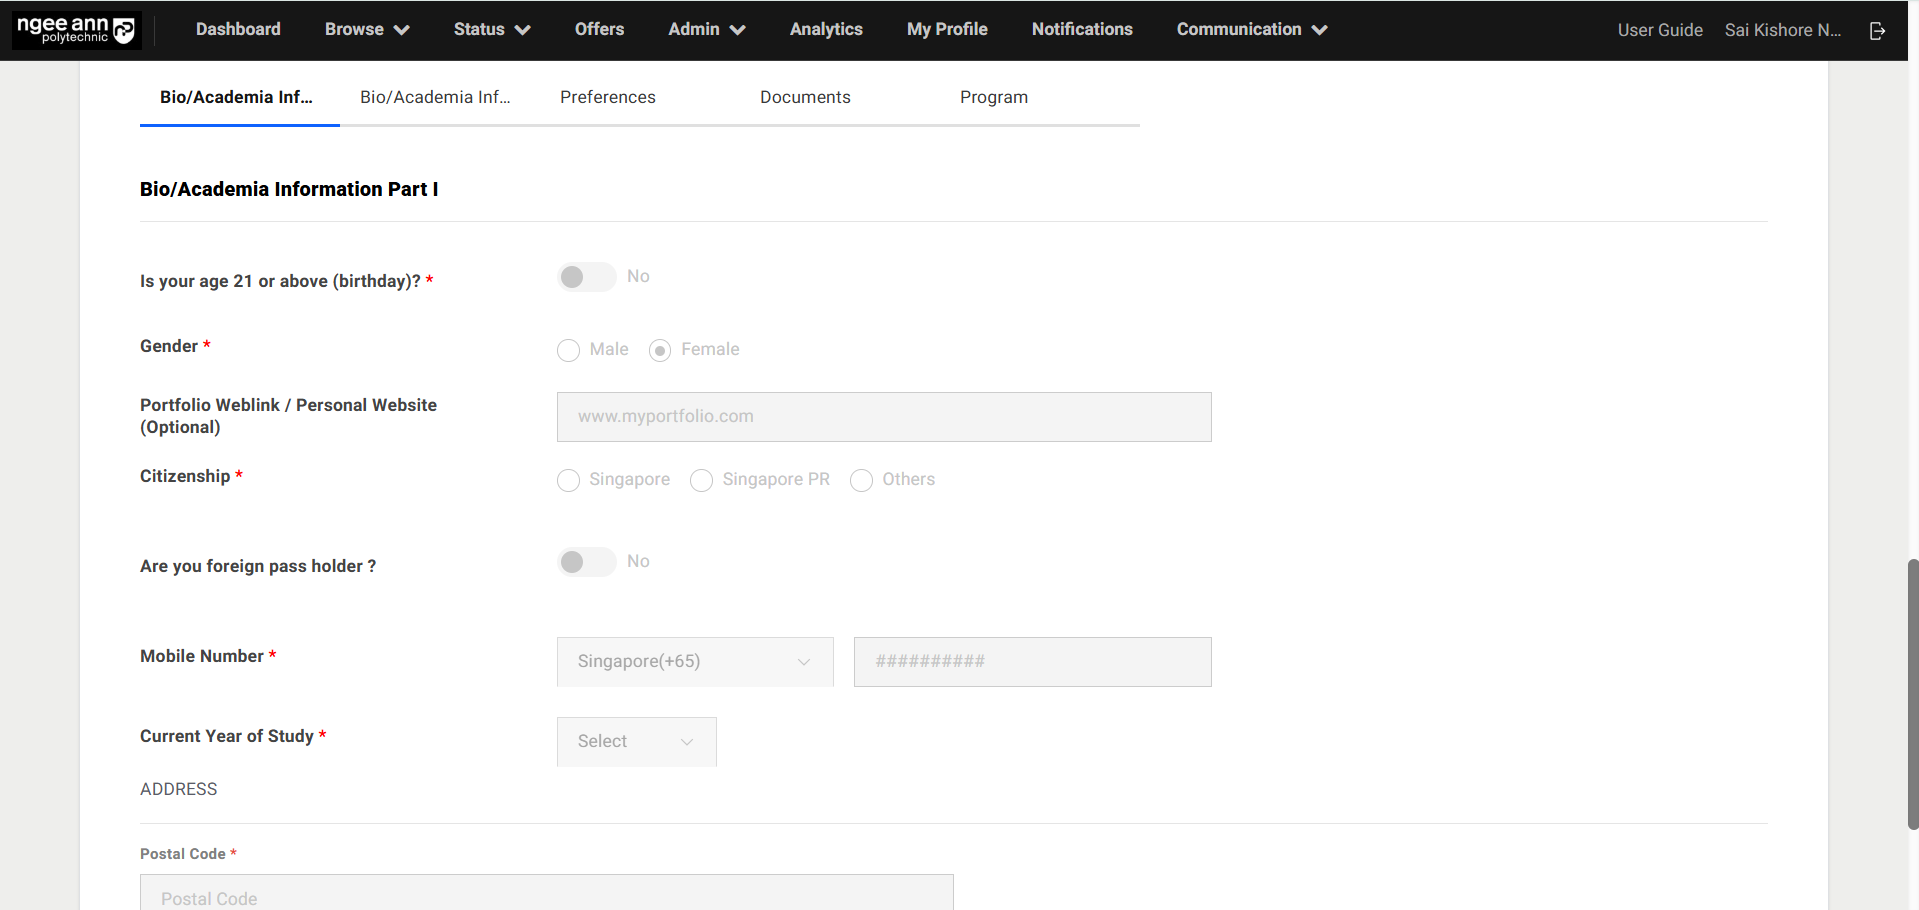
Edit Student Profile
You will be able to review the student's profile here. To edit the profile, click on "Edit". You will be redirected to the student profile page where you can overwrite student data.

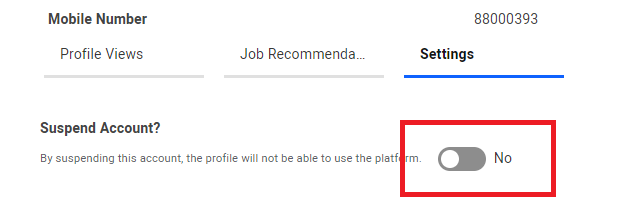
Suspend Student Profile
Currently in the platform, you can only suspend students one at time. Click on the "Settings" tab and switch the toggle to "Yes" to suspend the student.

Application Under Suspended Students
All pending applications for suspended students will be automatically closed and emails will be sent to the employer stating that the student is no longer available.

View Scores
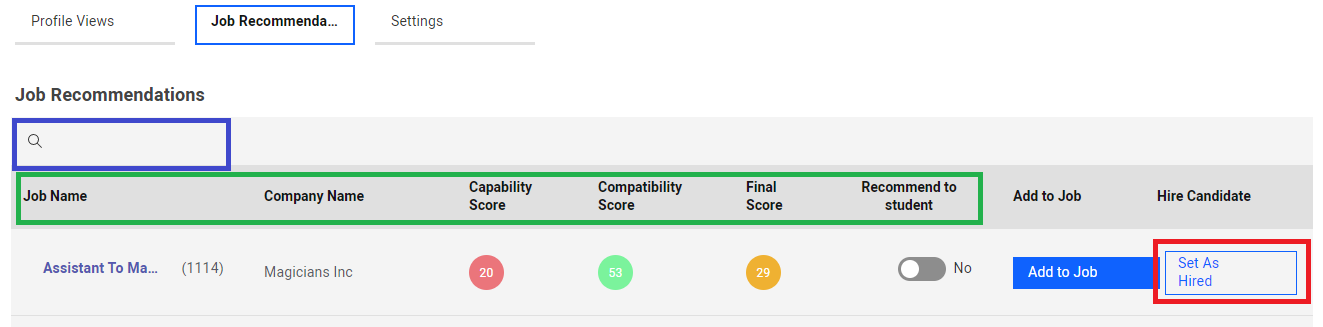
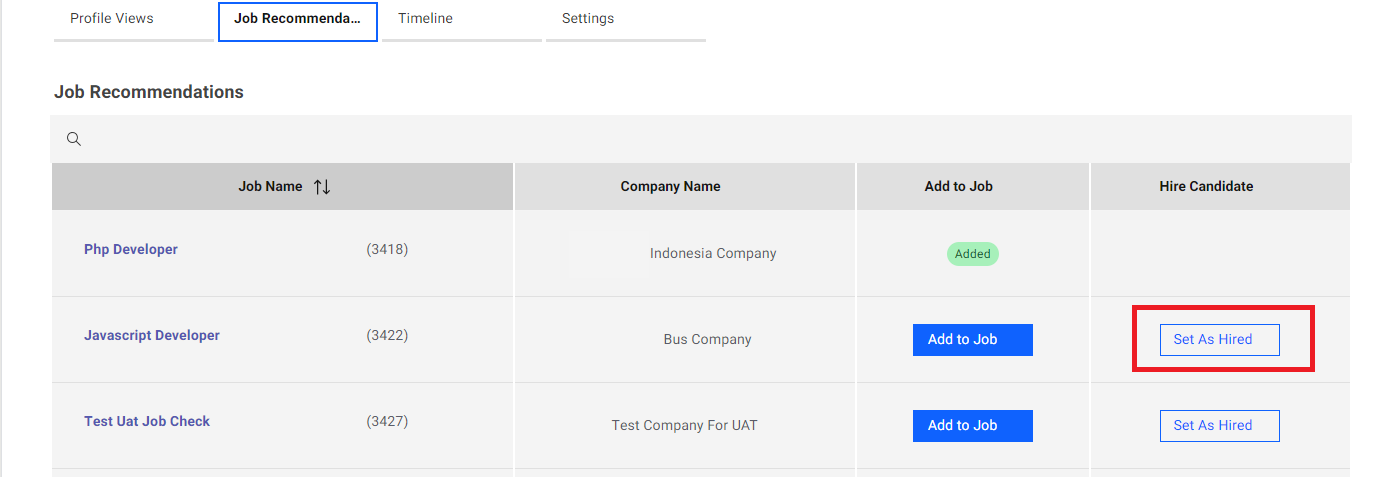
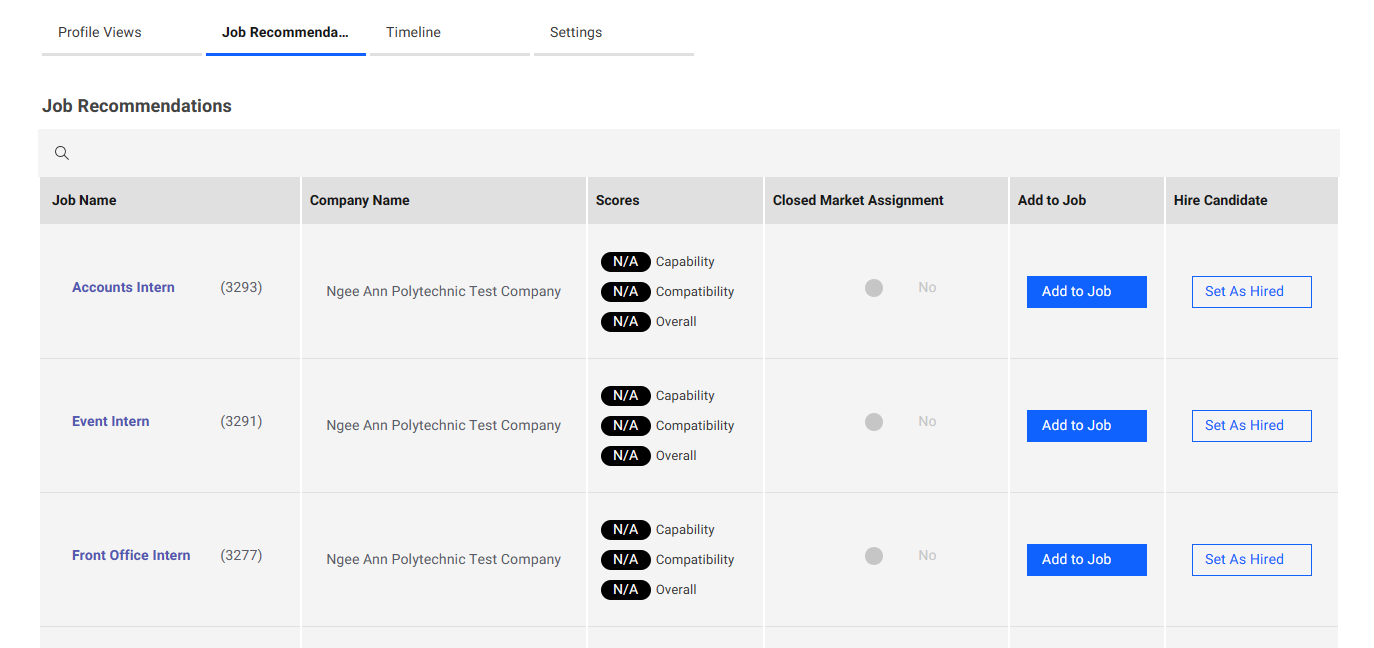
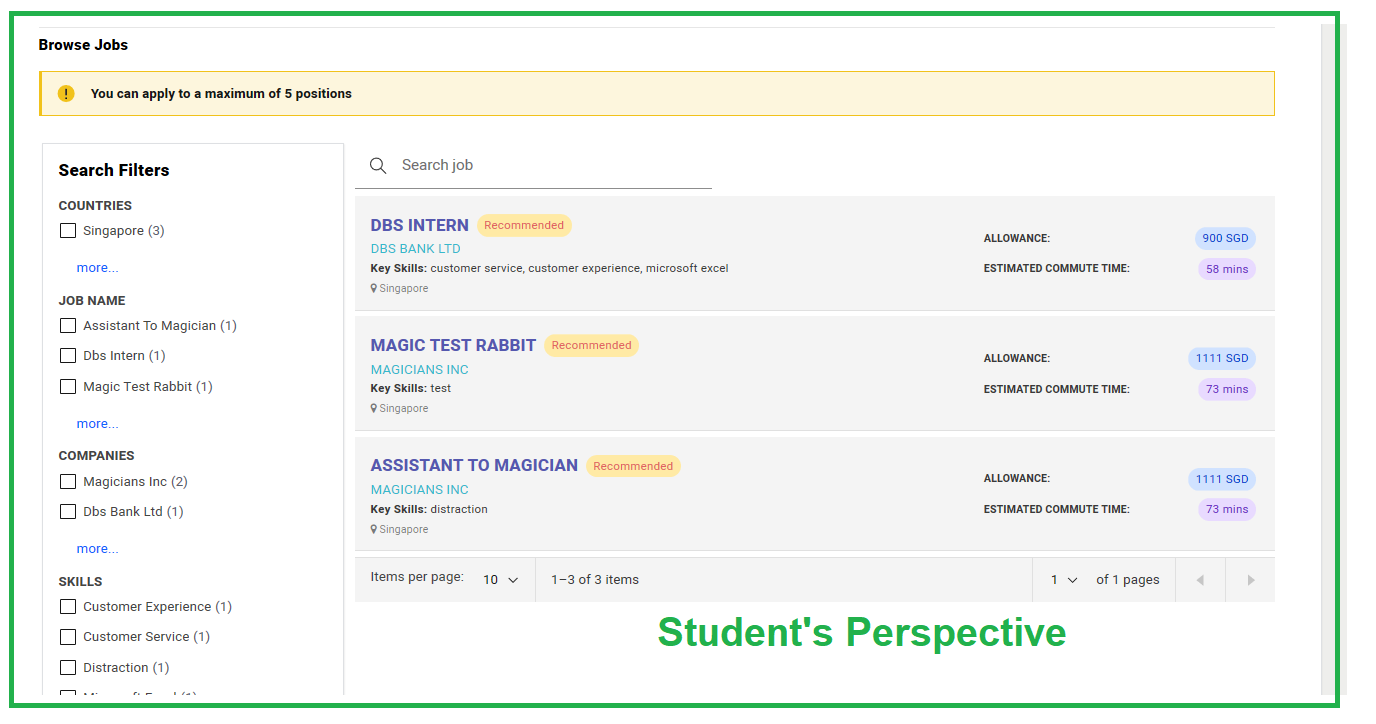
Click on the "Job Recommendations" tab.

The list of jobs in the system will tally with the jobs students can see from their account. Note that they will only be able to see jobs with the same batch as them.
To look for a particular id, job title or company, you can use the search button (indicated by the purple box). To sort by job title/company/scores, click on the columns (indicated by the green box).
Click on "Add to Job" to help the student apply for the job. This does not mean that the student will be placed immediately and requires follow up with the employer.
Click on "Set as Hired" to immediately placed the student for the job. The student will skip the employer-student process and just need to upload the offer letter in the platform.
Batch Management
Click on "Browse", followed by "Institutions".

Under the tabs, click on "Batch Management"
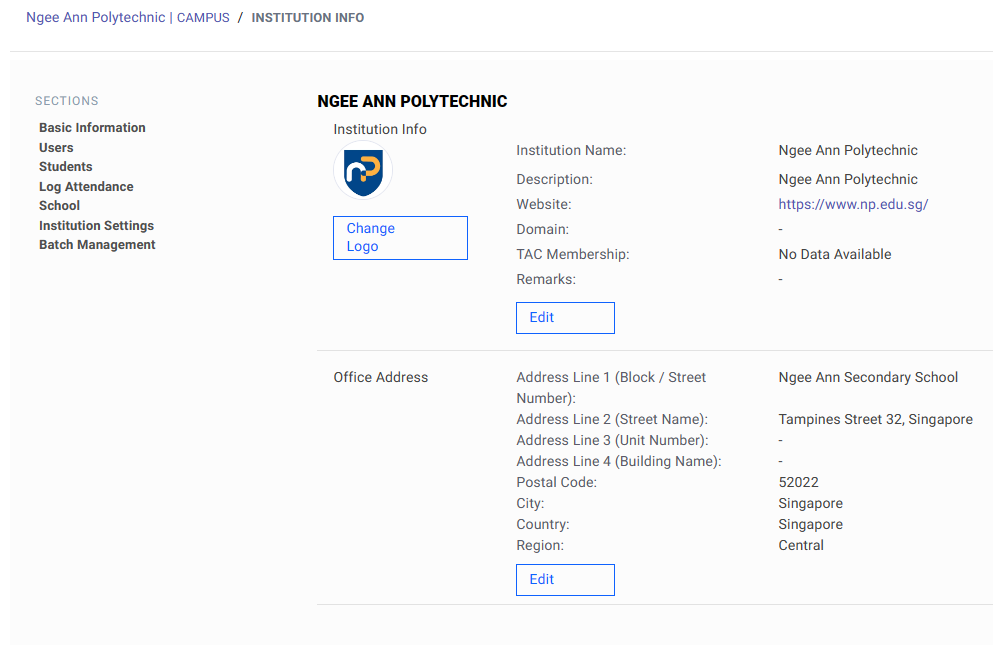
Note that only the System Owner will be able to edit or manage the batches. The rest of the admins (Internship Manager) can only view the batch management page.
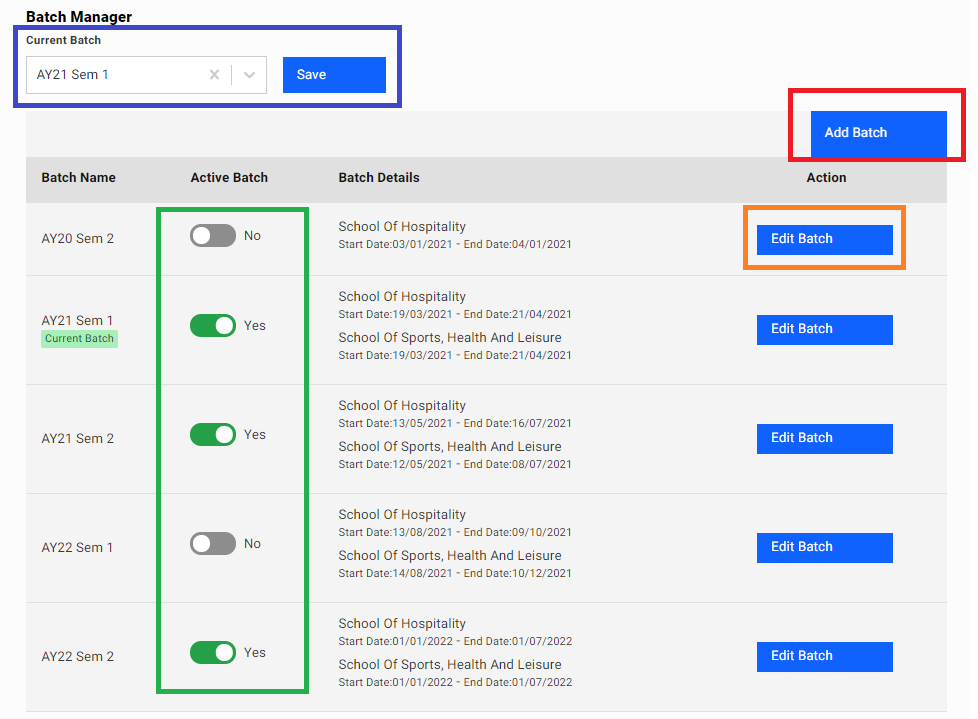
To toggle the current batch, click on the drop button, select the batch and click save as indicated by the purple box.
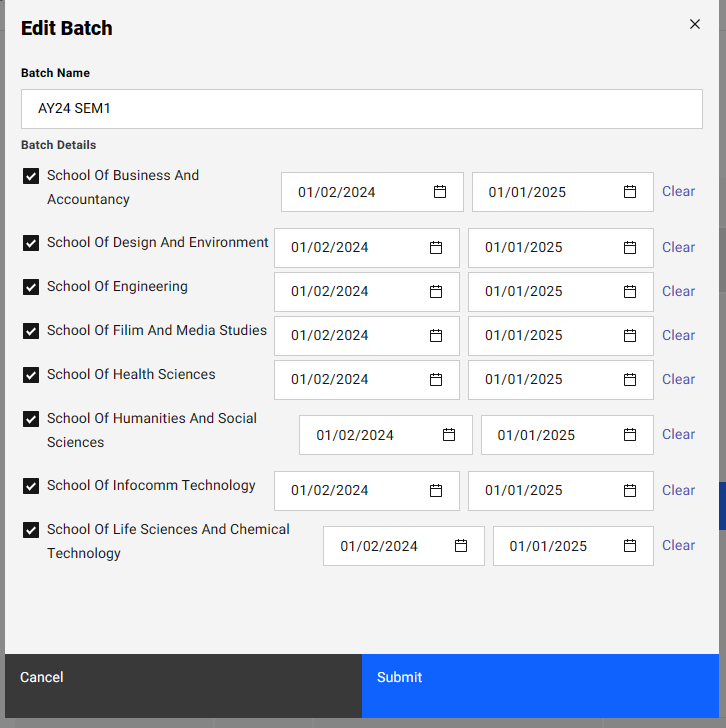
To add a new batch, click on "Add Batch" and fill in the respective details as indicated by the red box.
To toggle a particular batch as active, toggle a selected batch to "Yes". This will allow employers to post a new job under that batch as seen in the example below.
To edit a batch, click on the selected batch and fill in the respective details as indicated by the orange box.
Reverse Placement for Applications
During the internship placement cycle, there might be instances whereby you might need to reverse the placement of students. This could be due to an accidental mis click from the employer/student side or could be because the job is no longer available by the company.
Reversing the placement of a student will allow student to continue applying for jobs in the system.
Click on "Browse", followed by "Students".

Click on the affected student's name as indicated by the red box.

Click on the affected placement by clicking on "Yes" under Placement Completion Status.

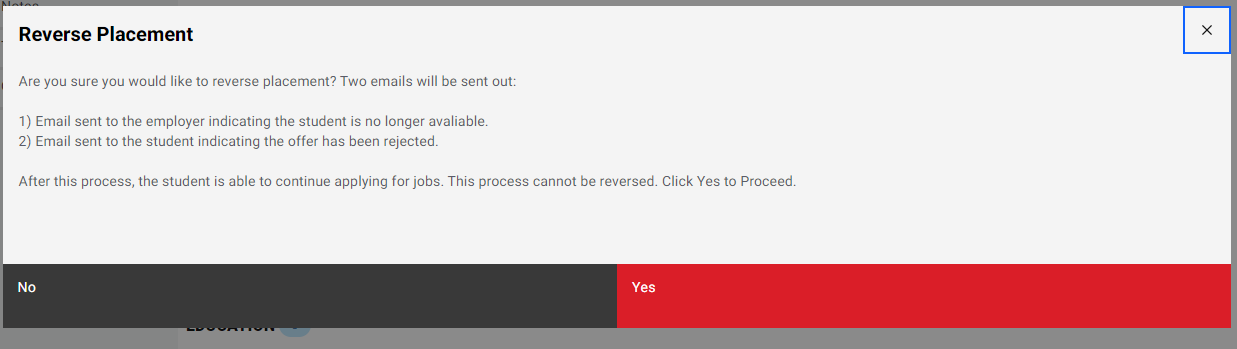
Under the application, click on "Reverse Placement" as indicated by the red box.

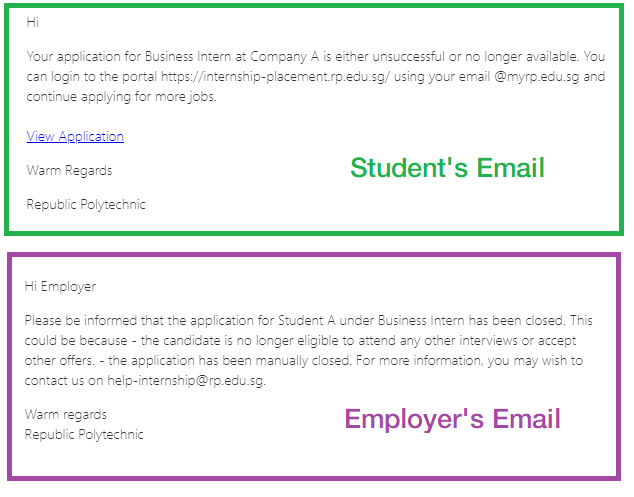
Note that an email will be sent to the employer and an email will also be sent to the student. The email templates are displayed below.
After this process, the student can continue applying for jobs.
@np.edu.sg
https://www.np.edu.sg/connect/
Ngee Ann Polytechnic
Ngee Ann Polytechnic
Add Employer Account on behalf of Company
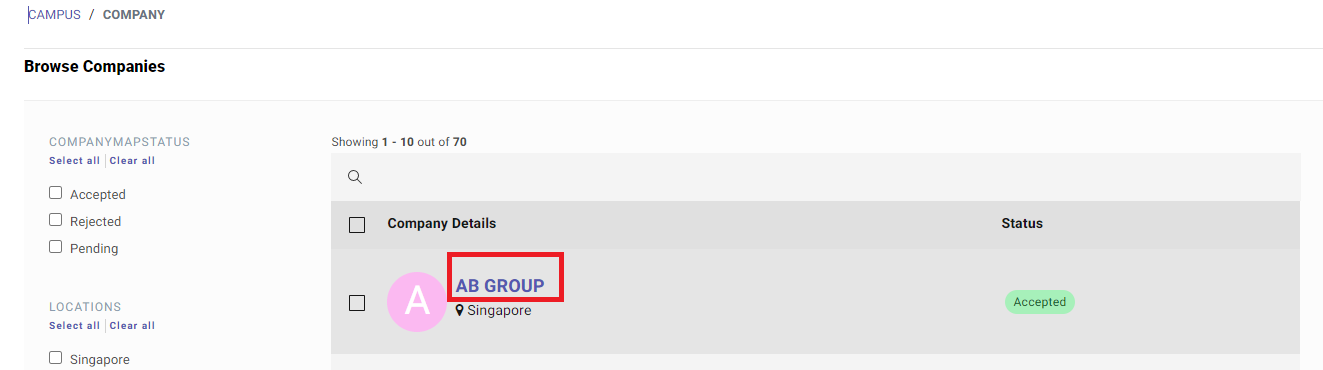
Click on "Browse", followed by "Companies".

Click on the respective company by selecting the company name as indicated by the red box.
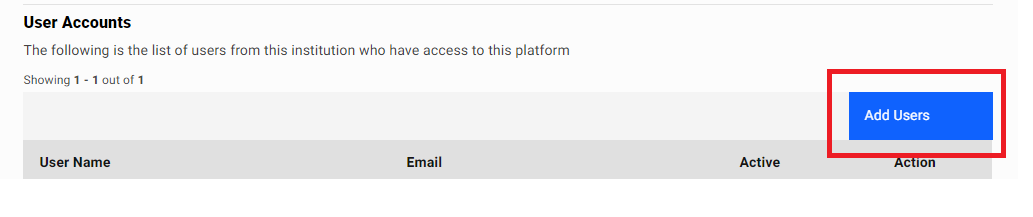
Click on "Add Users".
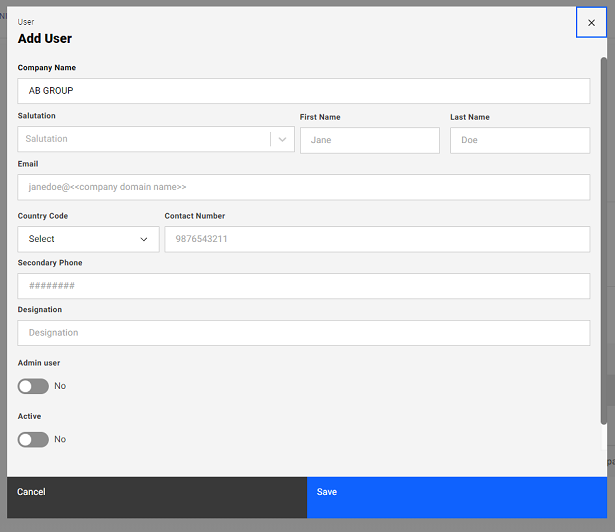
Fill in the respective details and toggle "Admin user" and "Active" to be "Yes".
Email Templates
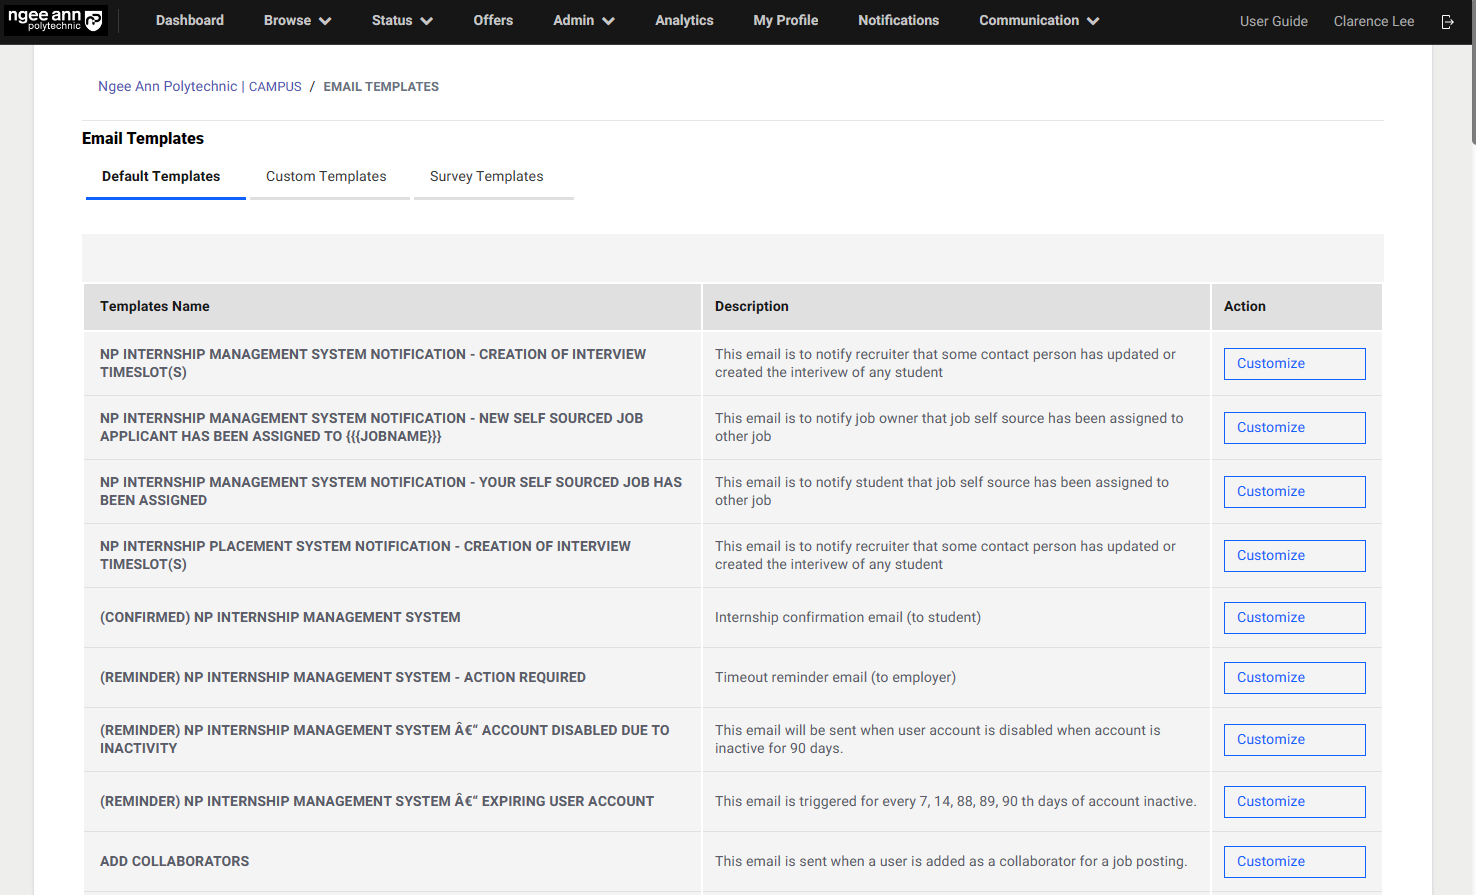
Click on "Communication", followed by "Email Templates"

Default Templates
A list of default templates are available and click on "Customize" to edit the contents in the email.
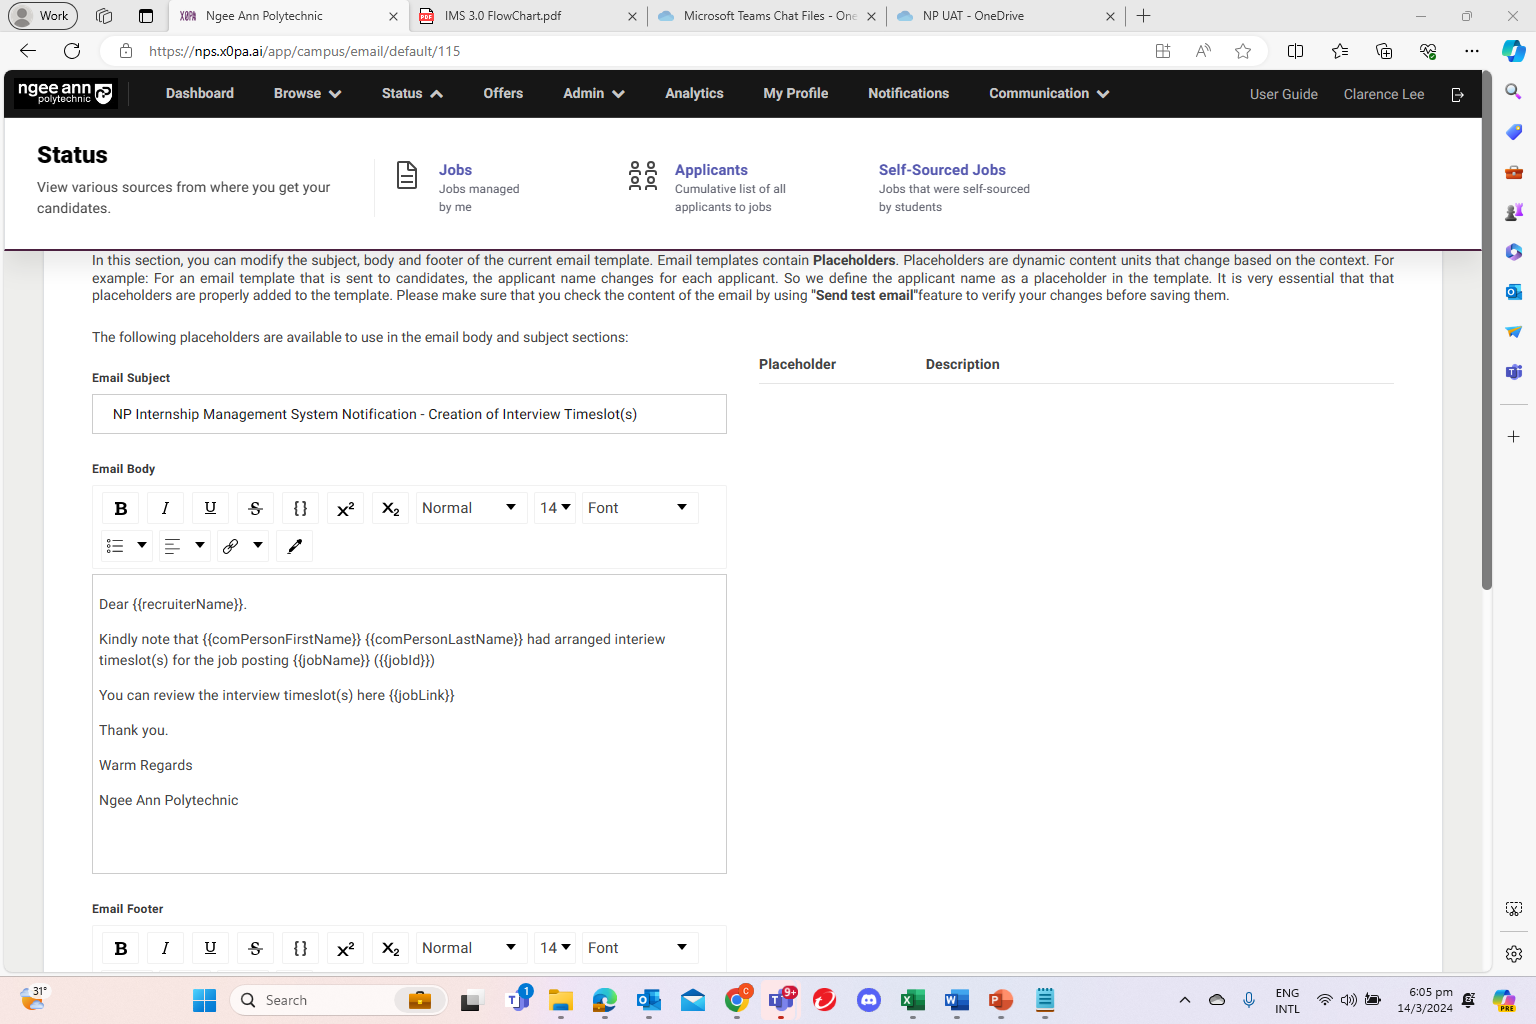
Those words enclosed in {{}} are placeholders extracted out from the database.
For example, if Aaron Ang, a student from RP, receives a "Receptionist" job interview from Singtel, a company,
{{candidateName}} >> Aaron Ang
{{companyName}} >> Singtel
{{jobName}} >> Receptionist
{{scheduleInterviewLink}} >> A link that prompts student to platform to select time slots.
Some other placeholders include
{{tzid}} >> Timezone
{{viewXXXXX}} or {{XXXXXlink}} >> Links that prompts user to platform
Once completed, you can either save template, send a test email to your email account or also preview the email.

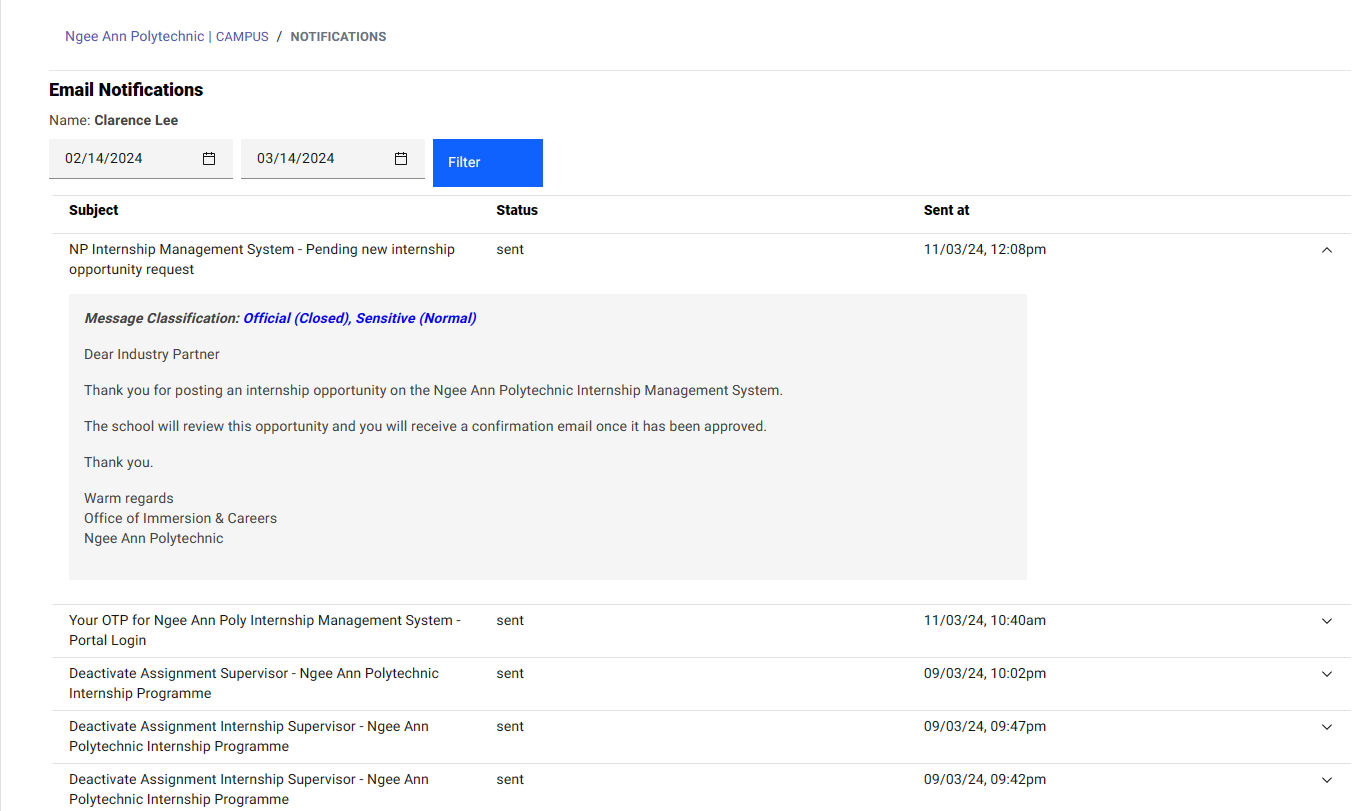
Notifications
On the top toolbar, click on "Notifications".

Here, you will be able to see all notifications sent to you via email. You may expand the accordion to see the email body by clicking on the button indicated by the red box.
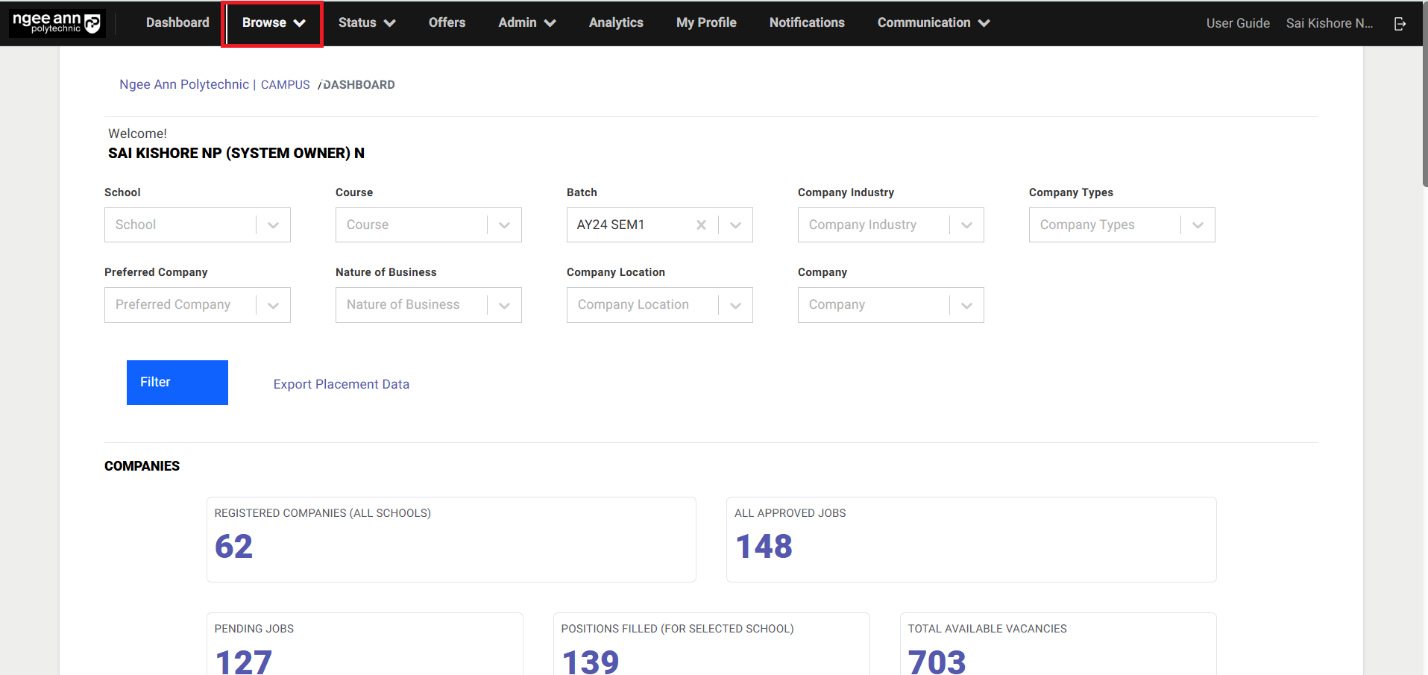
Analytics
By default, all schools, courses and the current batch is selected by default.
The System Owner will be able to filter by School, Course and Batch. The Internship Manager will be able to filter by Course and Batch.
The data is updated every hour. Click on "Update" to retrieve the new set of data immediately.

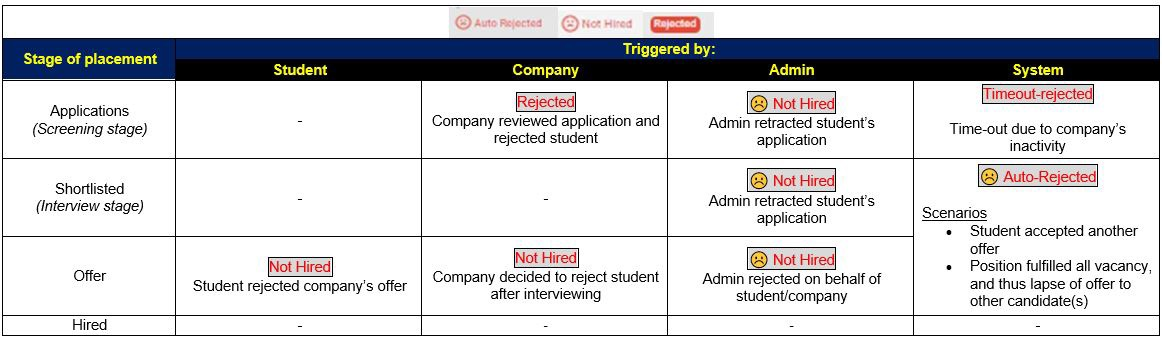
Rejection Status
- When a candidate is in the screening stage a rejection of the candidate at this stage will result in a status of "rejected".
- A shortlisted candidate will move to the "interview in progress" stage. At this stage, the option to make an offer or to reject will be given. if the candidate is rejected, the status will be "Not Hired".
- If the recruiter makes an offer, an email will be triggered to the candidate to accept or reject the offer If the offer is rejected by the candidate, the status will be "Not Hired".
- Some alternative scenarios for offer:
a. When student rejects the offer, their status will become "Not hired".
b. When Administrators reject a student who is in the offer approval process, the status will become "Not hired".
- "Auto rejection" happens in the following scenarios:
a. A candidate has applied for 3 jobs and has been selected for any of the job, the candidate will be auto-rejected for the other 2 jobs.
b. If a job posting has 5 approved vacancies and 10 students have applied. When 5 candidates are hired and the vacancies fulfiled the unselected candidates will get auto-rejected.
Deactivating Inactive Employer Accounts
Click on "Browse", followed by "Companies".

Click on the respective company by selecting the company name as indicated by the red box.
Click on active status and toggle.
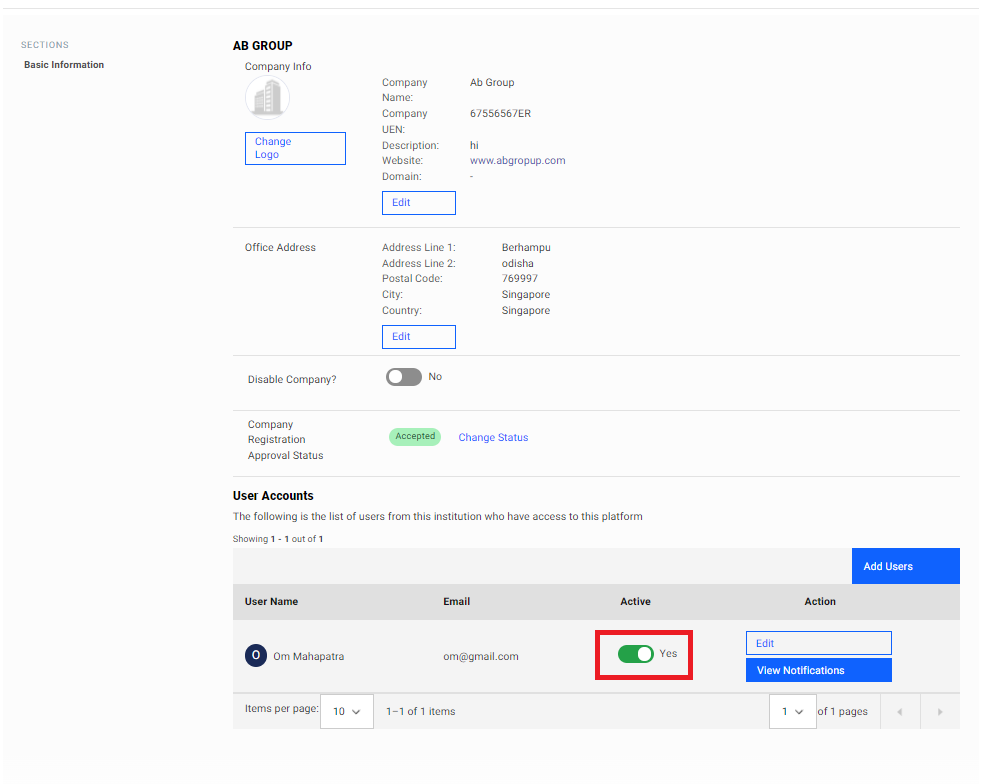
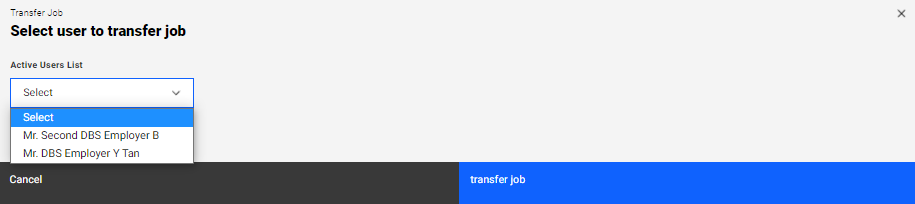
Select user to transfer Job and transfer.
Set user as inactive.

SET EMPLOYER ACCOUNT TO ACTIVE
Note that you can re-activate employer account again by toggling the active status.
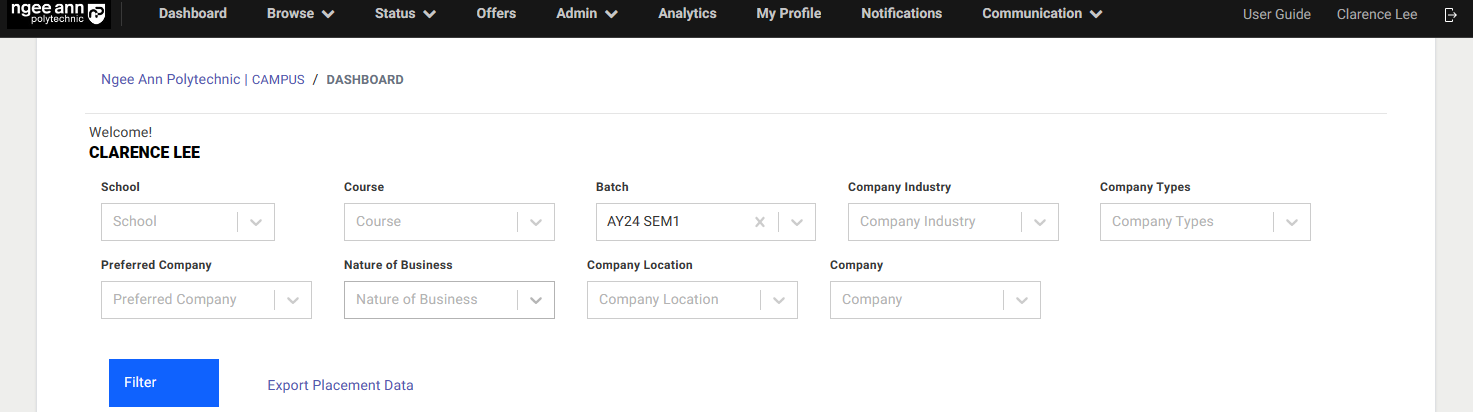
Export Placement Data
Purpose
Data available for: System Owner, Internship Manager
Where to download
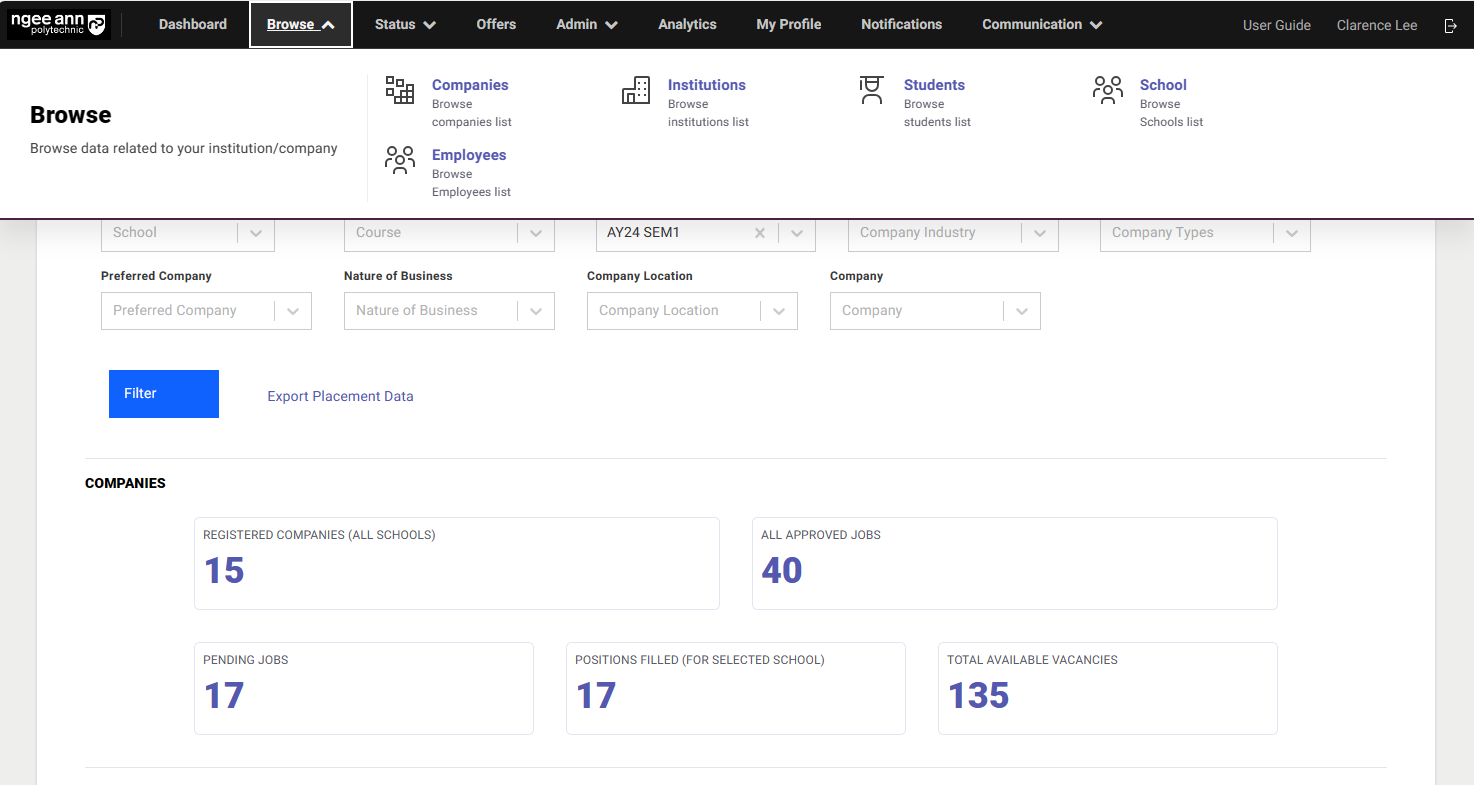
Under the home page, click on "Export Placement Data" as indicated by the red box.
Metadata
Column Name
- Student ID
- Student Name
- Start Date(Format: DD/MM/YYYY)
- End Date(Format: DD/MM/YYYY)
- School
- Programme
- Liaison Officer
Status
- Company Name
- Postal Code
- Address
Student Reporting Address
Company Website
Company Type
Industry Type
- Local/Overseas
- UEN
- Salutation
- Company Contact Person First Name
- Company Contact Person Last Name
Department
- Designation
- Contact Number
- Email Address
- Monthly Allowance
Monday To Friday Start
Monday To Friday End
Saturday(if applicable)
Saturday Start
Saturday End
Sunday & Public Holidays (if applicable)
Sunday And Holiday Start
Sunday And Holiday End
Job Role
Job Scope
'Secondary Responsibility
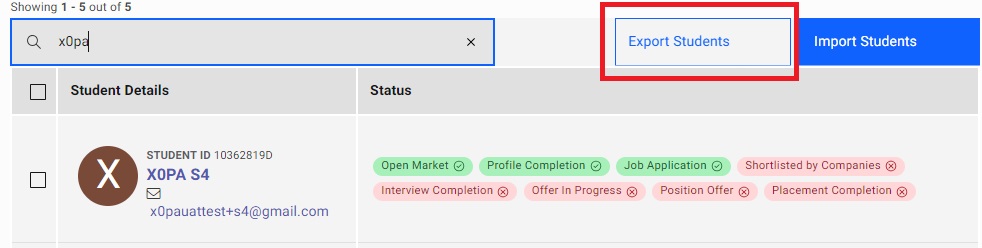
Export Student Data
Purpose
Data available for: All Admins
Where to download
Click on "Browse", followed by "Students".

Click on "Export Students" as indicated by the red box.
Metadata
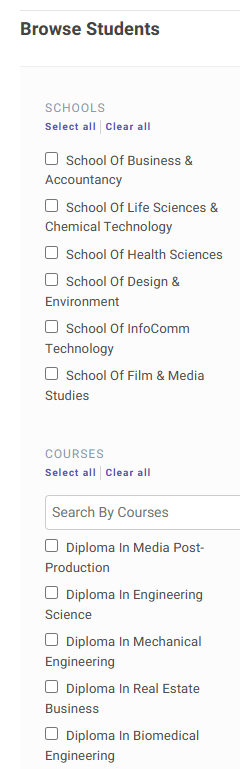
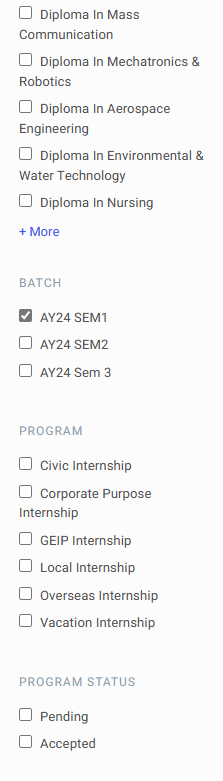
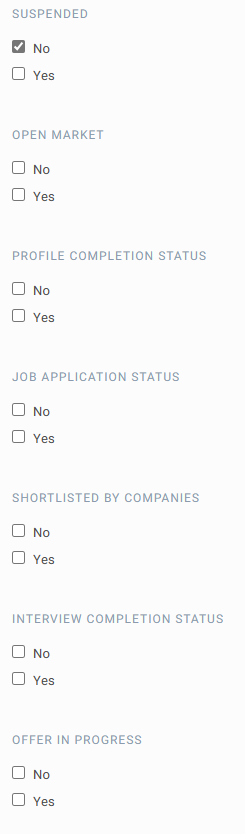
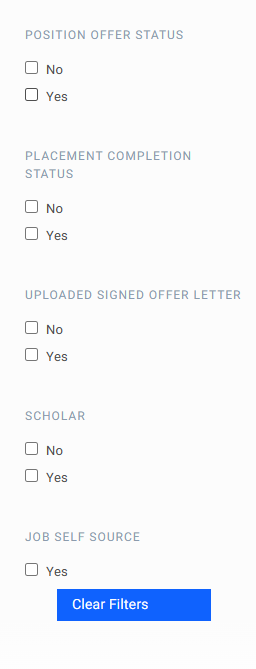
Users can download a specific section of student data based on filters. For example, if an admin would like to download all students from the batch (AY20 Sem 1) and the Diploma in Integrated Events Management who have been placed but yet to upload an offer letter, the following checkboxes have to be selected.
- Diploma in Integrated Events Management
- AY20 Sem 1
- Placement Completion Status (Yes)
- Uploaded Signed Offer Letter (No)
| Column Name | Description |
|---|---|
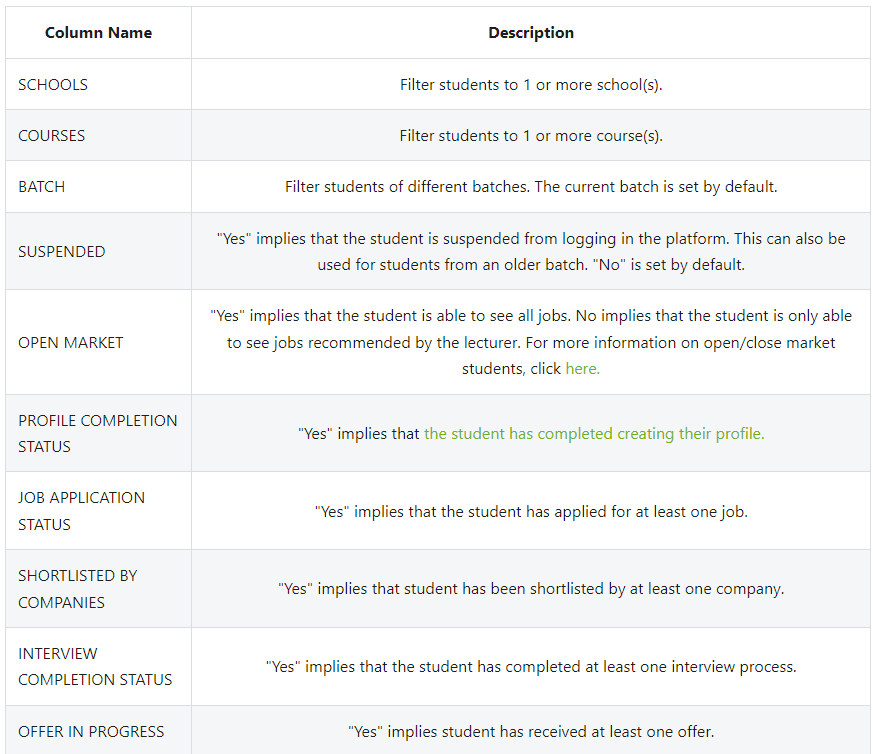
| StudentId | Student ID of Student |
| Student Name | Full Name of Student |
| Institutions | Ngee Ann Polytechnic |
| Courses | Course in Lower Case |
| Placement Completion Status | "Yes" implies student has been successfully placed in an internship |
| Schools | Schools from Ngee Ann Polytechnic |
| Suspended | "Yes" implies that the student is suspended from logging in the platform. This can also be used for students from an older batch |
| Open Market | Yes implies that the student is able to see all jobs. No implies that the student is only able to see jobs recommended by the lecturer. For more information on open/close market students, click here |
| Job Application Status | "Yes" implies that the student has applied for at least one job |
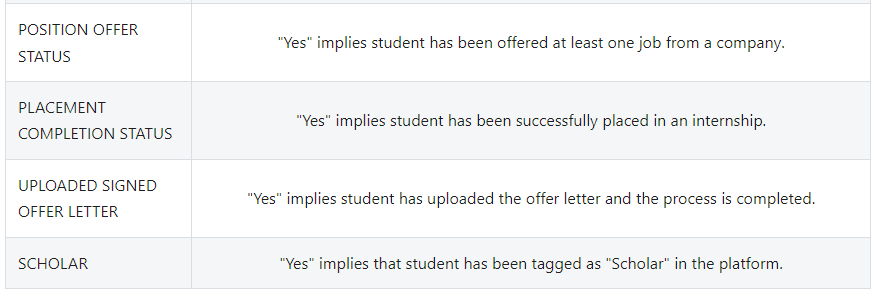
| Position Offer Status | "Yes" implies student has been offered at least one job from a company |
| Profile Completion Status | "Yes" implies that the student has completed creating their profile. |
| Interview Completion Status | "Yes" implies that the student has completed at least one interview process |
| Salary | Salary of the position is displayed if student has been placed |
| Company Name | Company of the position is displayed if student has been placed |
| Job Name | Job name of the position is displayed if student has been placed |
| Uploaded Signed Offer Letter | "Yes" implies student has uploaded the offer letter and the process is completed |
| Scholar | "Yes" implies student has been tagged as "Scholar" |
| Contact Number | Contact Number of the respective students. |
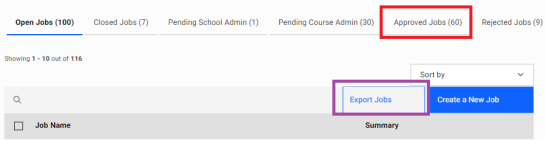
Export Job Data
Purpose
Data available for: All Admins
Where to download
Click on "Status", followed by "Jobs".
Click on “Approved Jobs” followed by “Export Jobs”.
Metadata
Contains hiring metrics of every job for admins to keep track
| Column Name | Description |
|---|---|
| Company ID | Company ID of Company (for easier tracking in platform) |
| Job ID | Job ID of Job (for easier tracking in platform) |
| Company Name | - |
| Job Name | - |
| Requested Vacancies | Number of vacancies requested for this position when creating/cloning job. |
| Primary Course Admin | All primary course admins from the job. |
| No. of Job Vacancies Approved in this Company | Total number of vacancies for the entire company that have been approved by admins (This sums up all the approved vacancies of all jobs belonging to that company |
| No. of Students Hired in this Company | Total number of students that have been placed in this company. This sums up all the hired placements of all jobs belonging to that company |
| Approved Vacancies | Number of vacancies approved for this position by the admins |
| Occupied Slots | Number of students that have been placed in this job position |
| No. of Job Availability | Number of positions left. This is the same as "Approved Vacancies" - "Occupied Slots" |
| Job Availability | "Yes" implies that there is at least one position available for this job position |
| Email of candidate | |
| Name | Name of candidate |
| Visible to XXXX | "Yes" implies that this job is open to Students from a specific course |
| Company Link | URL of the Company Details in the platform |
| Job Visibility | "Yes" implies that the job is set as "visible". For more information on job visibility, click here |
| No. of Applications | Total number of students that have applied for this position |
| No. of Shortlisted | Total number of applications that have been shortlisted by the employer |
| No. of Rejected | Total number of applications rejected by the employer |
| Job Link | link in the platform to the job |
| Rejected Job | Indicates if job is rejected in the platform |
| Job Batch | The respective batch the job is tagged to |
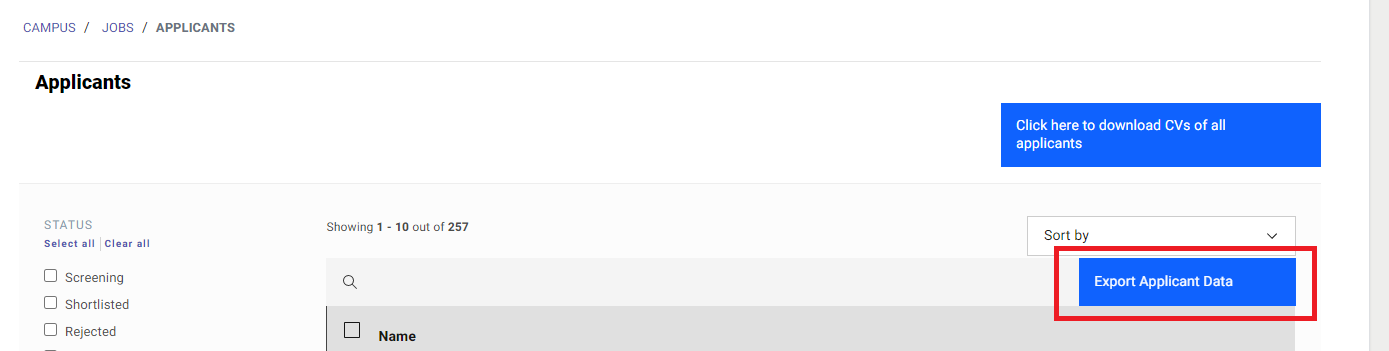
Export Applicant Data
Purpose
Data available for: All Admins
Tracking of applications for every student
Where to download
Click on "Status", followed by "Applicants".

Click on "Export Applicant Data" as indicated by the red box.
Metadata
| Column Name | Description |
|---|---|
| Student ID | Student ID of Student |
| Name | Full Name of Student |
| Diploma | Diploma (acronym) |
| Company Name | Company involved in application |
| Job Title | Job name involved in application |
| Shortlisted | "Yes" implies student has been shortlisted |
| Interview Completion Status | "Yes" implies student is currently undergoing interview |
| Position Offer Status | "Yes" implies student has been offered the job from that company |
| Placement Completion Status | "Yes" implies student has been placed |
| Application Link | Link in the platform to the application of the respective student and job |
| Suspended | "Yes" implies student is suspended from logging into the platform |
| Student Application | Date at which student has apply for the job |
| Student Placement | Date at which Student has been placed |
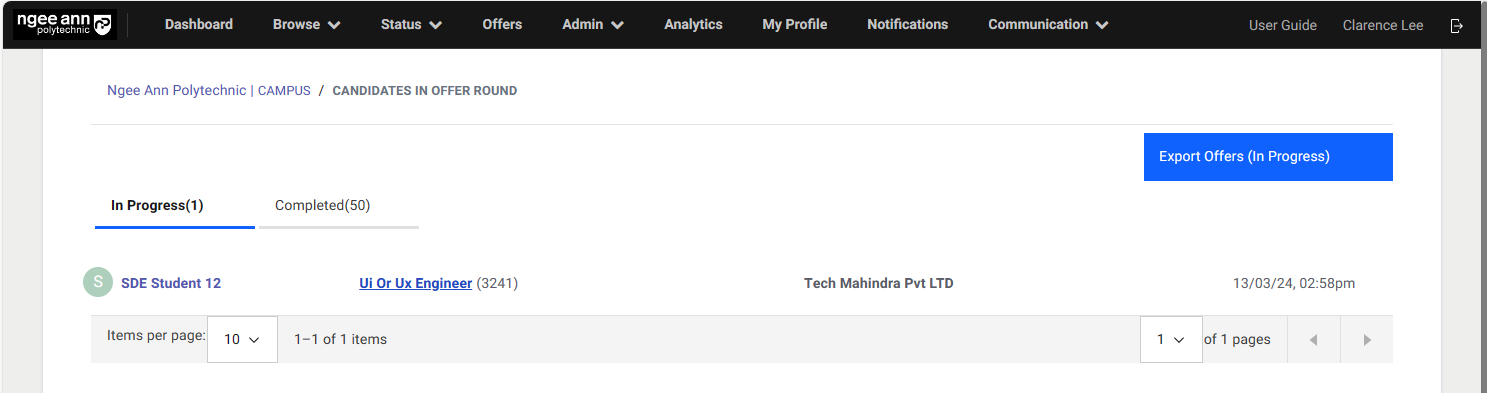
Export Offer Data
Purpose
Data available for: All Admins
Tracking of Offers for every student.
Where to download
Click on "Offers" on the top toolbar. Click on "Export Offers Data" as indicated by the red box.
Metadata
| Column Name | Description |
|---|---|
| Student Name | Full Name of Student |
| Diploma | - |
| - | |
| Company | Company name involved in offer |
| Job Title | Job name involved in offer |
| Application Link | Link in the platform to the offer of the respective student and job |
System Owner Actions (Change OTP Options, Change Terms of Use, Modify Email Templates)
Click on "Browse", followed by "Institutions".

Miscellaneous Features
Under the tabs, click on Institution Settings
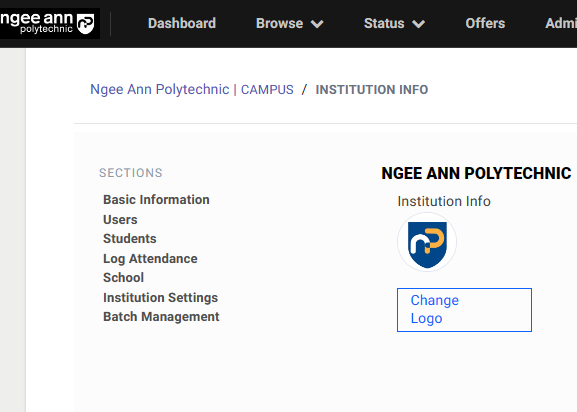
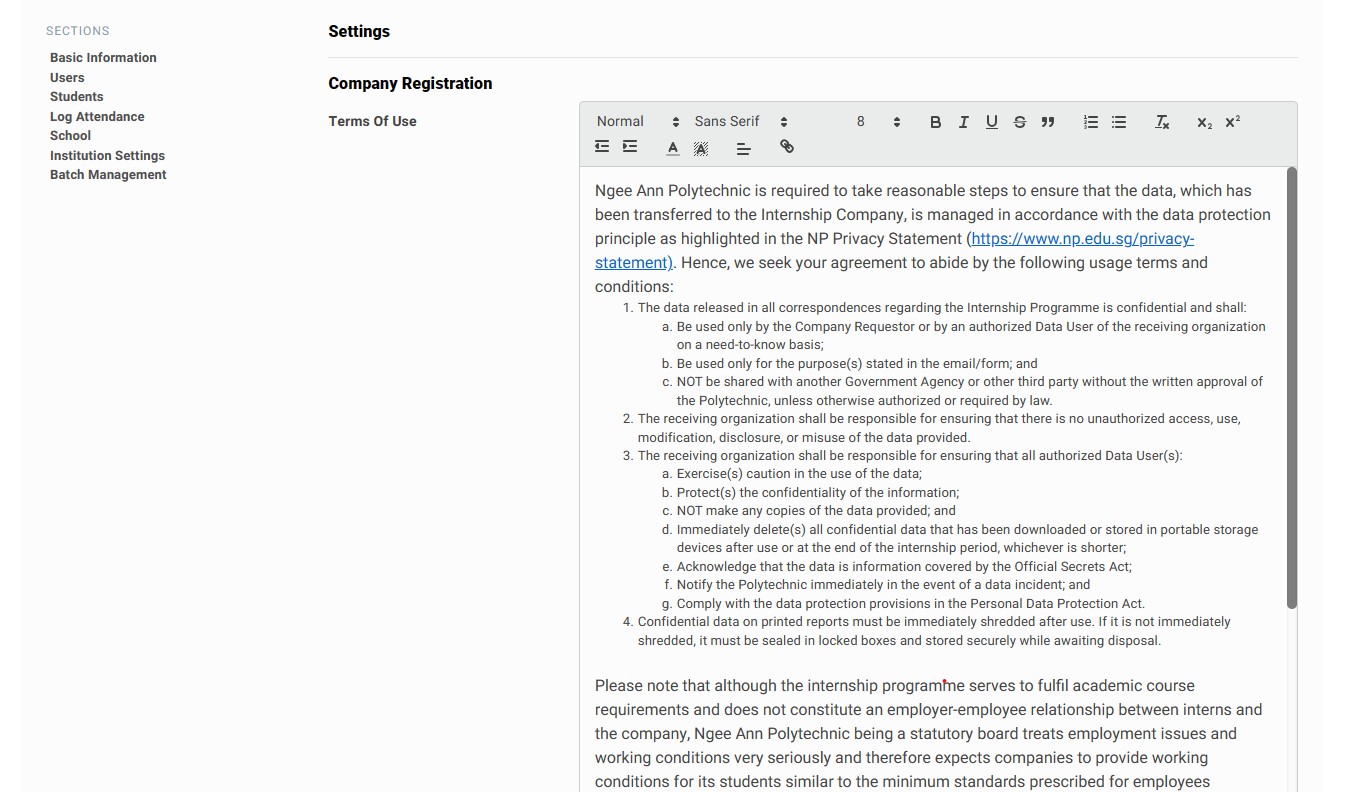
Change Terms of Use for Company Registration
Under Company Registration, the company is required to accept terms and conditions. The text can also be varied as well.
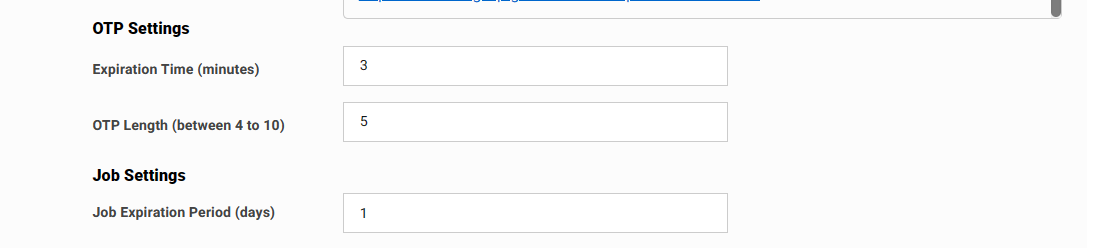
Change OTP Options (Length and Duration)
To change the OTP expiry date, insert a whole number into the expiration time (in minutes). The OTP length can also be varied as well. If OTP length is 6, an example of an OTP would be 123456.
Change Year Name
To change the name of the Year, insert a new name into the Field.
To add a year, click on “Add Year of Study”and insert the name of the year.

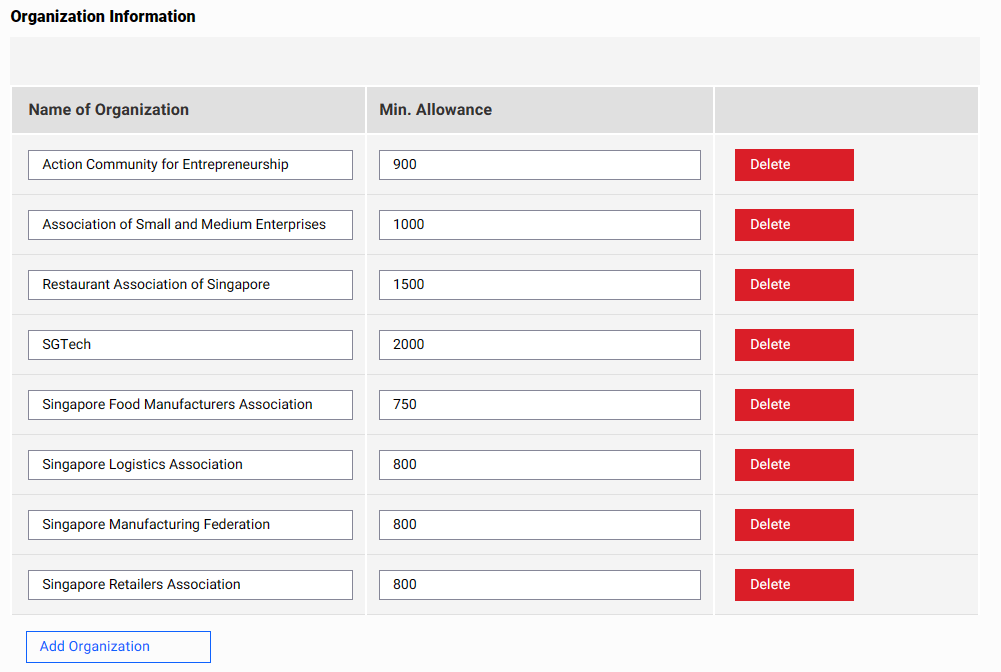
Change Organization Information
To change the name of the Organization, insert a new name into the Field.
To change the Min Allowance, insert a new allowance into the Field.
To remove a Organization, click on the “Delete” button.
To add an organization, click on “Add Organization “and insert the name of the year.
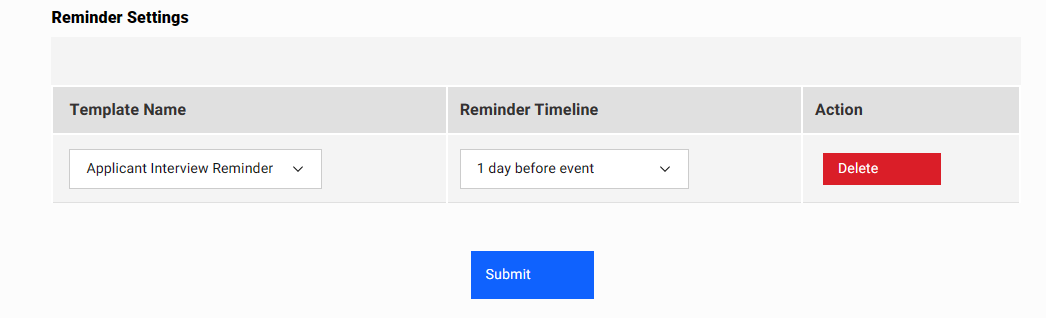
Change Reminder Settings and Confirming Changes
To change the Reminder Template and the timeline, select a new parameter from the dropdown box.
To remove a reminder template, click on the “Delete” button.
To confirm all of the changes in the settings page, click on “Submit
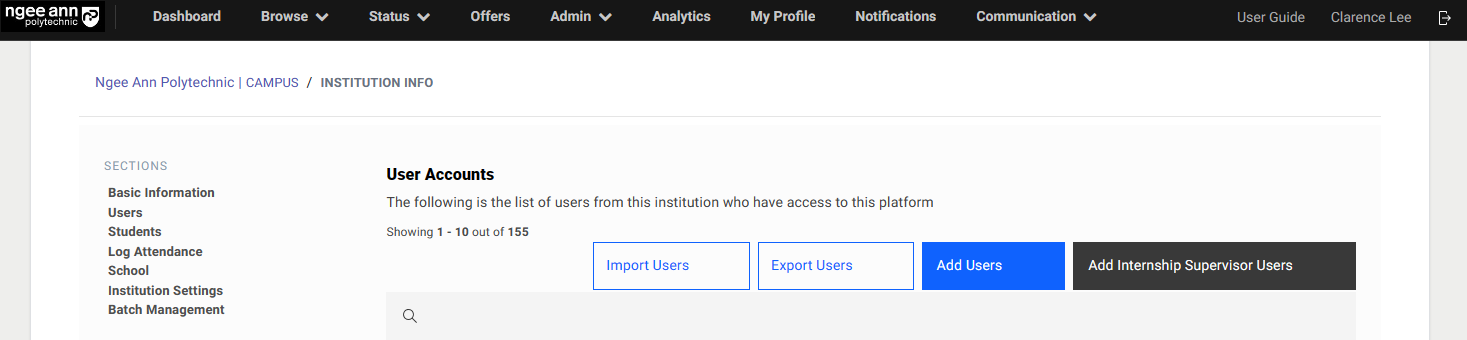
Adding/Configuring User Accounts
Click on "Browse", followed by "Institutions".
Add user account
**”**Click on "Users”. Click on "Add User", fill in the respective details to create a new admin account.
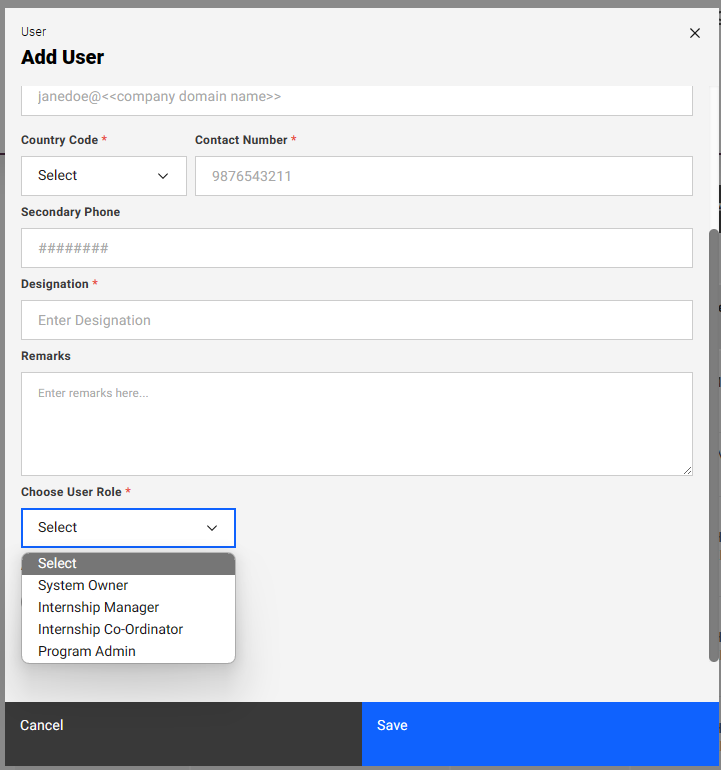
| Column Name | Description |
|---|---|
| Program Admin | By toggling "Program Admin" to true and selecting an internship program, the user is a Program admin. |
| Internship Coordinator | By toggling "Internship Coordinator" to true and selecting a school and a course the user is an Internship Coordinator. |
| Internship Manager | By enabling this option and selecting a school, the user will be given administrative privilege. |
| System Owner | Note that this toggle will override all other toggles and by changing "System Owner" to true, the user is a System Owner. |
| Active | This toggle is required to be set to Yes for the user to be able to login. The user will not be able to login if the toggle is switched to No. |
Student Onboarding
Importing Students using Excel
Click on "Browse", followed by "Students".

Click on "Import Students"
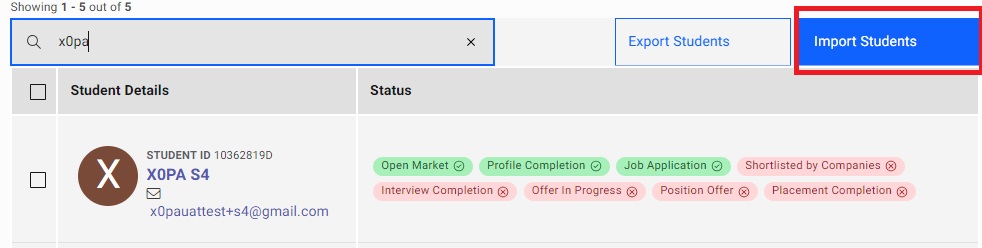
Click on "Download template here" to download a template of the excel file.
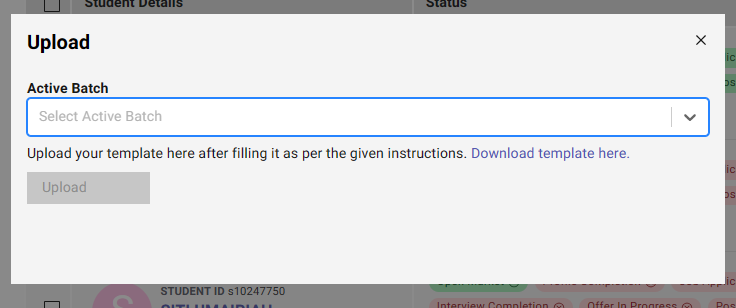
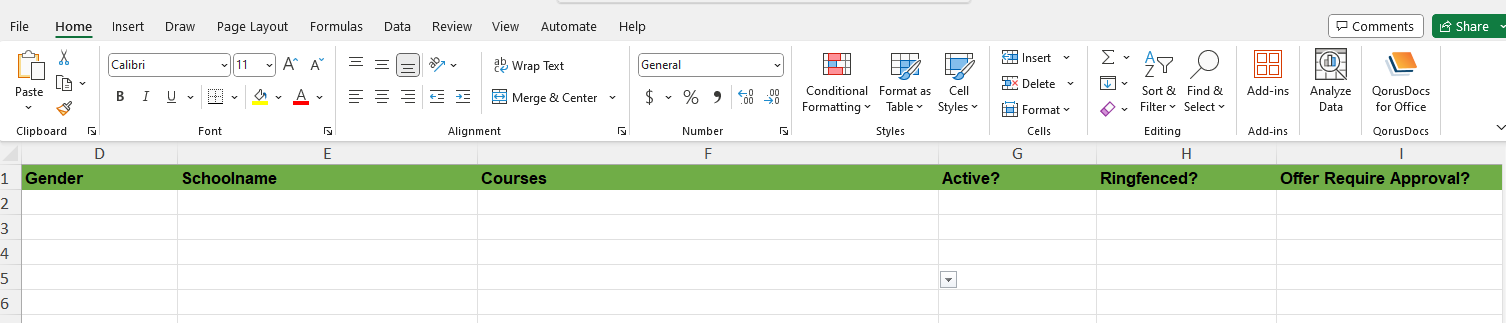
Populate the students into the excel file with the relevant information. If the schoolname or the course is invalid (not in our current database), that student will not have its data populated.
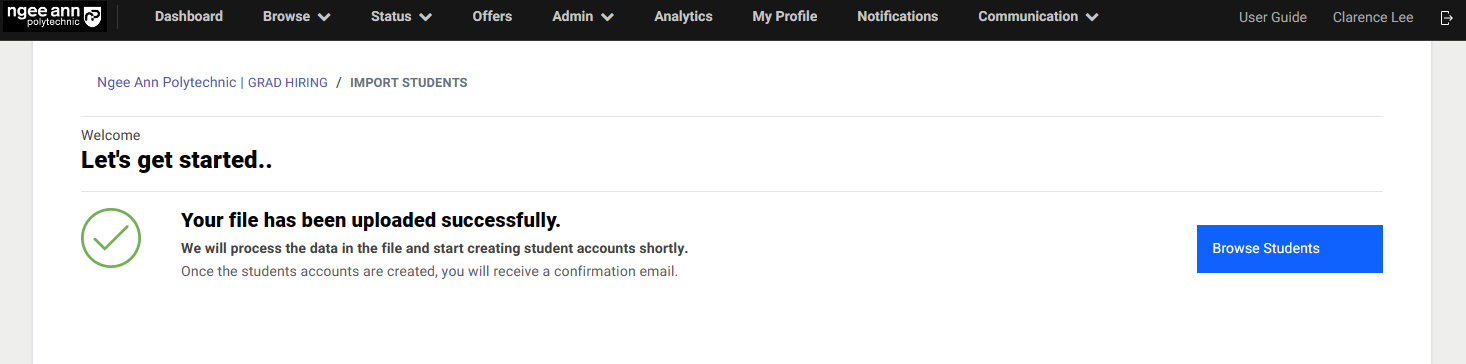
After completing the excel file, save, select the “Active Batch”, click on "Upload" and upload the file.
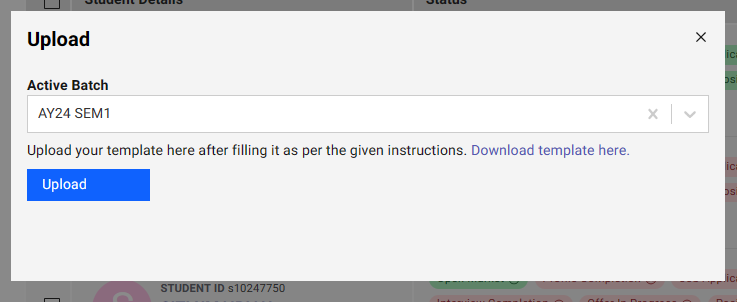
Once the file has been uploaded, a message will appear as seen below. Click on "Browse Students" to view the students' profiles.
Sending Mass Email to Students
Click on "Browse", followed by Students.
Click on "Send Email" (marked in green) to select the group of students filtered. Alternatively, click on "Send Email all X Students" to select every student.
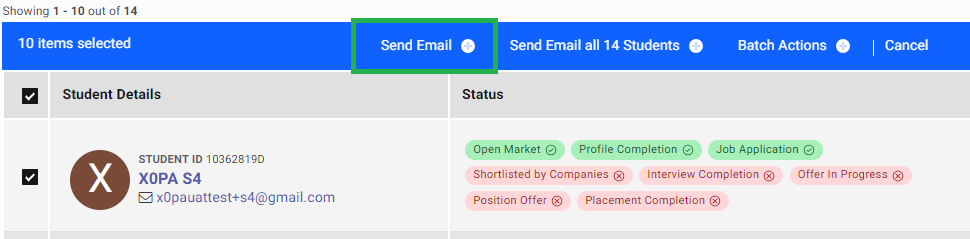
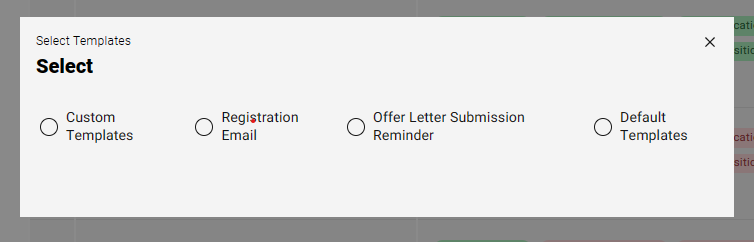
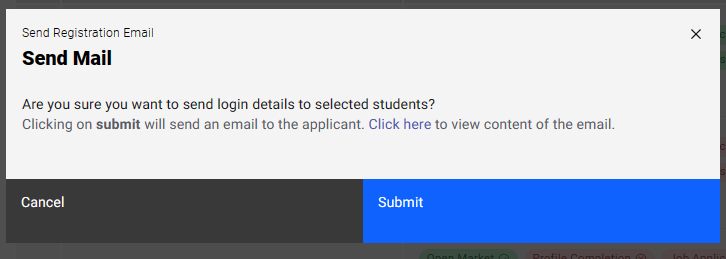
Select registration email to invite every student selected into the platform. The registration email can be seen below. You can also modify the email contents by clicking "Click here"" as indicated by the red box.
Administration Actions (Add School, Add User Account, Apply Job Limit/Change Profile Creation Settings)
Add School
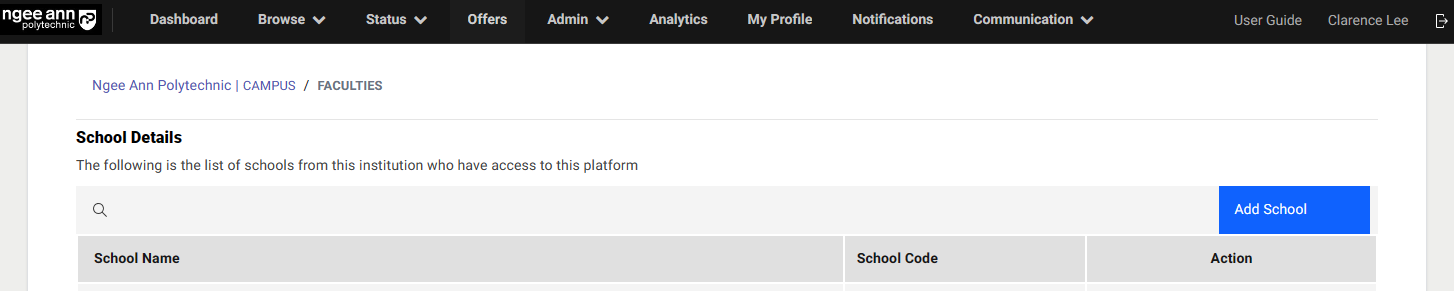
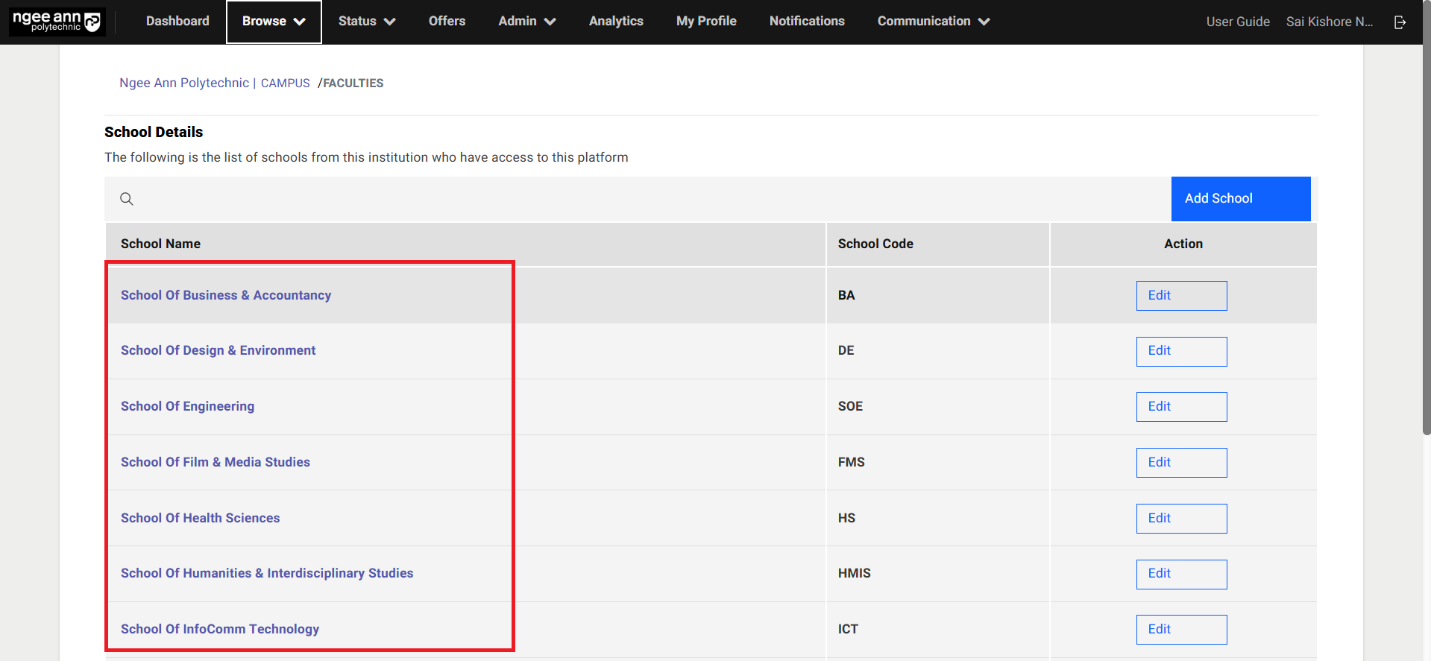
Click on "Browse", followed by "Schools".

Click on the Add School as indicated in the red box.
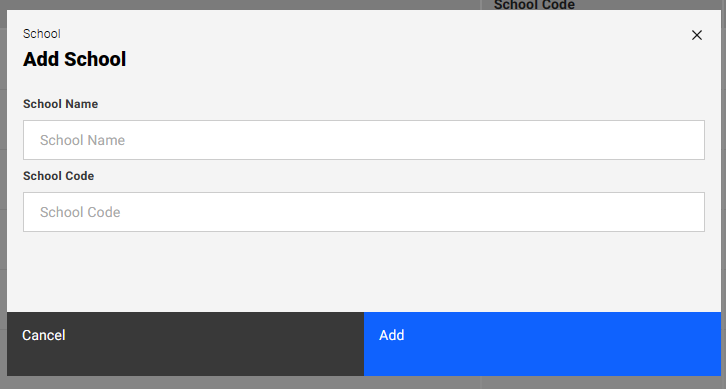
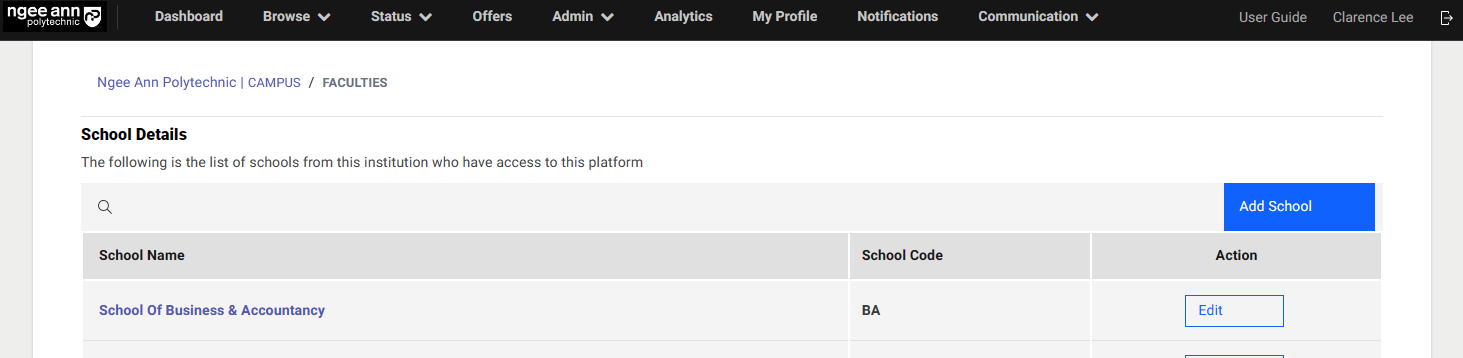
Input details School Name and School Code. Click on Add to add school.
Administration Actions
Add user account
Click on "Browse", followed by "Schools".
Click on the School Name
Click on the User
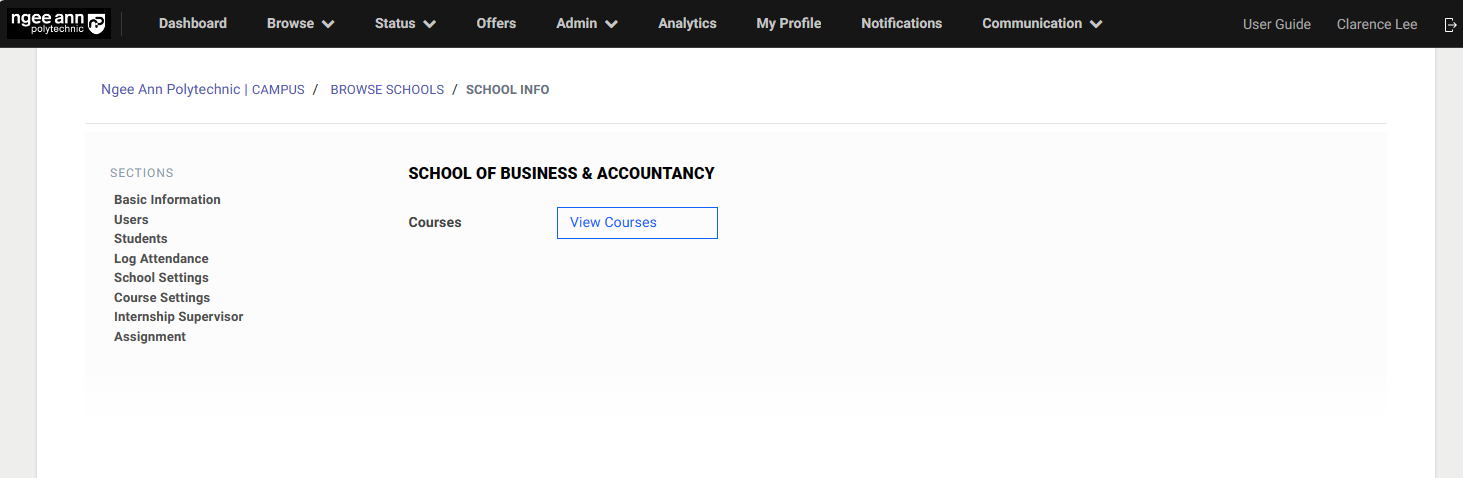
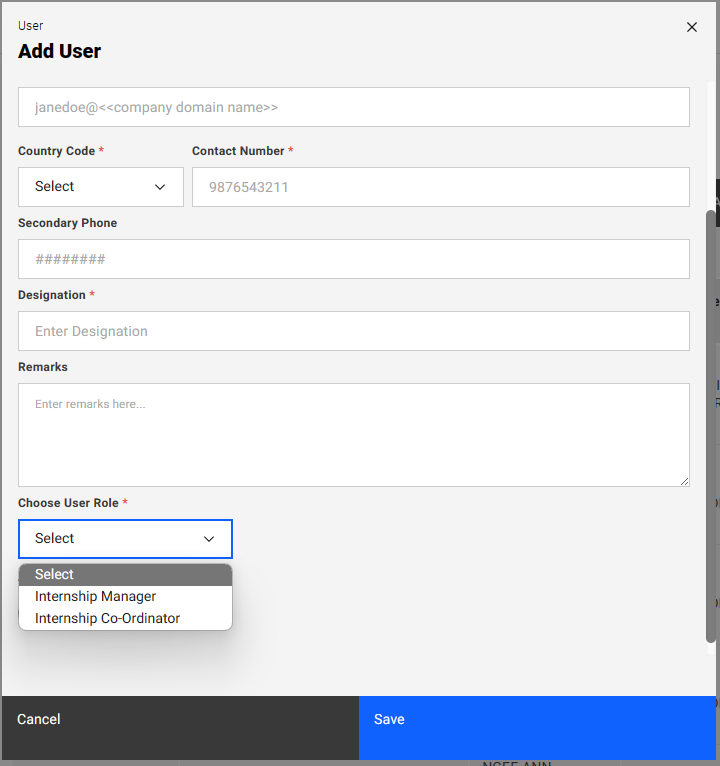
Click on "Add User", fill in the respective details to create a new Internship Manager and Coordinator account.

Change Apply Job Limit/Profile Creation Setting
Click on “school settings”.
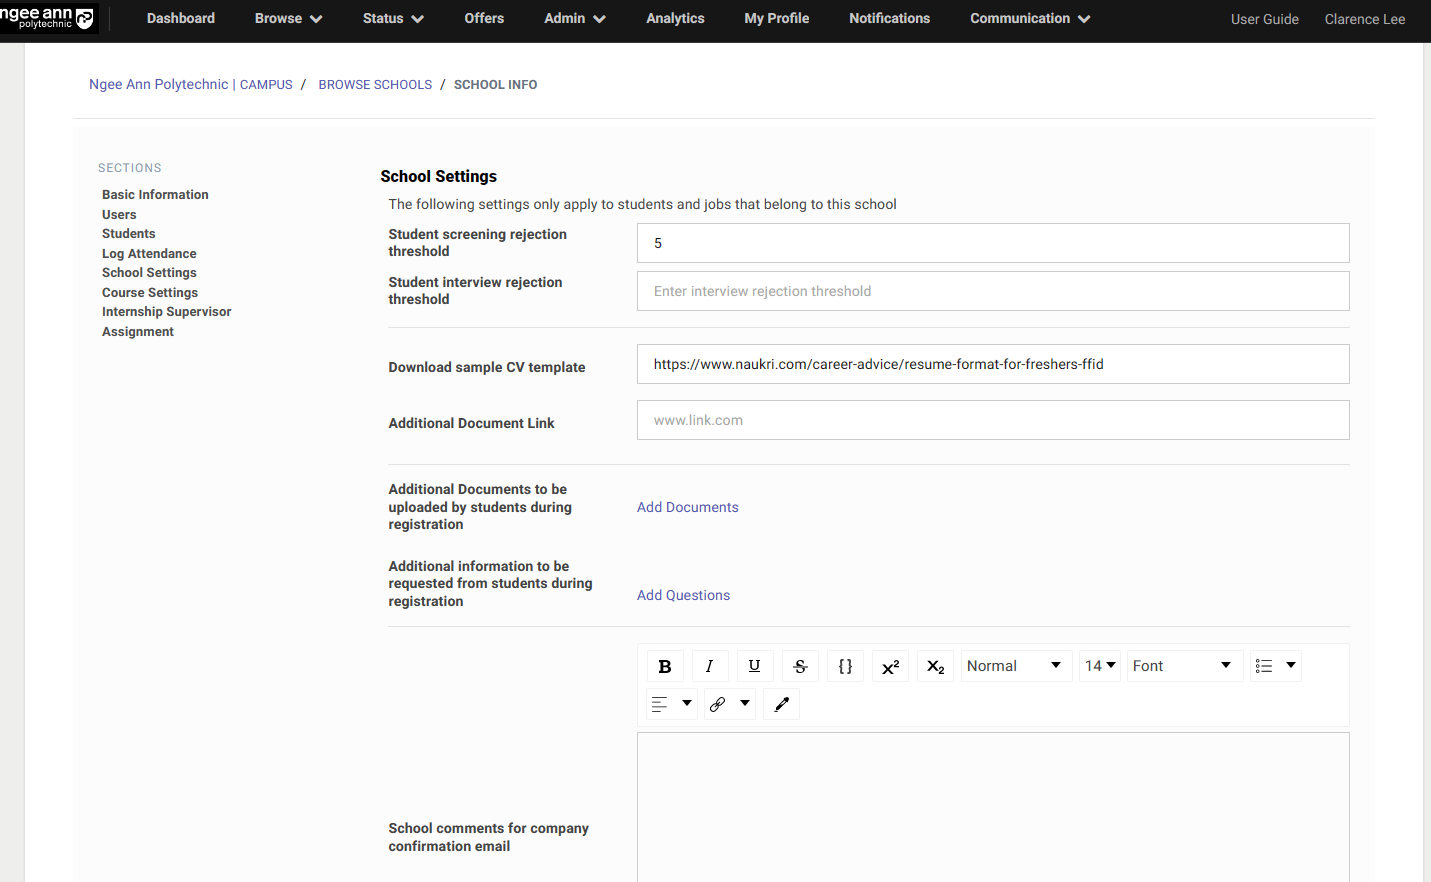
The following actions can all be configured here.
- Student screening rejection threshold
- Student Interview rejection threshold
- CV Template Link
- Additional Template Link
- Additional documents to be uploaded by student during registration
- Additional Information to be requested form students during registration
- School comments for company confirmation email
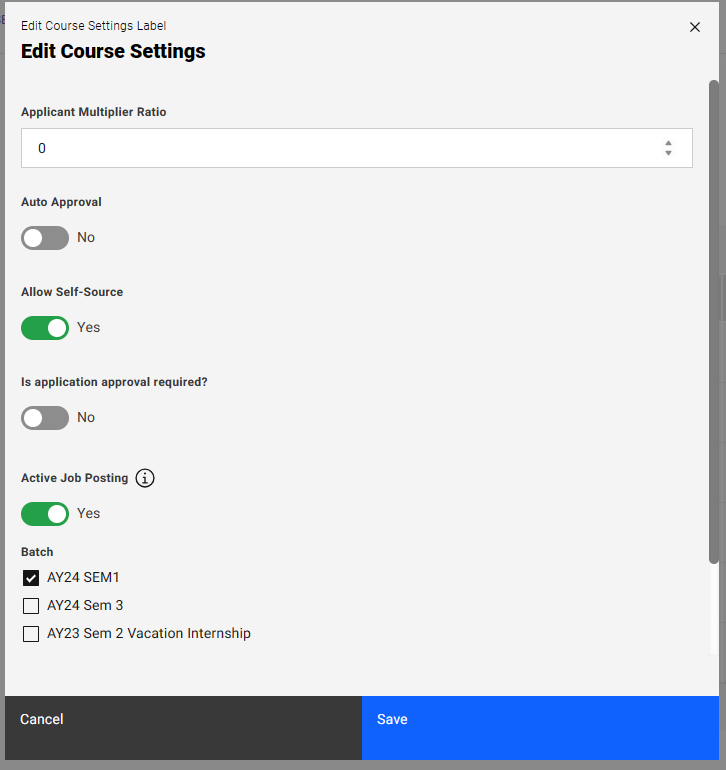
Configure Course settings [Applicant Multiplier Ratio, Token setting]
Click on “Course settings”.
Click on “Edit” at the respective Course
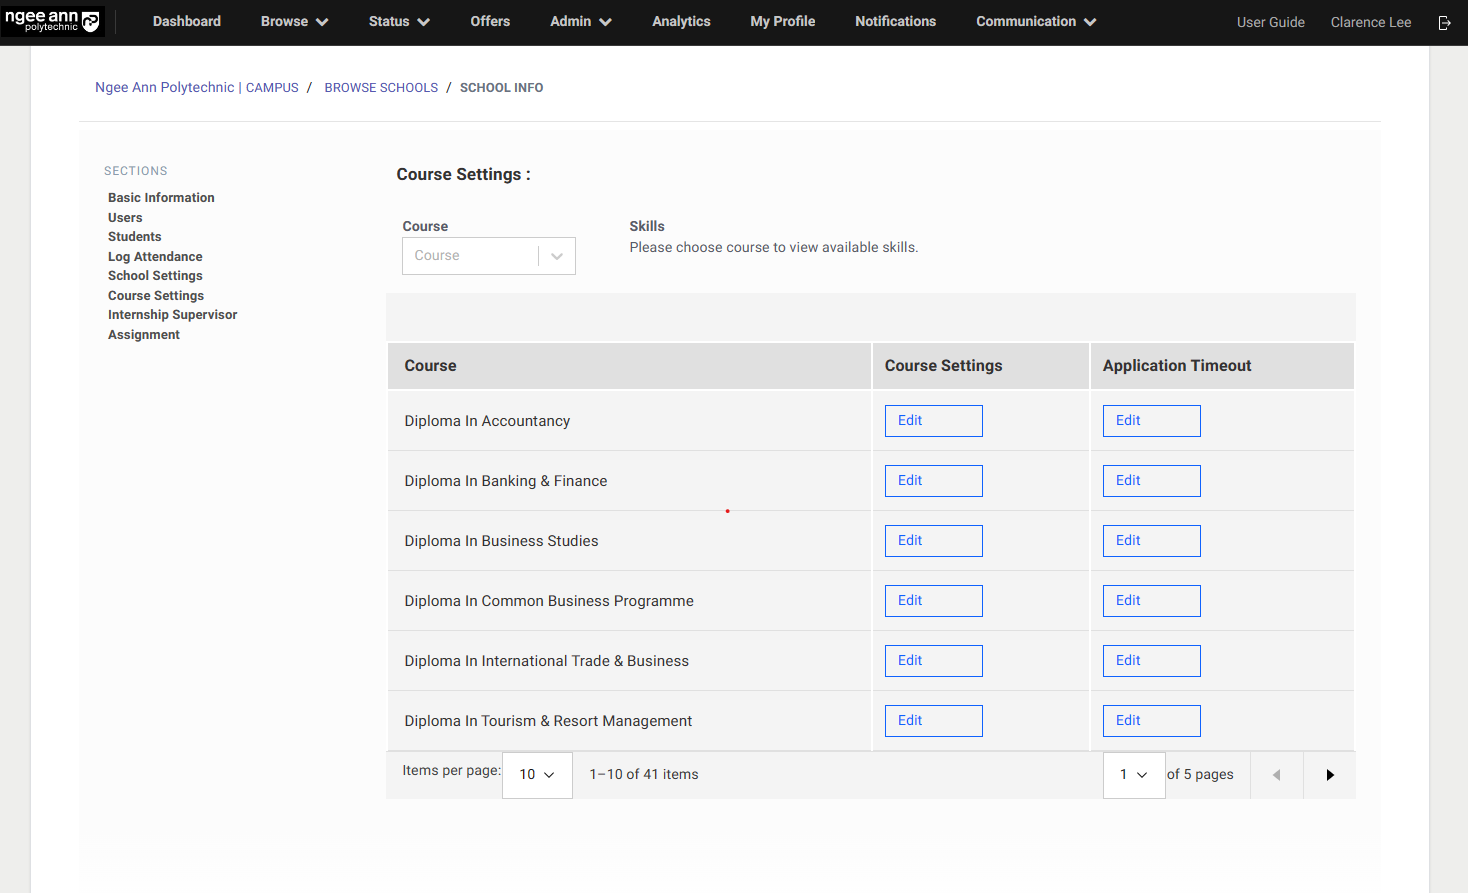
The respective options are :
- Applicant Multiplier Ratio is to determine the number of tokens given to students. For example: When a job post approved vacancies are 2 and the Multiplier Ratio is set to 1.5. Then 3 student applications will be allowed for the post (Maximum number of student applications = 2 x 1.5 = 3)
- Allow Auto Approval of Jobs
- Allow Self source jobs
- Specify if approval for applications is required
- Active Job Posting will determine if companies can create job postings for this course
- Specify which batch the course will be available in
- Set the number of tokens for each student in course
Internship Supervisor Assignment
Click on “Internship Supervisor Assignment”.
Click on the Internship Supervisor Assignment Template [Red Box] to download the template.
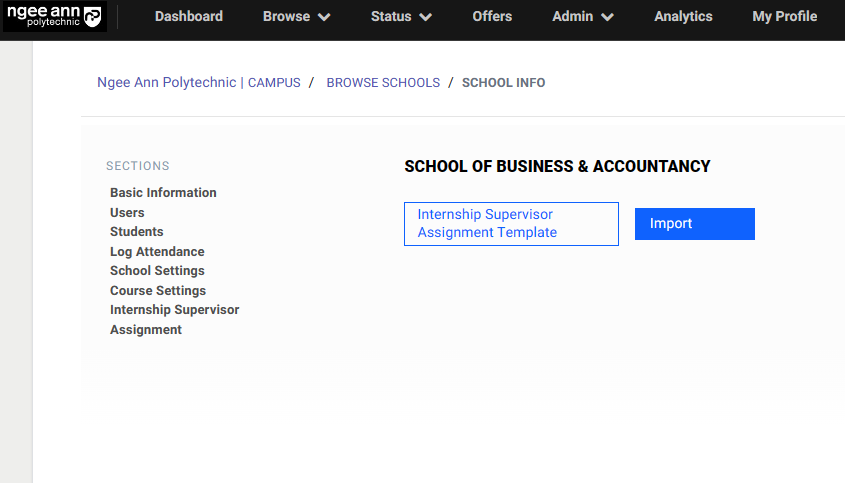
Fill in the information in to the template as required.
Then click on “Import” to upload the document.

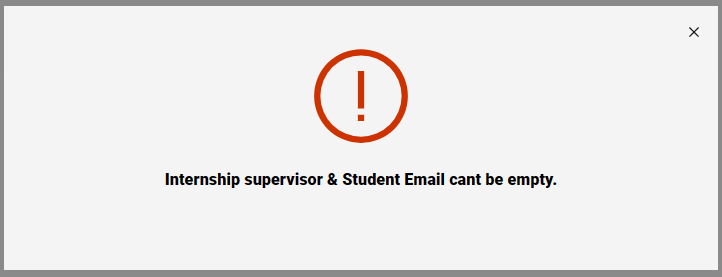
A successful message will appear if the upload was successful. If the import was unsuccessful, a message will appear as well.
Managing Students going through a different process
There are instances where the workflow of the student internship process is different from the main body.
The Internship Manager therefore has the ability to channel students to various groups. They are:
-
Students who have received a direct placement
-
Students who will see a subset of jobs.
Managing students who have received a direct placement.
Click on “Browse”, then “Students”. Then click on the student's name.
Click on "Job Recommendations".
There will be a large list of jobs to filter from in the system. To look for a particular job title or company, you can use the search button (indicated by the purple box). To sort by job title/company/scores, click on the columns.
Look for the job you are interested in the student to place and click "Set as Hired" (indicated by the red box).
To summarize, the student will be re-directed to the "upload offer letter” stage as seen below. They are still required to request for an offer letter from the employer and upload the signed letter into the system.
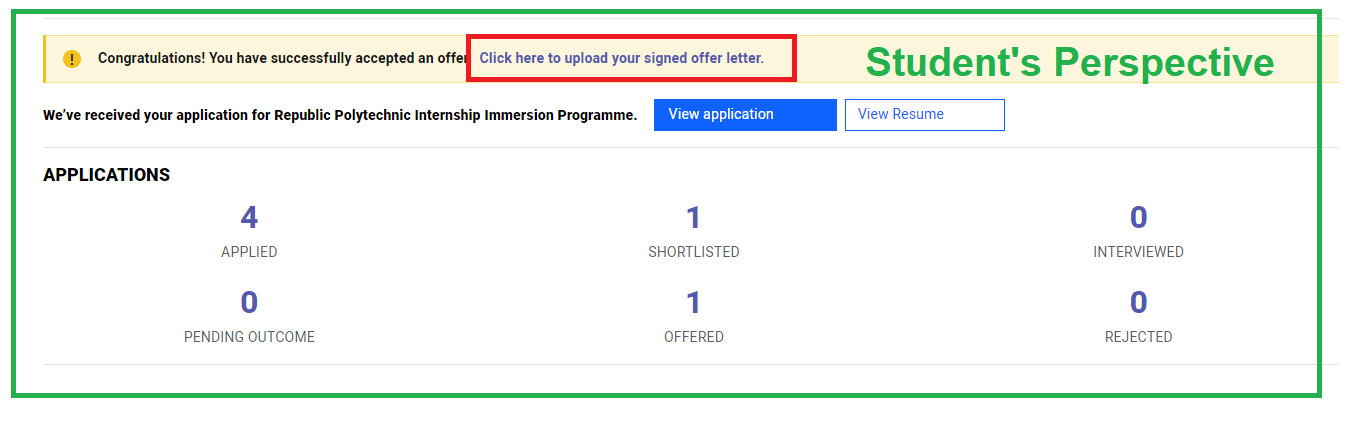
Please note that if the number of placements exceeds the number of approved vacancies, you will not be able to set the student as hired (a warning message will appear).
Managing students who will see only a subset of jobs
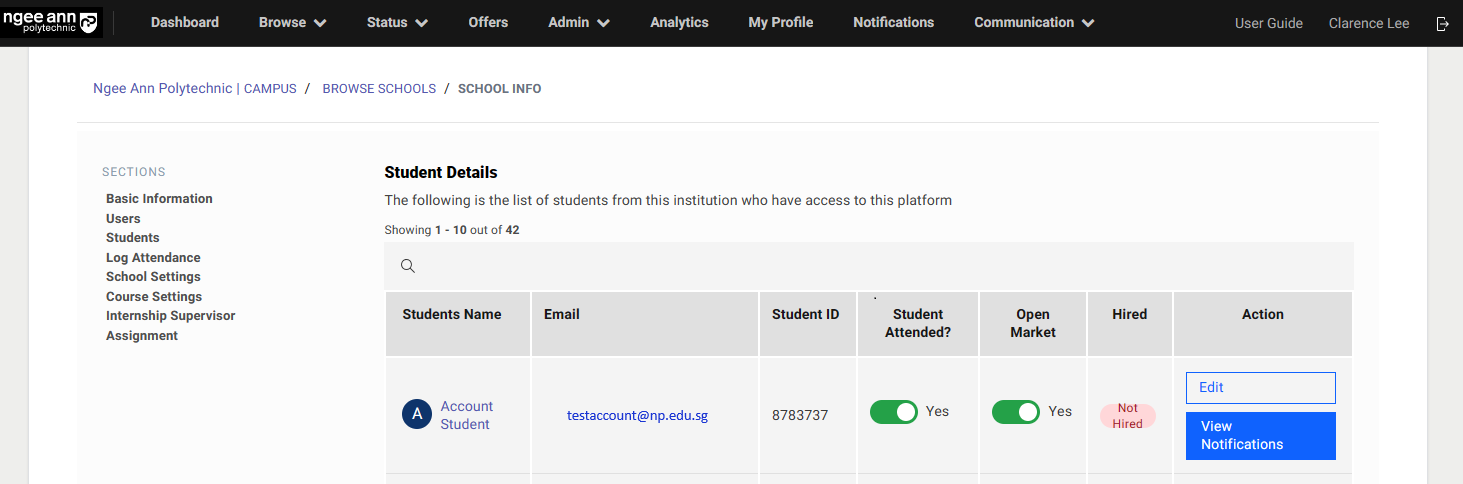
By default, every student is set as a open market. However, if you would like a student to see only a subset of jobs, you have to first set the student as close market. Click on "Browse", followed by "Schools".
Click on the respective school name, followed by the students option.
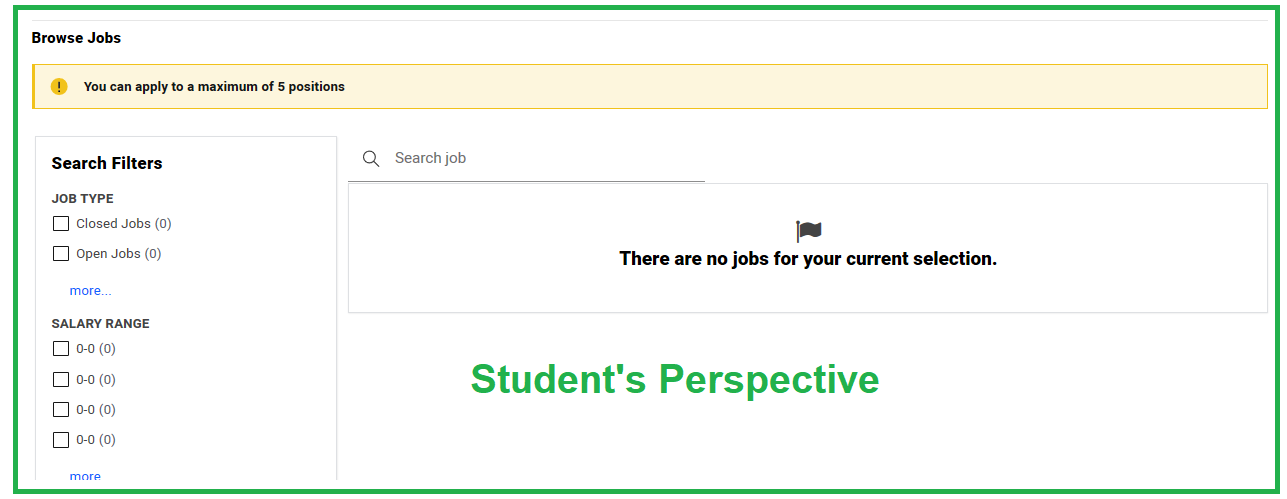
Toggle the Open Market tab to "Off". By toggling it to off, the student will no longer be able to see any jobs as seen below.
Click on "Browse", followed by "Students". Then click on the student's name.
Scroll down and select “Job Recommendation”.
Toggle to yes on the respective jobs you would like for the student to see. Similarly, there will be a large list of jobs to filter from in the system. To look for a particular job title or company, you can use the search button. To sort by job title/company/scores, click on the respective columns.
Job Management (Viewing, Filtering, Approval, Visibility)
Job Management Page
To get to this page, click on "Status", followed by "Jobs" and "Pending Jobs".

This refers to jobs that have yet to be approved or awaiting approved vacancies.
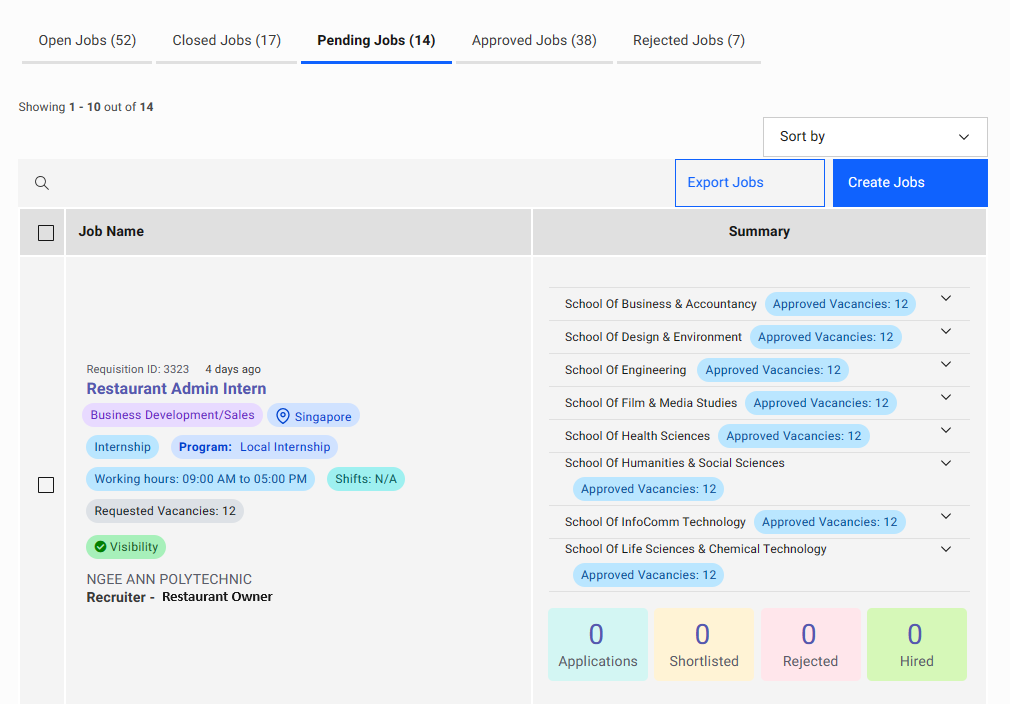
"Restaurant Admin Intern" here will direct you to the job detail page.
"Business Development/Sales" here depicts the job function for the particular job title.
"Requested Vacancies" depicts the number of vacancies requested by the employer.
"Approved Vacancies" depicts the number of vacancies approved by the course admin. The number represents the total number of vacancies for a particular school.
The number above "Applications" is the number of students who have applied for the job.
The number above "Shortlisted" is the number of students who have been shortlisted by the employer.
The number above "Rejected" is the number of students who have been rejected by the employer.
The number above "Hired" is the number of students who have been hired by the employer.
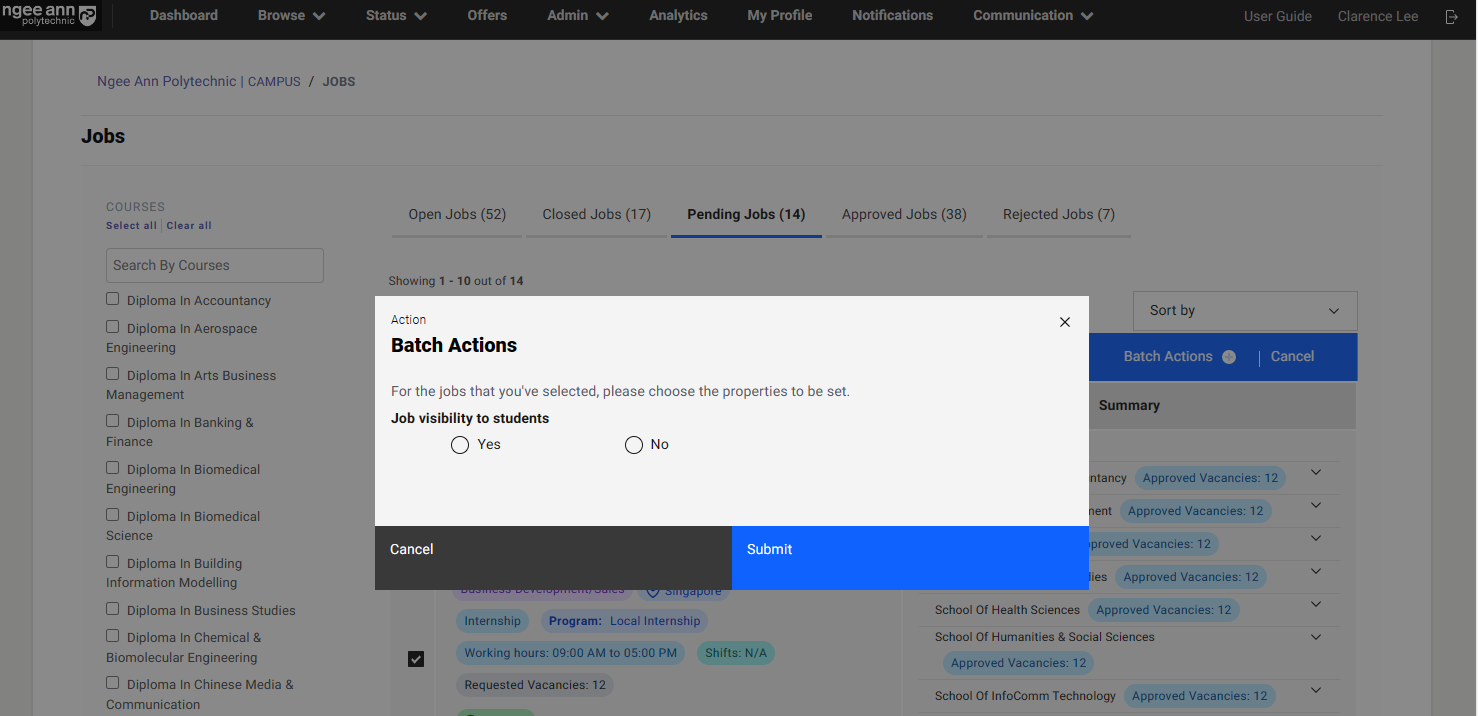
Job Visibility (Mass)
By default, all jobs have their visibility toggled to be off. The job can only be seen by students if they are made visible.
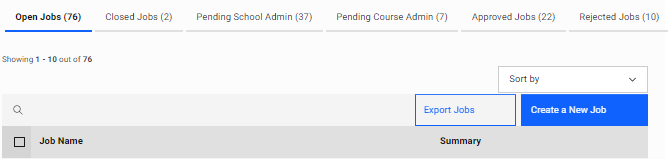
Click on "Status", followed by "Jobs" (as seen below).
Tick the checkboxes on the left and select "Batch Actions +"

Select "Yes", then click "Submit" to open up visibility to all jobs.
Create Job on behalf of Company
Click on "Status", followed by "Jobs" (as seen below).
Click on "Create a New Job".
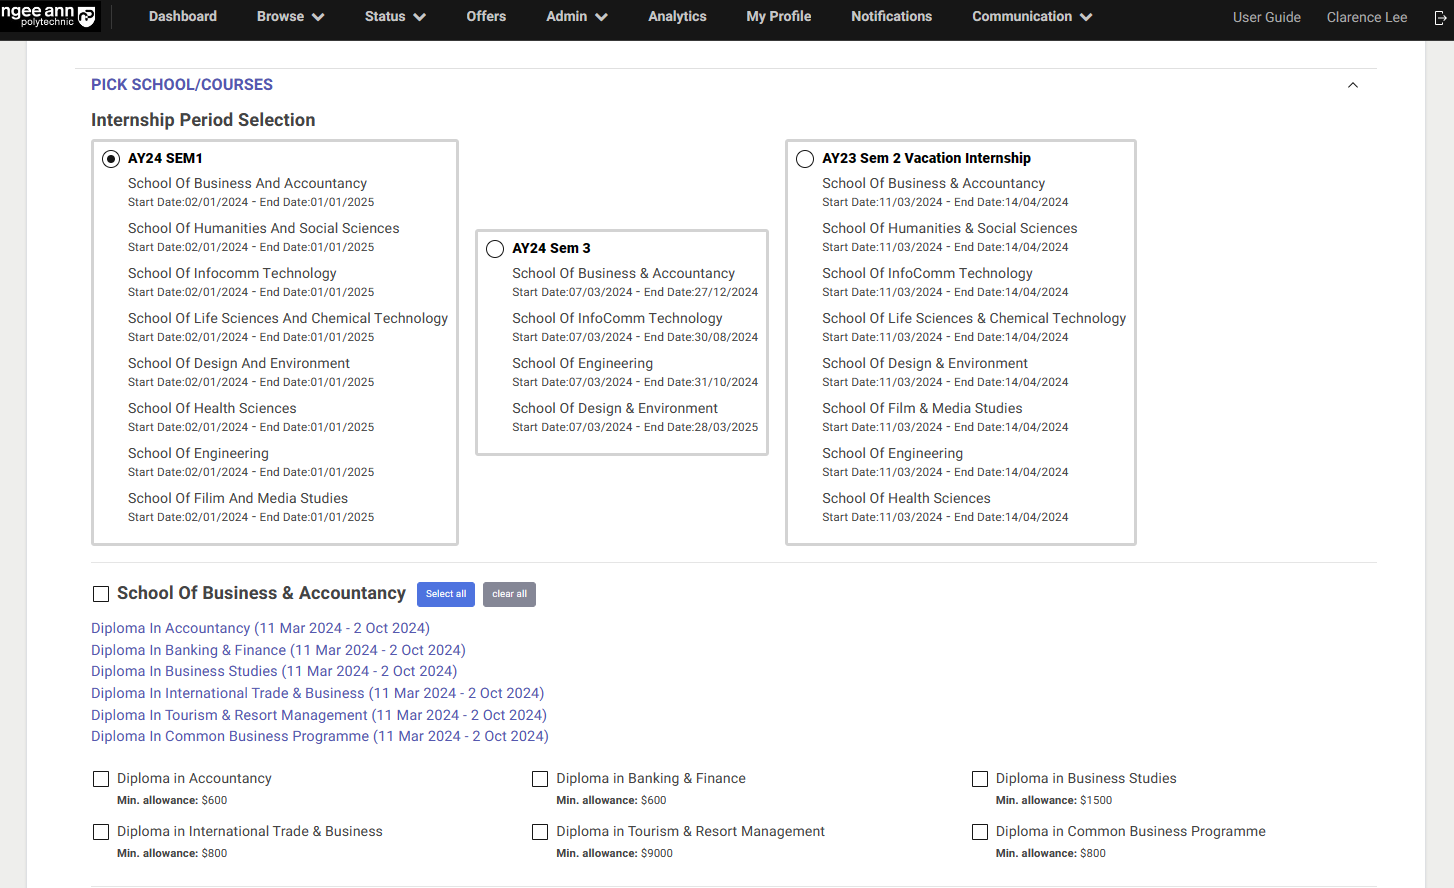
Fill in the respective details under job posting and tag them to the designated employer under the respective company.
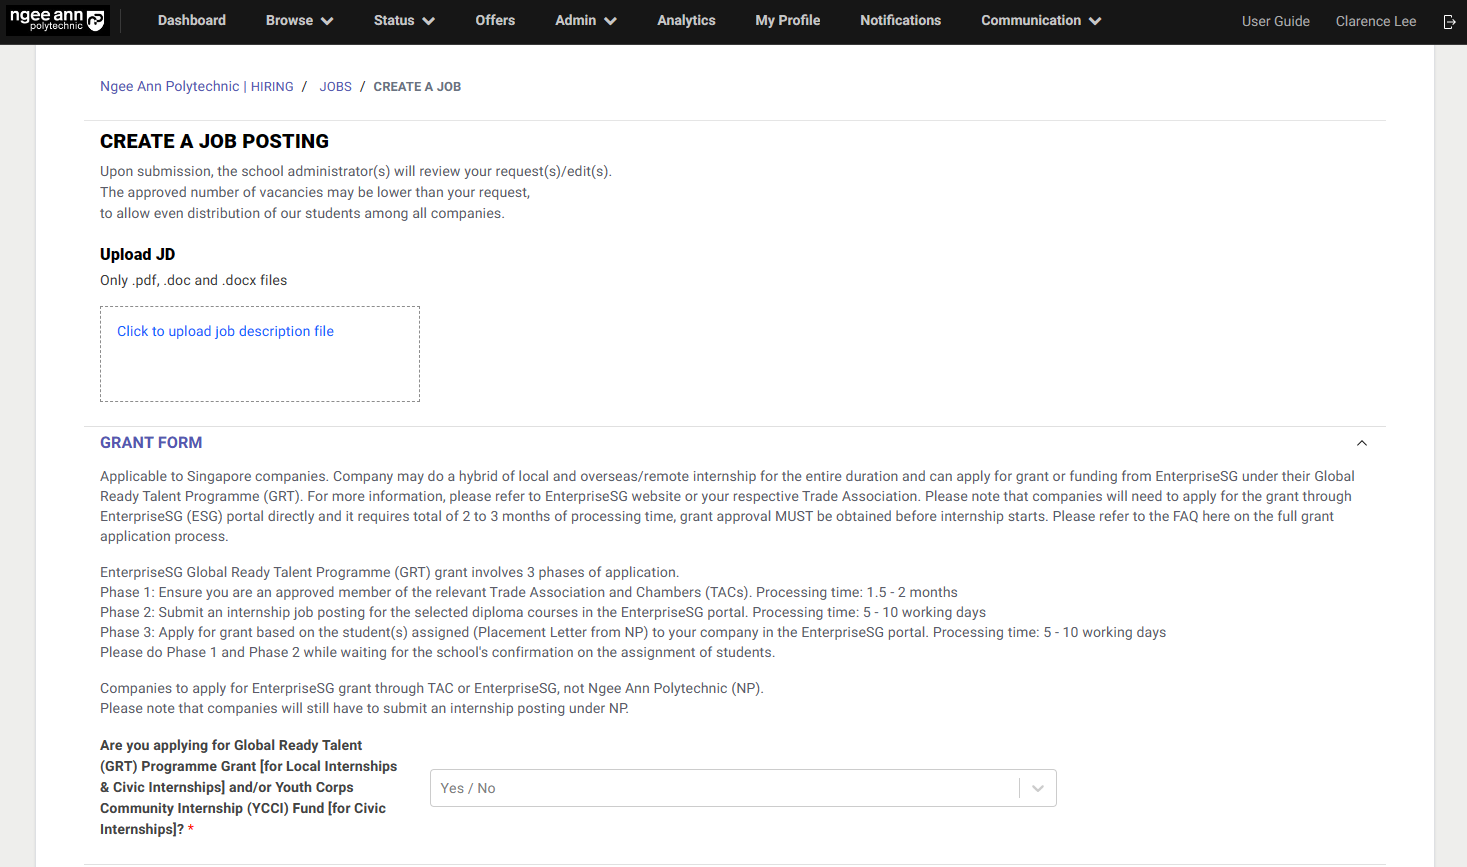
You may also select other schools when adding diplomas. For more information, refer to the Job Approval Process in the user guide.
On-The-Job Training (OJT)
Create OJT Job
OJT Admins:
Job Level OJT:
Create OJT (Manually):
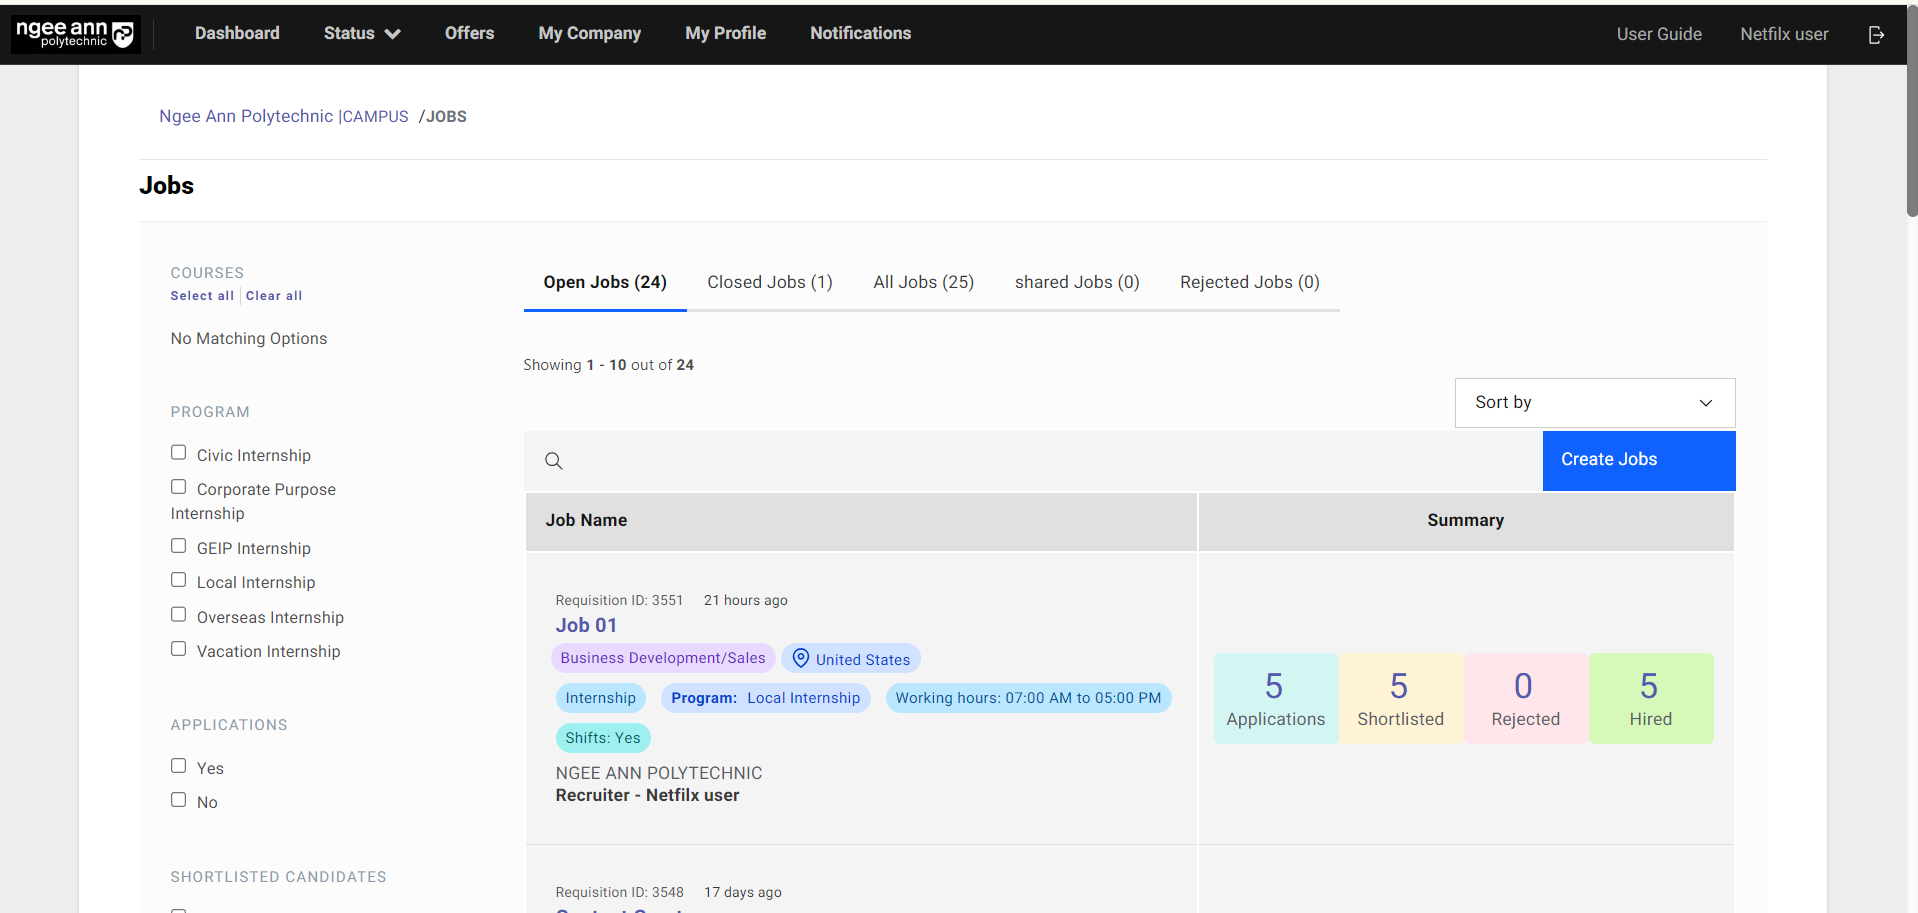
Step 1:
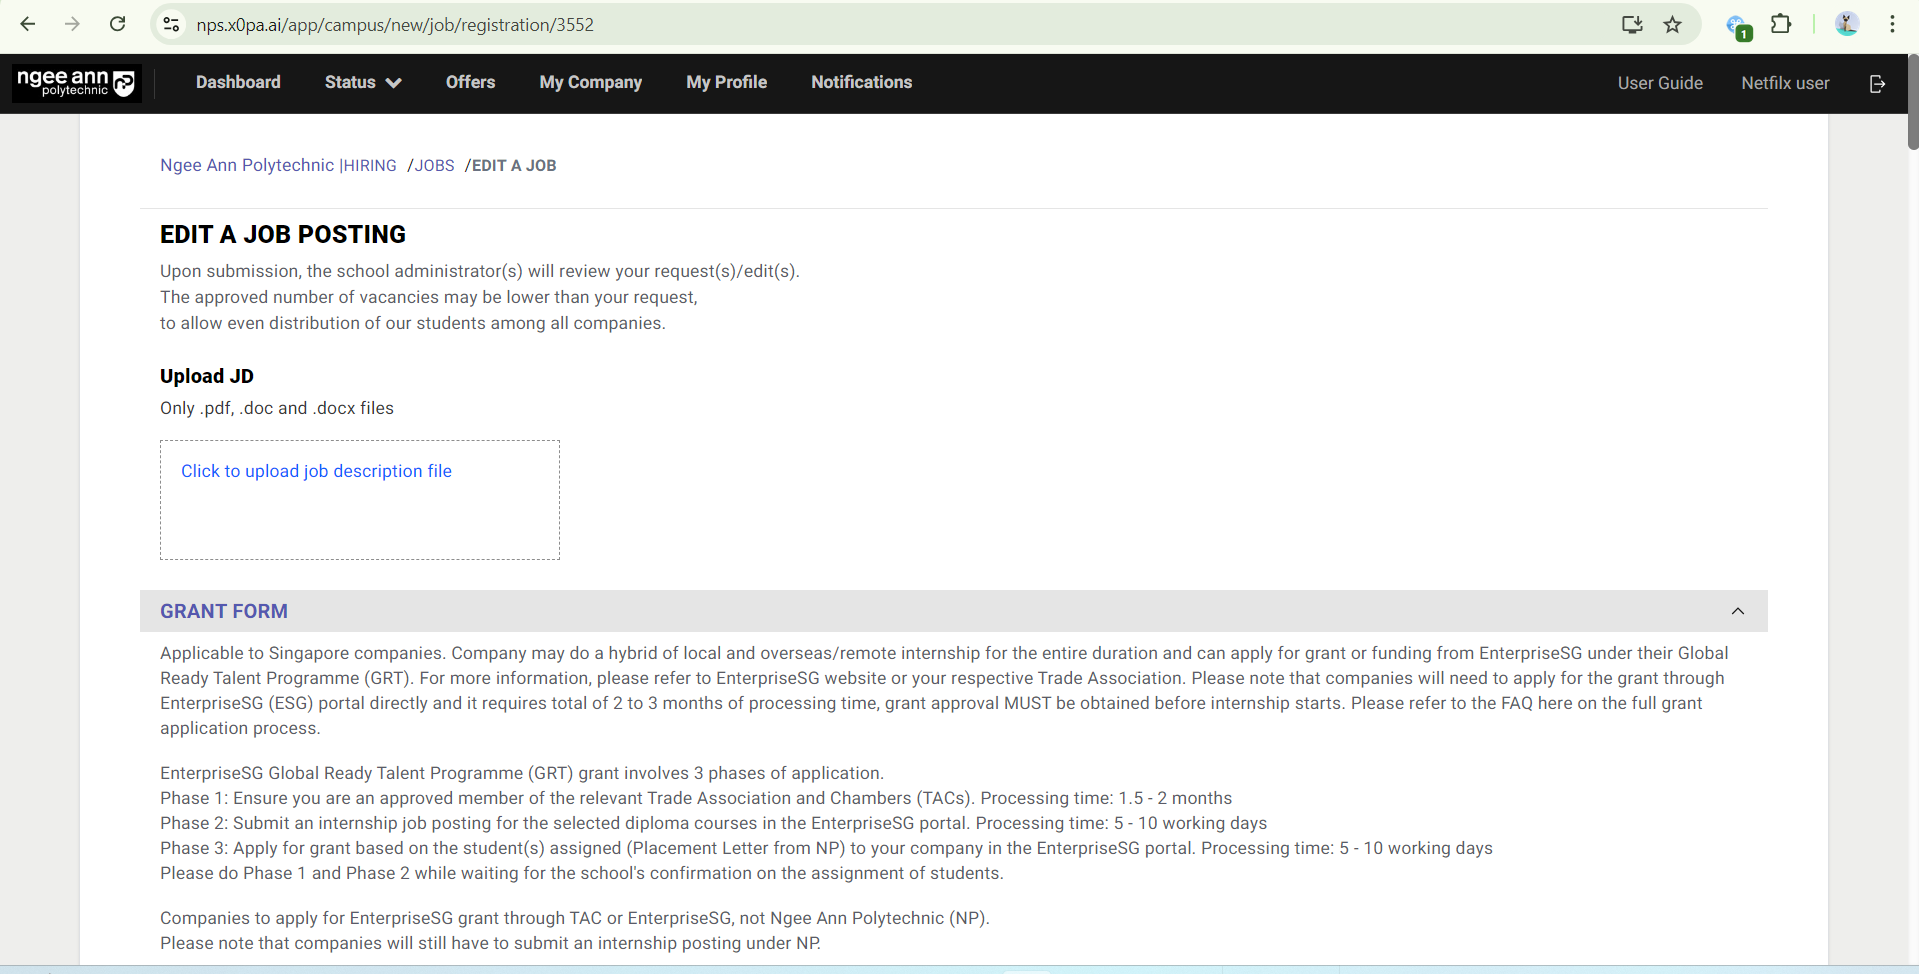
- Click on the “Create Jobs” button.
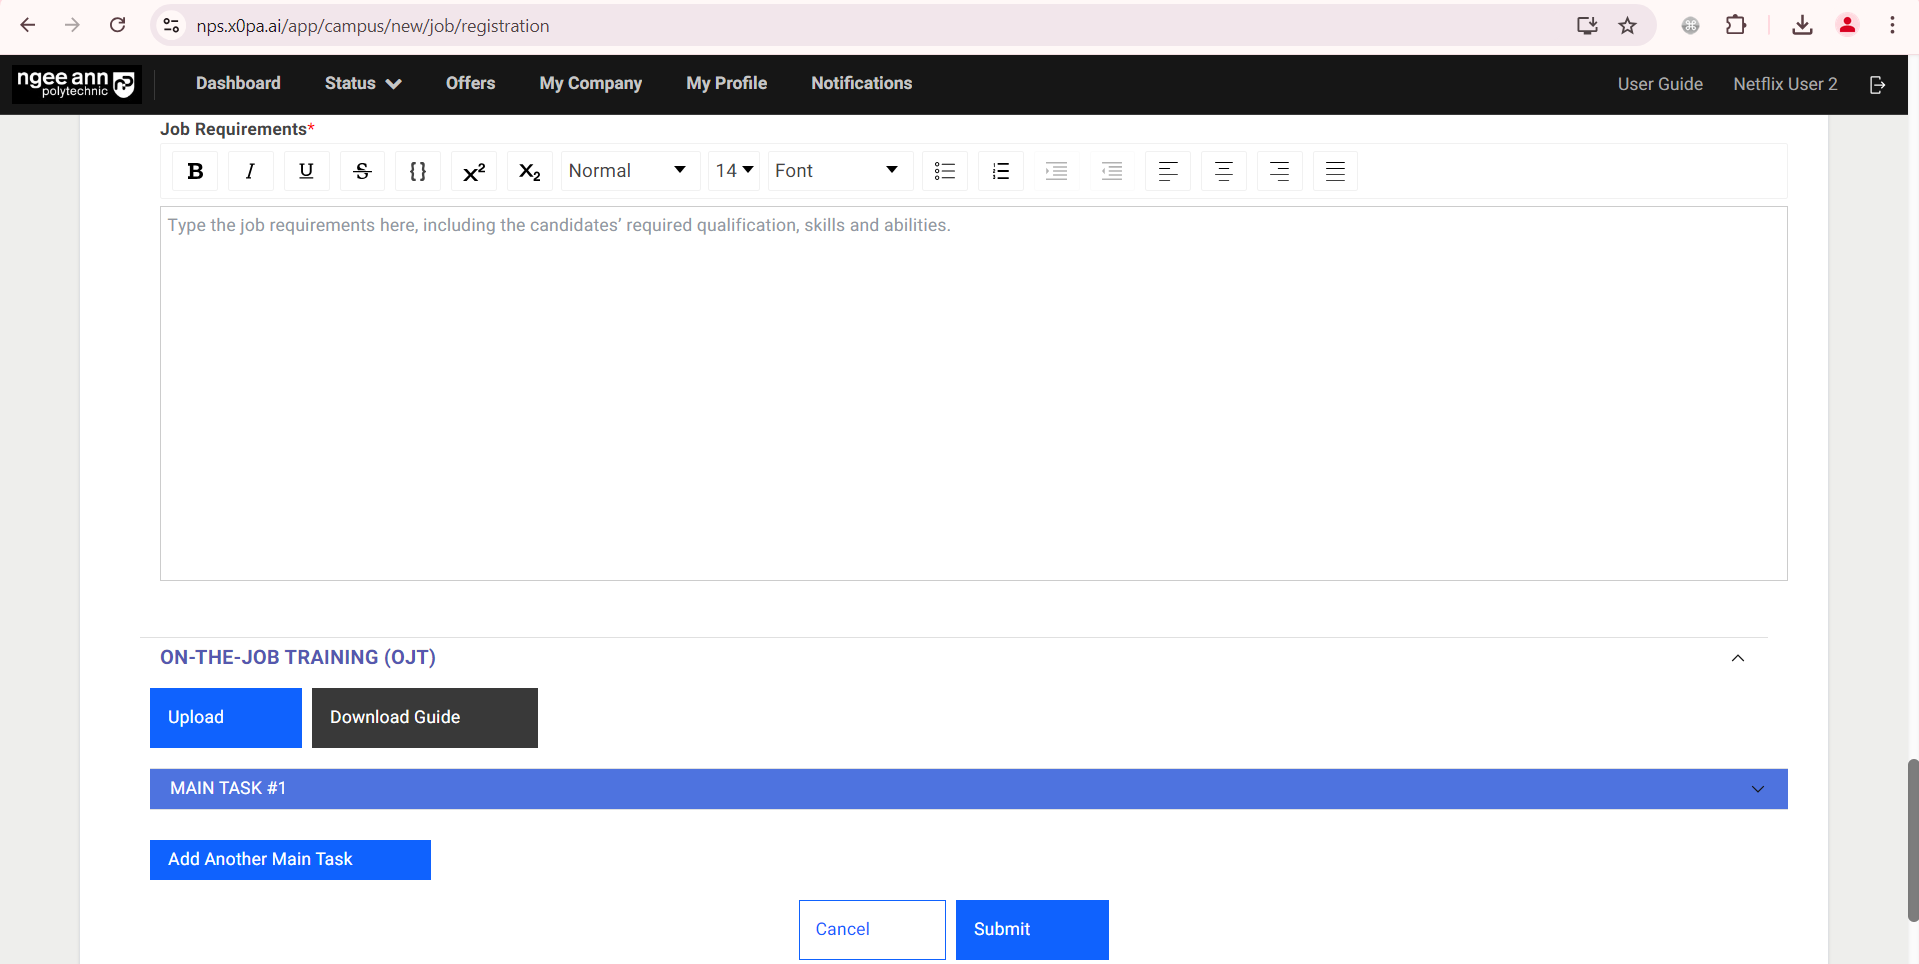
- Fill in Job Details, scroll to the bottom for the On-The-Job (OJT) section

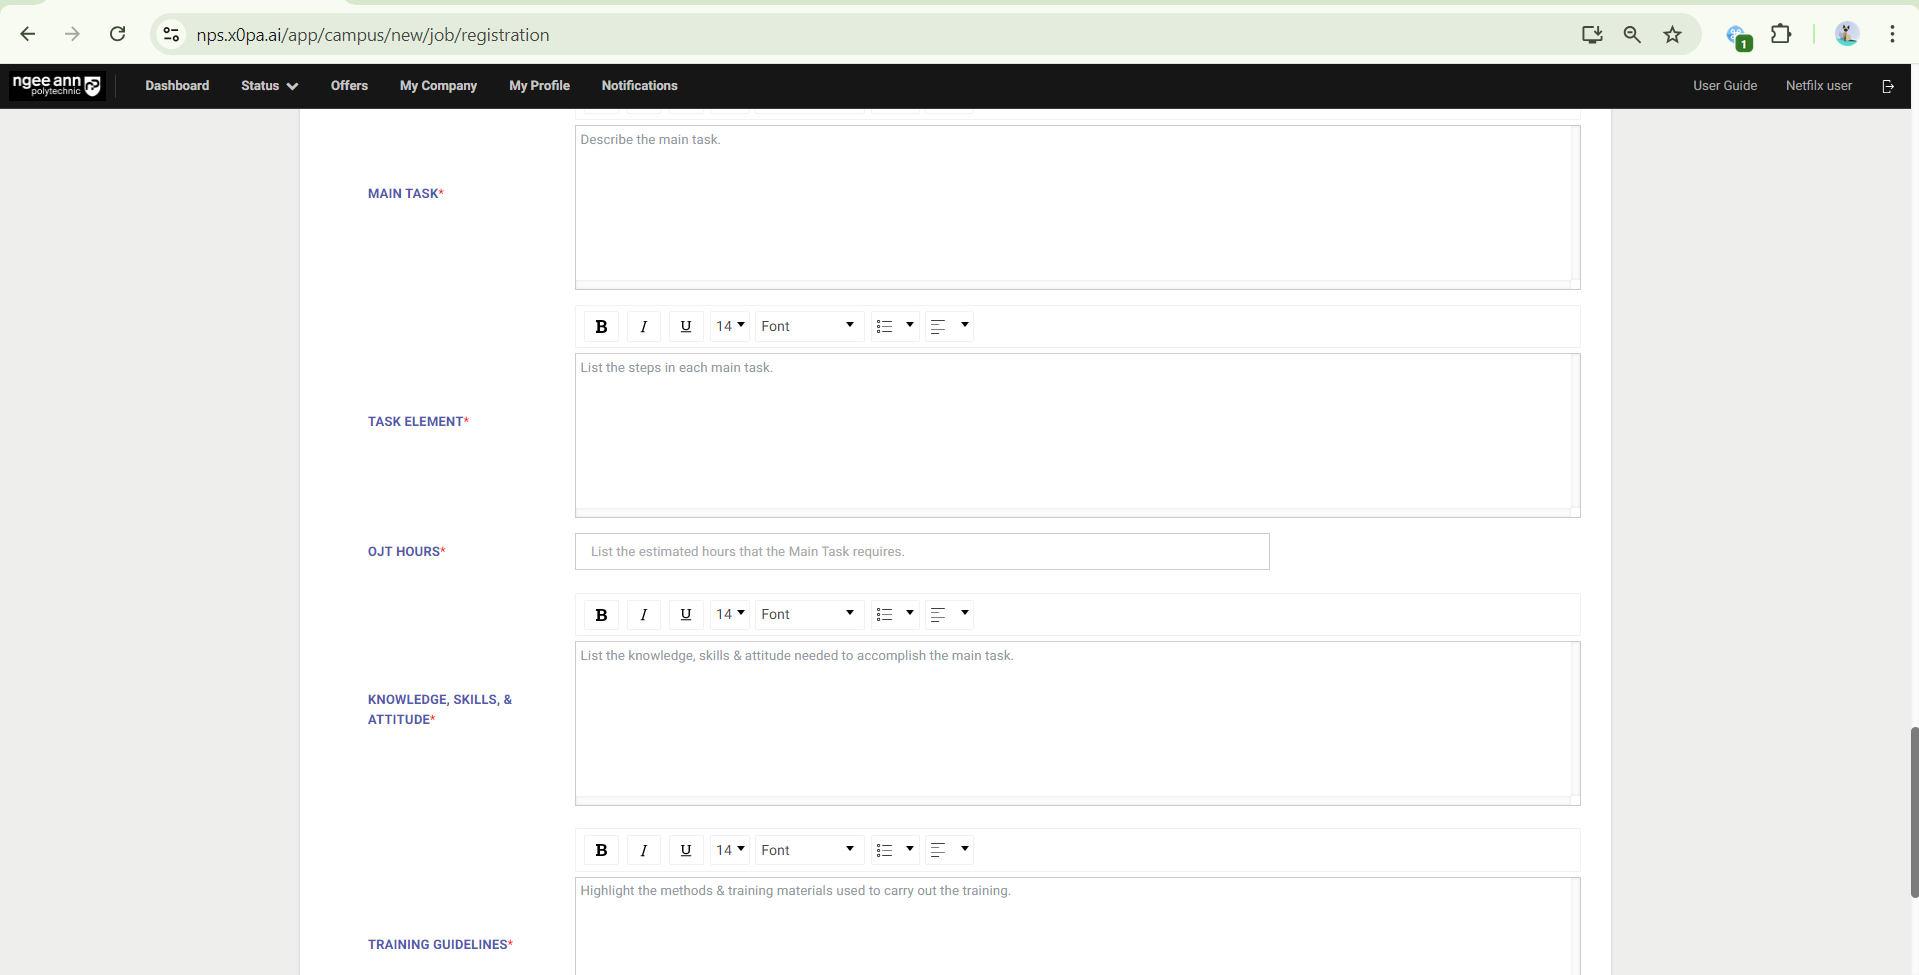
Step 2:
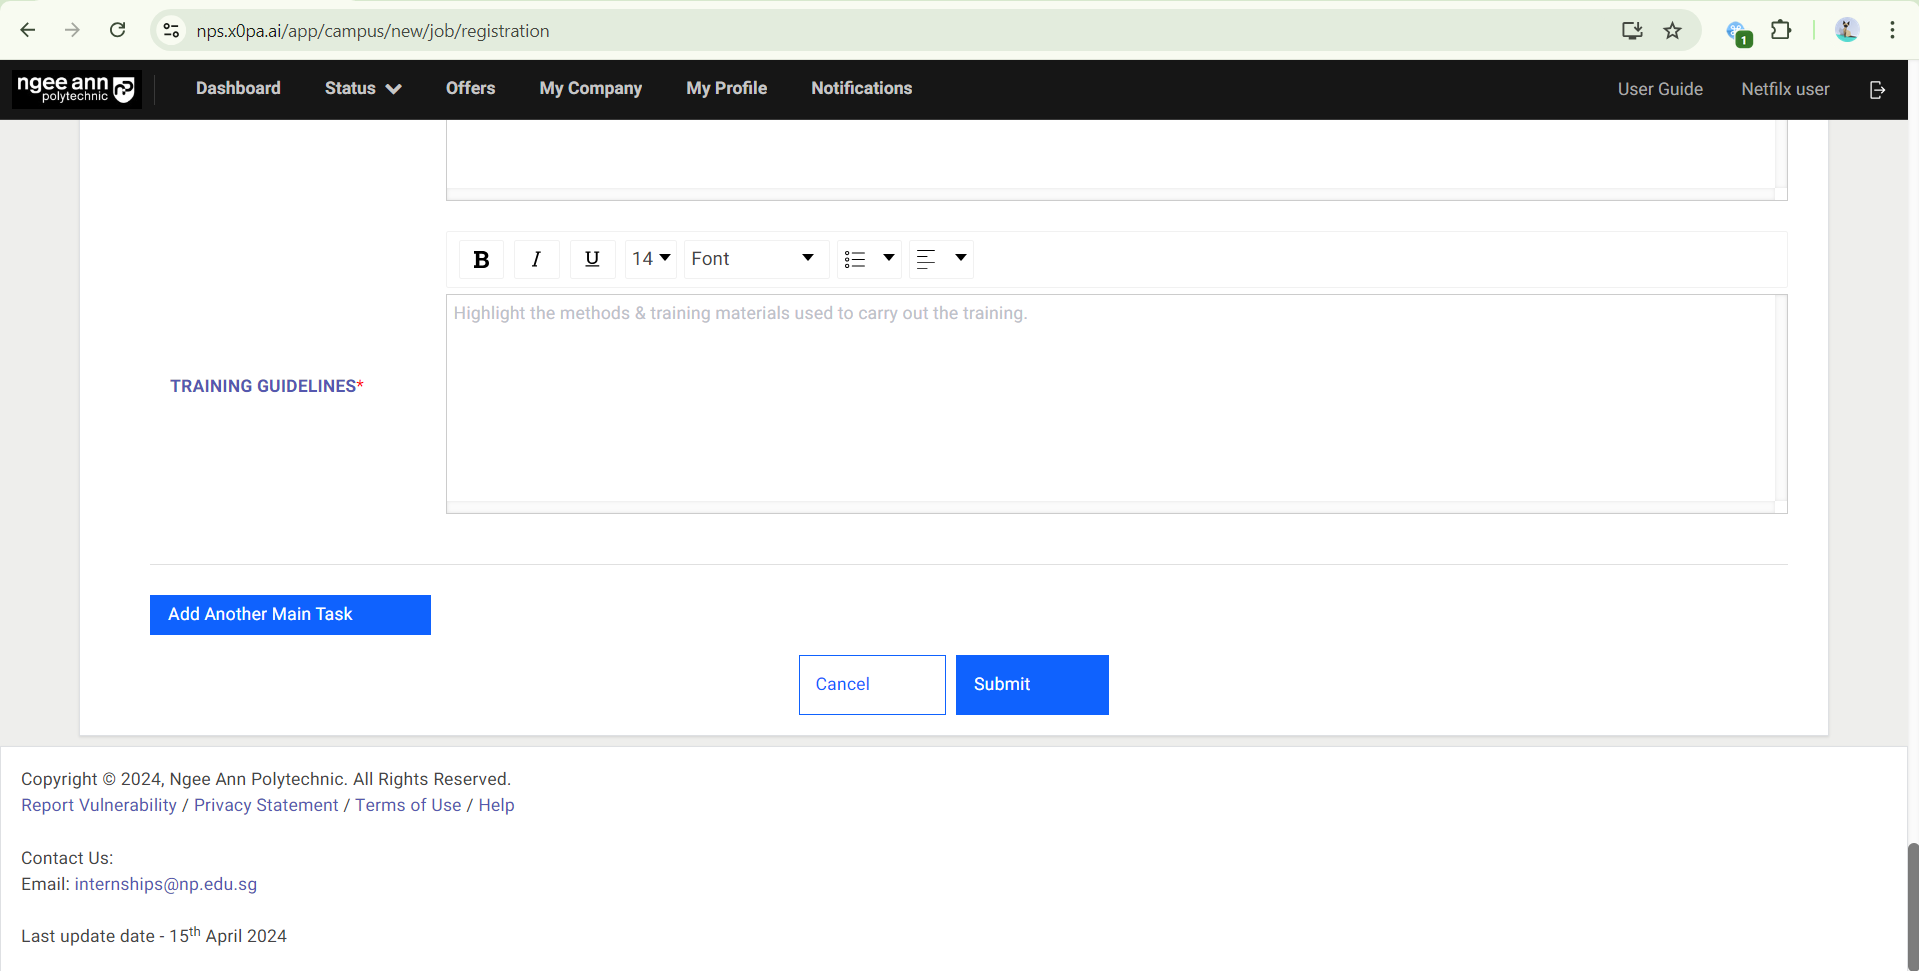
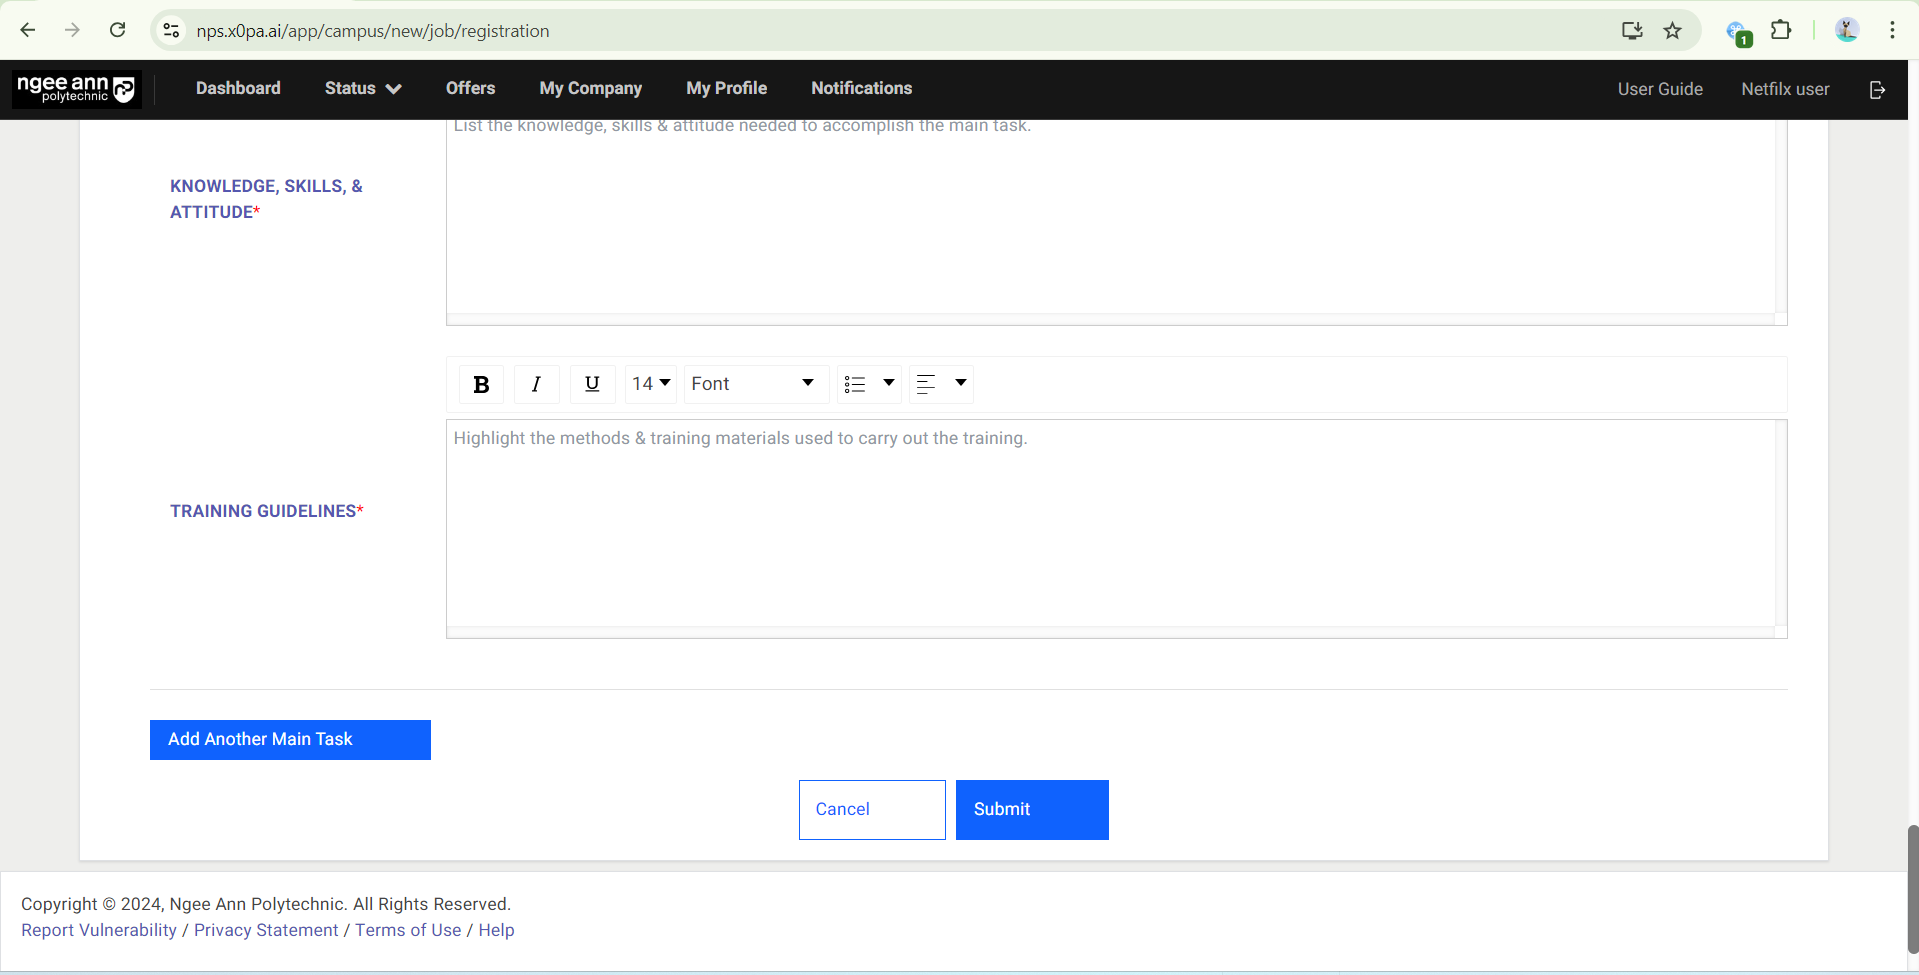
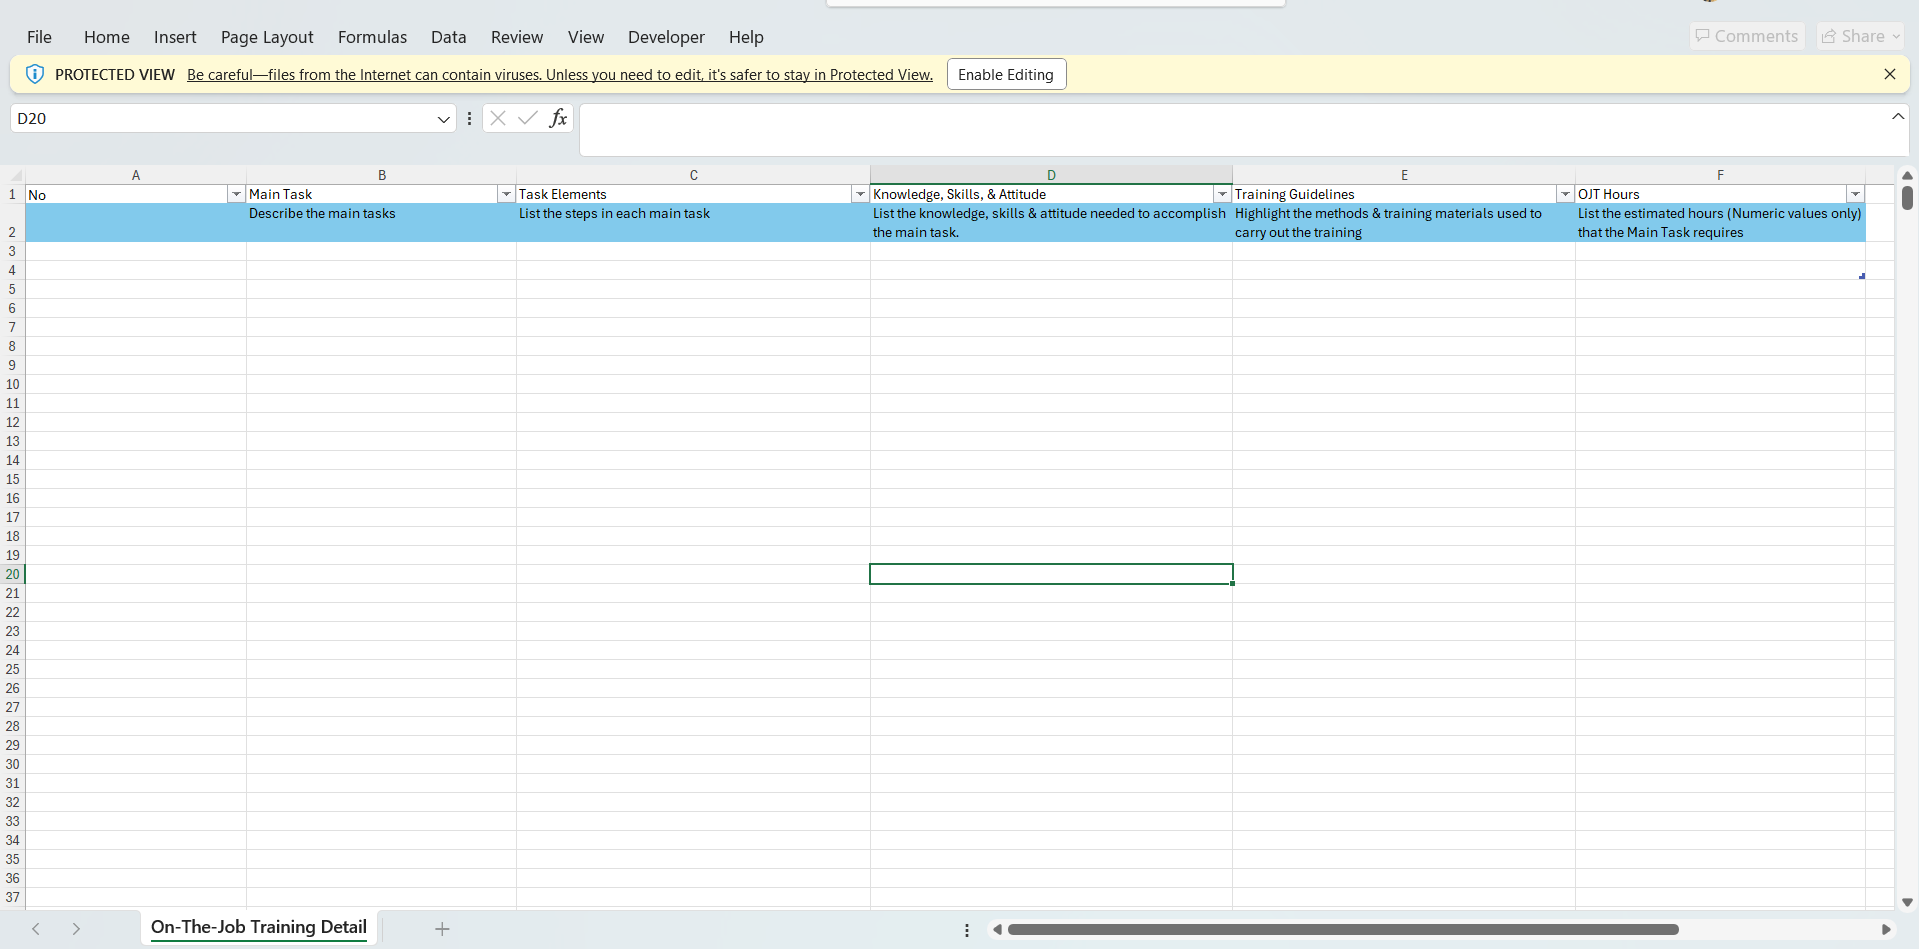
Fill in OJT details in the fields:
- Main Tasks
- Task Element
- OJT Hours
- Knowledge, Skills & Attitude
- Training Guidelines
Step 3:
- Click the “Add Another Main Task” button to add multiple main tasks.
- Fill in all details of each main task.
Step 4: If there are multiple main tasks, a “Trashcan” icon will appear beside each main task. Click on the icon to delete the main task.
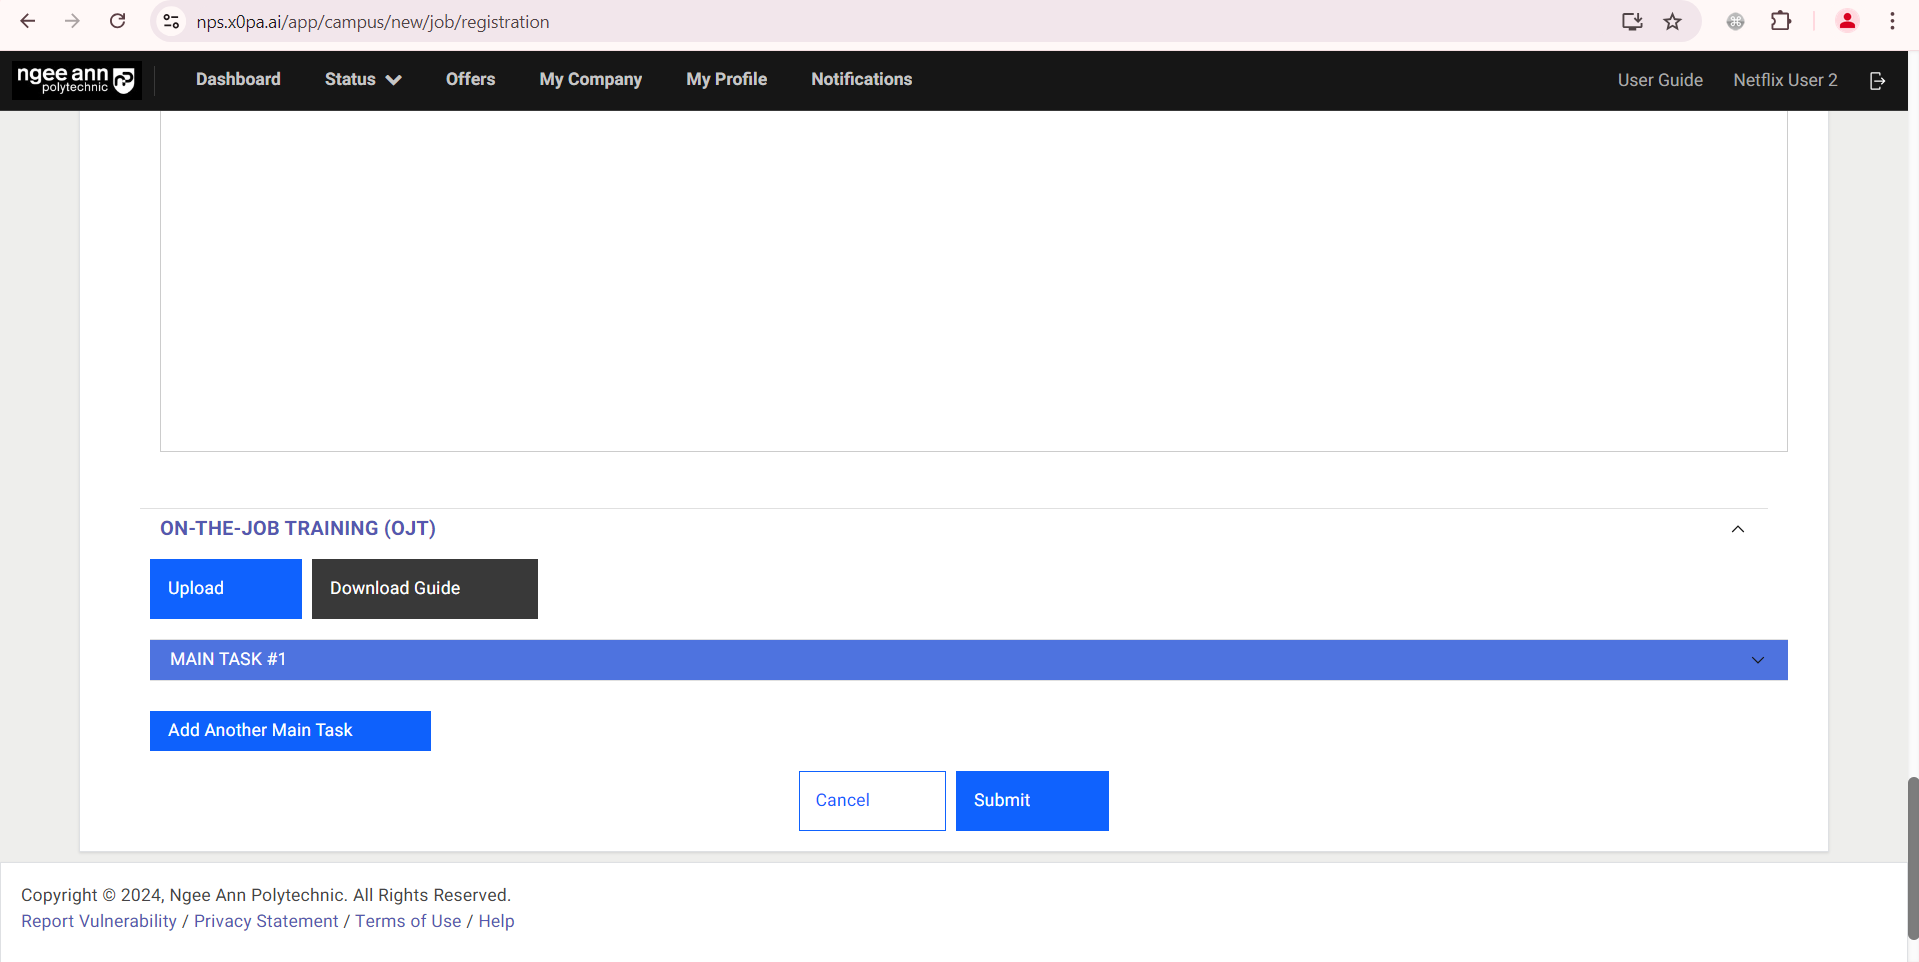
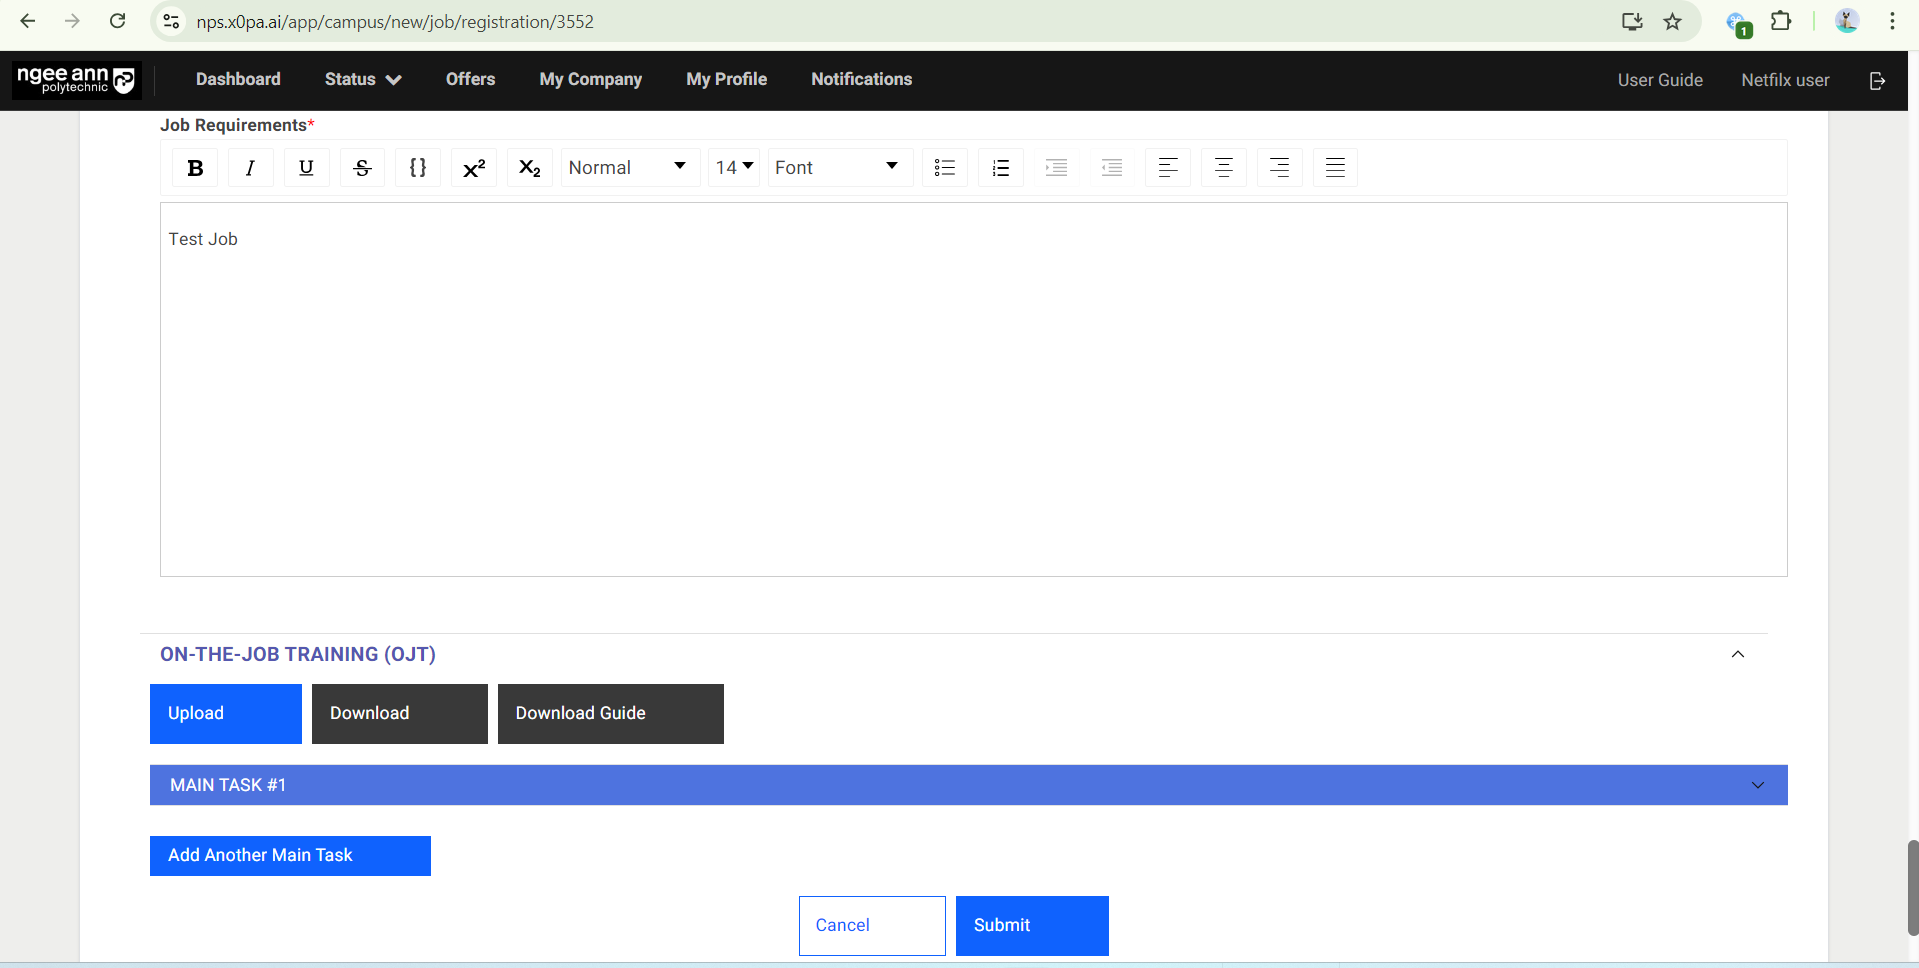
Step 5:
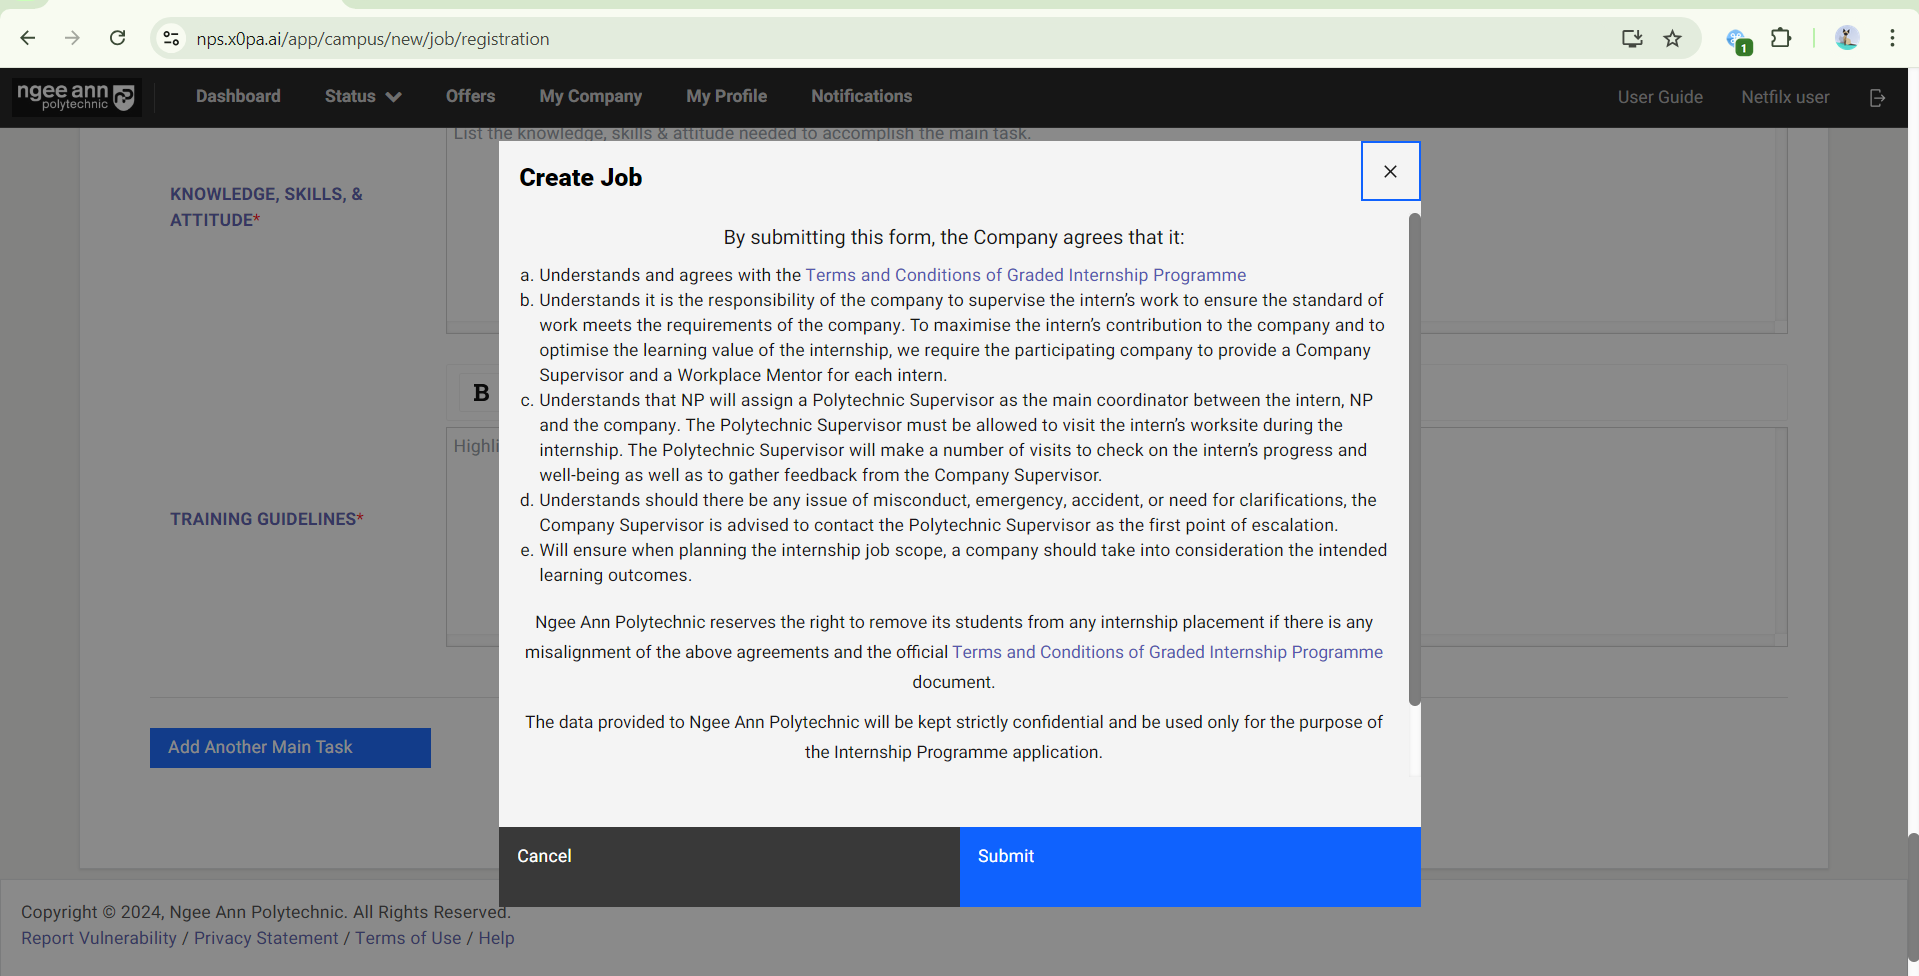
- Once the job and OJT details are filled and ready to submit, click on the “Submit” button.
- In the pop-up window, click on the “Submit” button.
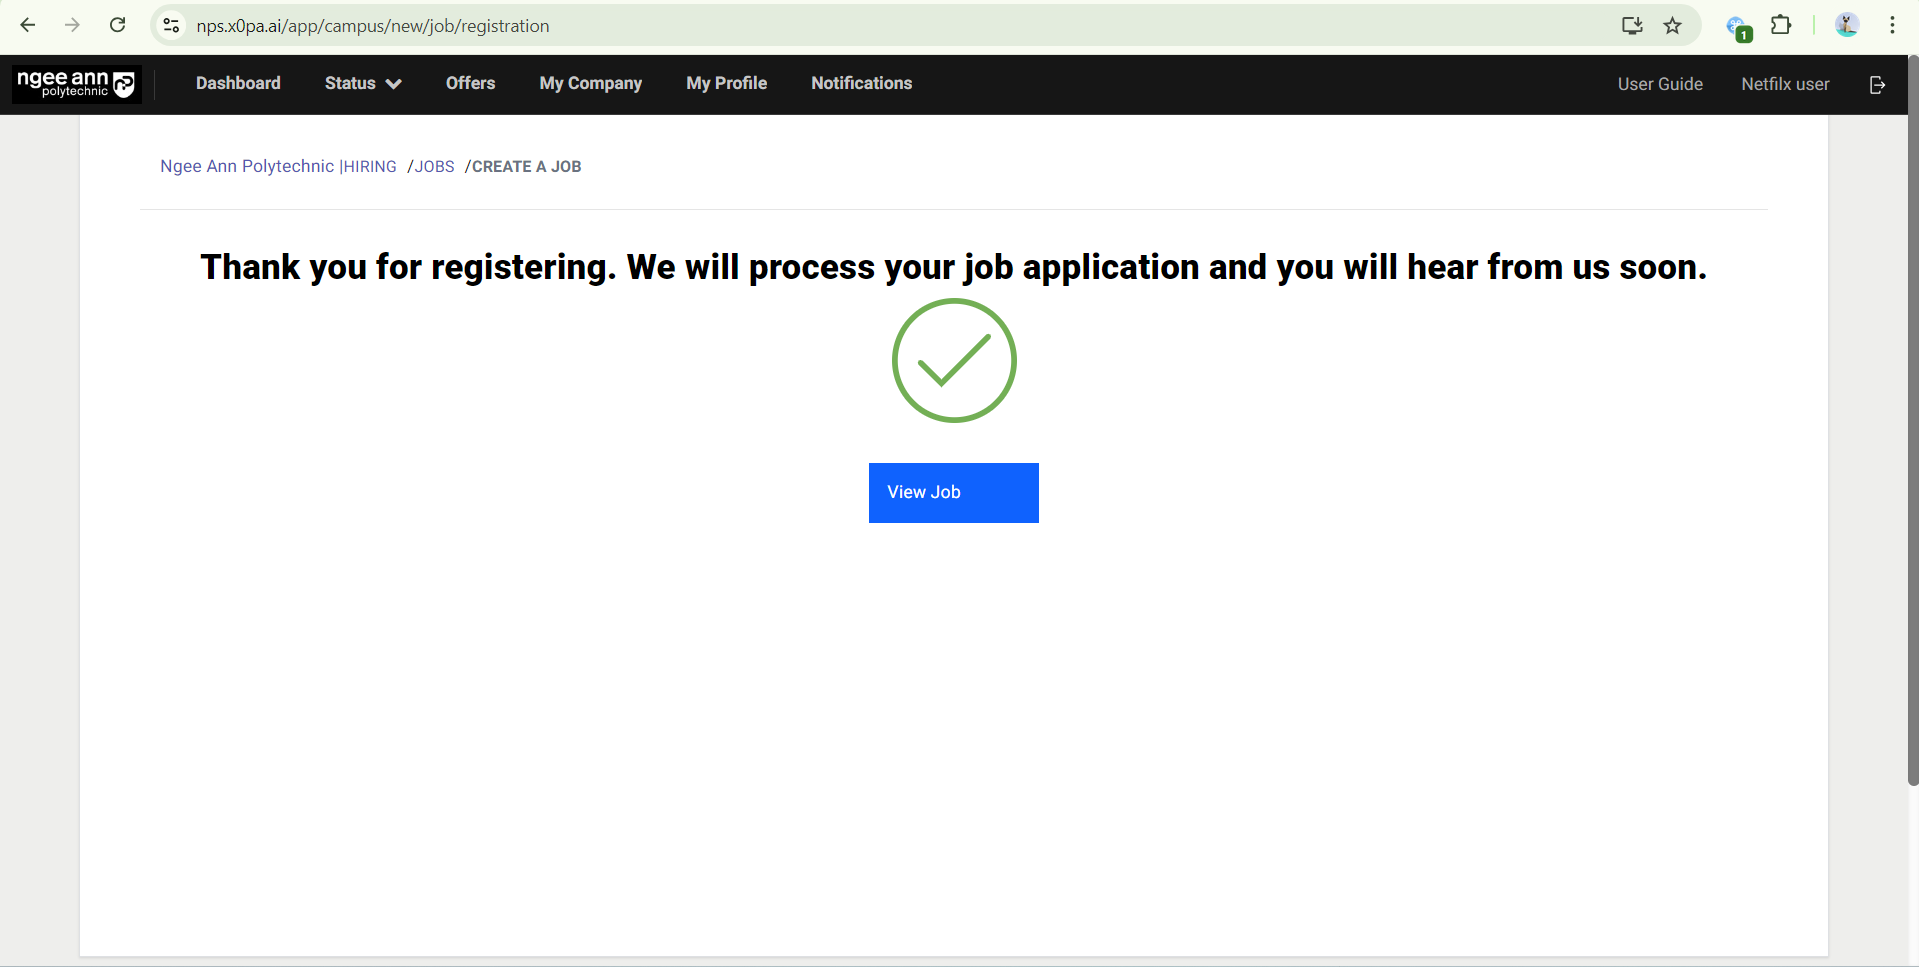
- Once the job was submitted successfully “Thank you for registering. We will process your job application and you will hear from us soon.” page will be shown


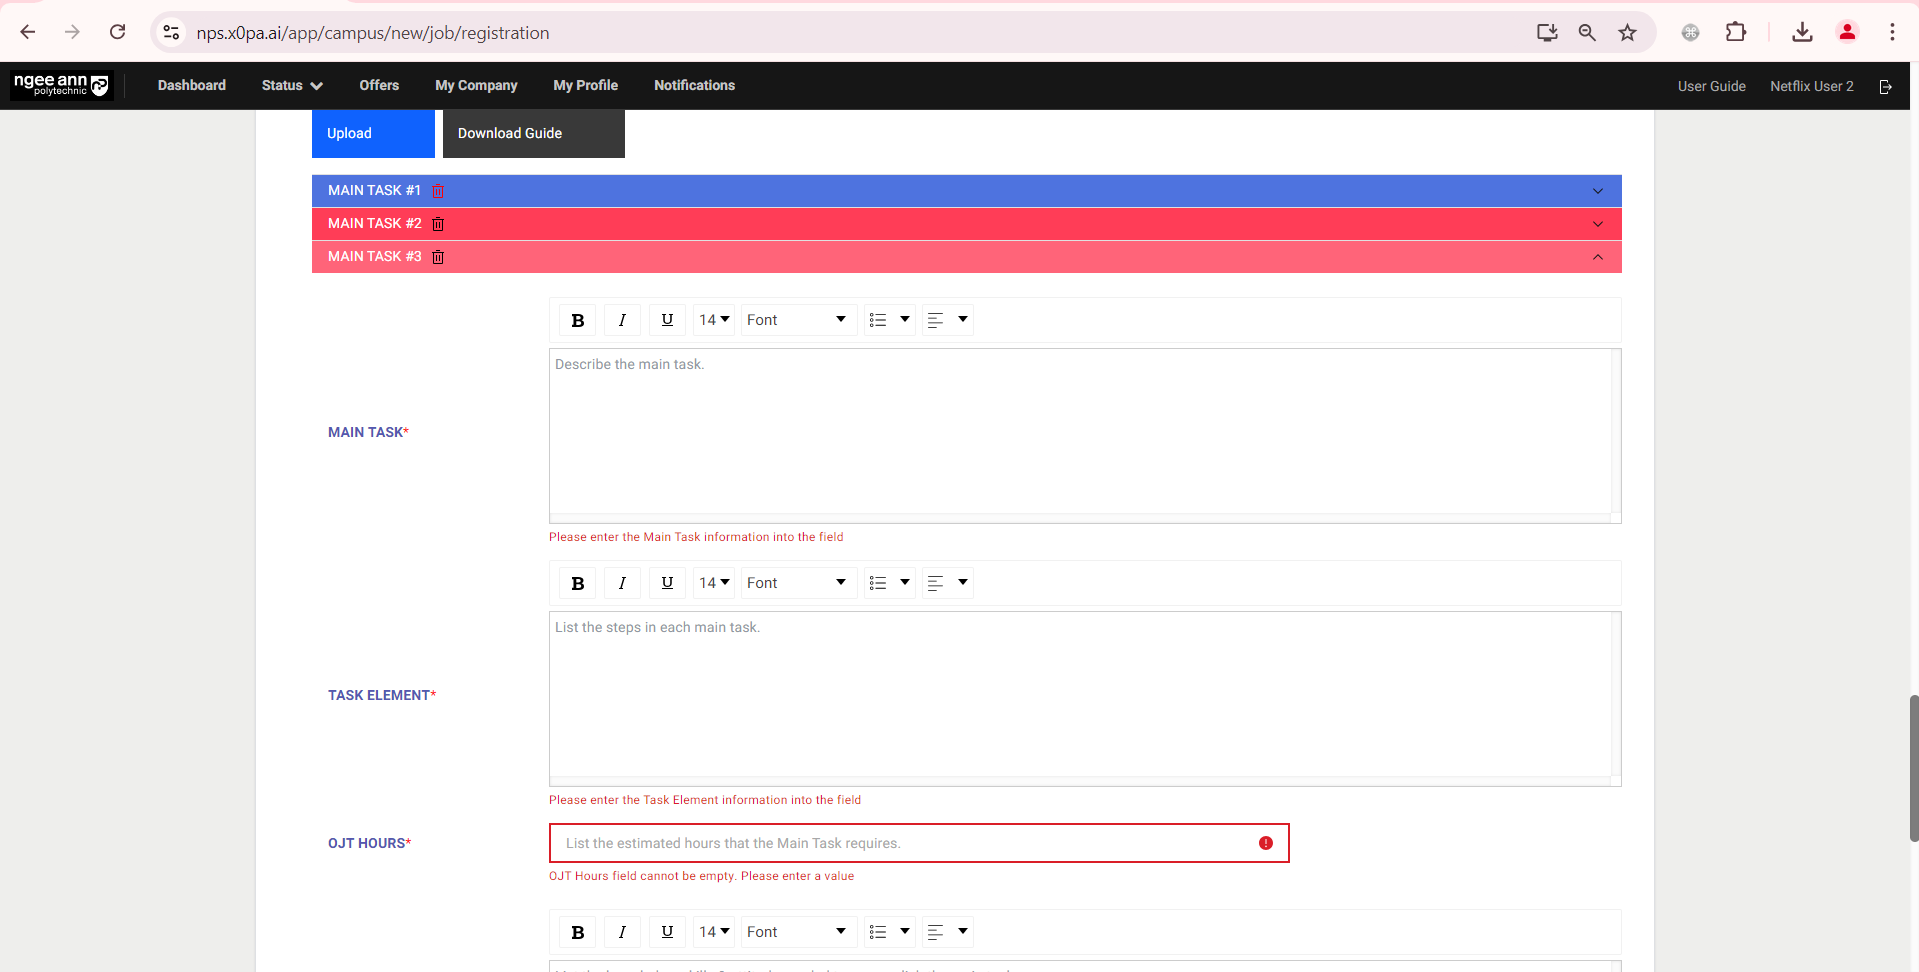
Step 6: The “Main Task X number” accordion will be highlighted in red colour and a validation error will be shown on the field when any OJT field is filled with an invalid or empty field during job submission.
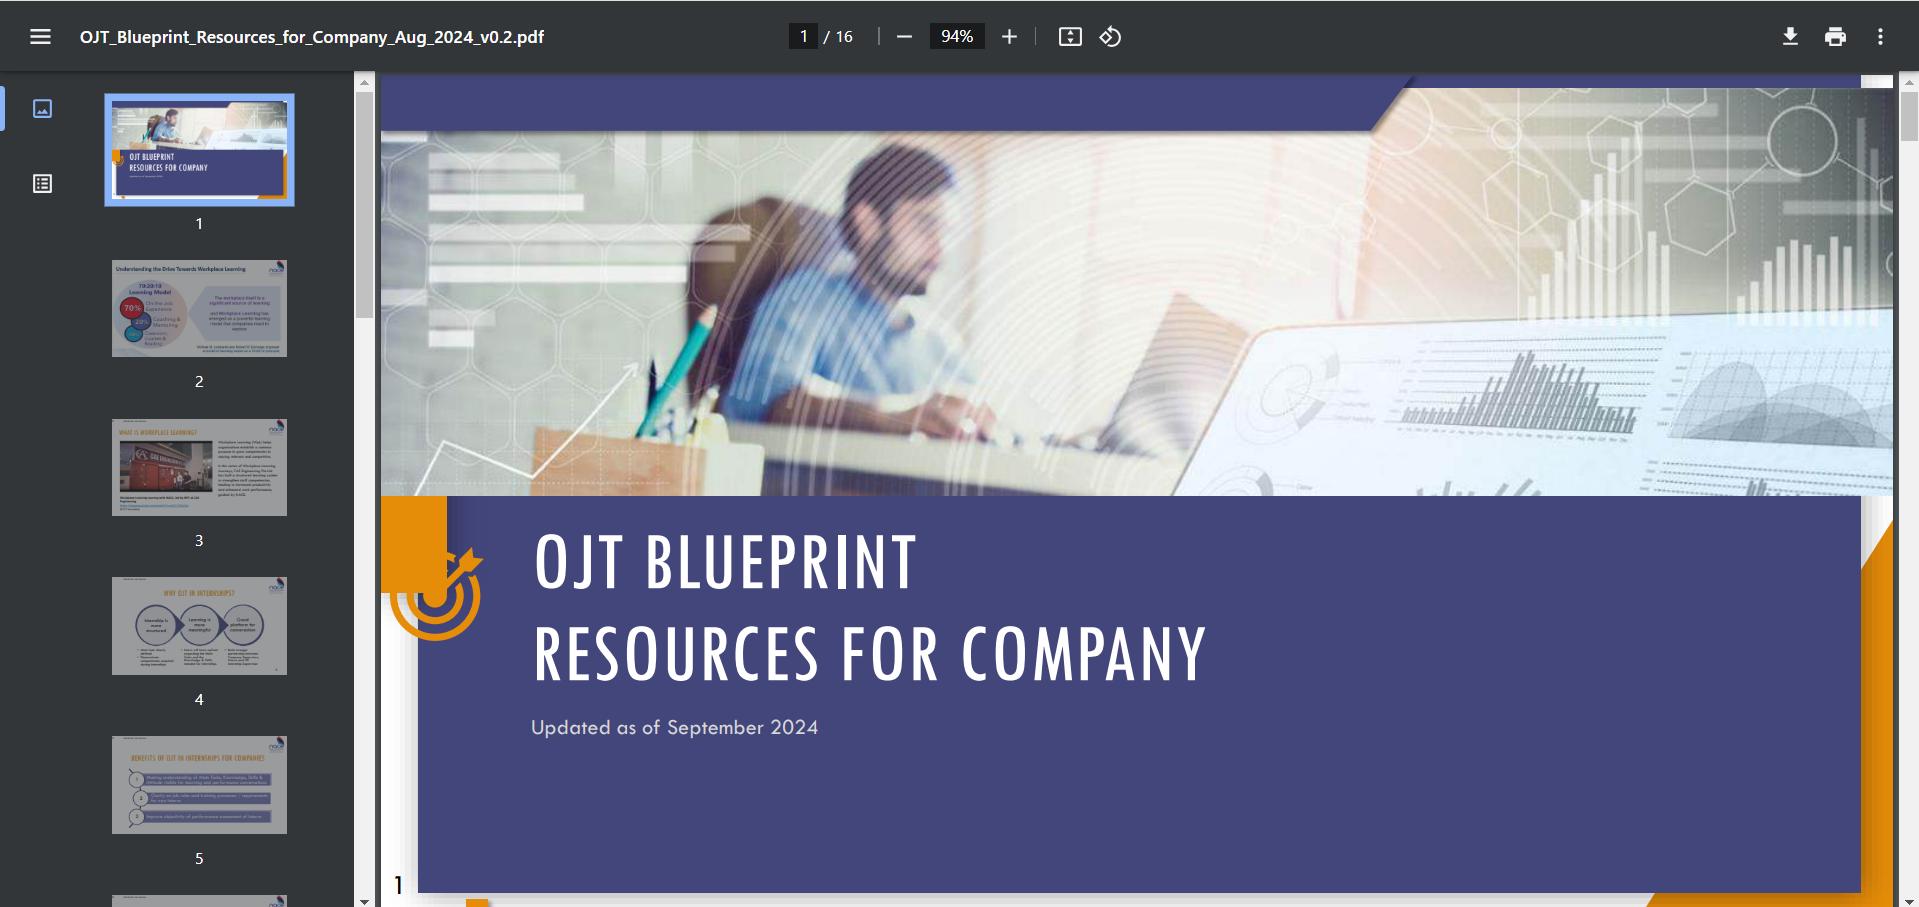
Step 7: The “OJT Blueprint Resources for Company” PDF file can be viewed and downloaded when clicking on the “Download Guide” button
Create OJT (Bulk Upload OJT Data)
Step 1:
- Click on the “Create Jobs” button.
- Fill in Job Details, scroll to the bottom for the On-The-Job (OJT) section


Step 2:
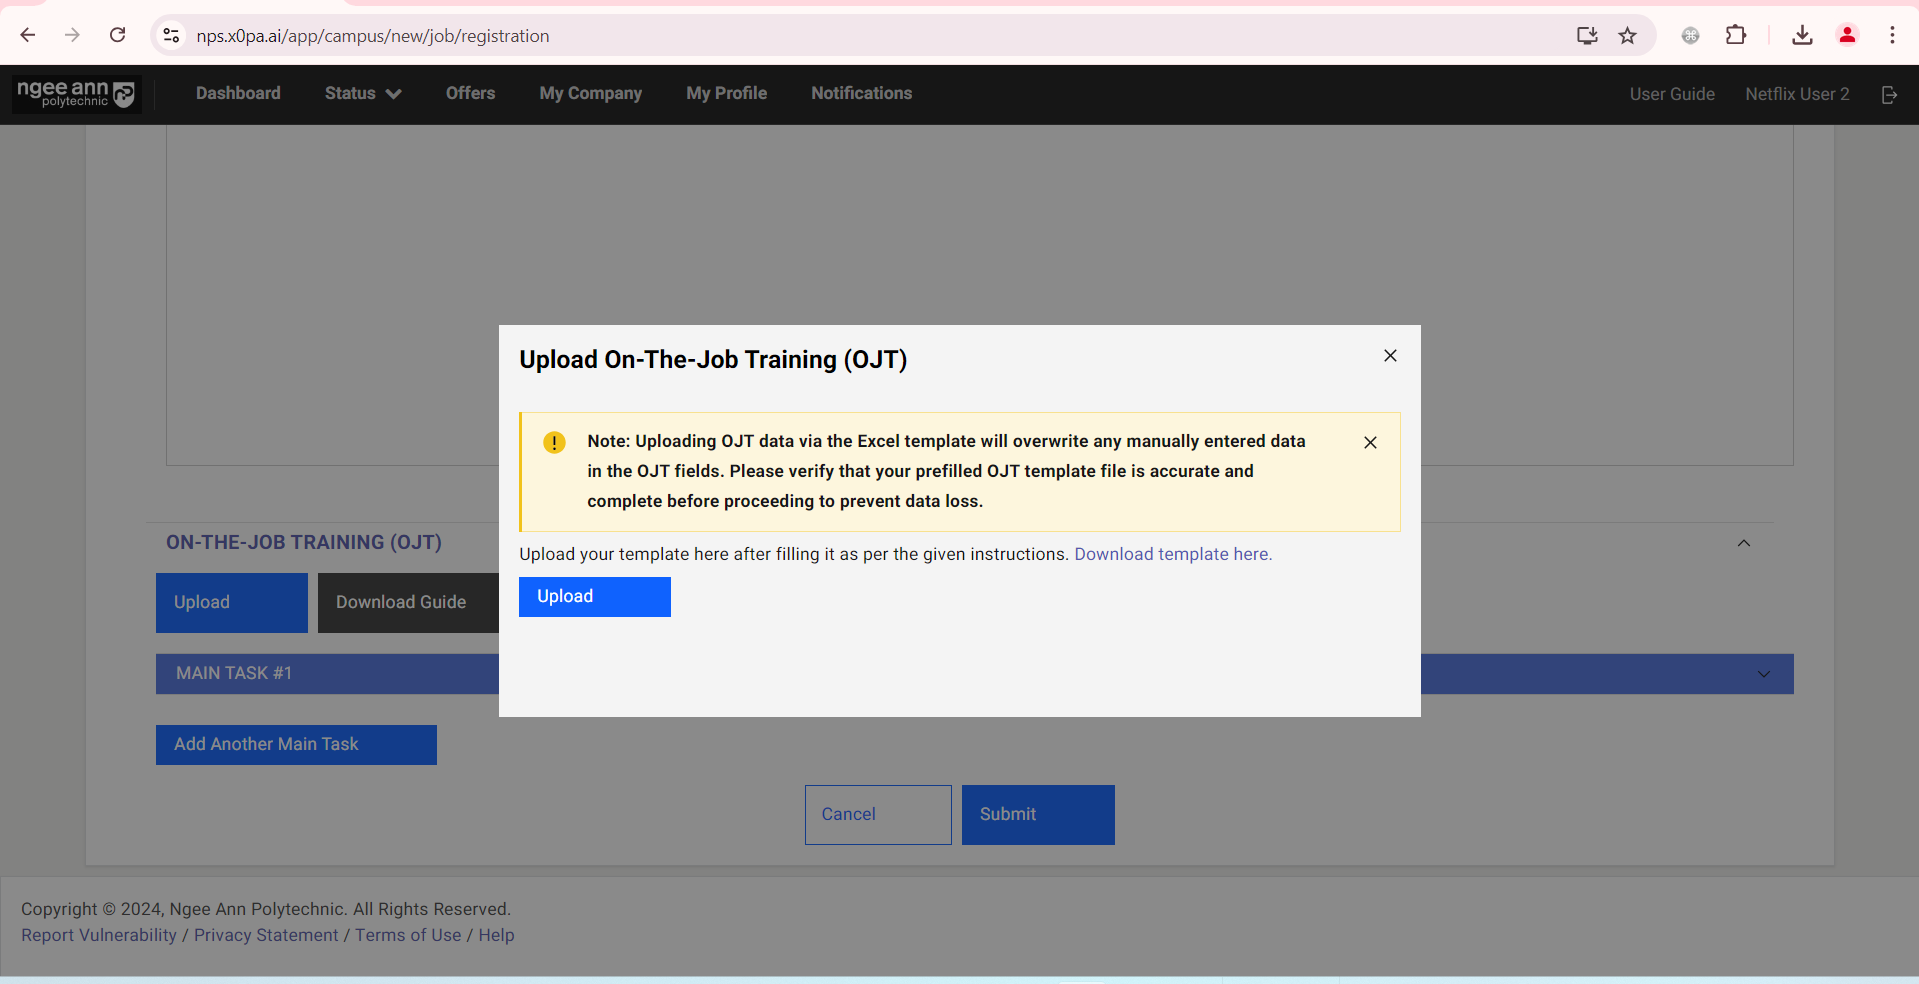
- OJT data can be uploaded in bulk. Click on “Upload”.
- In the pop-up window, click on “Download template here”.
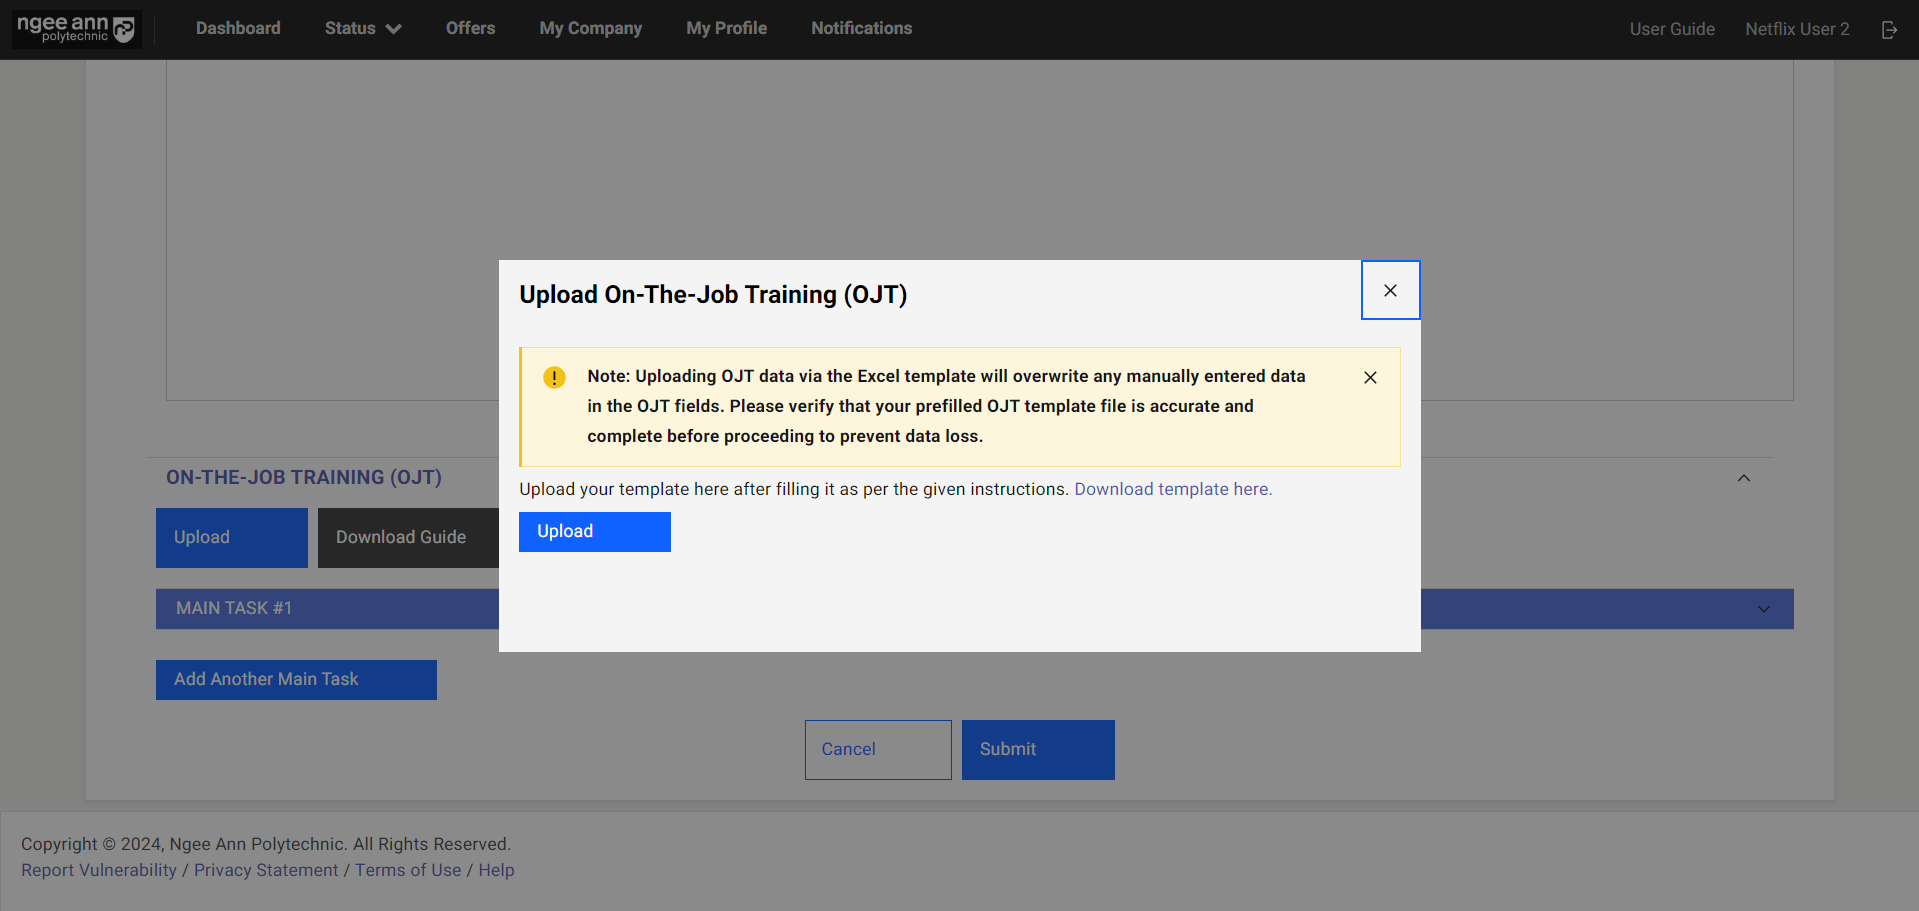
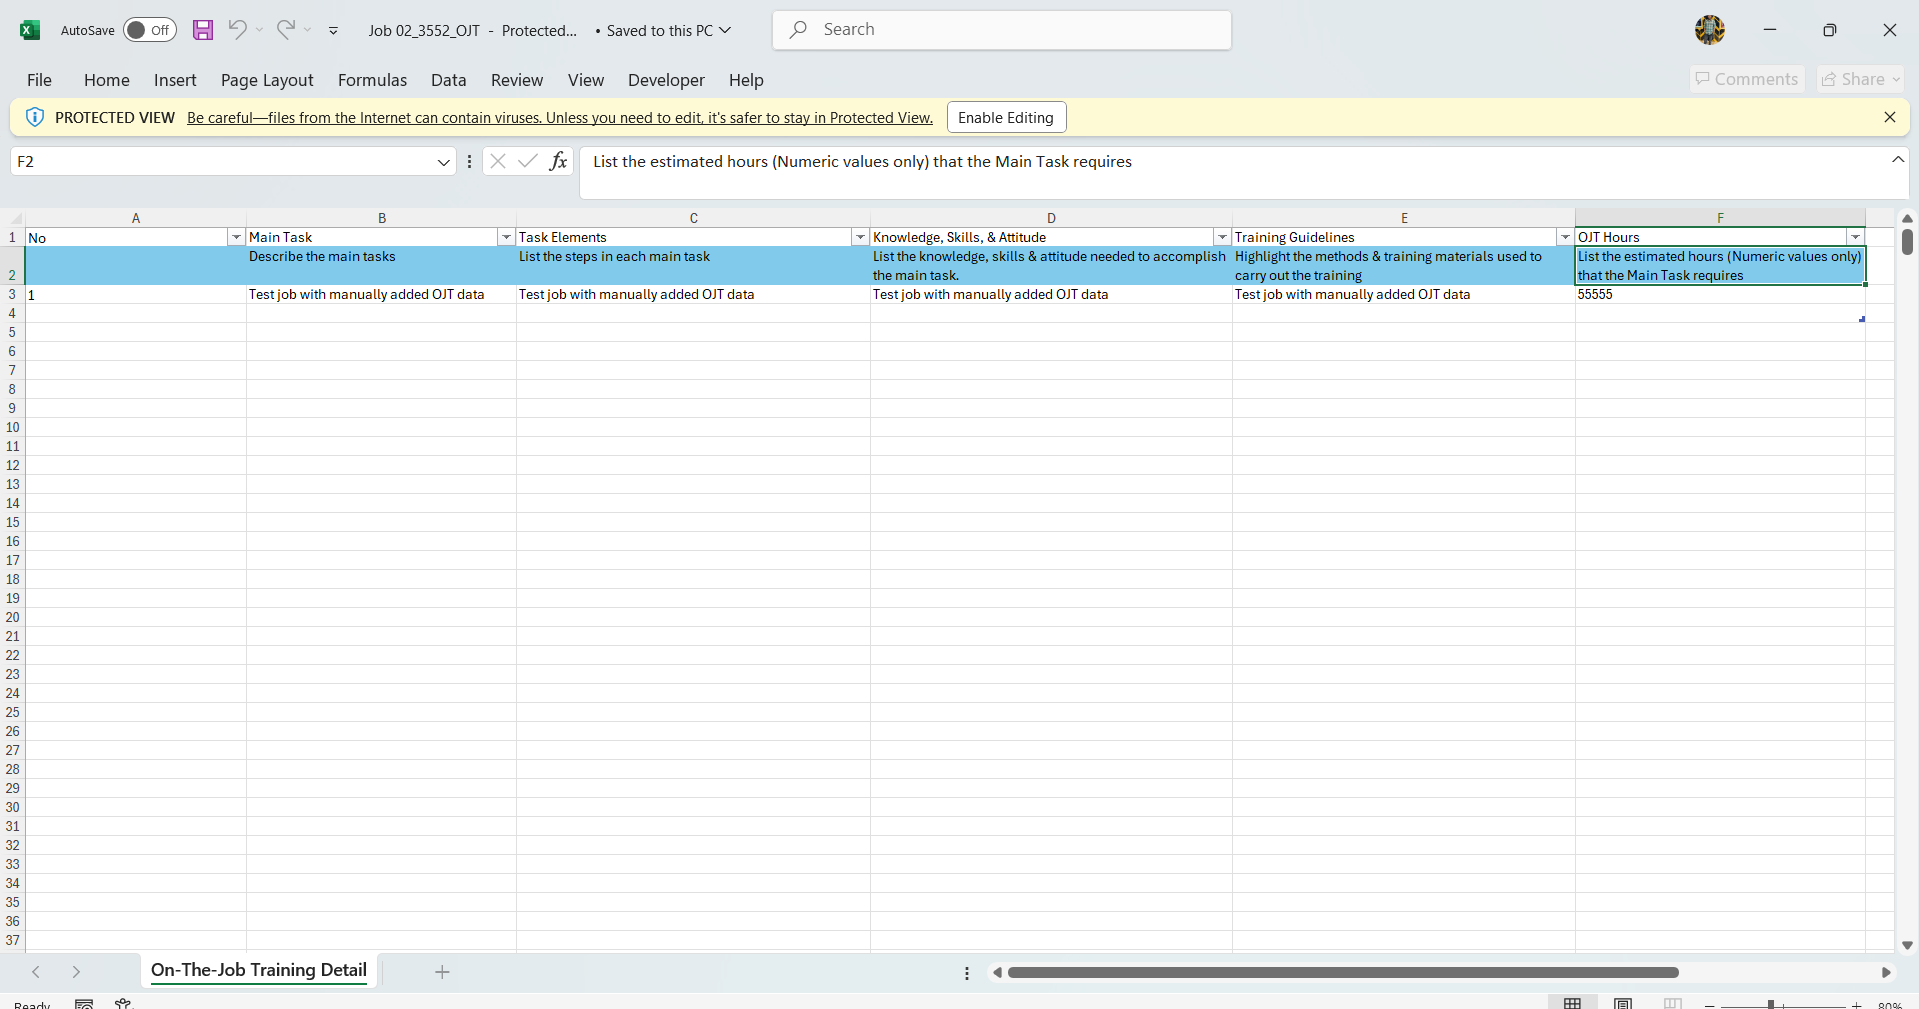
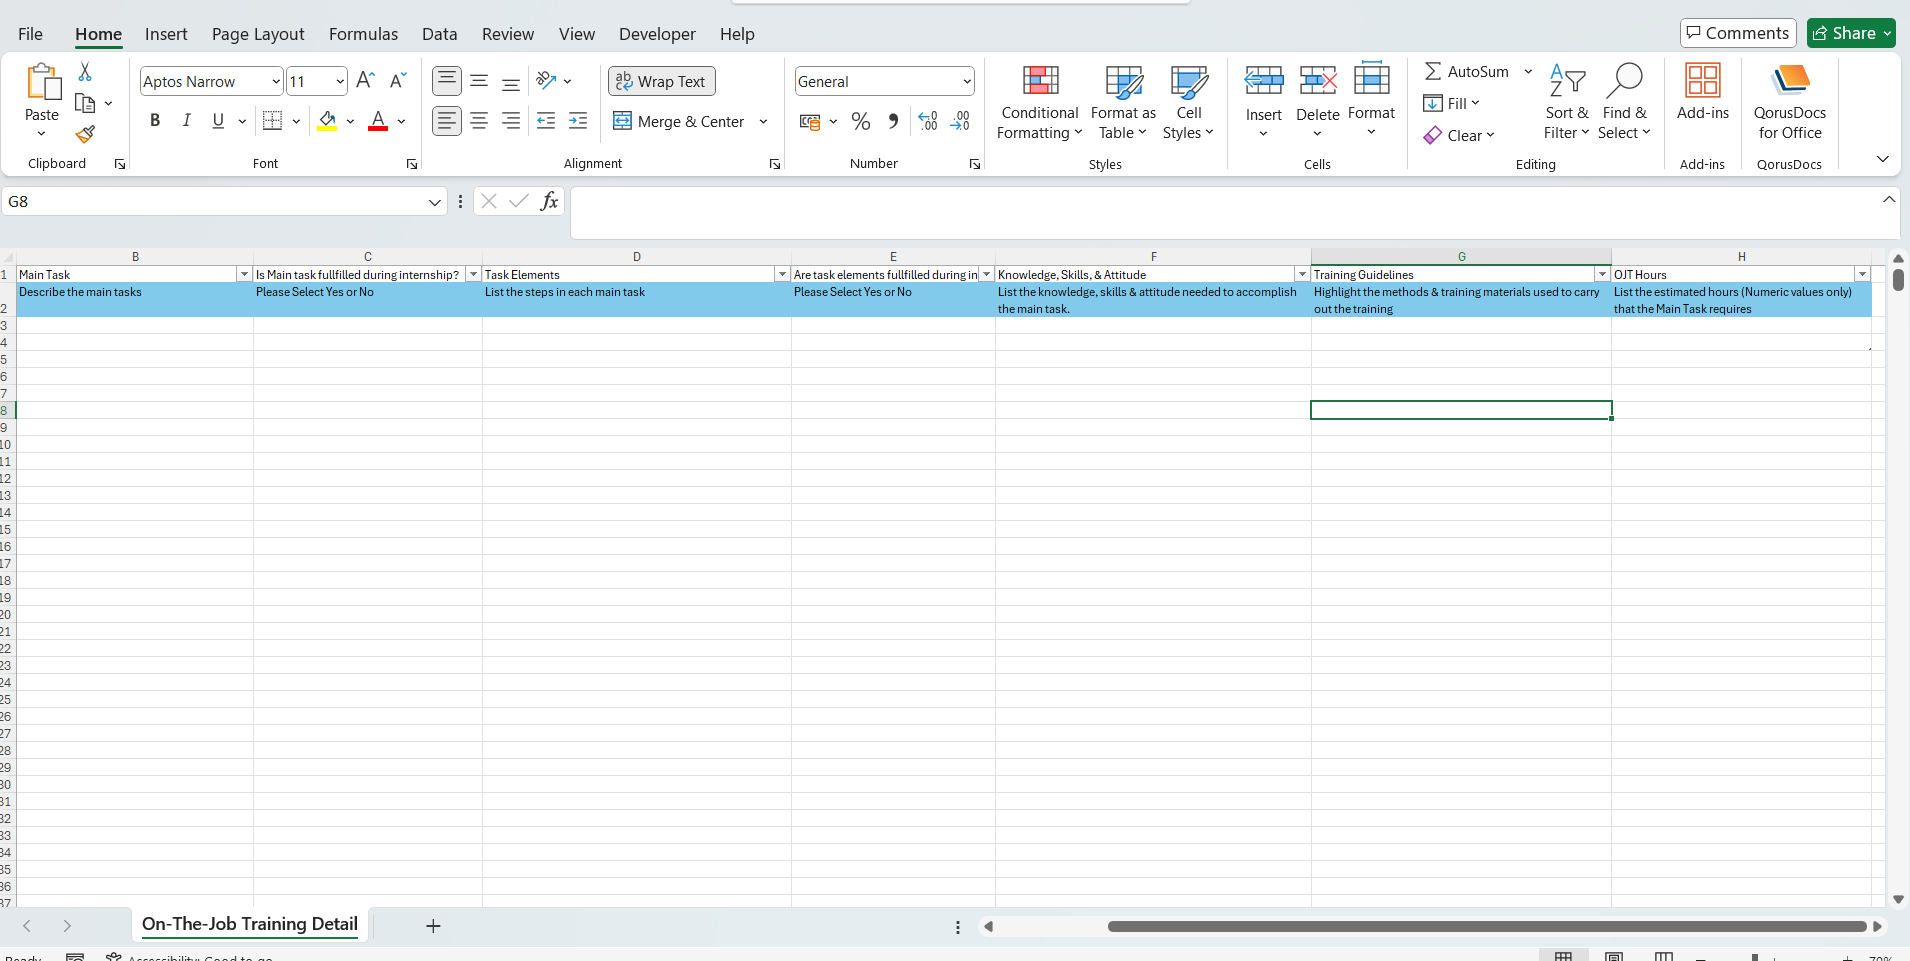
Step 3:
- Open the downloaded template. Fill in OJT details. Save the template.
- Click on the “Upload” button. Select the pre-filled OJT template and upload the file.
Step 4:
- OJT details will be filled out automatically based on the uploaded template.
Note: The uploaded template will overwrite any previous details that have been filled.

Step 5:
- Once the job and OJT details are filled and ready to submit, click on the “Submit” button.
- In the pop-up window, click on the “Submit” button.
- Once the job was submitted successfully “Thank you for registering. We will process your job application and you will hear from us soon.” page will be shown

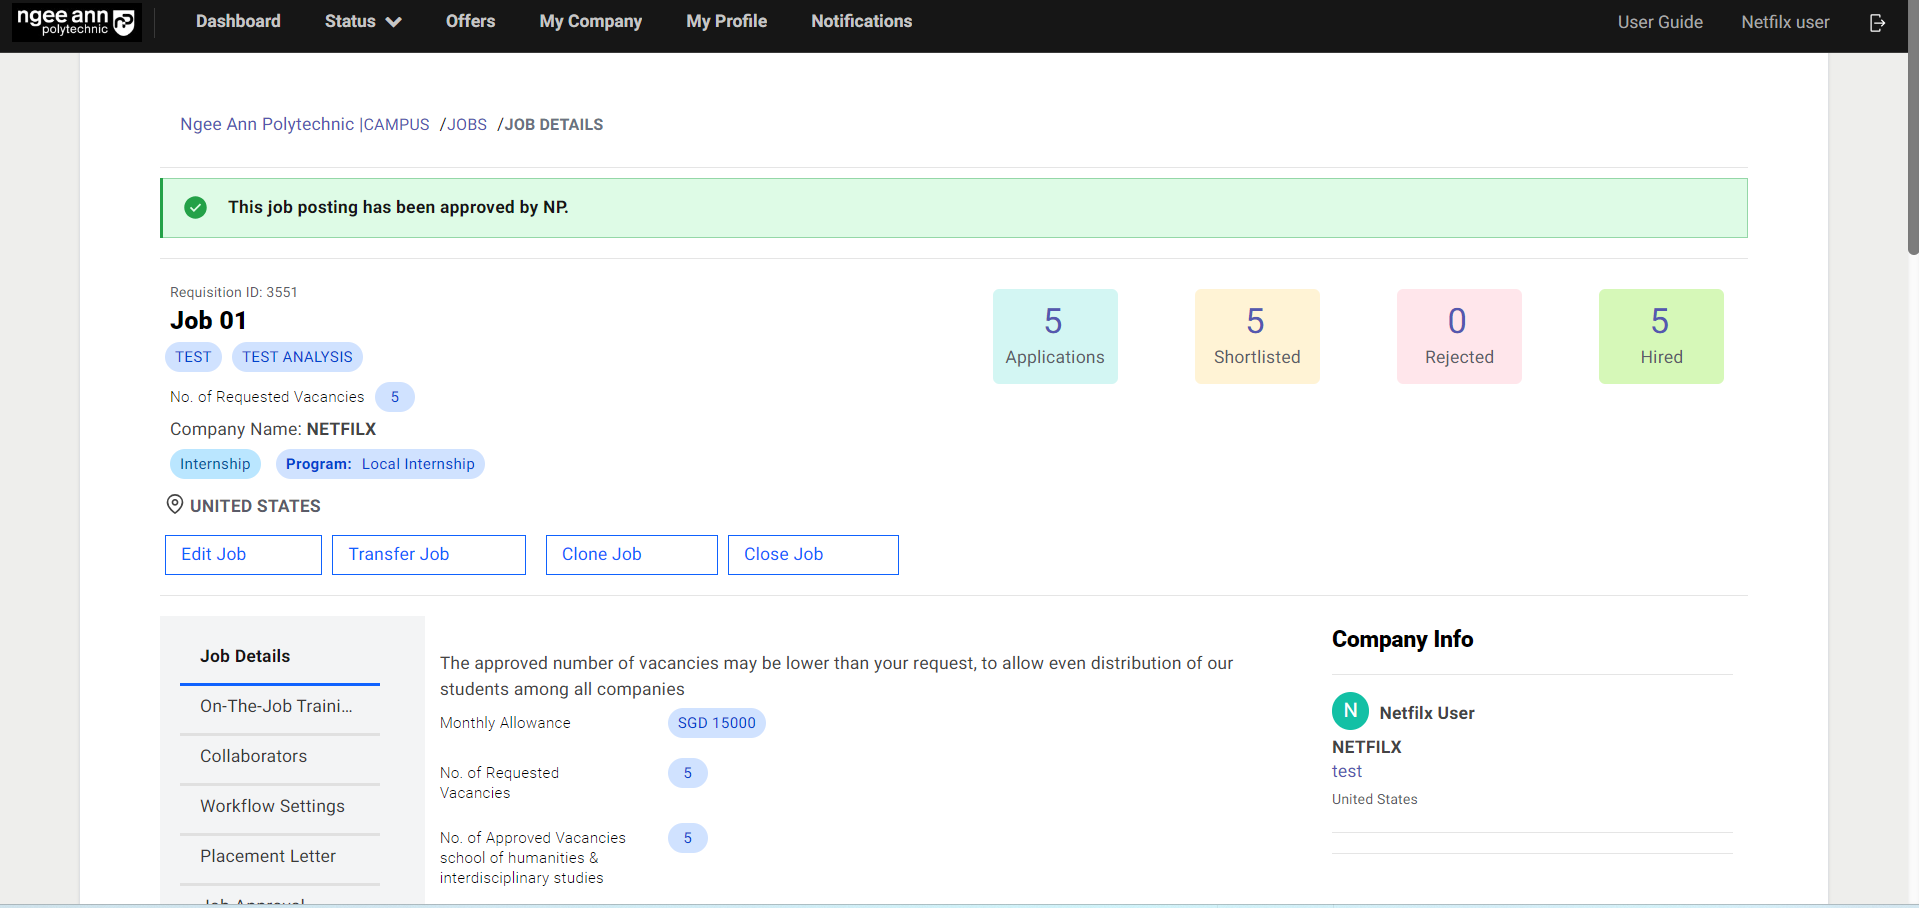
Approve OJT Job
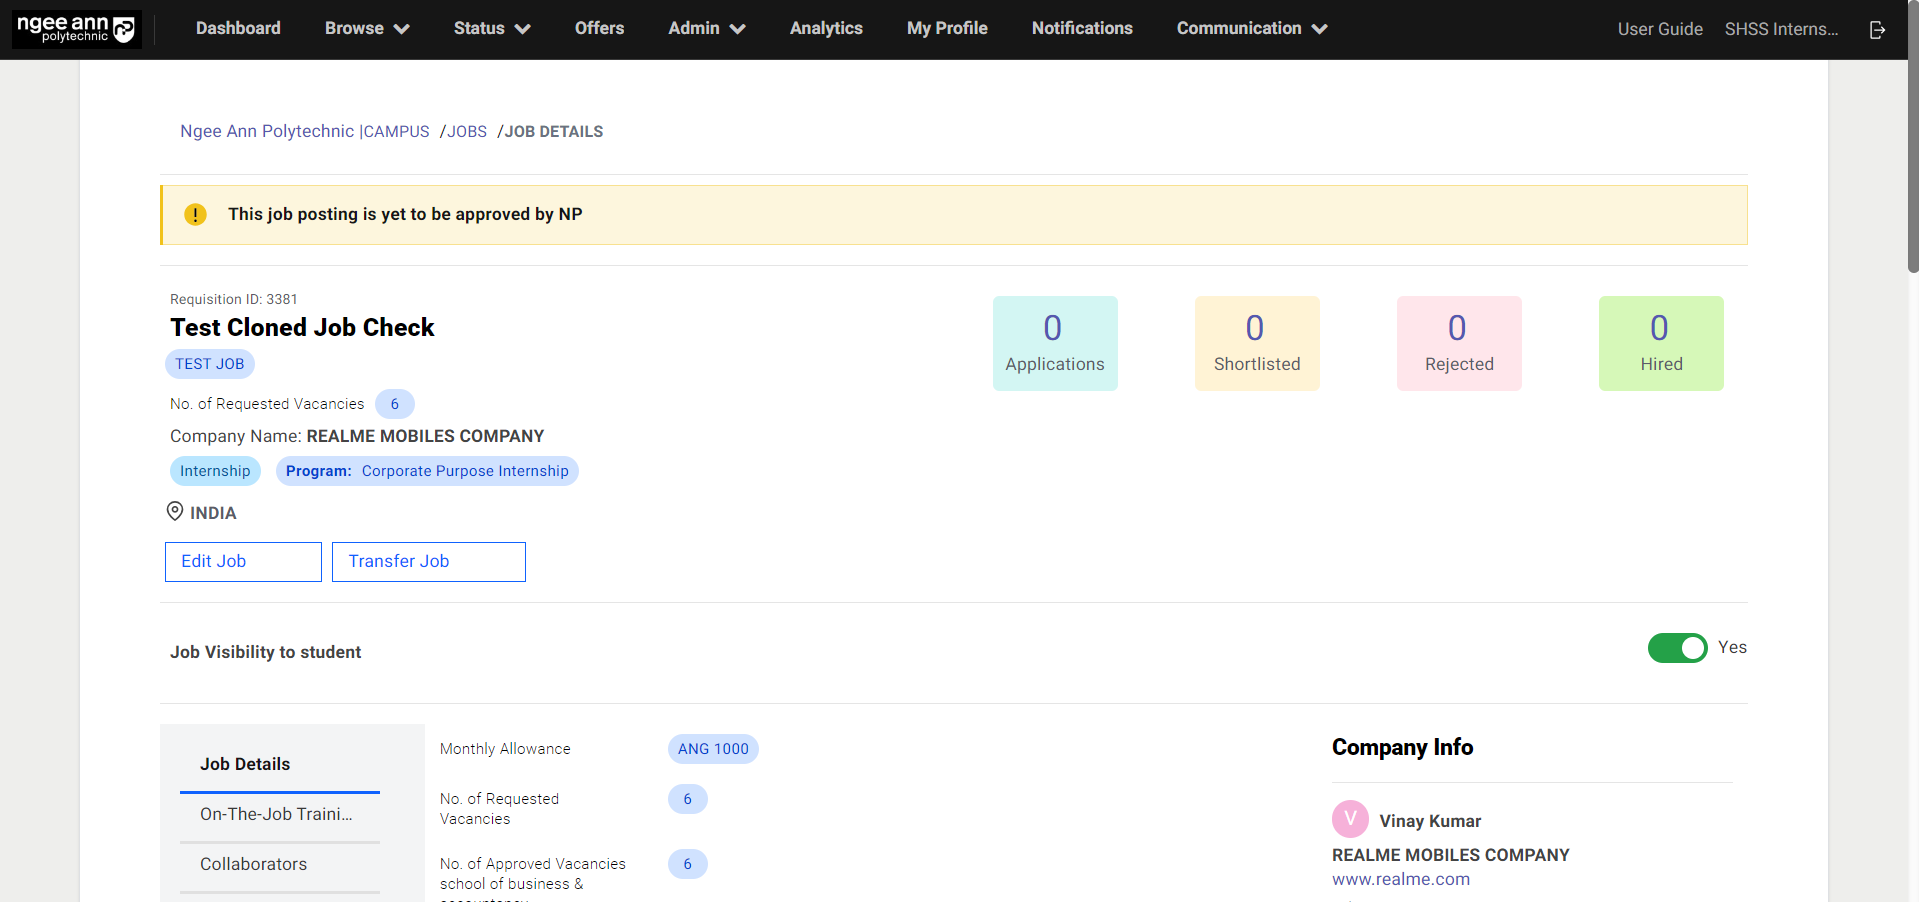
Job Approval
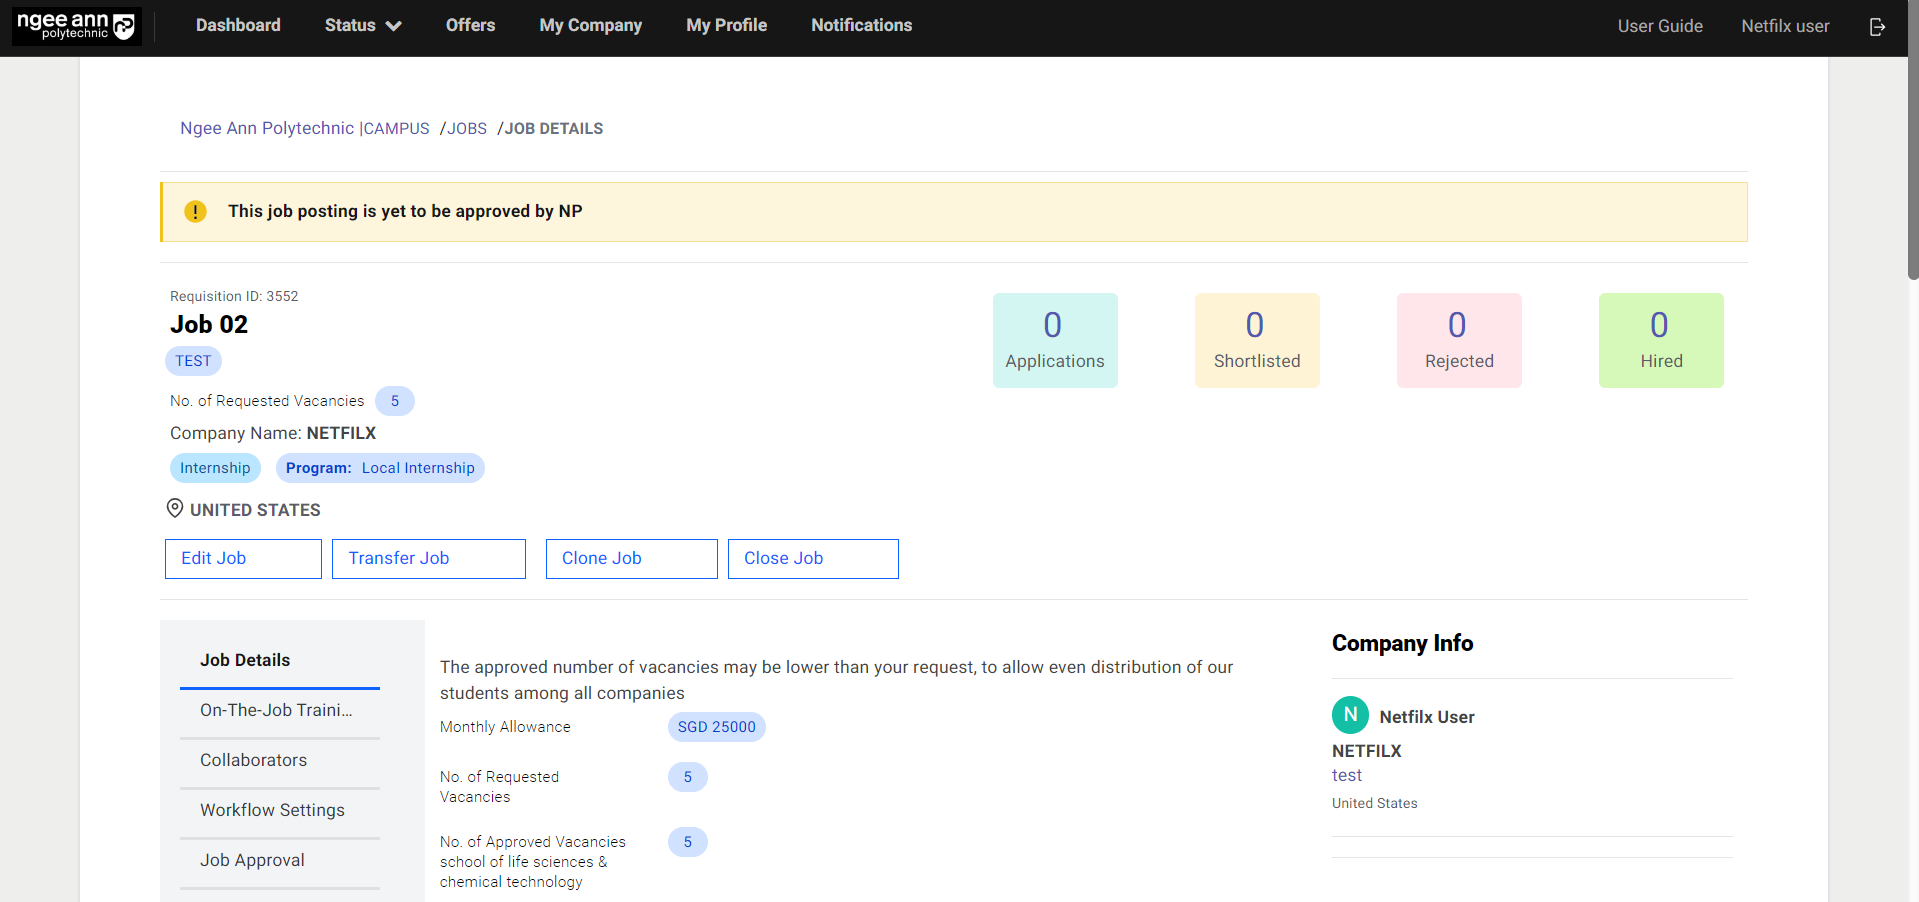
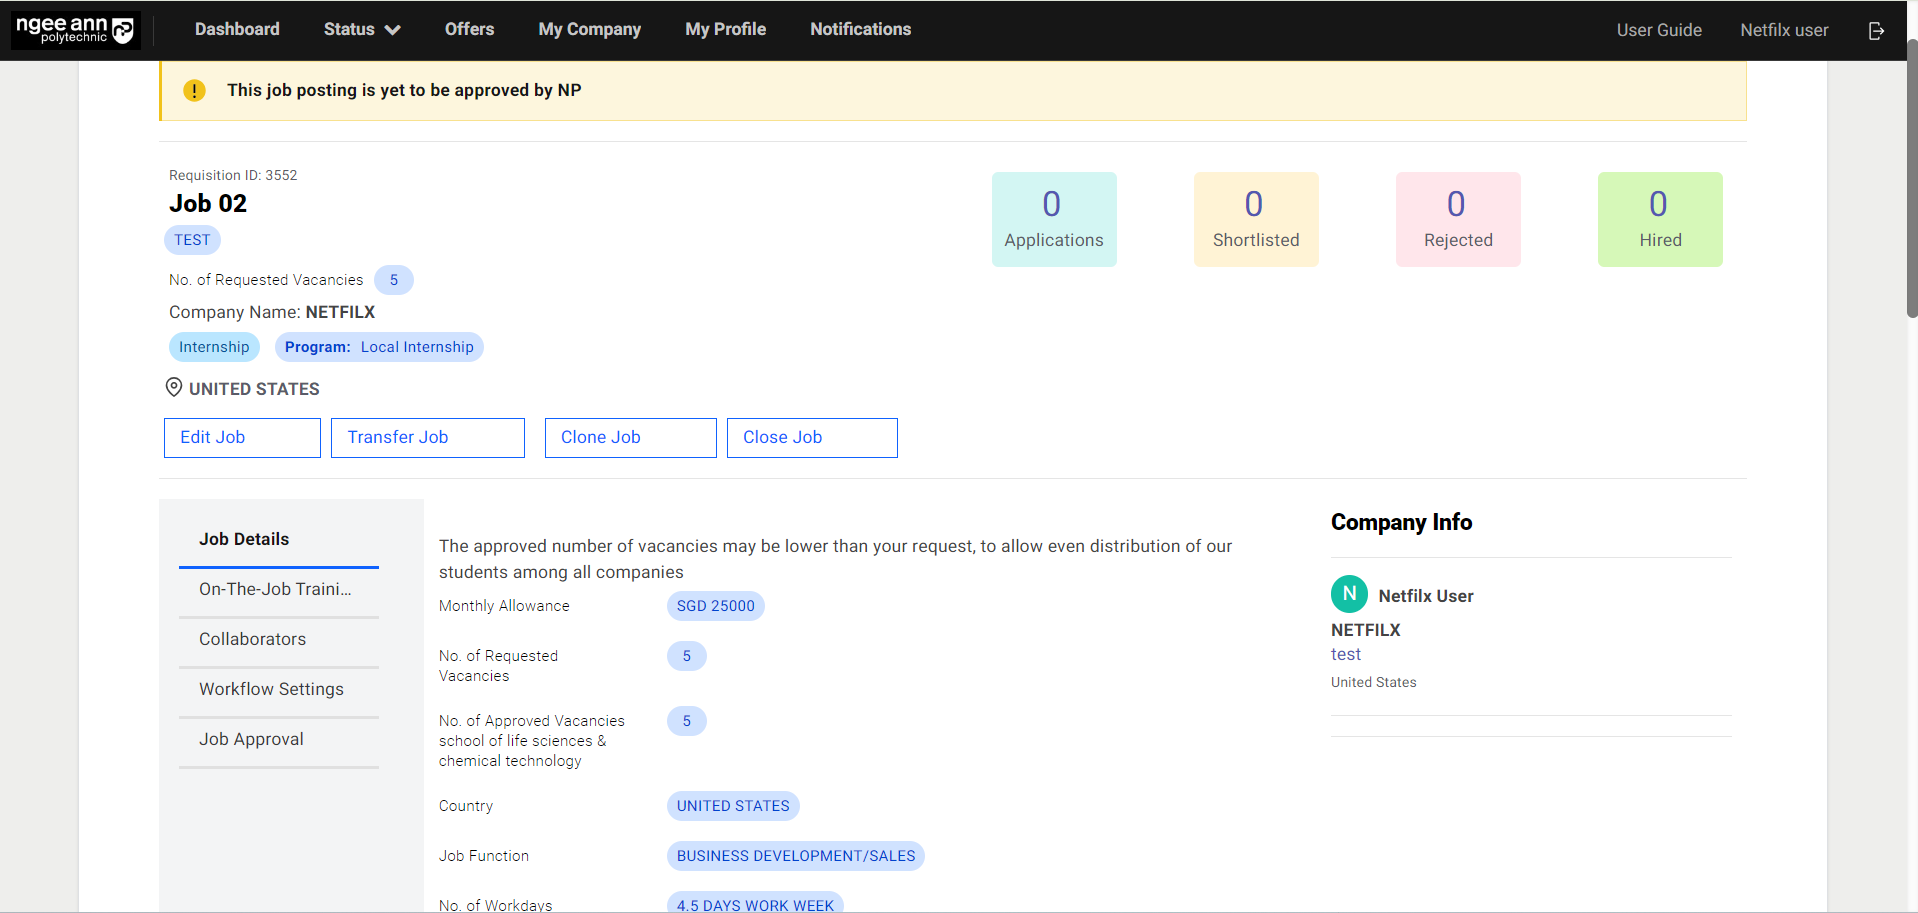
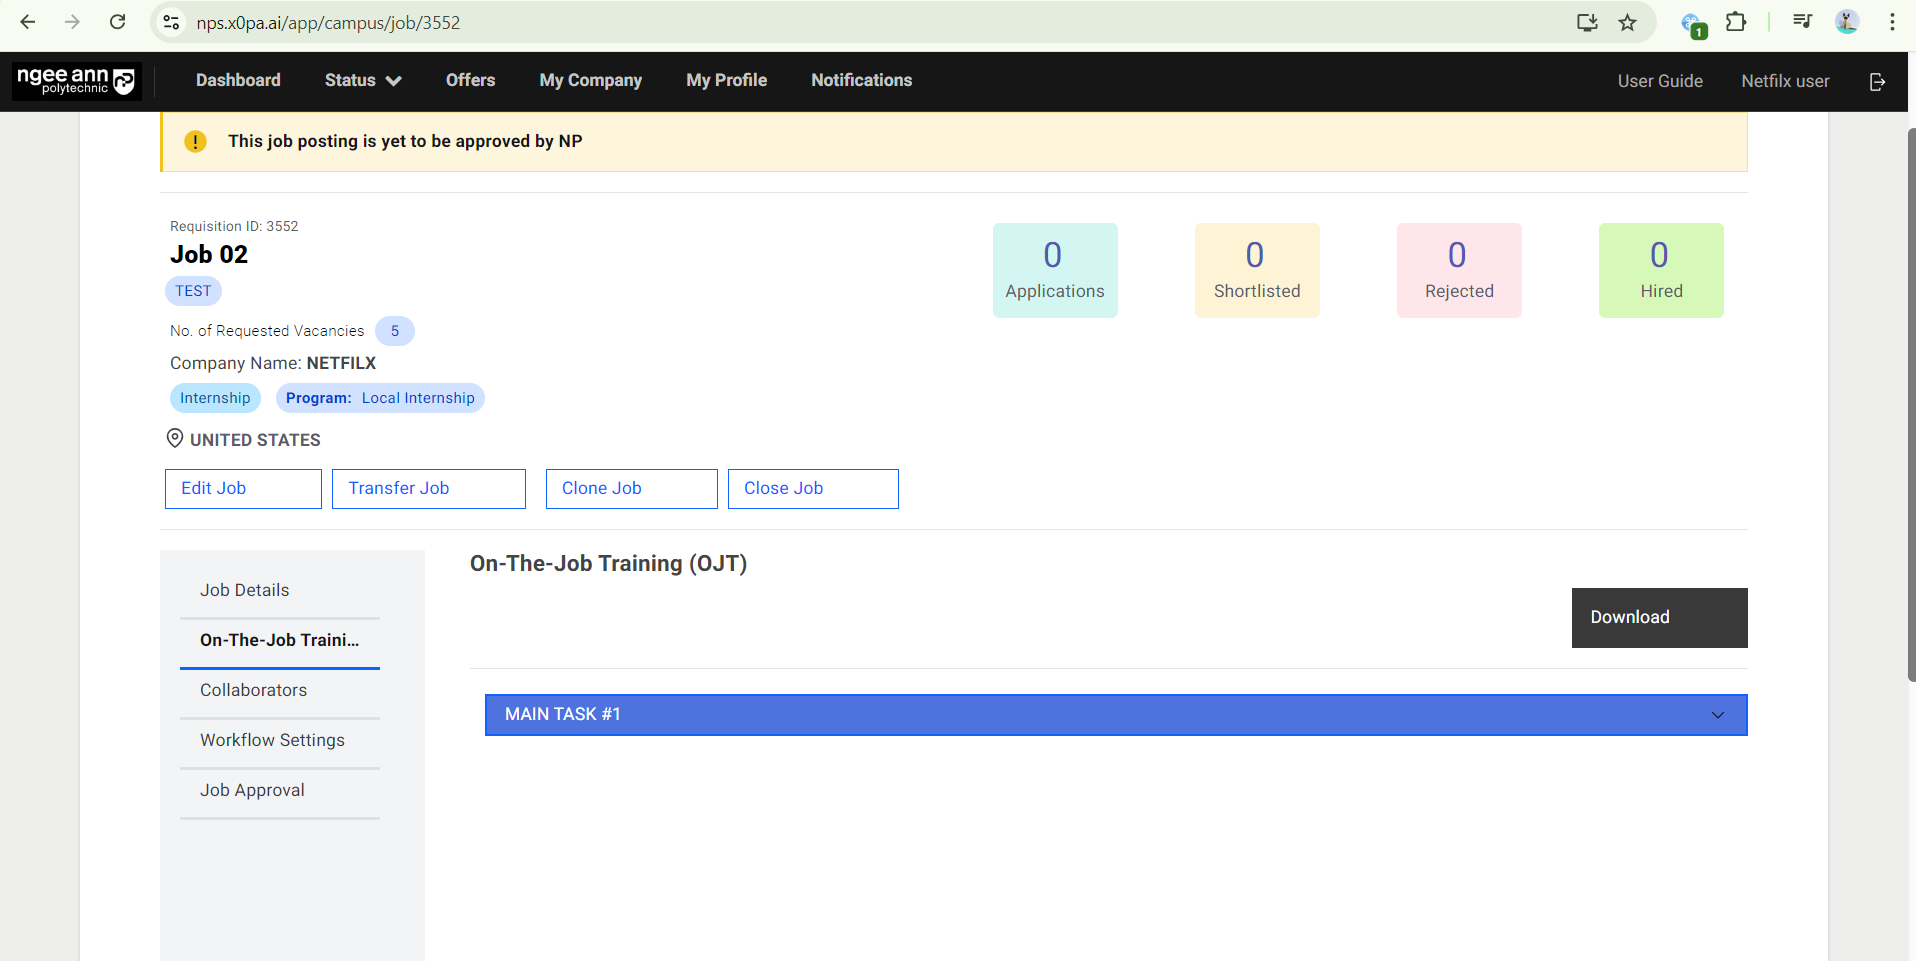
Step 1:
- Job & OJT details pending approval will have a banner showing the “This job posting is yet to be approved by NP” status.
- Click on “Job Approval”.
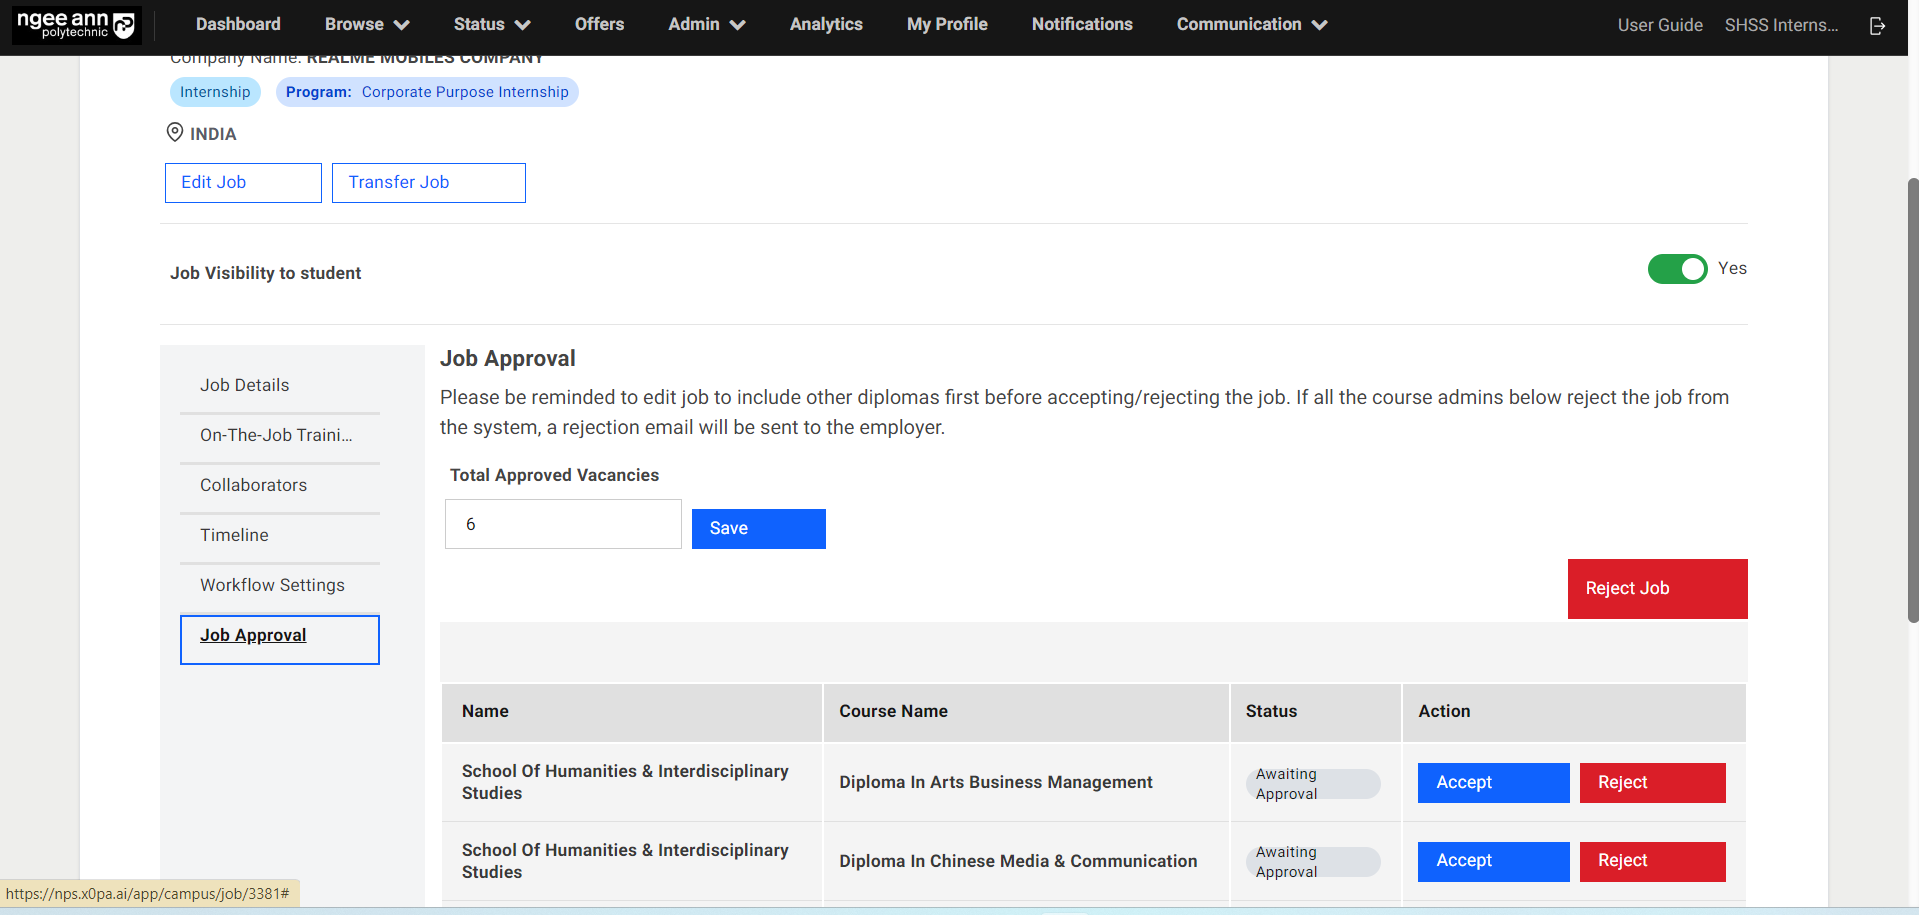
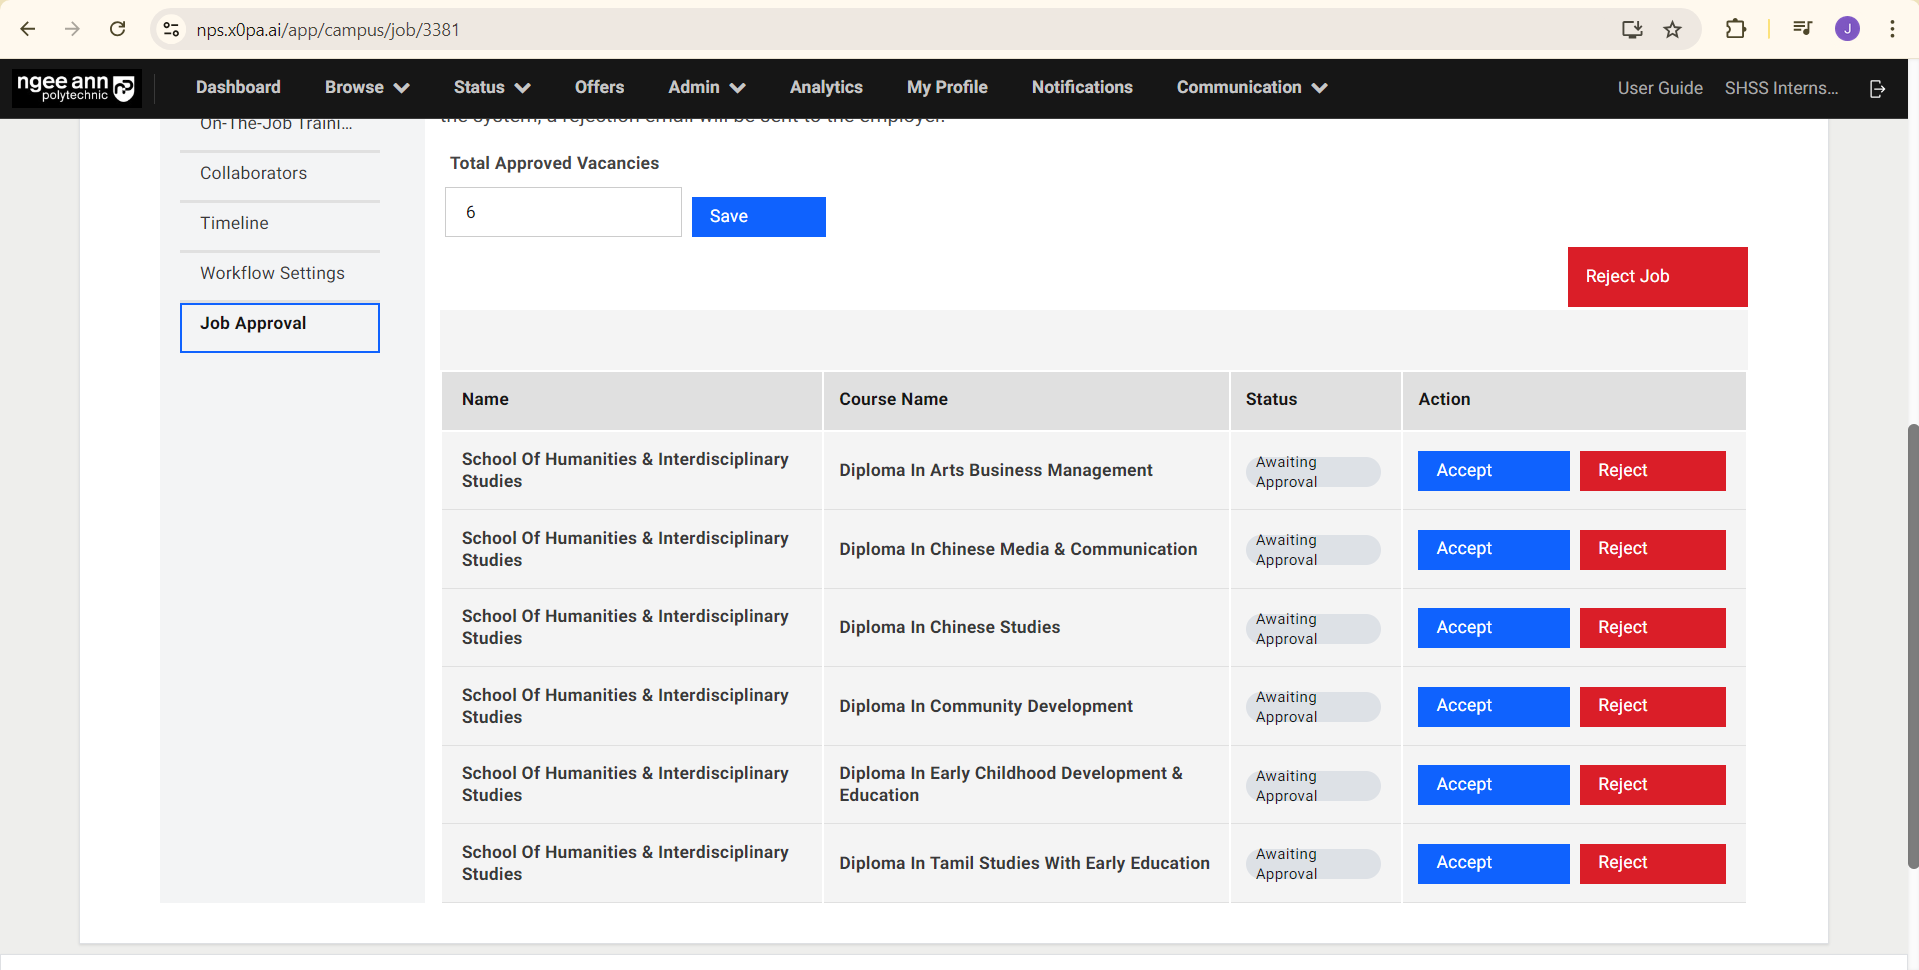
Step 2:
- Review the number of Requested vacancies and then set the value of “Total Approved Vacancies” that can be approved.
- Click on the save button to approve the number of vacancies.
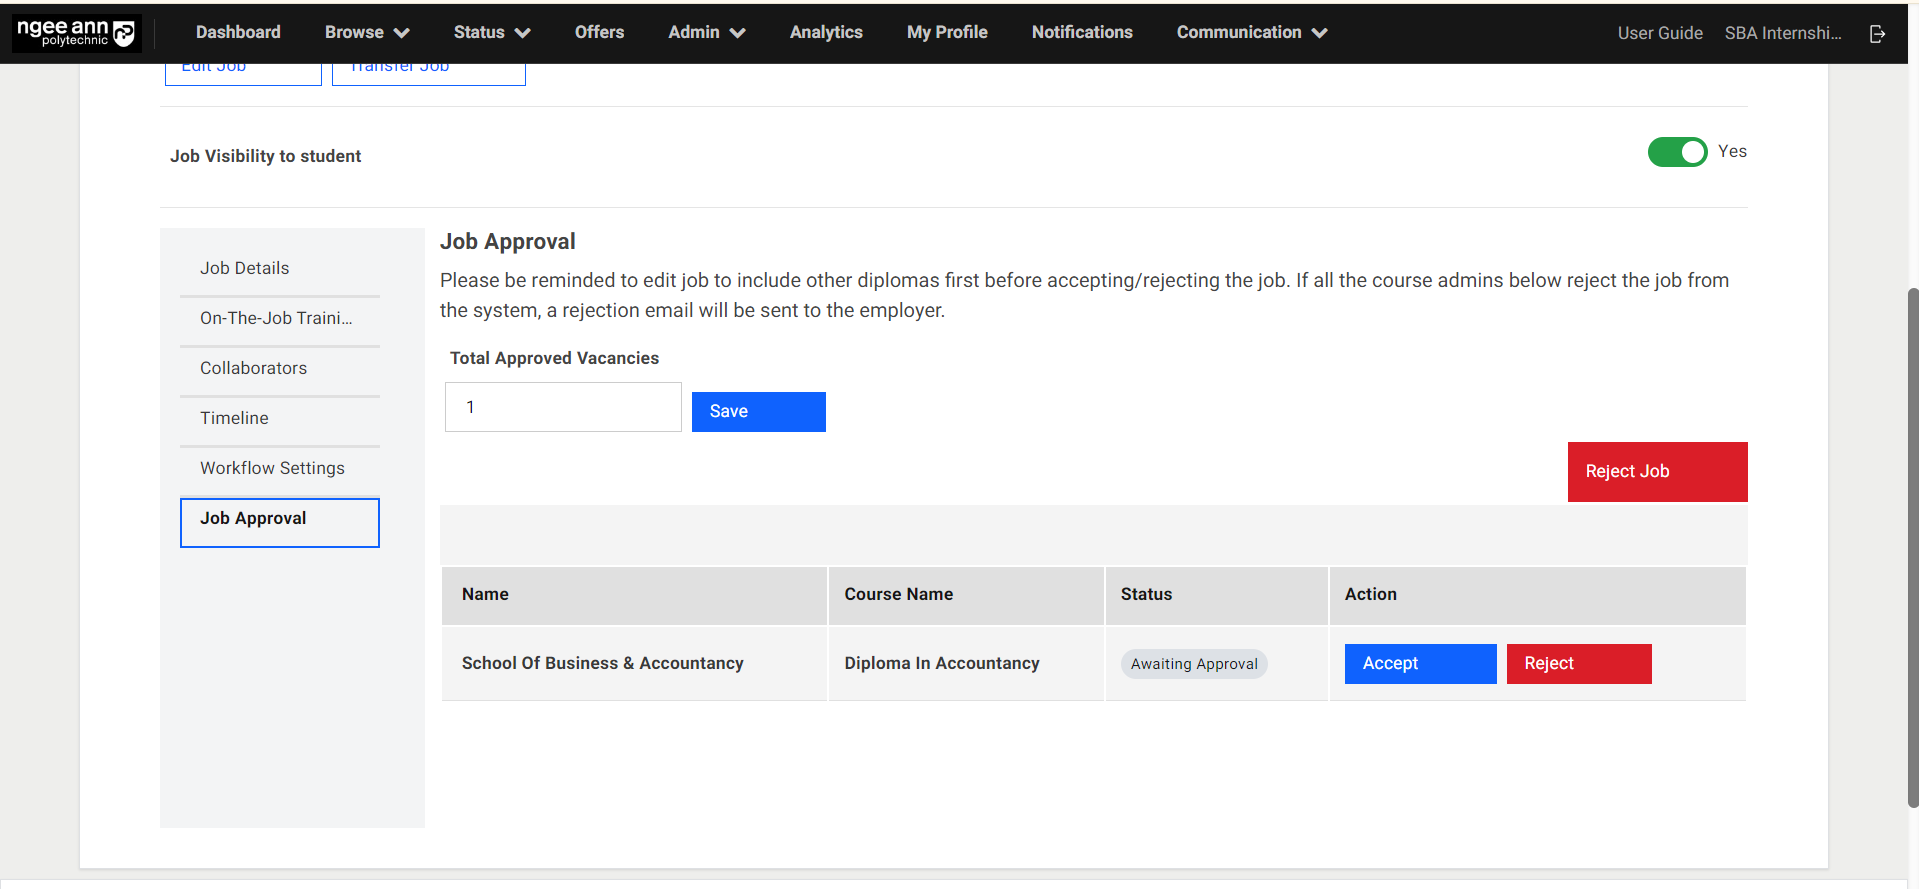
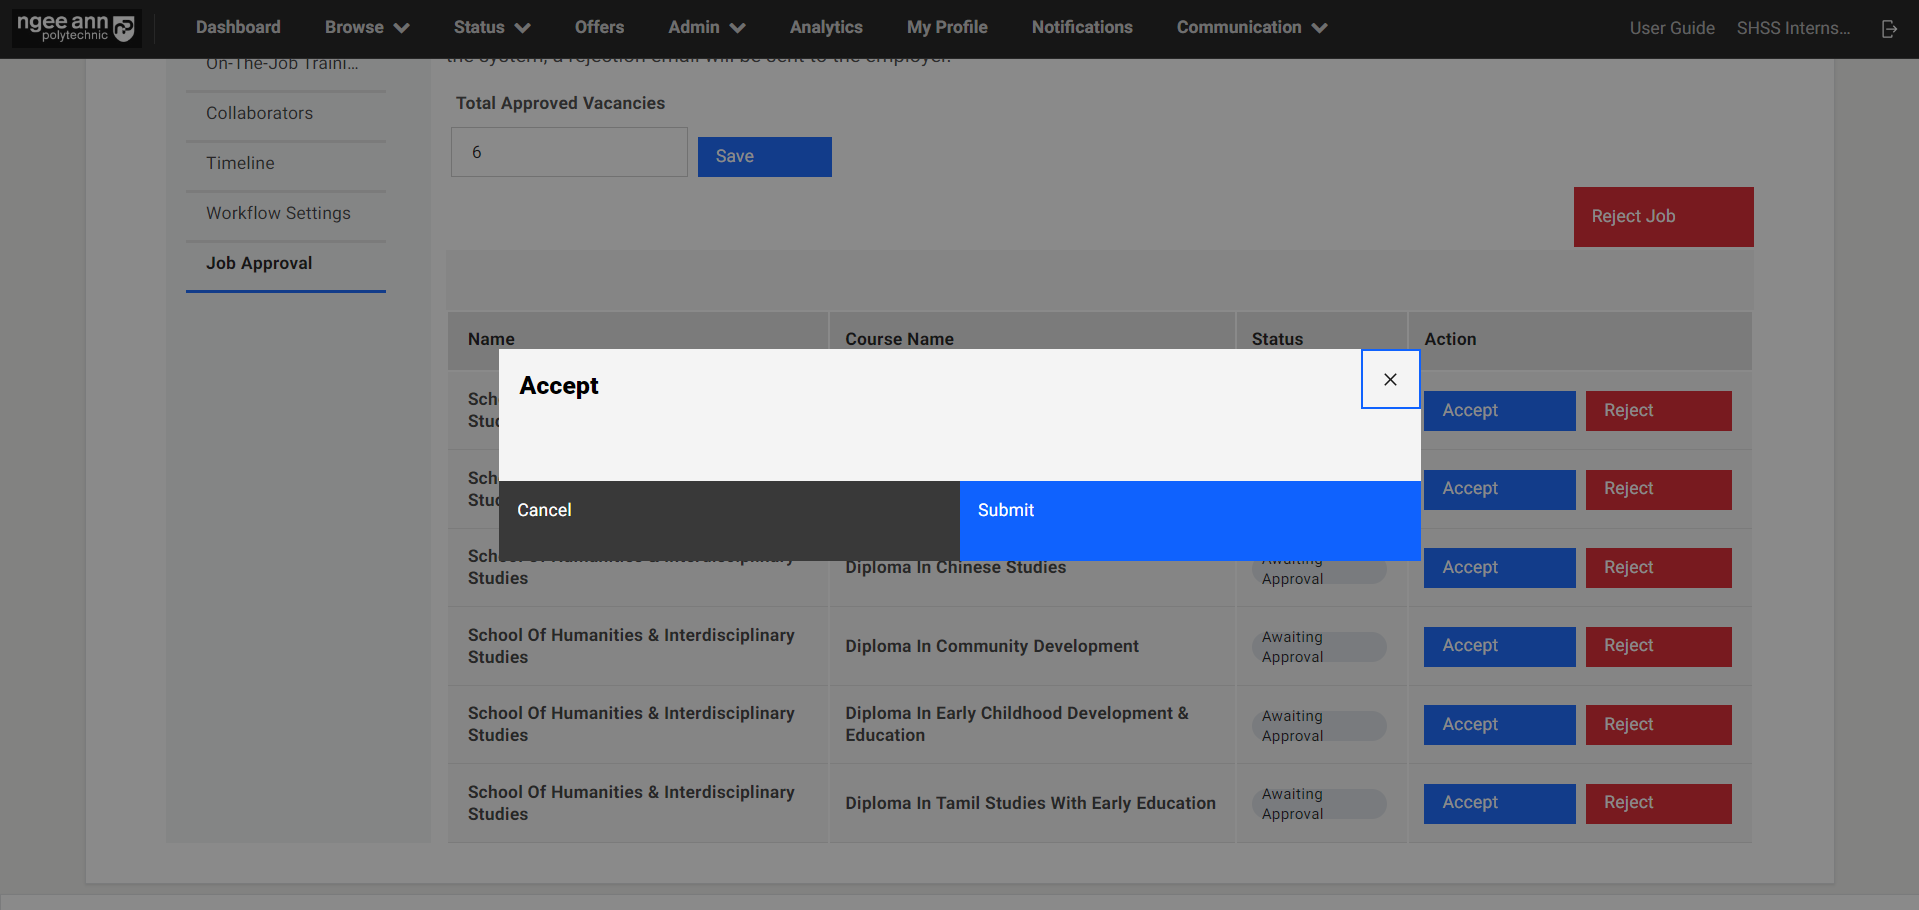
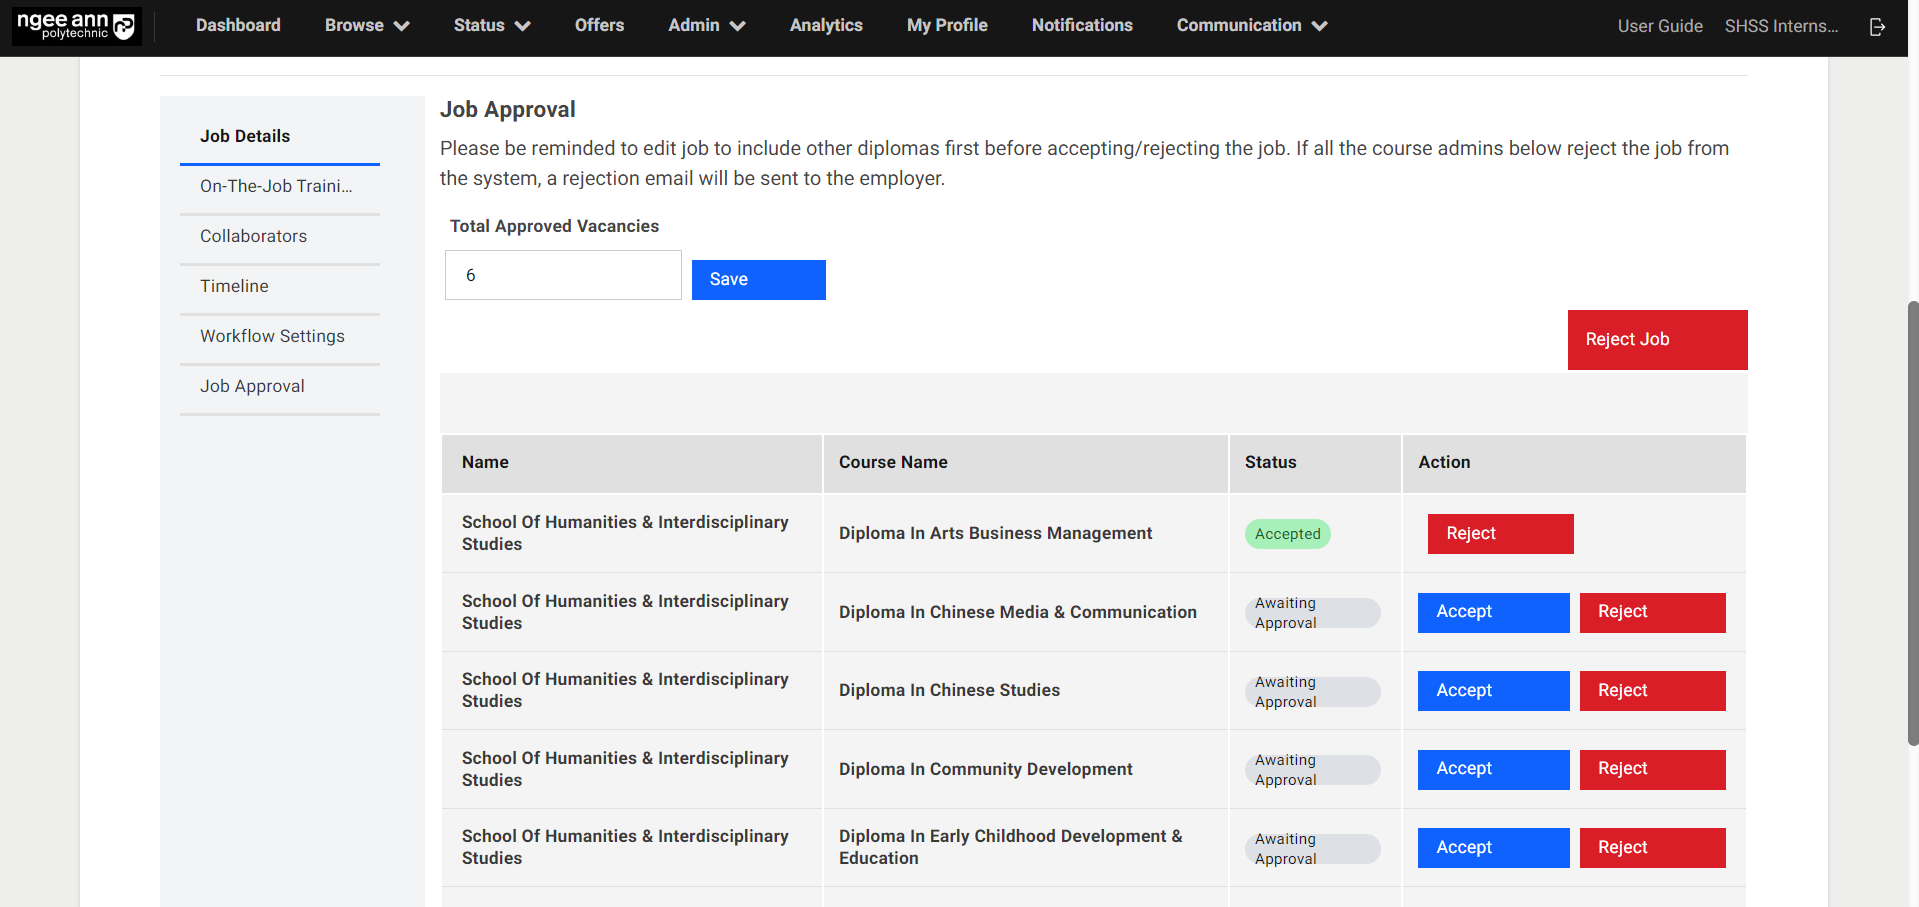
Step 3:
- Click on “Accept” button to approve the job.
- In the pop-up window, click on “Submit”.
- “Accepted” status will be shown under “Status” once the selected diploma has accepted.
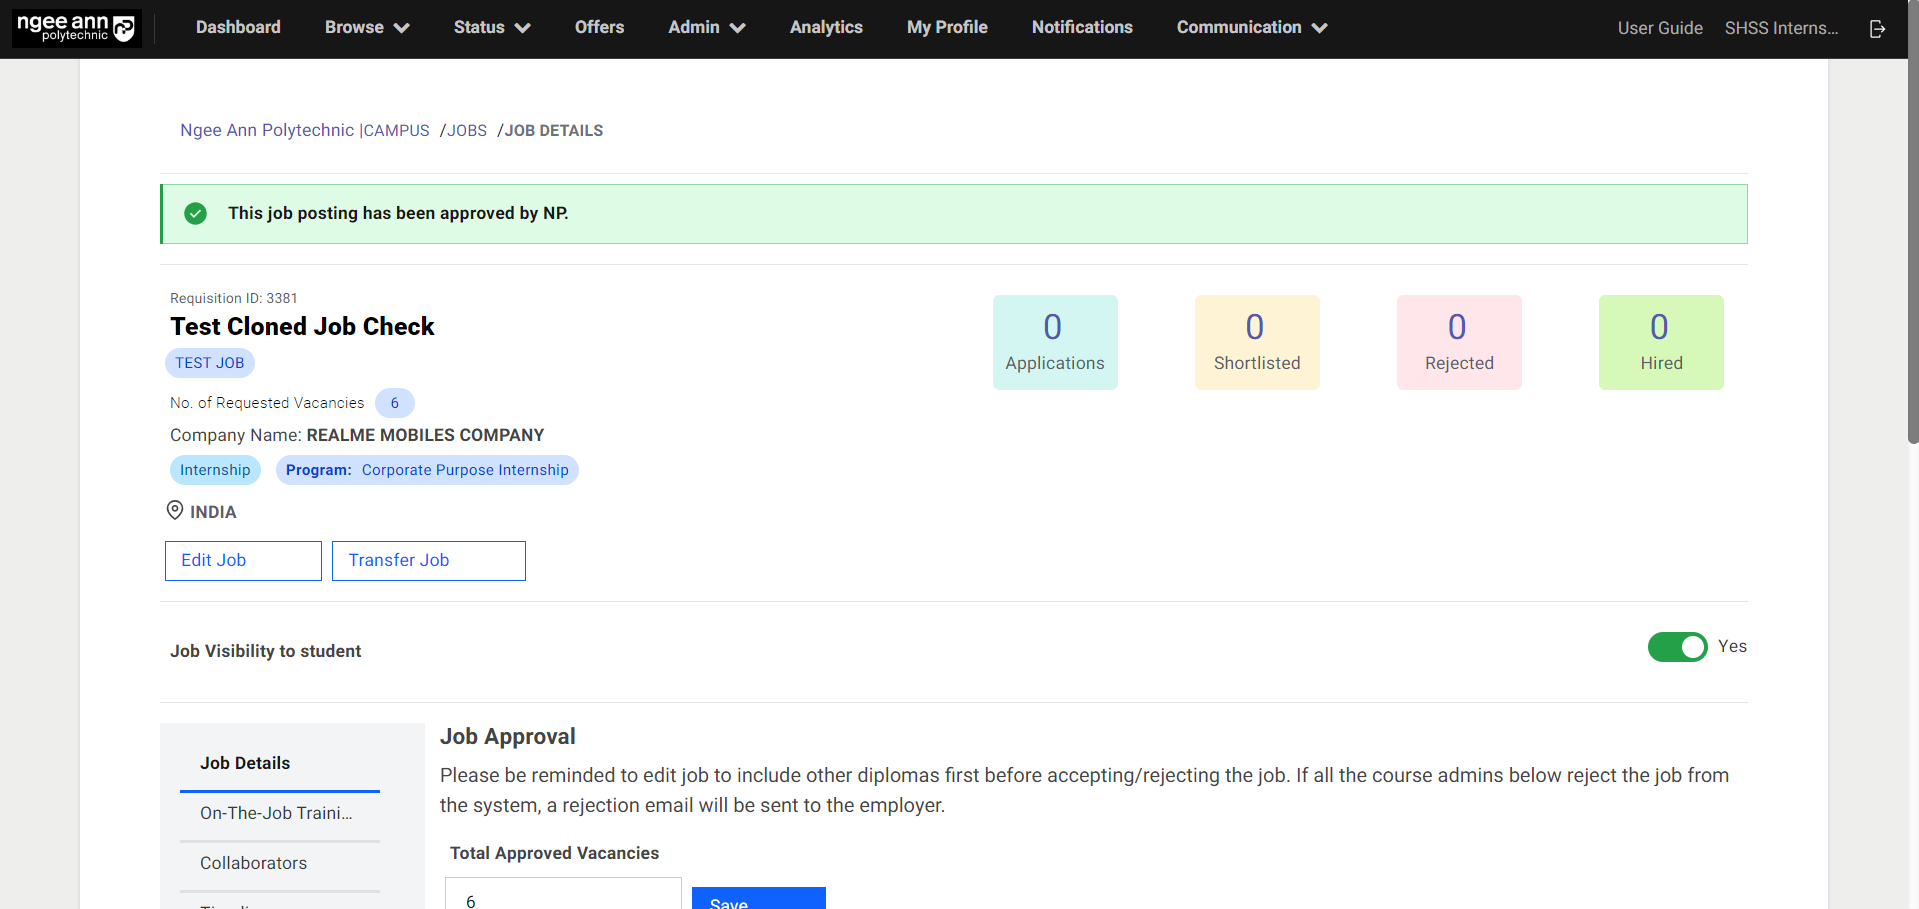
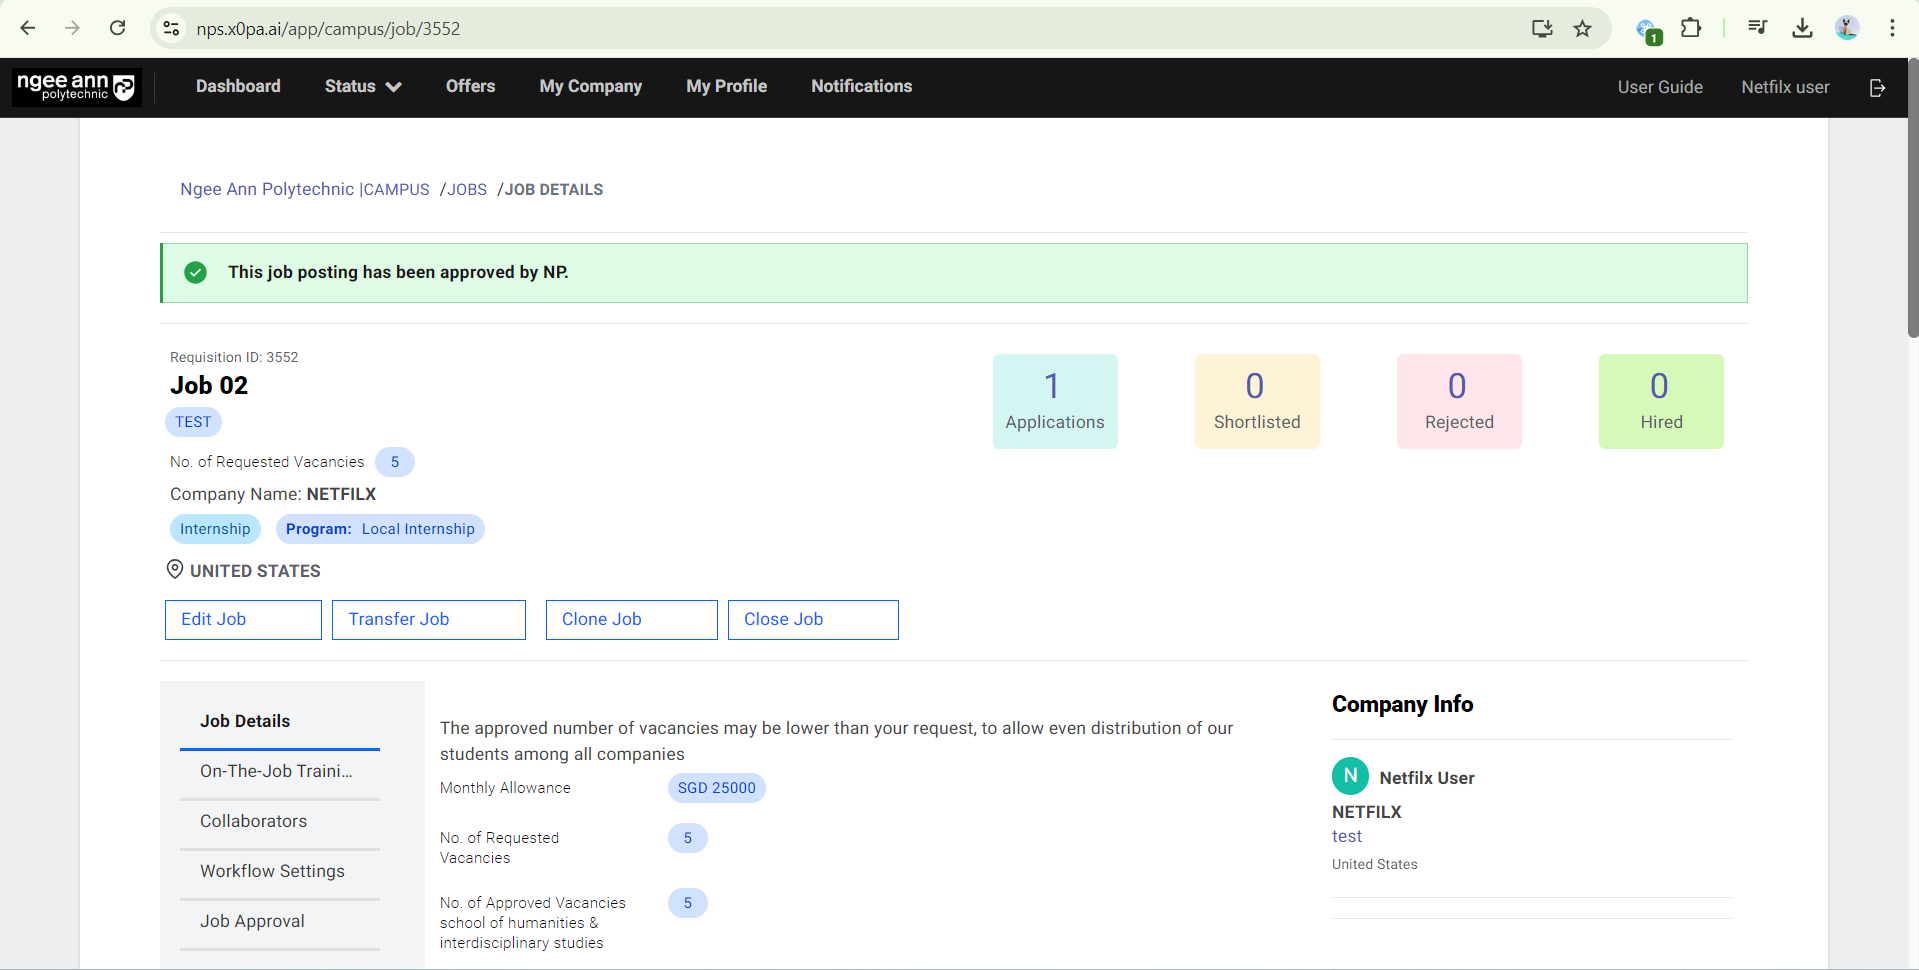
Step 4:
The approved job will have an “This job posting has been approved by NP” updated status banner.
Edit OJT Details (Job Level)
Step 1:
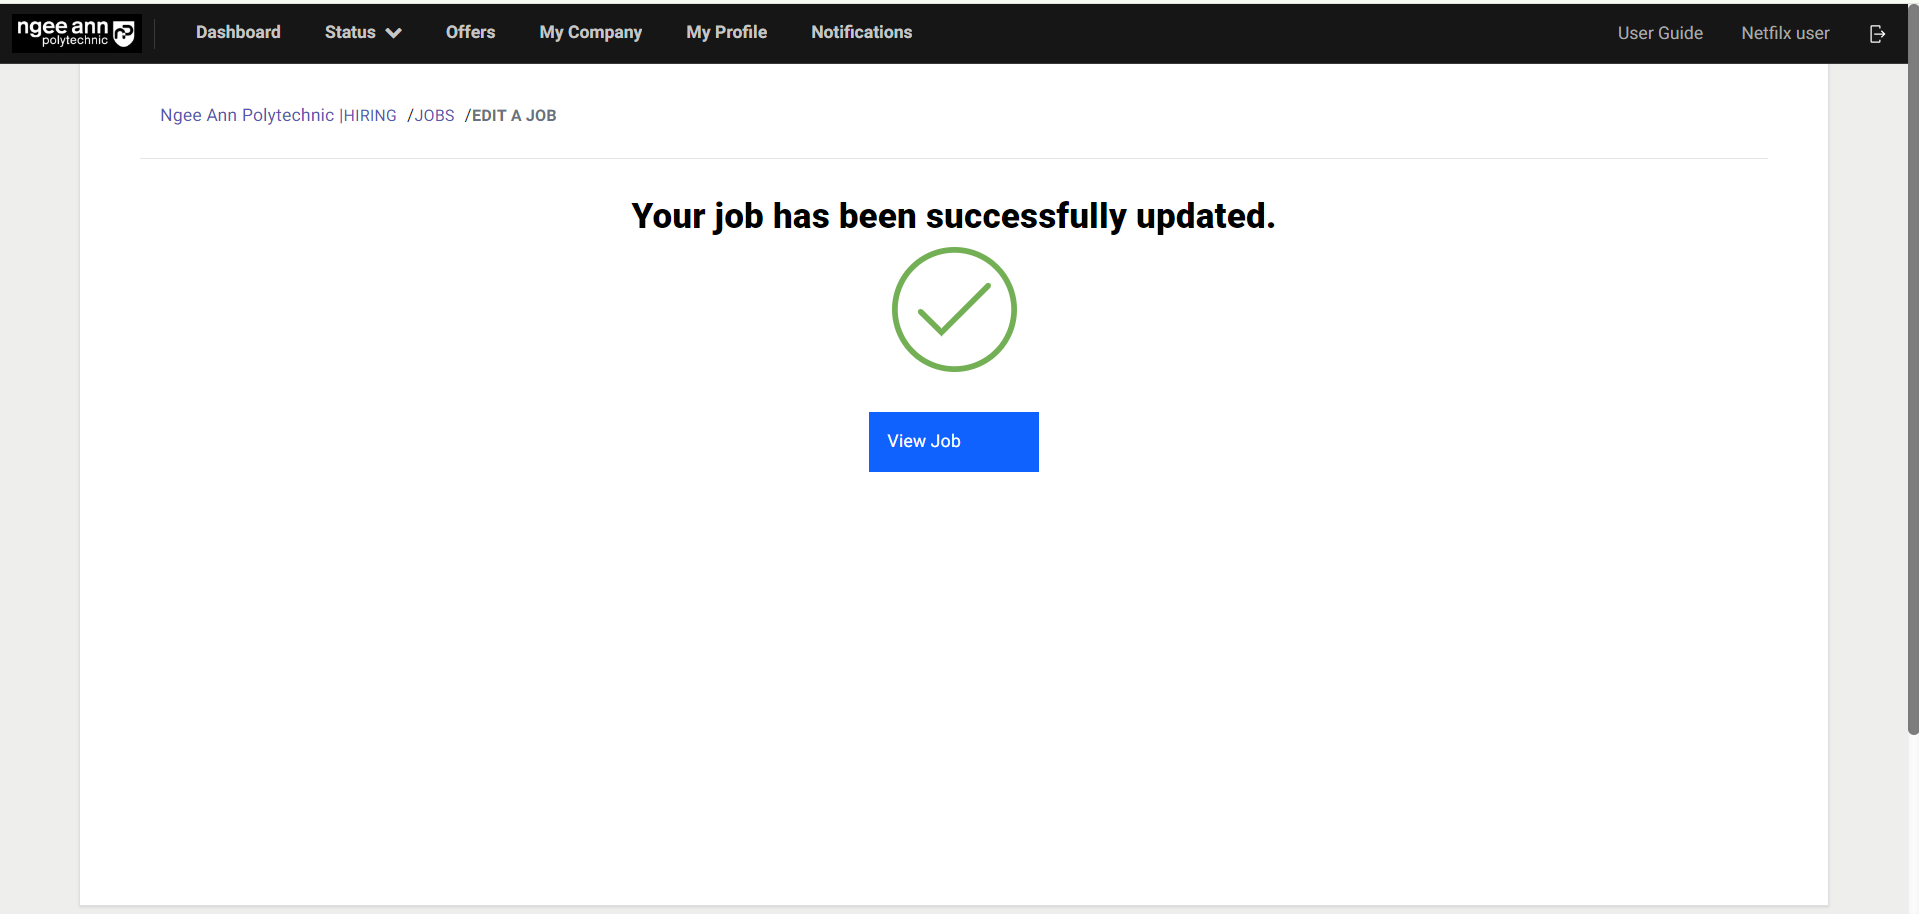
- If Job/OJT details must be updated, click on the “Edit Job” button.
- Edit the Job/OJT Details. Once all necessary details are updated, click on the “Submit” button.
- “Your job has been successfully updated.” page is shown once the job was edited successfully
Note: If Job/OJT details are edited, the job will be routed to the Internship Manager/Coordinator to approve again.
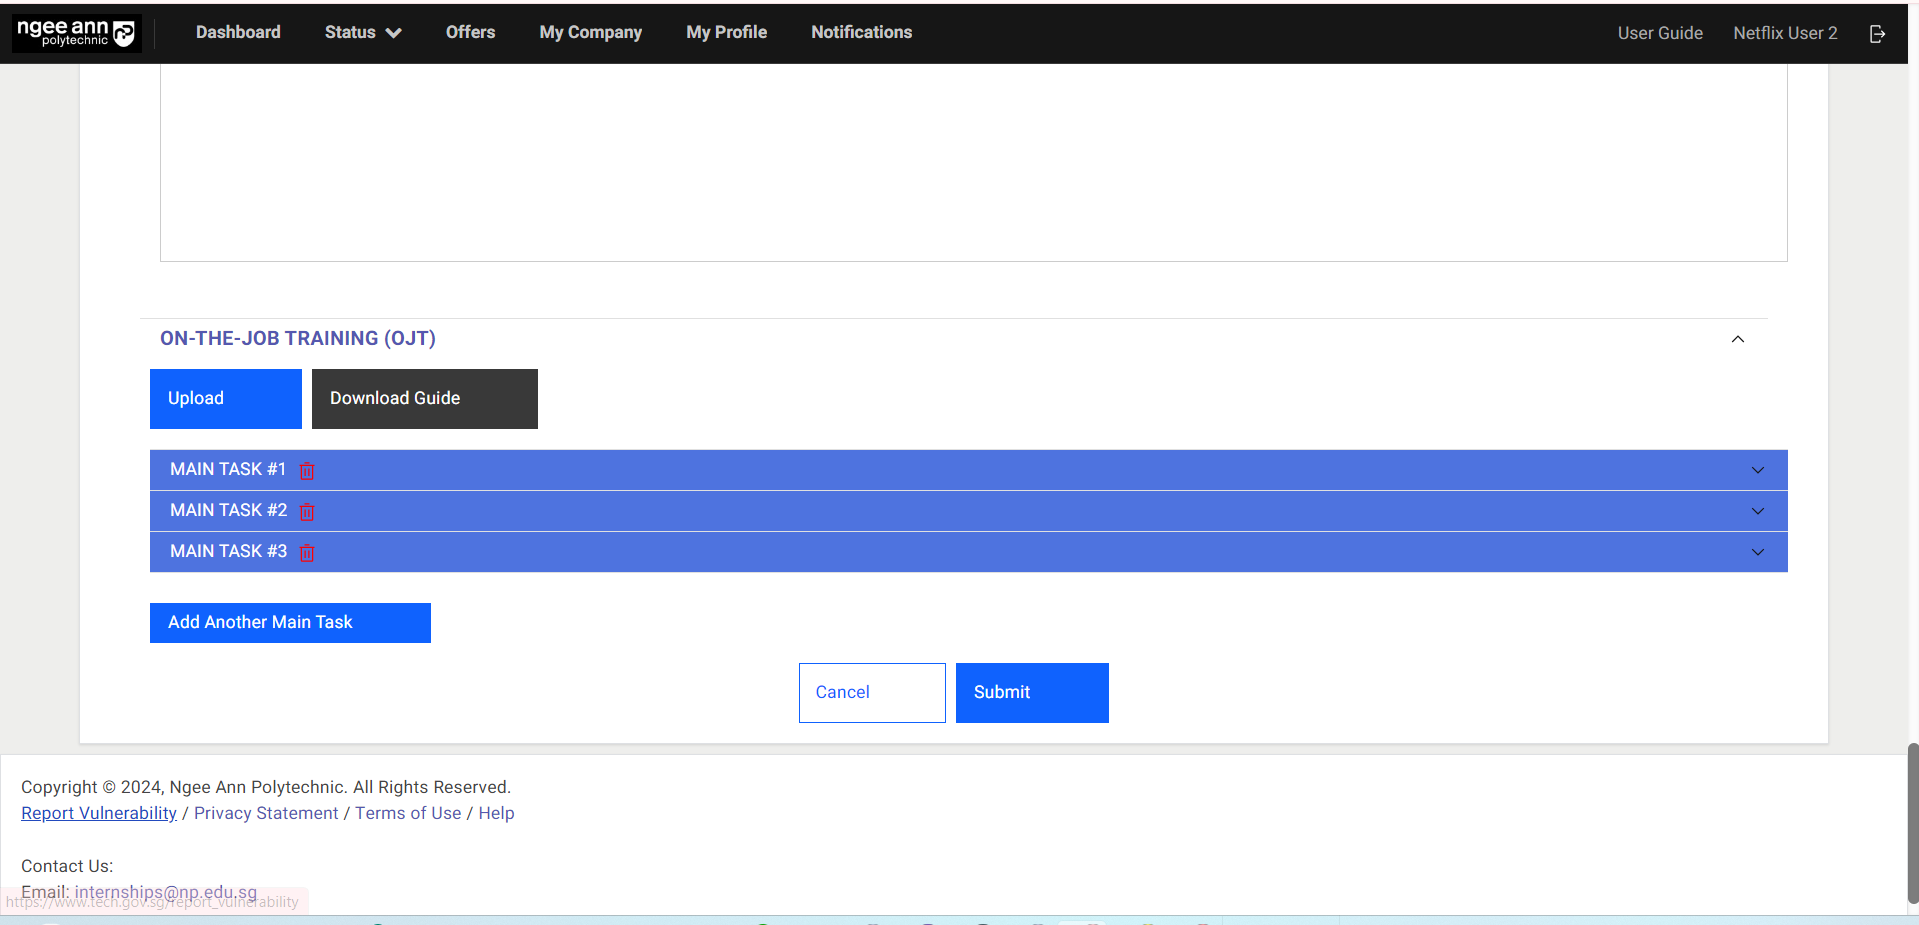
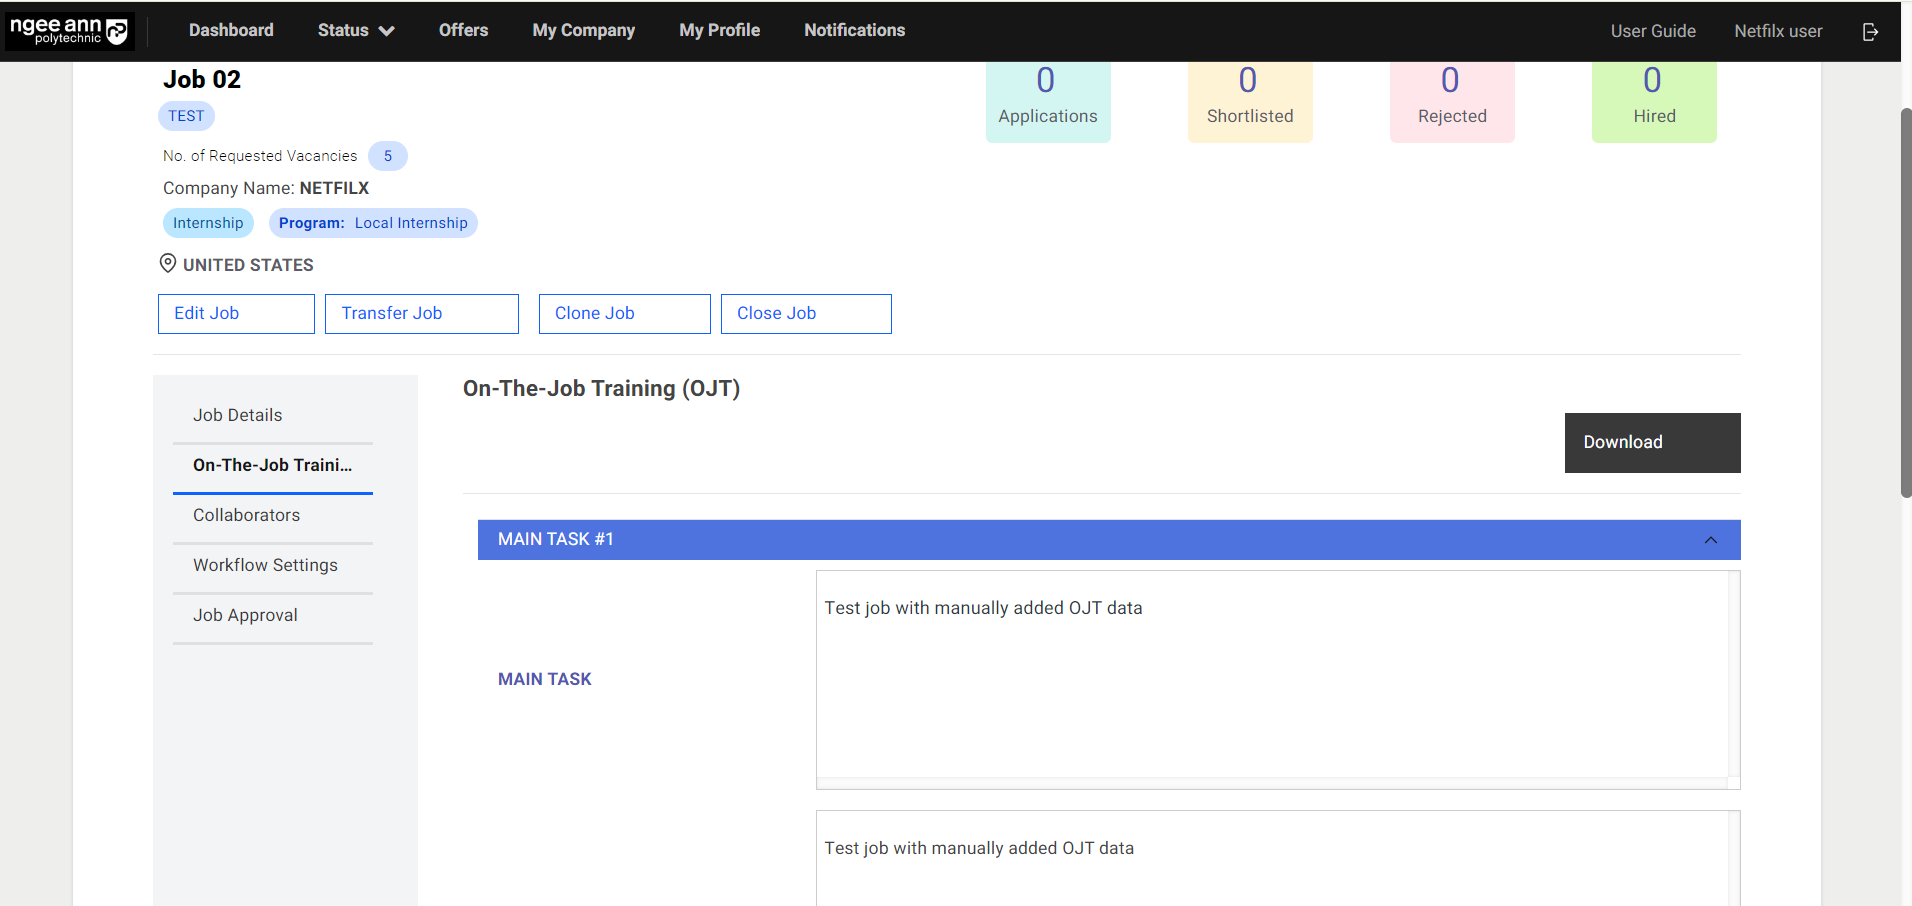
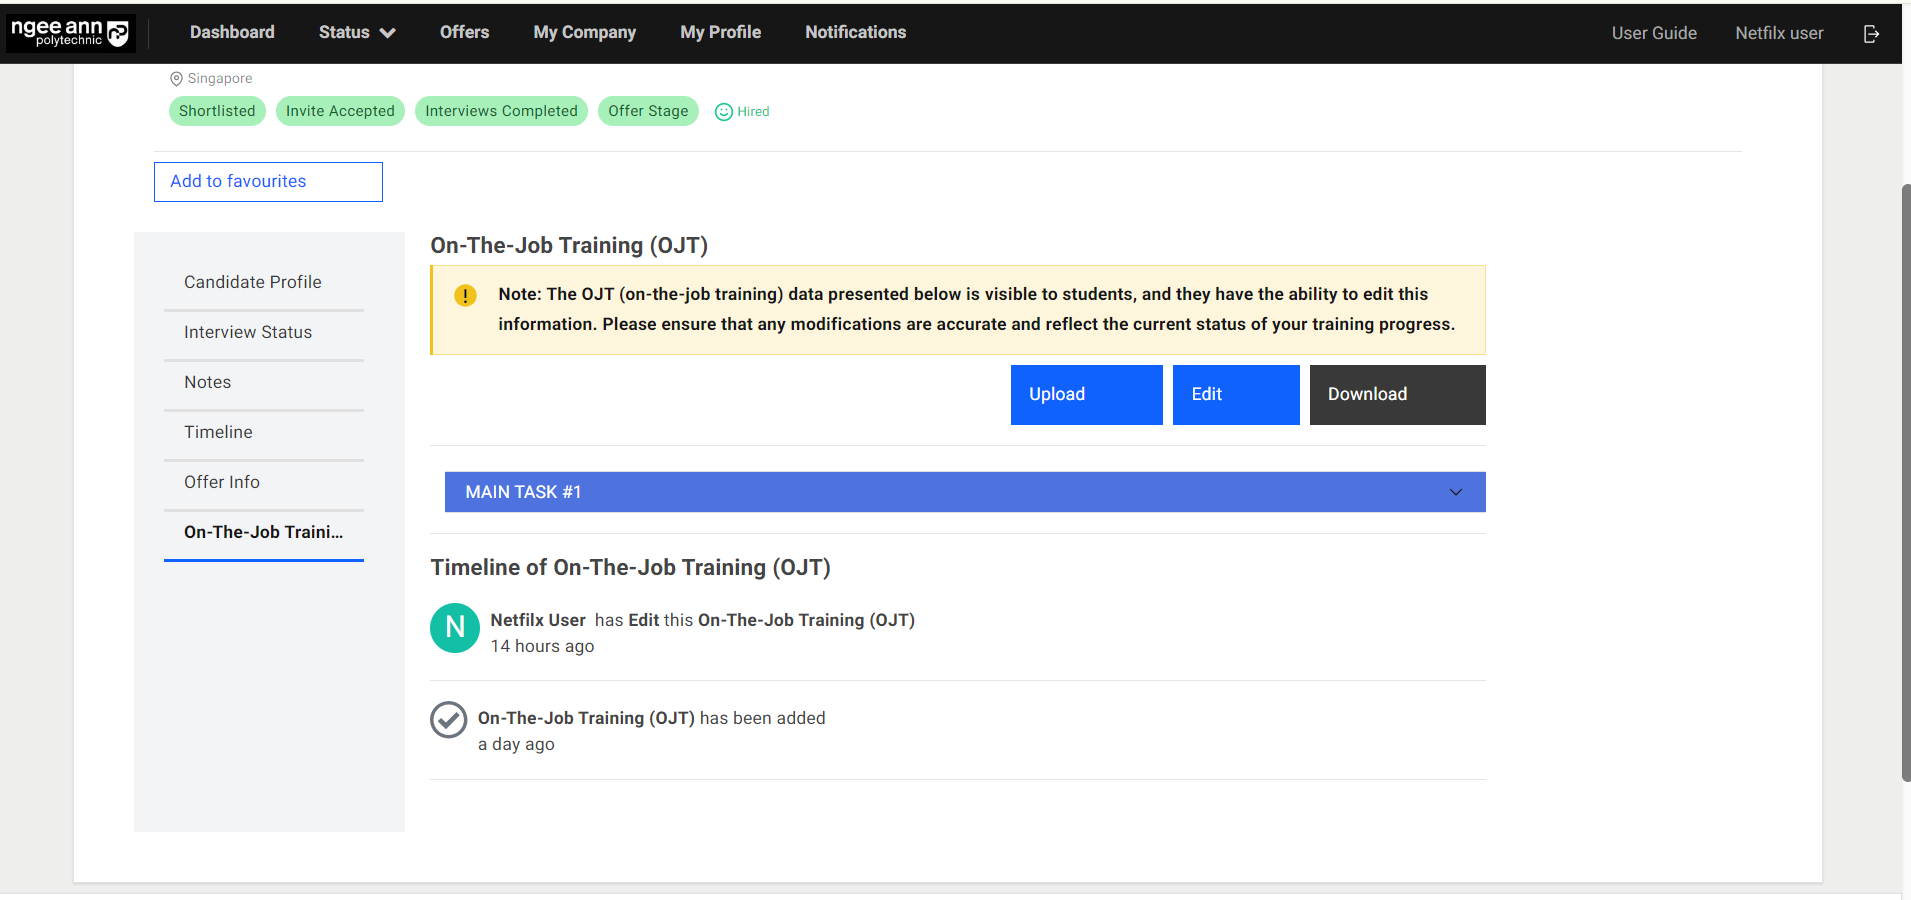
View OJT Details (Job Level)
Step 1:
- To view OJT details, click on the “On-The-Job-Training” button.
- Expand the main task to view the details.
Step 2:
- To export OJT details, click on the “Download” button.
- Open the downloaded file to view the OJT details.
View OJT Details (Student Level)
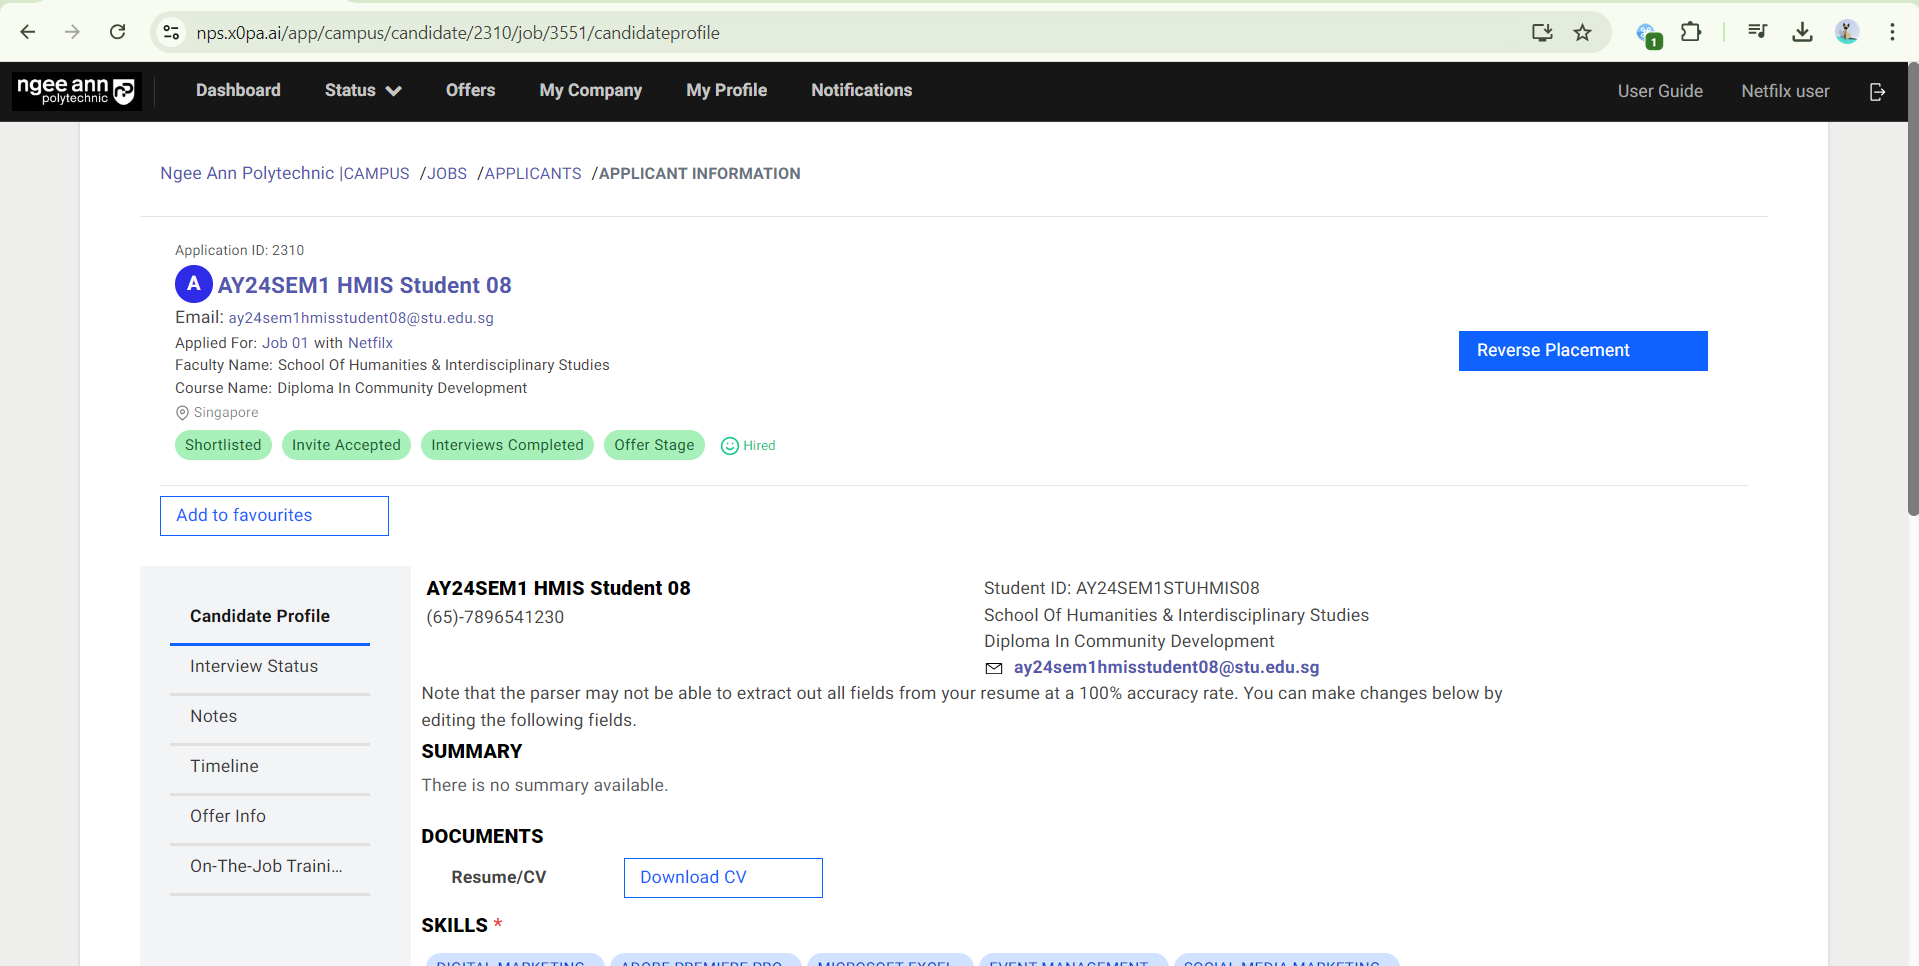
OJT Before Student/Applicant Hired
Note: OJT (On-the-Job Training) data will be visible once students have been hired for the job
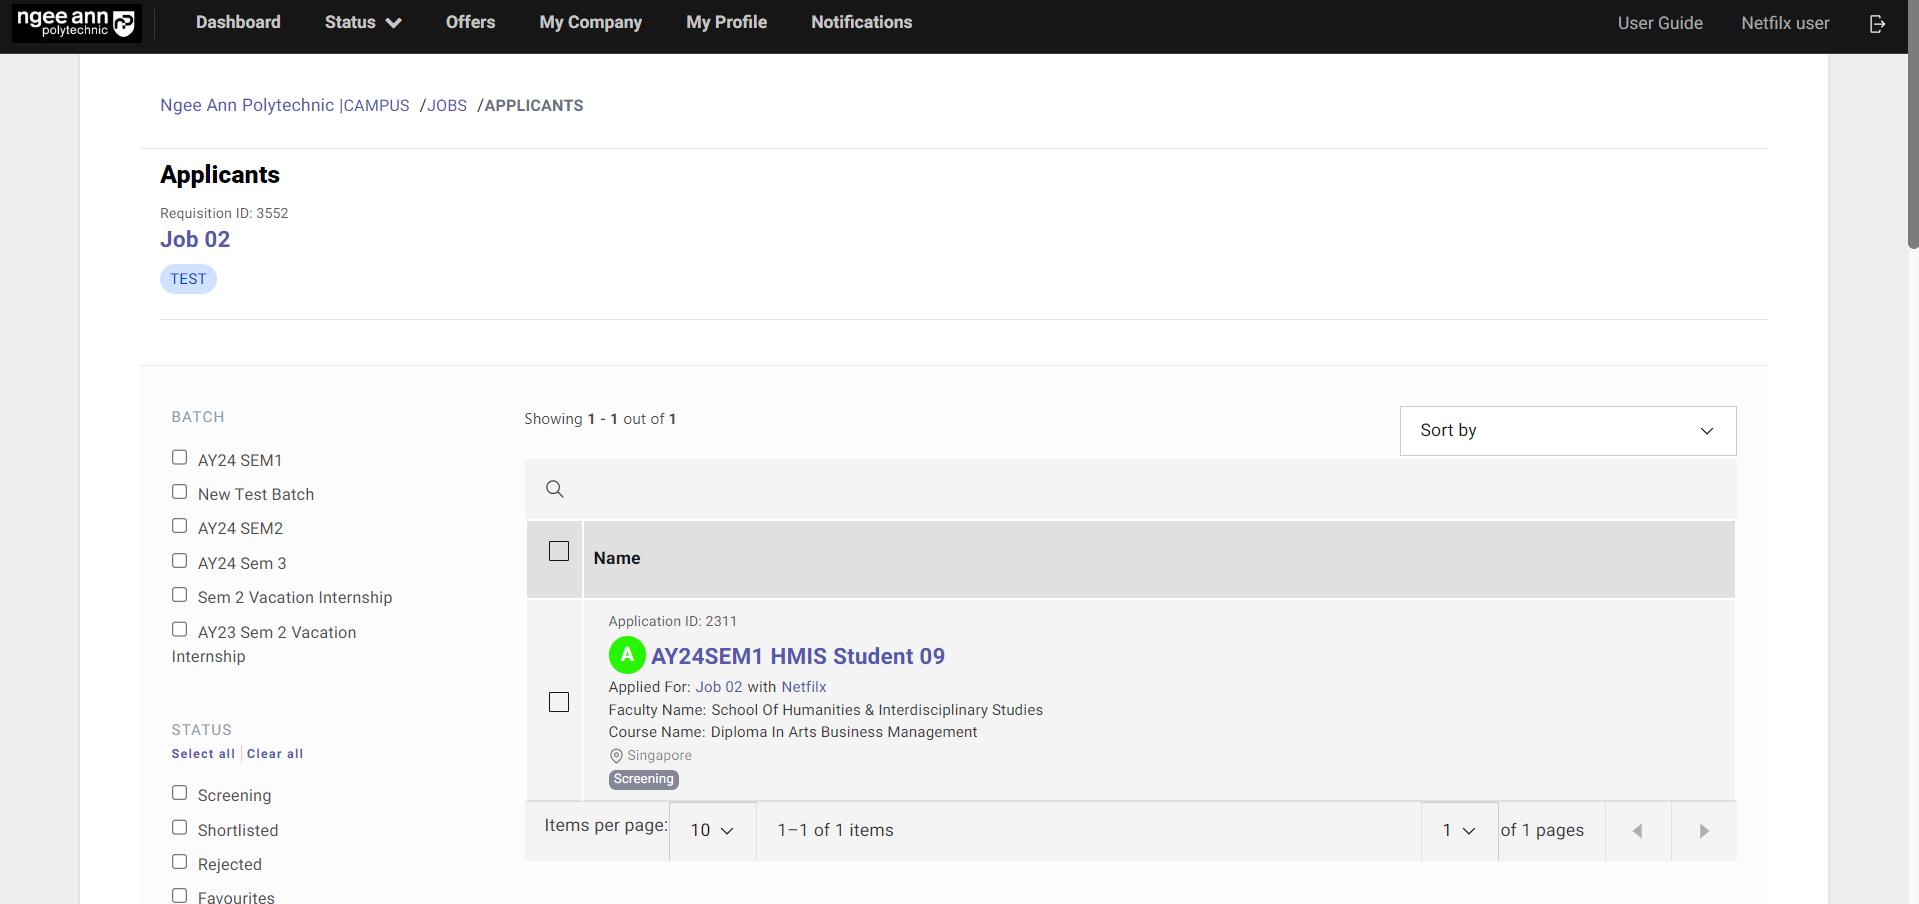
Step 1:
- In the OJT Job, click on the number of “Applications/Shortlisted/Rejected”.
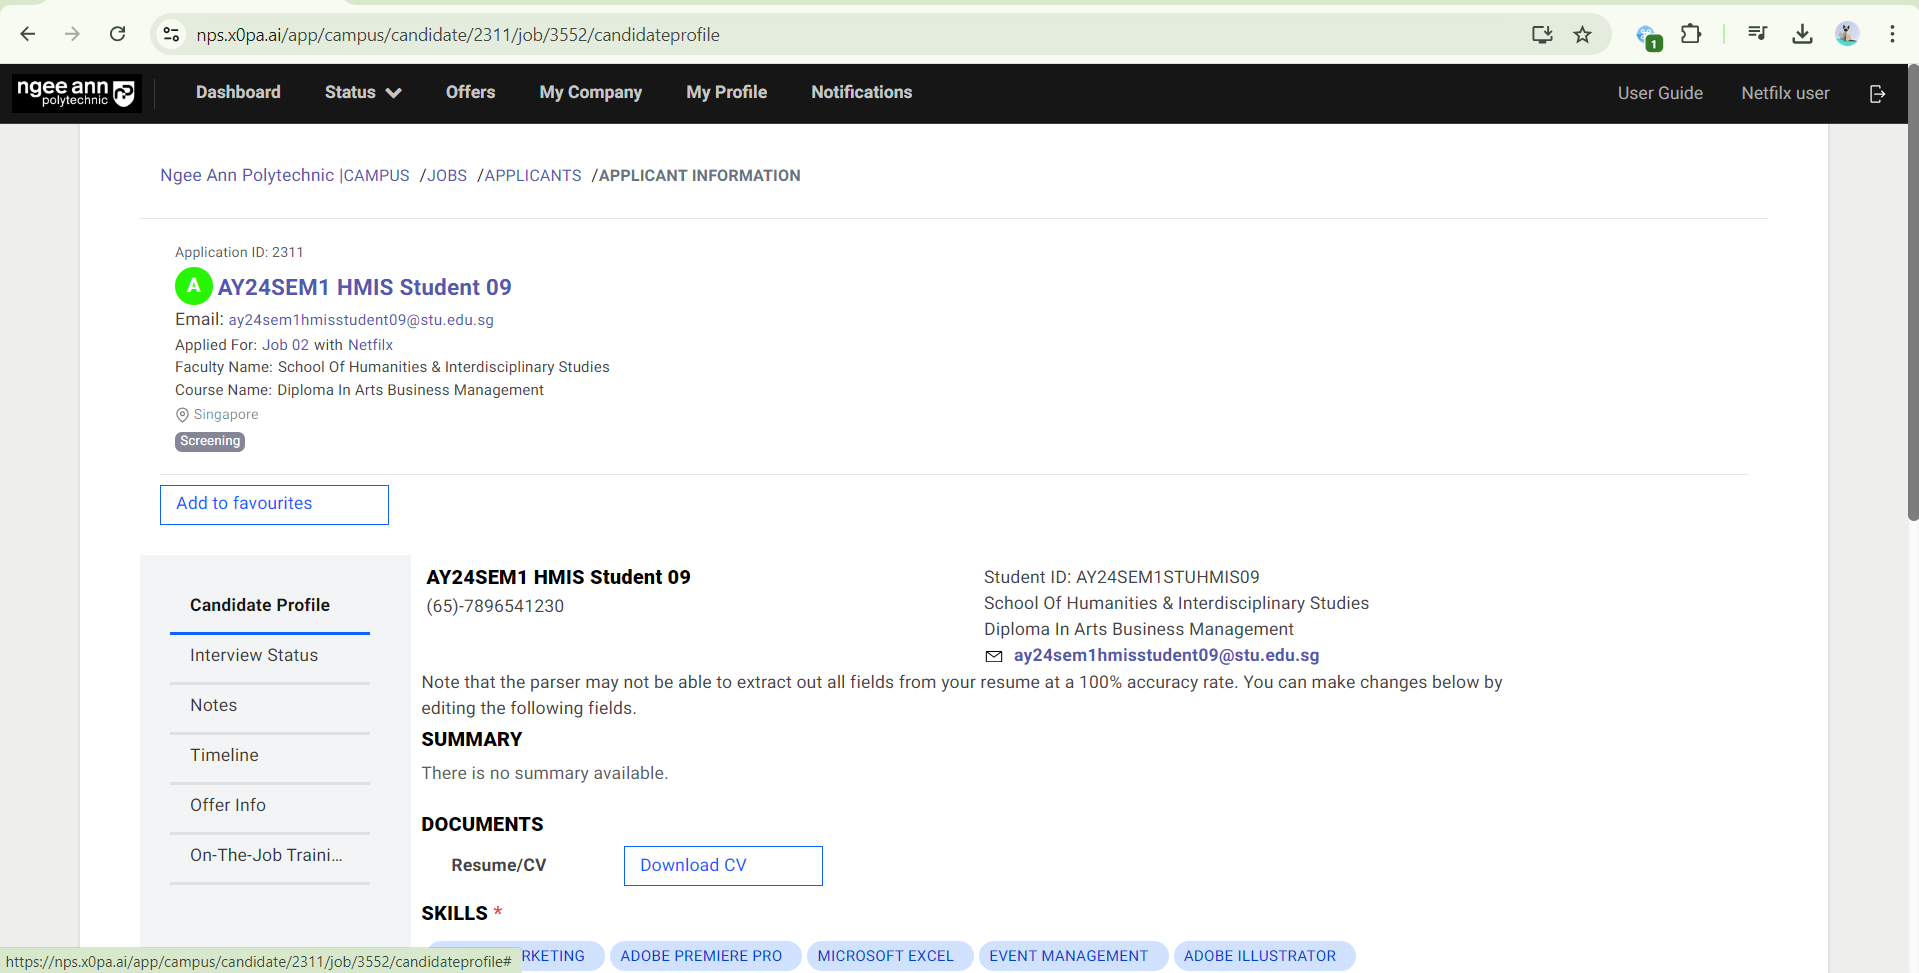
- Click on the Student Name.
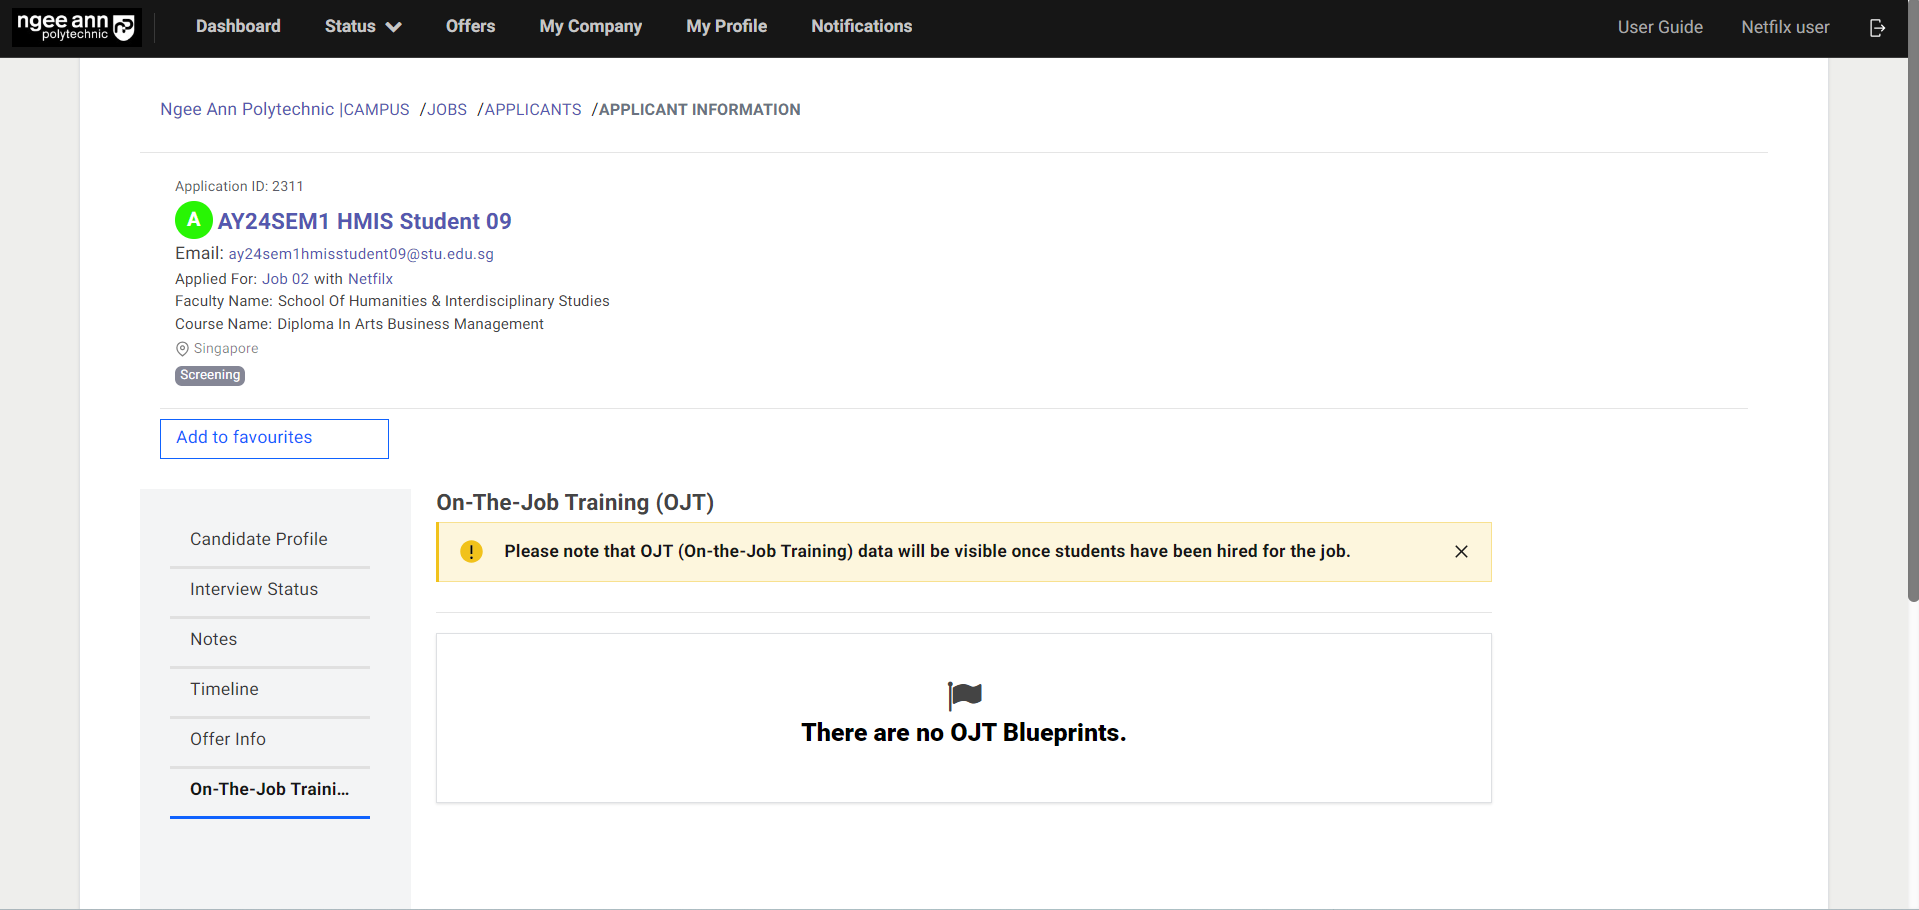
Step 2:
- Click on the “On-The-Job Training (OJT)” section tab.
- You will see the “Please note that OJT (On-the-Job Training) data will be visible once students have been hired for the job.” message banner under “On-The-Job Training (OJT)”
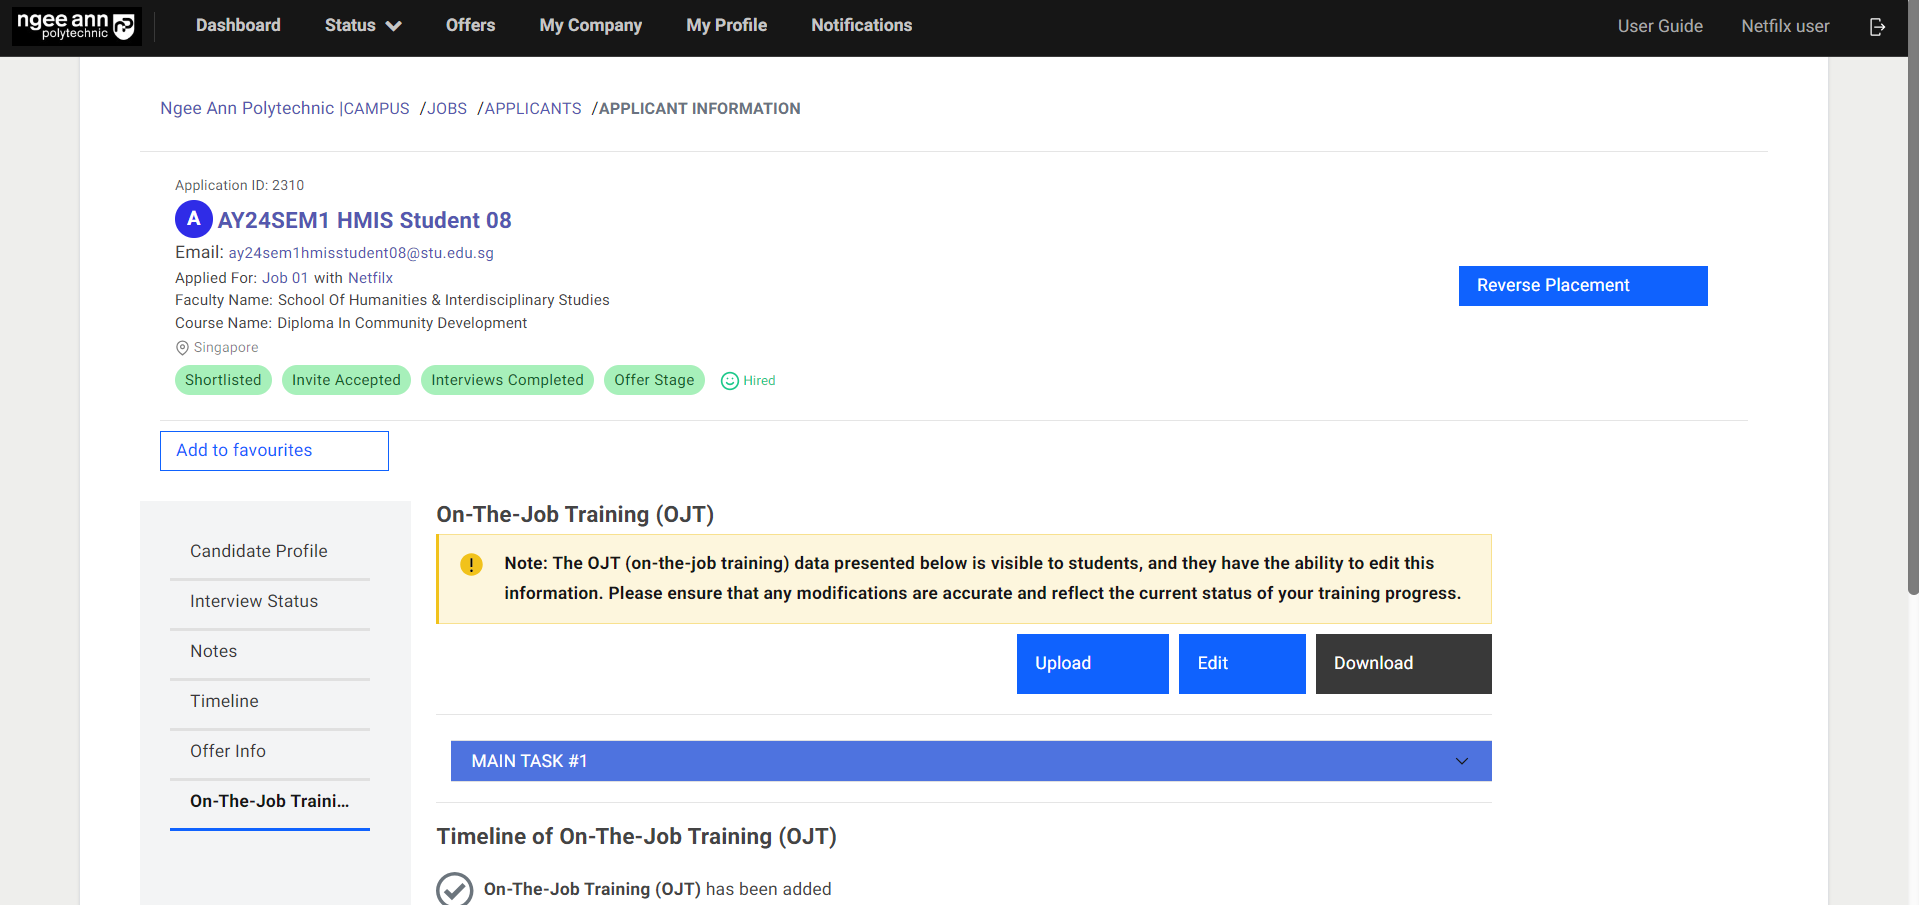
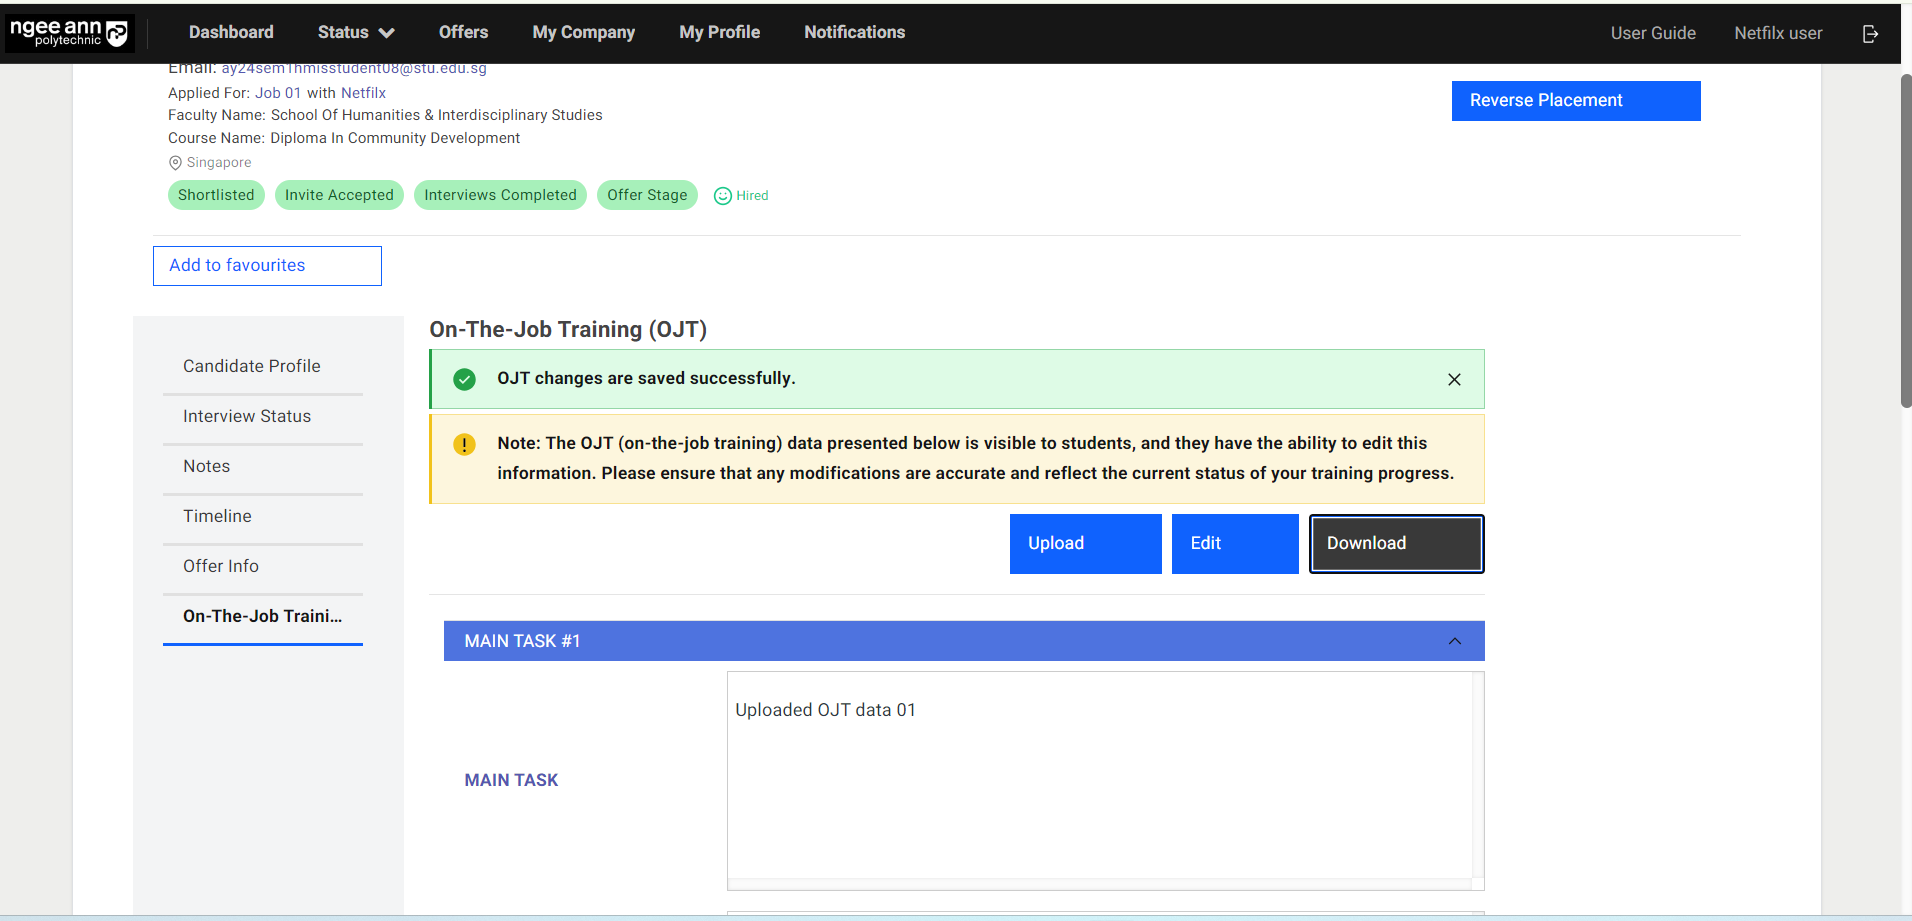
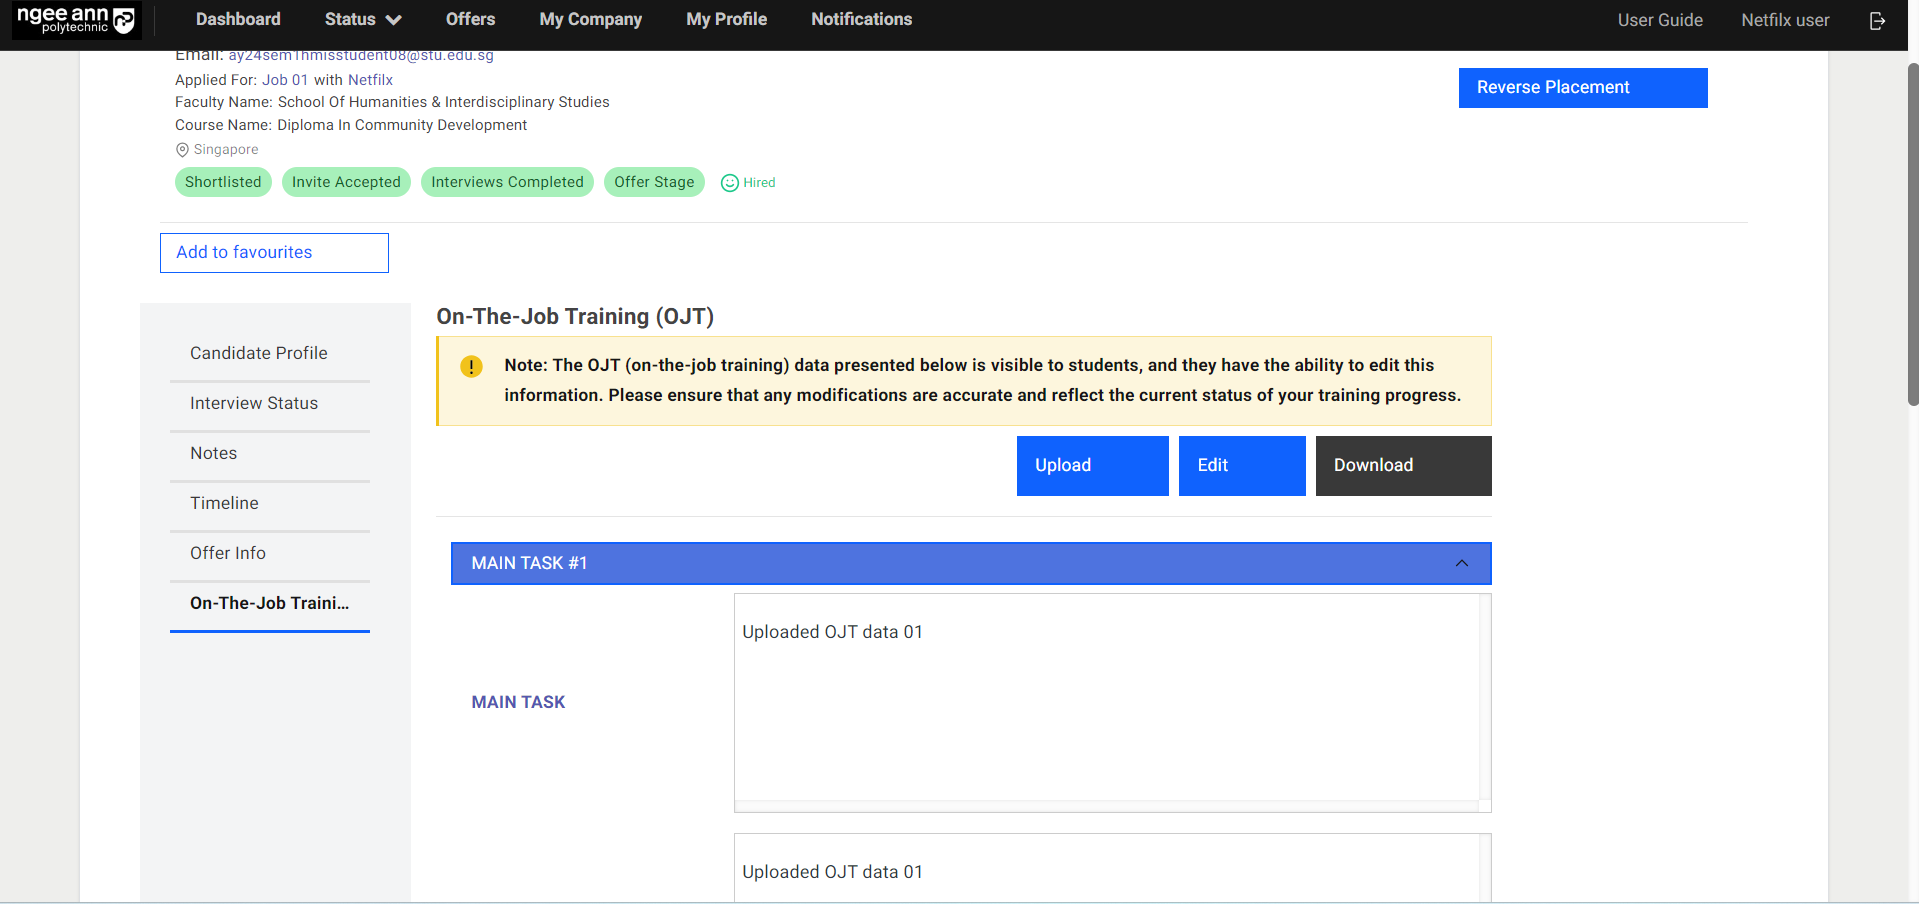
OJT Data Once Student Hired for the Jobs
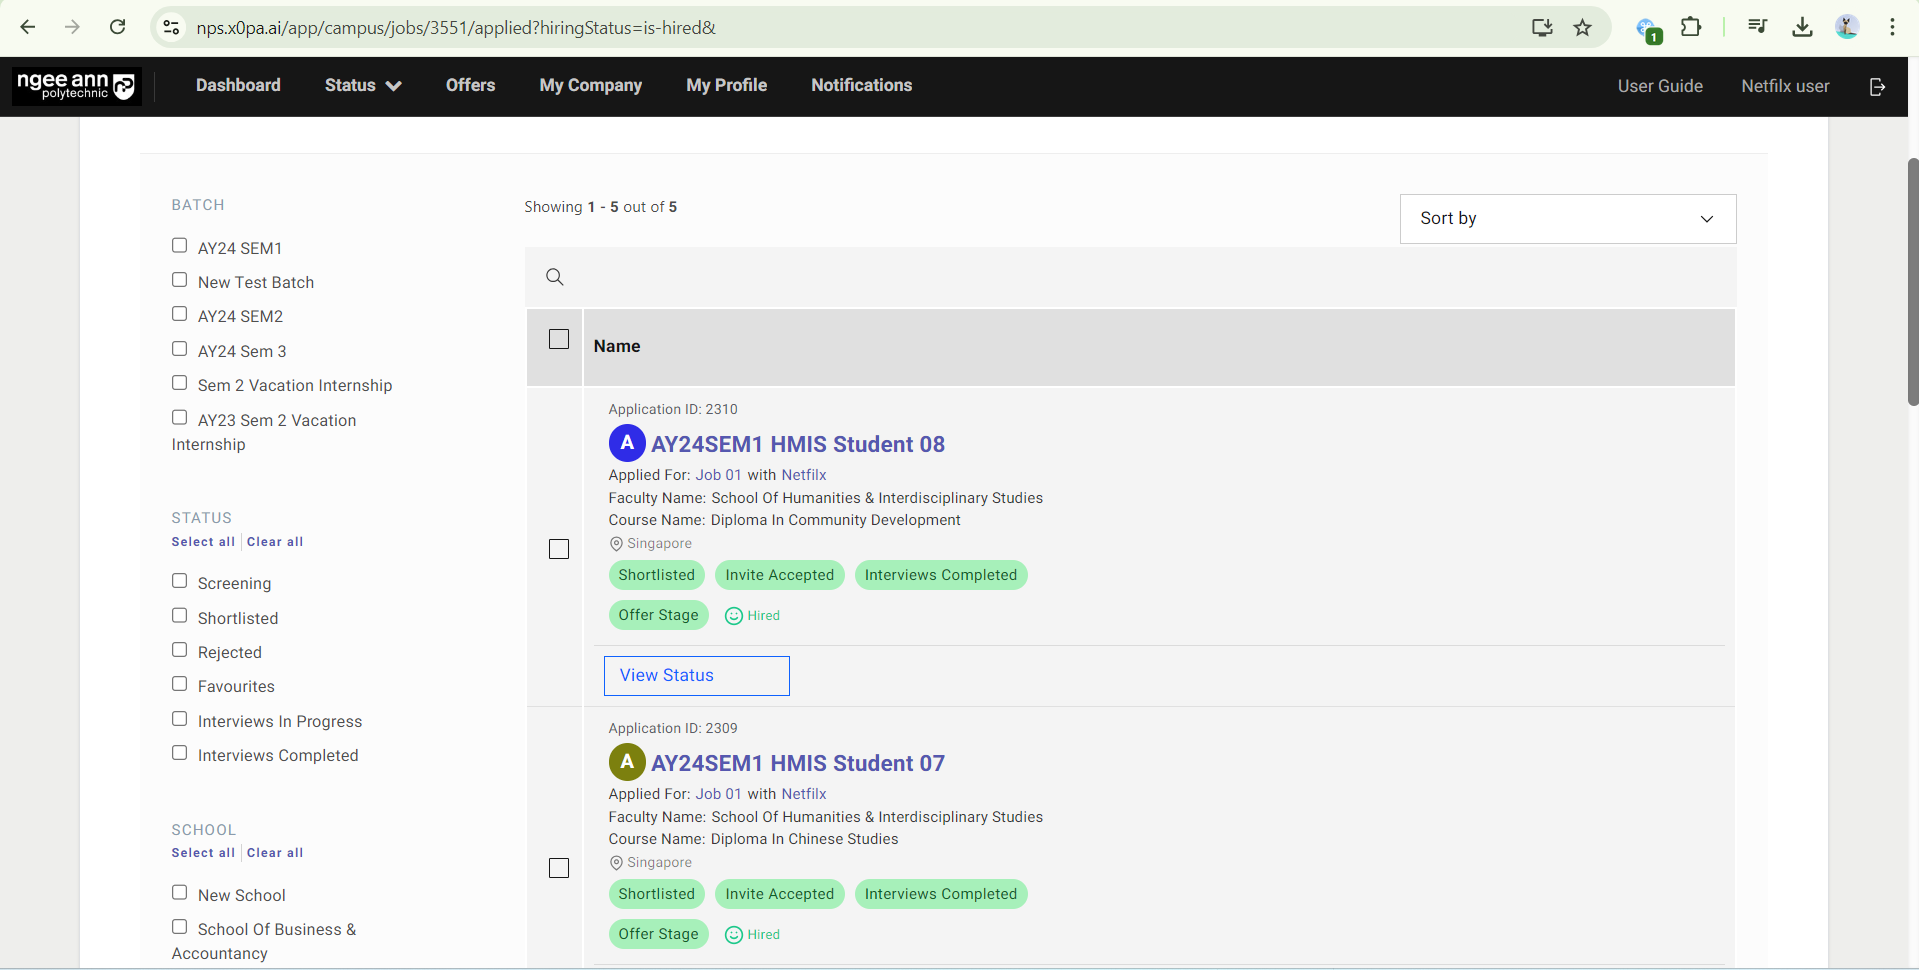
Step 1:
- In the OJT Job, click on the number of “Hired”.
- Click on the Student Name.

Step 2:
- Click “On-The-Job Training (OJT)” to edit OJT Details.
- You will see OJT details under the “On-The-Job Training (OJT)” section

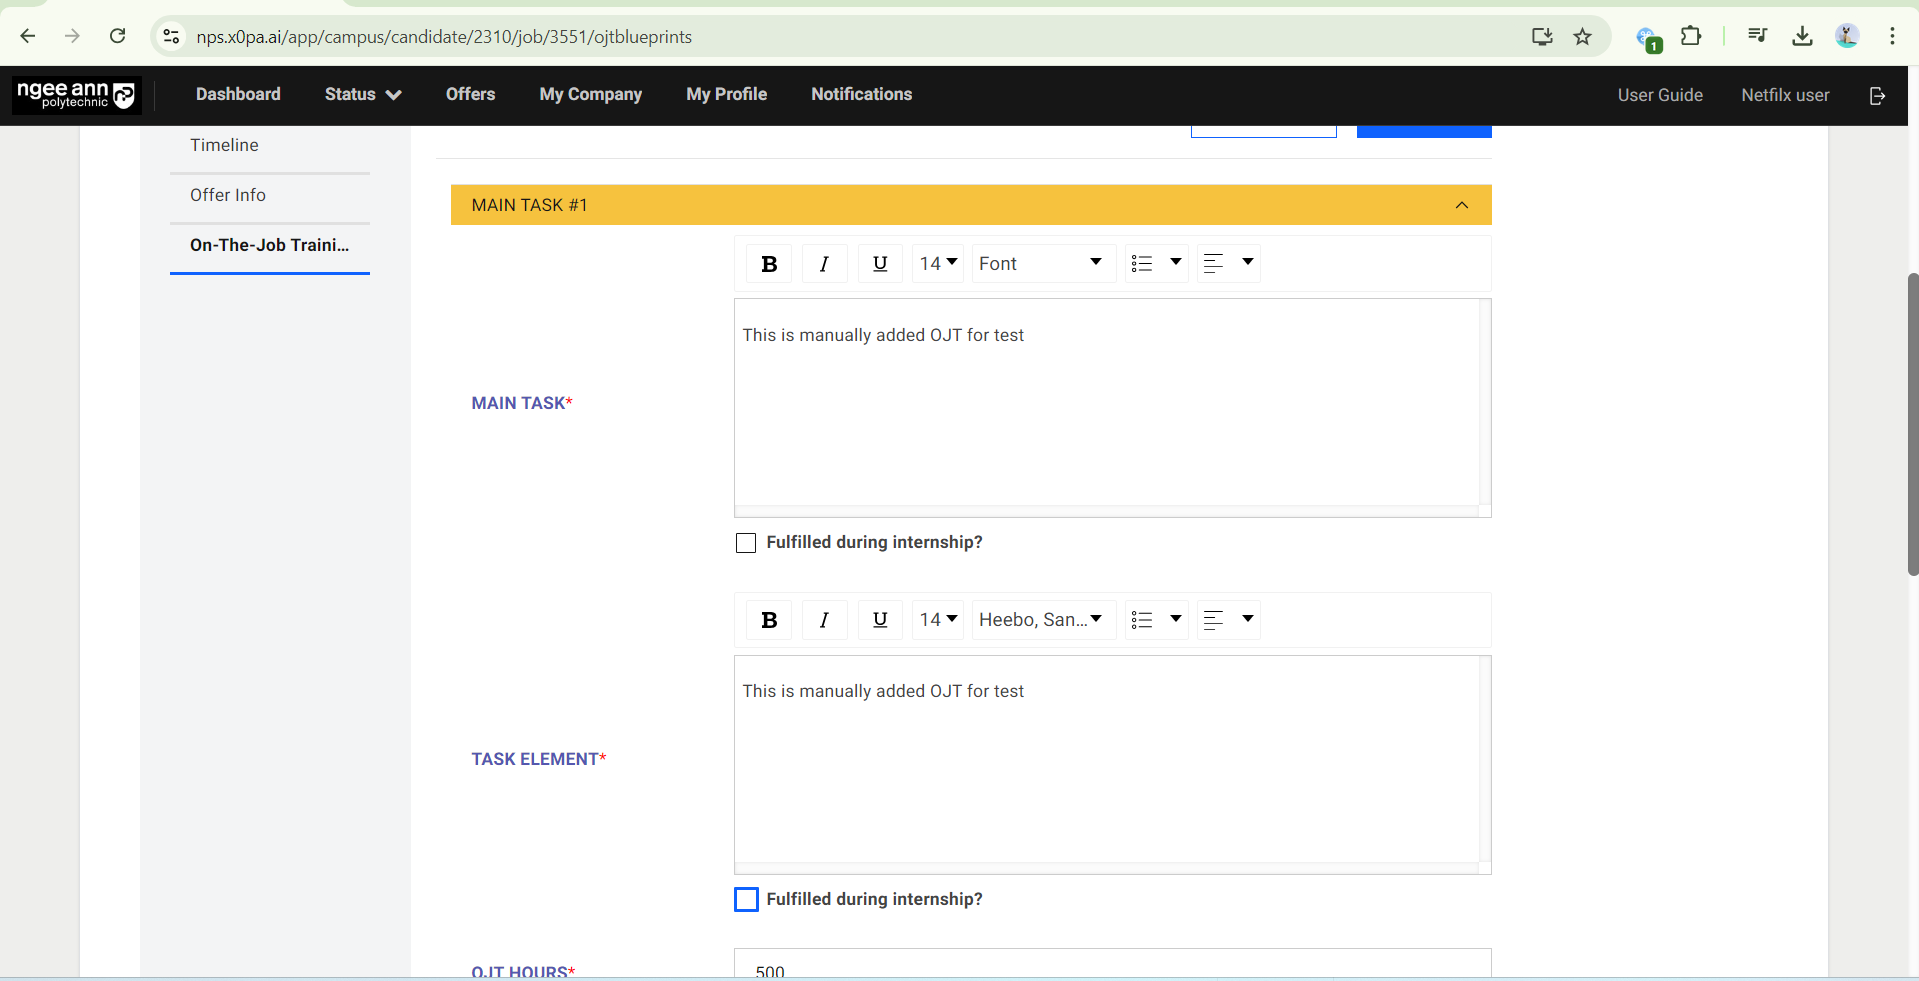
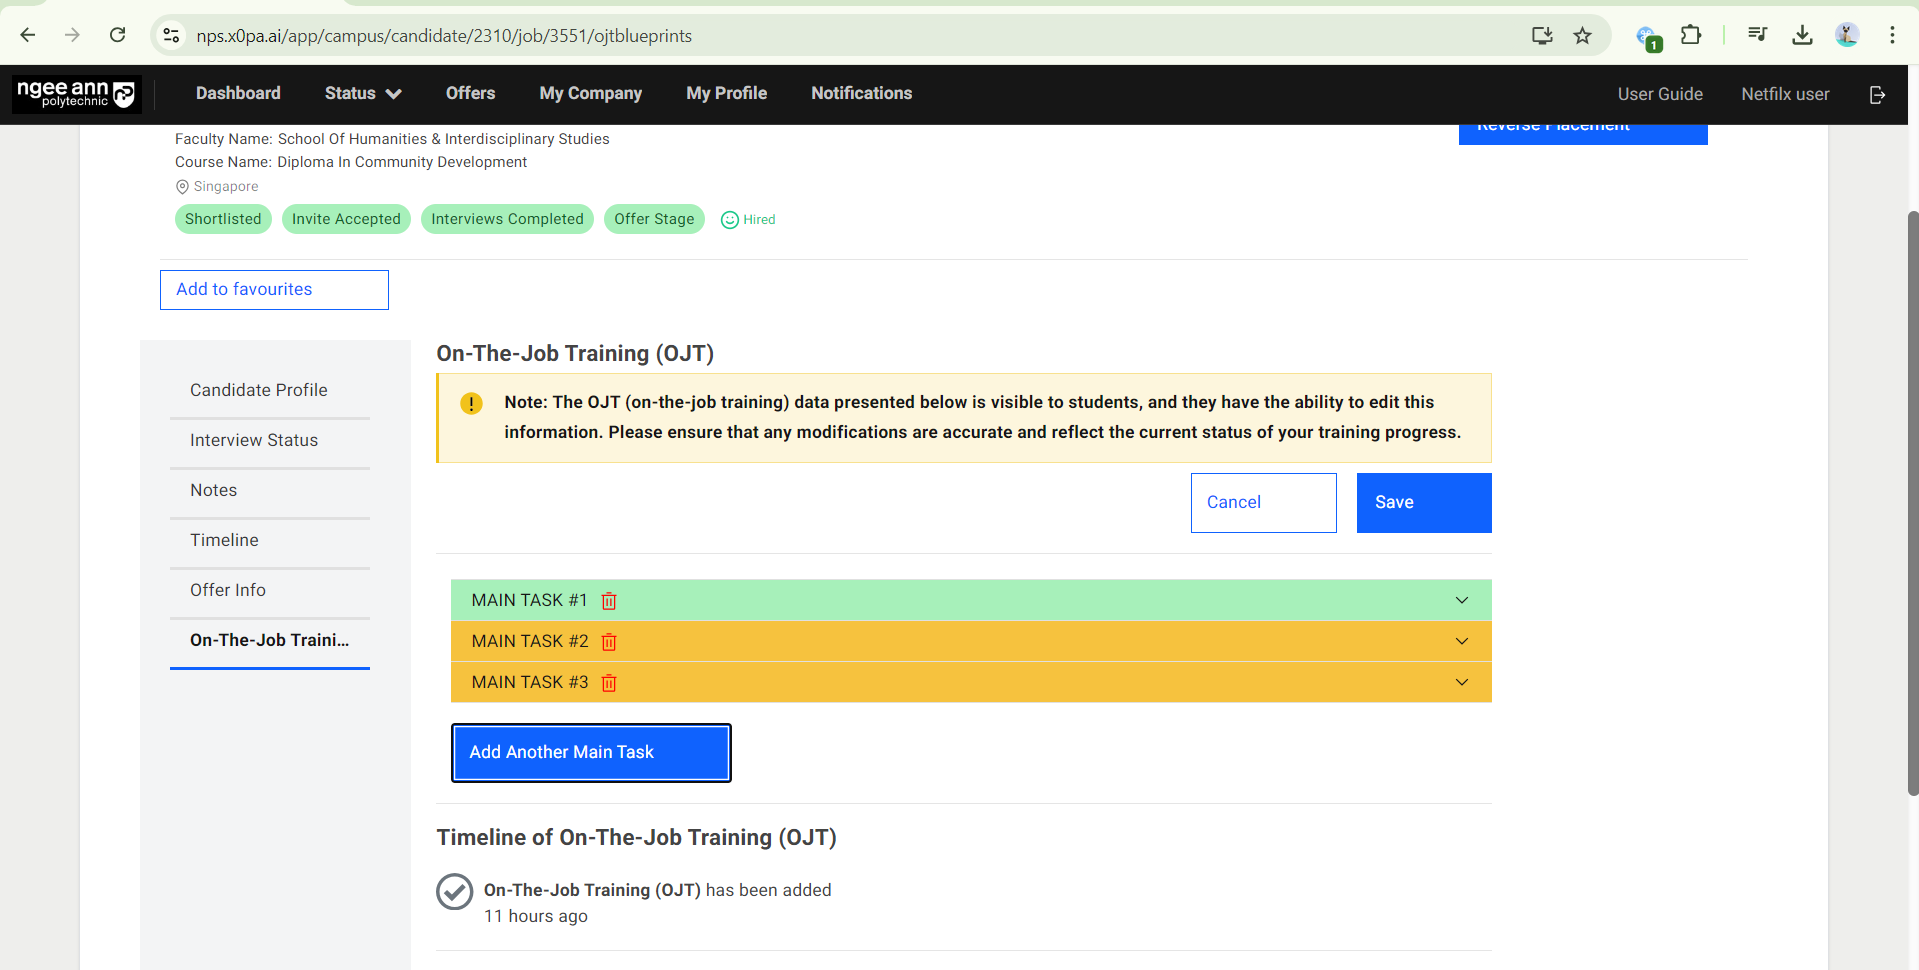
Edit OJT Details (Student Level)
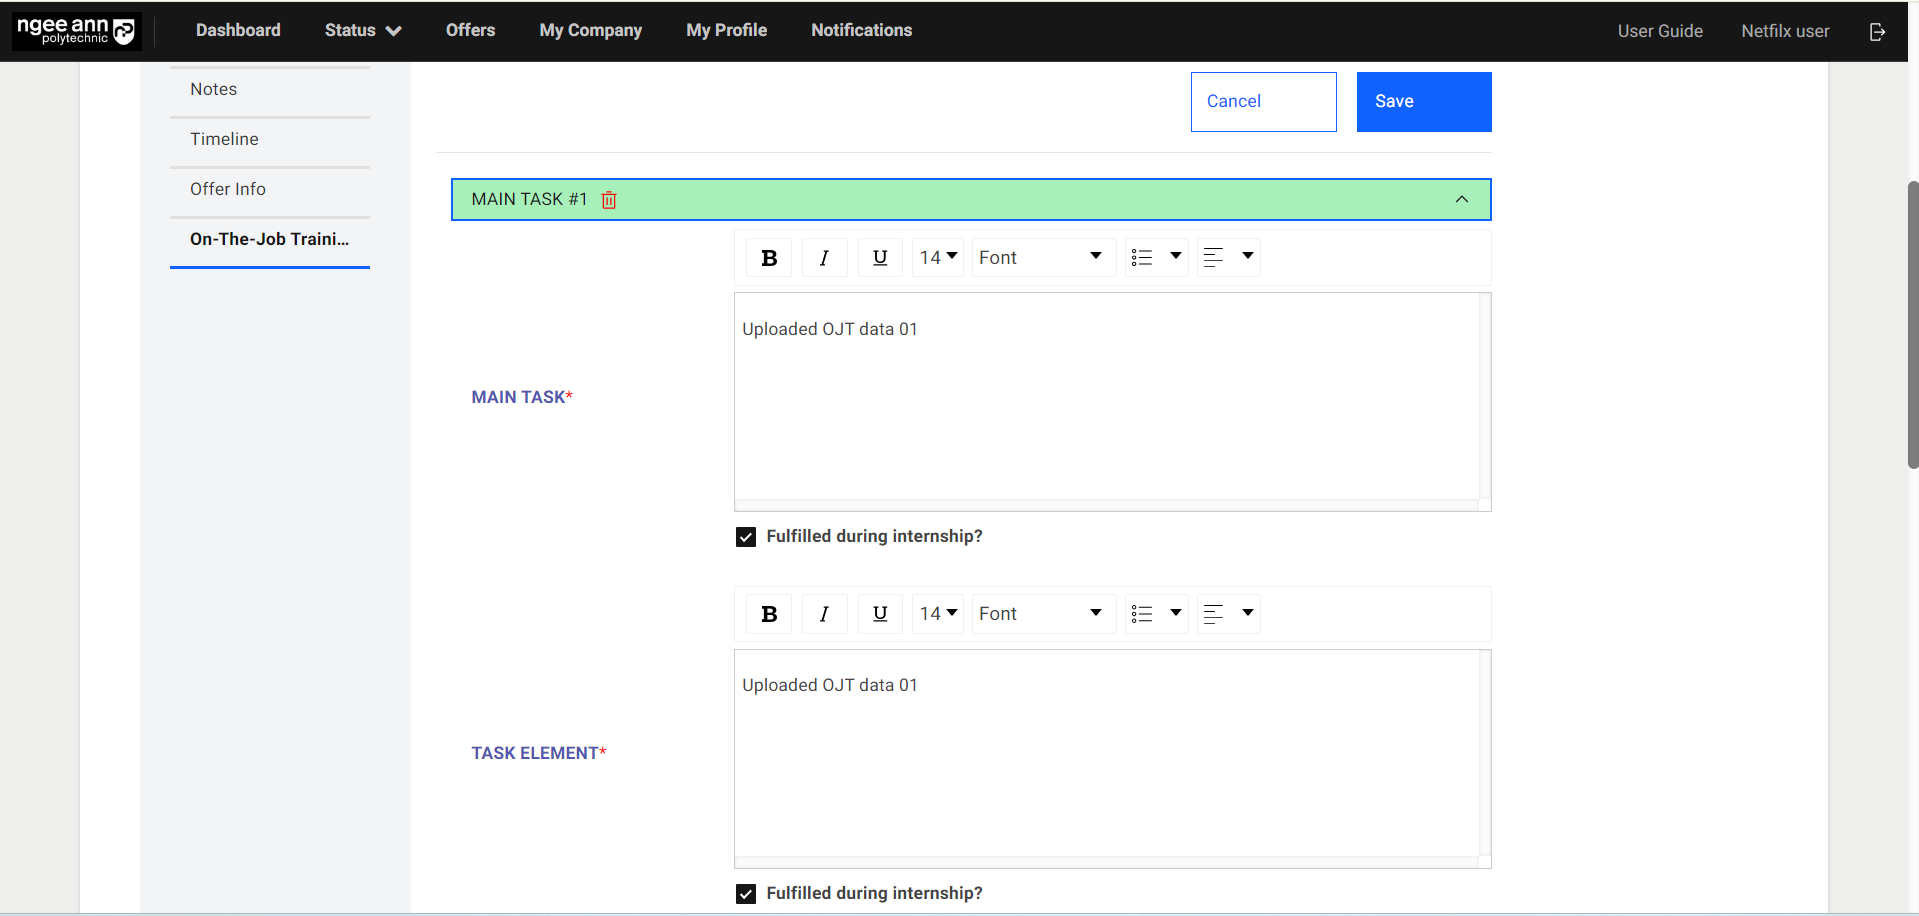
Step 1:
- Click on the “Edit” button
- Edit the Job/OJT Details from the fields
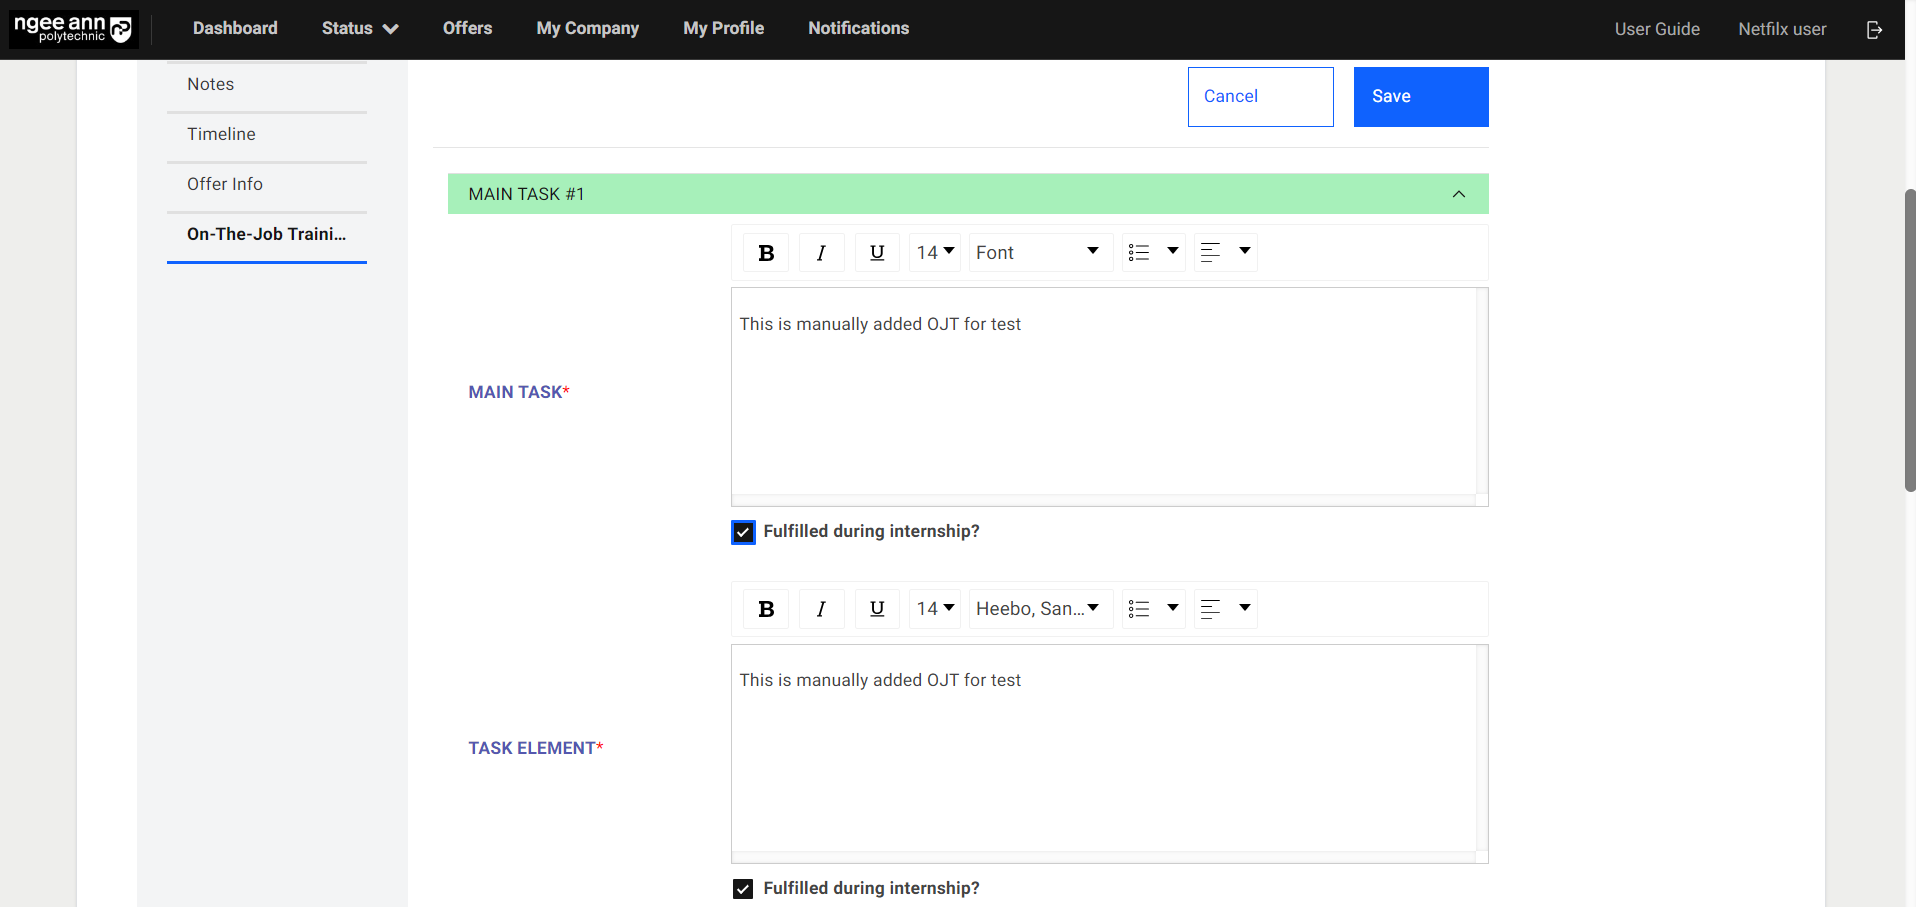
- Check “Fulfilled during the internship?” if the student has fulfilled the main task(s) during the internship.
- If both "Main Task” and “Task Element" OJT fields’ "Fulfilled during the internship?" checkboxes are checked, the respective "Main Task X Number" accordion will change to green color.
Note: The student cannot check this checkbox.

Step 2:
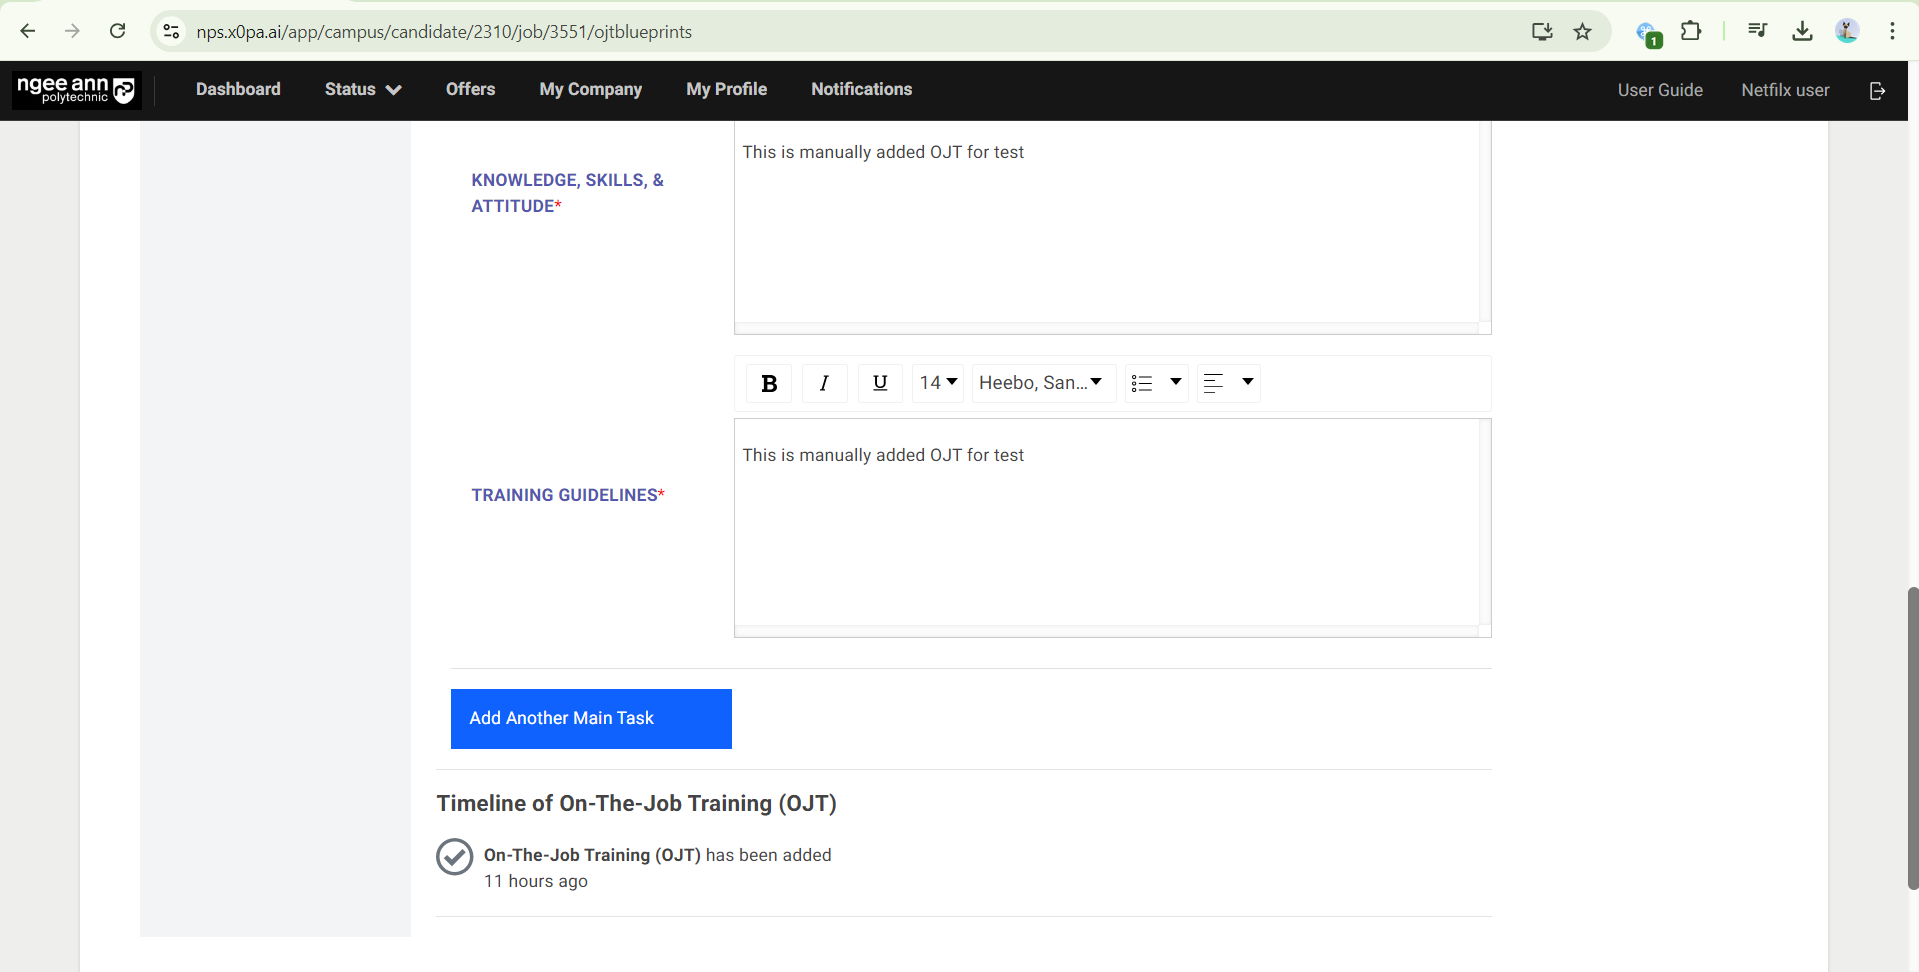
- If additional main task needs to be added, click on the “Add Another Main Task” button. Fill in details of the additional main task.
- The main task can be deleted by clicking on the “Trashcan” icon.
- Once all necessary details are updated, click on the “Save” button to save the details.
- “OJT changes are saved successfully.” message banner will be shown once OJT details are saved.

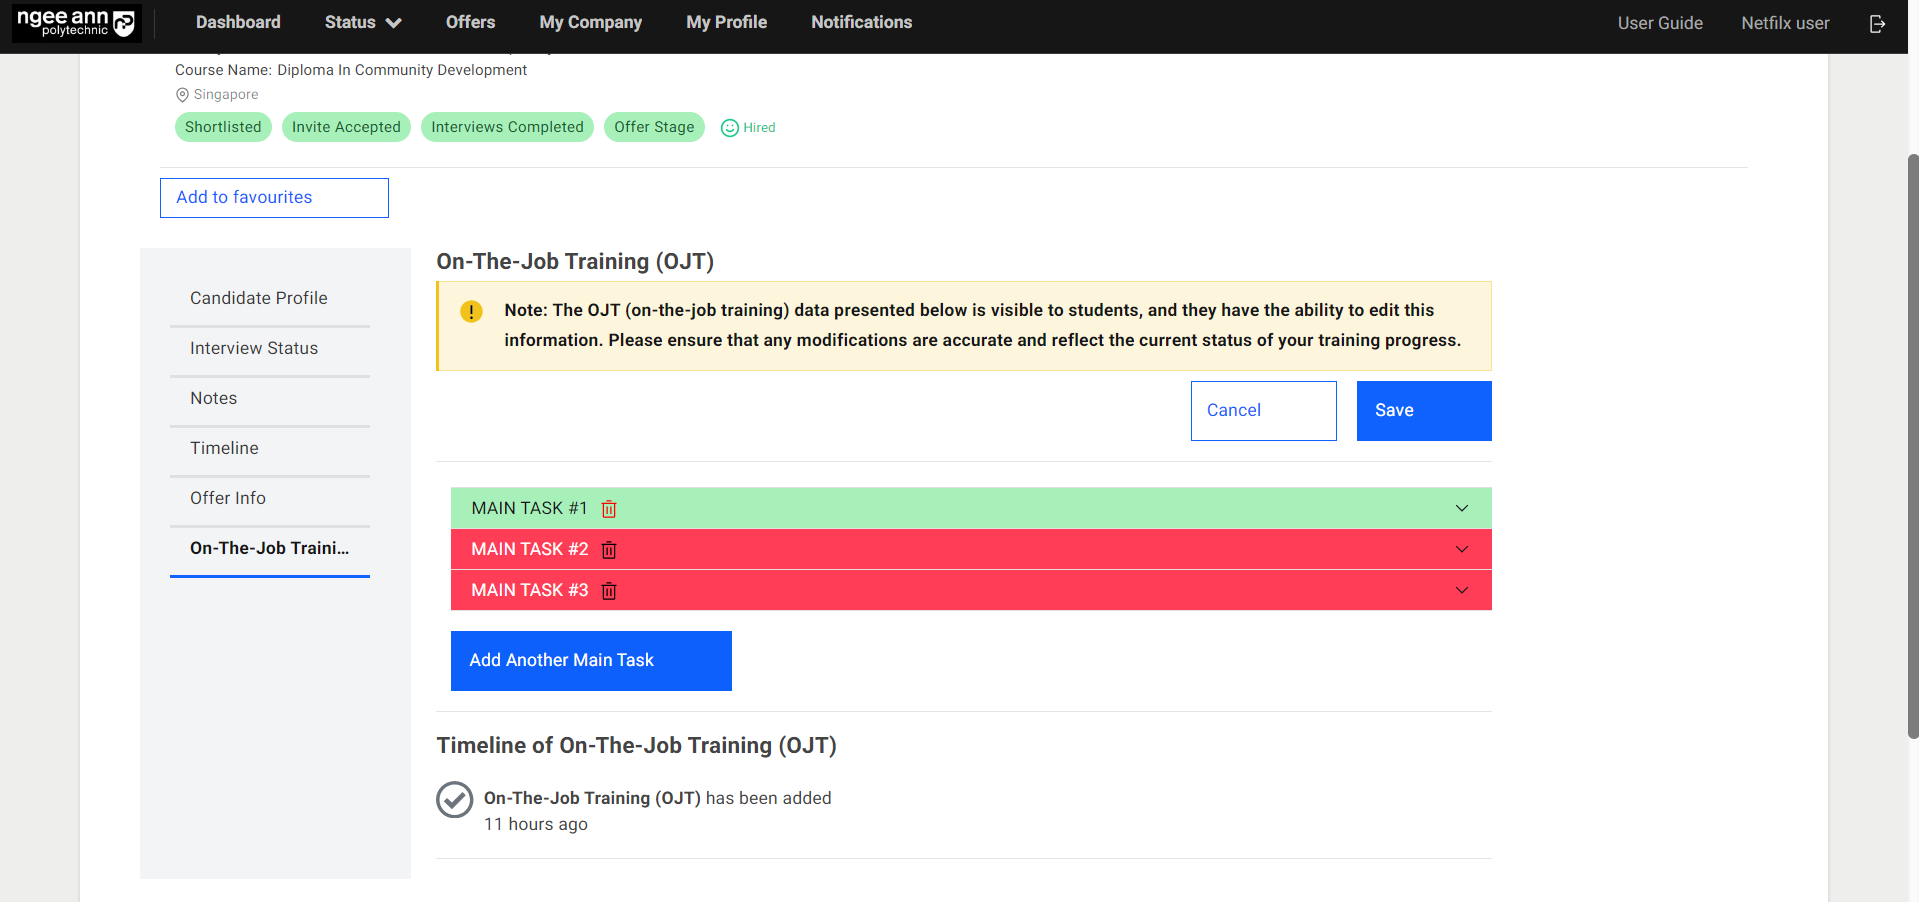
Step 3:
- The “Main Task X number” accordion will change to red colour and a validation error will be shown on the field when any OJT field is filled with an invalid or empty field during submission.
Bulk Upload OJT Details at Student/Application level
Step 1:
- In the OJT Job, click on the number of “Hired”.
- Click on the Student Name.

Step 2:
- Click “On-The-Job Training (OJT)” to edit OJT Details.
- You will see OJT details under the “On-The-Job Training (OJT)” section

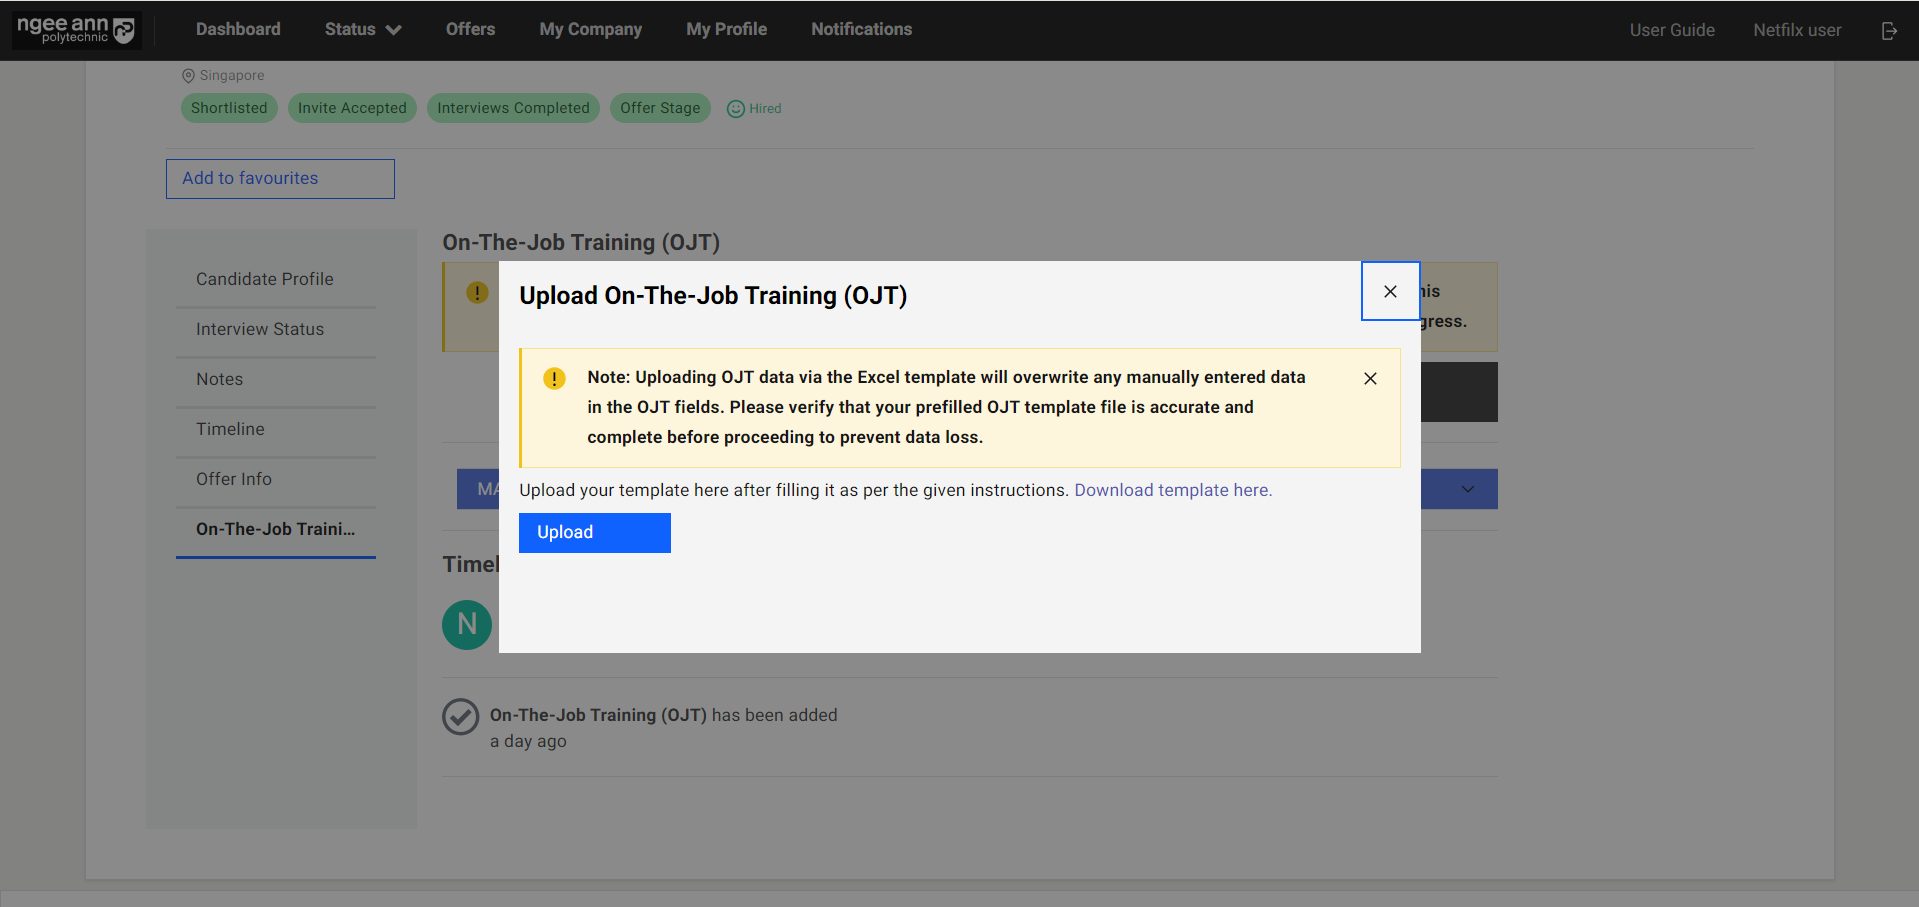
Step 3:
- Student/Application-level OJT data can be uploaded in bulk. Click on “Upload”.
- In the pop-up window, click on “Download template here”.
- Open the downloaded template. Fill in OJT details. Save the template.
- Click on the “Upload” button. Select the pre-filled OJT template and upload the file.
- OJT details will be filled automatically based on the uploaded template.
- Click on the “Save” button to save the OJT data.
- “OJT changes are saved successfully.” message banner will be shown once OJT data is saved successfully.
Note: The uploaded template will overwrite any previous details that have been filled.
Download OJT Details
Step 1:
- To export OJT details, click on the “Download” button.
- Open the downloaded file to view the OJT details.

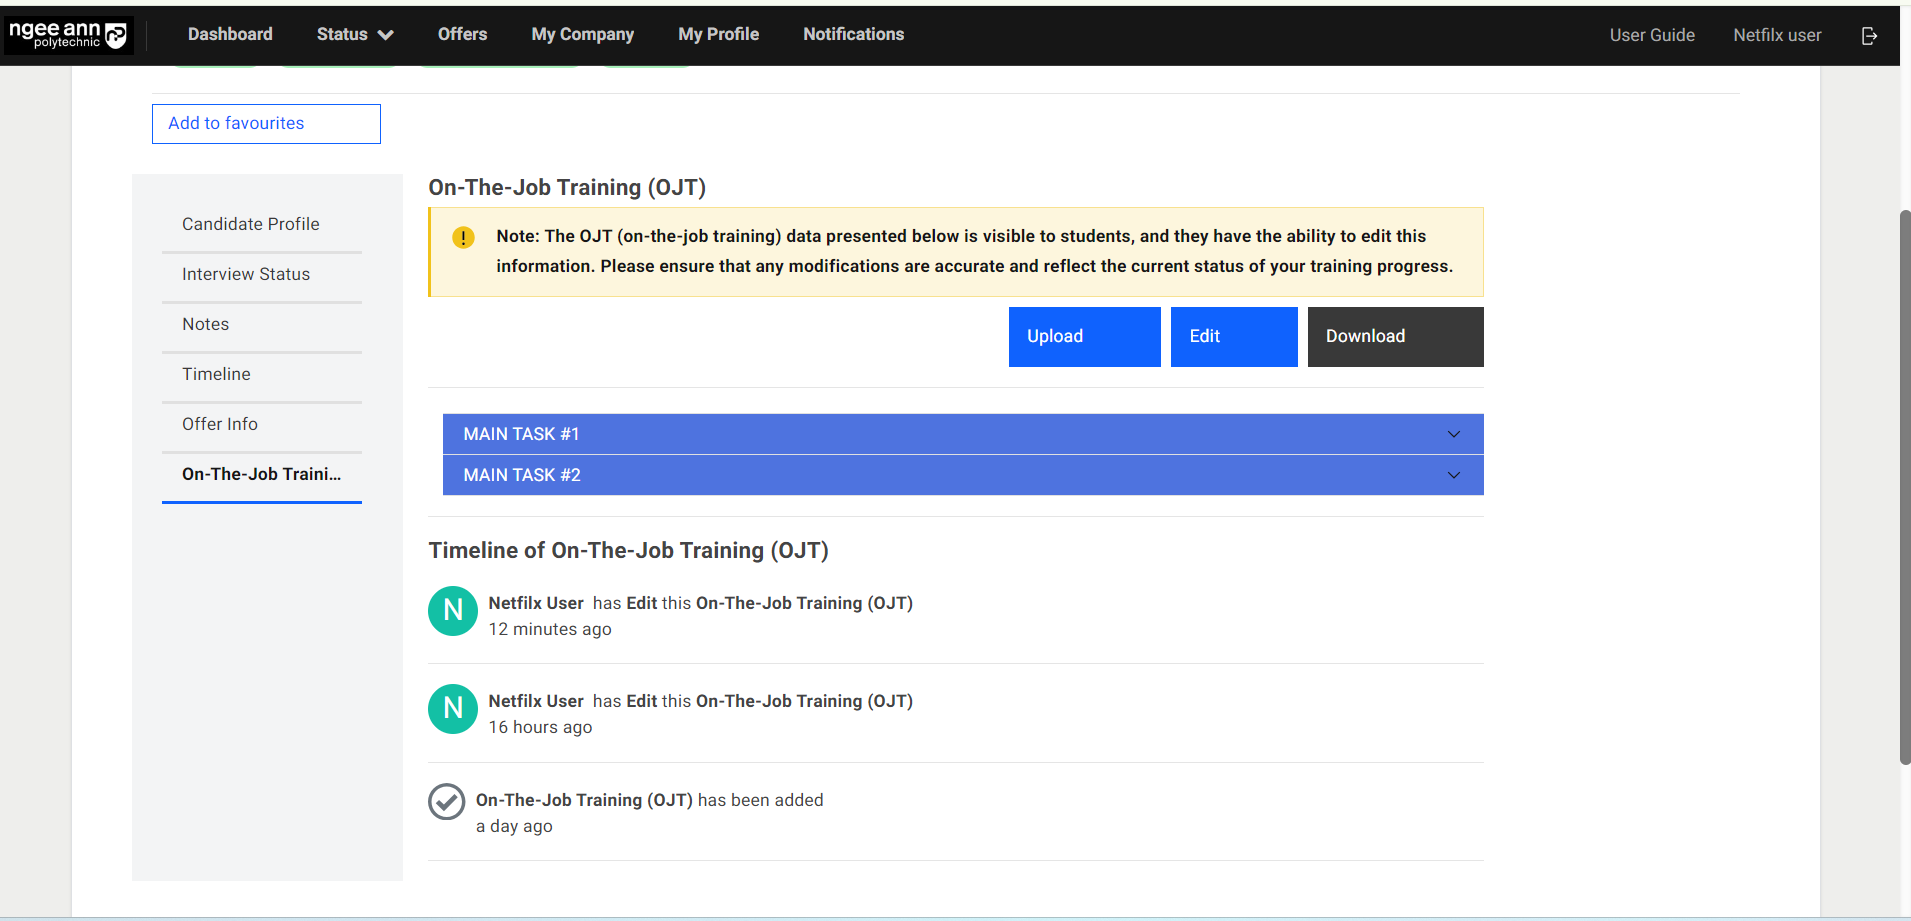
Track Changes of OJT
For edits made to the OJT details, the changes will be tracked under the “Timeline of On-The-Job Training (OJT)” section.
Note: Timeline is not visible to students.
Archive Student
Student Profile Page:
Step 1:
- Click on the “Browse”
- Click on the “Students”
- Navigates to “Student” page
Step 2:
- Click on the student’s name link text button from the table
- Navigates to respective student’s profile page
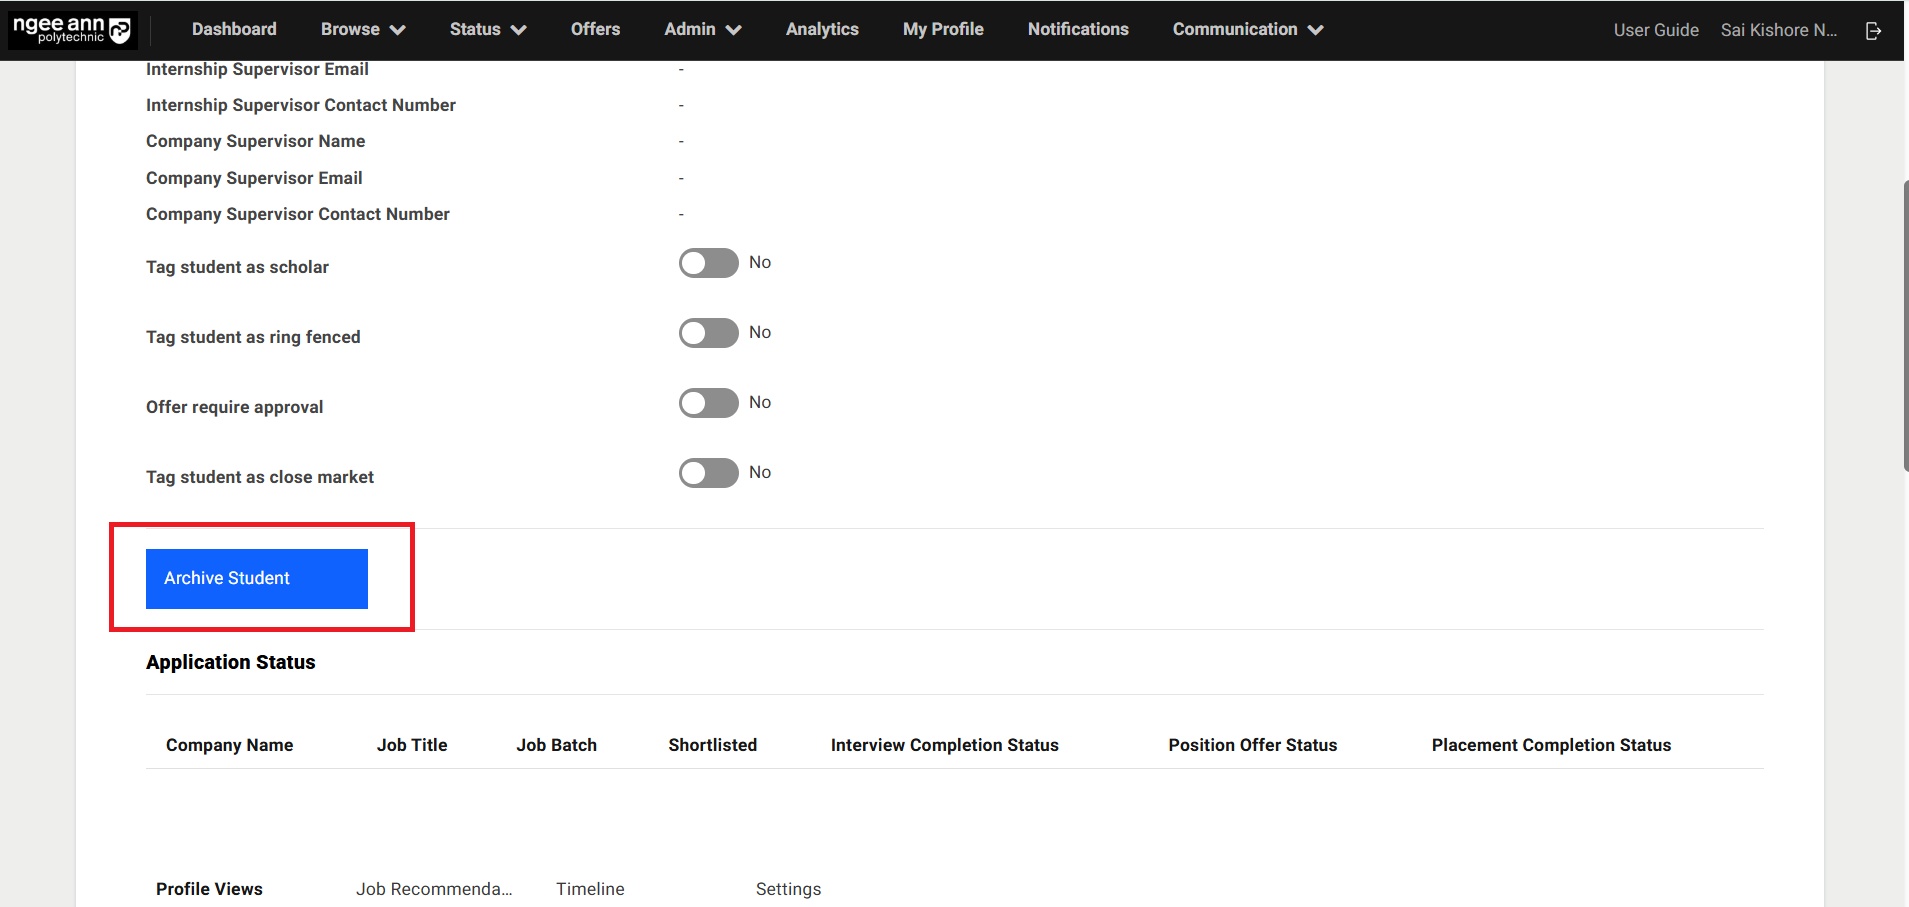
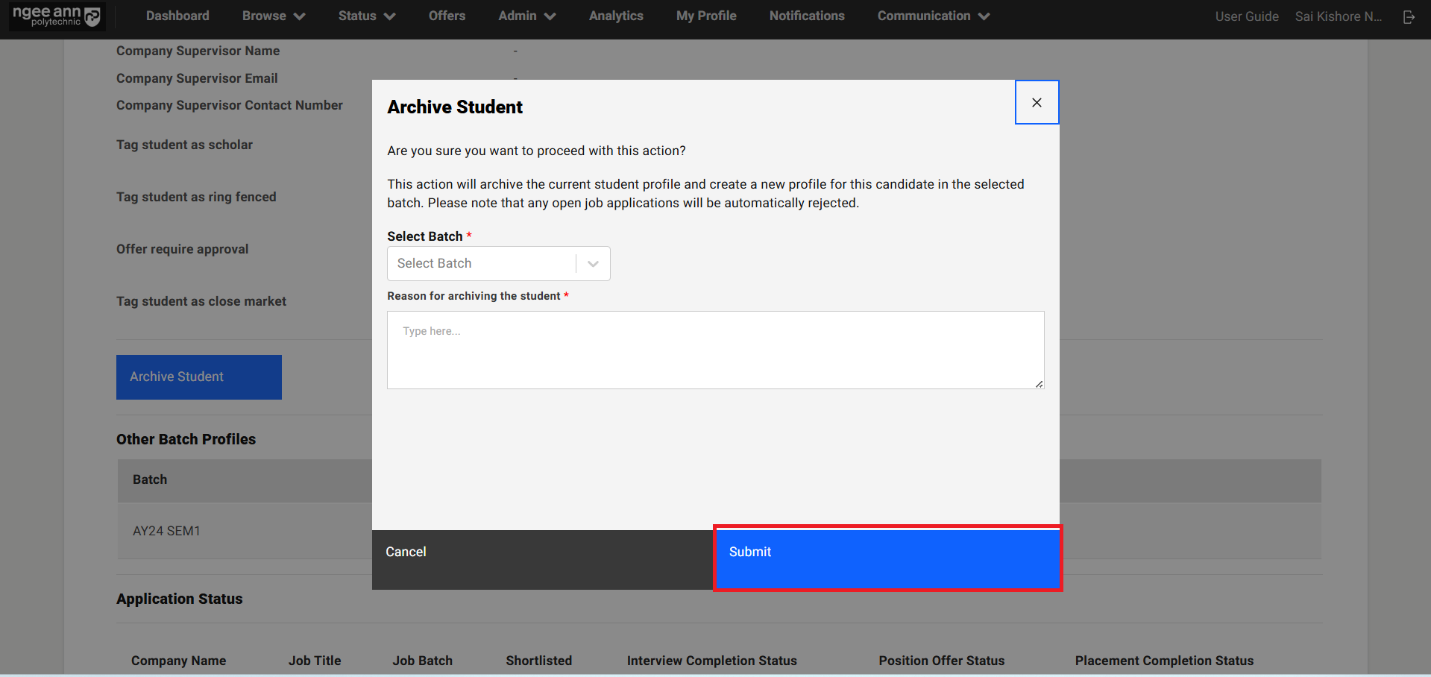
Archive Student Button:
Step 1:
- See the “Archive Student” button in the respective student profile page
- Click on the “Archive Student” button
- “Archive Student” popup get open
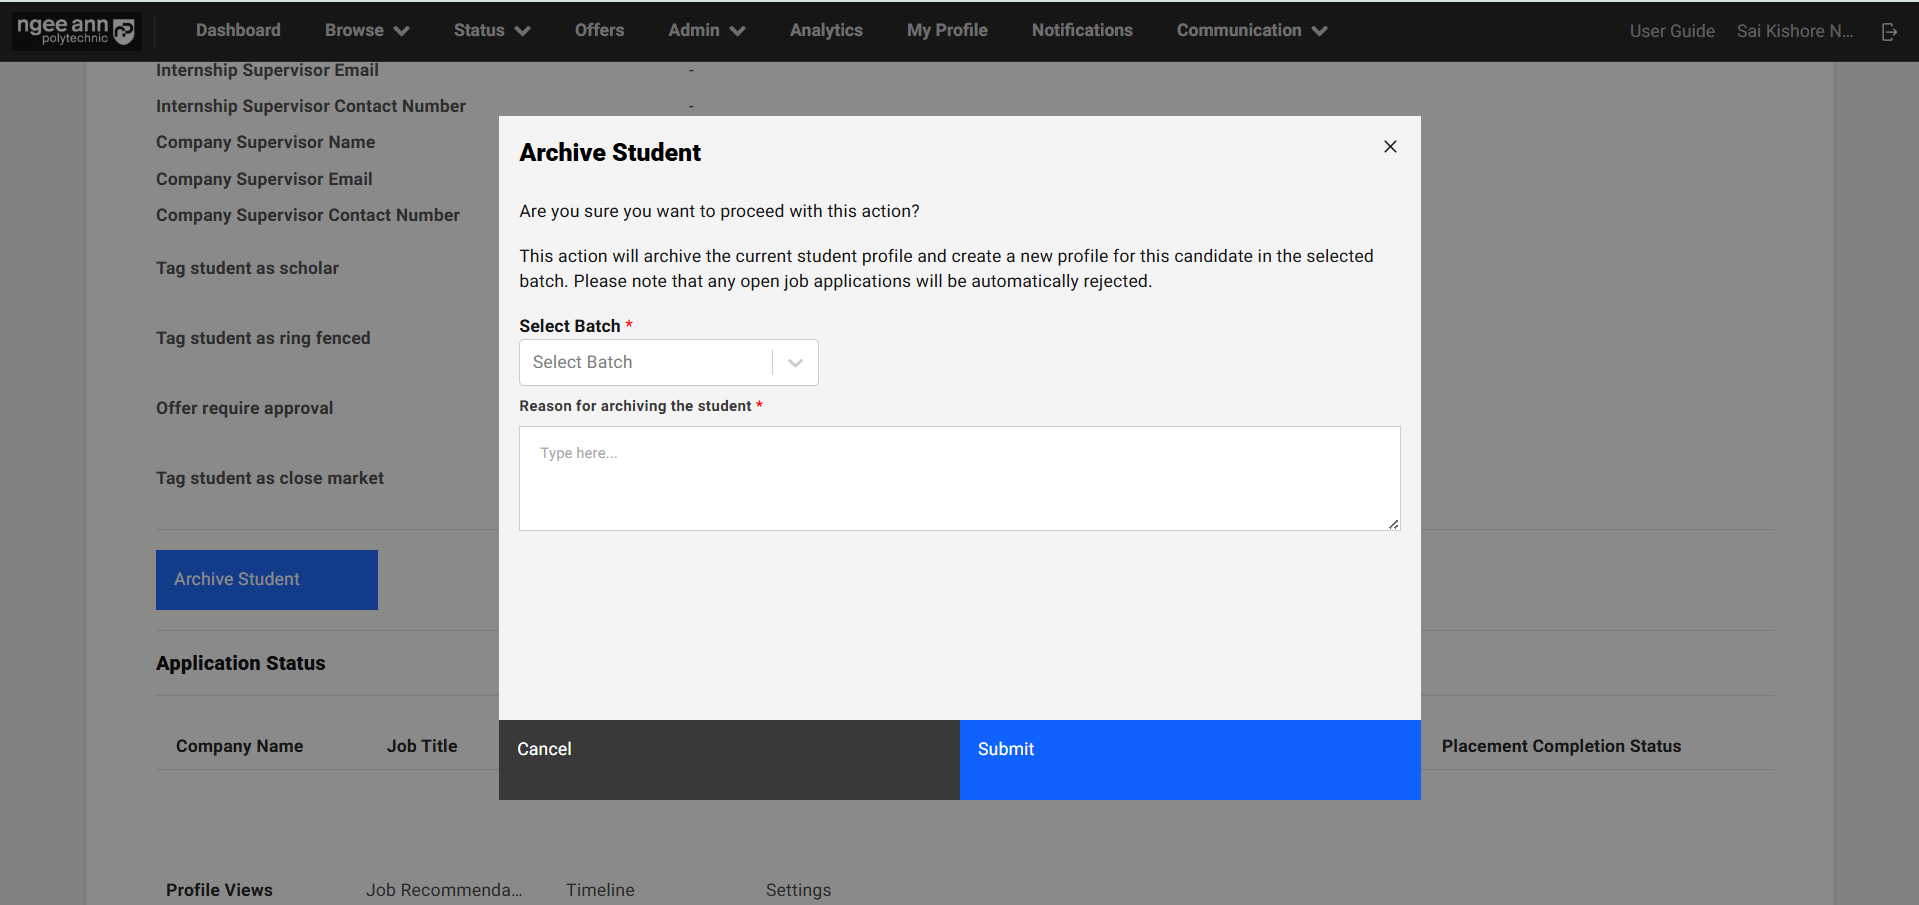
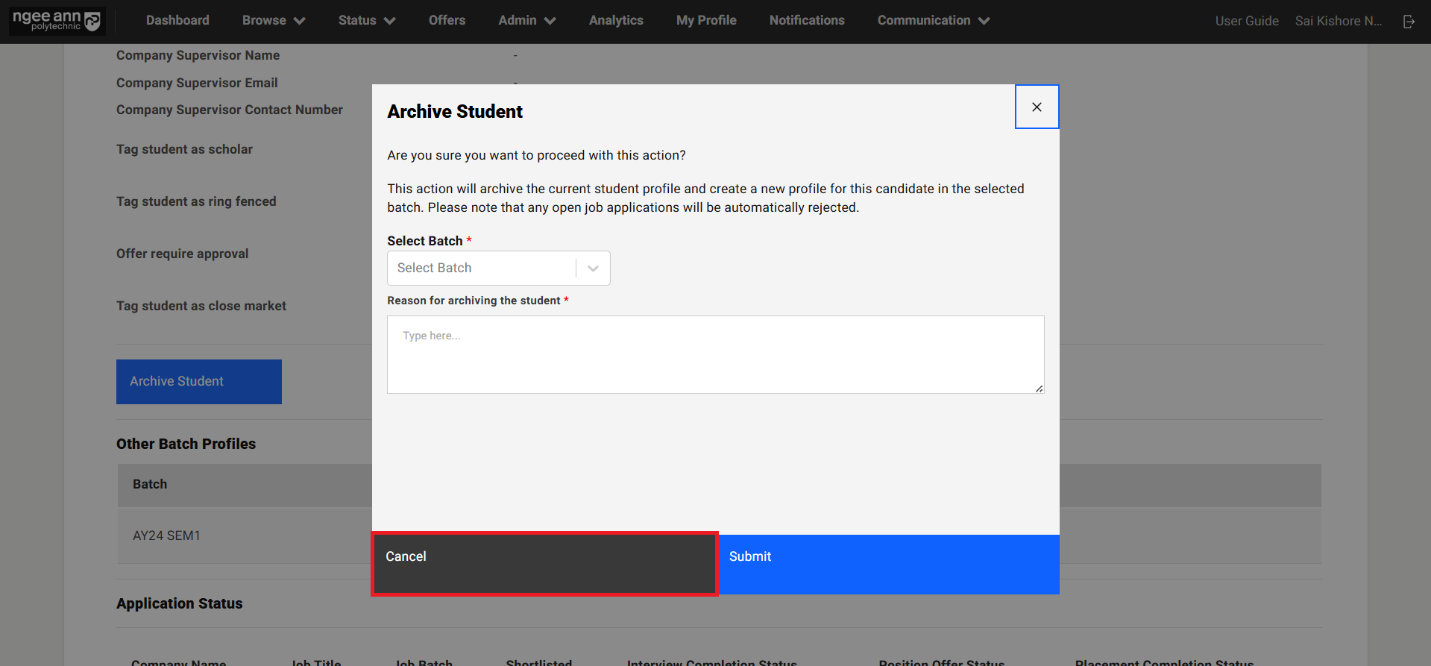
Archive the Student:
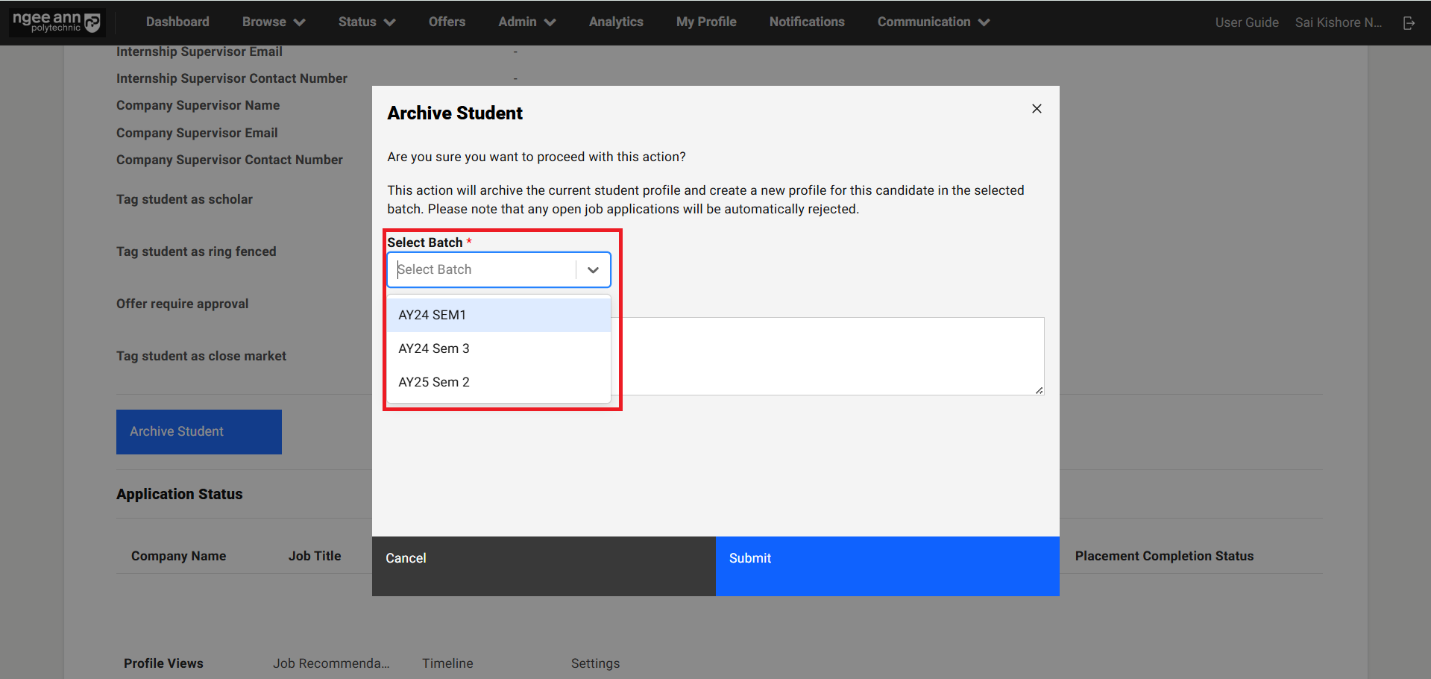
Step 1:
- Click on the “Select Batch” dropdown field
- Select the active semester batch from the dropdown options
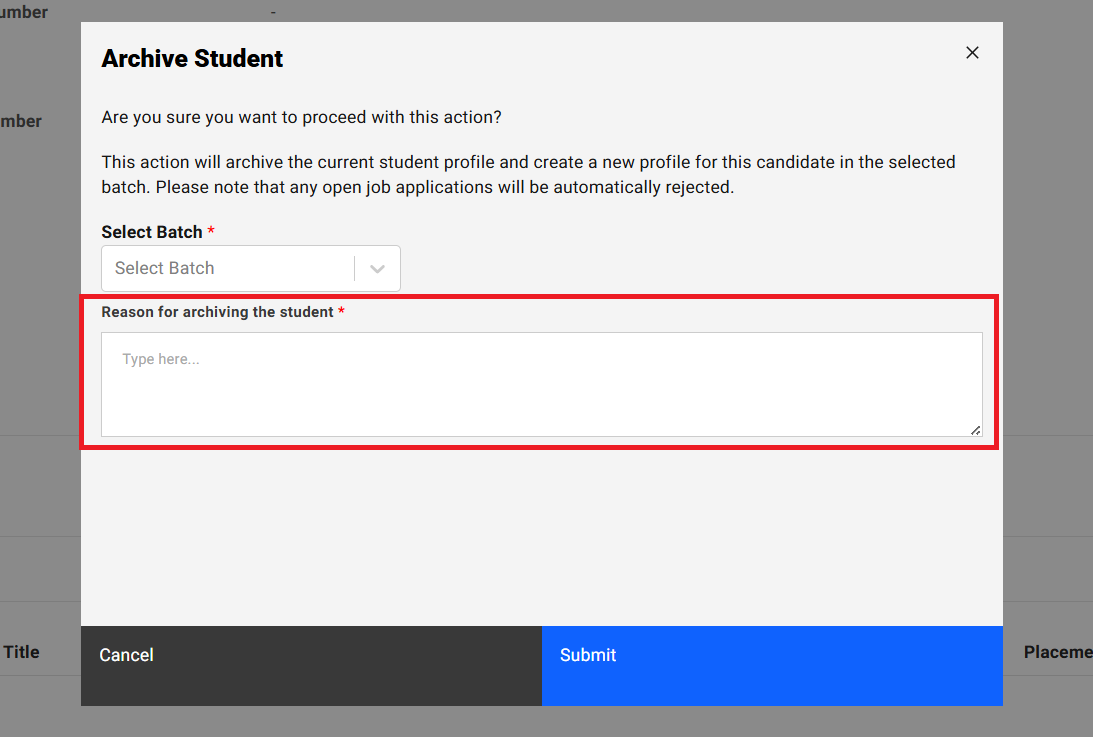
- Enter reason in the “Reason for archiving the student” text box.
Step 2:
- Click on the “Submit” button to archive respective student to selected active semester batch
- Click on the “Cancel” button “Archive Student” popup get closed and respective student profile does not get archived
NOTE: System Owner/Internship Manager/Internship Co-Ordinator role users can archive the student even though student in Any stage (Registration incomplete/Screening/Interview-Stage/Offer-Stage/Hired).
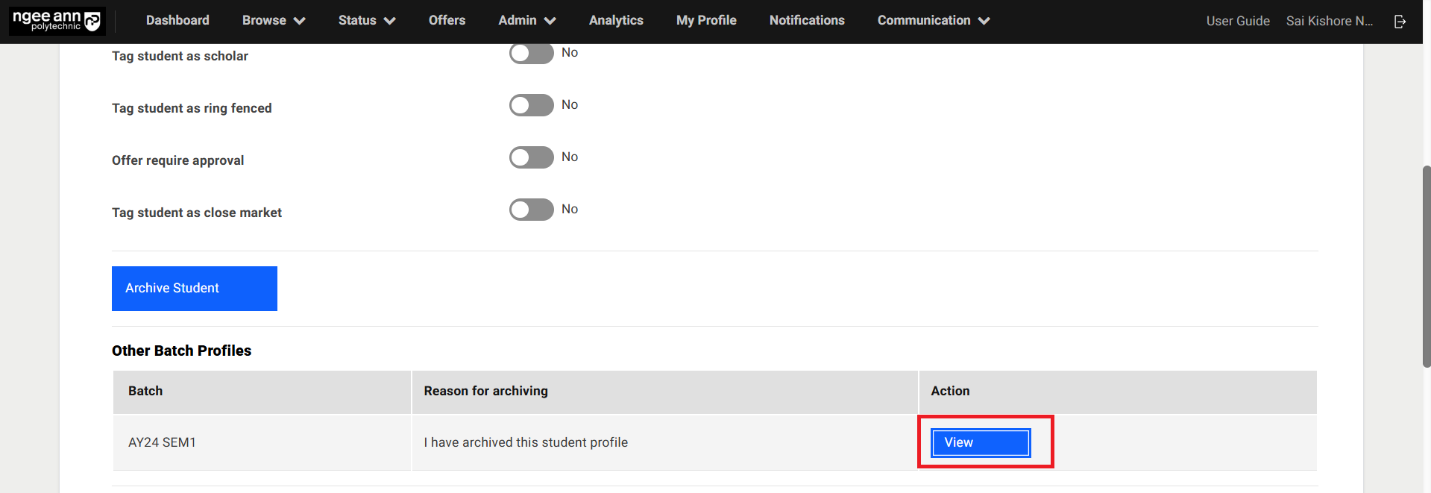
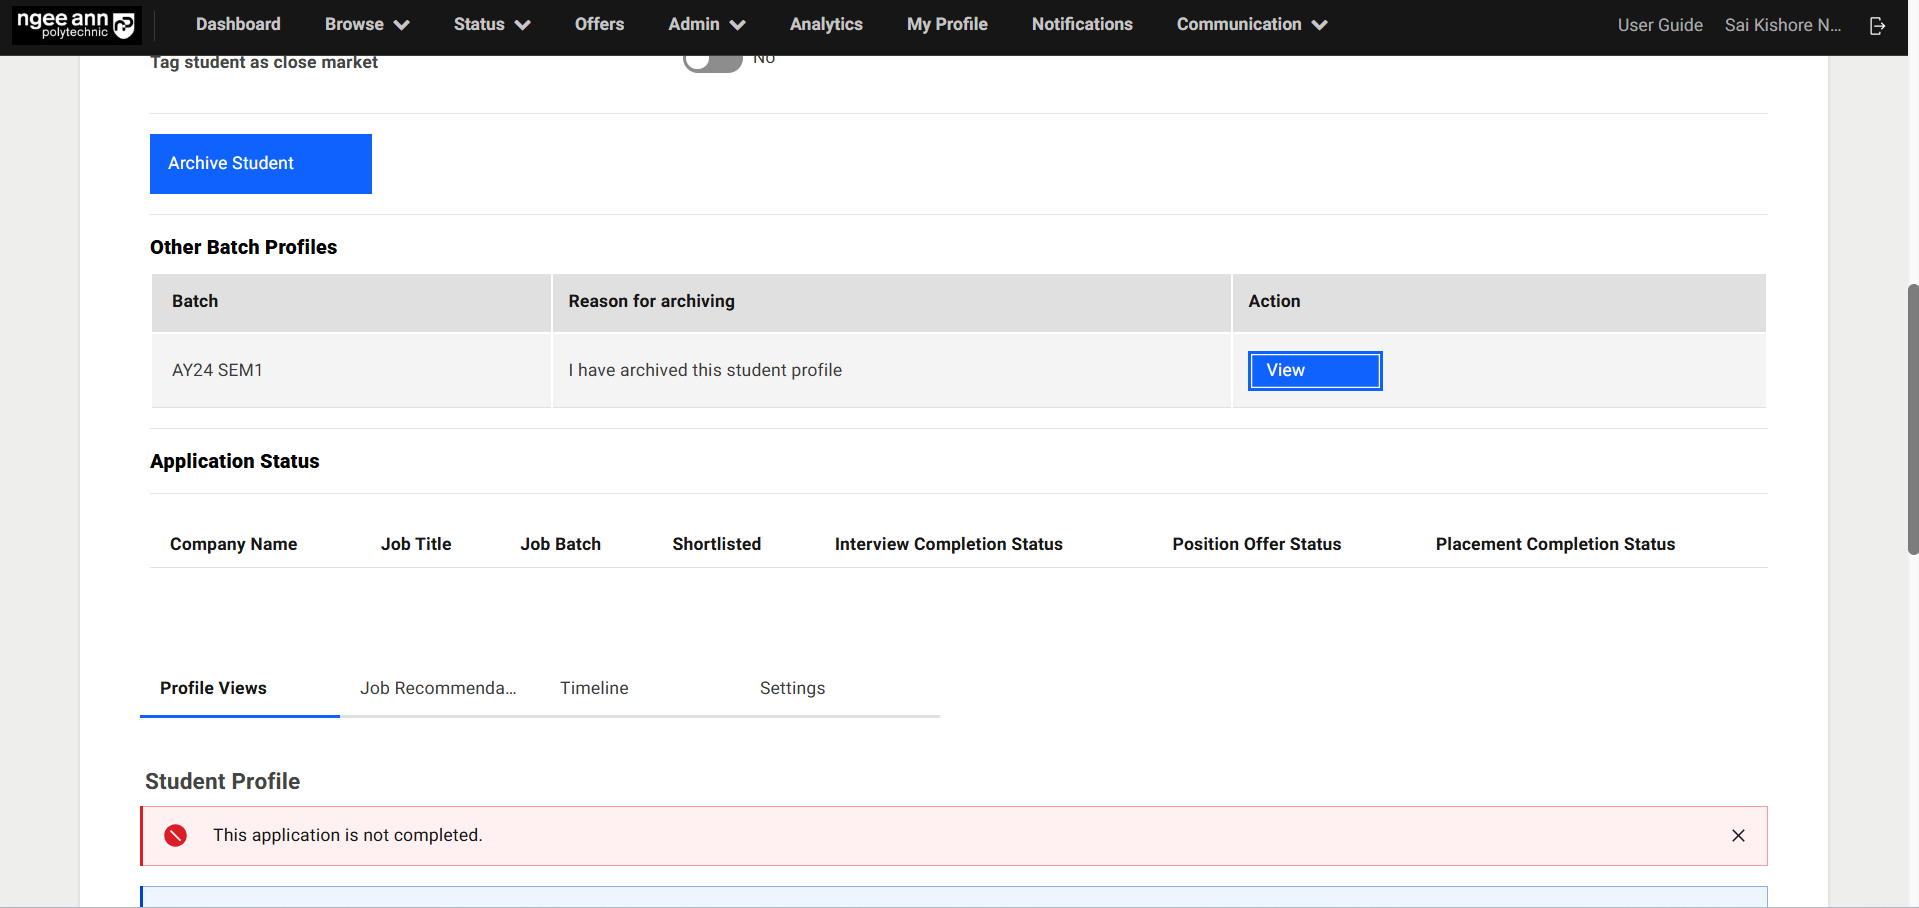
Other Batch Profiles Table:
Step 1:
- Once student profile successfully archived then System Owner/Internship Manager/Internship Co-Ordinator role users are able to see the “Other Batch Profiles” table in the respective archived student active profile page.
- See the respective student profile archived batch details in the “other Batch Profiles” details in the table
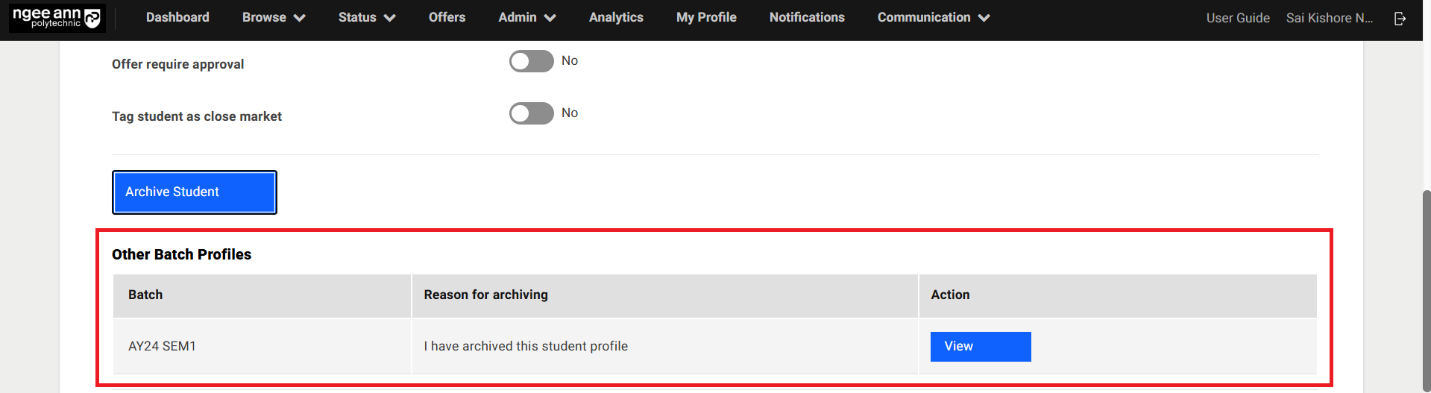
Archived Student Profile:
Step 1:
- Click on the “View” button under “Actions” column from the table
- Navigates to respective student archived student profile page
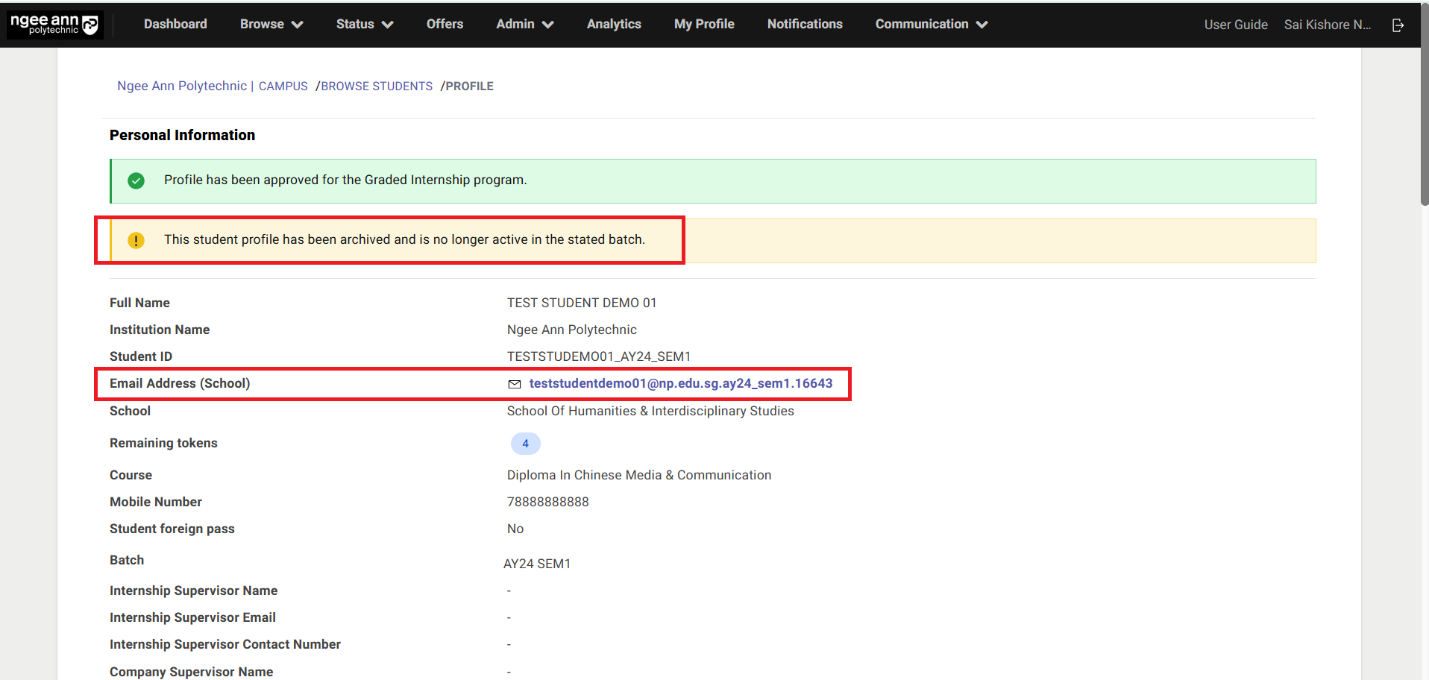
 Step 2:
 - See “This student profile has been archived and is no longer active in the stated batch.” Message banner in the respective student archived student profile page
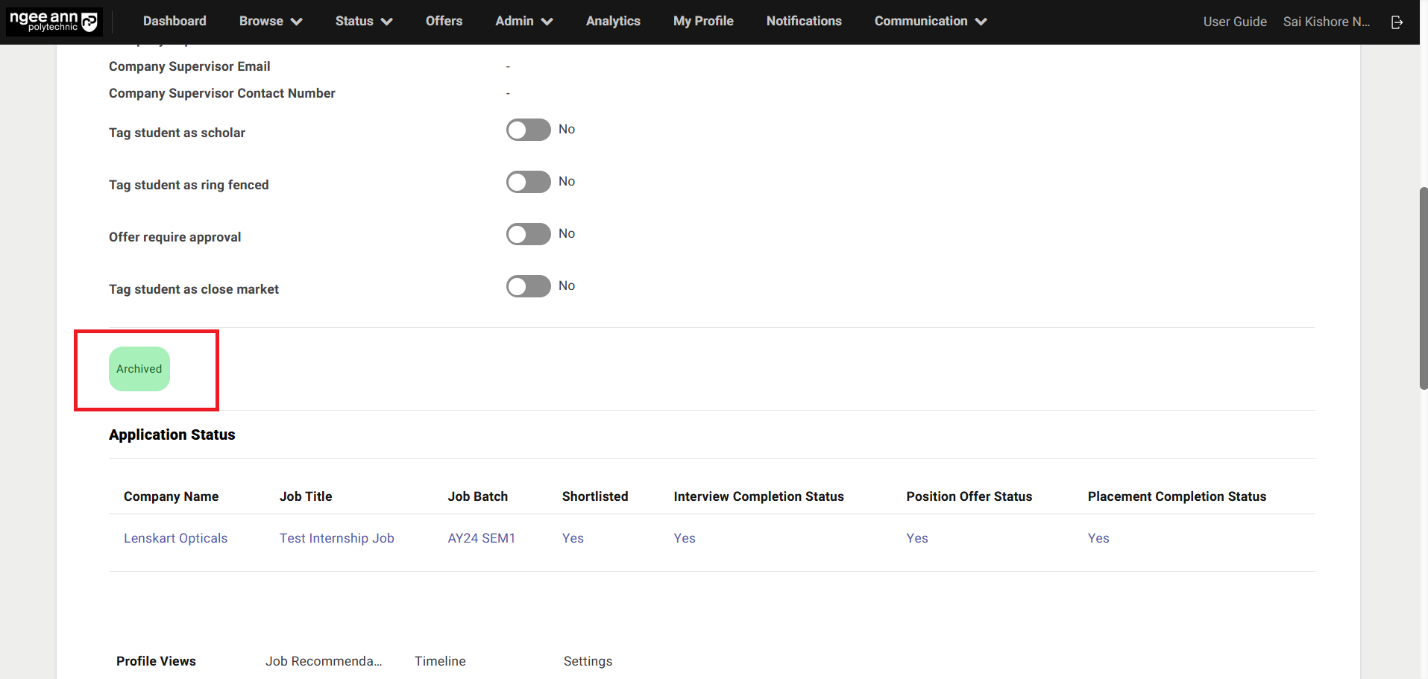
- “Archived” green tag will be shown below the “Personal Details” section in the archived student profile page.
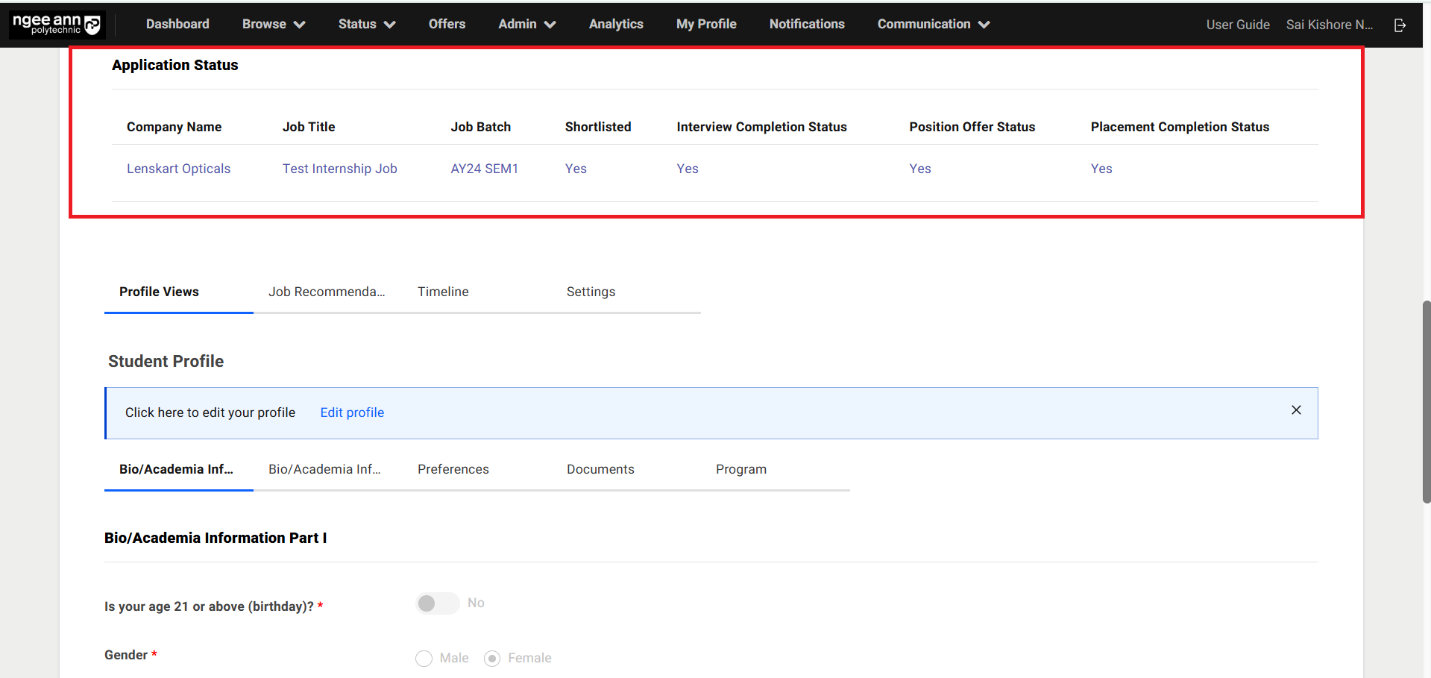
Note: In the archived student profile page respective student applied jobs or student’s internship data will persist in the archived profile page
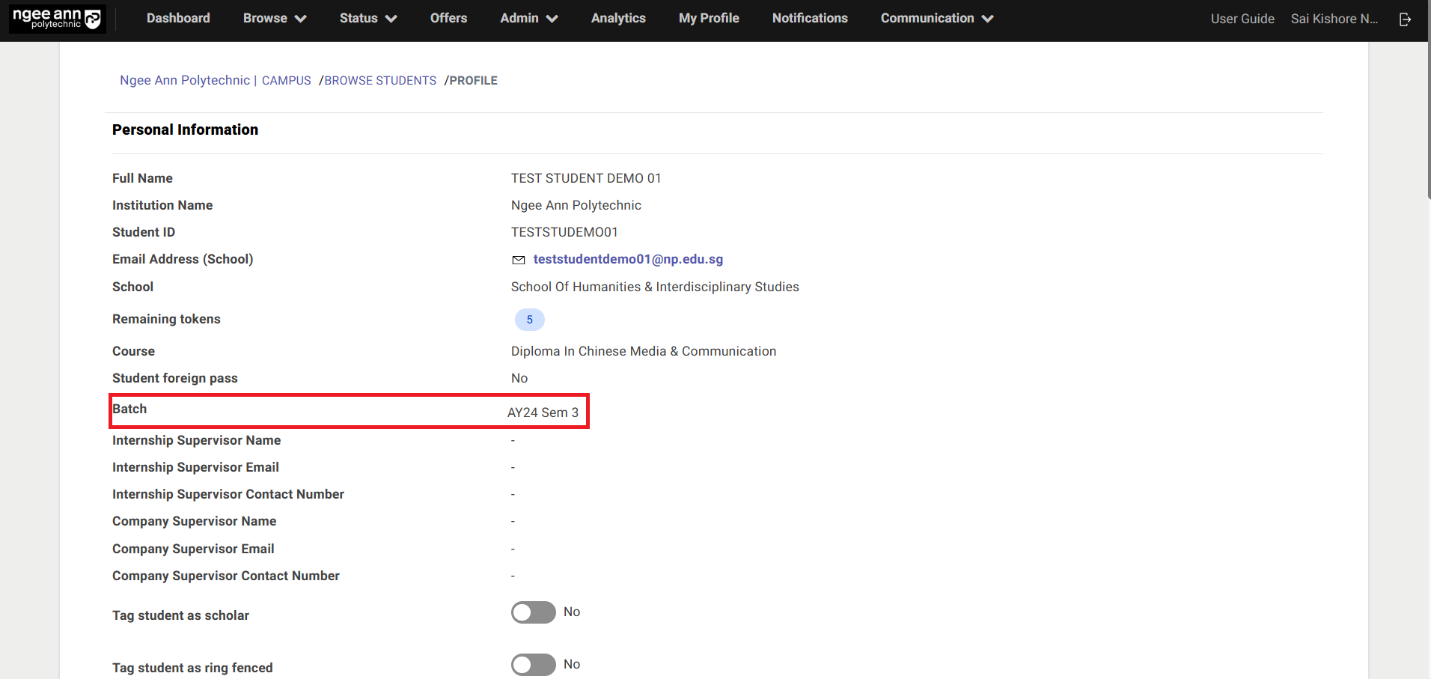
Active Student Profile:
Step 1:
- Once student profile is archived to selected active semester batch then respective profile will “Active Profile”.
- Once student profile is archived then new student cloned profile will be created.
Note: Once student profile is archived then new cloned student profile will be created and again student need to complete registration processes again.
Student Assessment
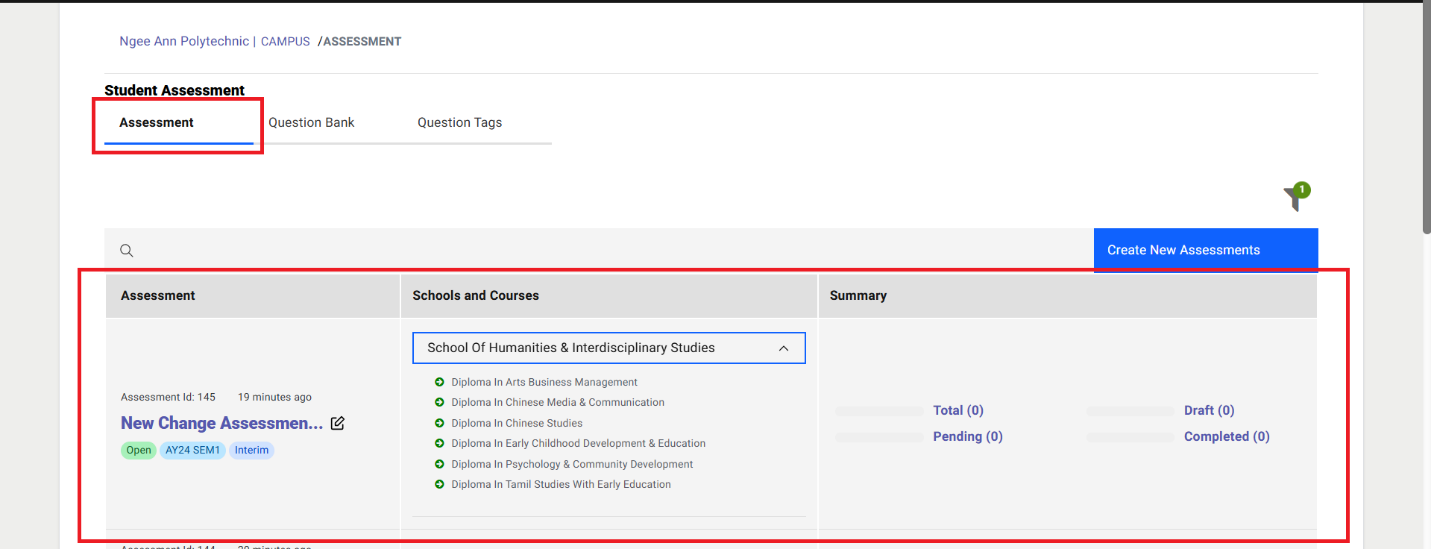
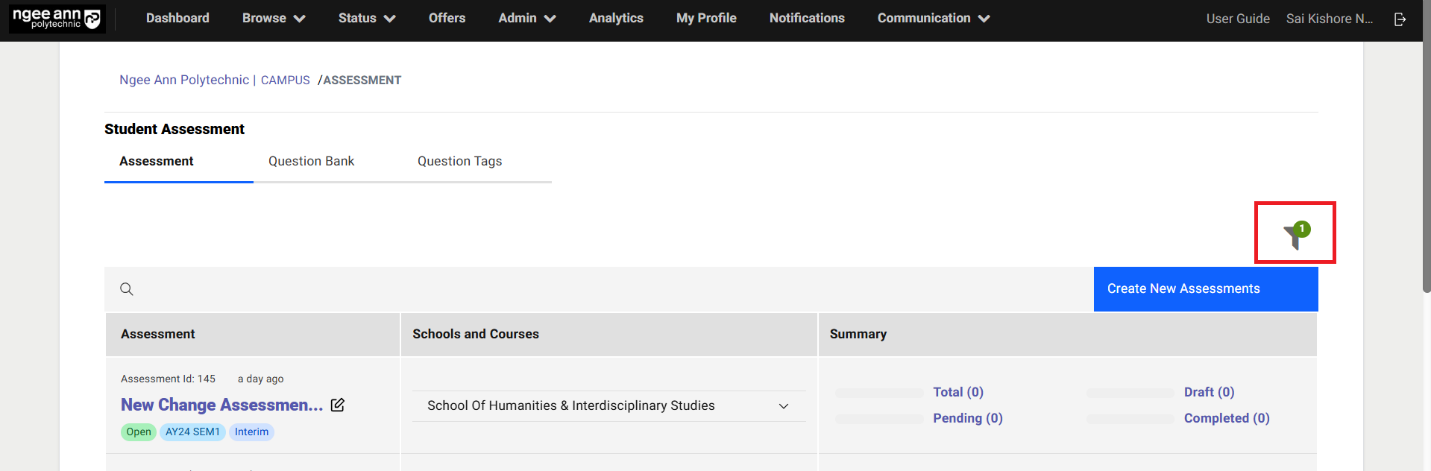
Assessment Page:
Step 1:
- Click on the “Communication” header tab
- Click on the “Student Assessments” sub-tab
- Make sure navigate to “Assessment” page

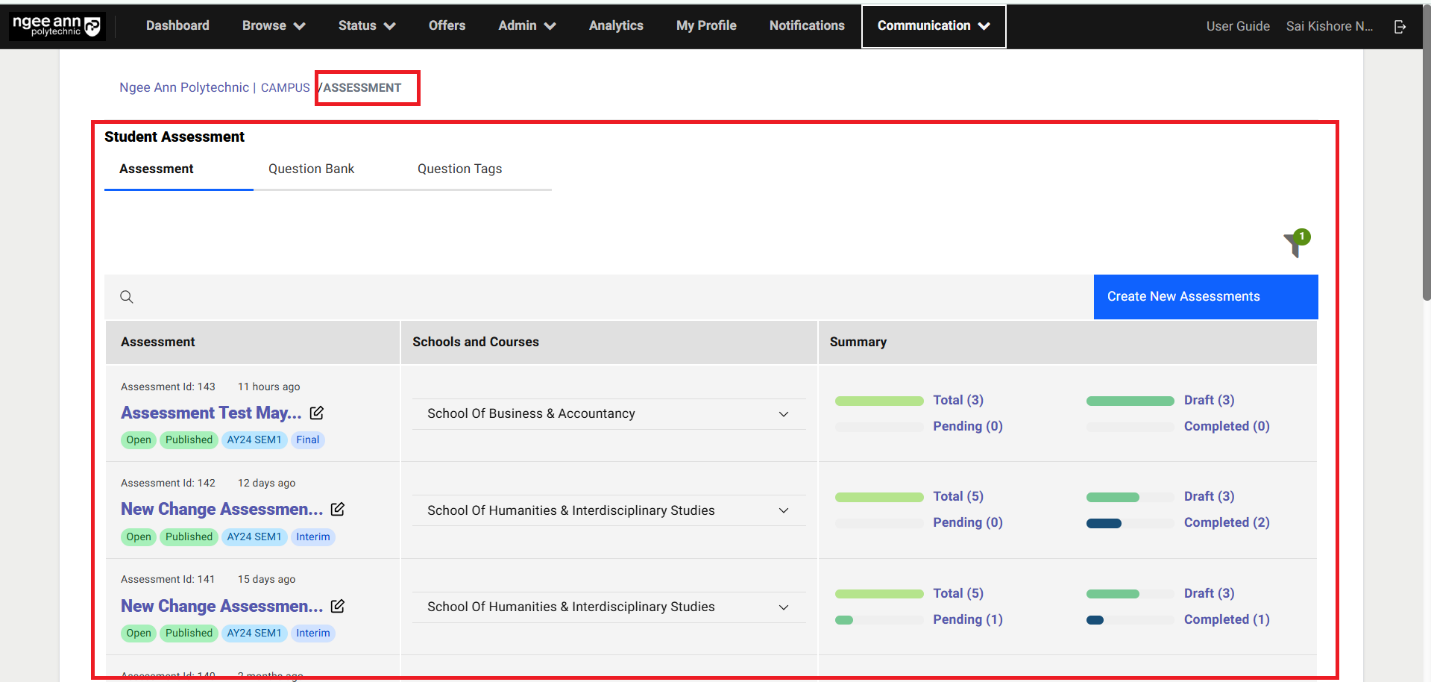
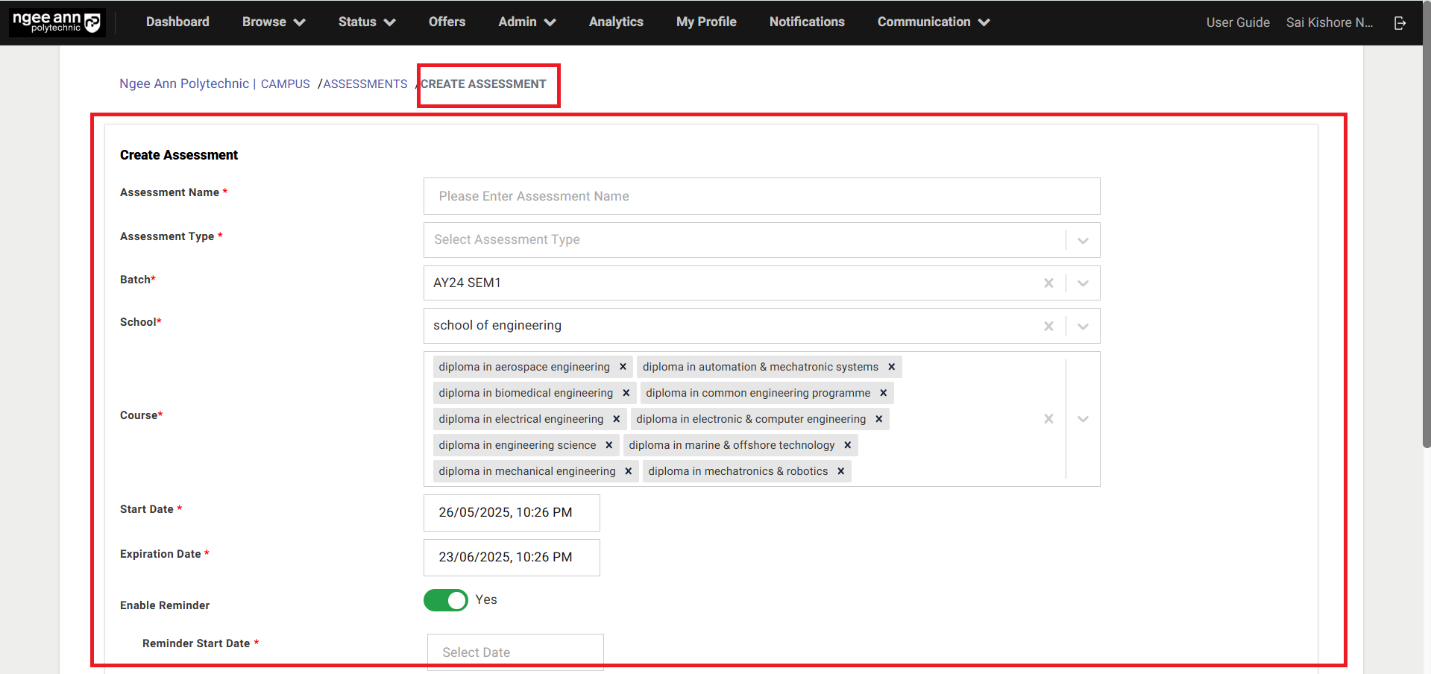
Create New Assessments:
Step 1:
- Click on the “Assessment” section tab under “Assessment” page
- Click on the “Create New Assessments” button above the table

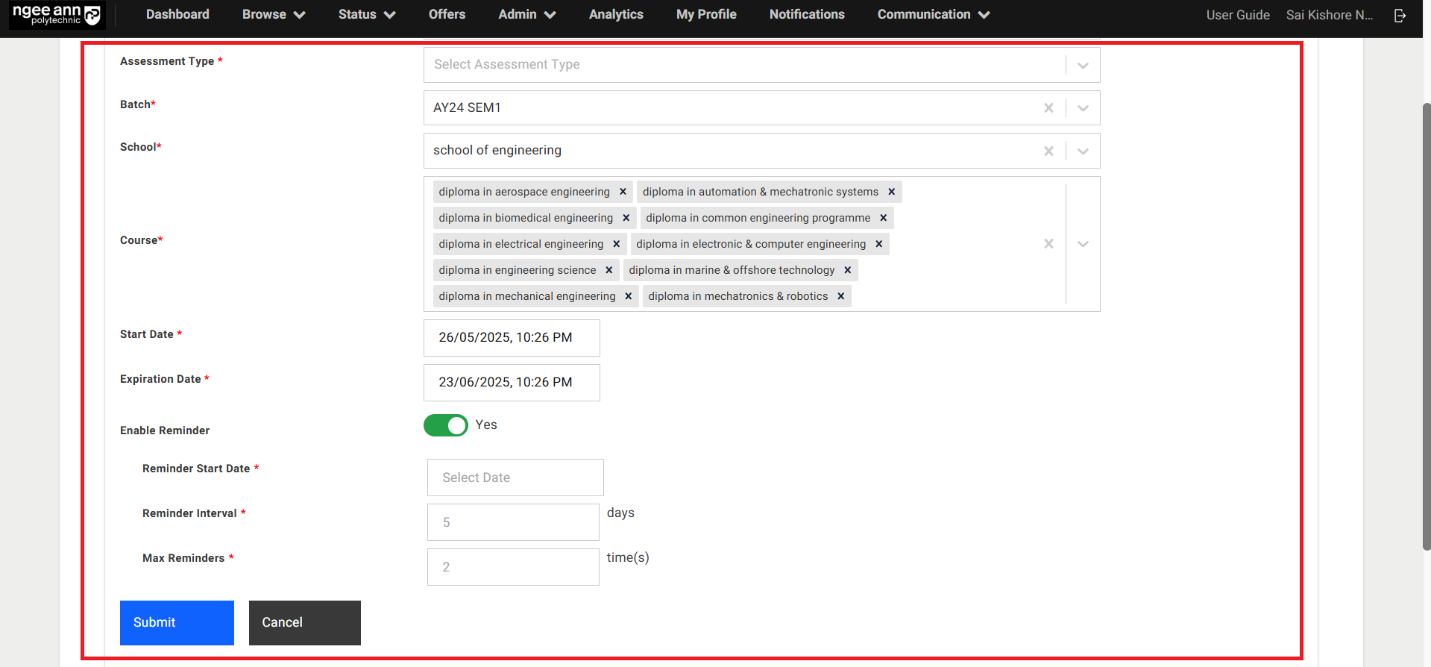
Step 2:
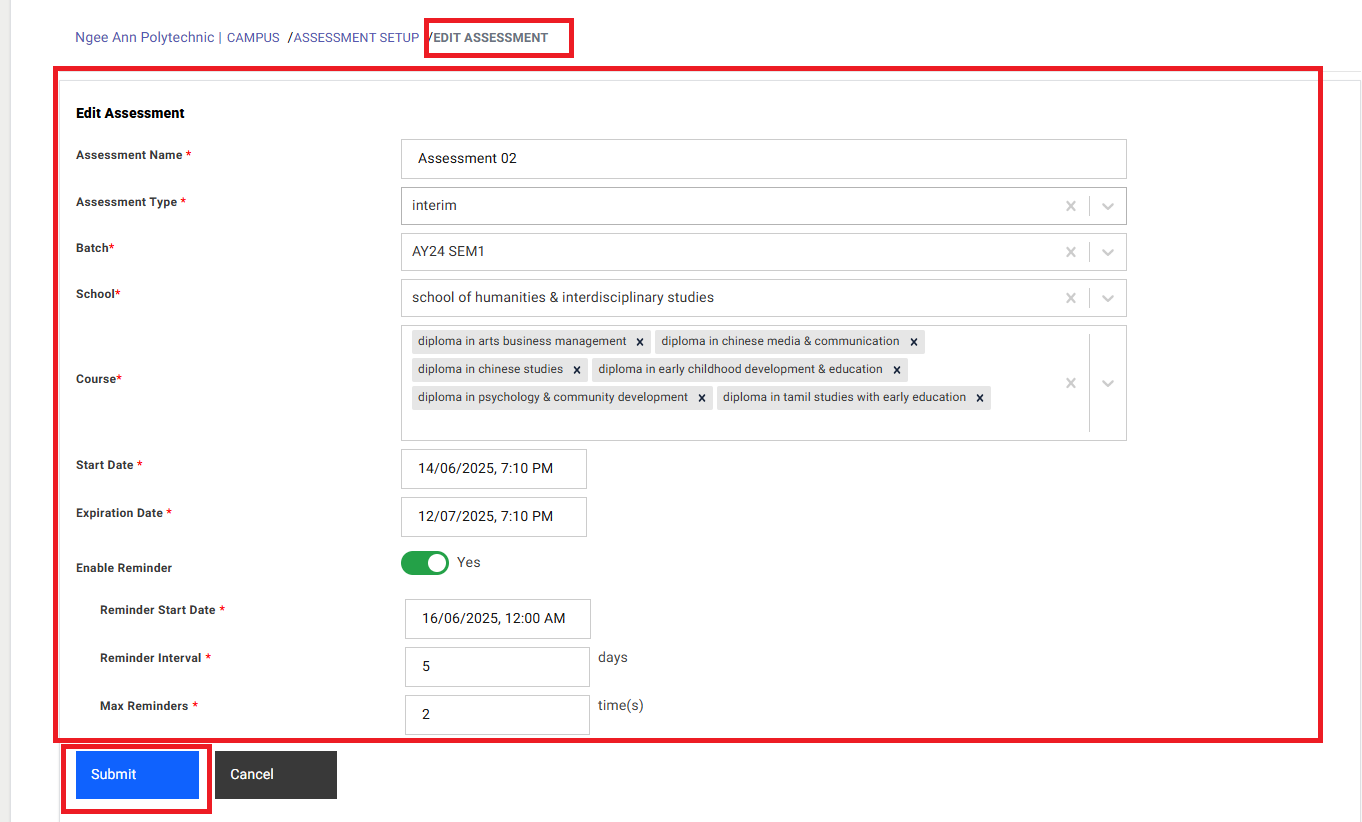
- Make sure navigate to “Create Assessment” page
- Enter assessment details into the fields
- Click on the “Submit” button to create assessment for the students
Note: If the user enables the "Email Reminders" toggle, sets a reminder start date, and specifies a validation period, the corresponding assessment respondents will receive reminders.
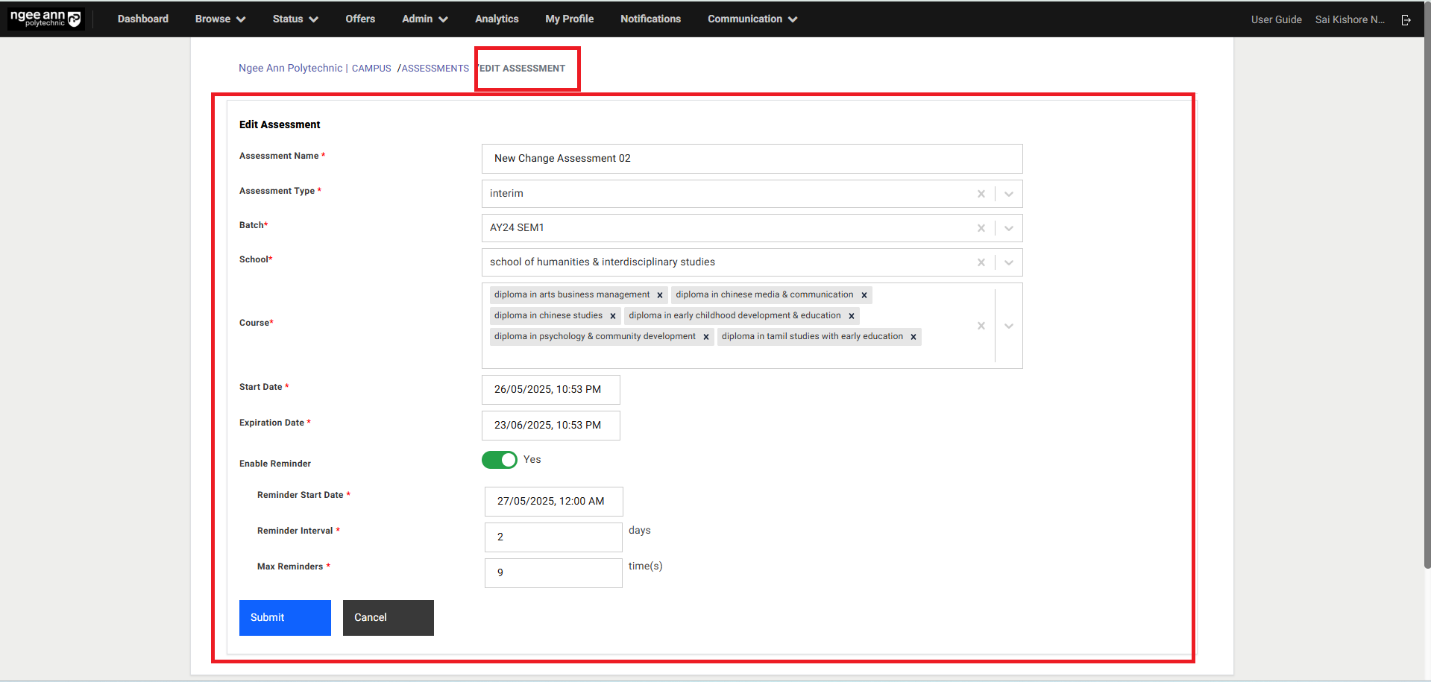
| Component Name | Description |
|---|---|
| Assessment Name | Enter the name of the assessment. |
| Assessment Type | Choose the type of assessment: 1. Interim 2. Final |
| Batch | A dropdown showing a list of active semester batches. Select the appropriate batch. |
| School | Select the school to which the assessment belongs from the list provided. |
| Course | Based on the selected school, a list of its associated courses will be shown. You can remove a selected school by clicking the "X" button. |
| Start Date | Select the assessment's start date and time using the calendar picker. |
| Expiration Date | Select the assessment's end date and time using the calendar picker. |
| Enable Reminders | If enabled, respondents will receive email reminders. This includes: • Reminder Start Date – When reminders begin. • Validation Period – Set in the "Reminder interval & Max Reminders" field. |
Step 3:
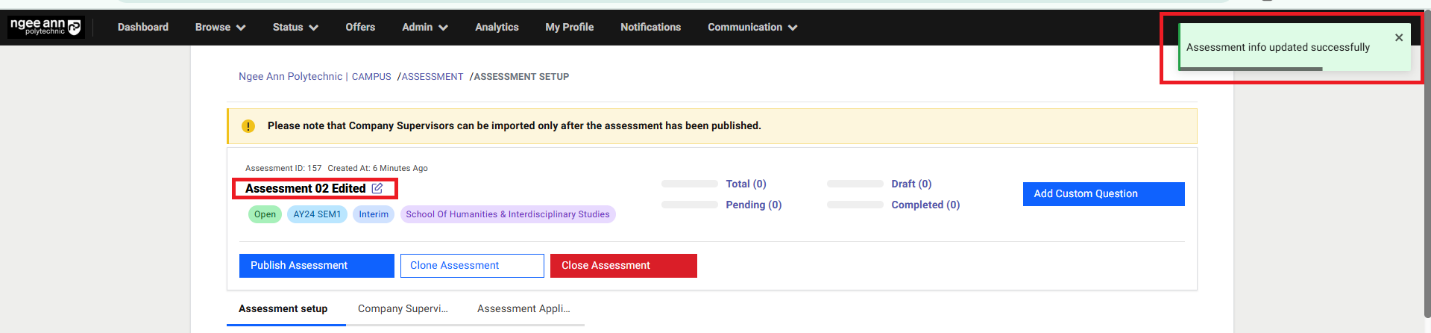
- Once an assessment is successfully created, a confirmation or success message should be displayed to the user.
- All created assessment details should be visible in a structured table.
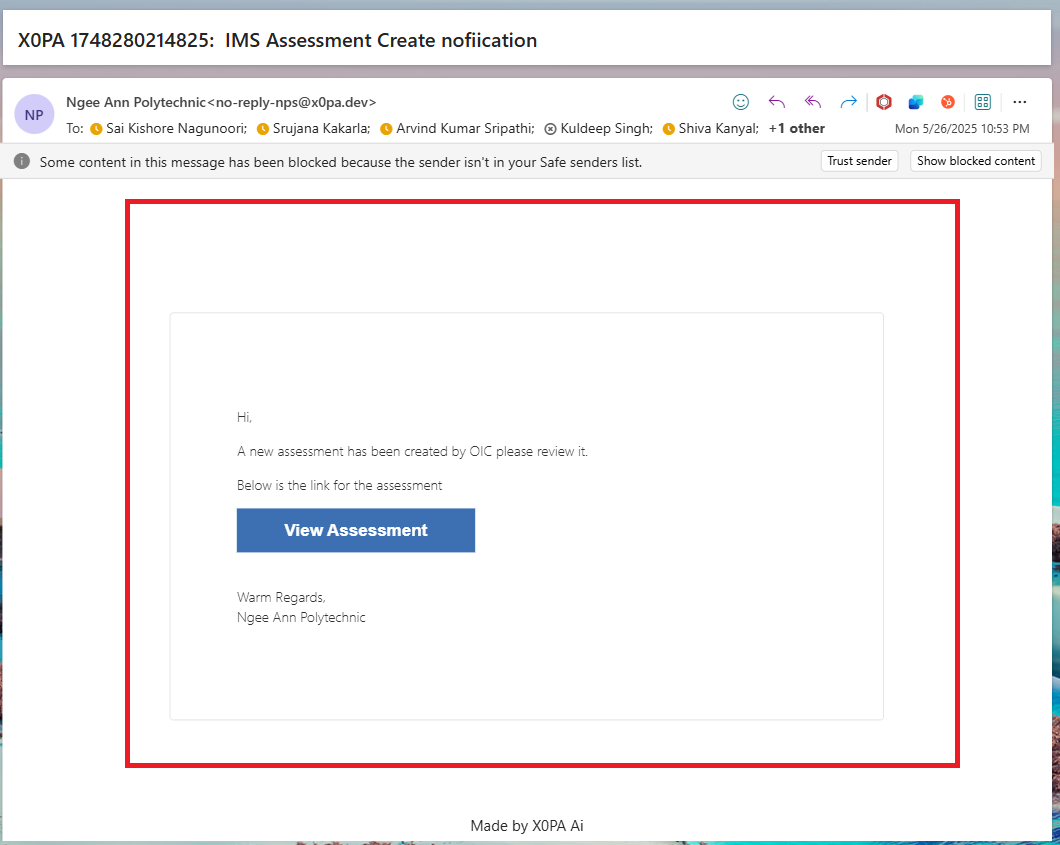
- Upon successful assessment creation, the system should send email notifications to users with the following roles:
- Internship Manager
- Internship Coordinator
Note: These users must be tagged to the respective School and Diploma Course selected during the assessment creation.
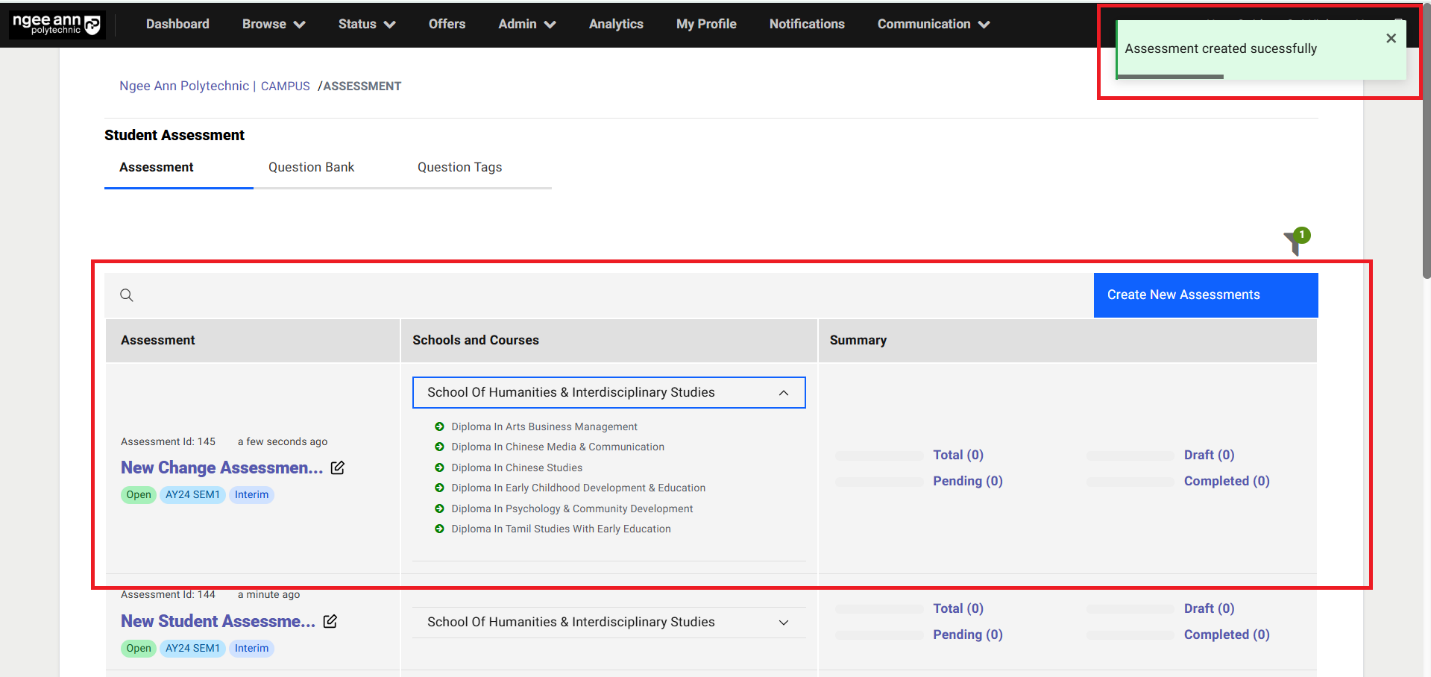
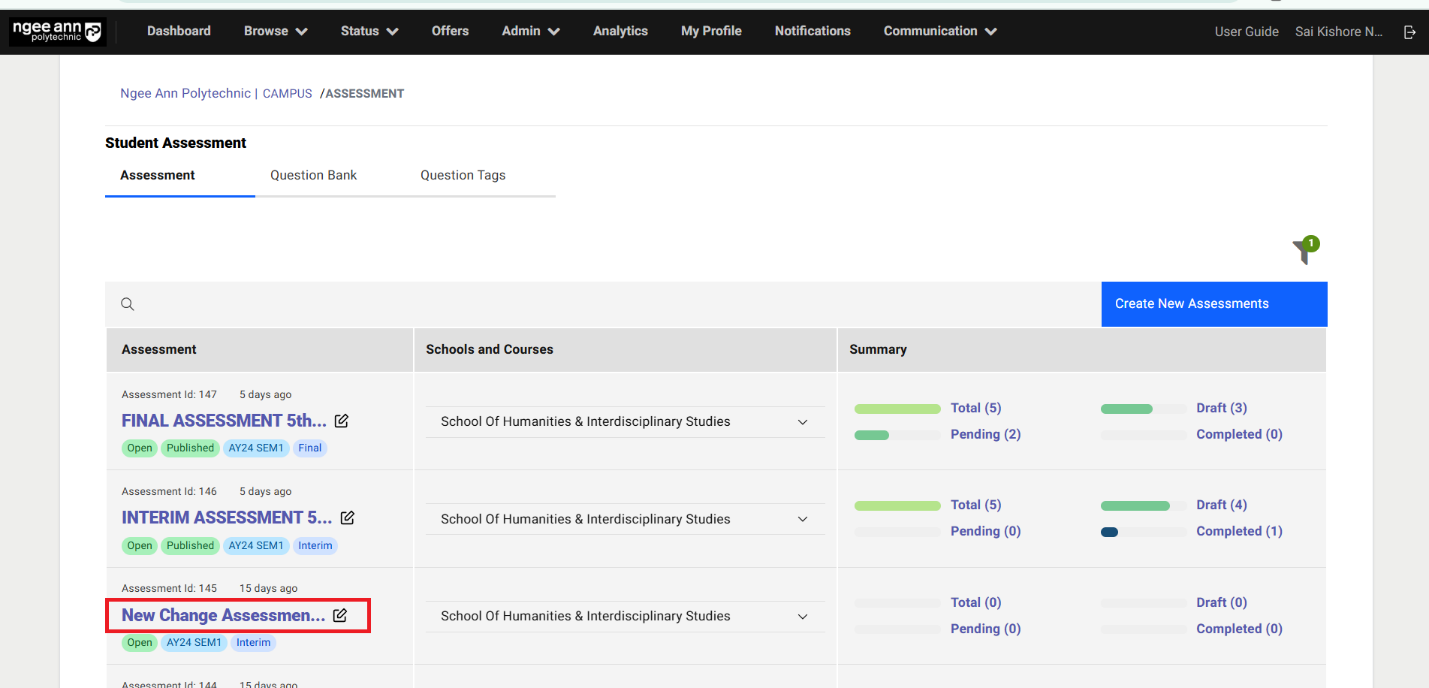
Assessment Dashboard:
Step 1:
- Click on the “Assessment” Section Tab
- See the successfully created assessments in the dashboard table.
Note: Clicking any status link will redirect you to the "Company Supervisors" tab, where the table automatically filters to show only company supervisors matching the selected status.
| Column Name | Description |
|---|---|
| Assessment | Displays the following details: • Assessment ID • Creation Timestamp • Assessment Name – shown as a clickable text button • Edit Icon – to modify the assessment • Open/Closed Status Tag – indicates current assessment status • Published Tag – displayed only if the assessment has been published • Semester Batch Tag – shows associated batch • Assessment Type Tag – indicates whether the assessment is Interim or Final |
| School and Courses | Displays the school and diploma courses associated with the assessment. |
| Summary | Shows company supervisors status counts as clickable link buttons. Each reflects real-time updates based on participant activity: • Total – Total number of respondents added to the survey • Draft – Respondents who have been added but not yet sent invitations • Awaiting Response – Invitations sent, but no response yet • In Progress – Respondents who have started but not finished the survey • Completed – Respondents who have fully completed the survey |
Edit Assessment (Before Published):
Step 1:
- Click on the “Edit (Pencil)” icon beside assessment name in the table
- Make sure navigate to “Edit Assessment” page.

Step 2:
- Make sure saved assessment details persist into the fields
- Edit/Update assessment details from the table
- Click on the “Submit” button to save the updated assessment and updated assessment details will be shown in the table.
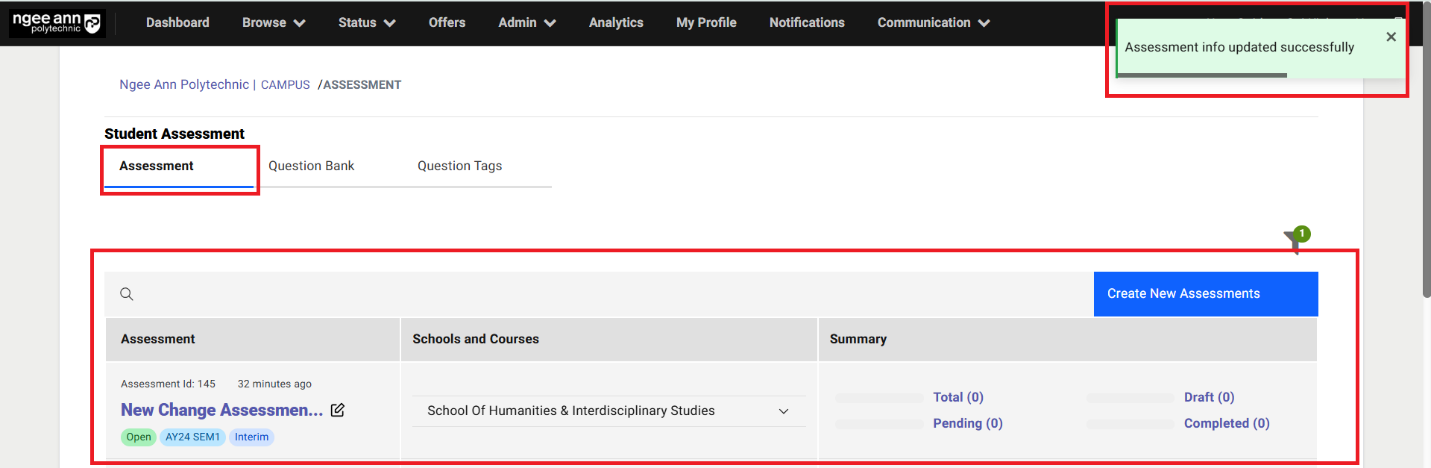
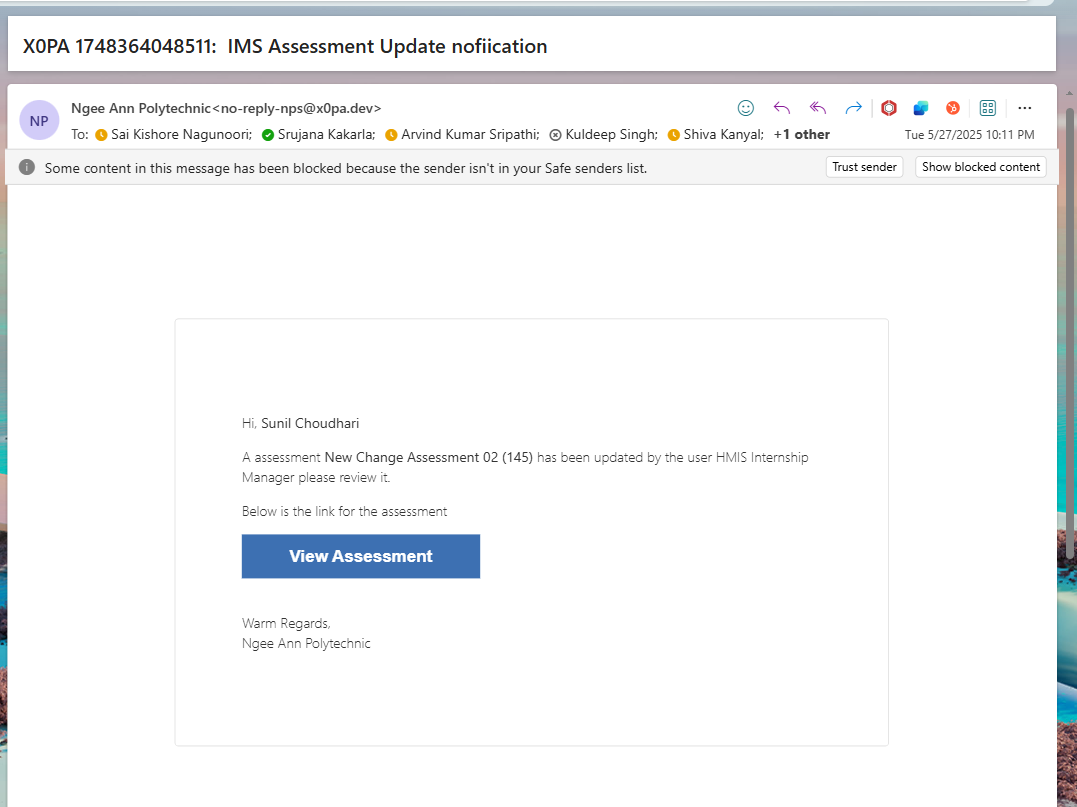
Step 3:
- Ensure that a notification email is sent to the system owner whenever a user with the Internship Manager or Internship Coordinator role edits an assessment they are tagged in.
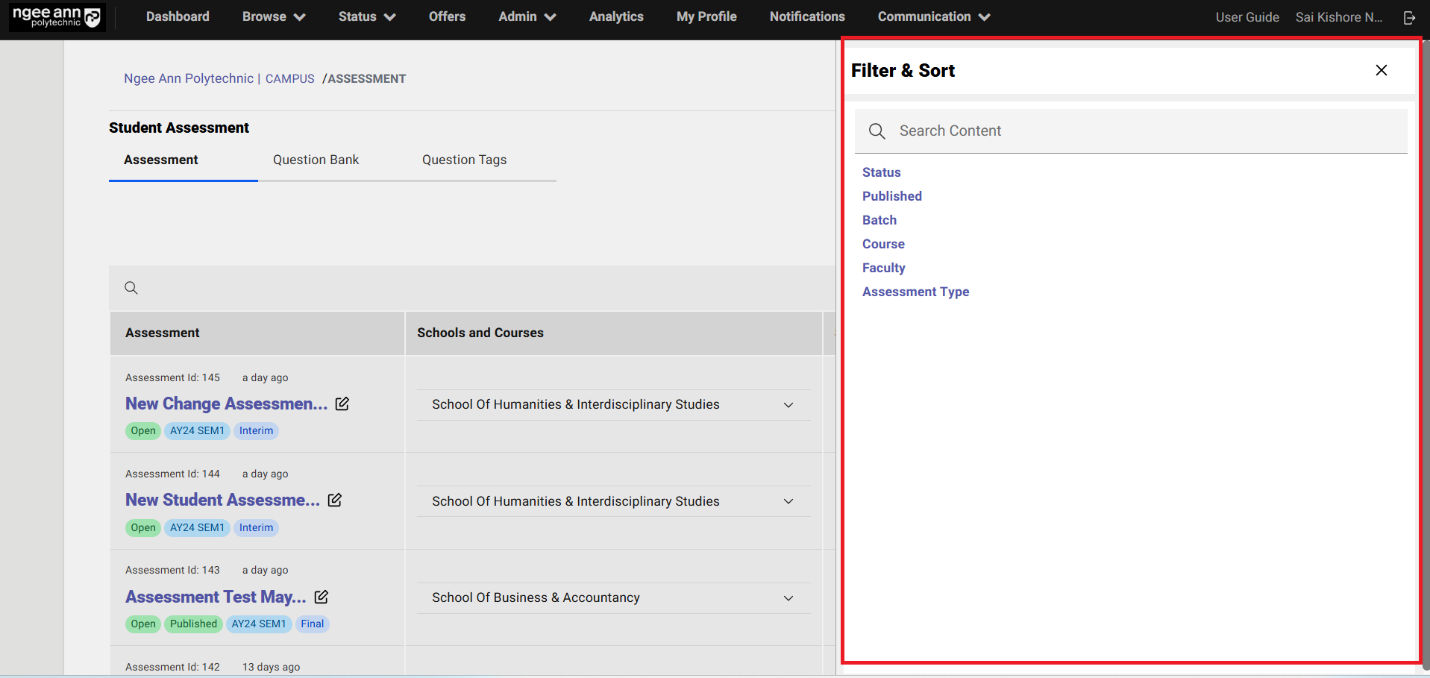
Filters (Assessment Page):
- Click the “Filter” button located above the table on the “Assessment” page.
- Ensure the “Filter & Sort” popup opens.
- Select and apply the desired filters from the popup.
- Verify that the table updates accordingly, displaying data based on the applied filters.
Note: By default, the “Status” filter is set to “Open.”
Question Bank Section Tab:
- Click on the “Question Bank” section tab from “Assessment” page
- Make sure “Questions” table will be shown
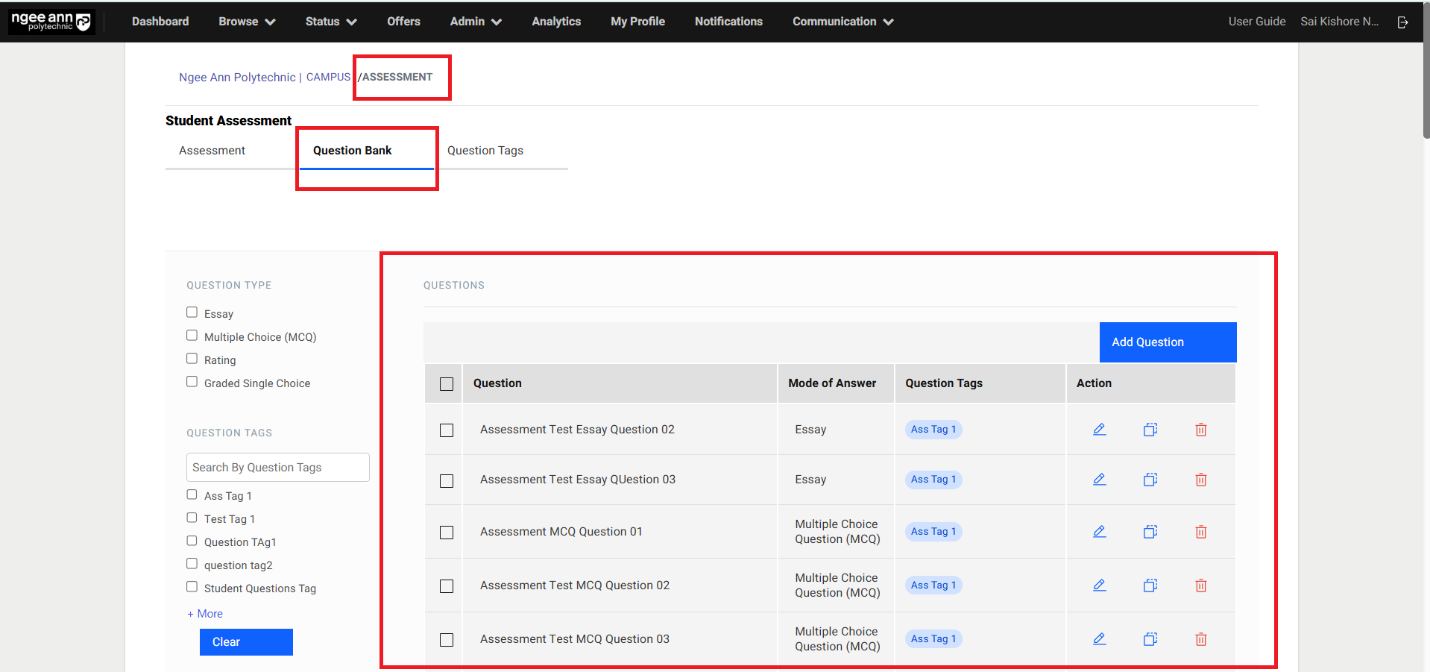
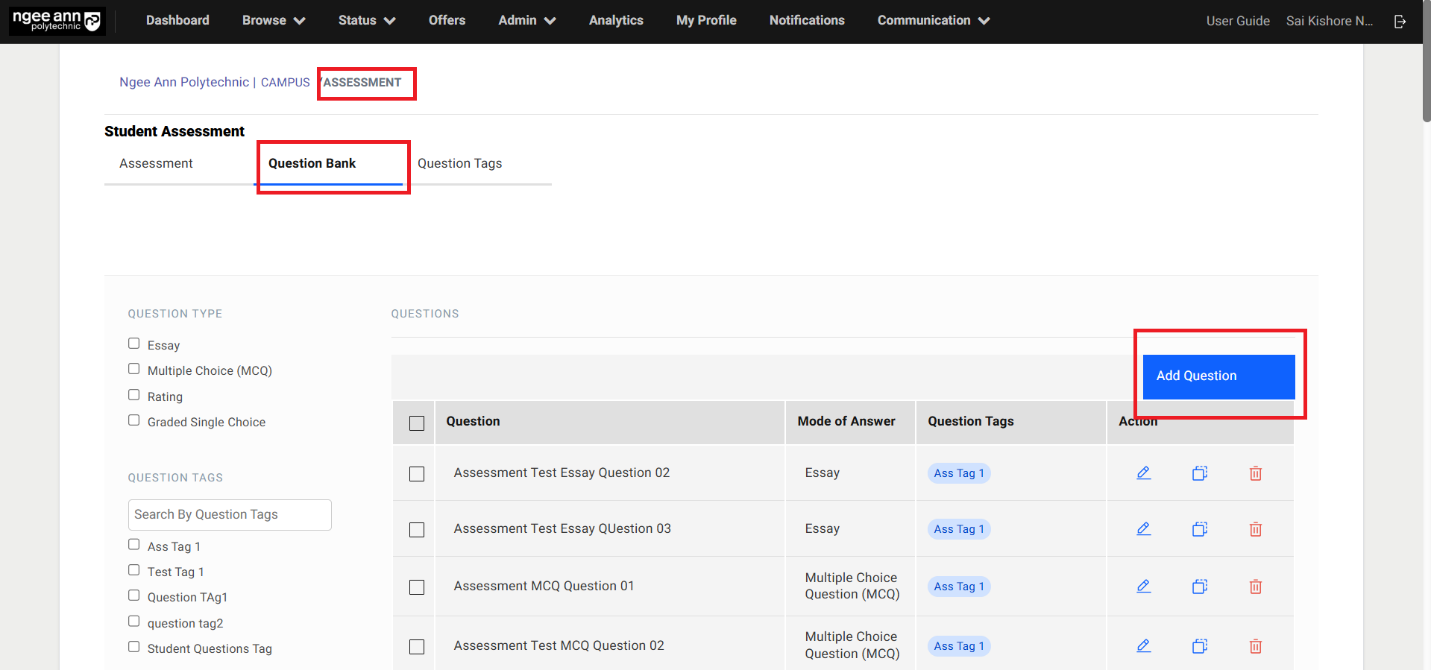
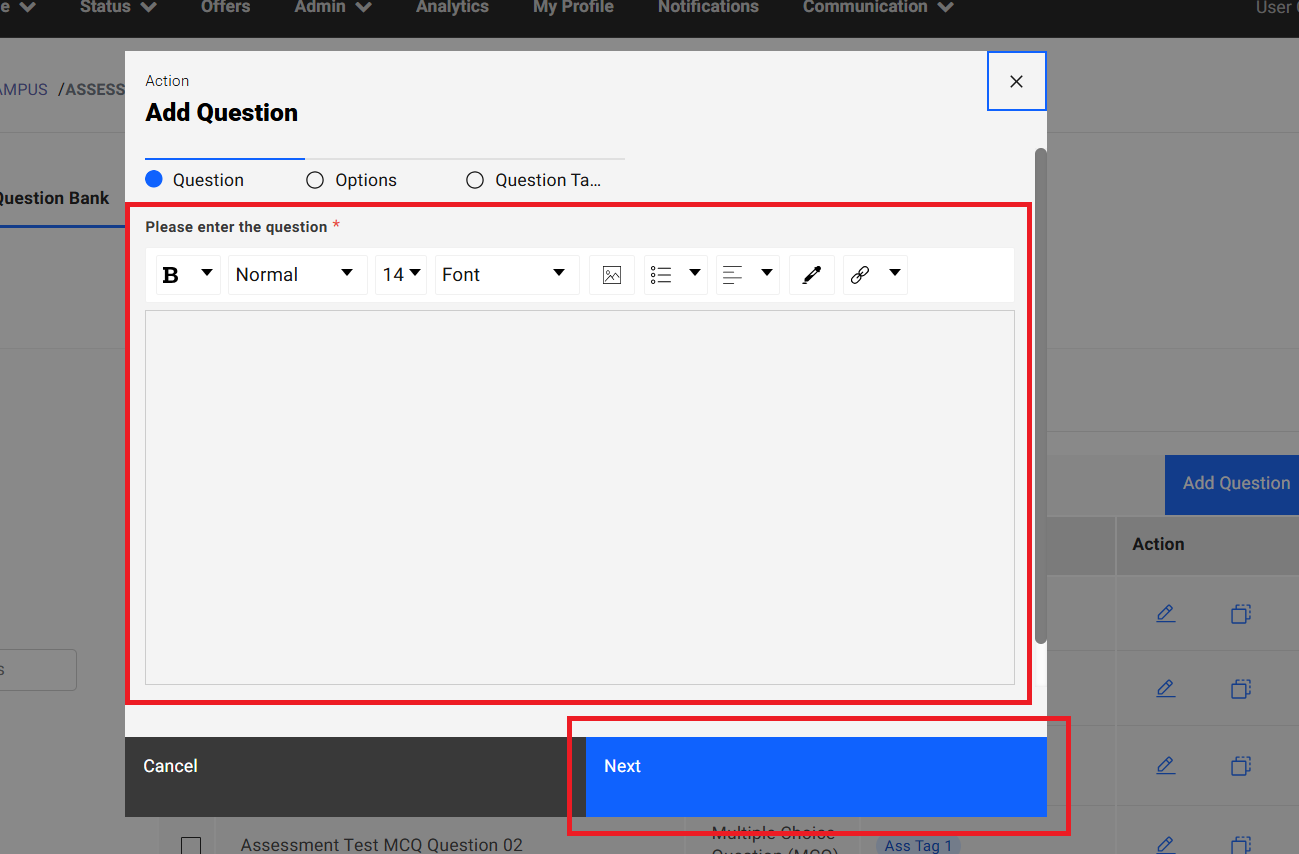
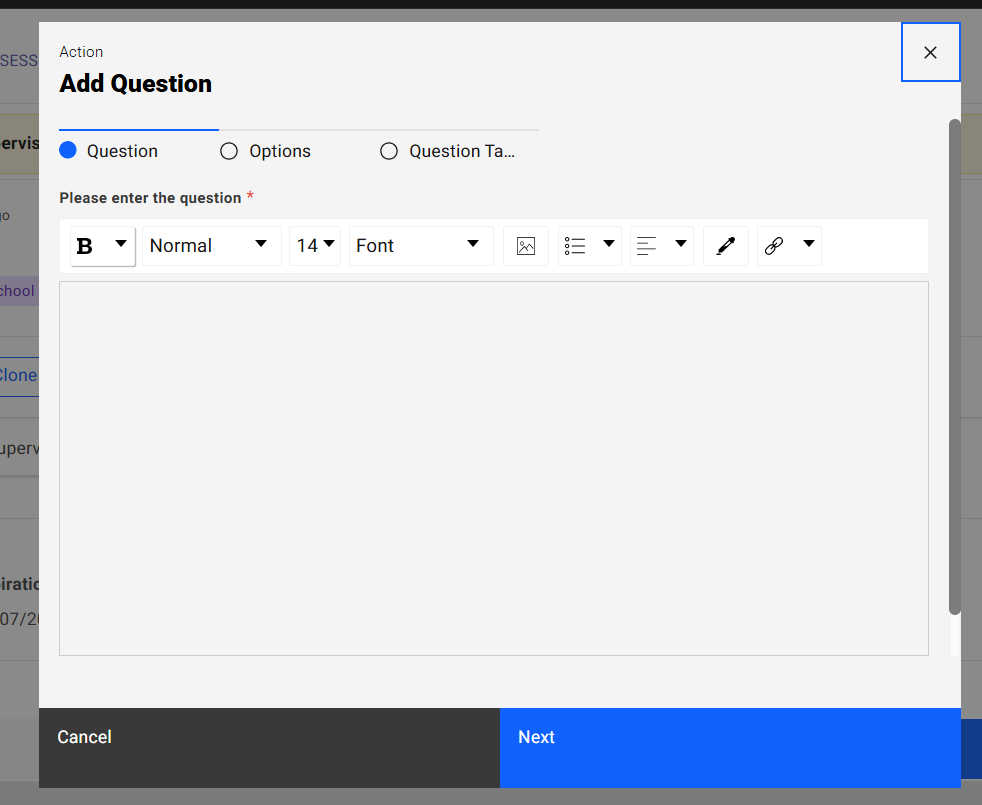
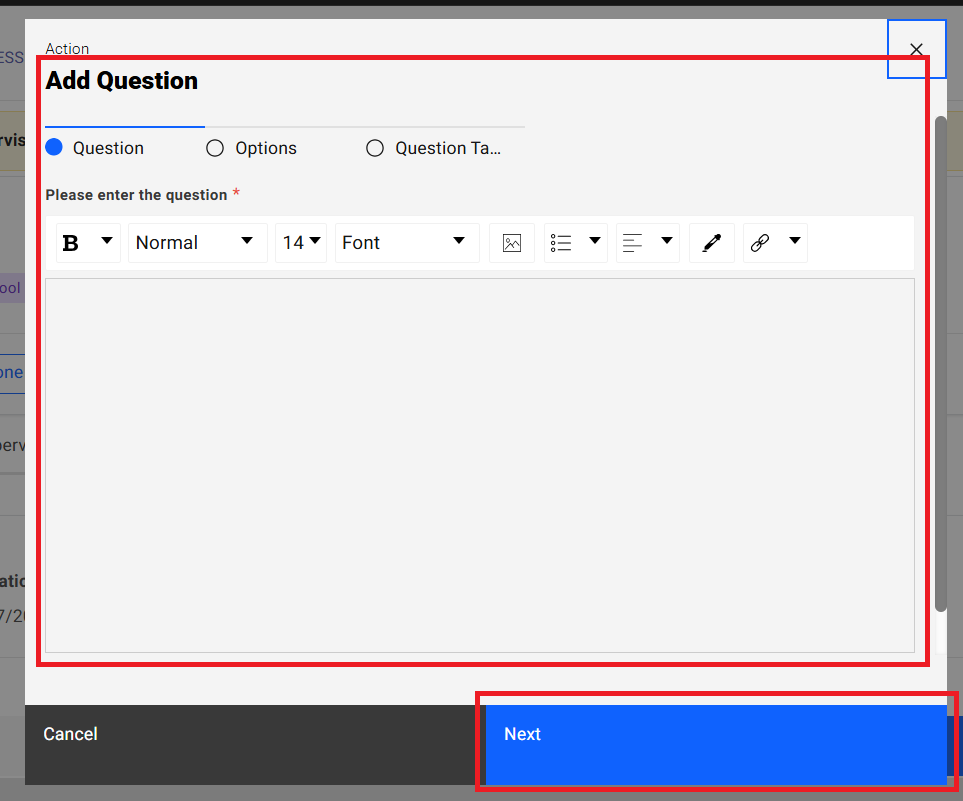
Add Question:
- Click on the “Add Question” button above the table.
- “Add Question” popup get open
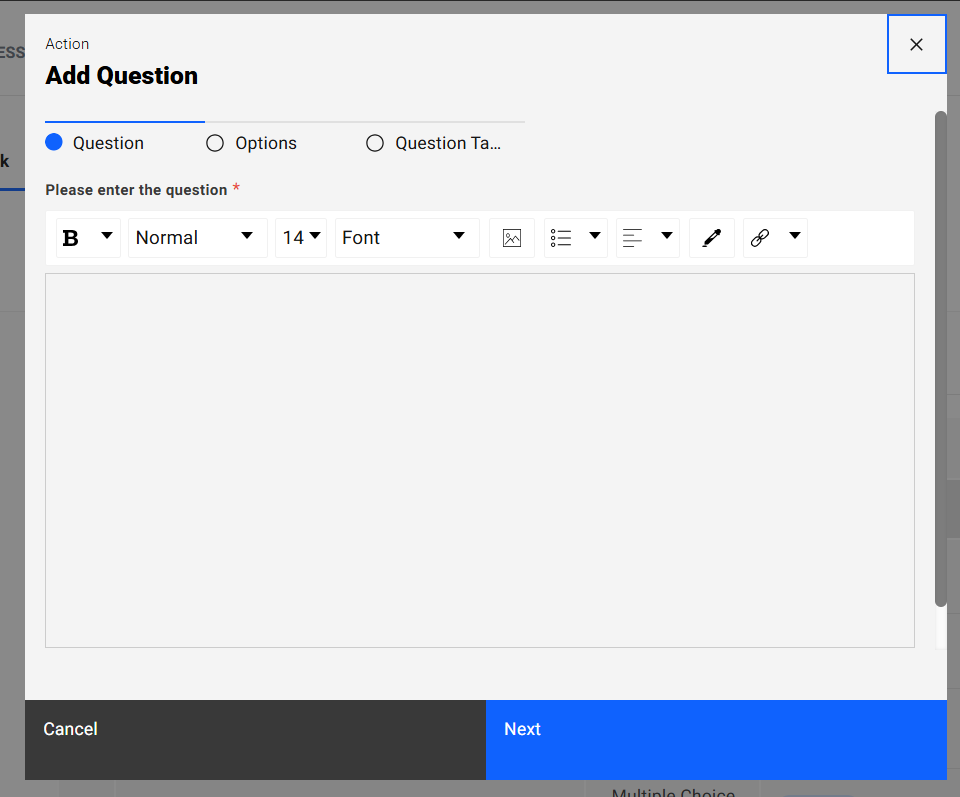
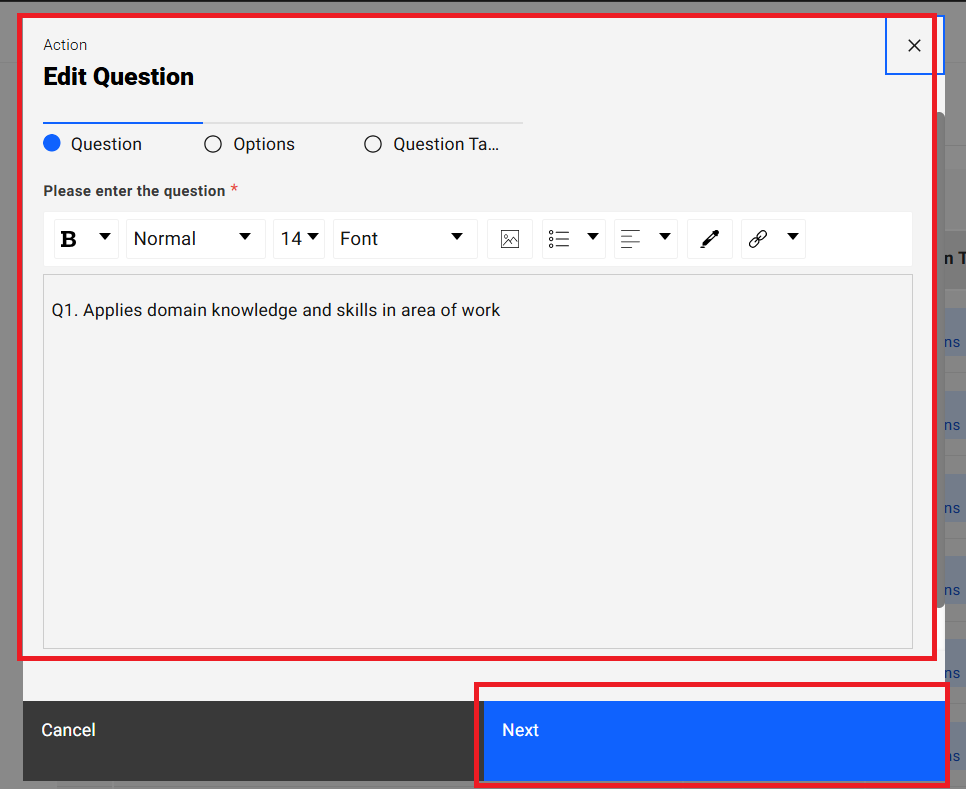
Step 2:
- Enter question name into the “Please enter the question” text editor field under “Question” section tab in the popup
- Click on the “Next” button
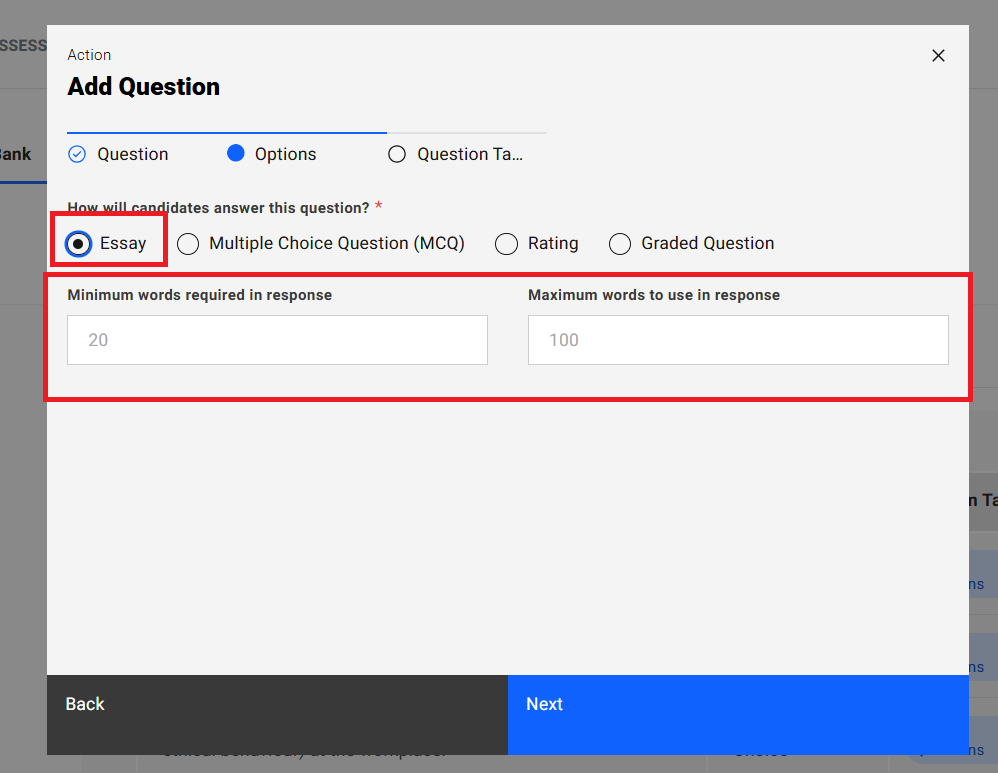
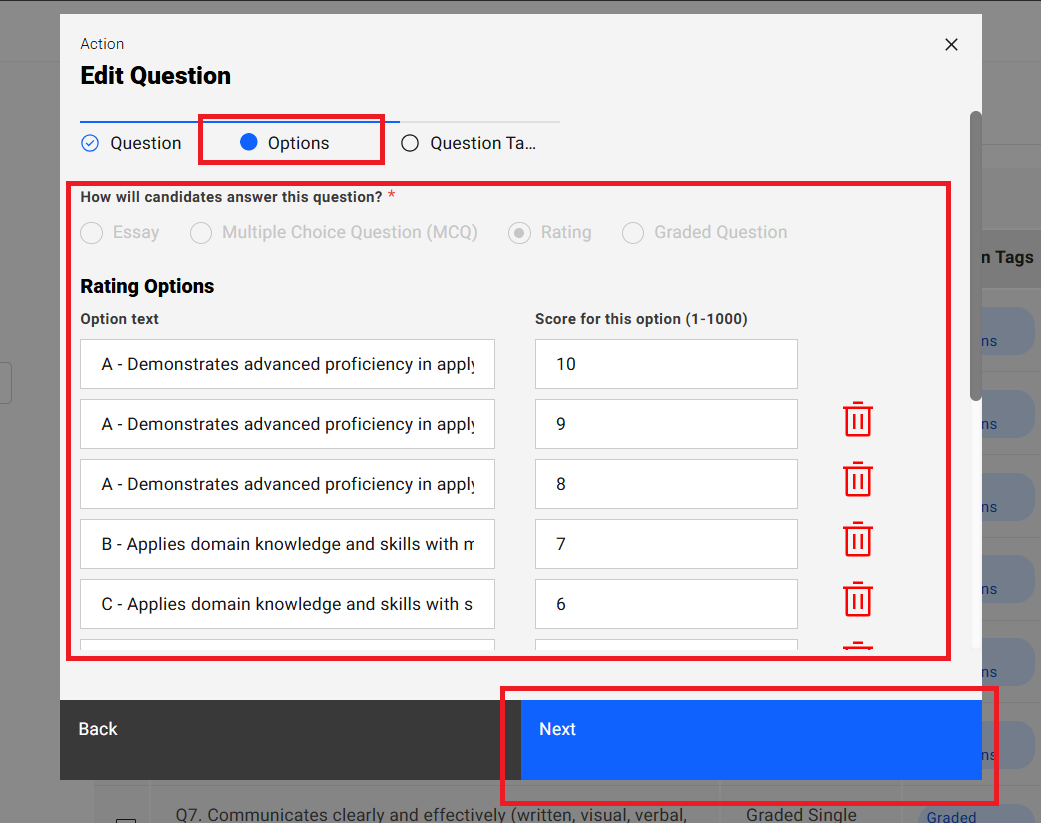
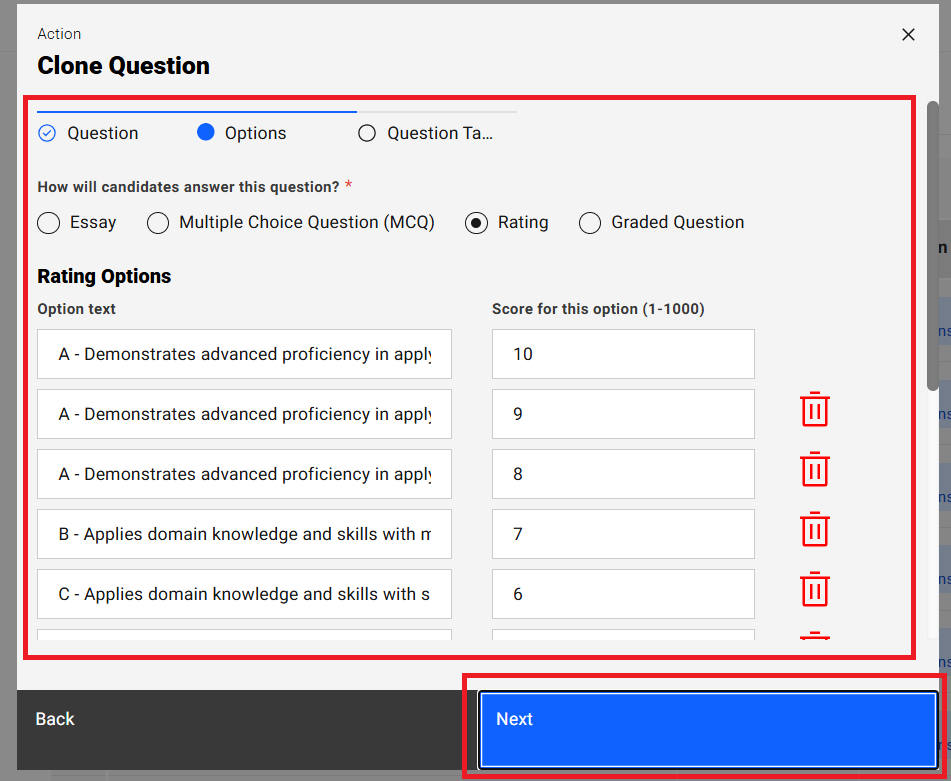
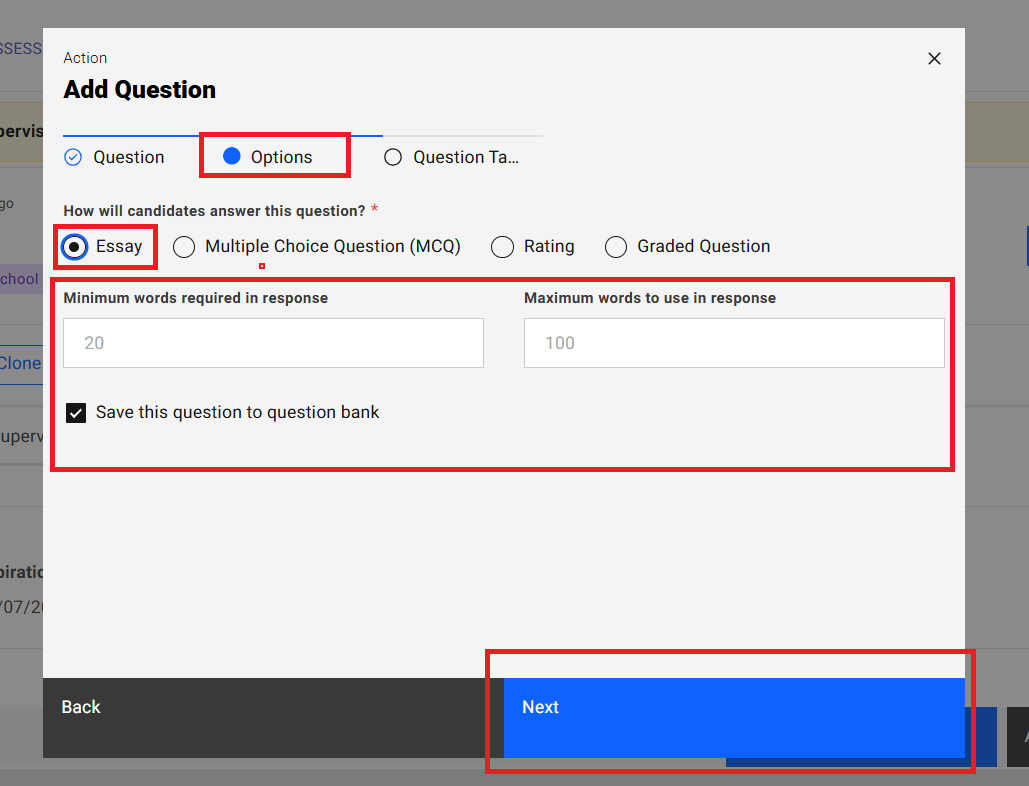
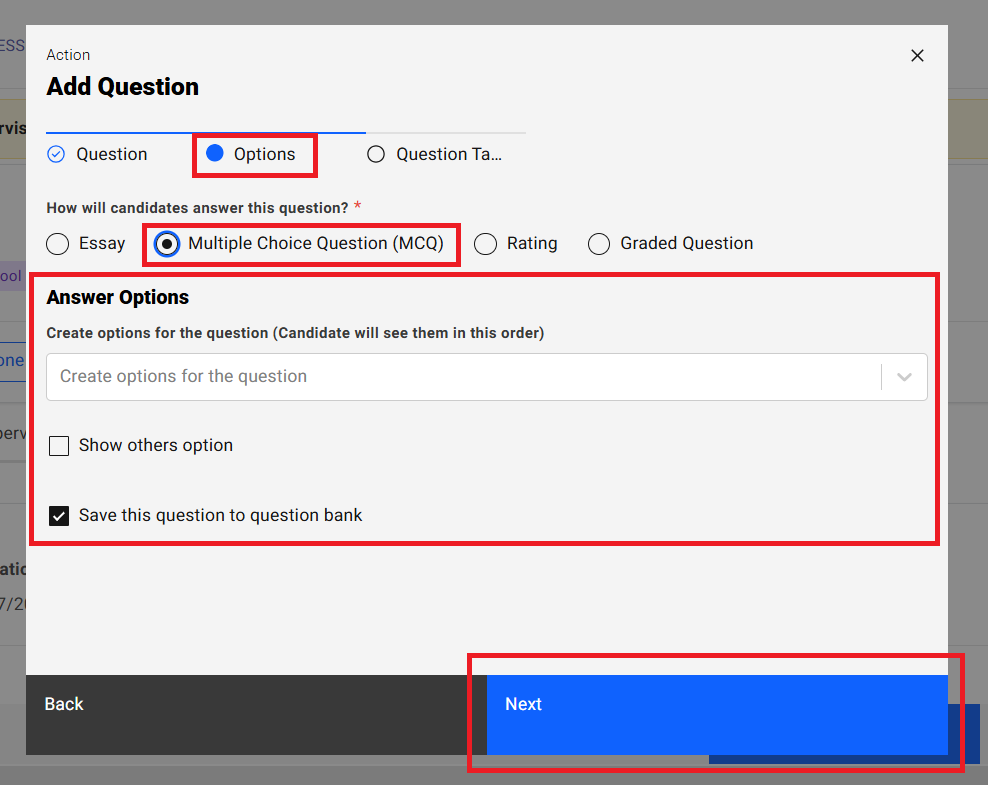
Step 3:
- Navigate to “Options” section tab in the “Add Question” popup
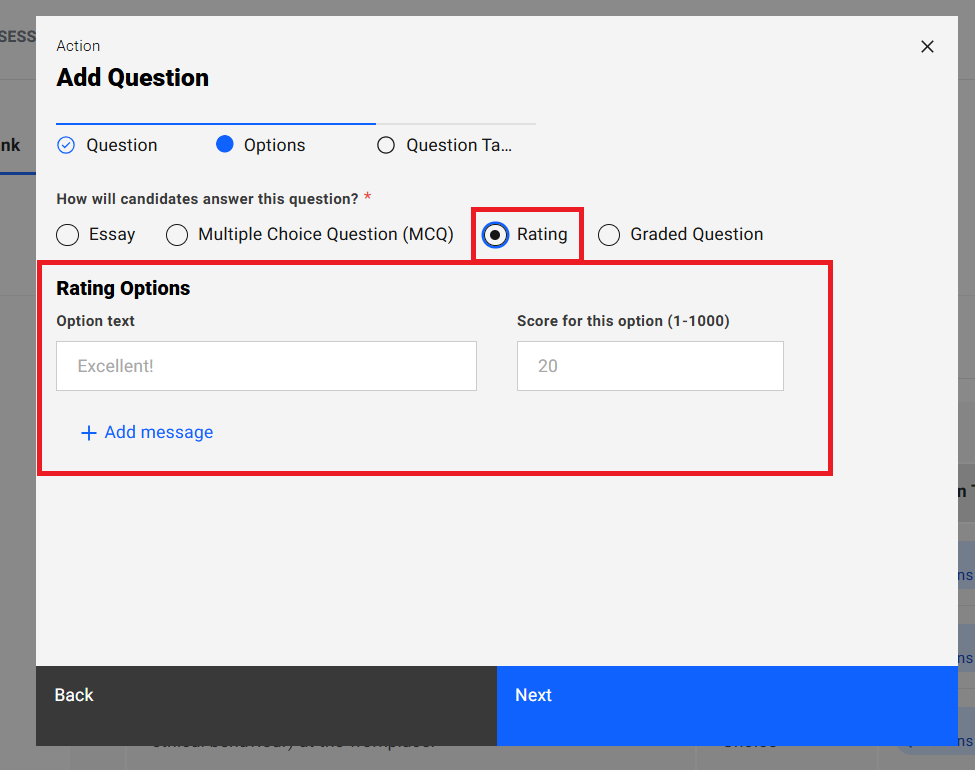
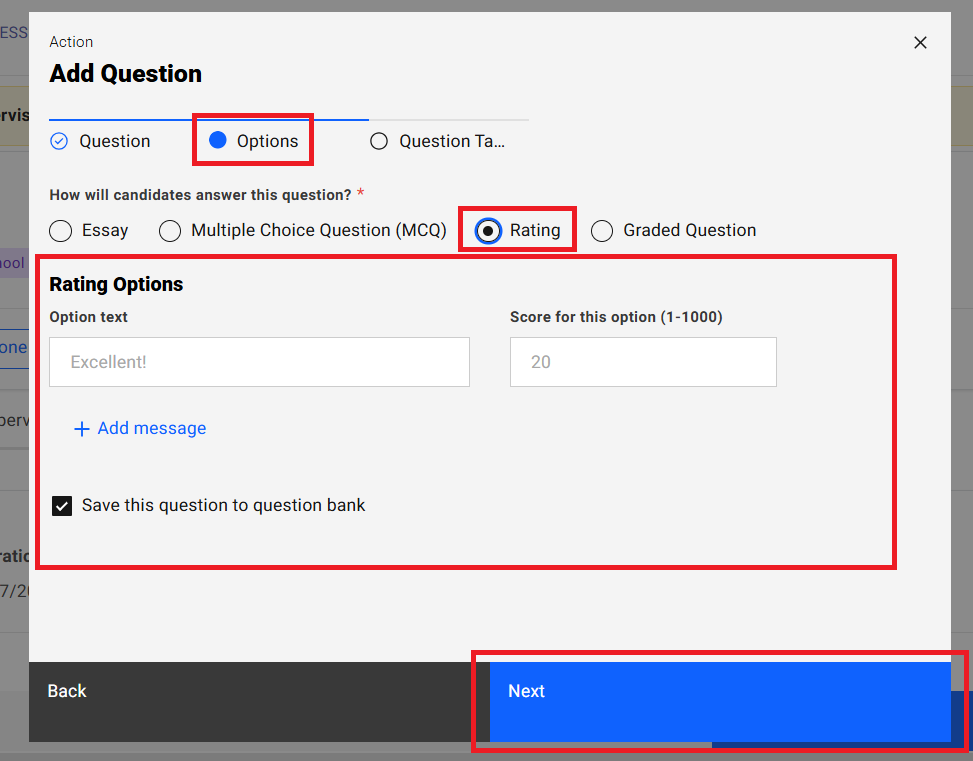
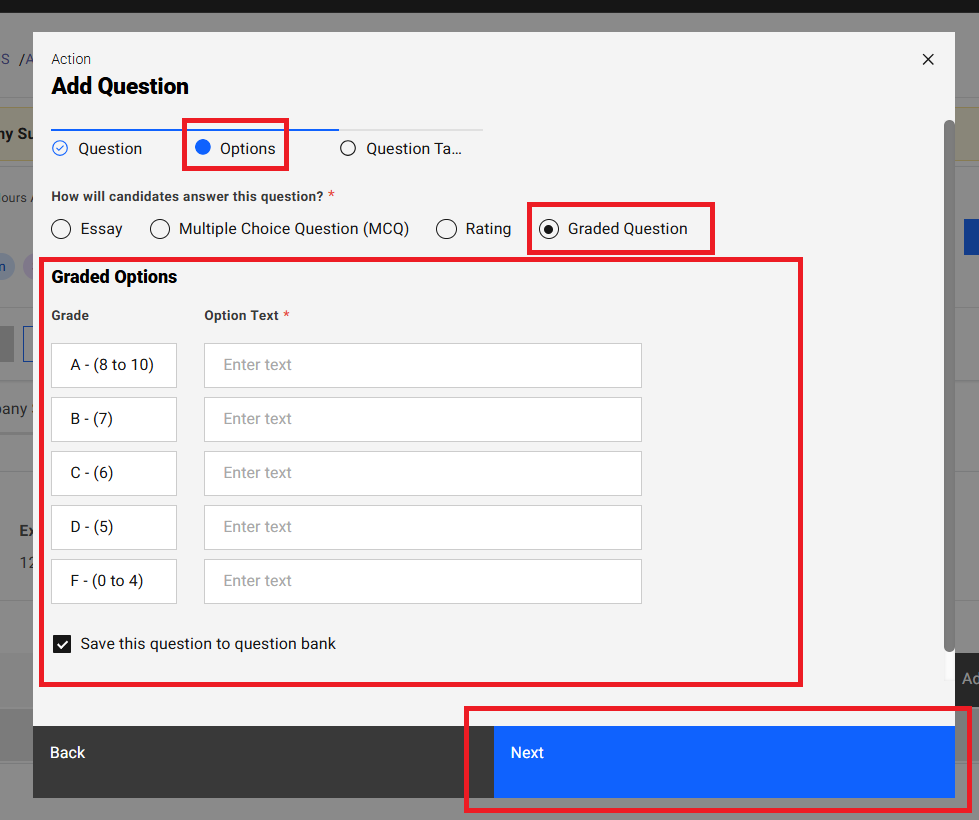
- Select answer type for respective question (Essay/Multiple Choice Question (MCQ)/Rating/Graded Question)
- Enter options data for the selected answer type
- Click on the “Next” button
- Click on the “Back” button to navigate back to “Question” section tab in the “Add Question” popup.
Note:
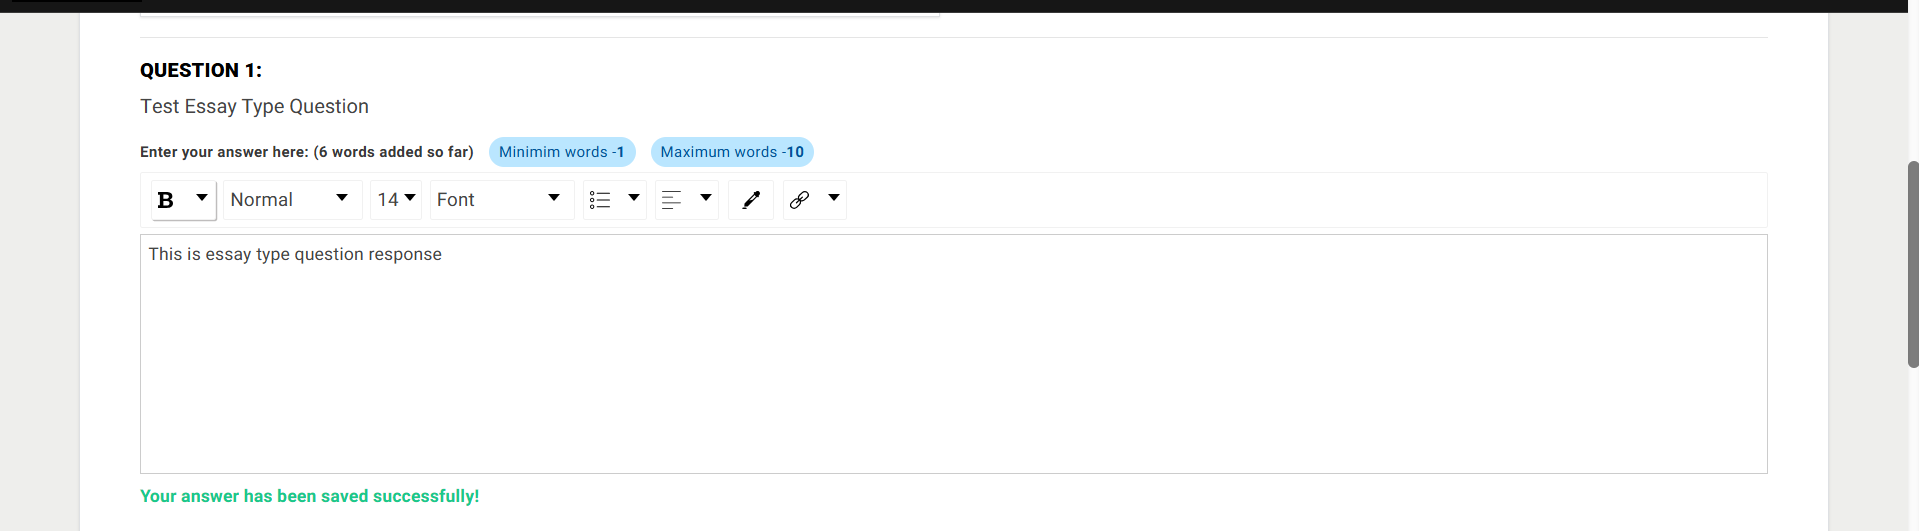
1. Essay Question
- When an Essay question is added to an assessment, company supervisors will be provided with a text box to enter their response.
- The response must comply with the specified word limits:
- Minimum word limit: Ensures the response meets a required length.
- Maximum word limit: Prevents the response from exceeding the allowed length.
2. Multiple Choice Question (MCQ)
- For MCQ questions, company supervisors must select one option from the available choices.
- If the "Show Others Option" setting is enabled:
- Selecting "Others" will display an additional text box where the supervisor can specify their answer.
3. Rating Question
- A Rating question requires company supervisors to select one value from a predefined scale.
- The selected rating’s score will be recorded and made available to institution administrators for evaluation purposes.
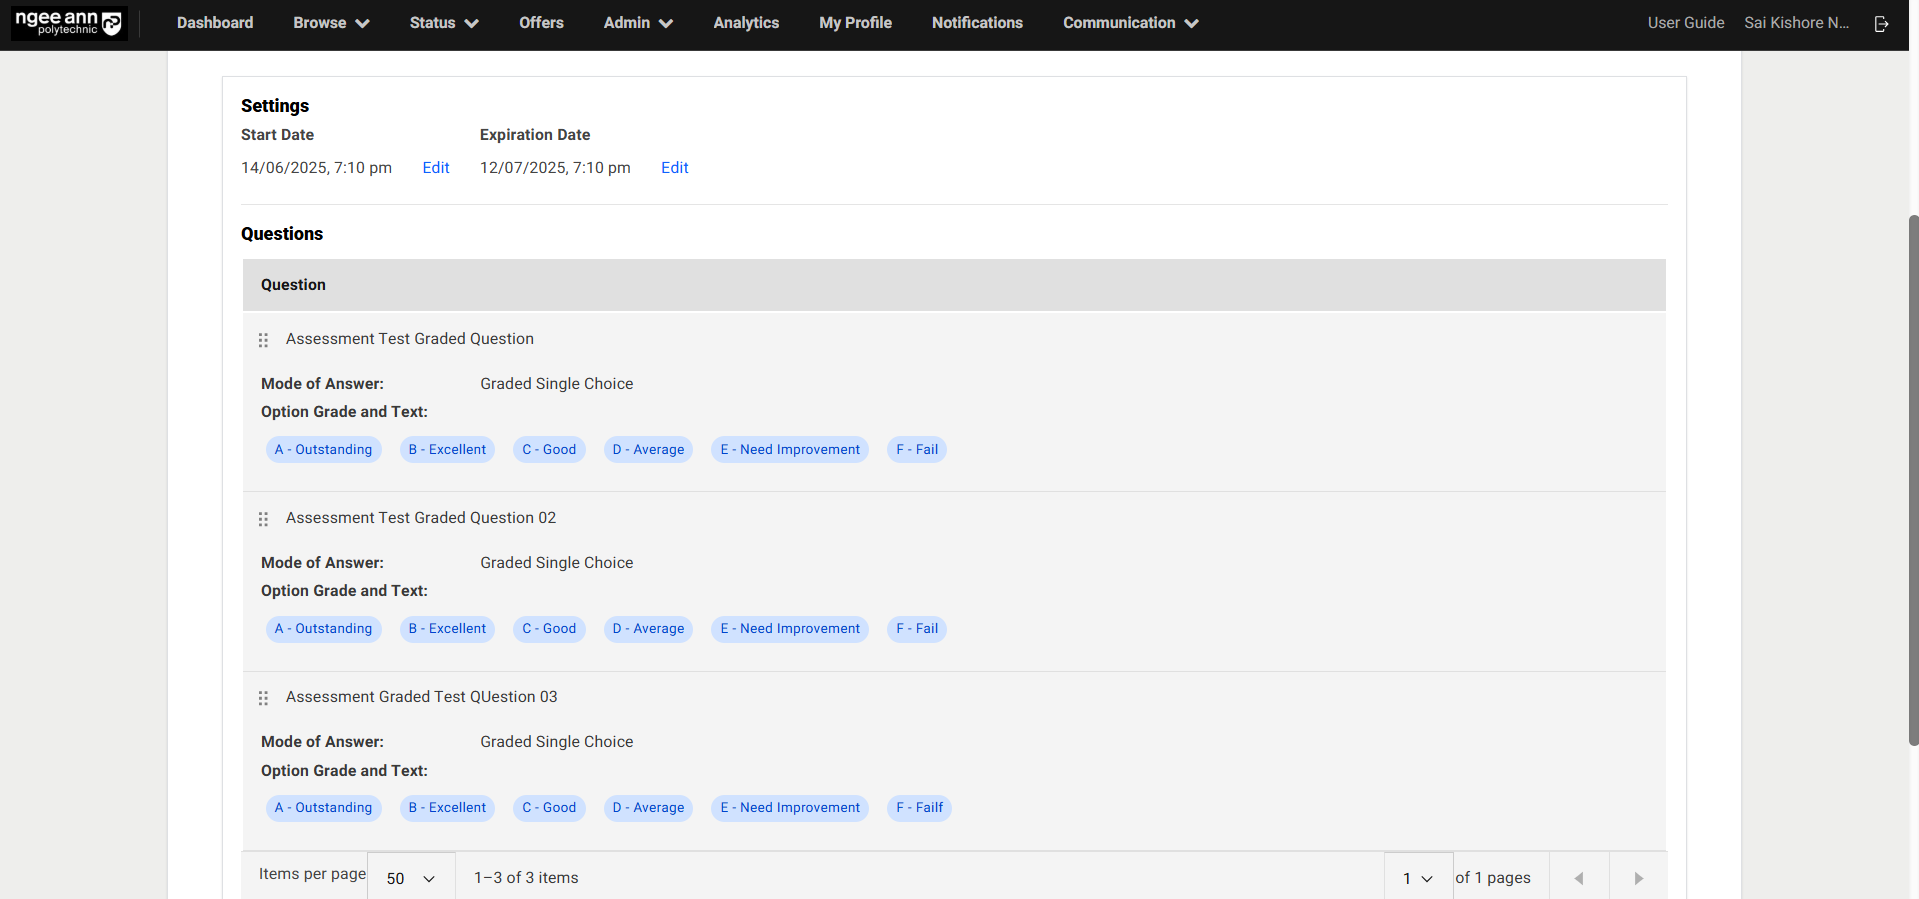
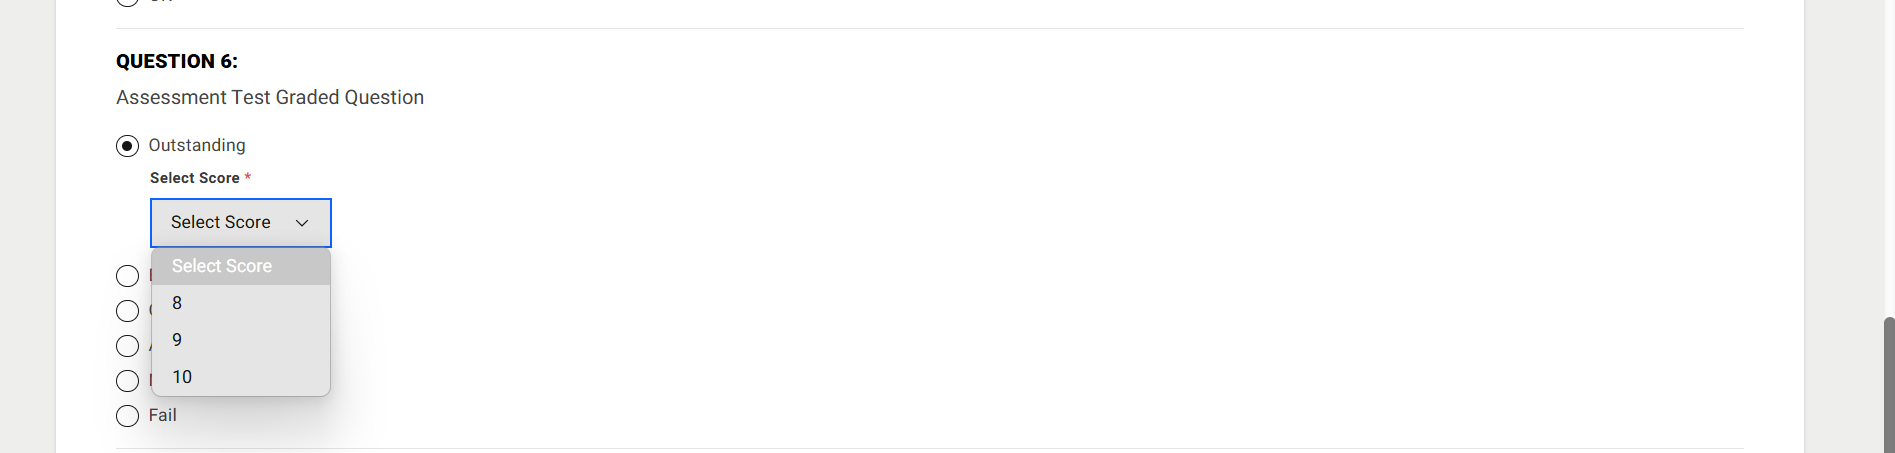
4. Graded Question
- Each Graded question includes options tagged with predefined grades: A, B, C, D, and F.
- Company supervisors must select a grade from a dropdown menu, and the associated grade score will be recorded.
- The grading scale is as follows:
- A: Score range of 8 to 10
- B: 7
- C: 6
- D: 5
- F: Score range of 0 to 4


Step 4:
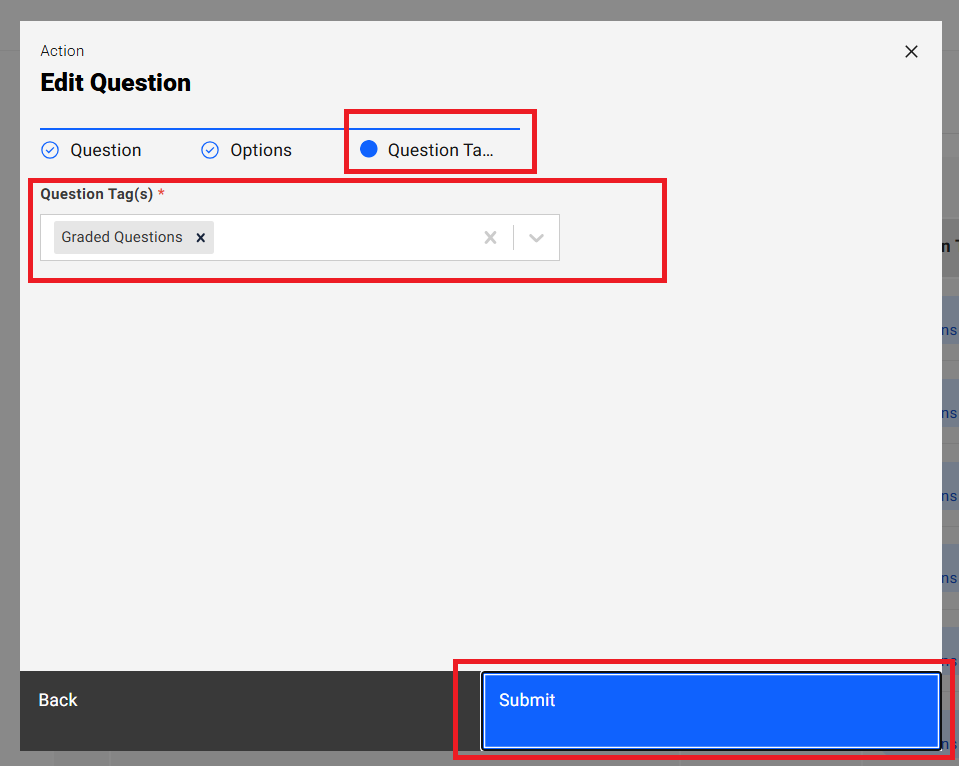
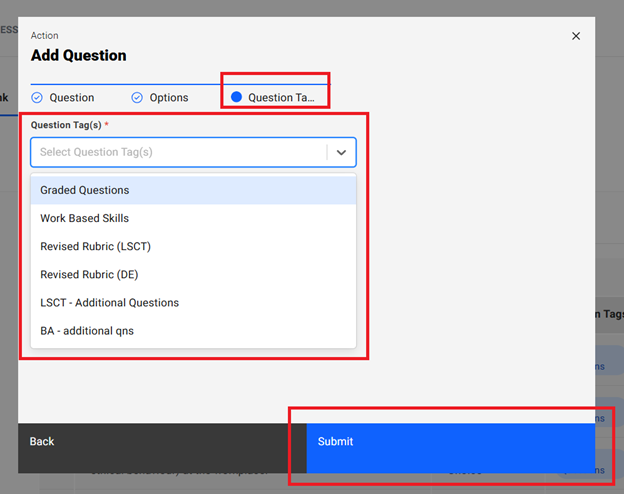
- Navigate to “Question Tags” section tab in the “Add Question” popup
- Click on the “Question Tag(s)” dropdown field
- Select pre-saved list of tags as options from the dropdown field
- Selected tag shown in the dropdown field
- Click on the “Submit” button
- Saved question will be shown in the table and successes message will be shown
- Click on the “Back” button navigate to “Options” section tab in the popup

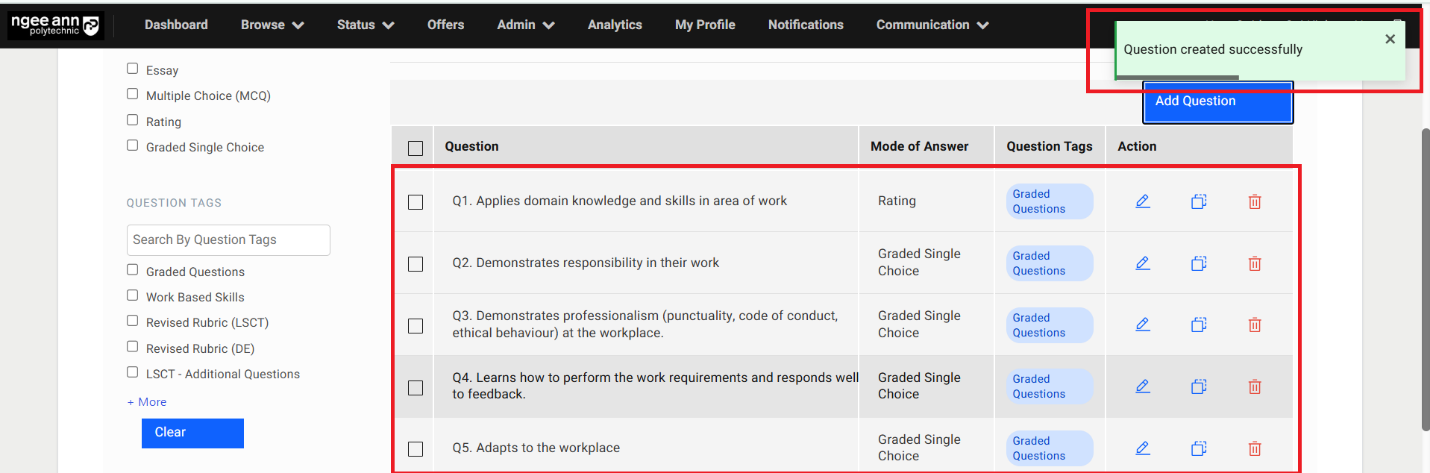
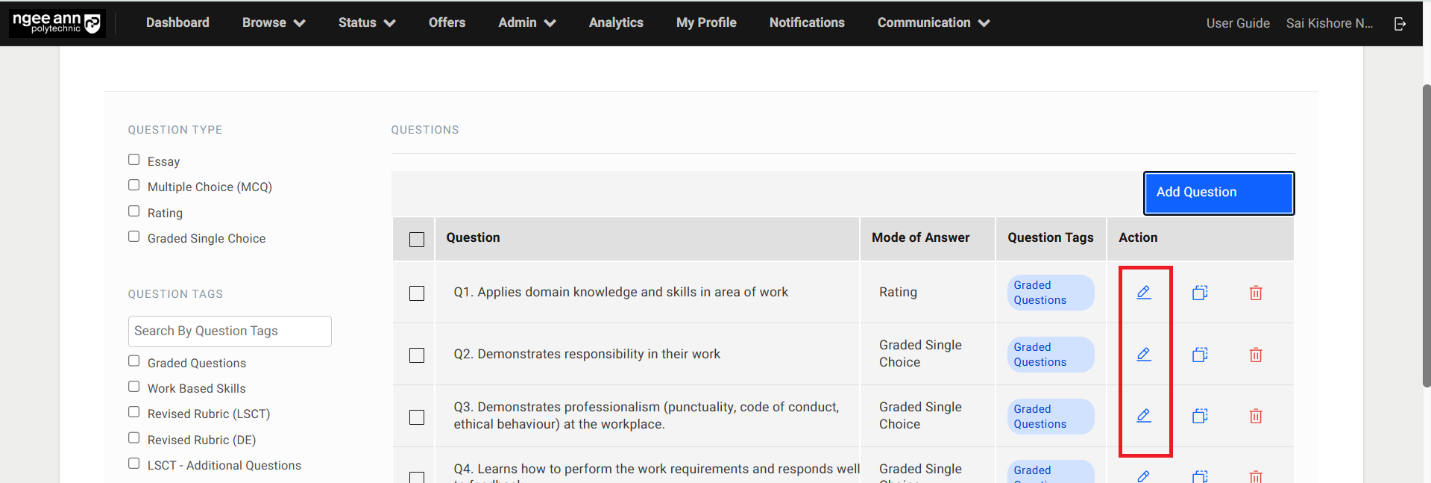
Edit Question:
Step 1:
- Click on the Edit (Pencil) icon under “Action” column in the table
- “Edit Question” popup get open with previous saved question details persisted into the fields in the popup.
- Update the details in the “Edit Question” popup
- Click on the “Submit” button to save the changes
- Make sure updated changes will get reflected in the table for respective question
Note: Make sure while edit the question user will not able to option category for respective question.
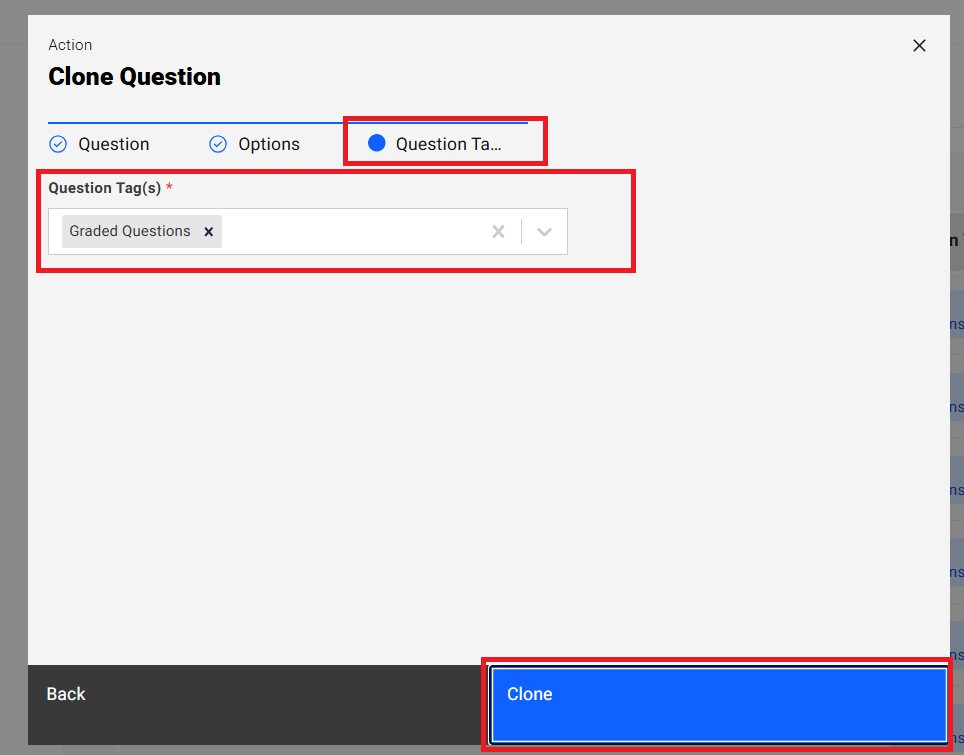
Clone Question:
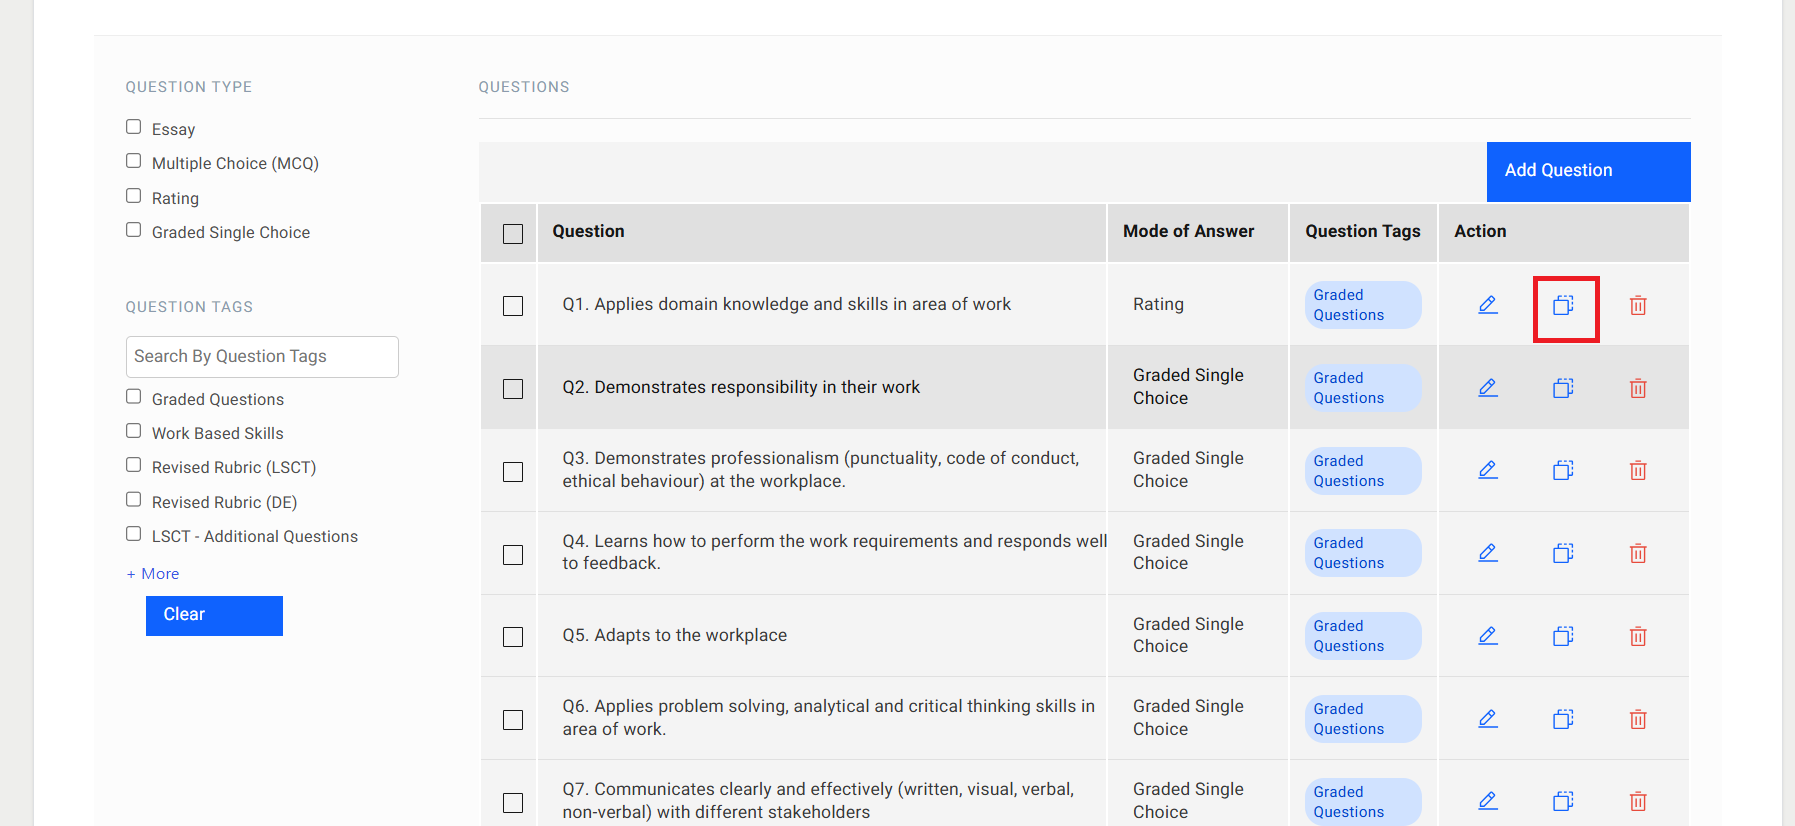
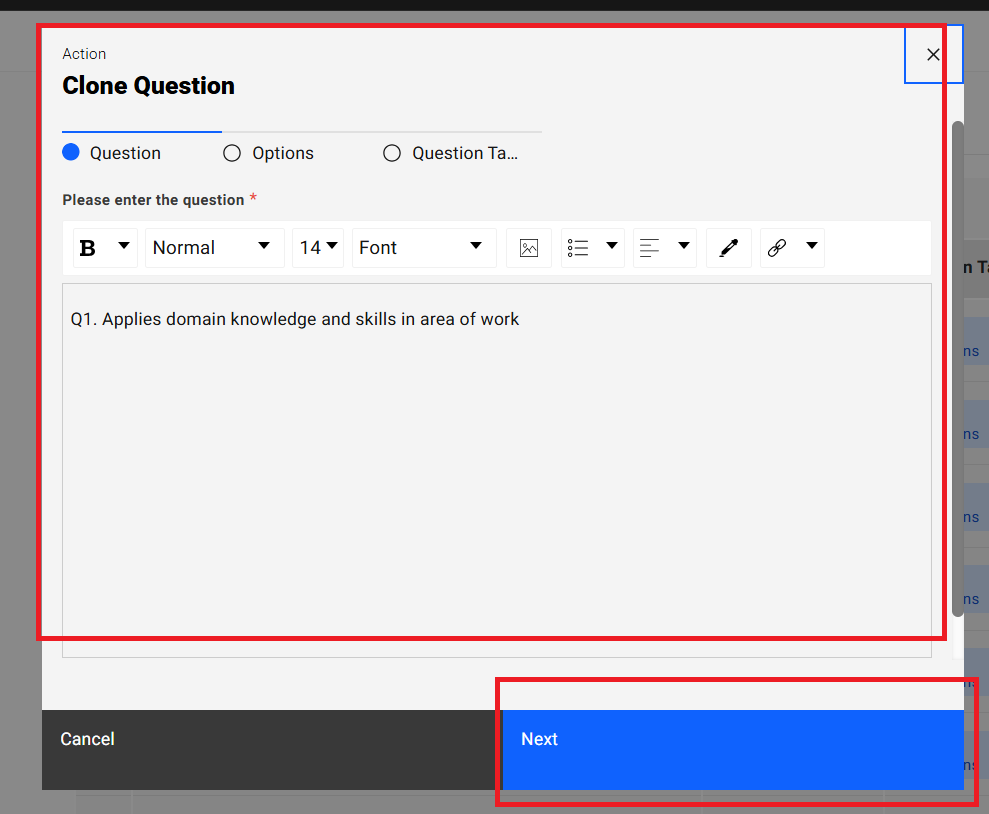
Step 1:
- Click on the “Clone Question (overlapping squares)” icon from “Action” column for respective question from the table
- “Clone Question” popup get open with respective question details persisted into the fields in the popup.
- Update the question details
- Click on the “Clone” button from popup to clone the question
- Cloned question will be shown in the table and successes message banner will be shown once question cloned successfully
Note:
1. Users cannot clone the exact question text, but they can reuse the answer options and question tags.
2. While cloning, users can modify the answer option type (EX: Essay to Rating)
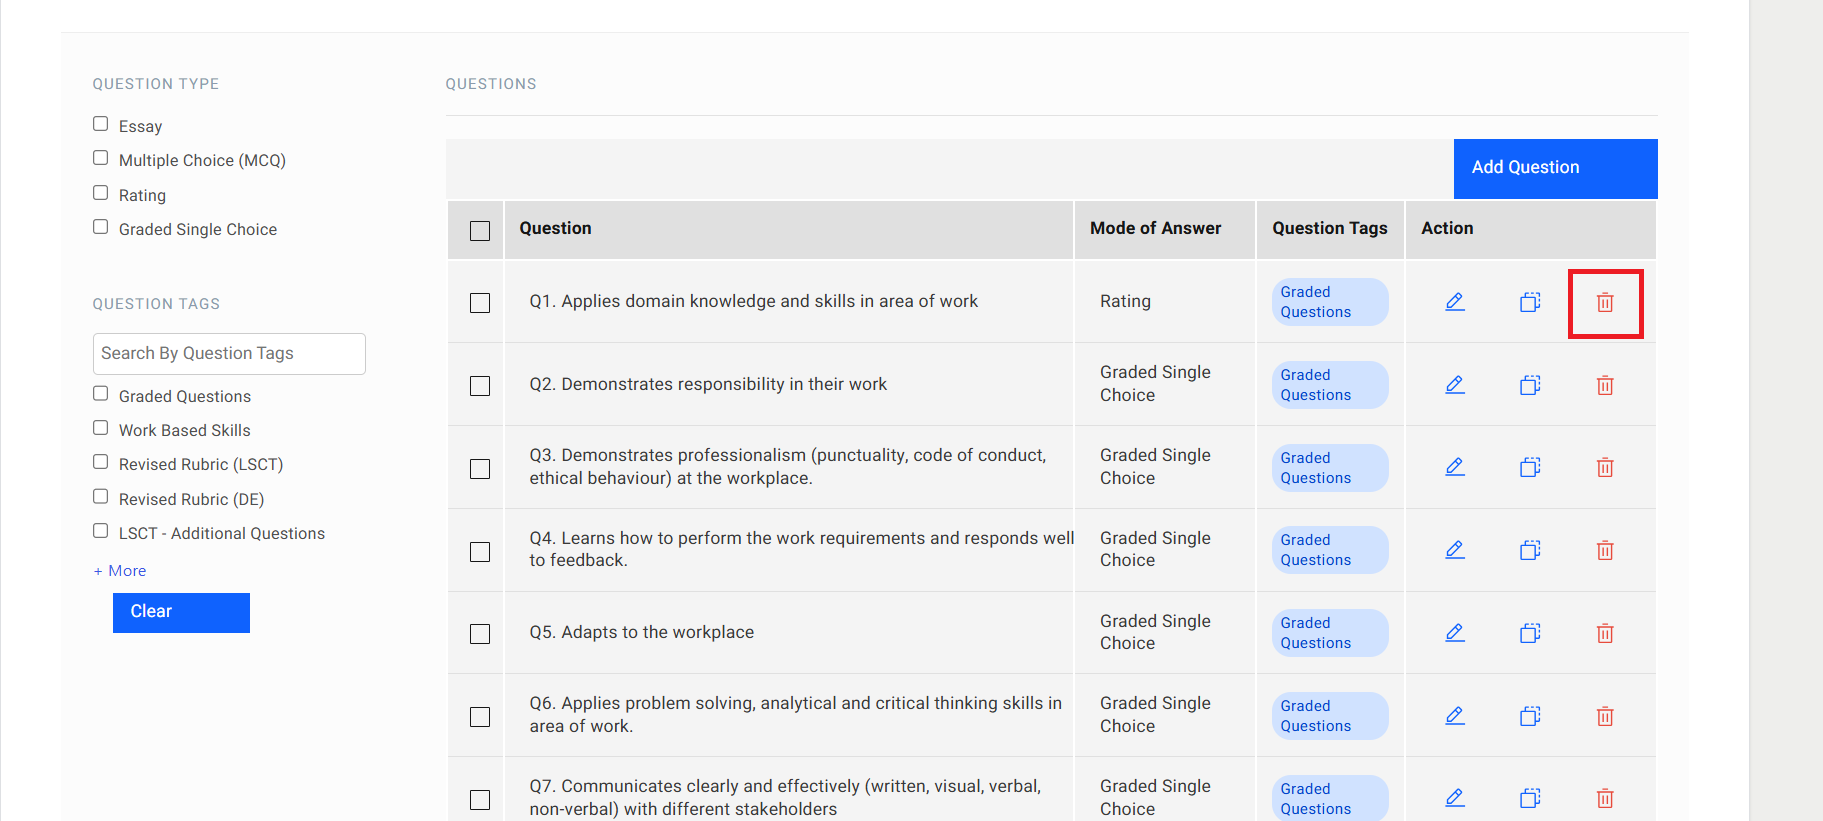
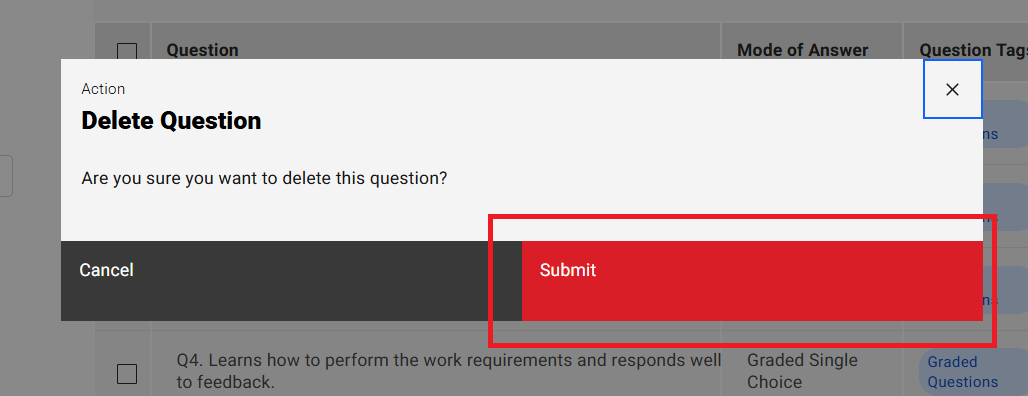
Delete Question:
Step 1:
- Click on the “Delete (Trash)” icon under “Action” column from the table for respective question
- “Delete Question” confirmation popup get open
- Click on “Submit” button from the popup
- Respective question will get deleted from the table successfully and successes message will be shown
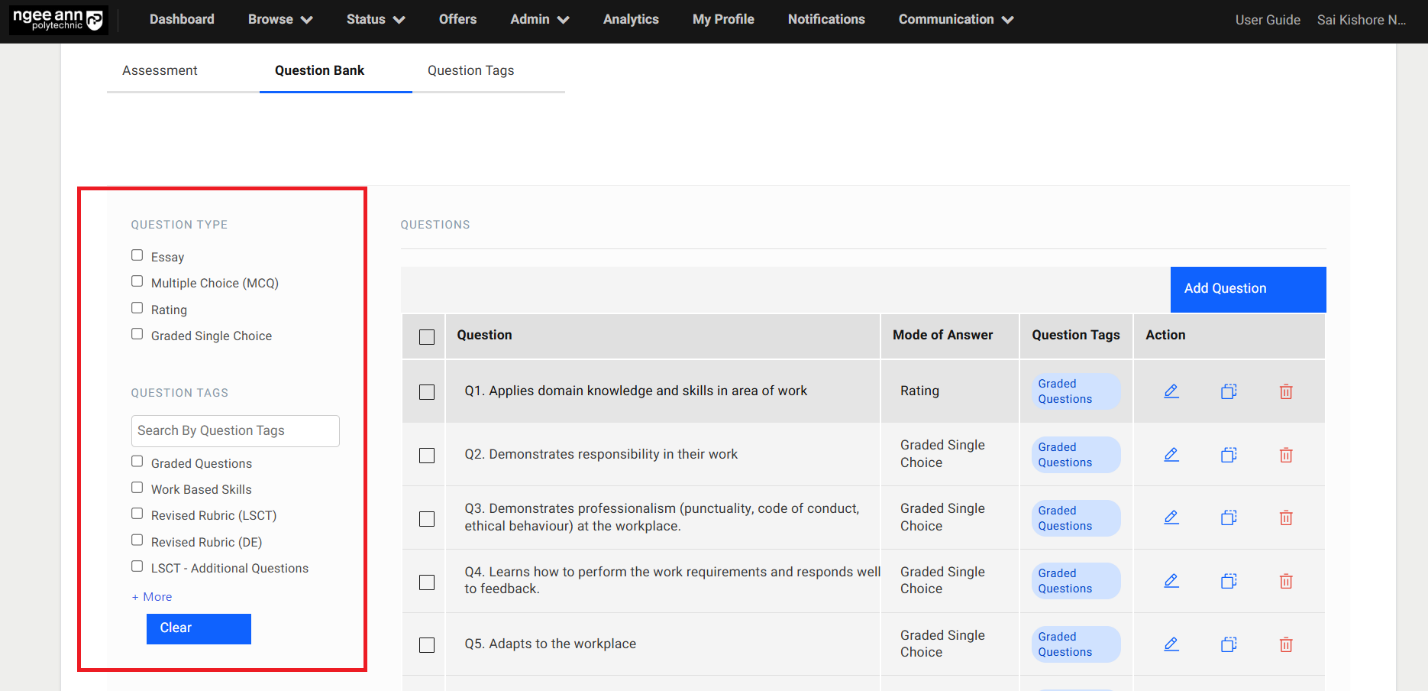
Question Bank Filters:
Step 1:
- See the “Question Type & Question Tags” filters with respective filter options on the left side of the table under “Question Bank” section tab.
- Select your desired filter criteria and apply the filters
- The table will automatically update to display only the filtered questions.
- Click on the “Clear” button to clear the applied filters and total questions will be shown in the table
Question Tags Section Tab:
Step 1:
- Click on the “Question Tags” section tab from the “Survey” page
- See the “Question Tags” table
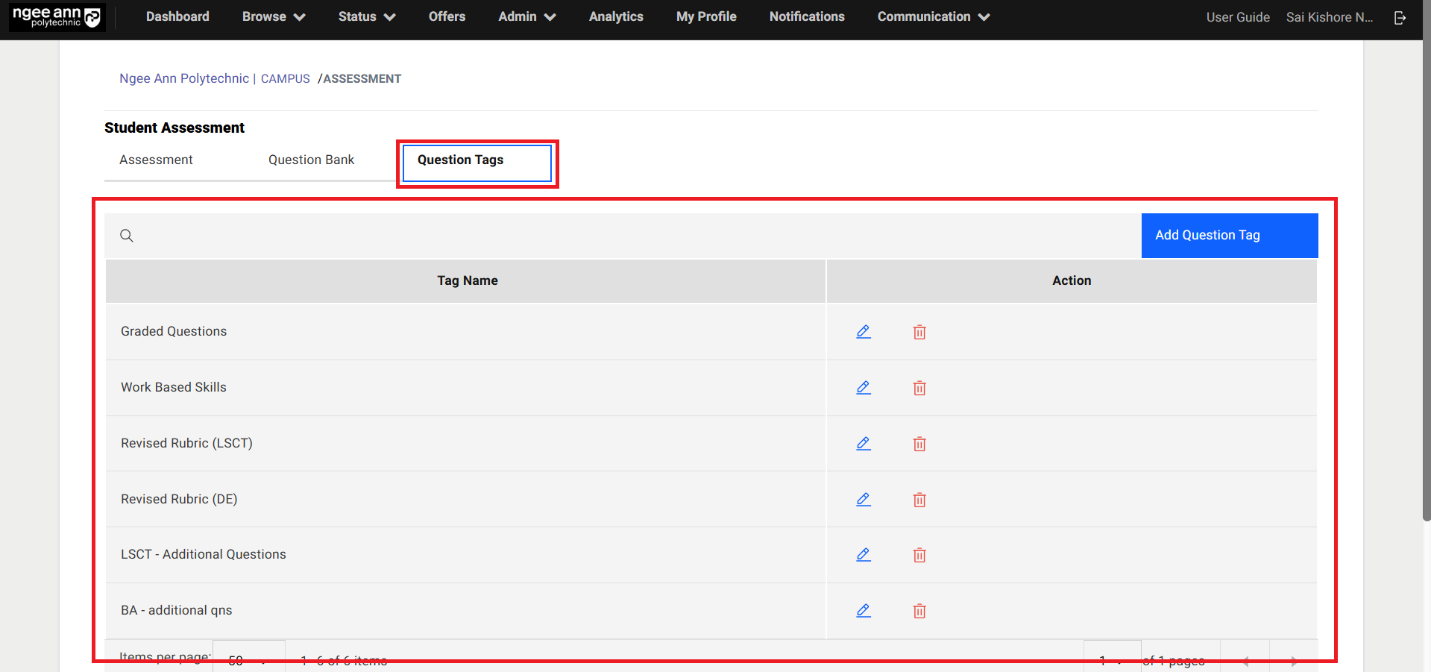
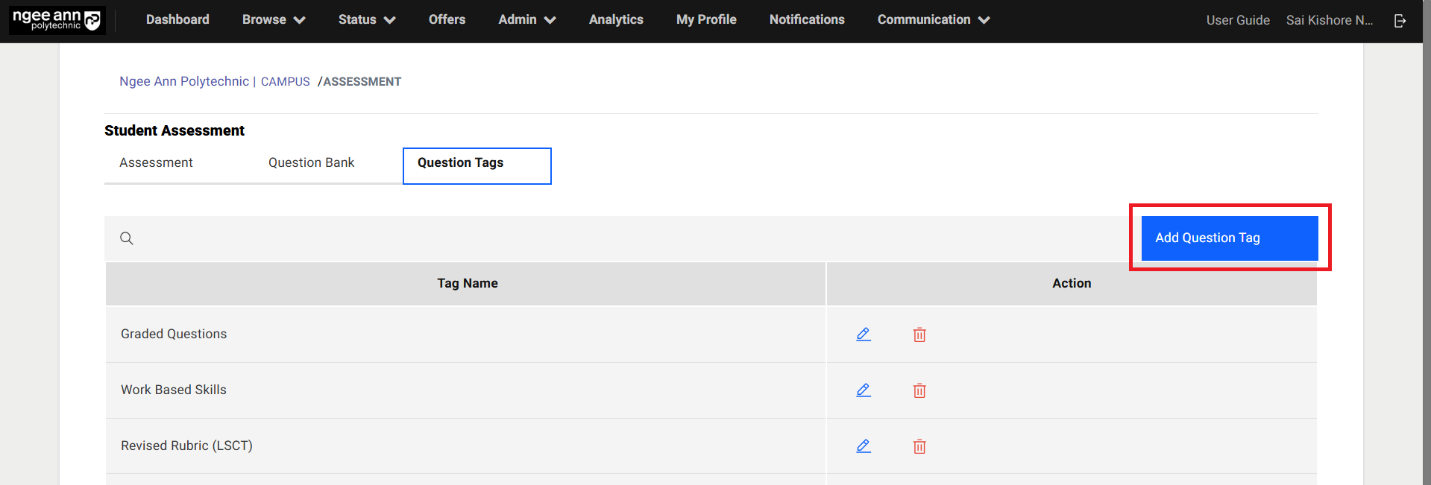
Add Question Tag:
Step 1:
- Click on the “Add Question Tag” button above the table
- “Add Question tag” popup get open
- Enter question tag name into the “Tag Name” text field in the popup.
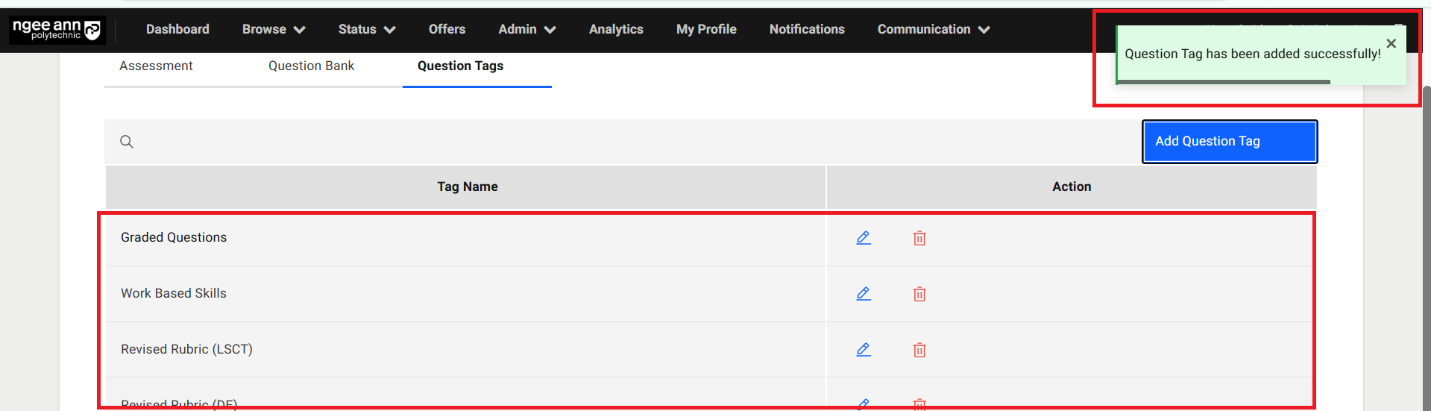
- Click on the “Submit” button to save the tag and successes message will be shown
- See saved tag will be shown in the table

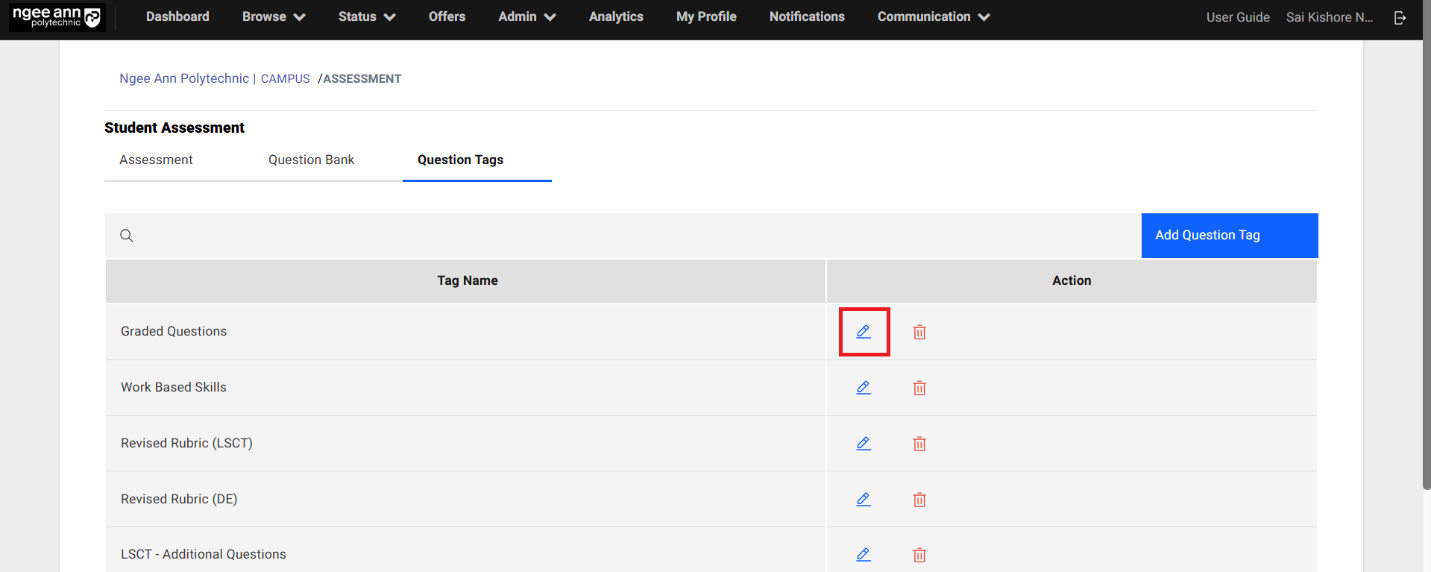
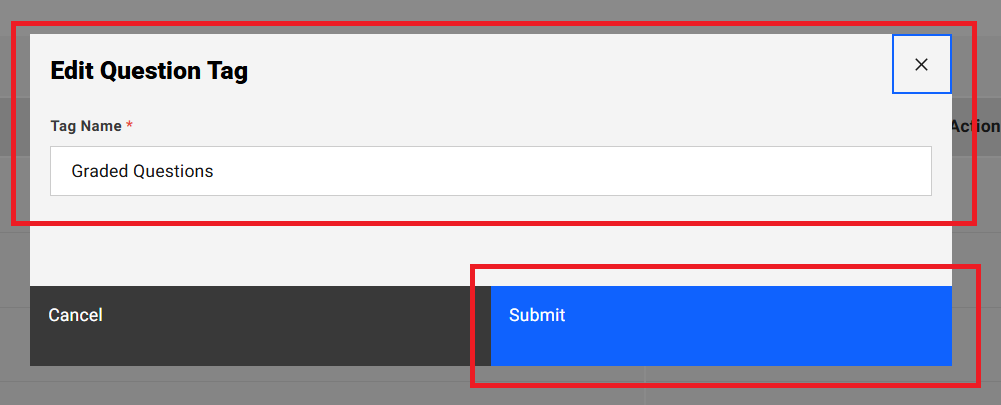
Edit Question Tag:
Step 1:
- Click on the “Edit (pencil)” icon under “Action” column in the table
- “Edit Question Tag” popup get open with saved question tag name persist in the field.
- Update the question tag name from the text field
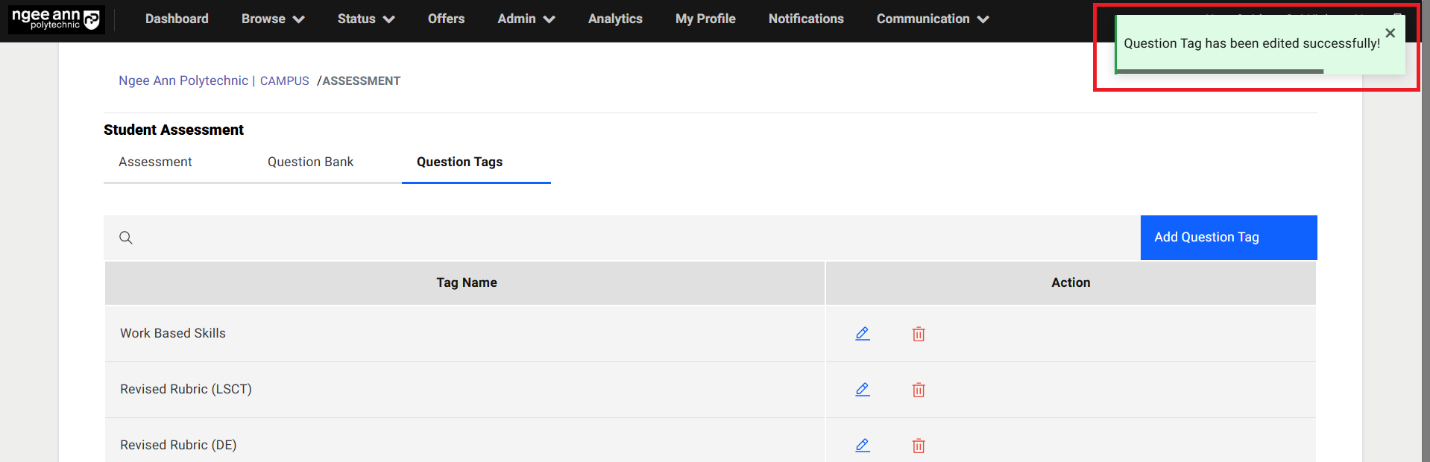
- Click on the “Submit” button to save the updated tag name and successes message will be shown
- See updated tag name will reflect in the table.
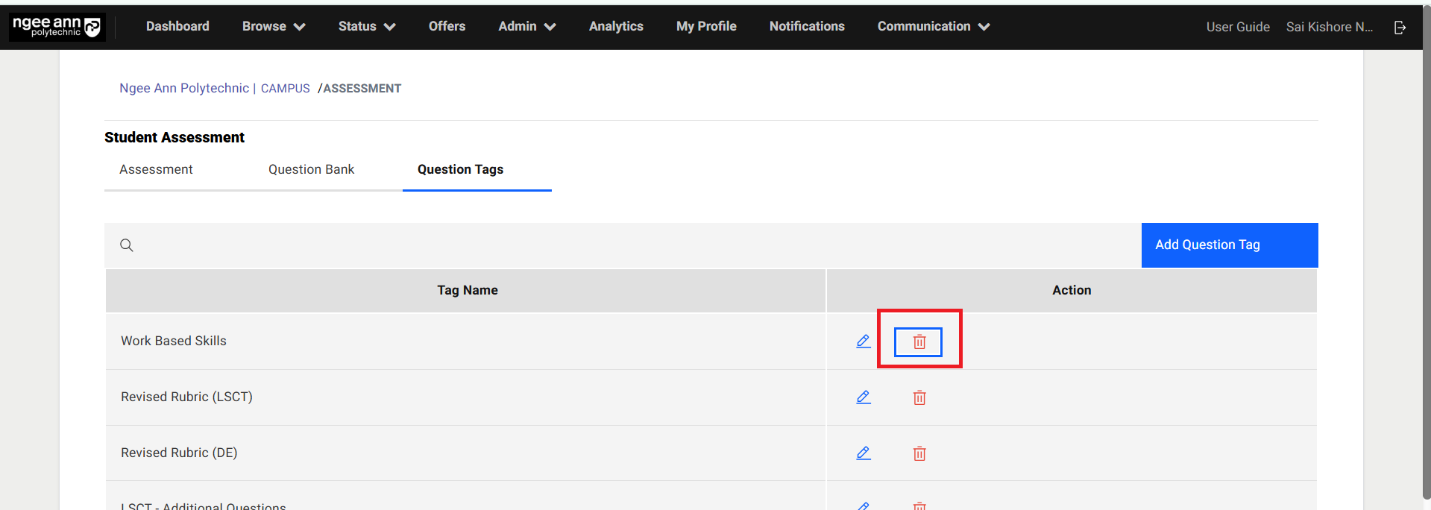
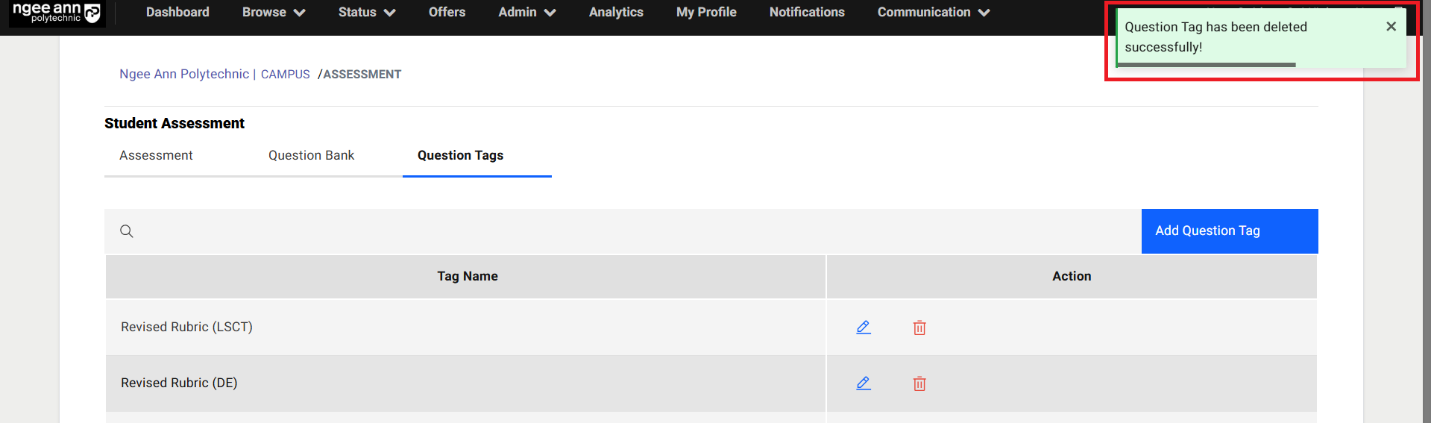
Delete Question Tag:
Step 1:
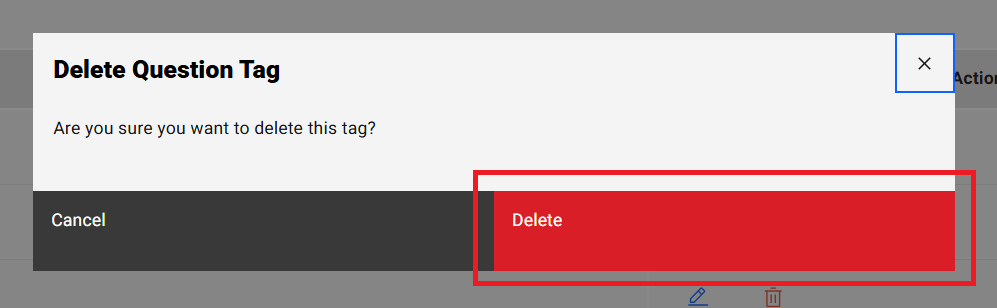
- Click on the “Delete (Trash)” icon under “Action” column in the table
- “Delete Question Tag” popup get open
- Click on the “Delete” button from the popup and successes message will be shown
- See respective tag will get removed from the table.
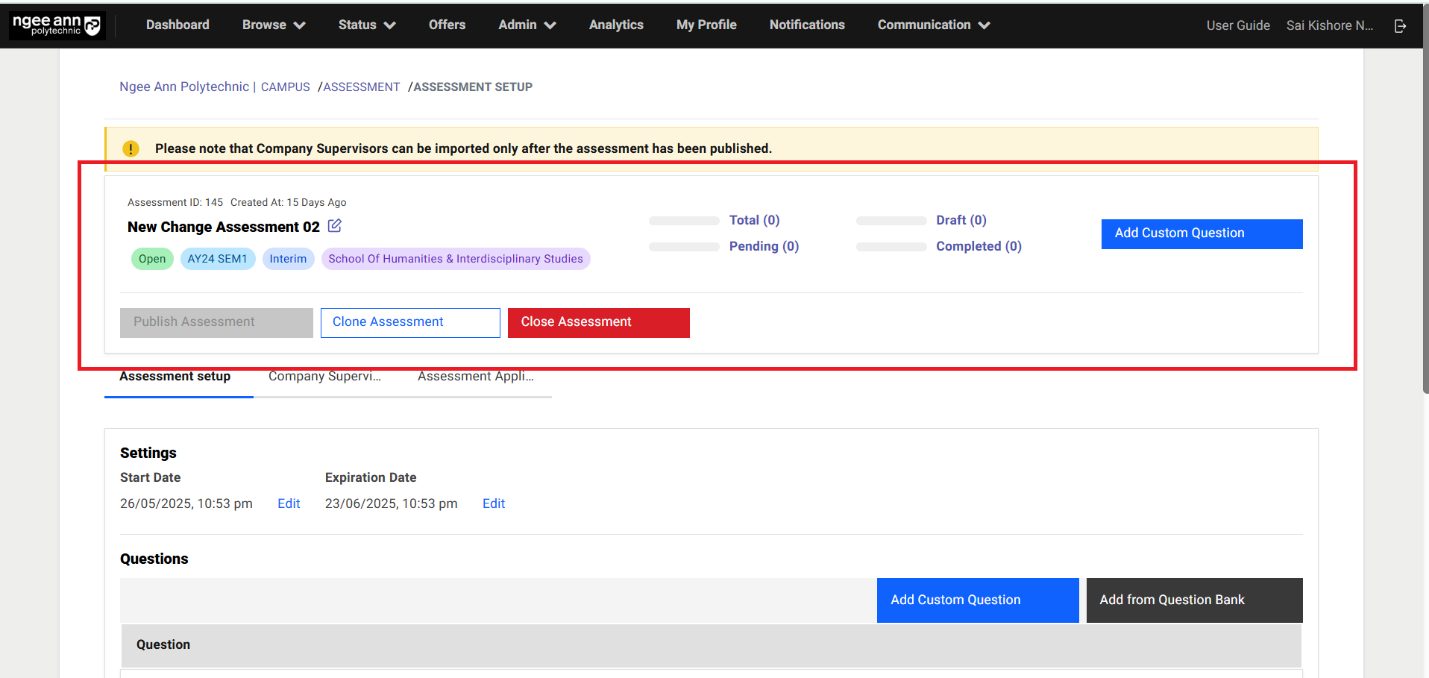
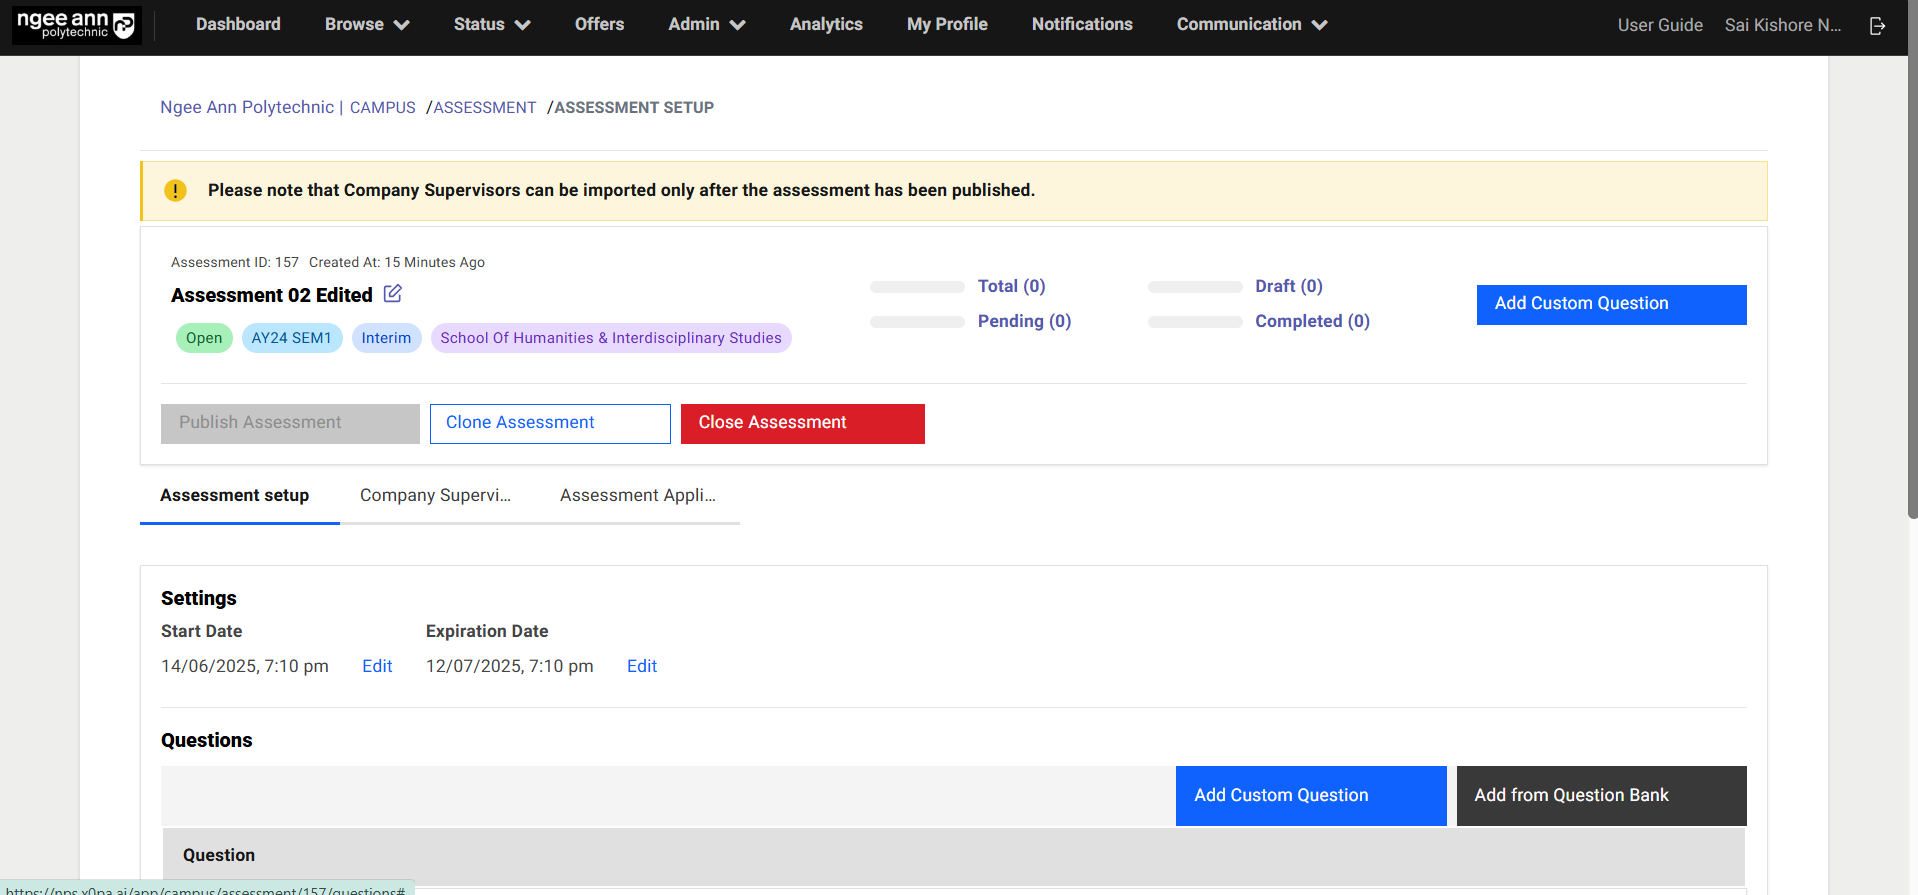
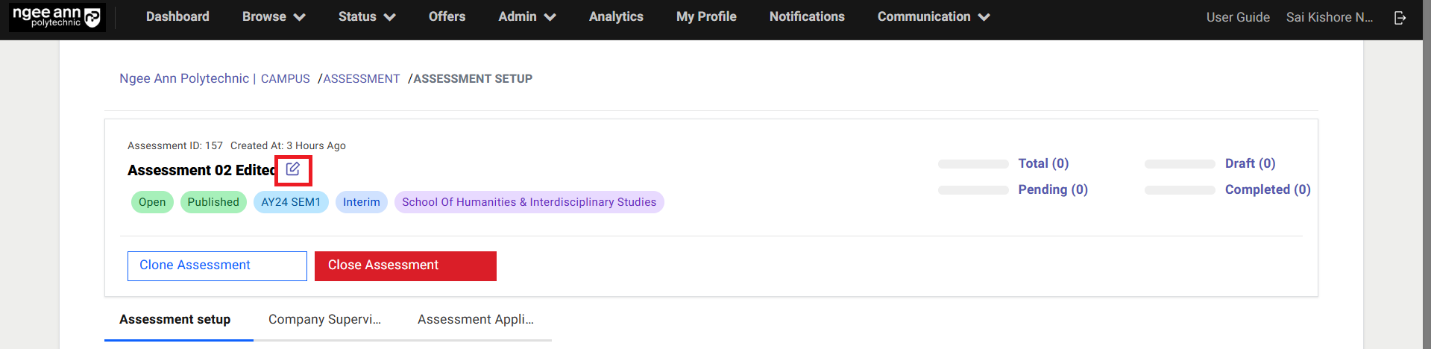
Assessment Setup Page:
Step 1:
- Click the “Assessment Name' link (under the “Assessment” column in the table) located in the “Assessment” tab on the Assessment page.
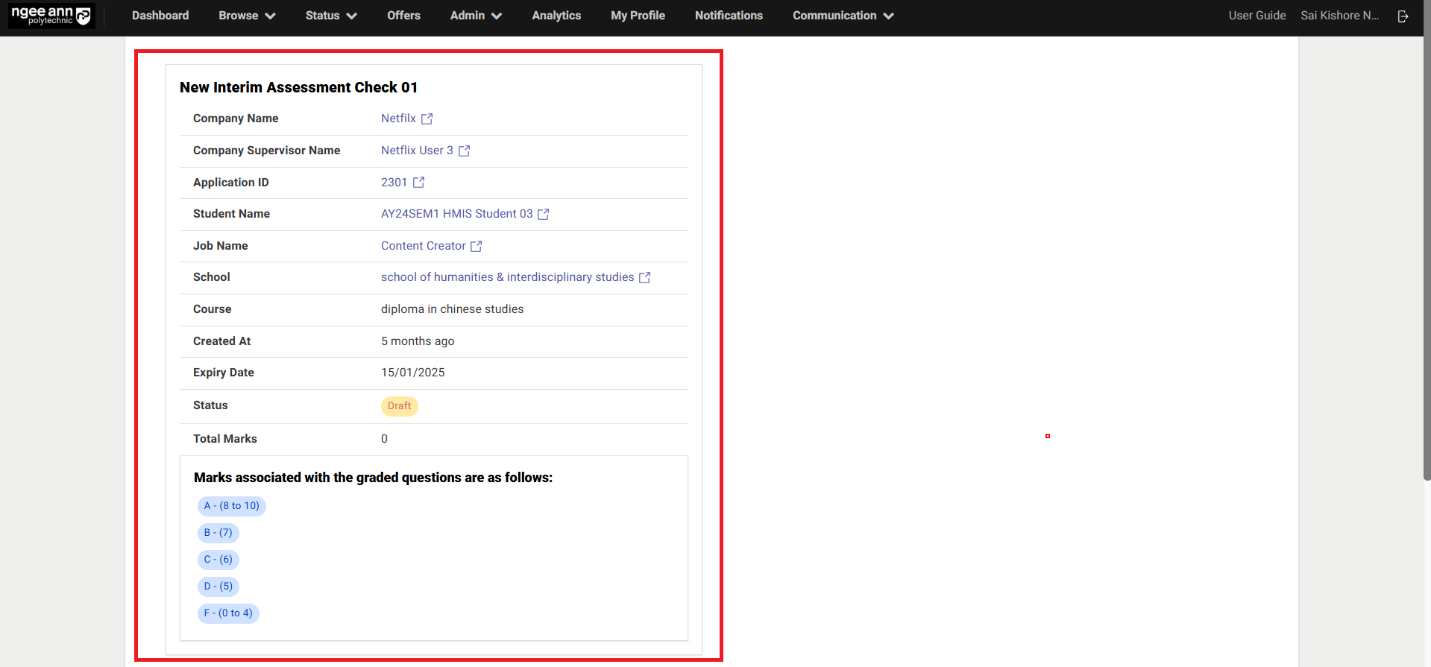
- Navigate to respective Assessment “Assessment Setup” page
- See the Assessment details in the box
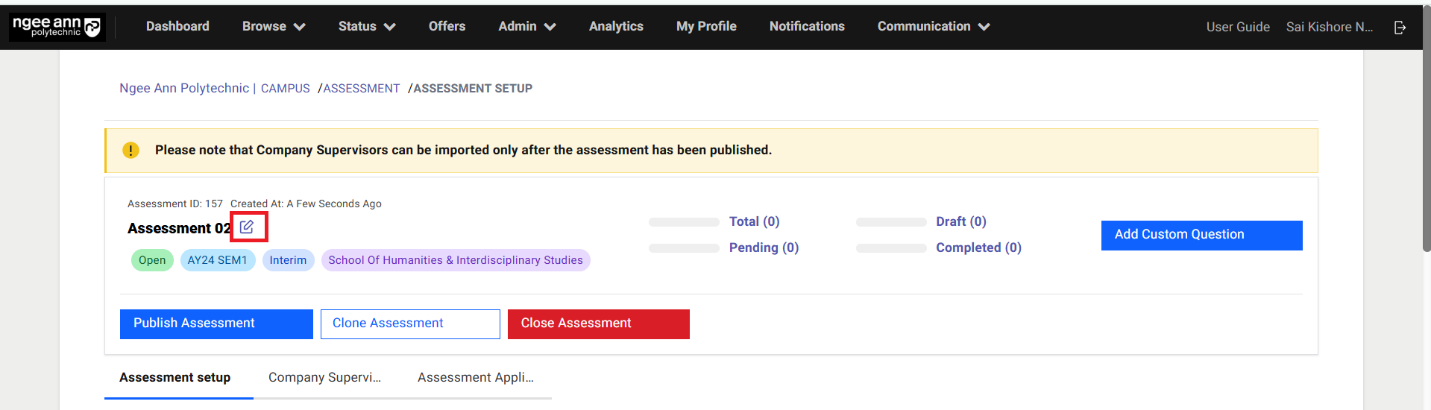
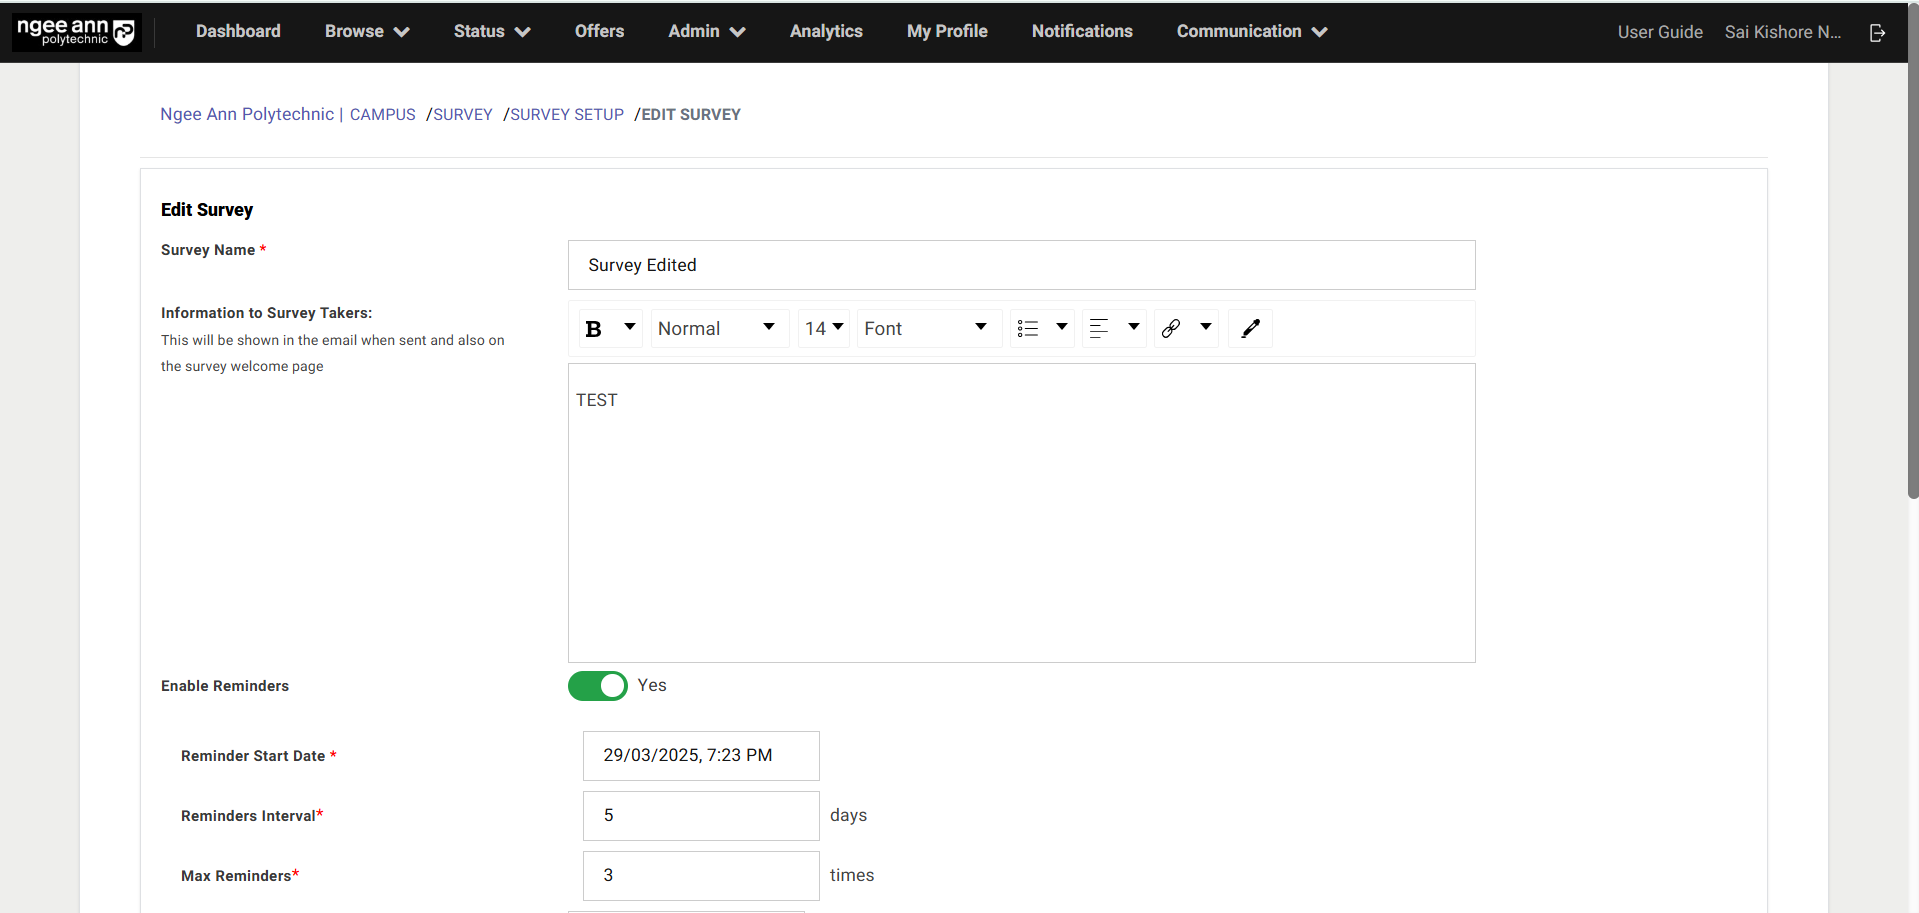
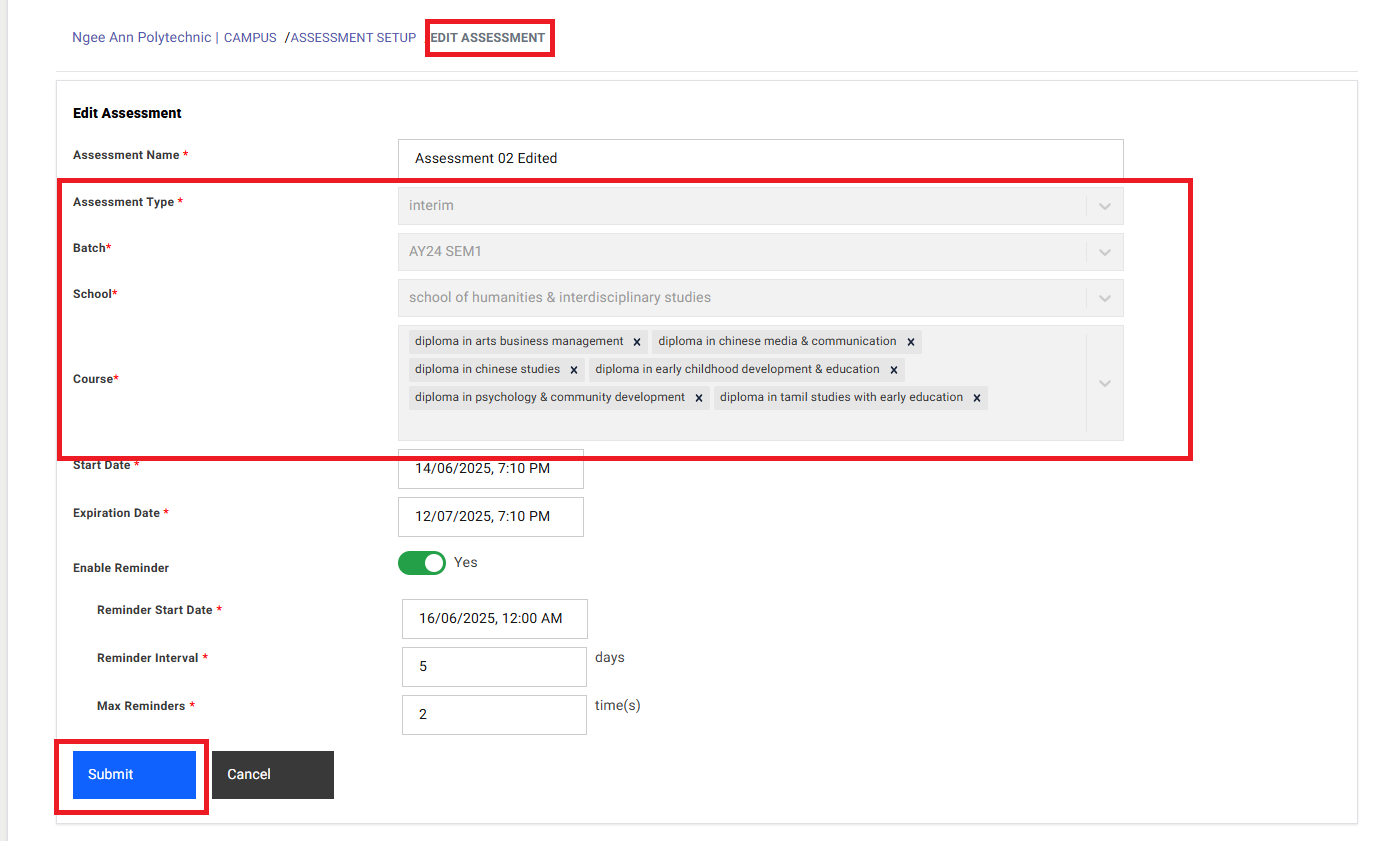
Edit Assessment Details from Assessment Setup Page (Before Assessment Published):
Step 1:
- Click on the “Edit (Pencil)” icon.
- “Edit Assessment” page get open with saved Assessment details persisted into the fields
- Update the details into the fields
- Click on the “Submit” button to save the updated changes for the Assessment
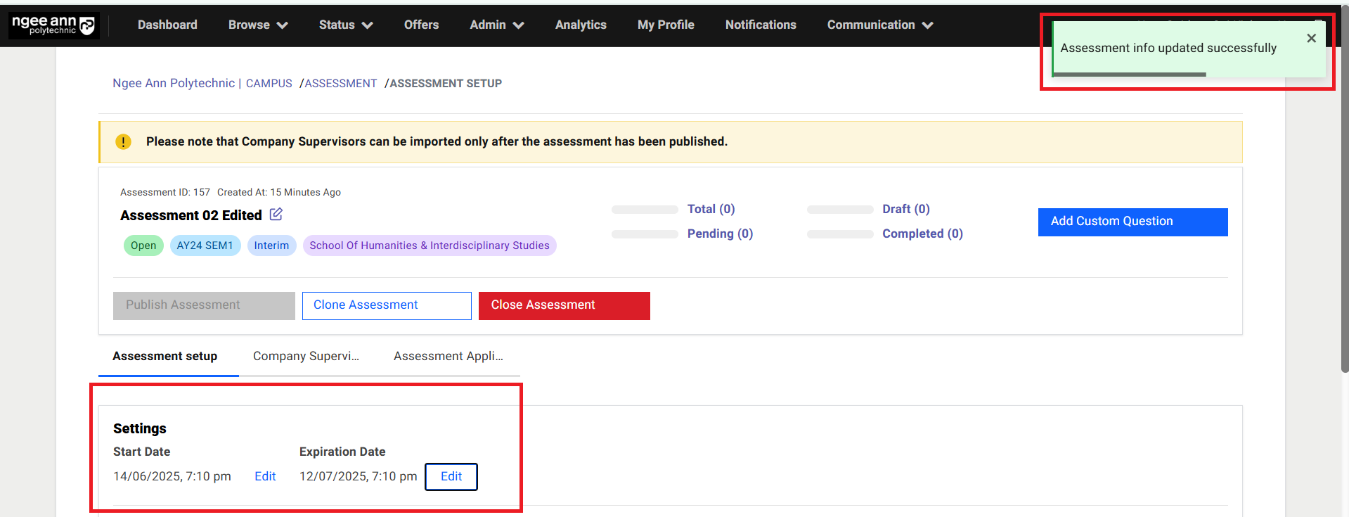
- Updated changes reflected in the box and successes message will be shown.
Assessment Setup Section tab:
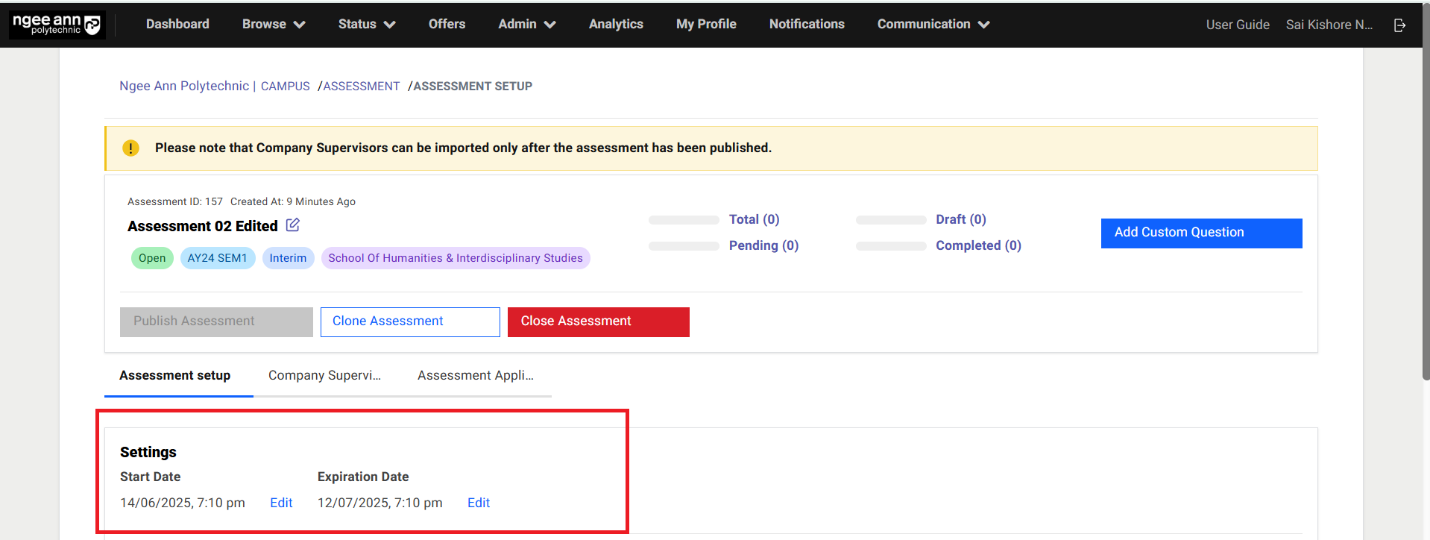
- Click on the “Assessment Setup” section tab from “Assessment Setup” page
- Under “Assessment Setup” section tab “Settings & Questions” section are shown.

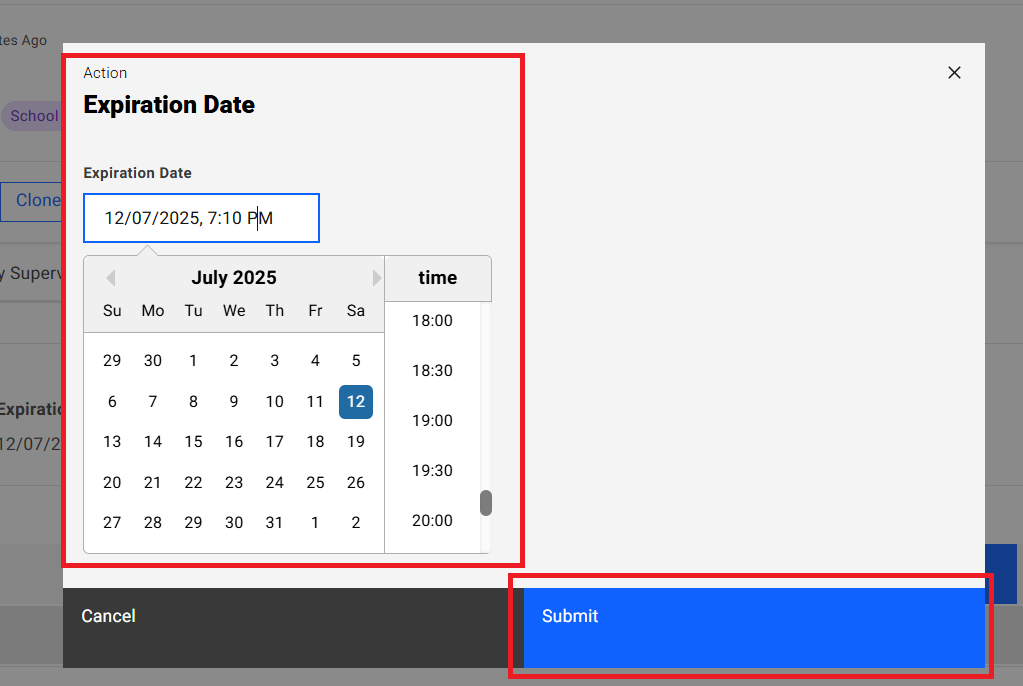
Settings Section:
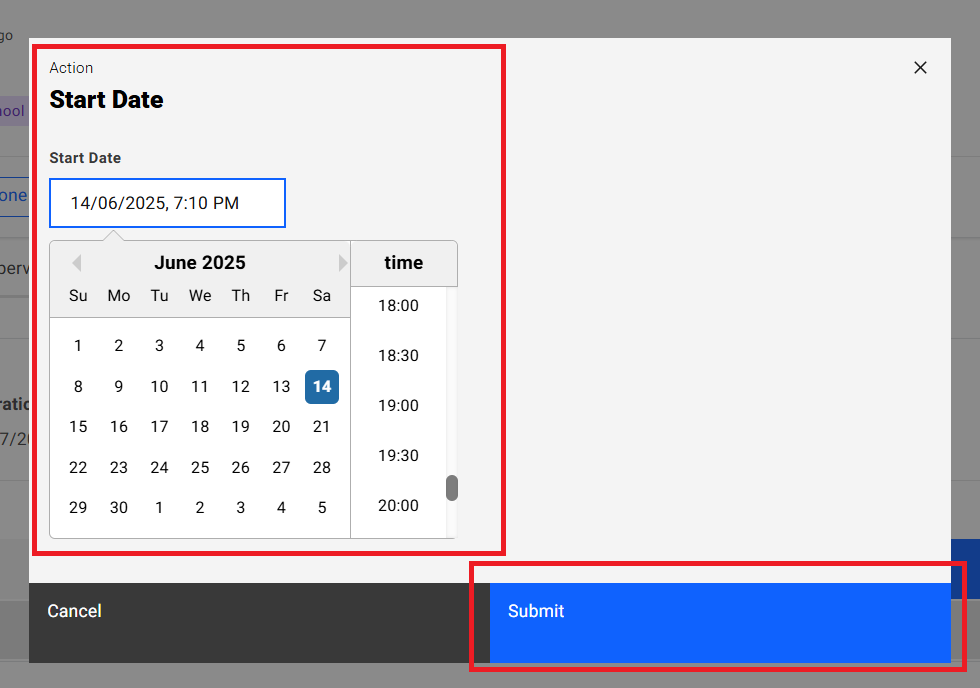
Step 1:
- See respective Assessment saved Start & Expiration Date fields are shown
- Click on the Edit button
- “Start Date & Expiration Date” popup get open
- Update the Date & Time from the fields
- Click on “Submit” button to save the dates and successes message will be shown
- Updated dates is shown under “Start & Expiration Date” field under “Settings” section
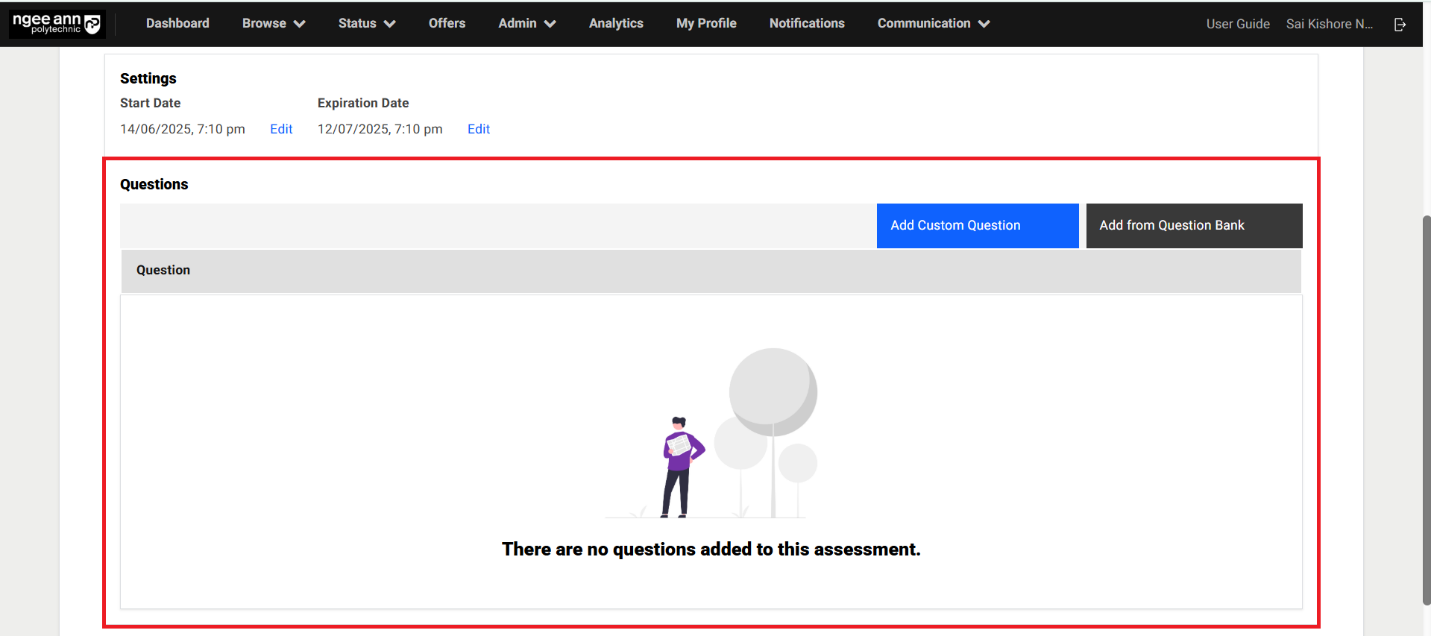
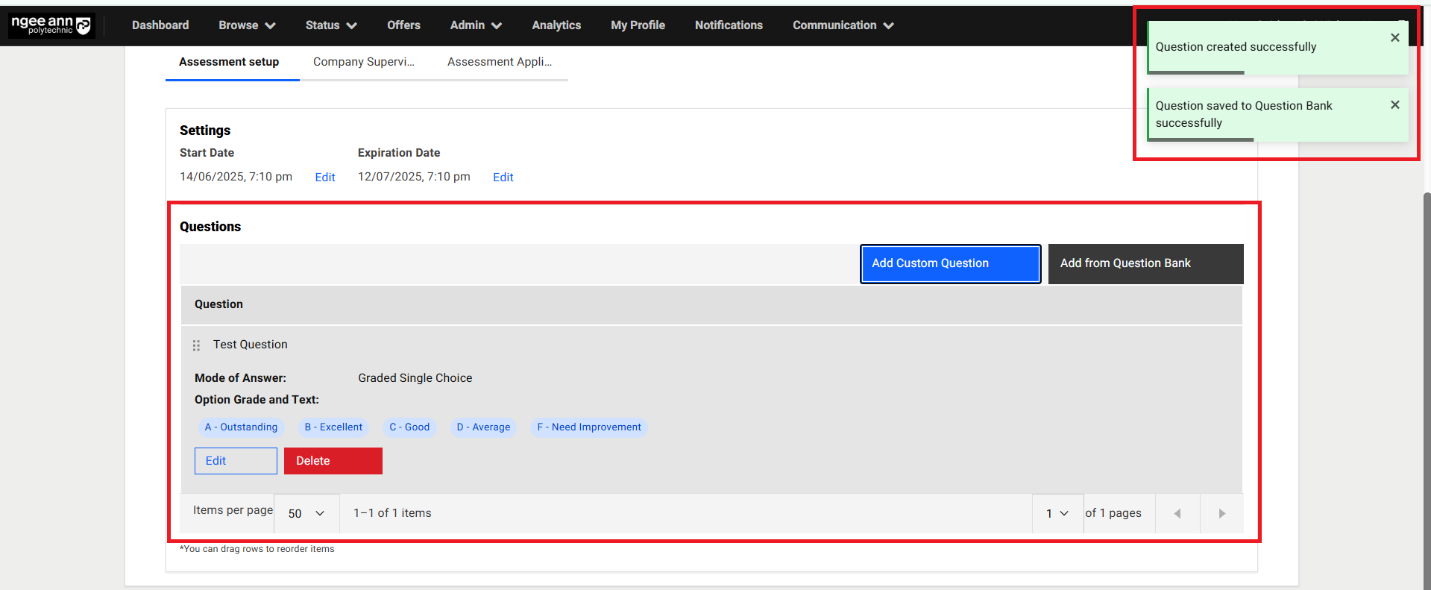
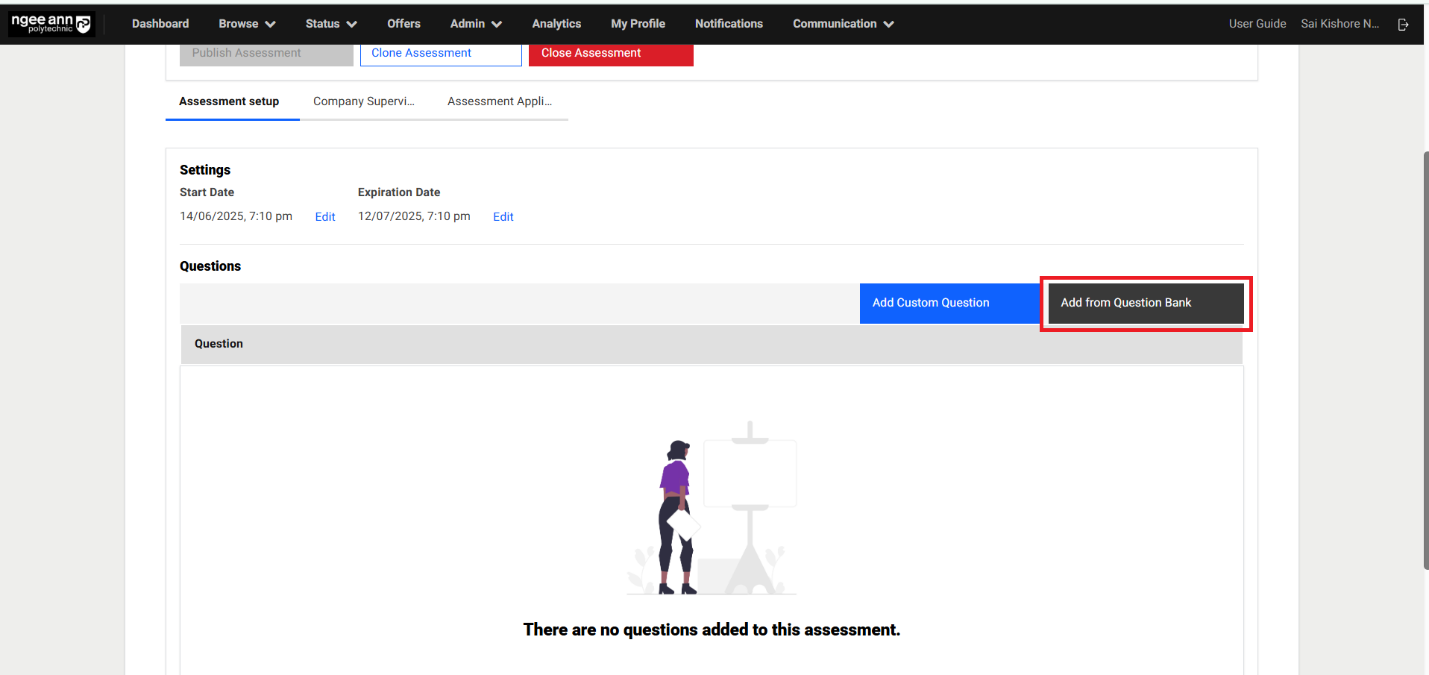
Questions Section:
Step 1:
- See “Questions” section below “Settings” section under “Assessment Setup” section tab
- See “Add Custom Question & Add from Question Bank” buttons will be shown in the “Questions” section
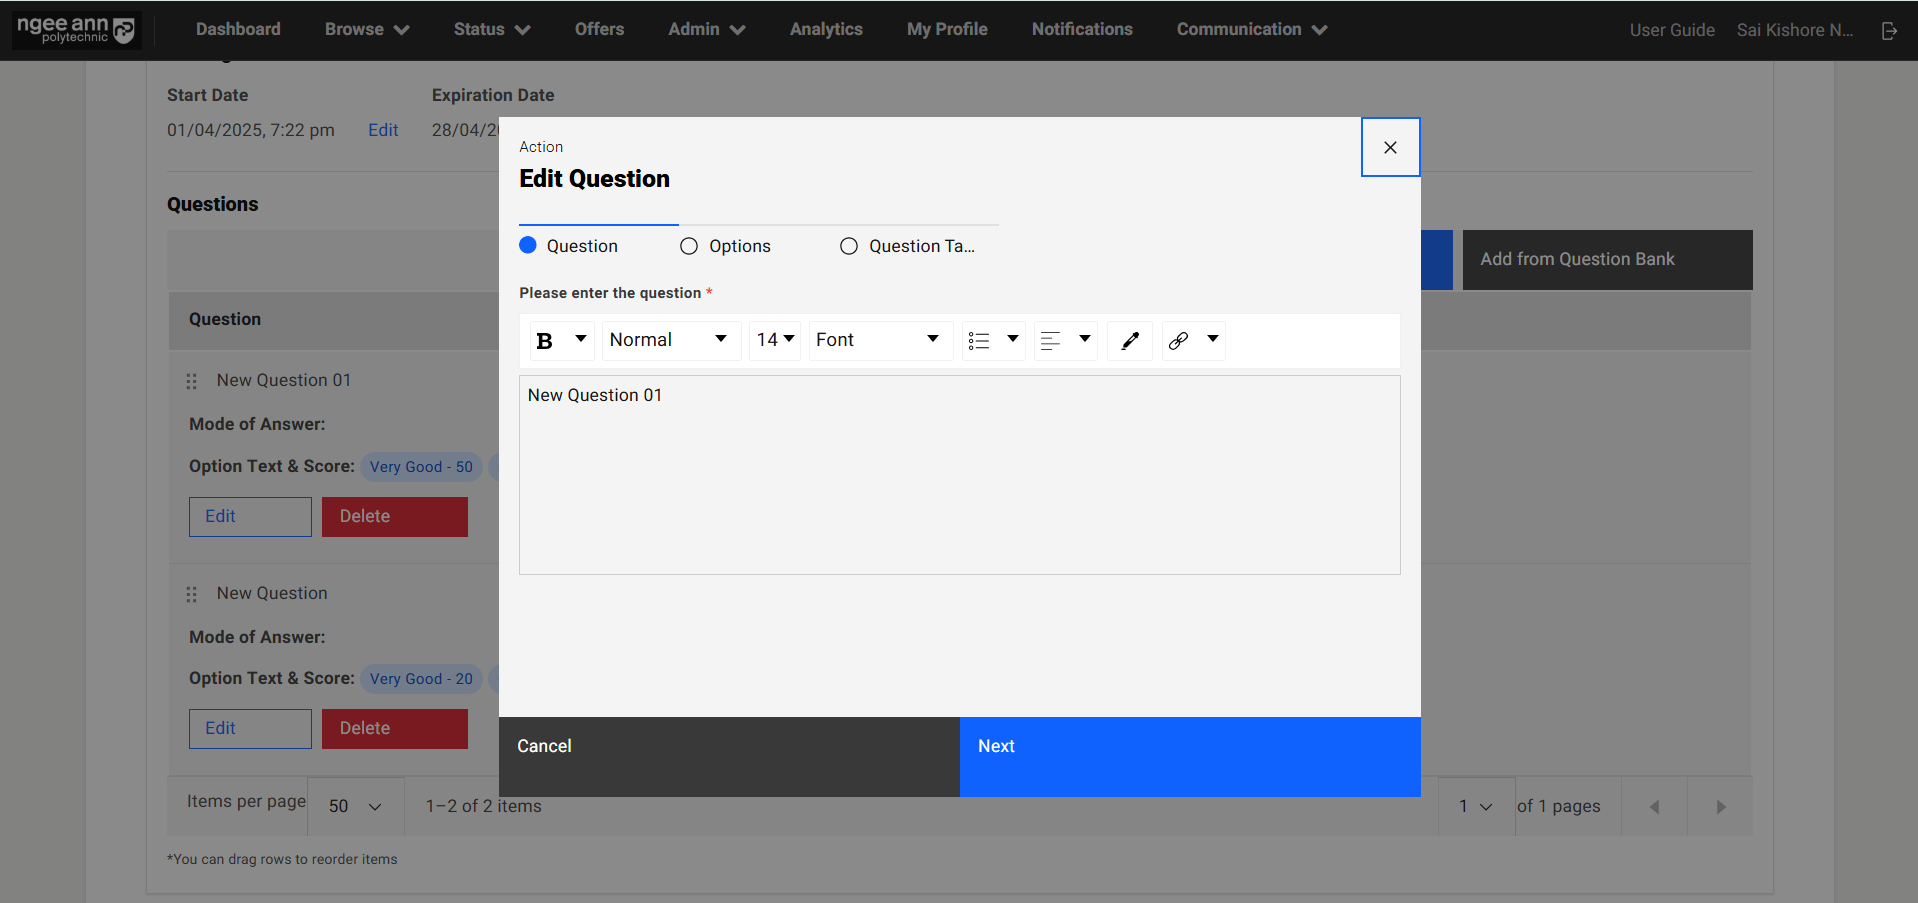
Add Custom Question:
Step 1:
- Click on the “Add Custom Question” button
- Add Question popup get open
Step 2:
- Enter question name into the “Please enter the question” text editor field under “Question” section tab in the popup
- Click on the “Next” button
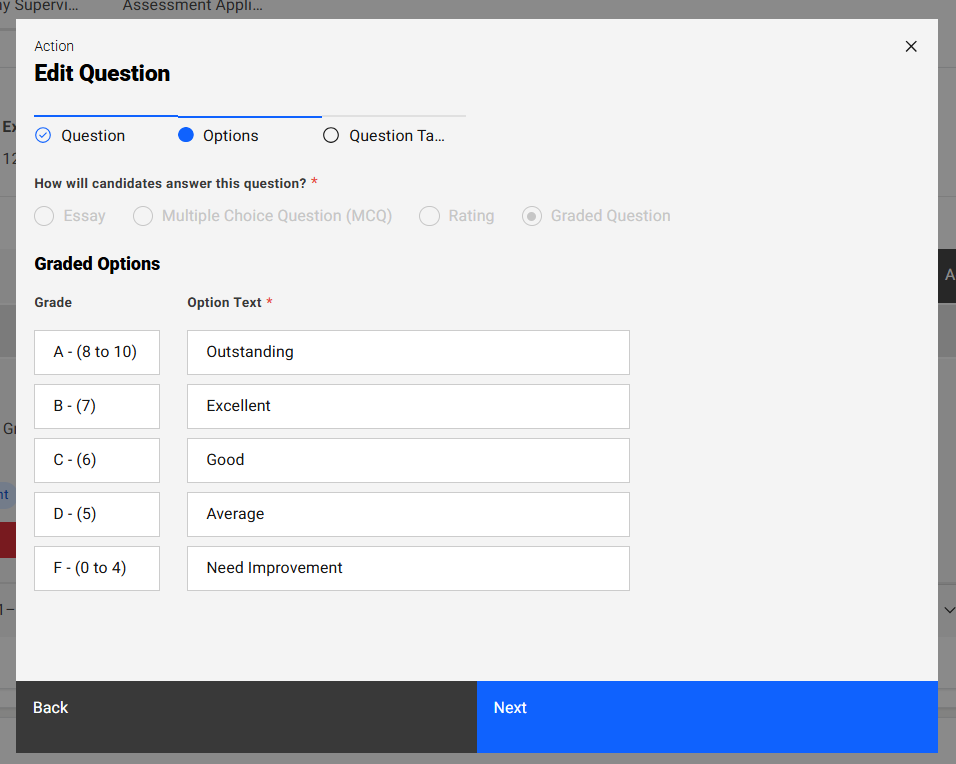
Step 3:
- Navigate to “Options” section tab in the “Add Question” popup
- Select answer type for respective question (Essay/Multiple Choice Question (MCQ)/Rating/Graded Question)
- Enter options data for the selected answer type
- Click on the “Next” button
- Click on the “Back” button to navigate back to “Question” section tab in the “Add Question” popup.
Note:
1. Essay Question
- When an Essay question is added to an assessment, company supervisors will be provided with a text box to enter their response.
- The response must comply with the specified word limits:
- Minimum word limit: Ensures the response meets a required length.
- Maximum word limit: Prevents the response from exceeding the allowed length.
2. Multiple Choice Question (MCQ)
- For MCQ questions, company supervisors must select one option from the available choices.
- If the "Show Others Option" setting is enabled:
- Selecting "Others" will display an additional text box where the supervisor can specify their answer.
3. Rating Question
- A Rating question requires company supervisors to select one value from a predefined scale.
- The selected rating’s score will be recorded and made available to institution administrators for evaluation purposes.
4. Graded Question
- Each Graded question includes options tagged with predefined grades: A, B, C, D, and F.
- Company supervisors must select a grade from a dropdown menu, and the associated grade score will be recorded.
- The grading scale is as follows:
- A: Score range of 8 to 10
- B: 7
- C: 6
- D: 5
- F: Score range of 0 to 4
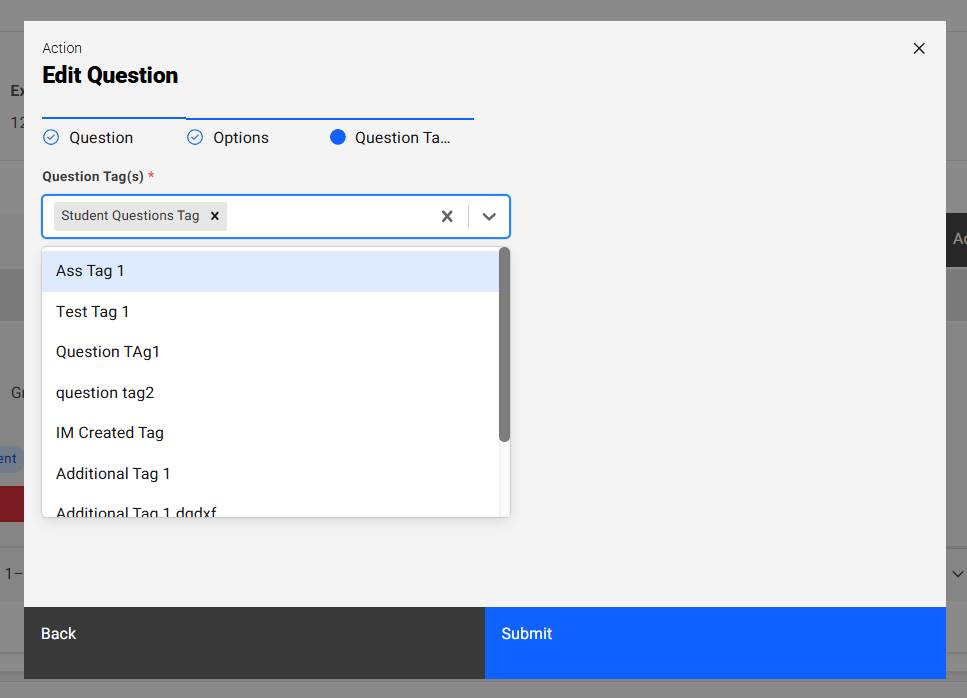
Step 4:
- Navigate to “Question Tags” section tab in the “Add Question” popup
- Click on the “Question Tag(s)” dropdown field
- Select pre-saved list of tags as options from the dropdown field
- Selected tag shown in the dropdown field
- Click on the “Submit” button
- Saved question will be shown in the table and successes message will be shown
- Click on the “Back” button navigate to “Options” section tab in the popup
Note: If the "Save this question to question Bank" checkbox is selected while adding a new question, the question will be added to the current assesment and also saved in the Question Bank for future use in other assessments.
Edit Questions:
Step 1:
- Click on the ��“Edit” button inside the question card below “Questions” section
- “Edit Question” popup get open with previous saved question details persisted into the fields in the popup.
- Update the details in the “Edit Question” popup
- Click on the “Submit” button to save the changes
- Make sure updated changes will get reflected in the table for respective question
Note: Make sure while edit the question user will not able to change option category for respective question.
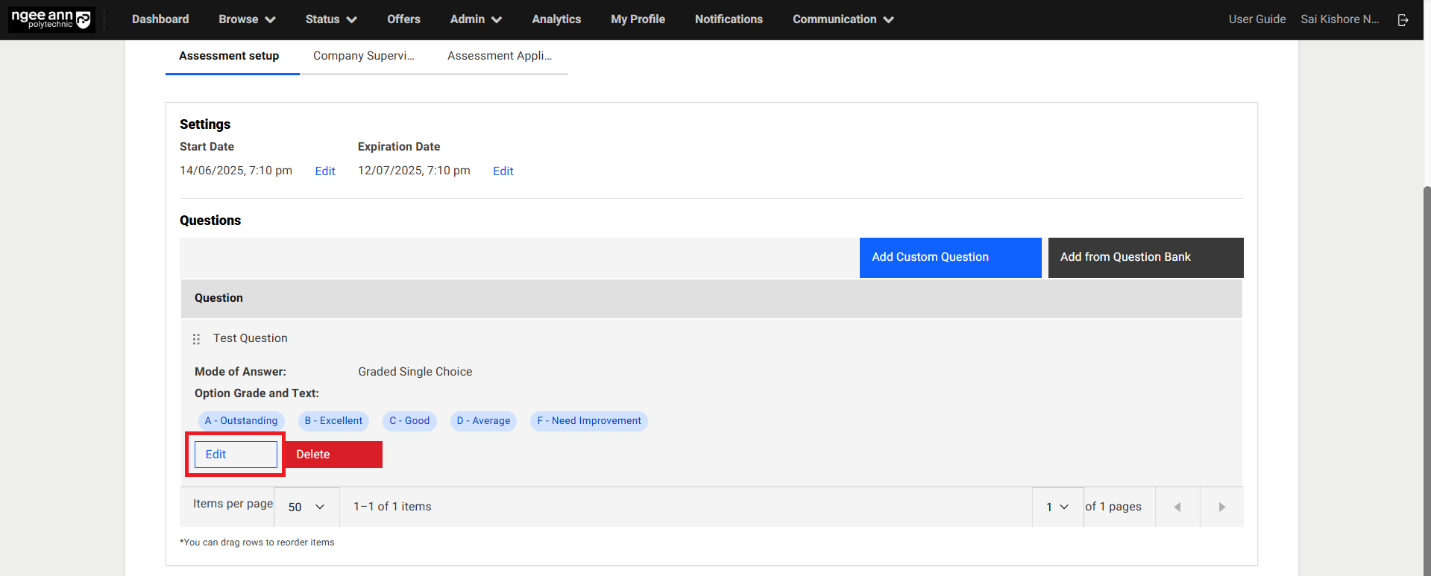
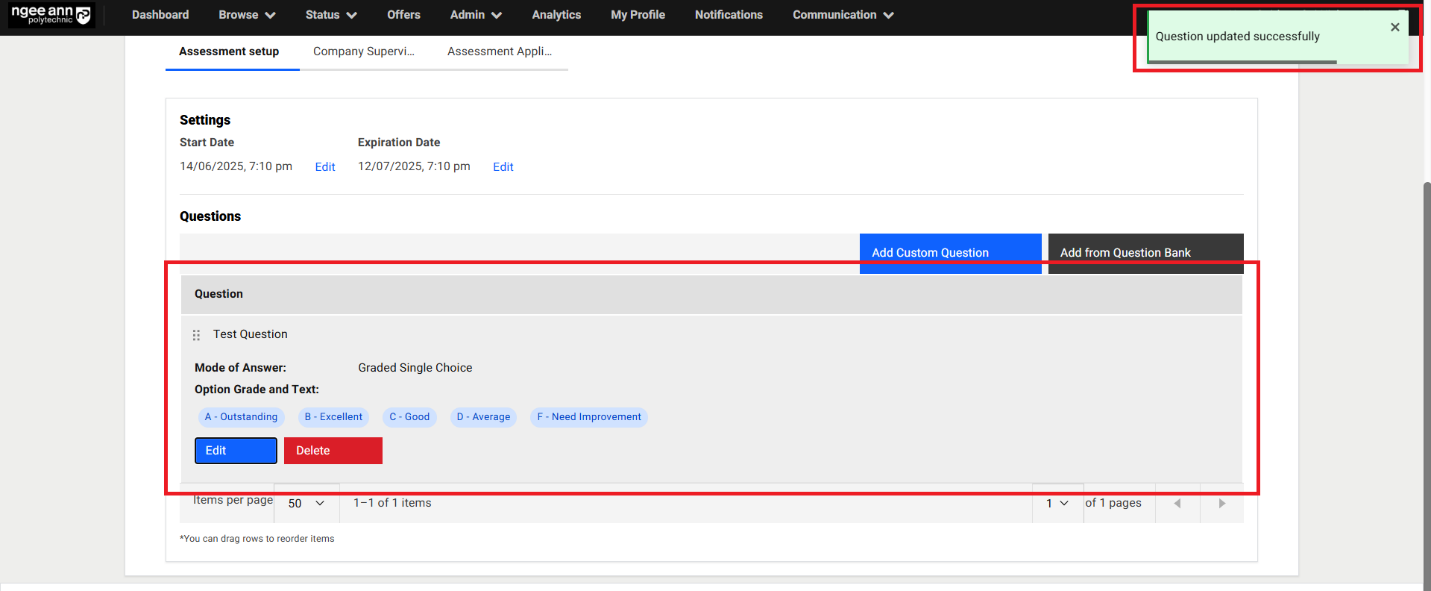
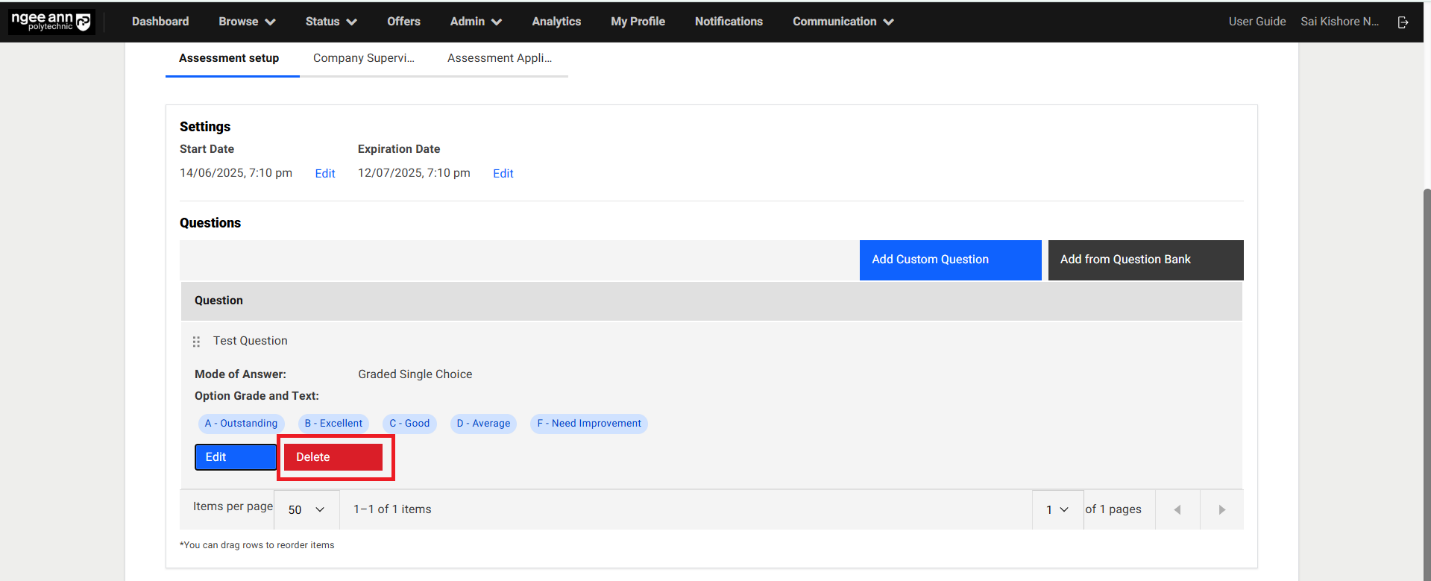
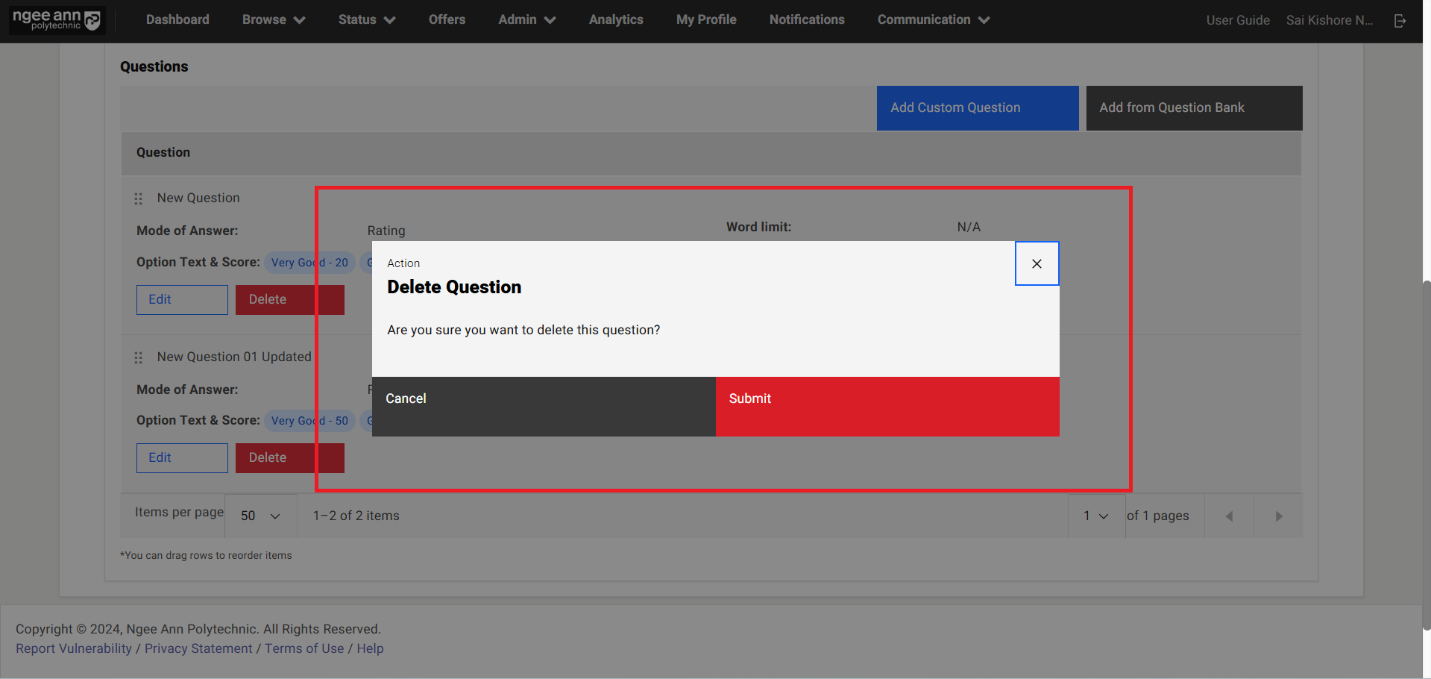
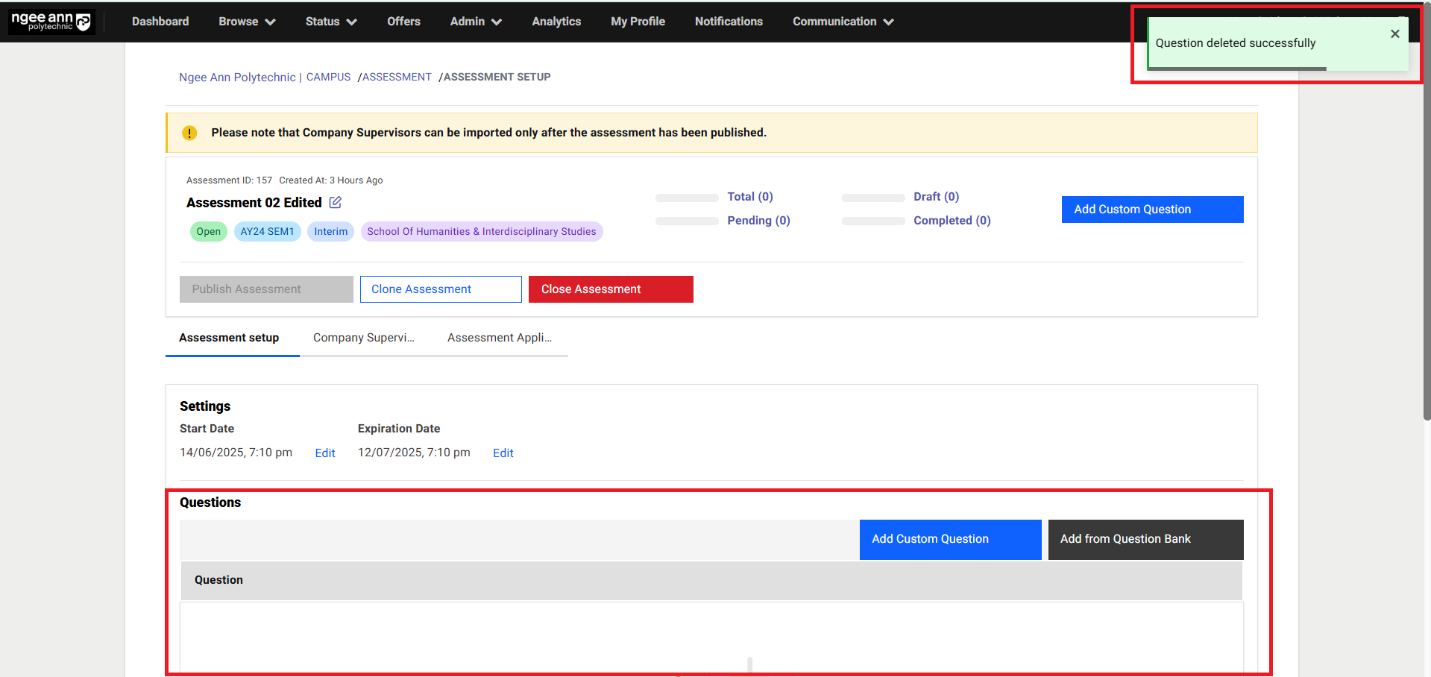
Delete Question:
Step 1:
- Click on the “Delete” button beside the “Edit” button in the question card.
- “Delete Question” confirmation popup gets open
- Click on “Submit” button from the popup
- Respective question card will get deleted from the table successfully and successes message will be shown.
Add From Question Bank:
Step 1:
- Click on the “Add from Question Bank” button
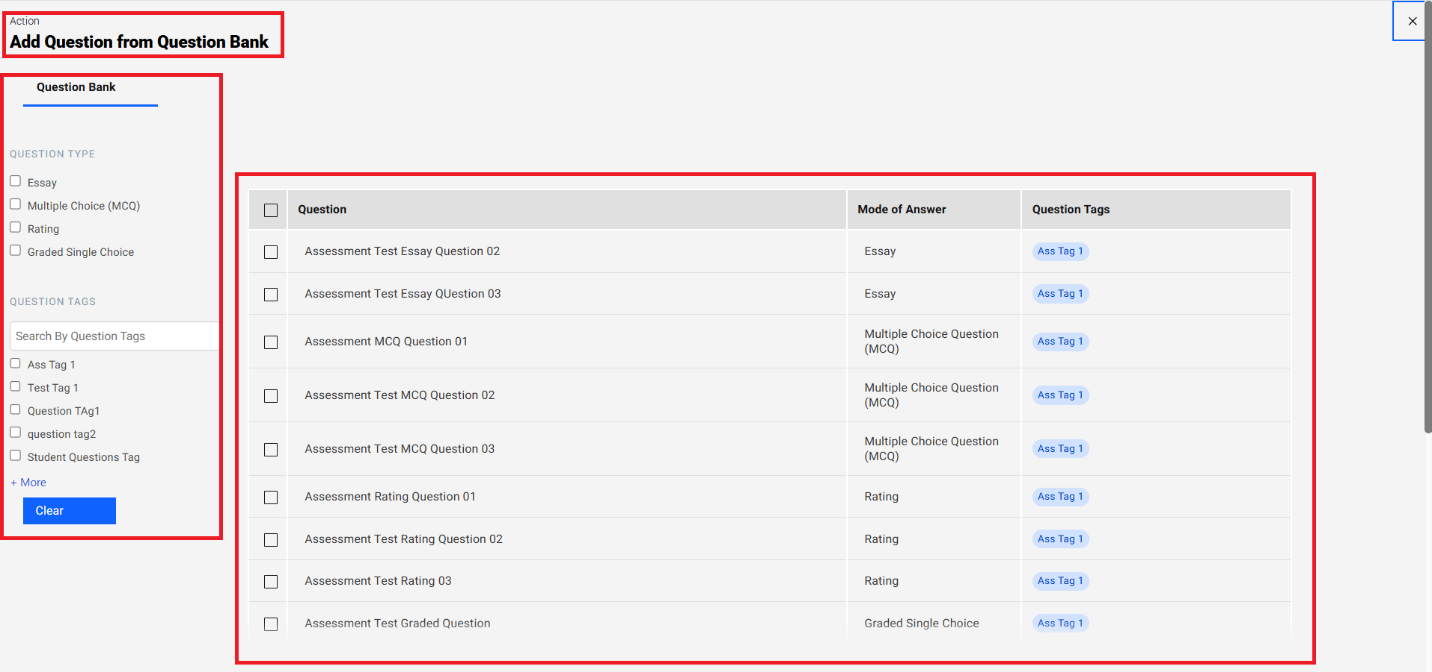
- “Add Question from Question Bank” popup get open
- See the table will have list of saved questions
- Apply the “Question Type &Question Tags” filters from filters section.
- Click on the “Clear” button from filter sectioMake sure applied filters get removed from the filter
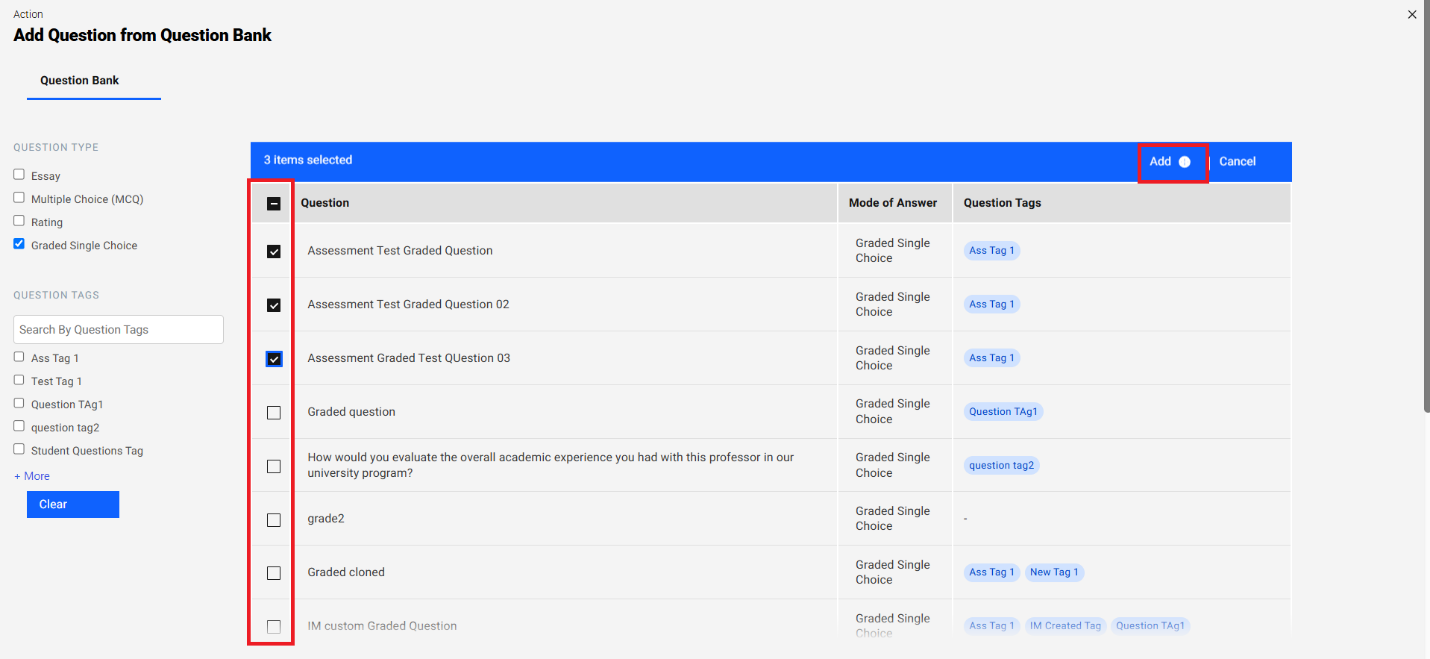
- Select questions from the table
- Click on the “Add” list option button
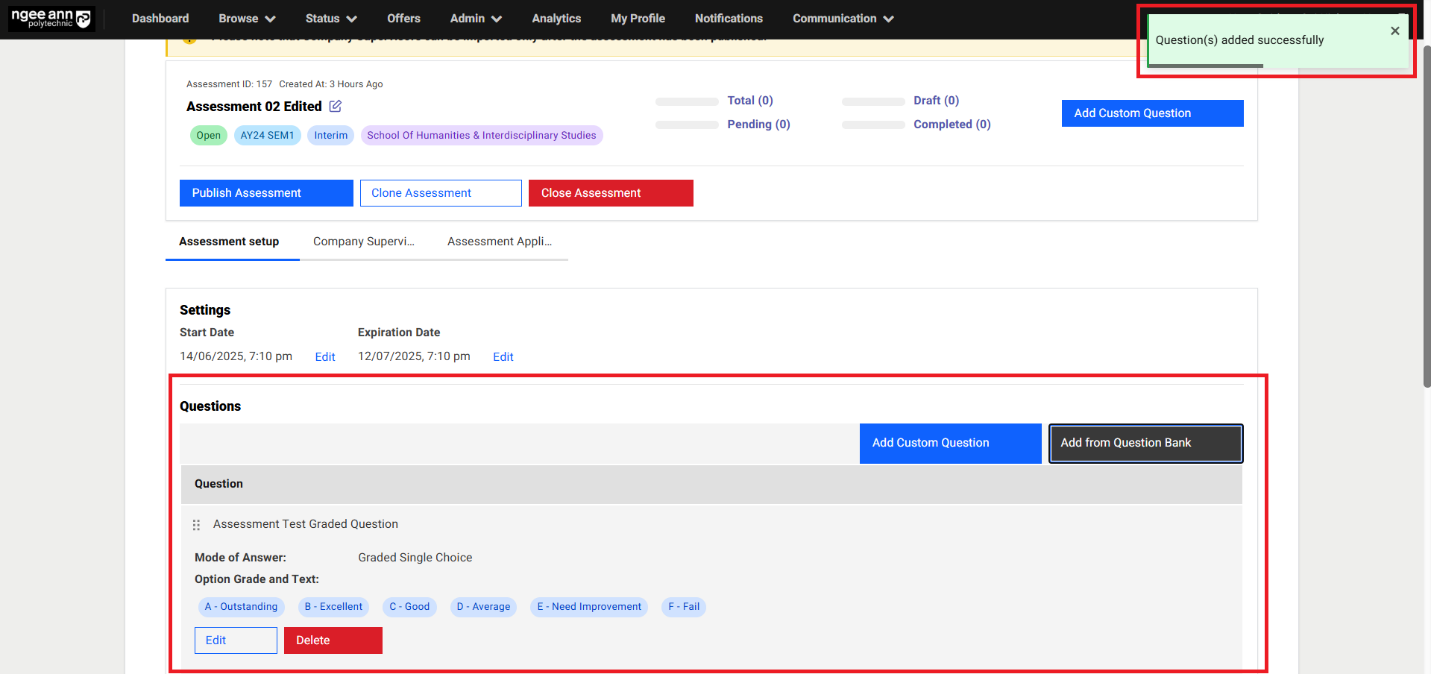
- “Add Question from Question Bank” popup get closed and navigate back to “Assessment Setup” page.
- See saved questions added to the assessment and respective questions shown in the “Questions” section under “Assessment Setup” section tab.
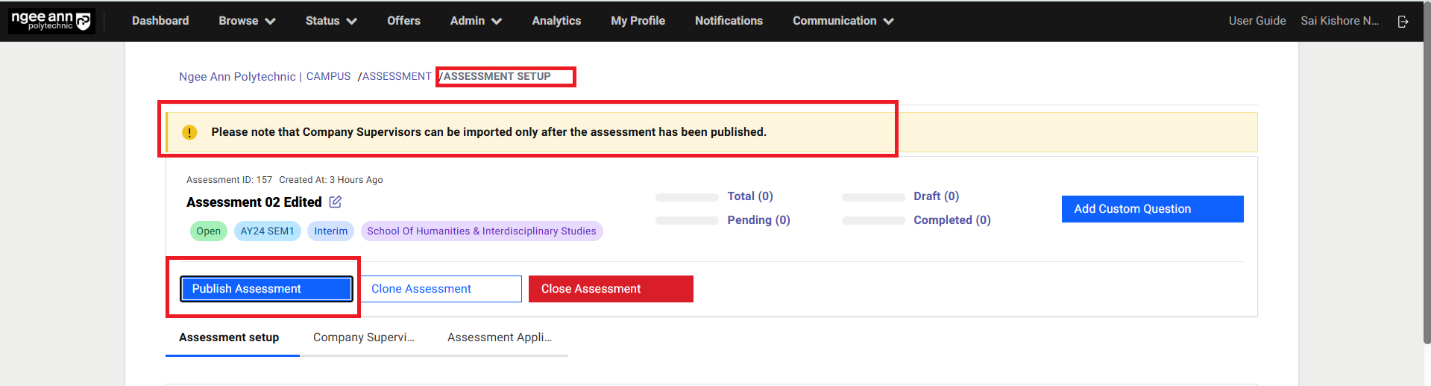
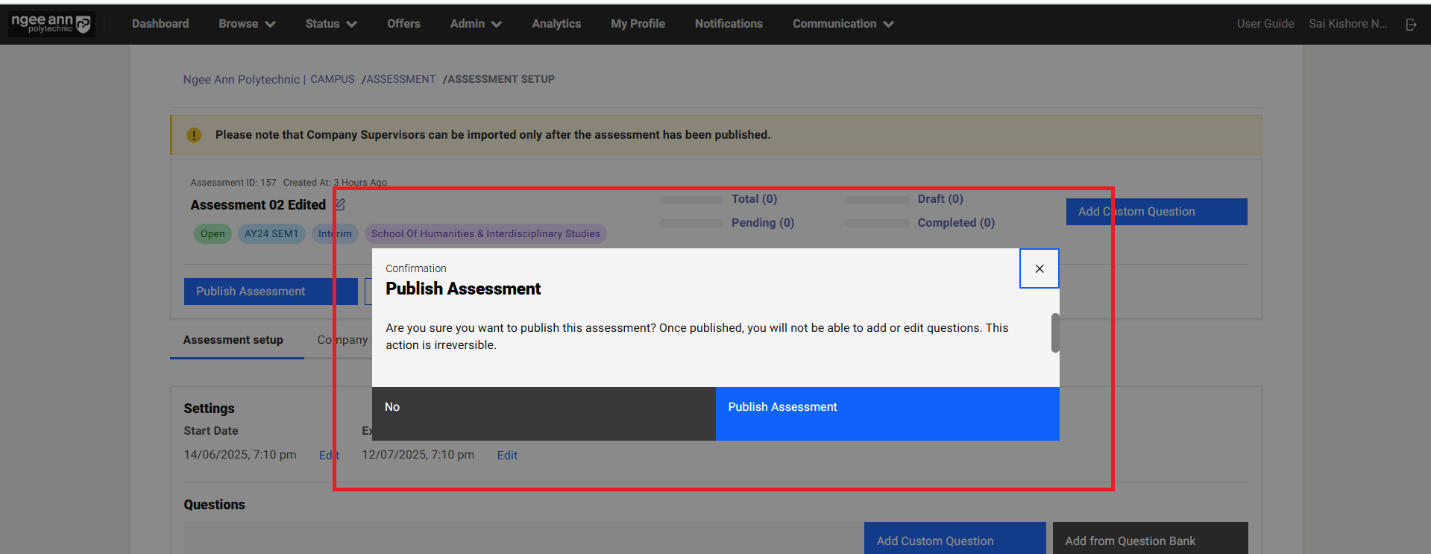
Publish Assessment:
Step 1:
- Click on the “Publish Assessment” button
- Make sure “Publish Assessment” popup get open
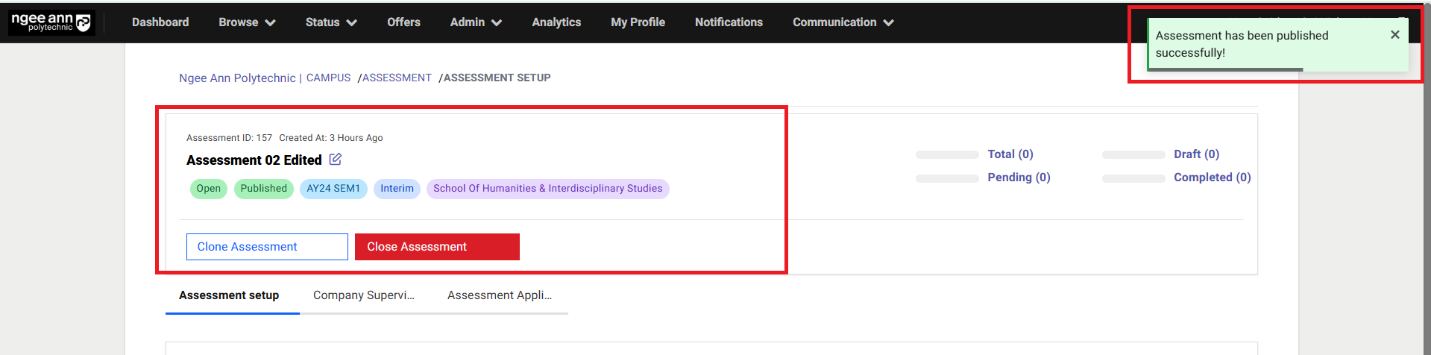
- Click on the “Publish Assessment” button from popup to publish the survey
- Make sure respective assessment get published and successes message banner will be shown
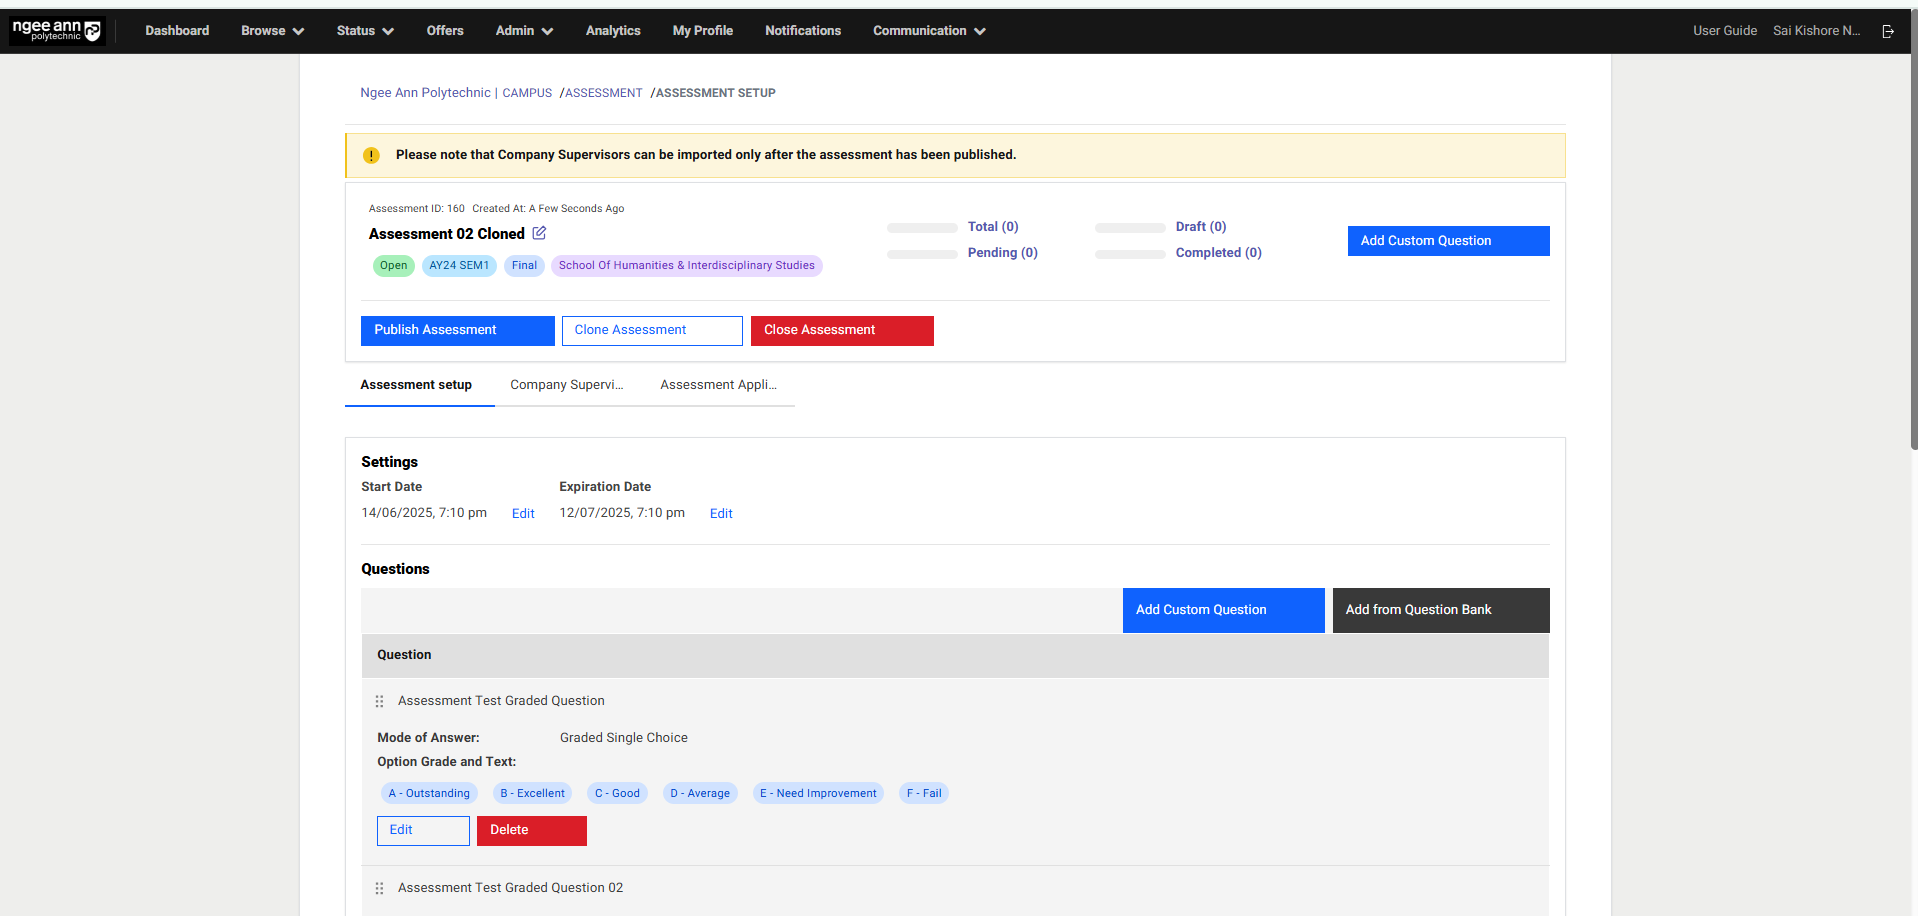
Note:
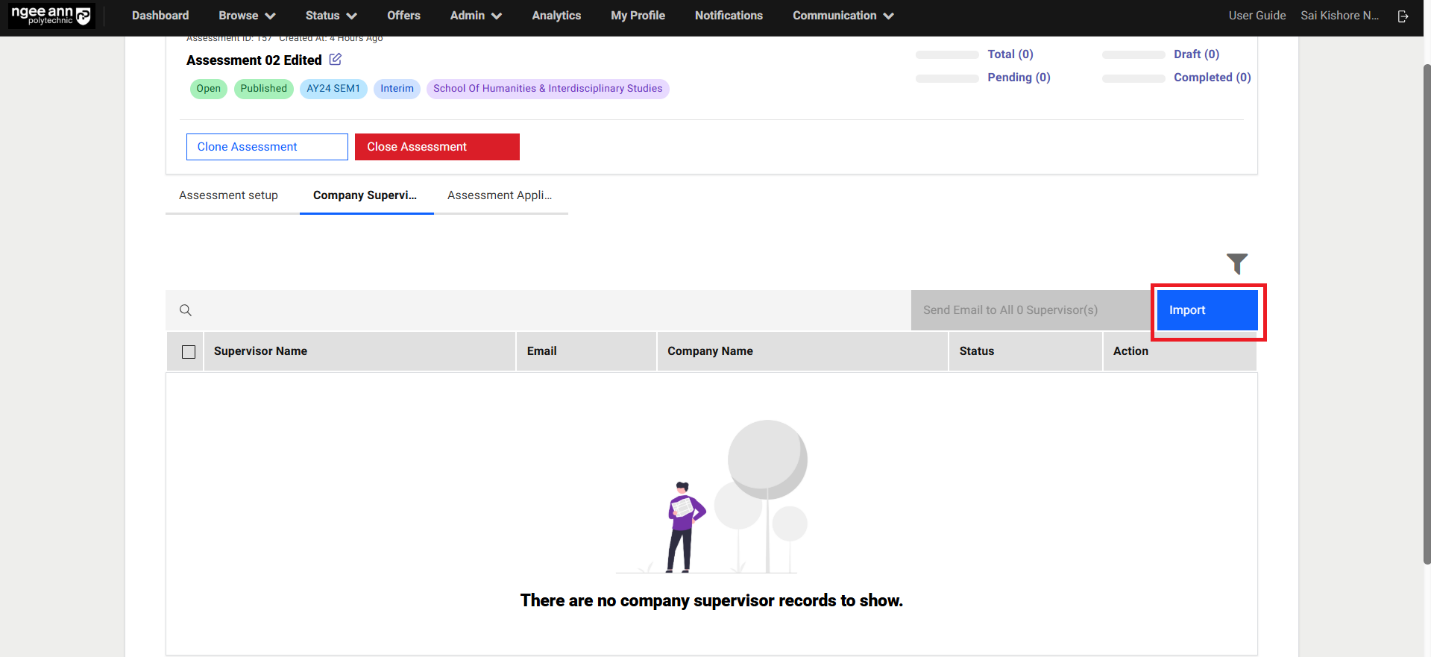
1. “Please note that Company Supervisors can be imported only after the assessment has been published.” Message will be shown before assessment is published.
2. Once Assessment is published then user not able to Edit/Delete the added questions for respective Assessment under “Assessment Setup” section tab
Edit Assessment (After Assessment Published):
Step 1:
- Click on the “Edit” icon beside survey name
- Navigate to “Edit Assessment” page
- Update details into the fields
- Click on the “submit” button
- Updated changes reflect on the respective survey
Note: Batch, Assessment Type, School & Course fields will be non-editable fields when user edit the published Assessment from the “Edit Assessment” page.
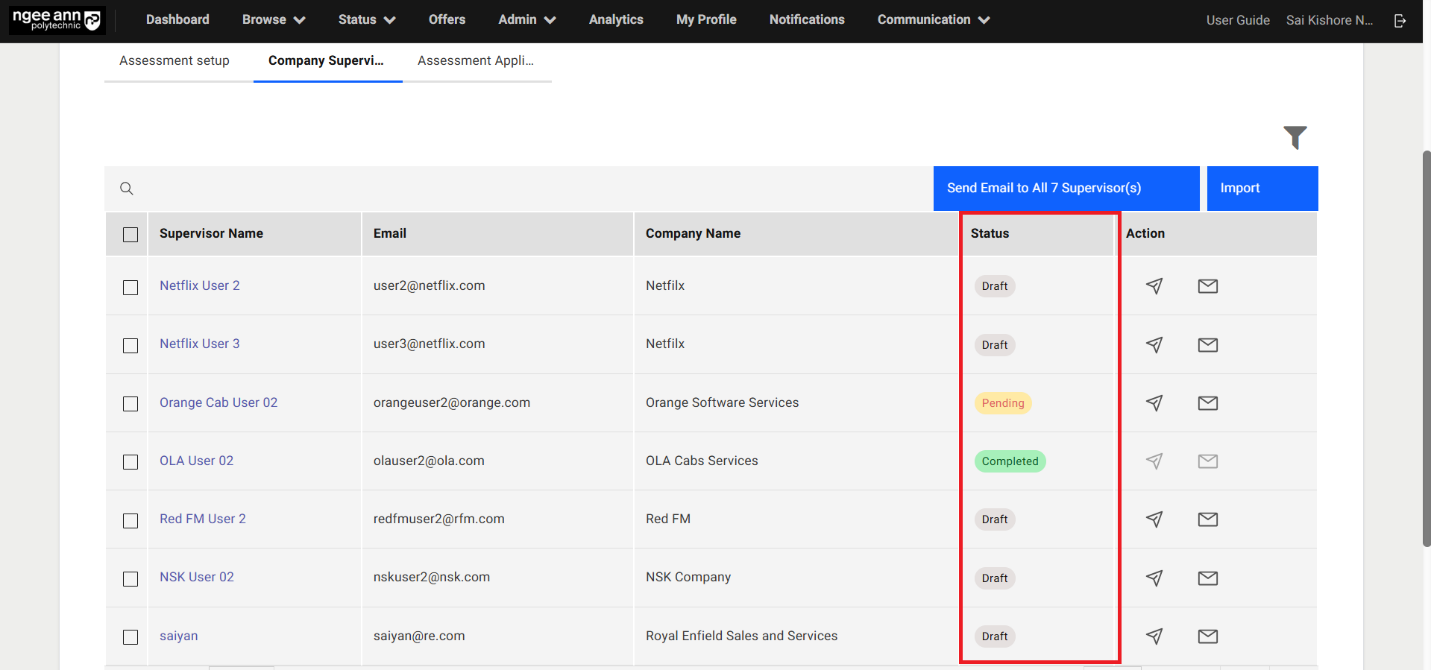
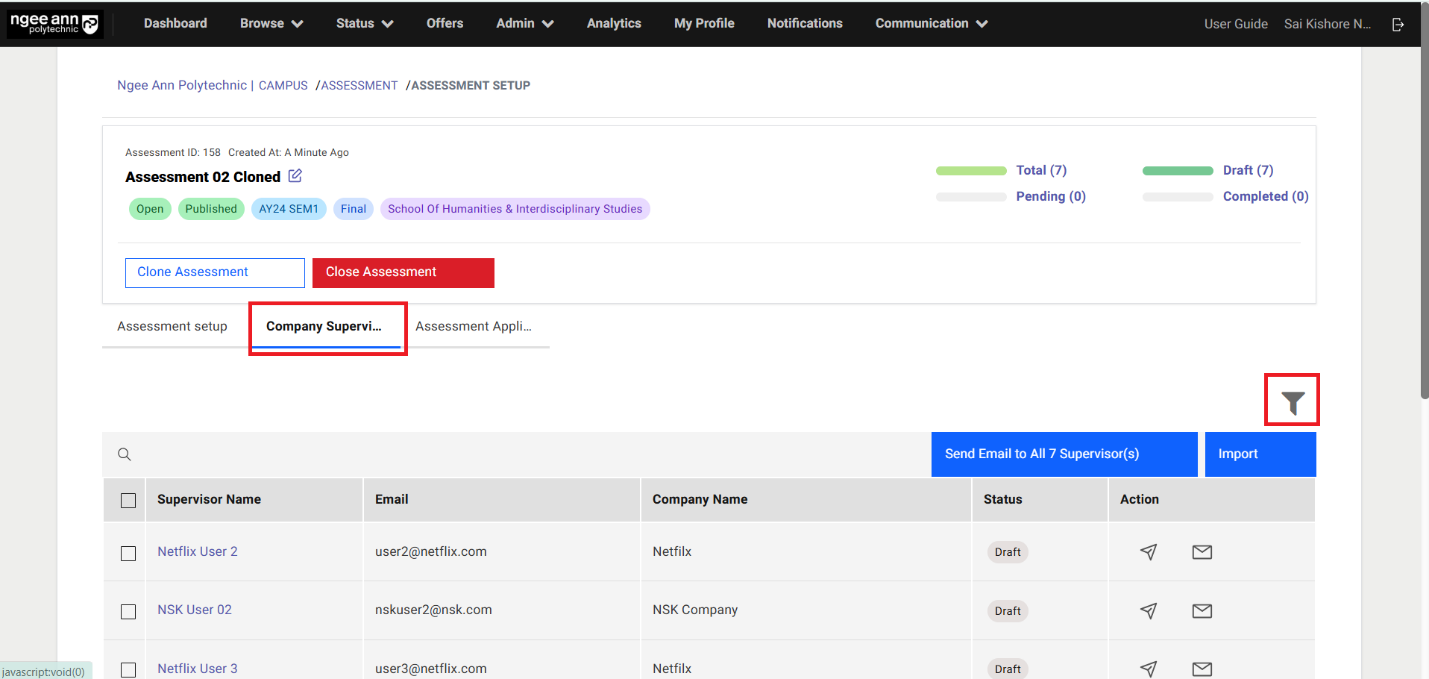
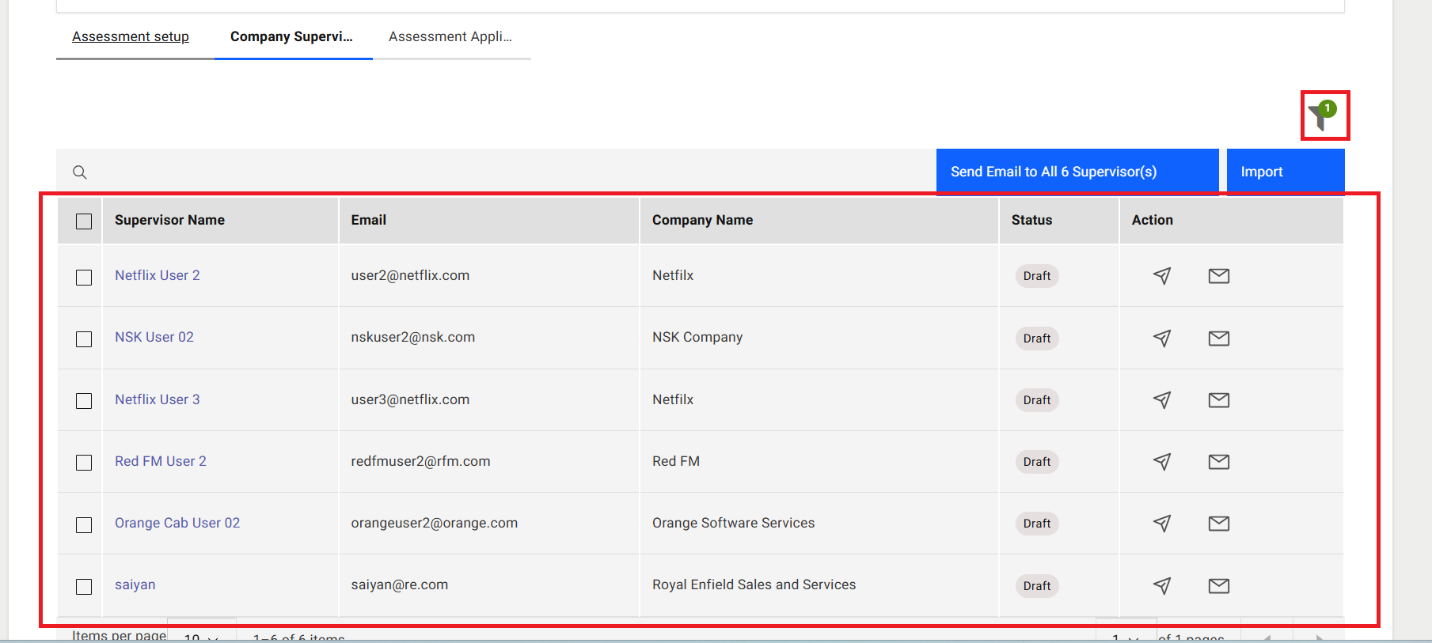
Company Supervisor Section Tab:
Step 1:
- Click on the “Company Supervisor” Section tab under “Assessment Setup” page
- Make sure Company supervisor table will be shown under section tab.
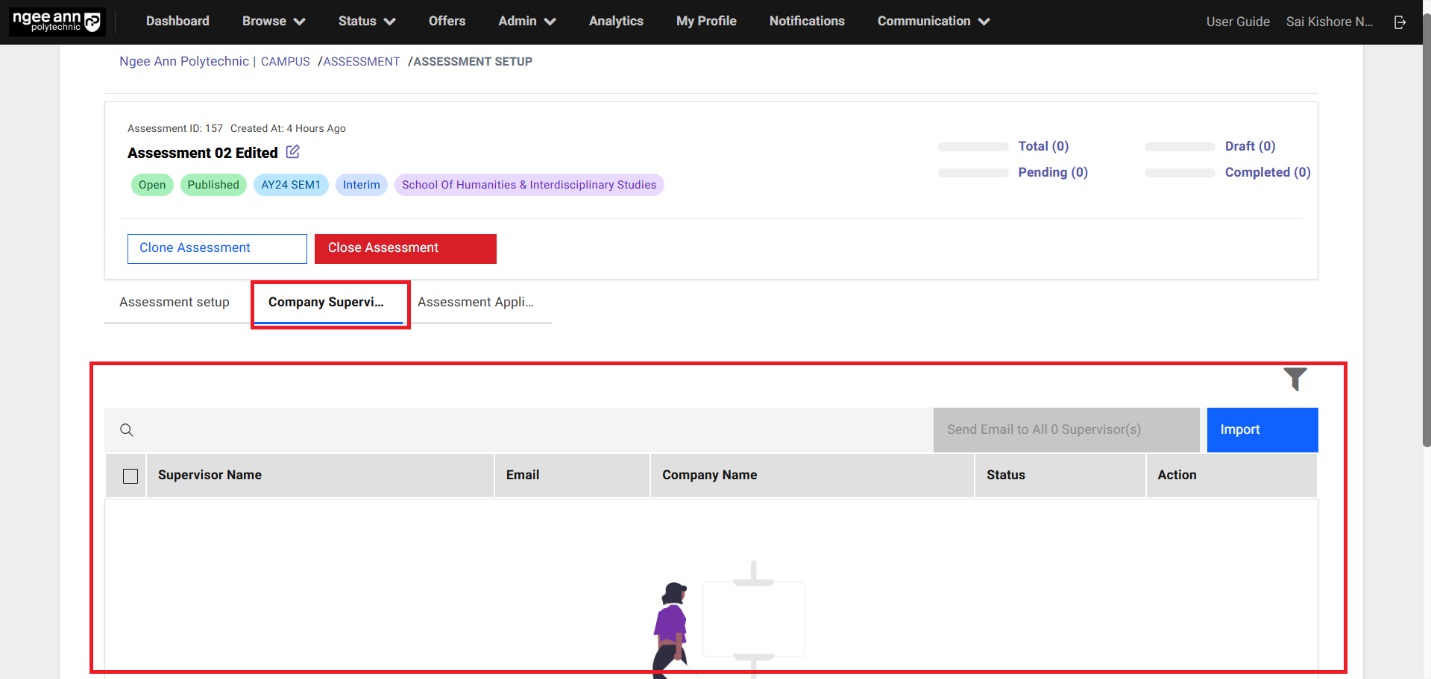
Import Company Supervisors:
Step 1:
- Click the "Import" button located above the table.
- Ensure the assessment is tagged to the correct School and Course. Only hired applicants who are tagged to a Company Supervisor will appear in the table.
Note:
- Applicants must be:
- Marked as hired
- Respective company should have an existing company supervisor
- Tagged to a Company Supervisor via the "Company Supervisor" page
- Once these conditions are met, the respective supervisor's details will be displayed in the table.
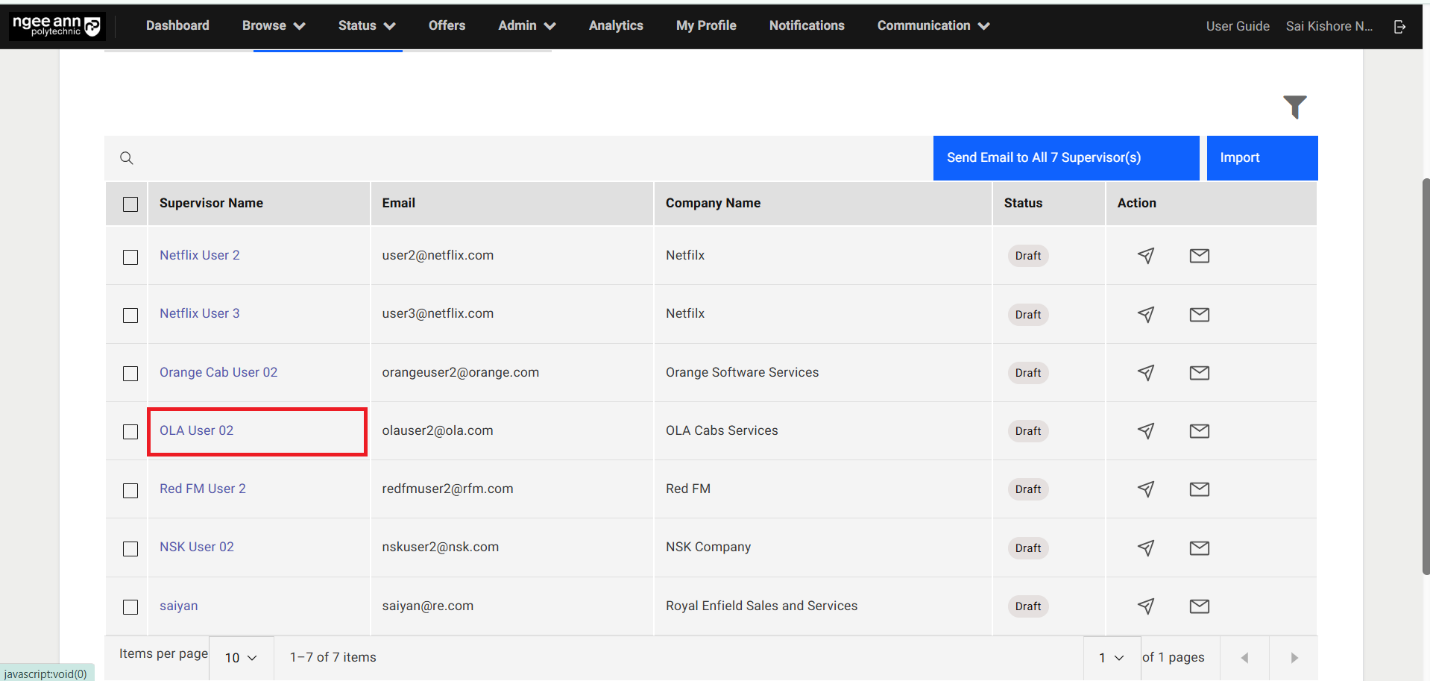
Step 2:
- Click on the company supervisor's name link under the "Supervisor Name" column in the table
- Verify that you are redirected to the "Assessment Applicants" page.
- The table will display the list of applicants tagged under the selected supervisor, filtered by the respective assessment-linked school and course.
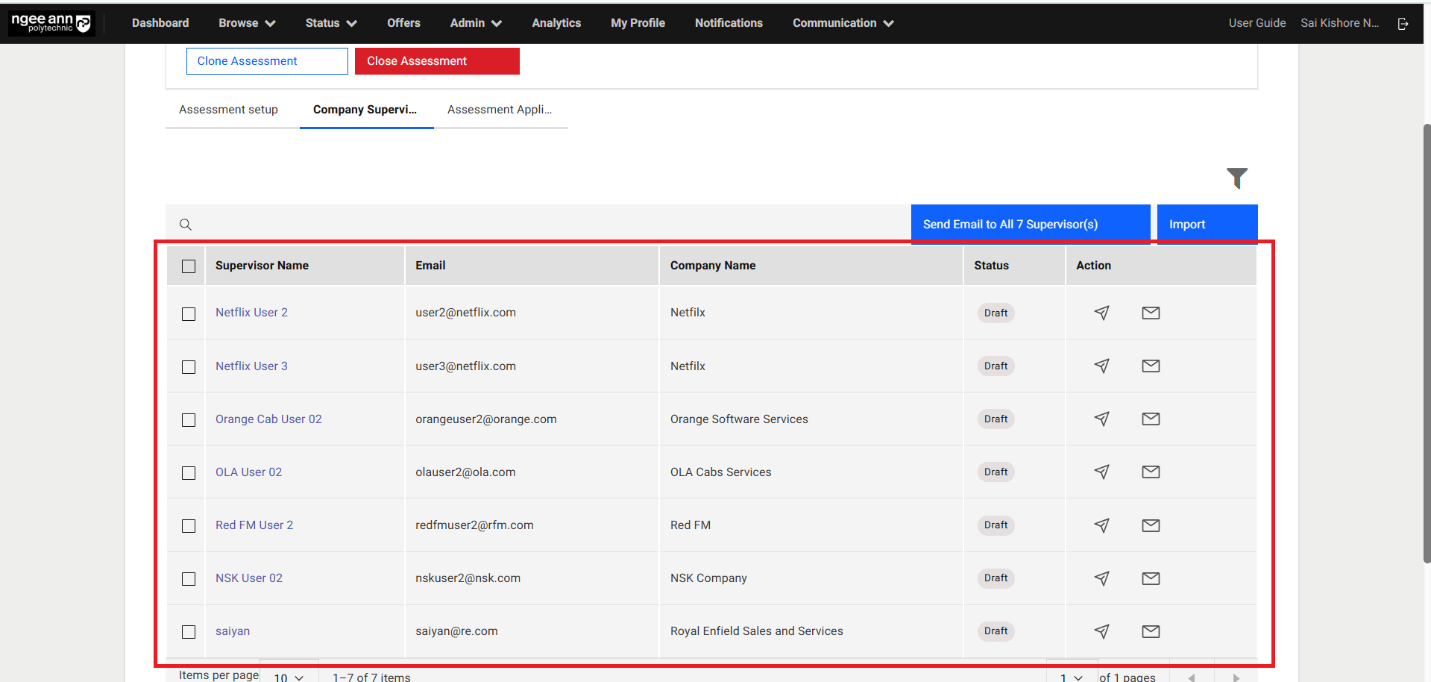
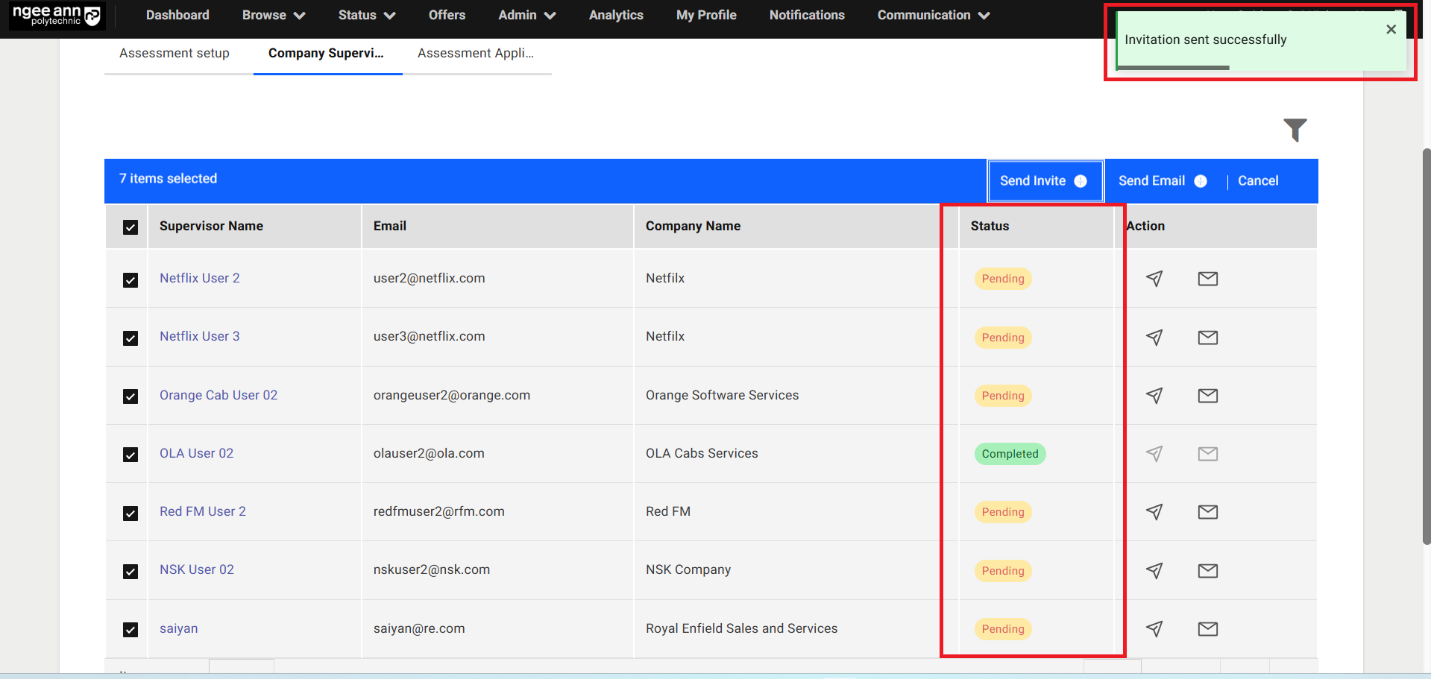
Status:
| Status | Description |
|---|---|
| Draft | The Company Supervisor has been imported into the survey system but has not yet been invited to complete the assessment. |
| Pending | The Company Supervisor has been sent an invitation and has started the assessment. However, not all applicants assigned to them have completed their responses |
| Completed | The Company Supervisor assigned applicants have fully completed the assessment. Note: “Completed” status will only be shown when all applicants tagged to the Company Supervisor have submitted responses. If even one applicant’s assessment is still in progress or incomplete, the status will remain “Pending”. |
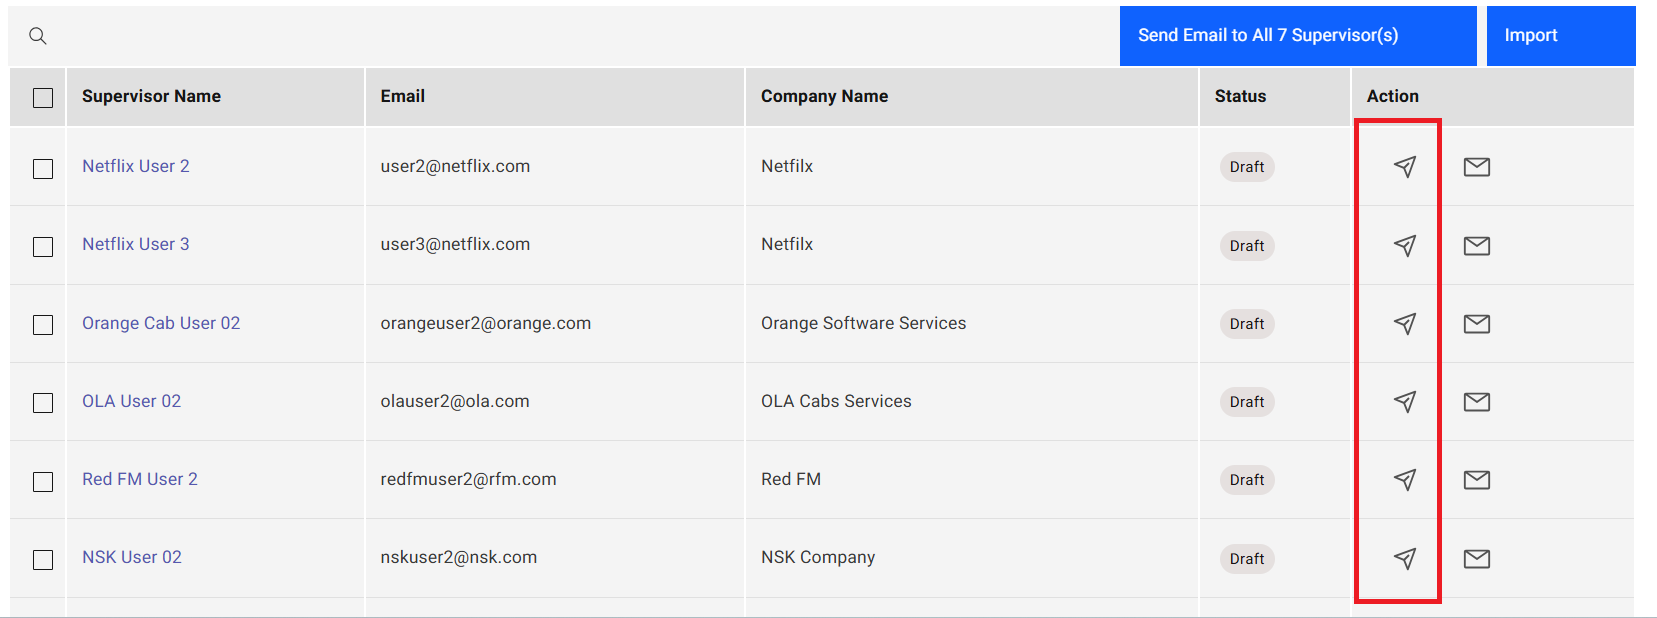
Send Assessment invite to Company Supervisors (Individually):
Step 1:
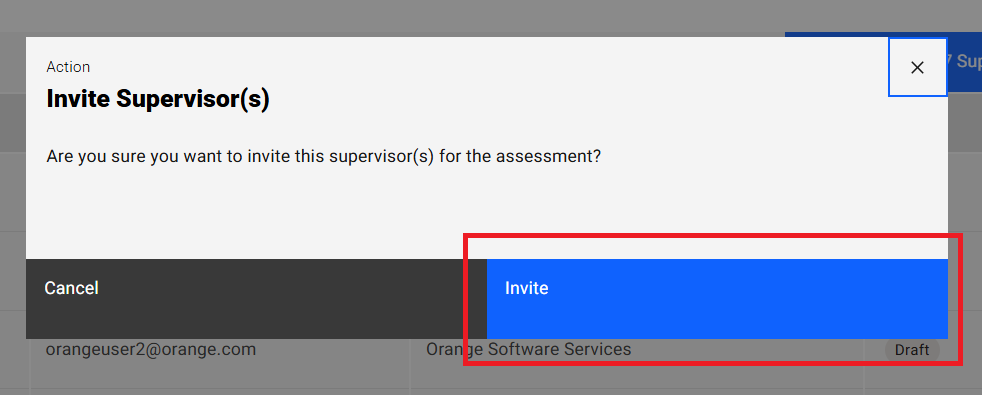
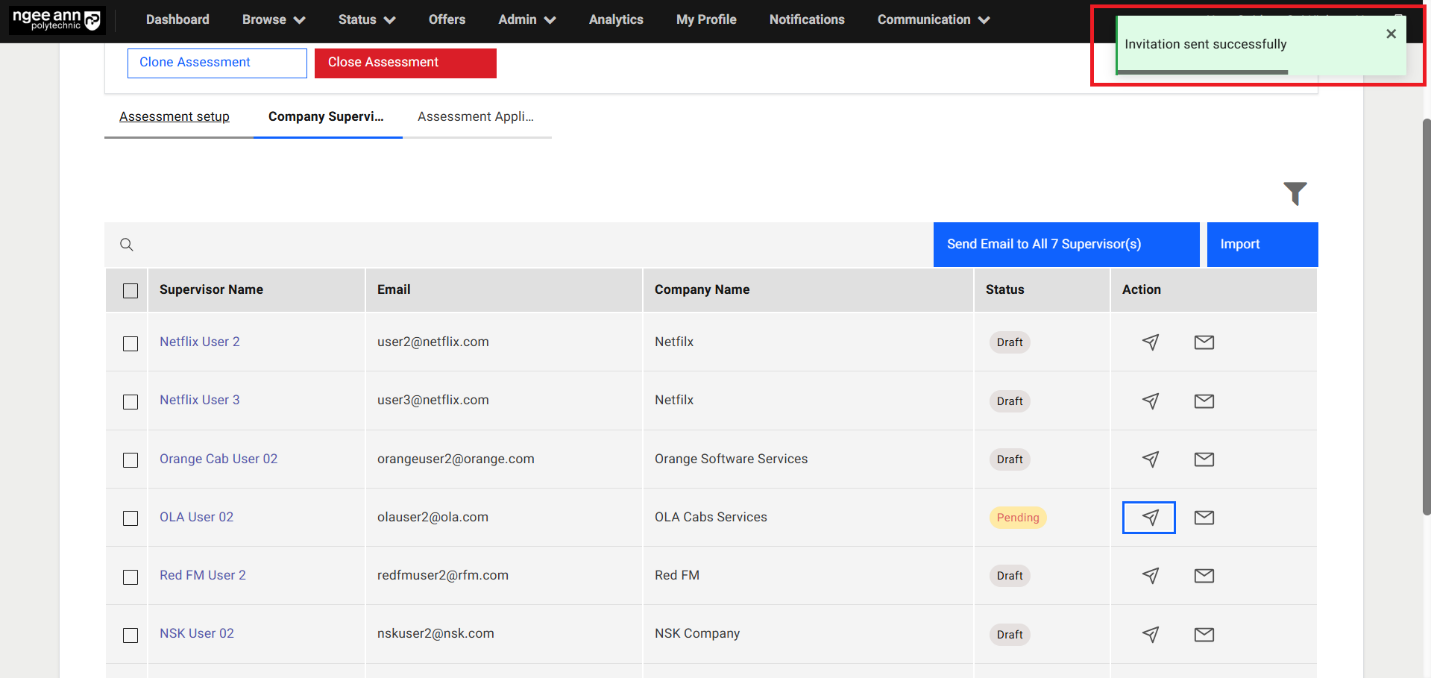
- Click on the “Send Invite” button under “Action” column in the table
- Click on the “Invite” button from the “Invite Supervisor(s)” popup
- Make sure assessment invitation notification mail sent to respective company supervisor and successes message will be shown
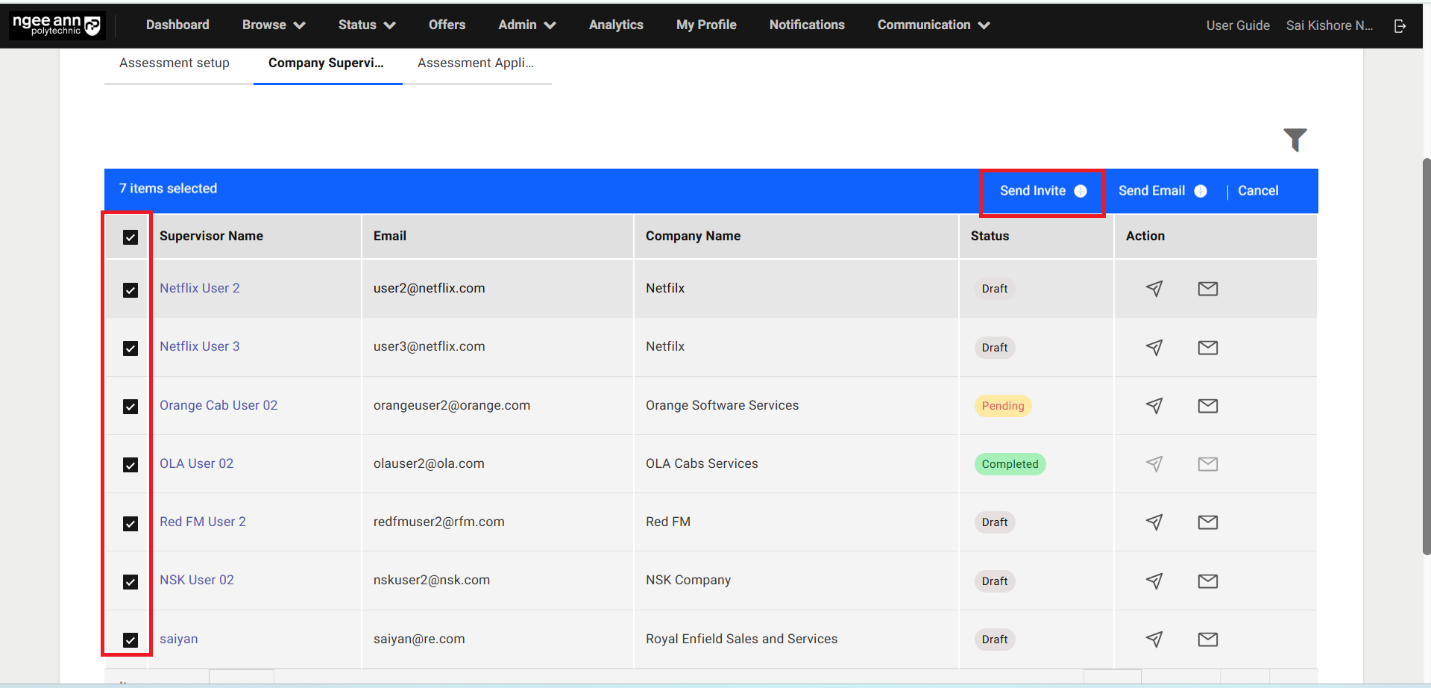
Send Assessment invite to Company Supervisors (Bulk):
Step 1:
- Select company supervisor from the table
- Make sure” Send Invite” list option button will be shown above the table
- Click on the “Send Invite” list option button
- Click on the “Invite” button from the “Invite Supervisor(s)” popup
- Make sure assessment invitation notification mail sent to all selected company supervisor and successes message will be shown

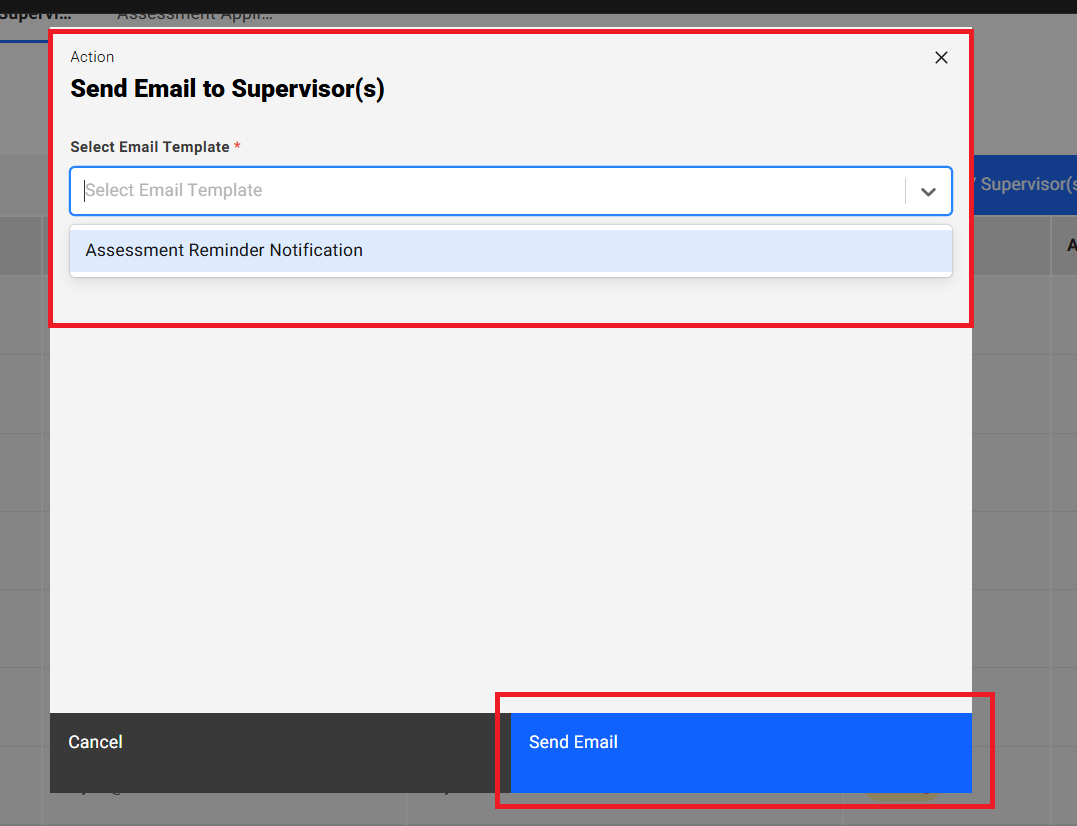
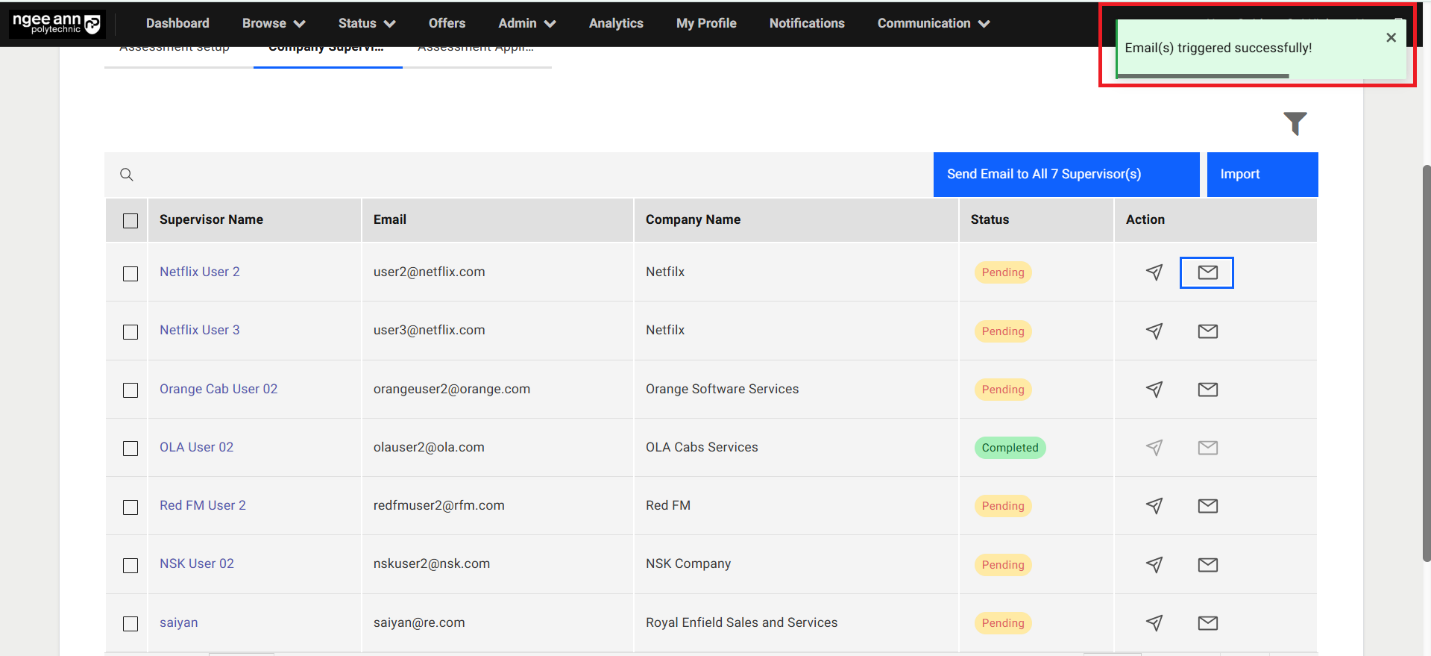
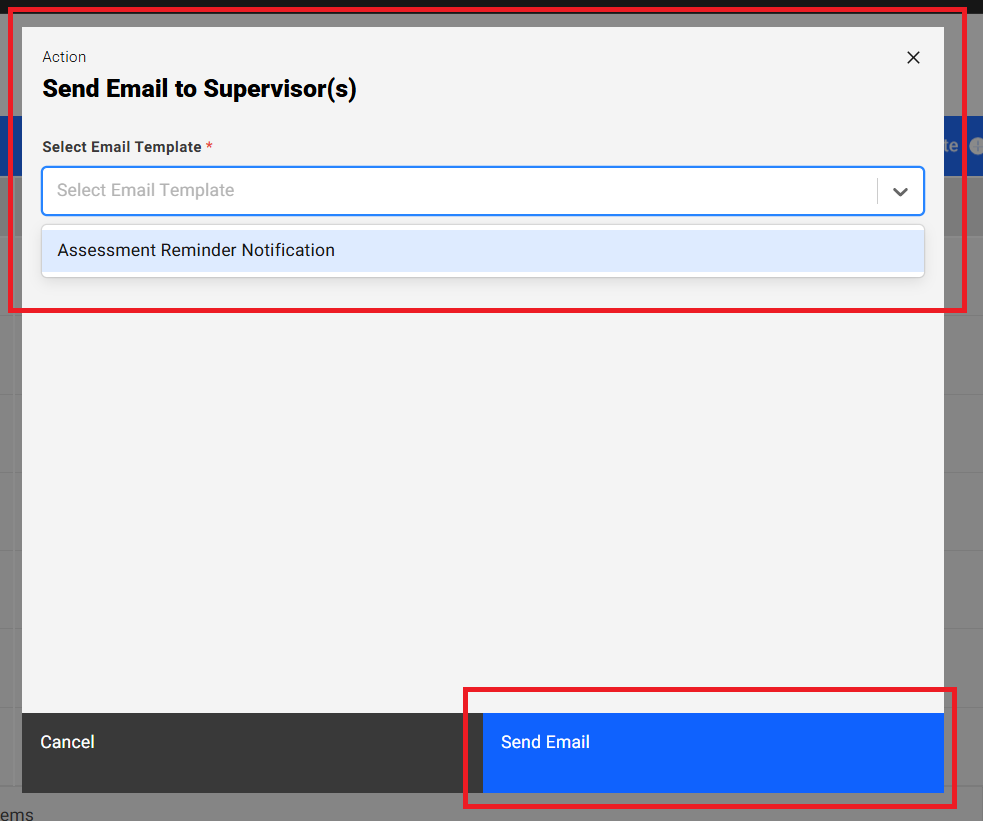
Send Assessment Reminder Mail (Individually):
Step 1:
- Click on the “Send Email” button under “Action” column in the table
- Make sure “Send Email to Supervisor(s)” popup get open.
- Select “Assessment Reminder Notification” template from the “Select Email Template” dropdown field.
- Click on the “Send Email” button to send reminder to respective company supervisor.
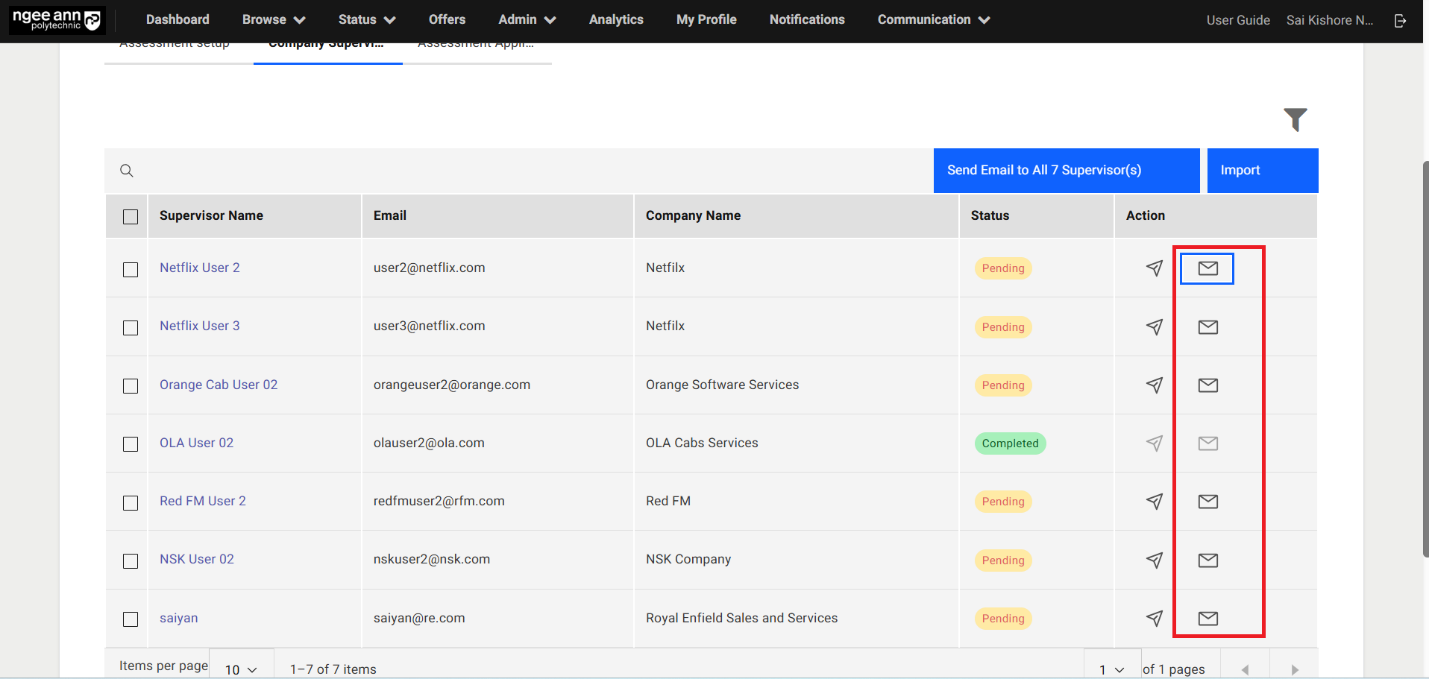
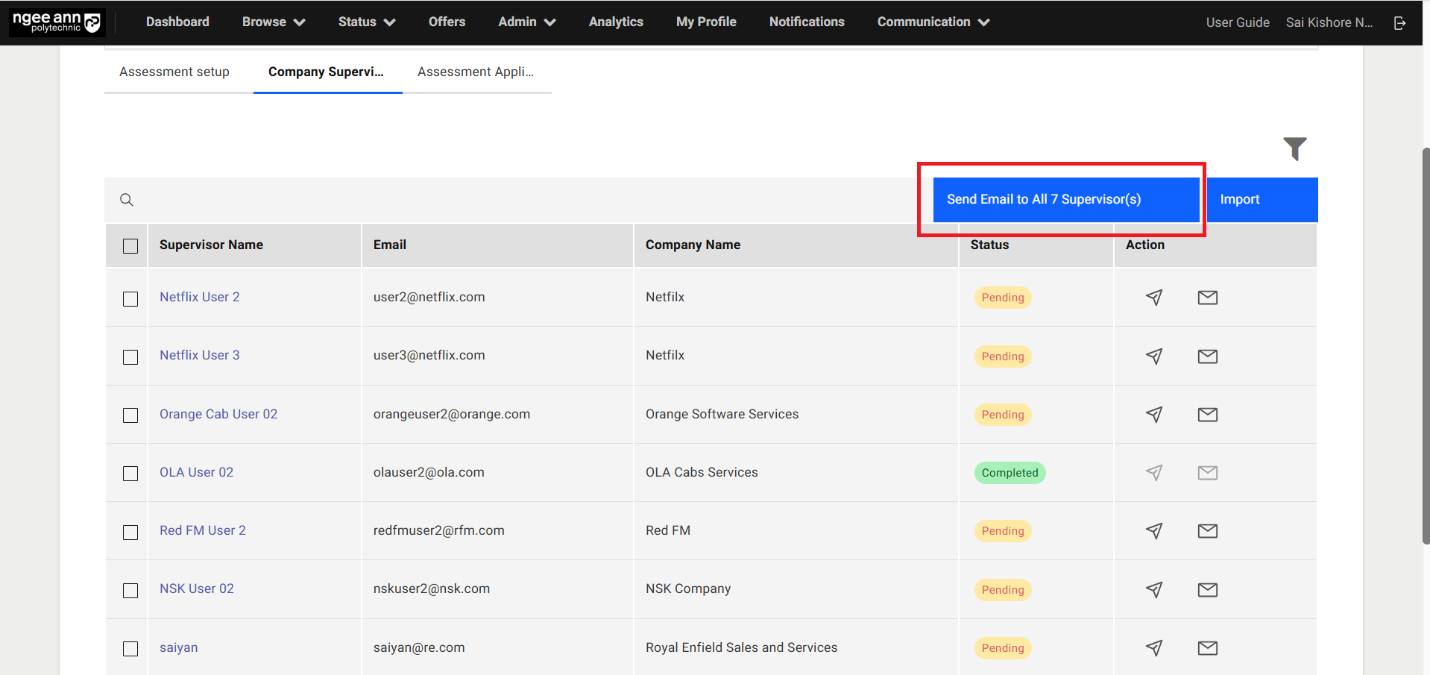
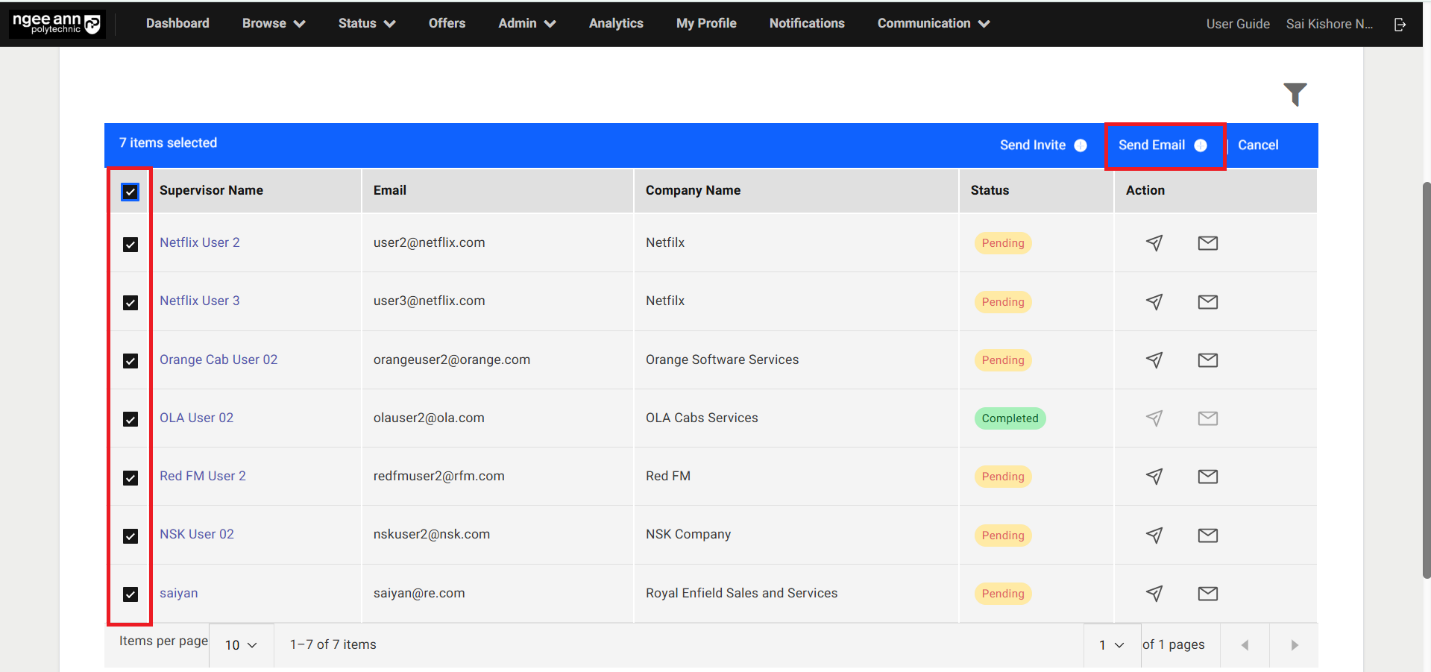
Send Assessment Reminder Mail (Bulk):
Step 1:
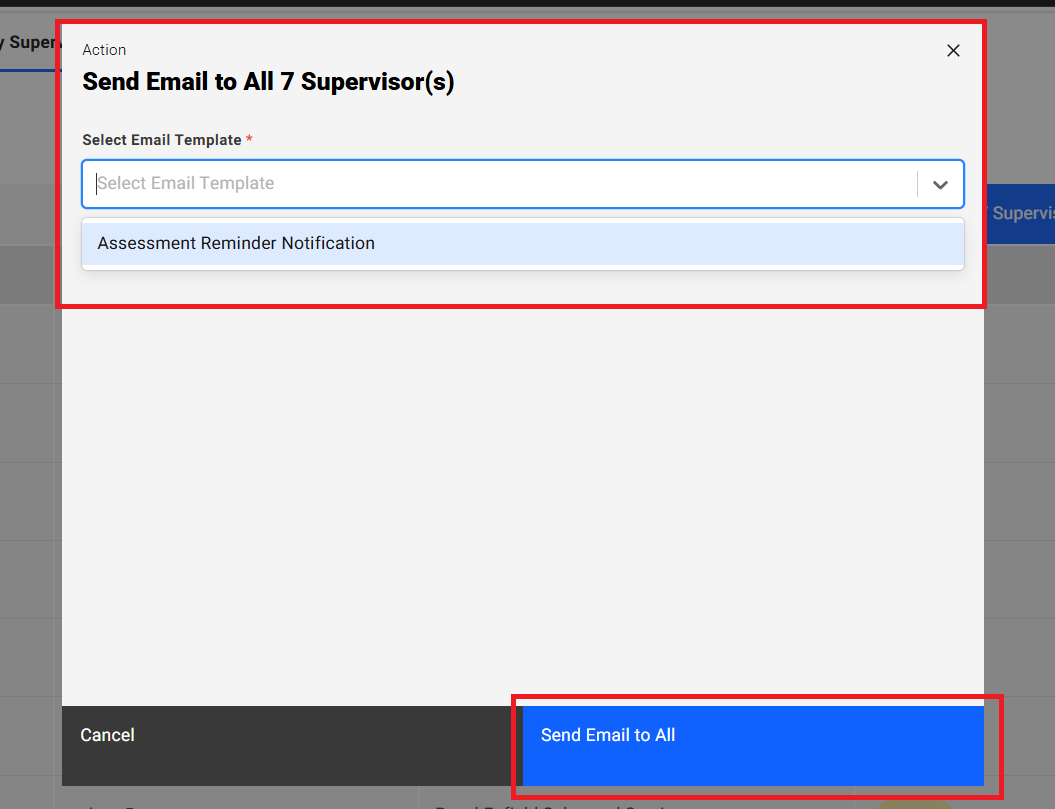
- Click on the “Send Email to all X number Supervisor(s)” button above the table
- Make sure “Send Email to Supervisor(s)” popup get open.
- Select “Assessment Reminder Notification” template from the “Select Email Template” dropdown field.
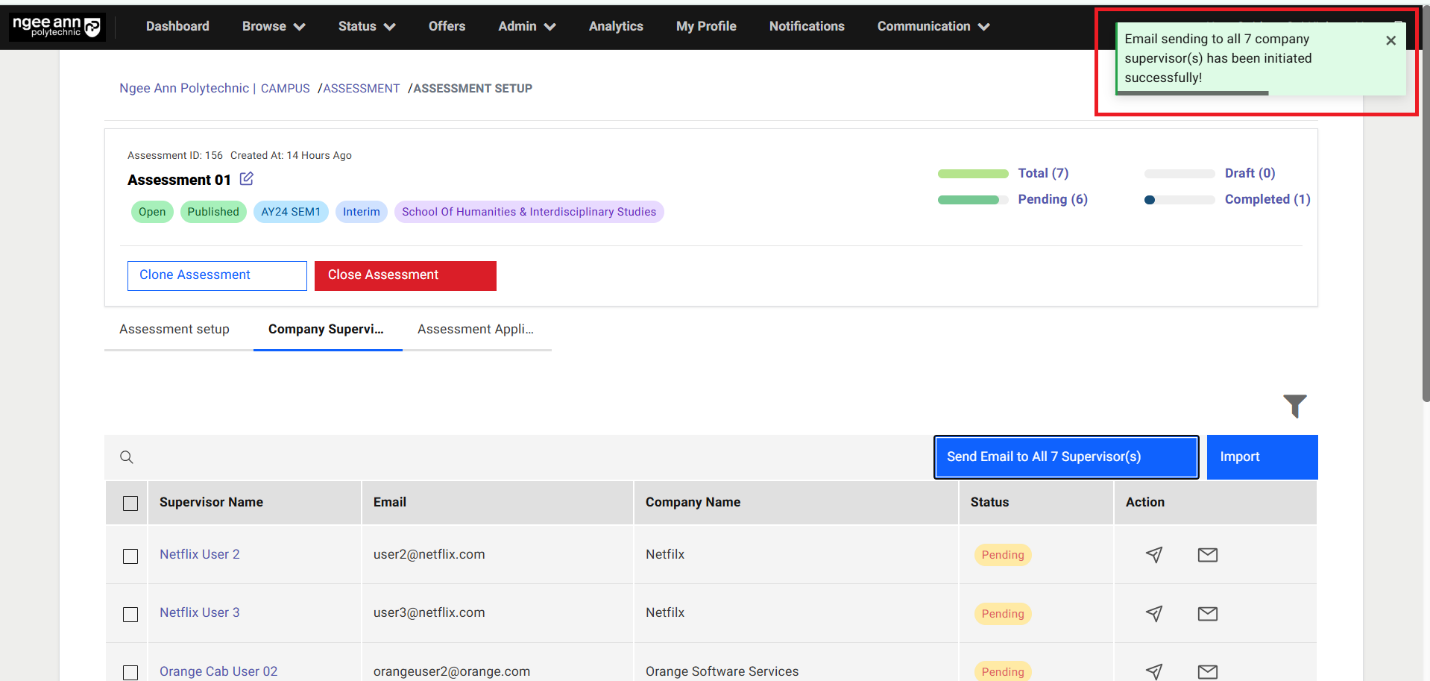
- Click on the “Send Email to all” button to send reminder to all company supervisors present in the table.
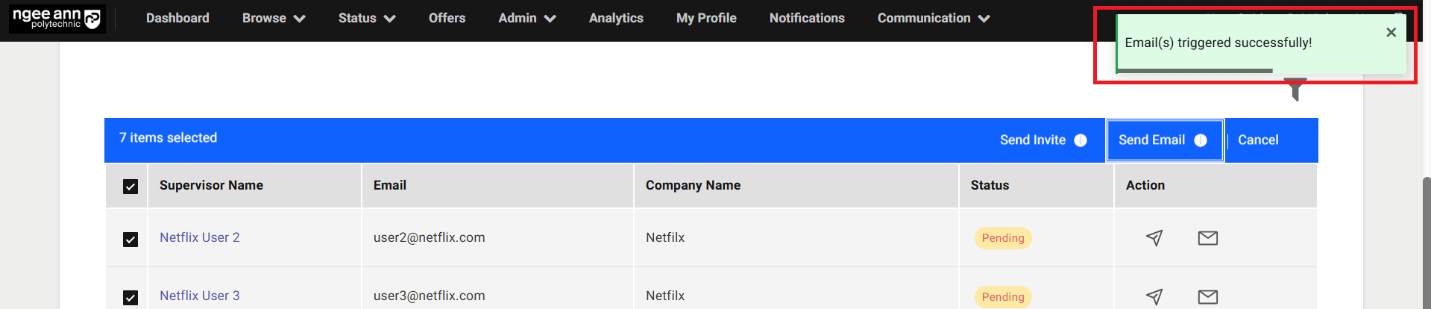
- Successes message will be shown
Step 2:
- Select company supervisor from the table
- Make sure “Send Email” list option button will be shown above the table
- Click on the “Send Email” list option button
- Select “Assessment Reminder Notification” template from the “Select Email Template” dropdown field.
- Click on the “Send Email” button to send reminder mail to selected company supervisors present in the table.
- Successes message will be shown
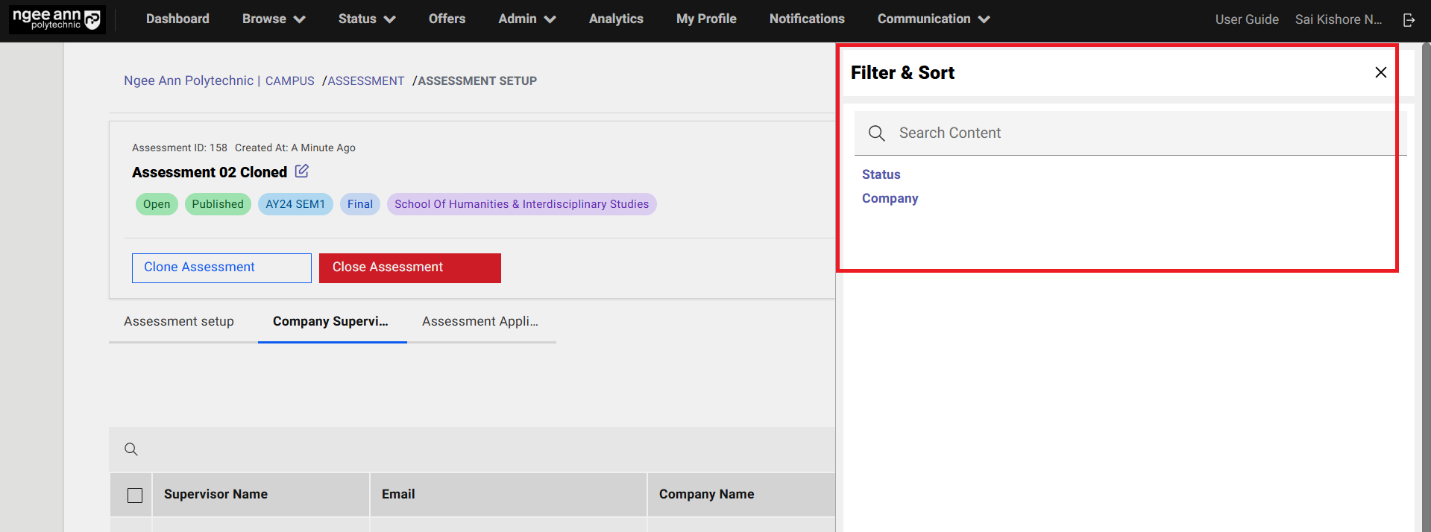
Filters:
Step 1:
- Click the “Filter” button located above the table in the “Company Supervisor” section tab.
- Ensure that the “Filter & Sort” popup appears with available filter options.
- Select and apply the desired filters.
- Verify that the table updates to display data matching the selected filter criteria.
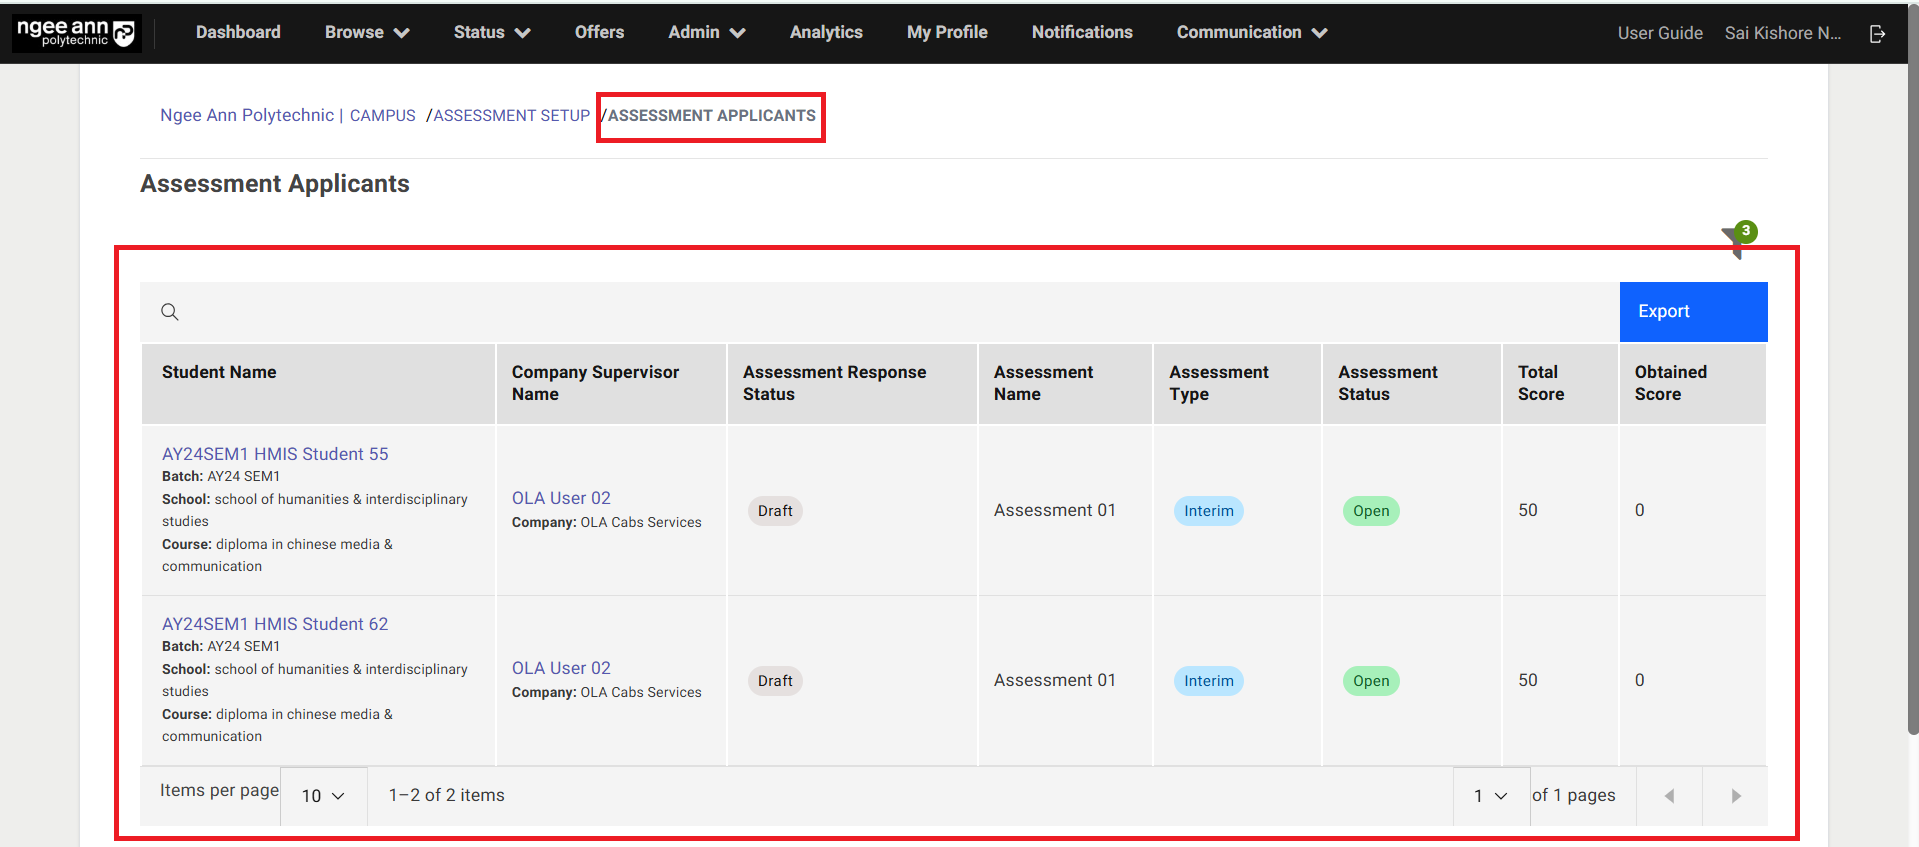
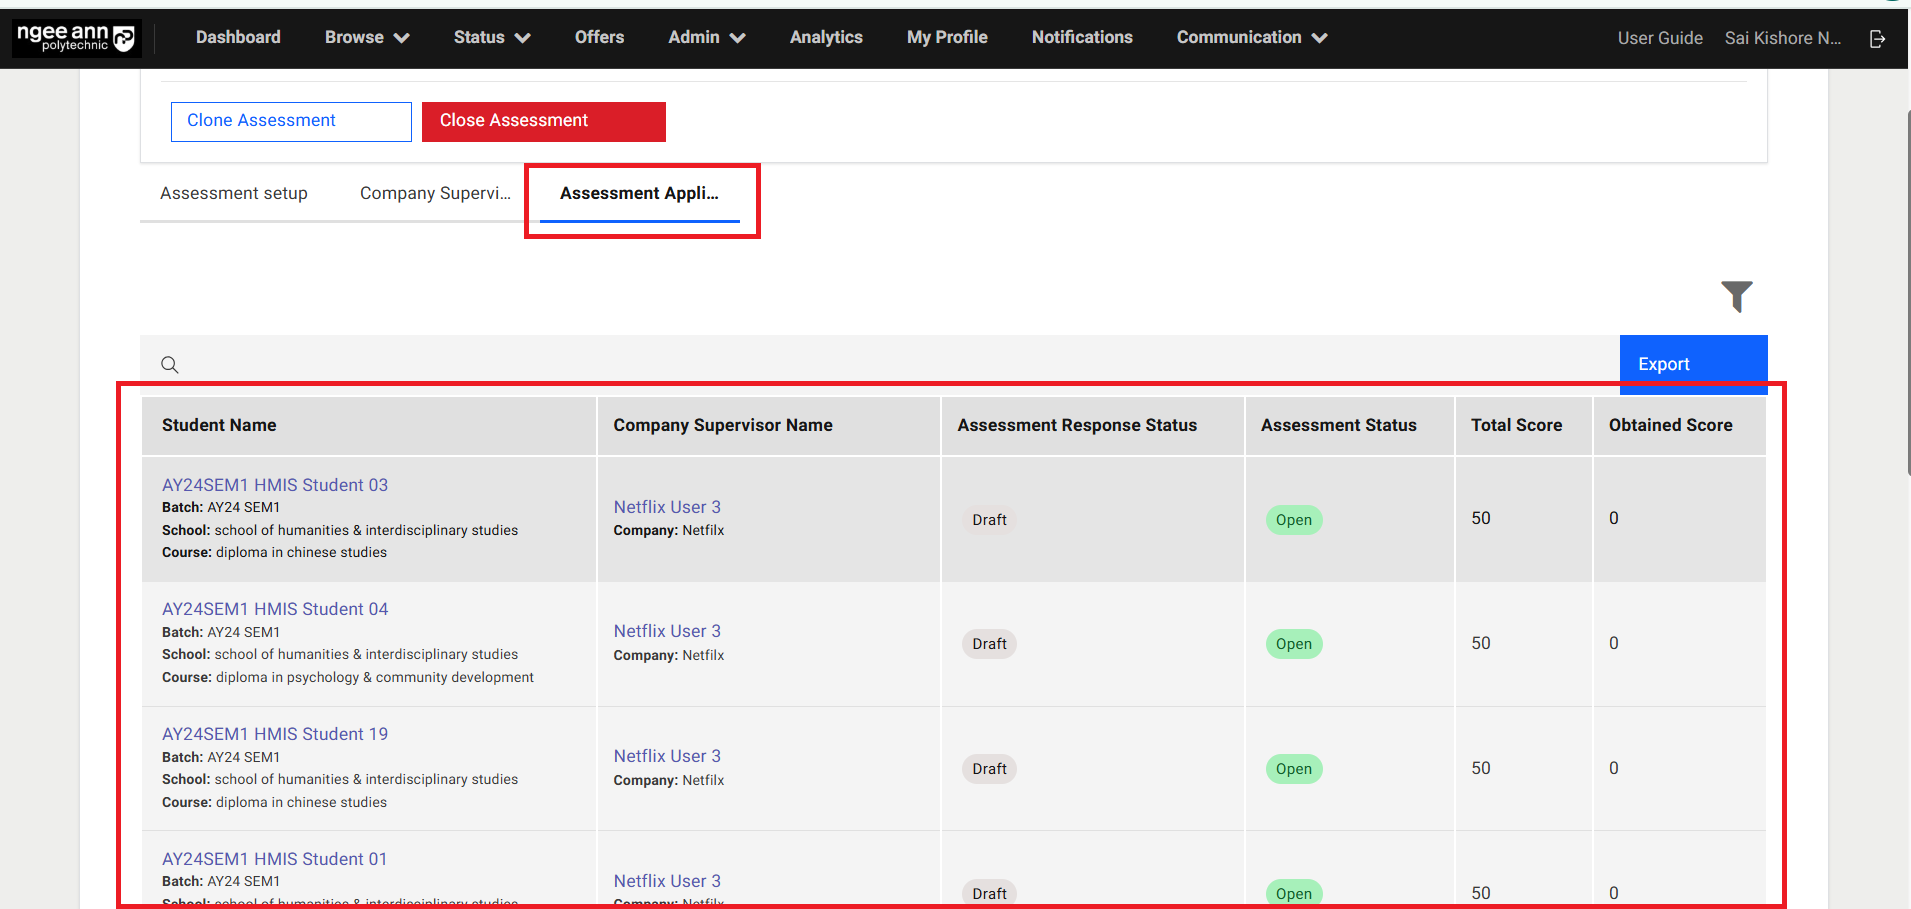
Assessment Applicants Section Tab:
Step 1:
- Click the “Assessment Applicants” section tab.
- Ensure that the table displays the list of applicants associated with the respective assessment and their tagged Company Supervisor.
| Column Name | Description |
|---|---|
| Student Name | 1. This column displays a list of applicants associated with the corresponding assessment, along with their assigned Company Supervisor. 2. Clicking on an applicant's name (as a link text button) will navigate to the applicant's Application Information page, specifically landing on the Assessment section tab. |
| Company Supervisor Name | 1. This column shows the name of the company where the applicant has been hired, along with the name of their assigned Company Supervisor. 2. Clicking on the Company Supervisor's name (as a link text button) will navigate to the respective Company Employee page. |
| Assessment Response Status | This column indicates the status of the applicant's assessment as completed by the Company Supervisor. The statuses include: • Draft: The Company Supervisor has been added to the survey system but has not yet been invited to complete the assessment. • In Progress: The Company Supervisor has received the invitation and has started the assessment. • Completed: The assessment has been fully completed by the assigned Company Supervisor. |
| Assessment Status | This column shows whether the assessment is currently active or not. The statuses include: • Open: The assessment is still active (i.e., the expiration time has not yet passed). • Closed: The assessment is no longer active (i.e., the expiration time has passed). |
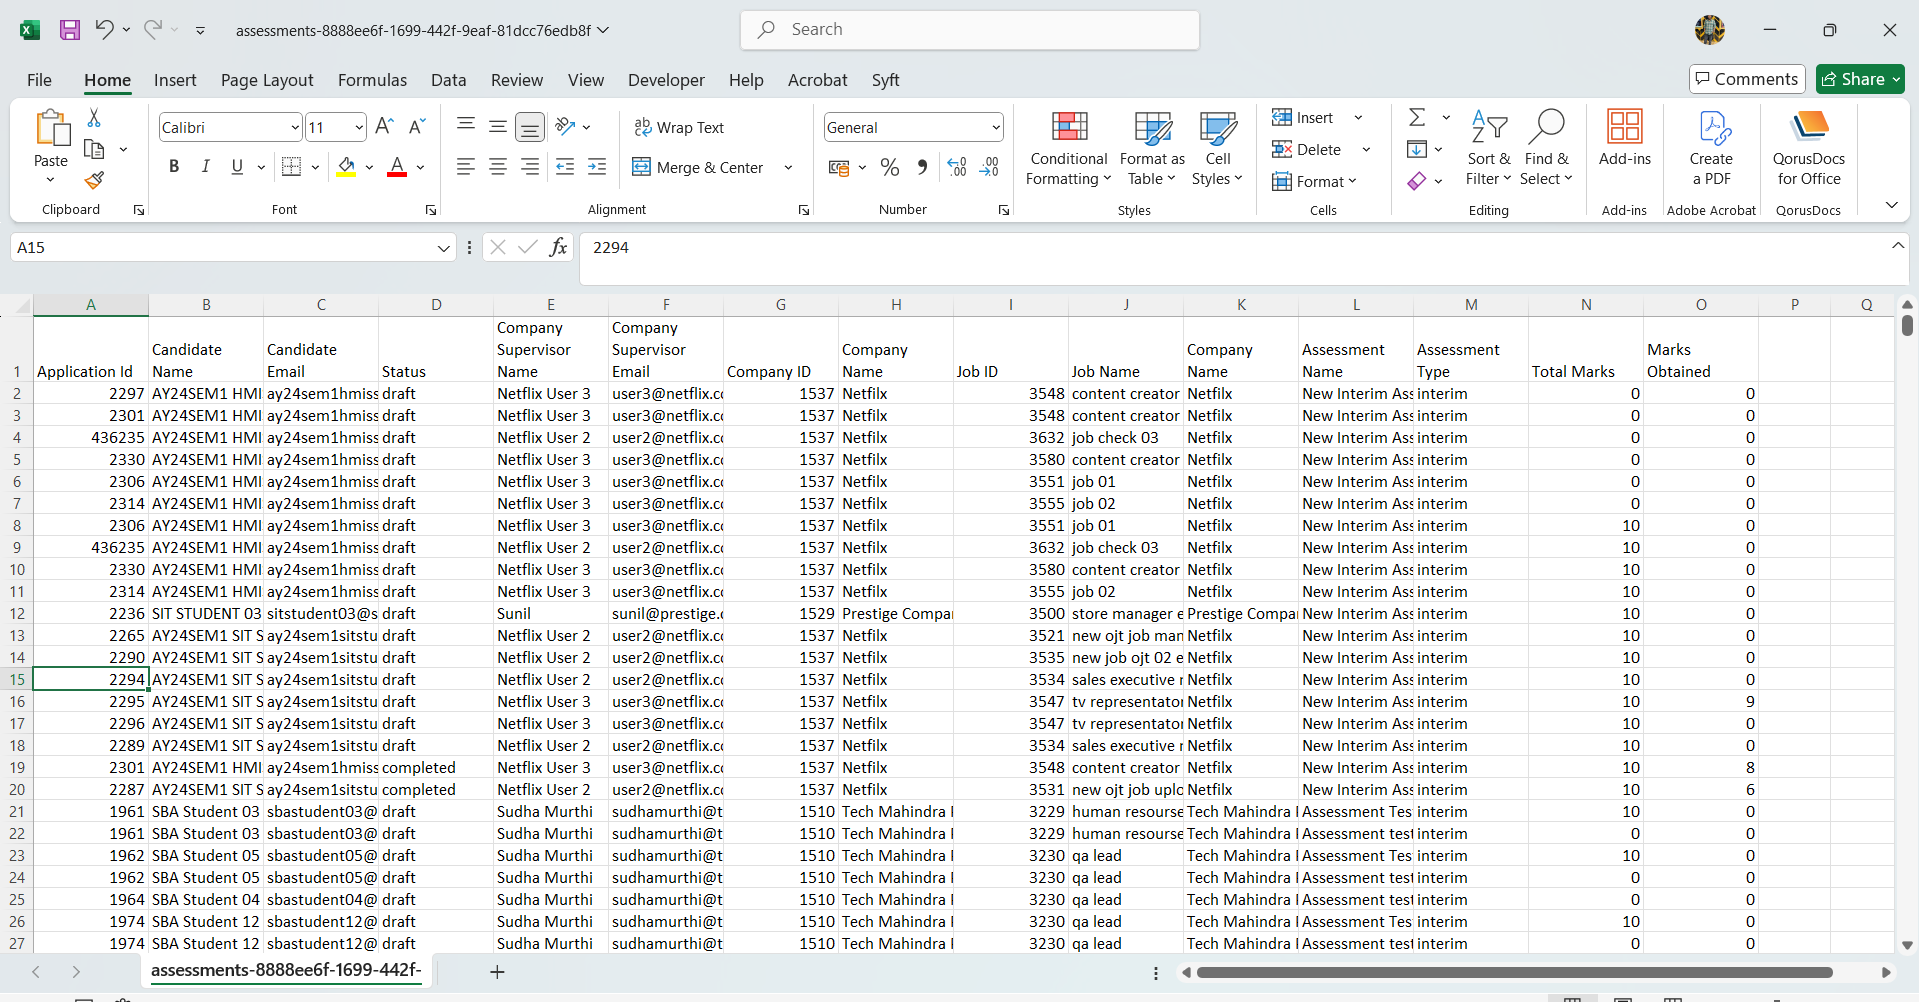
| Total Score | Displays the total score for all graded questions in the applicant's tagged assessment. Each graded question is worth a maximum of 10 marks. Only graded questions are included in the total. |
| Obtained Score | Displays the score obtained by the applicant, calculated as the sum of scores assigned to the options selected by the Company Supervisor for each graded question. |

Filters:
Step 1:
- Click the “Filter” button located above the table in the “Assessment Applicants” section tab.
- Ensure that the “Filter & Sort” popup appears with available filter options.
- Select and apply the desired filters.
- Verify that the table updates to display data matching the selected filter criteria.

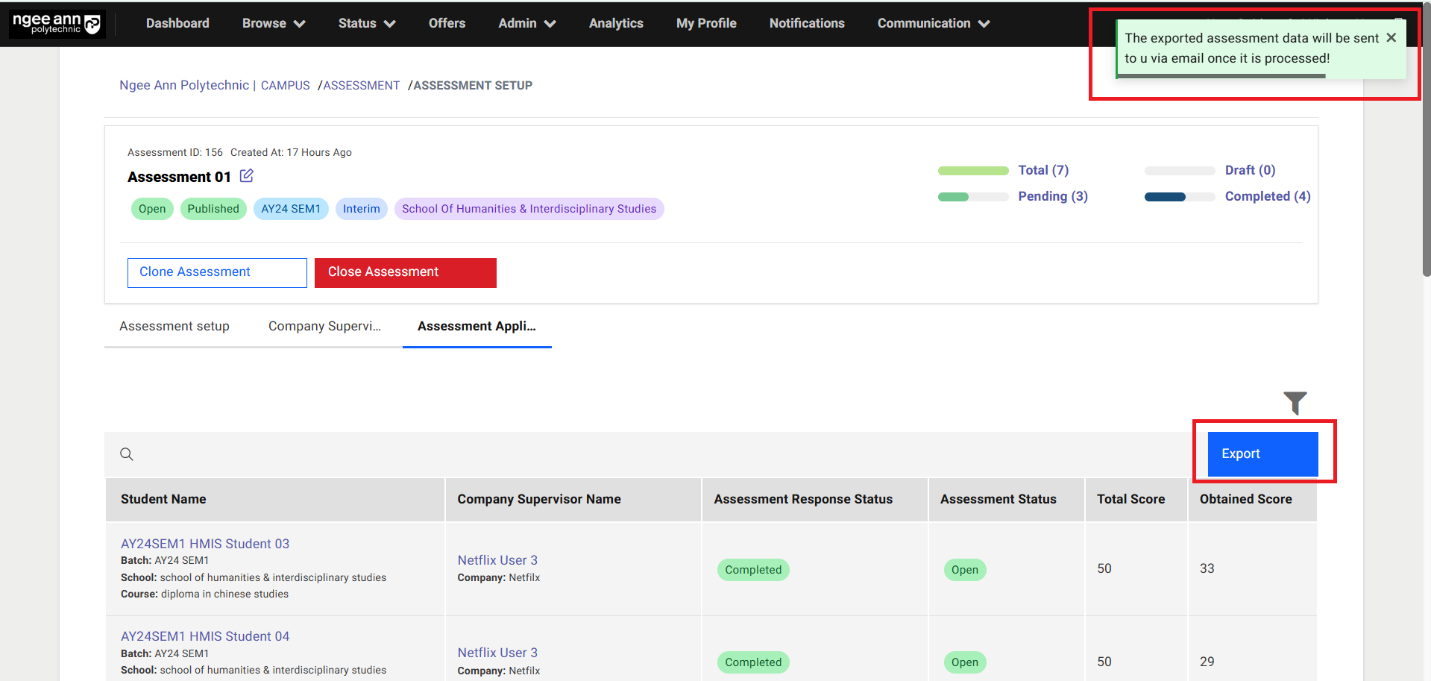
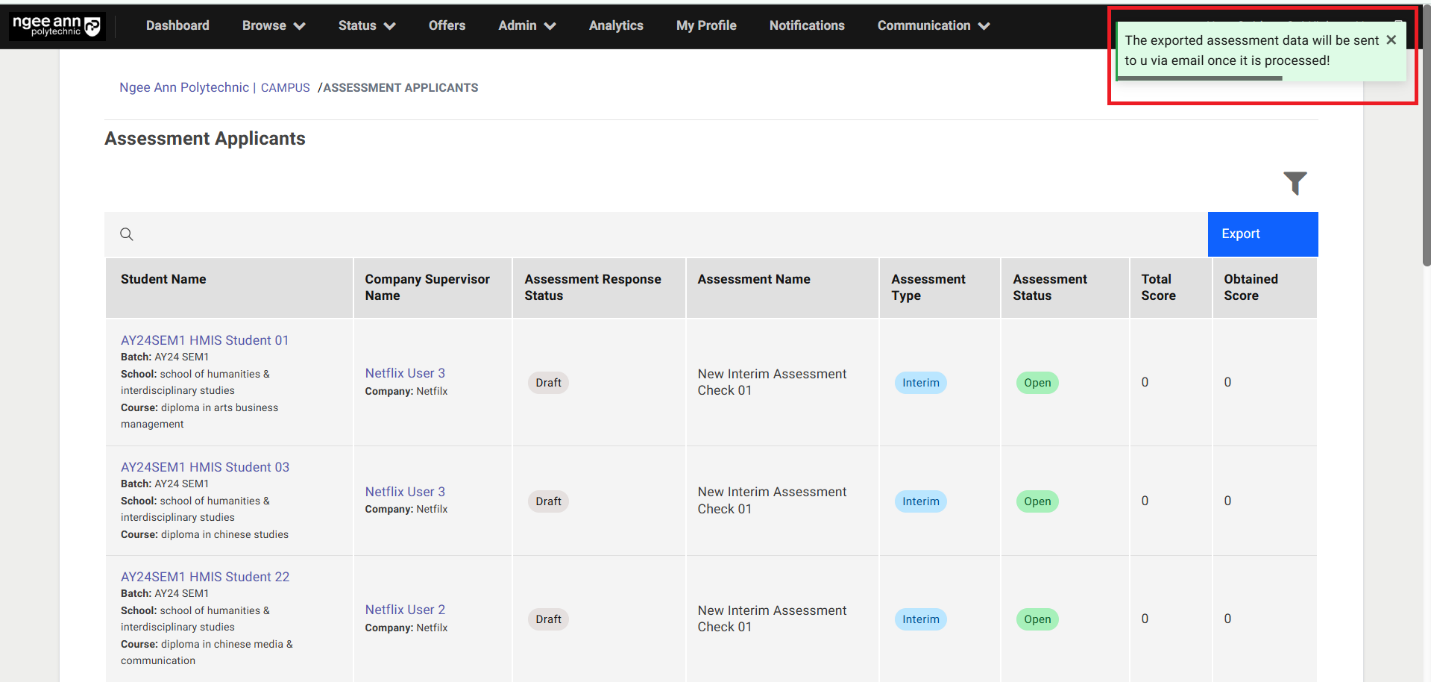
Export:
Step 1:
- Click the “Export” button located above the table.
- Ensure that the exported sheet includes applicants who are tagged to assessment data.
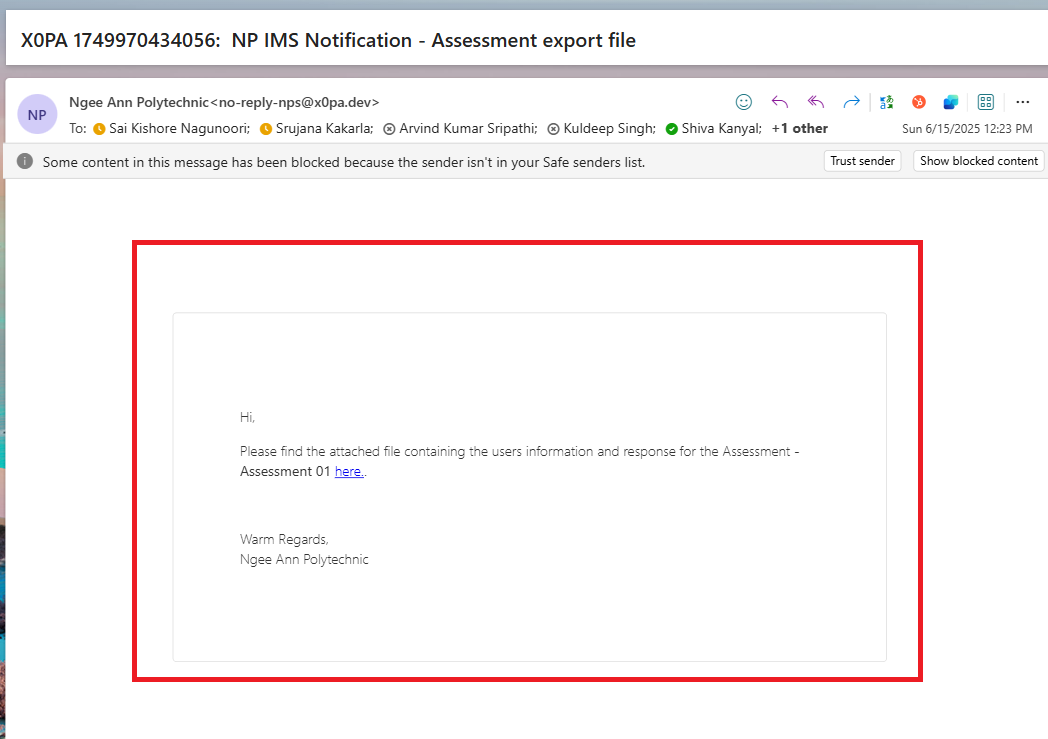
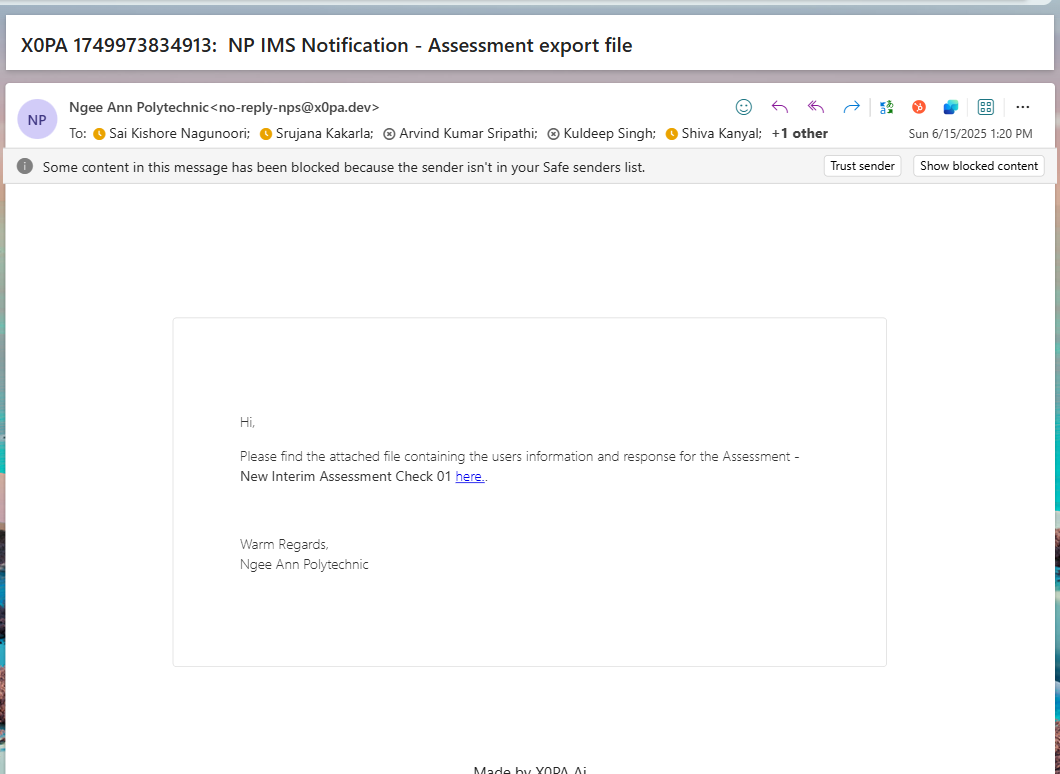
- Verify that the exported sheet is sent to the respective user's email.
- Click the “here” link text button from the notification mail
- Confirm that the exported sheet is downloaded successfully.
- Check that both applicants and their associated assessment data are present in the exported sheet.

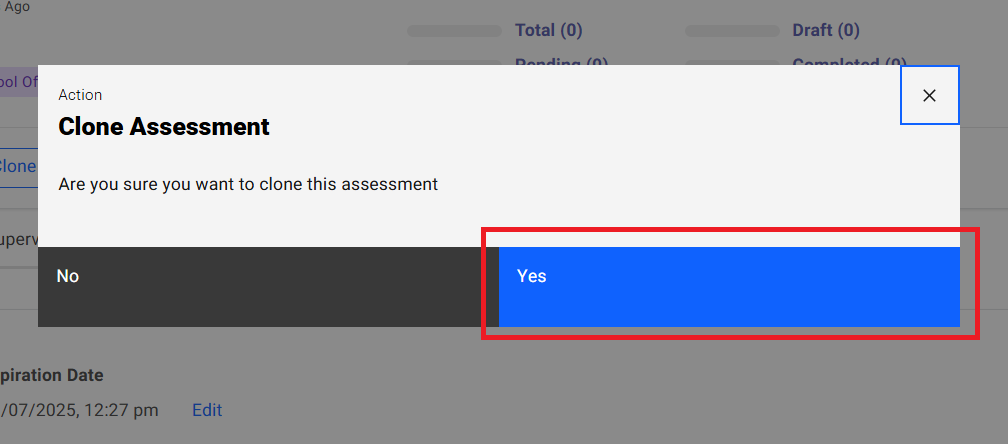
Clone Assessment:
Step 1:
- Click the “Clone Assessment” button.
- In the “Clone Assessment” popup, click the “Yes” button to confirm.
- Verify that the selected assessment is successfully cloned.
Note: Cloning an assessment will also clone all associated questions.

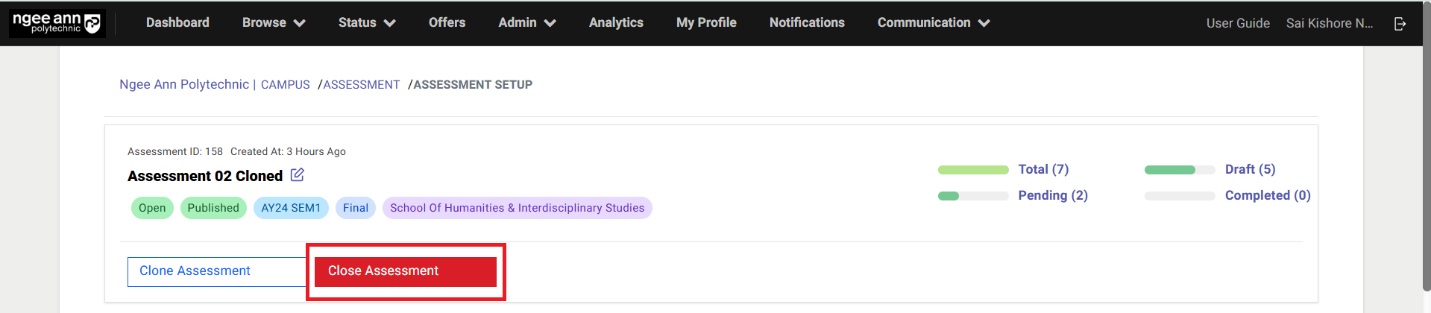
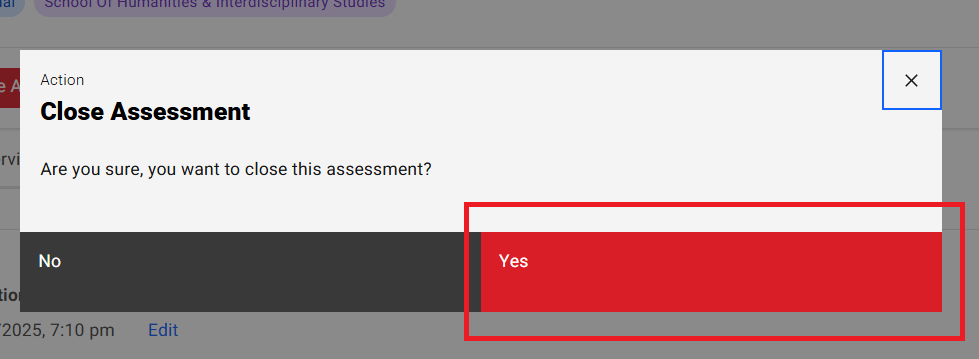
Close Assessment:
Step 1:
- Click the “Close Assessment” button.
- In the *“Close Assessment” popup, click the “Yes” button to confirm.
- Verify that the selected survey is successfully closed and successes message will be shown
Note:
• The “Close Assessment” button is only visible when the assessment is open.
• The assessment will automatically close once it reaches its expiration time.
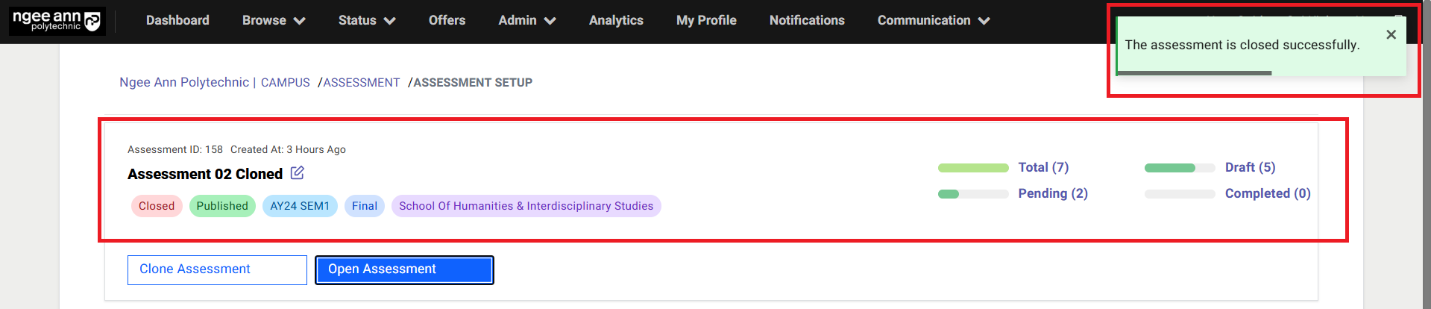
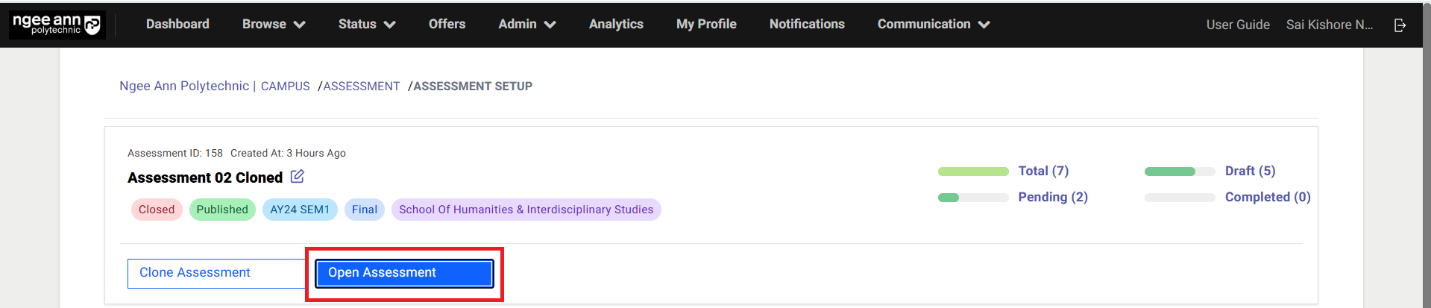
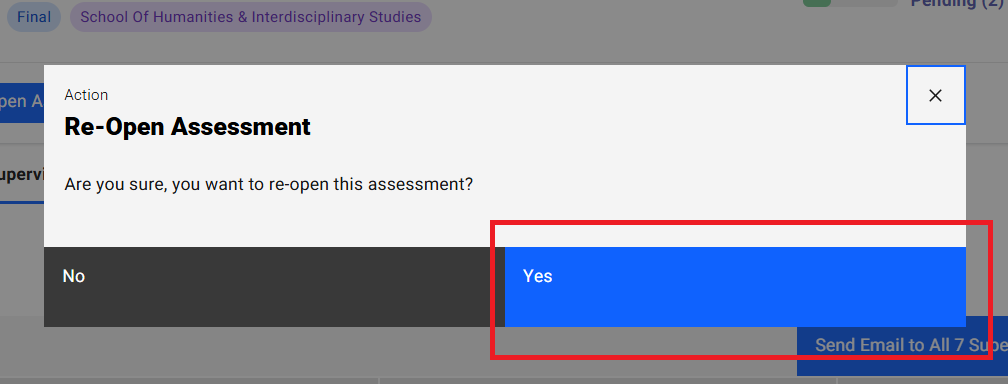
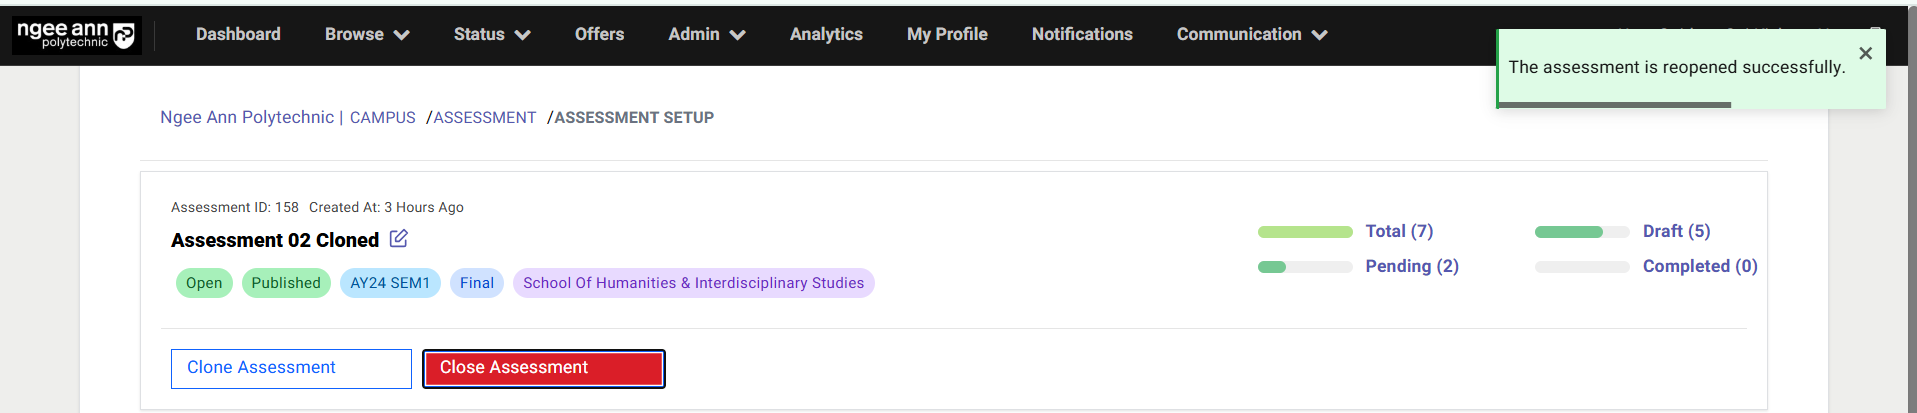
Re-Open Assessment:
Step 1:
- Click on the “Re-Open Assessment” button
- Click on the “Yes” button from the “Open Assessment” popup
- Make sure respective assessment get reopened and start & End dates will be set accordingly.
- Make sure successes message will be shown once assessment re-opened.
Note:
• The “Open Assessment” button is only visible when the survey is Closed.
Assessment Applicants:
Step 1:
- Click on the “Communication” header tab
- Click on the “Assessment Applicants” sub-tab
- Make sure navigate to “Assessment Applicants” page


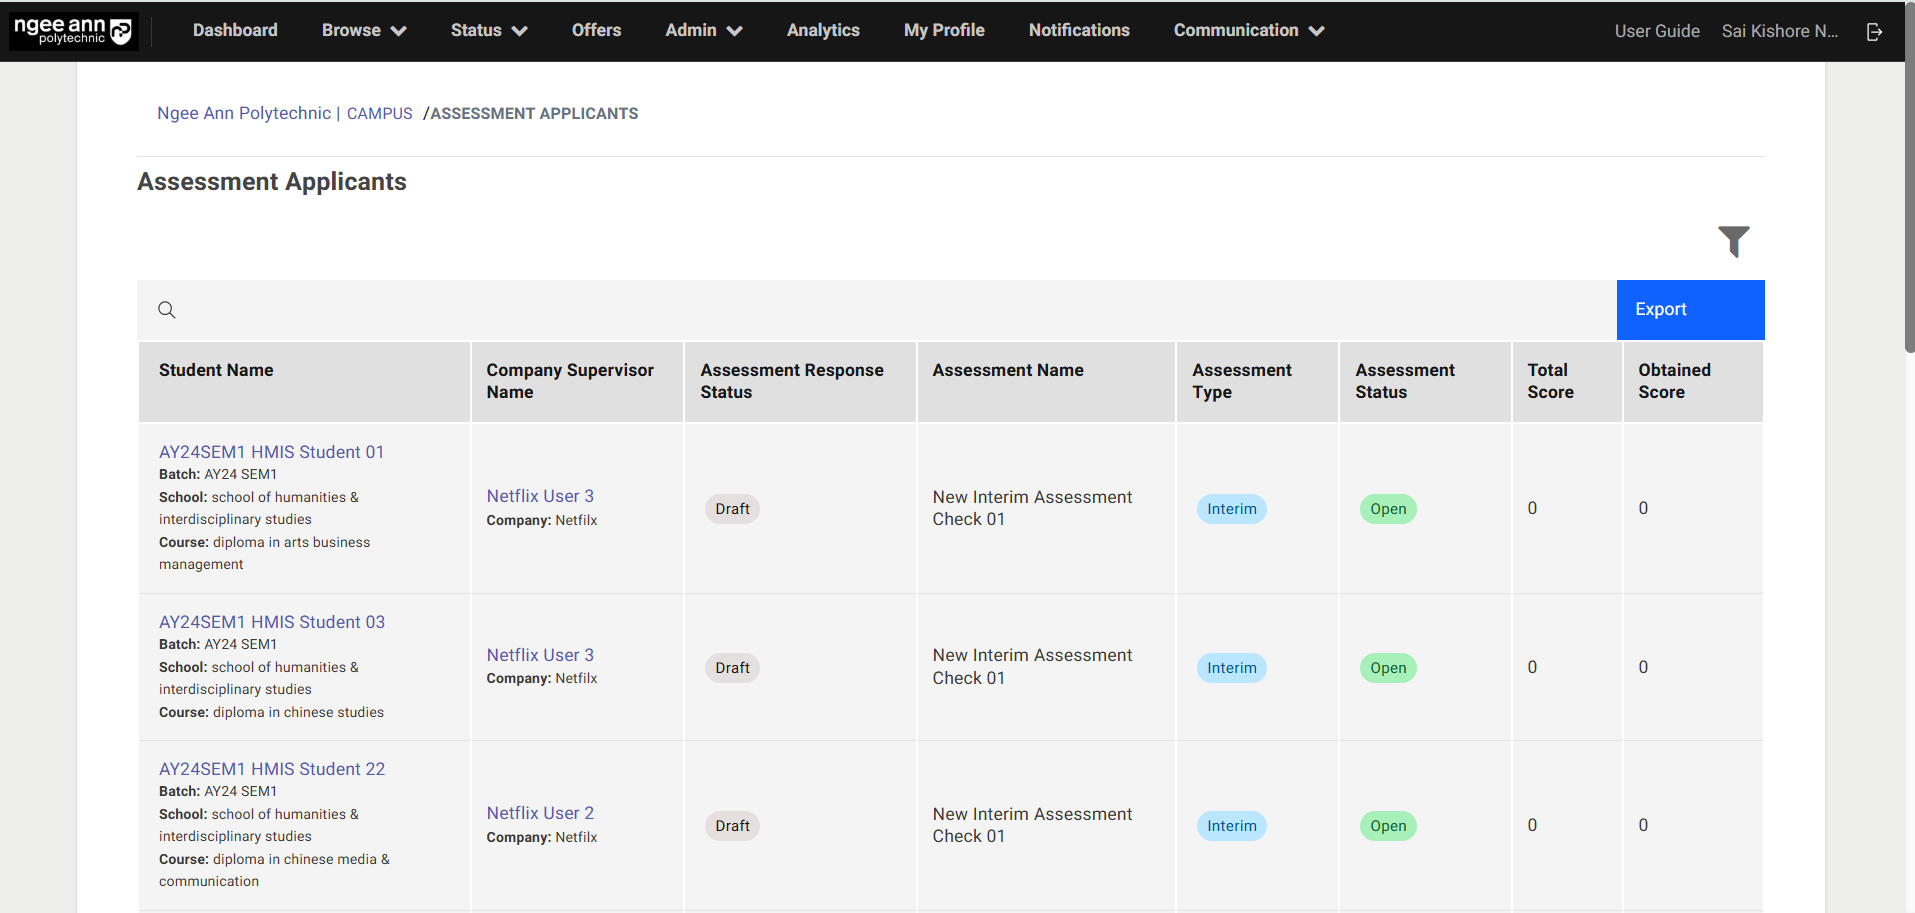
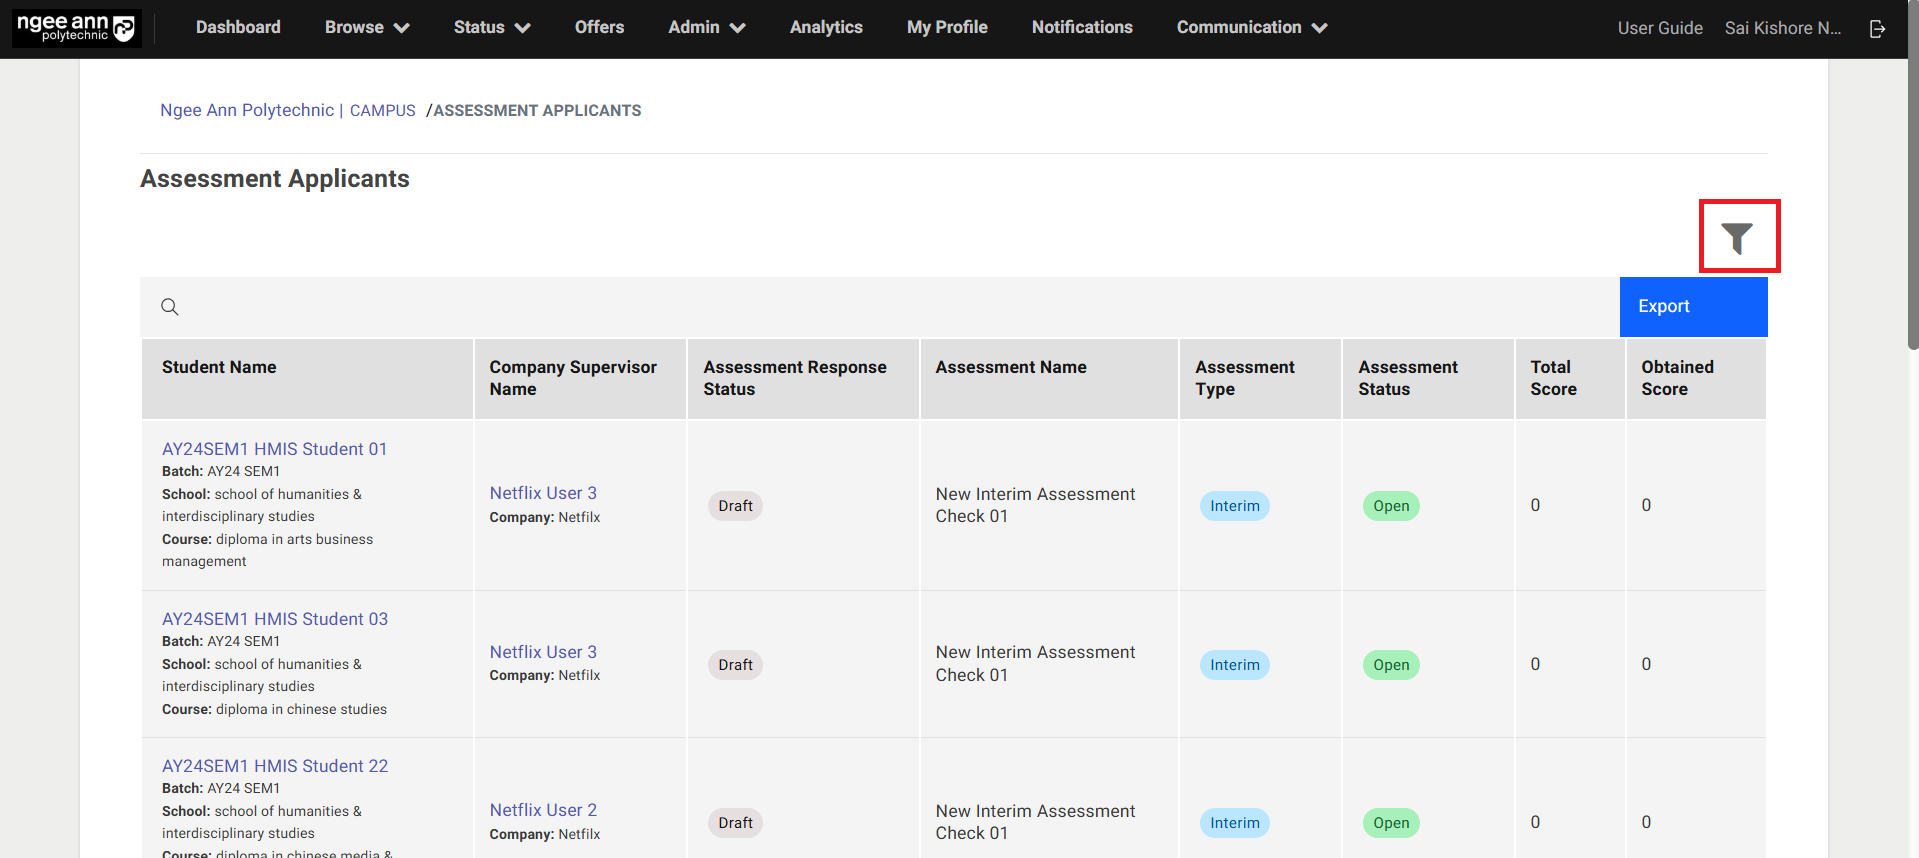
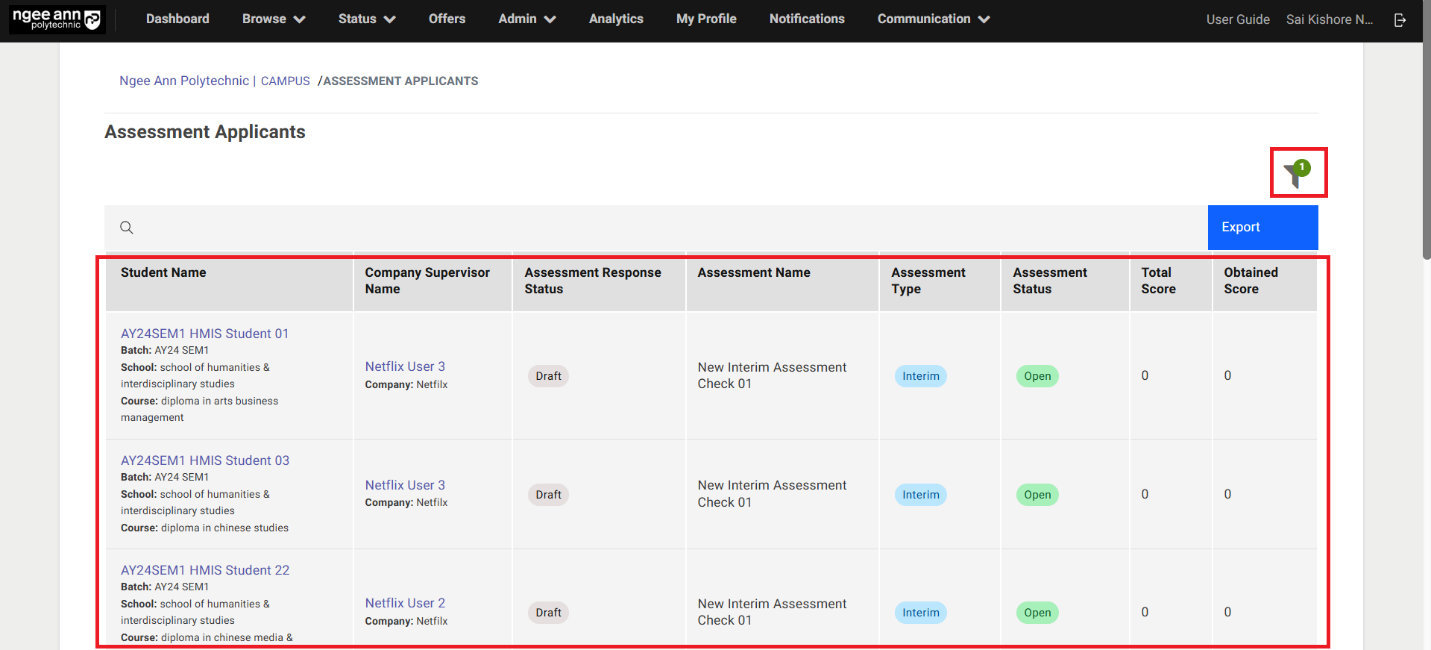
Assessment Applicants Page:
- See the “Assessment Applicants” page.
- Ensure that the table displays the list of applicants associated with the assessments and their tagged Company Supervisor.
| Column Name | Description |
|---|---|
| Student Name | 1. This column displays a list of applicants associated with the corresponding assessment, along with their assigned Company Supervisor. 2. Clicking on an applicant's name (as a link text button) will navigate to the applicant's Application Information page, specifically landing on the Assessment section tab. |
| Company Supervisor Name | 1. This column shows the name of the company where the applicant has been hired, along with the name of their assigned Company Supervisor. 2. Clicking on the Company Supervisor's name (as a link text button) will navigate to the respective Company Employee page. |
| Assessment Response Status | This column indicates the status of the applicant's assessment as completed by the Company Supervisor. The statuses include: • Draft: The Company Supervisor has been added to the survey system but has not yet been invited to complete the assessment. • In Progress: The Company Supervisor has received the invitation and has started the assessment. • Completed: The assessment has been fully completed by the assigned Company Supervisor. |
| Assessment Name | This column displays the name of the assessment associated with each applicant. |
| Assessment Type | This column shows the type of assessment tagged to the respective applicant. There are two types: Interim and Final. The relevant assessment type will be displayed accordingly. |
| Assessment Status | This column shows whether the assessment is currently active or not. The statuses include: • Open: The assessment is still active (i.e., the expiration time has not yet passed). • Closed: The assessment is no longer active (i.e., the expiration time has passed). |
| Total Score | Displays the total score for all graded questions in the applicant's tagged assessment. Each graded question is worth a maximum of 10 marks. Only graded questions are included in the total. |
| Obtained Score | Displays the score obtained by the applicant, calculated as the sum of scores assigned to the options selected by the Company Supervisor for each graded question. |
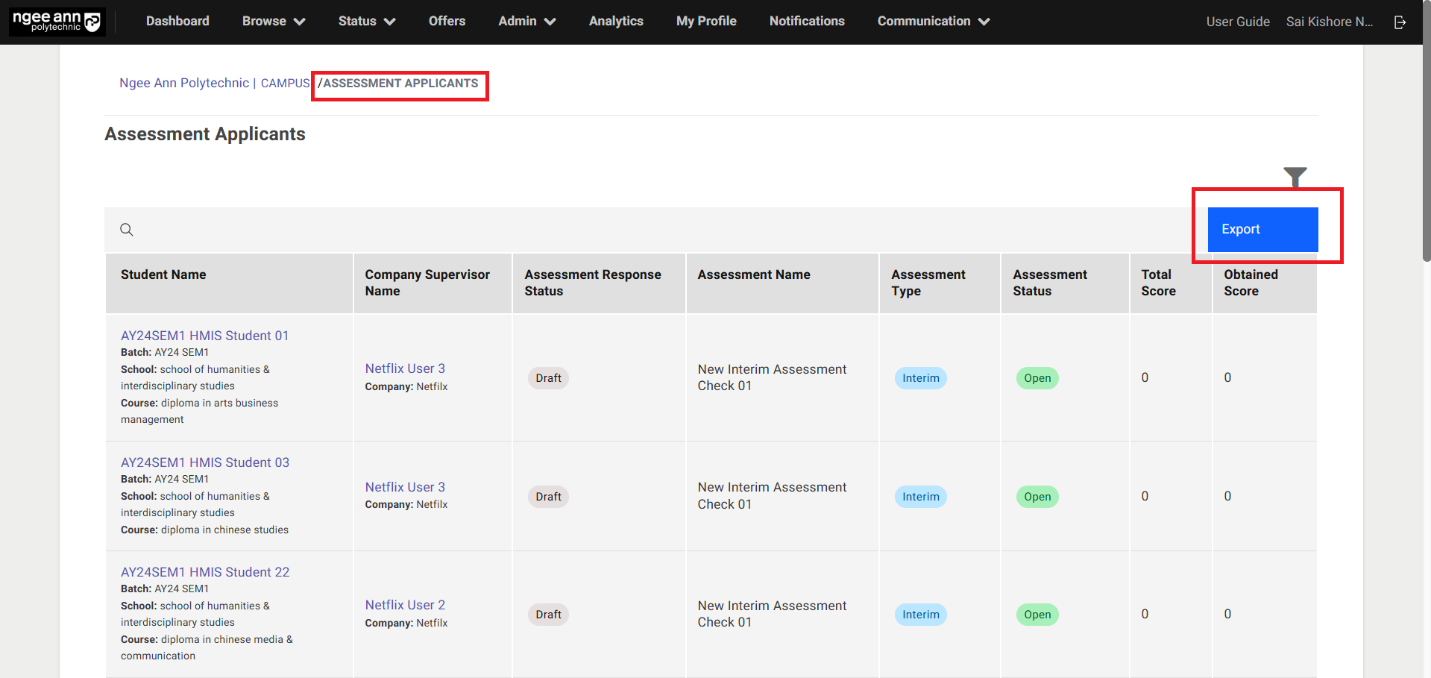
Export:
Step 1:
- Click the “Export” button located above the table under “Assessment Applicants” page.
- Ensure that the exported sheet includes applicants who are tagged to assessment data.
- Verify that the exported sheet is sent to the respective user's email.
- Click the “here” link text button from the notification mail
- Confirm that the exported sheet is downloaded successfully.
- Check that both applicants and their associated assessment data are present in the exported sheet.
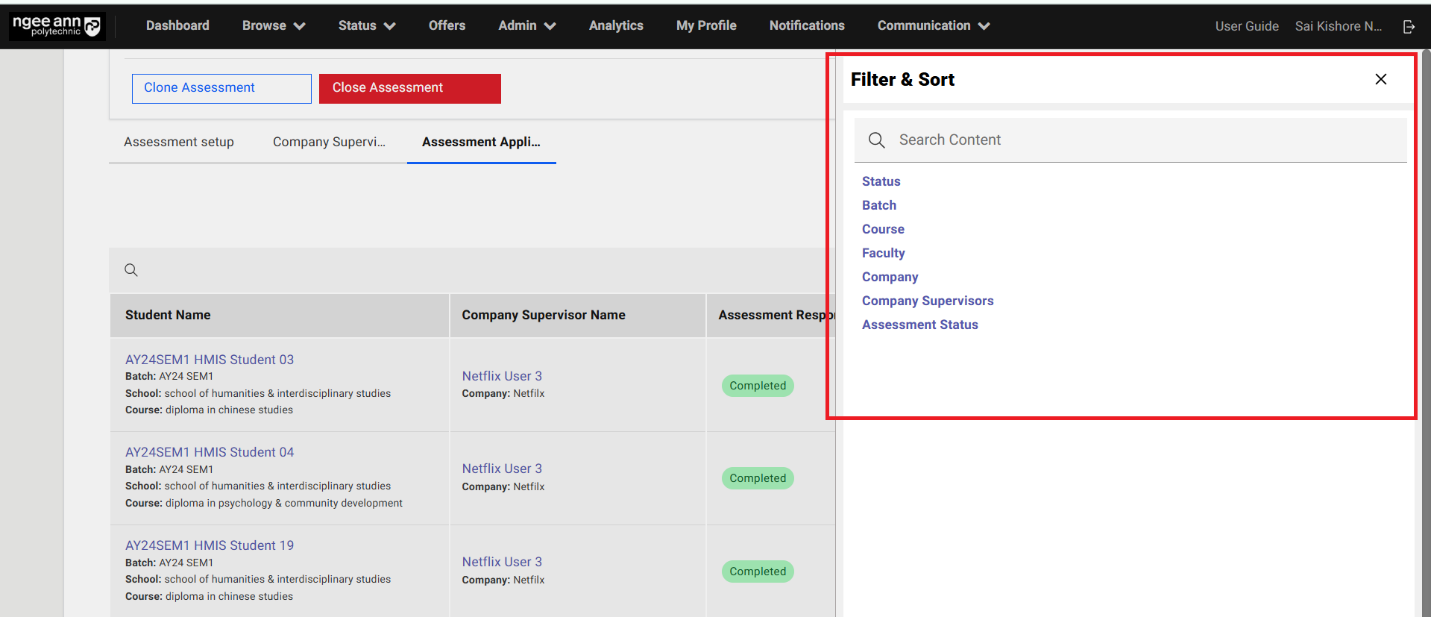
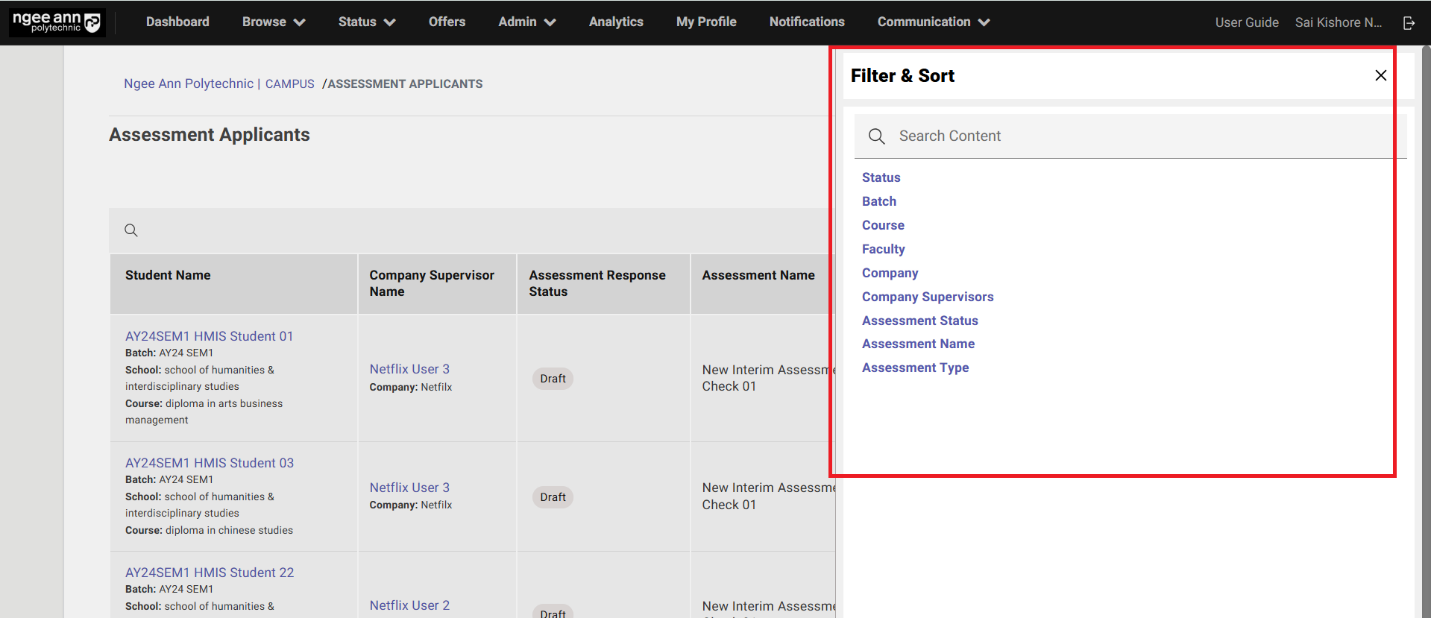
Filters:
Step 1:
- Click the “Filter” button located above the table in the “Assessment Applicants” page.
- Ensure that the “Filter & Sort” popup appears with available filter options.
- Select and apply the desired filters.
- Verify that the table updates to display data matching the selected filter criteria.
- Use the search filter located above the table to search by Student Name, Company Supervisor Name, or Assessment Name.
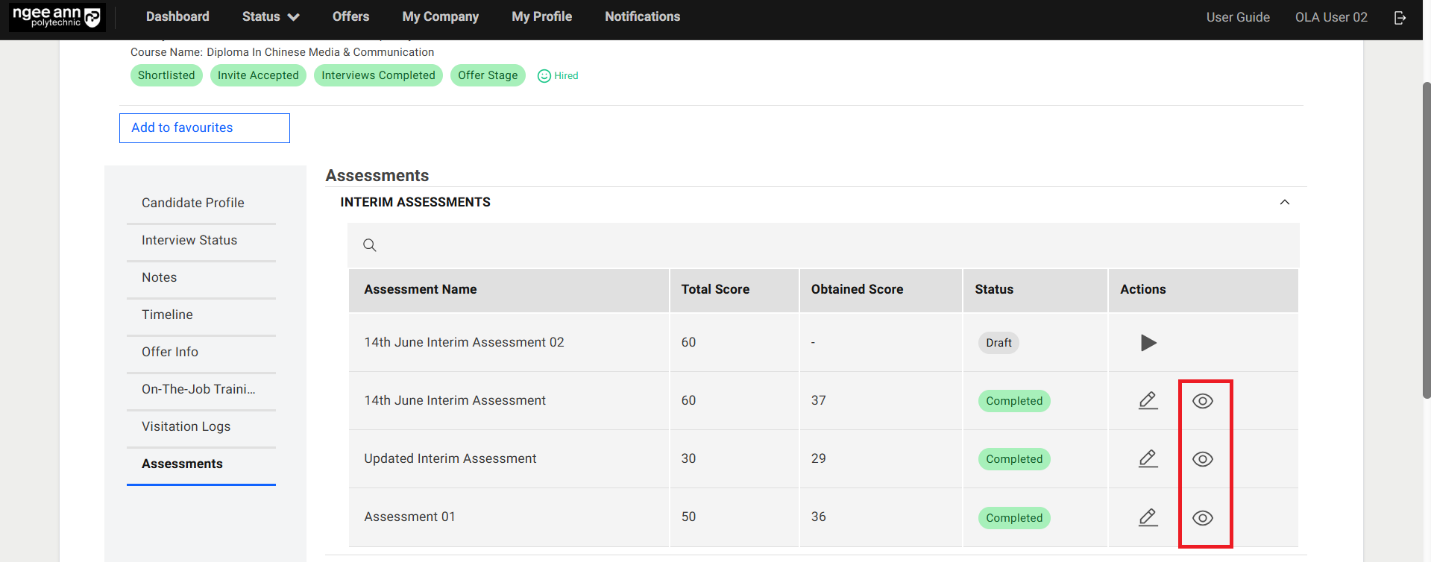
Assessment Section Tab (Application Information Page):
Step 1:
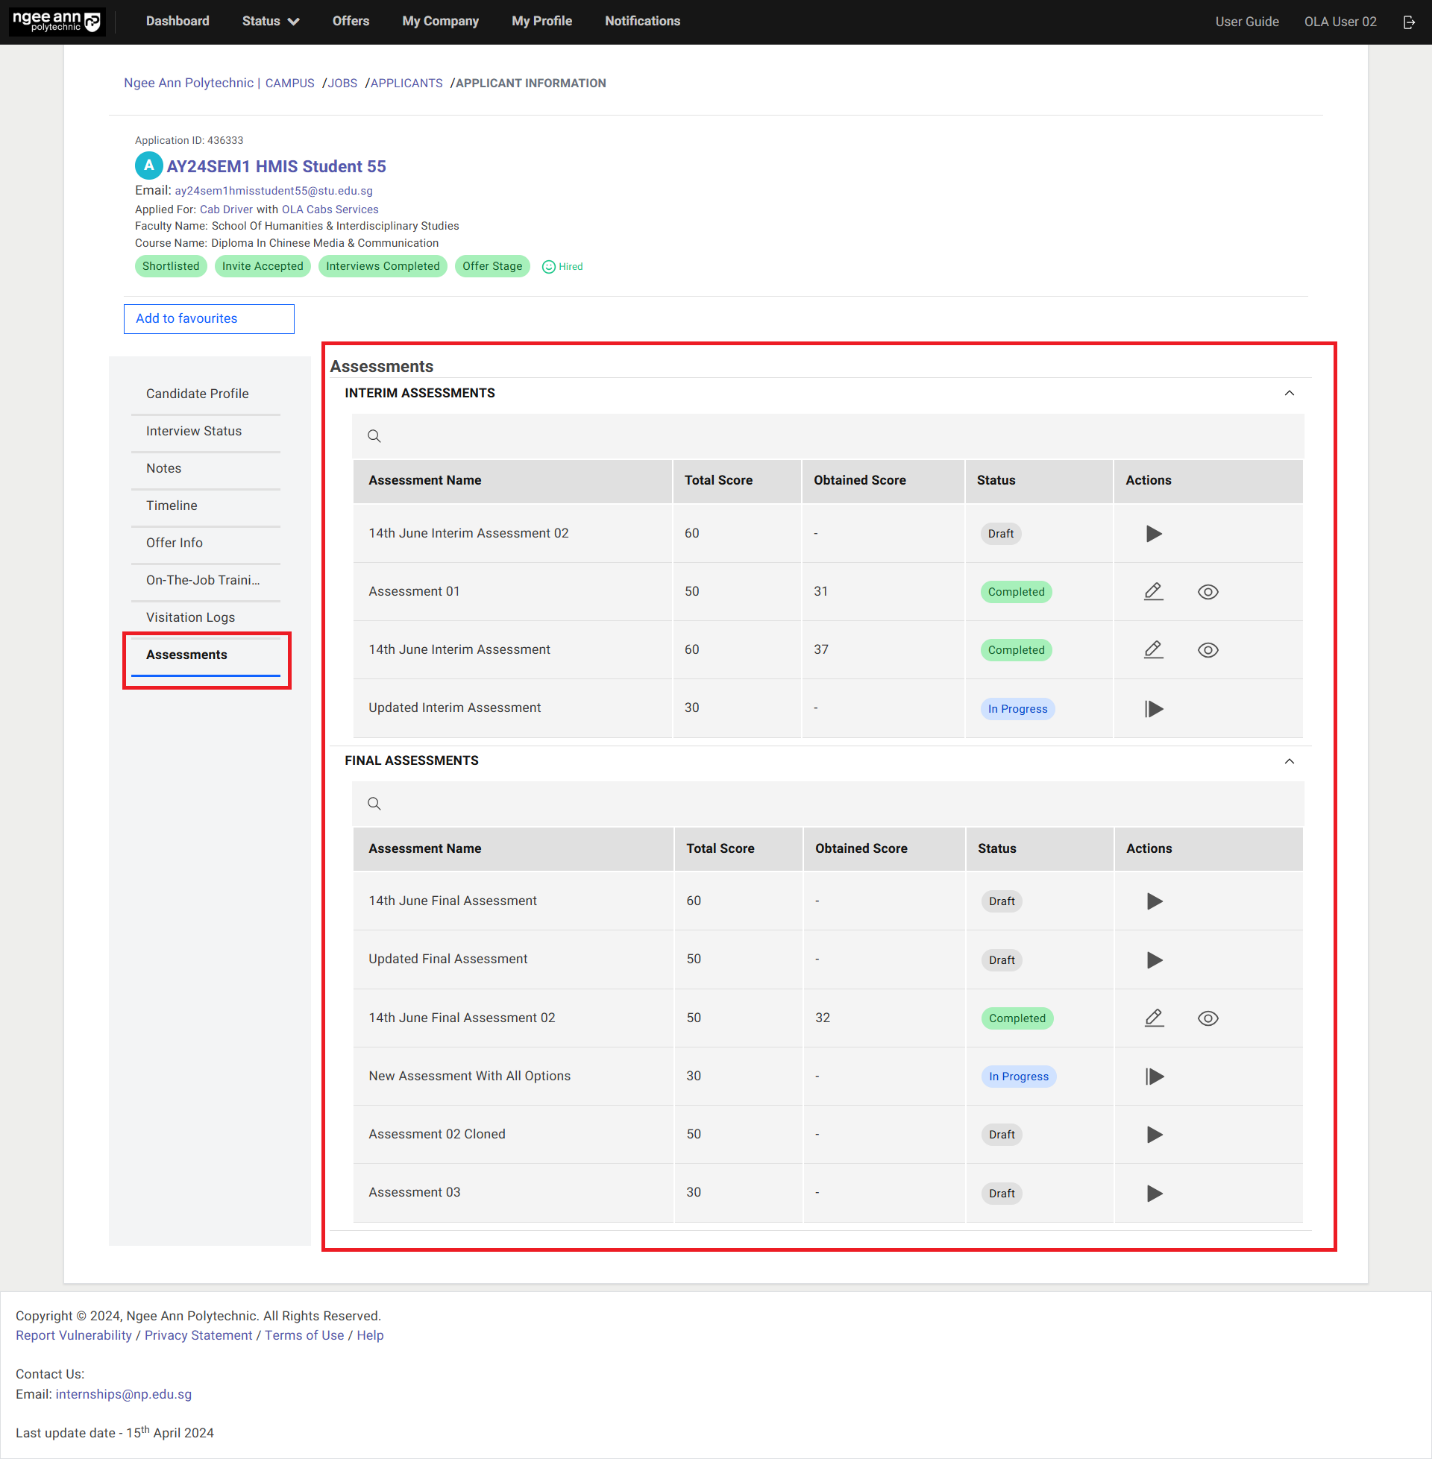
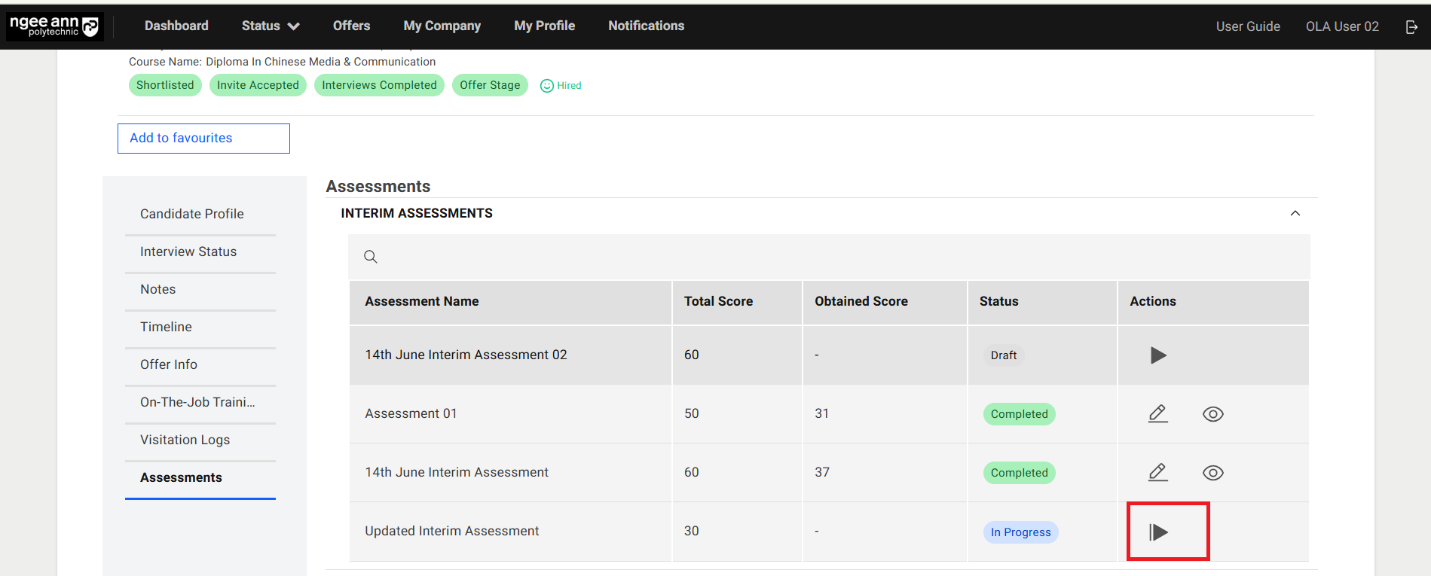
- Click on the “Assessments” section tab from respective applicant “Application Information” page
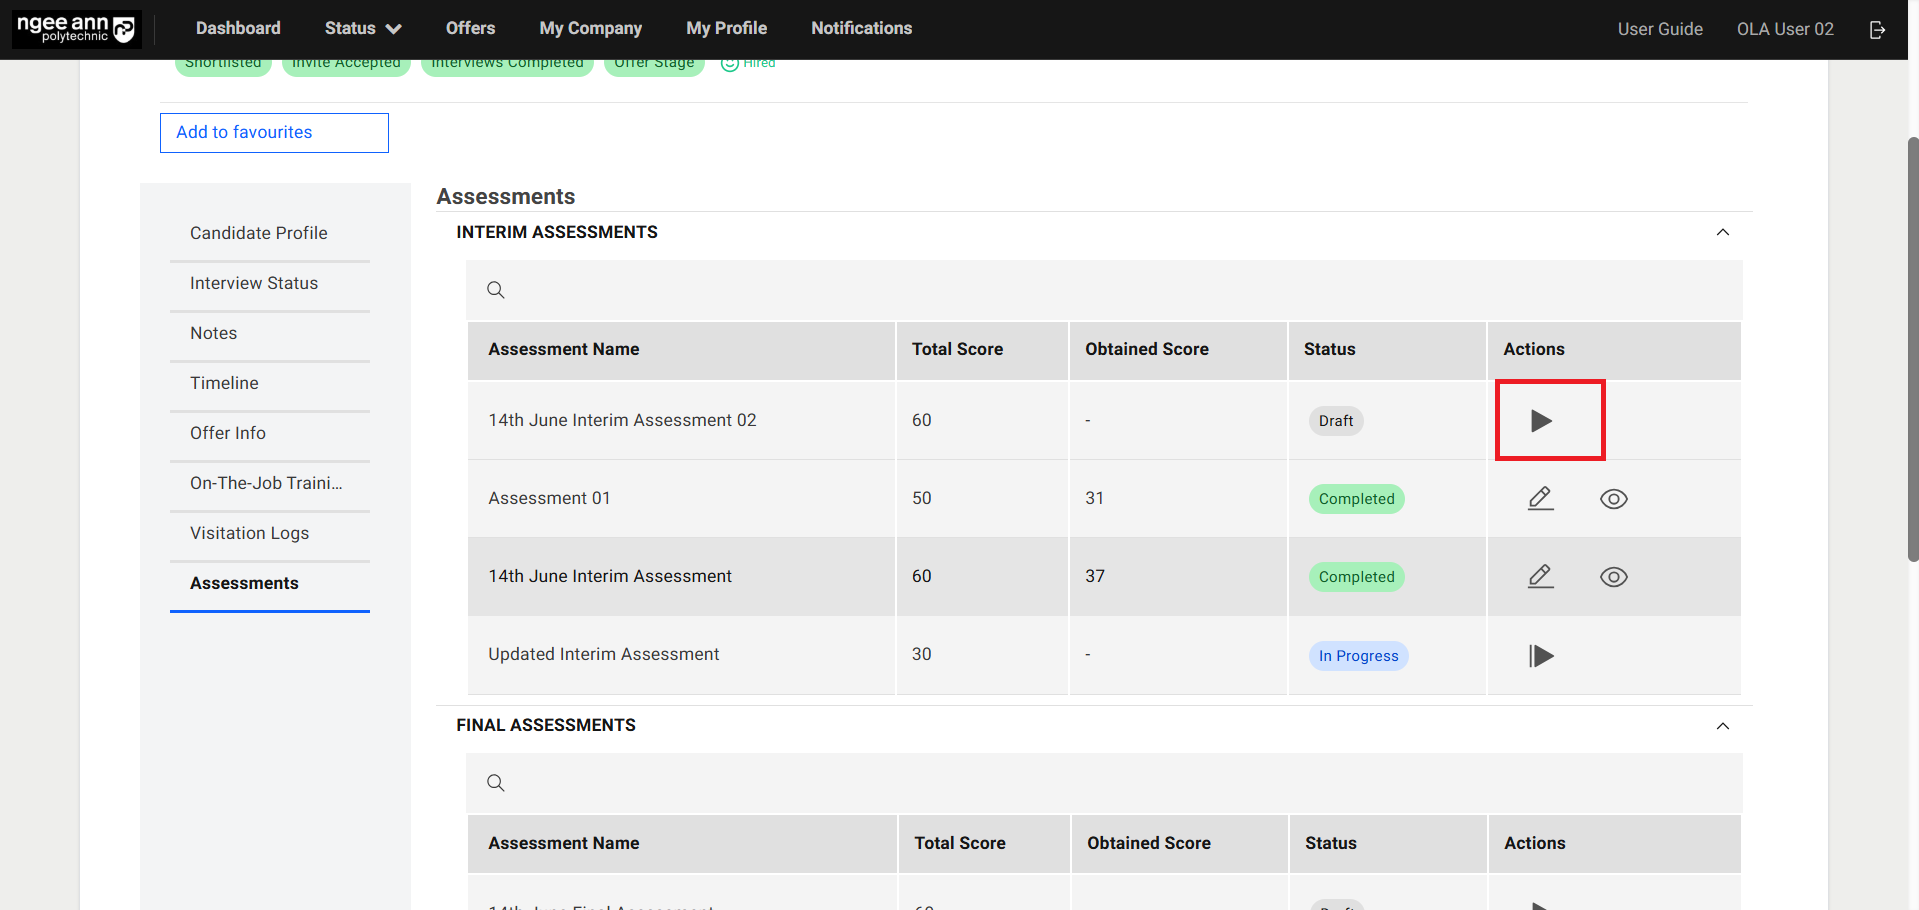
- Make sure “Assessments” page is shown with “Interim Assessments & Final Assessments” accordions
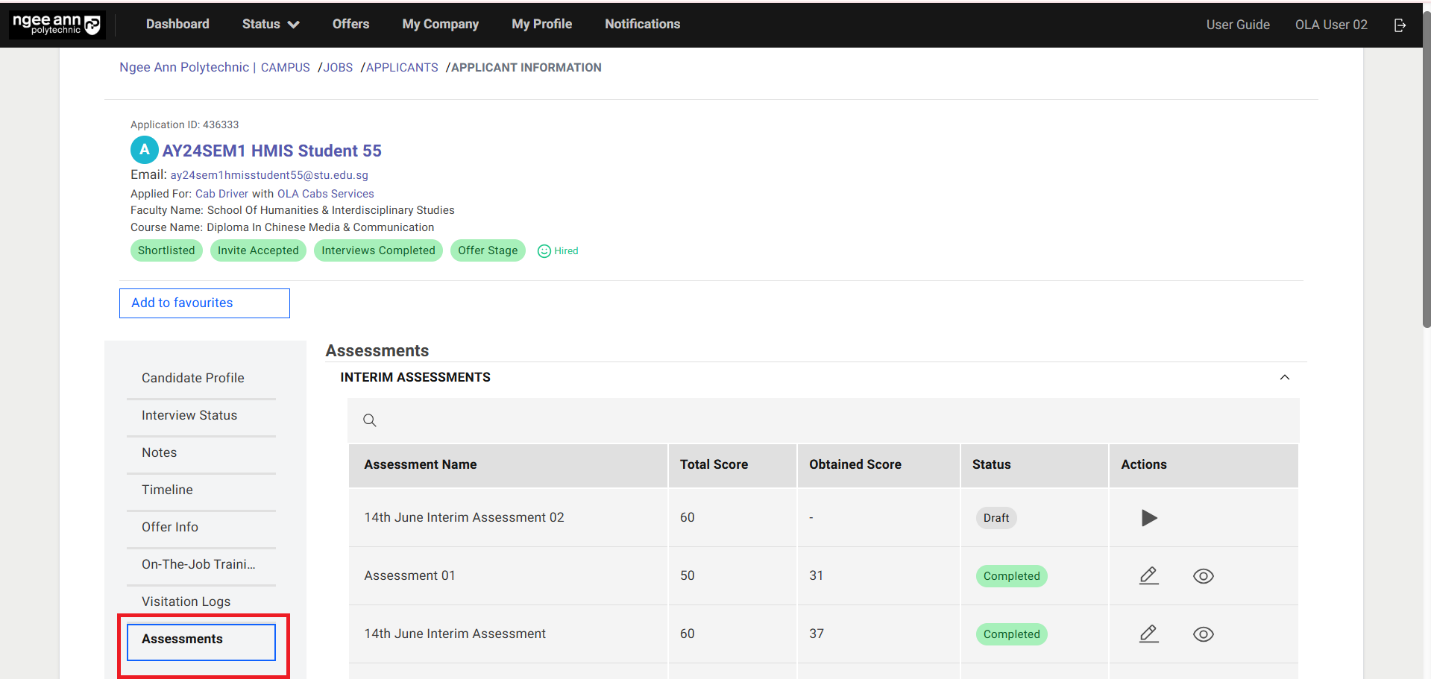
Step 2:
Interim Assessments:
- Click on the “Interim Assessments” accordion to collapse/expand the accordion
- Make sure see respective student tagged/assigned “Interim Assessment” records will be shown in the table.
Final Assessments:
- Click on the “Final Assessments” accordion to collapse/expand the accordion
- Make sure see respective student tagged/assigned “Final Assessment” records will be shown in the table
Start Assessment (Interim/Final):
Step 1:
- Click on the “Start Assessment (Triangle)” button from “Actions” column
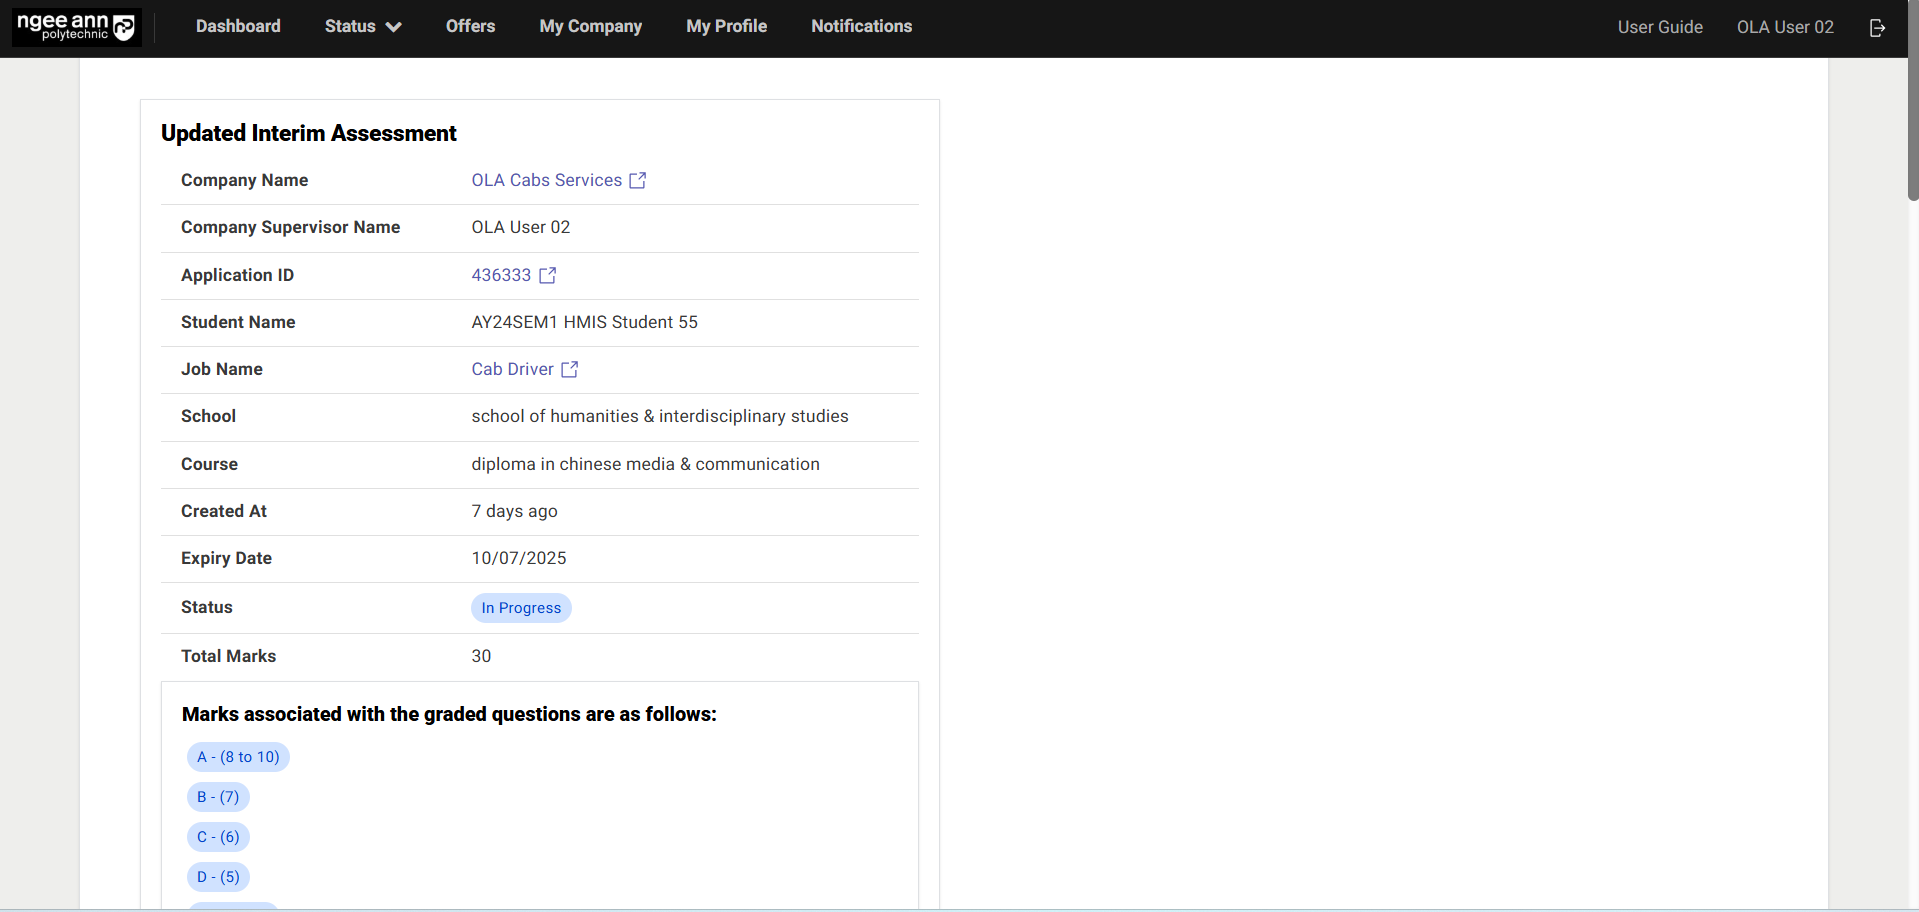
Step 2:
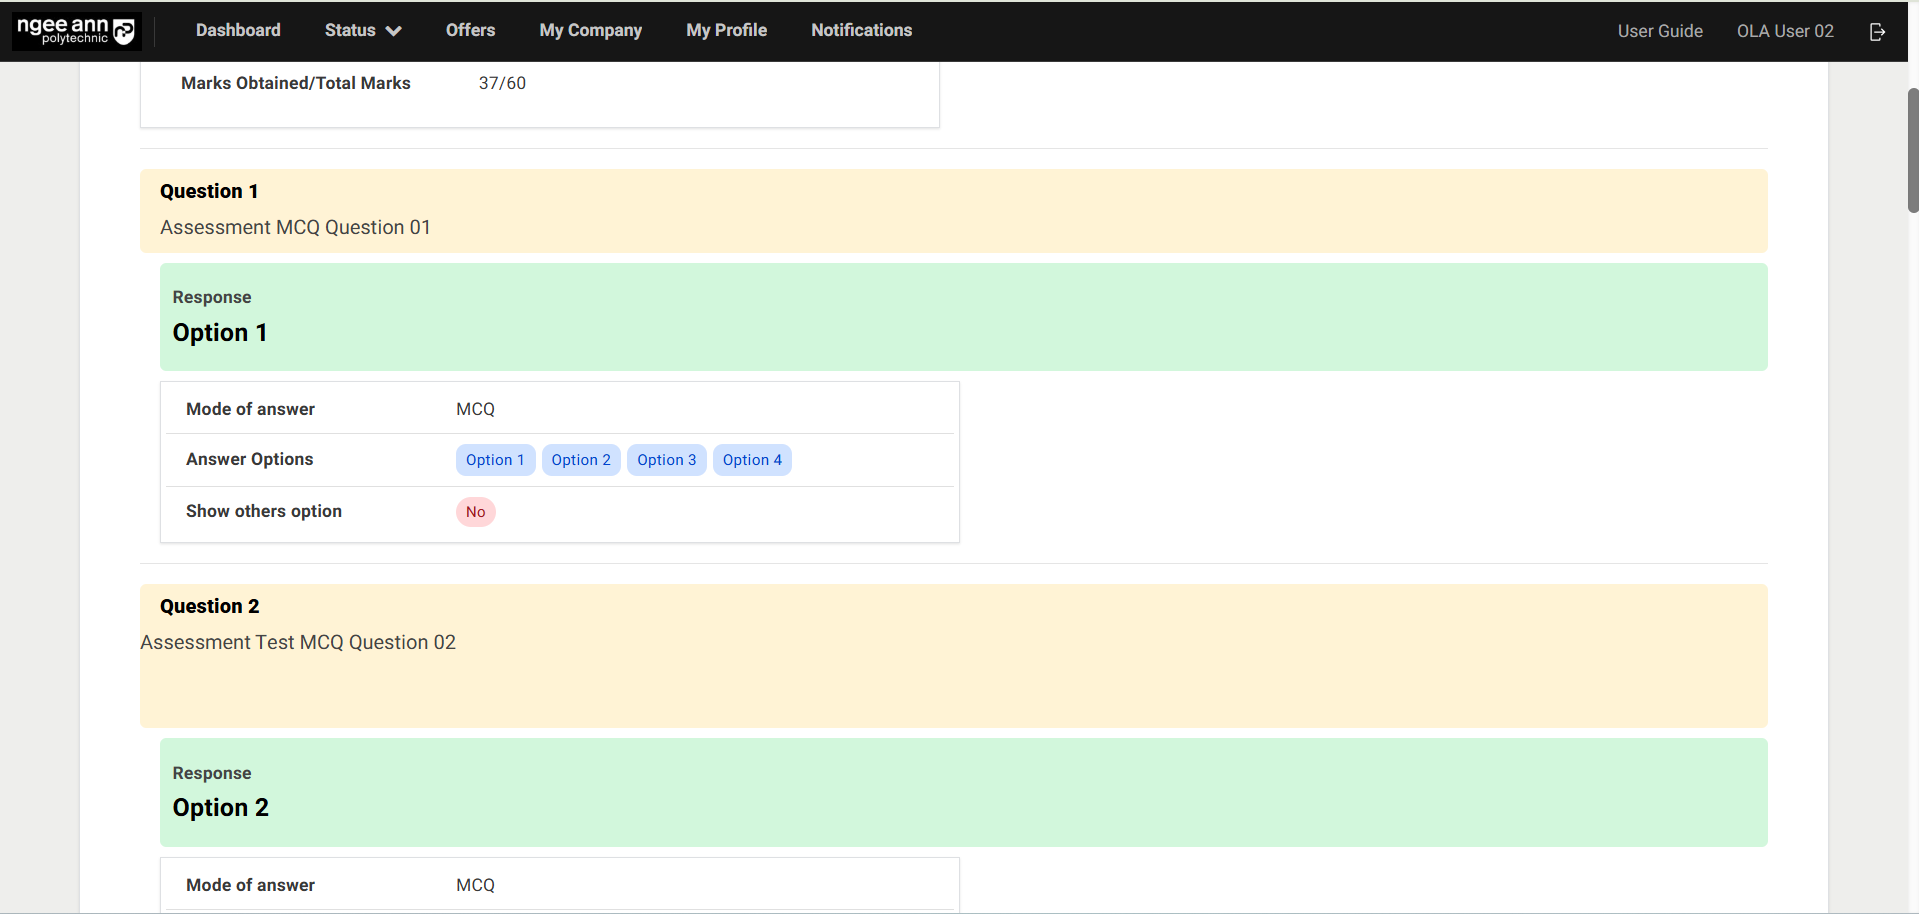
- Ensure you navigate to the “Assessment” page, which includes the Applicant/Student Details section.
- Verify that the relevant assessment-tagged questions are displayed on the page.
Note: Click the link-style buttons within the Applicant/Student Details box to navigate to the corresponding pages.
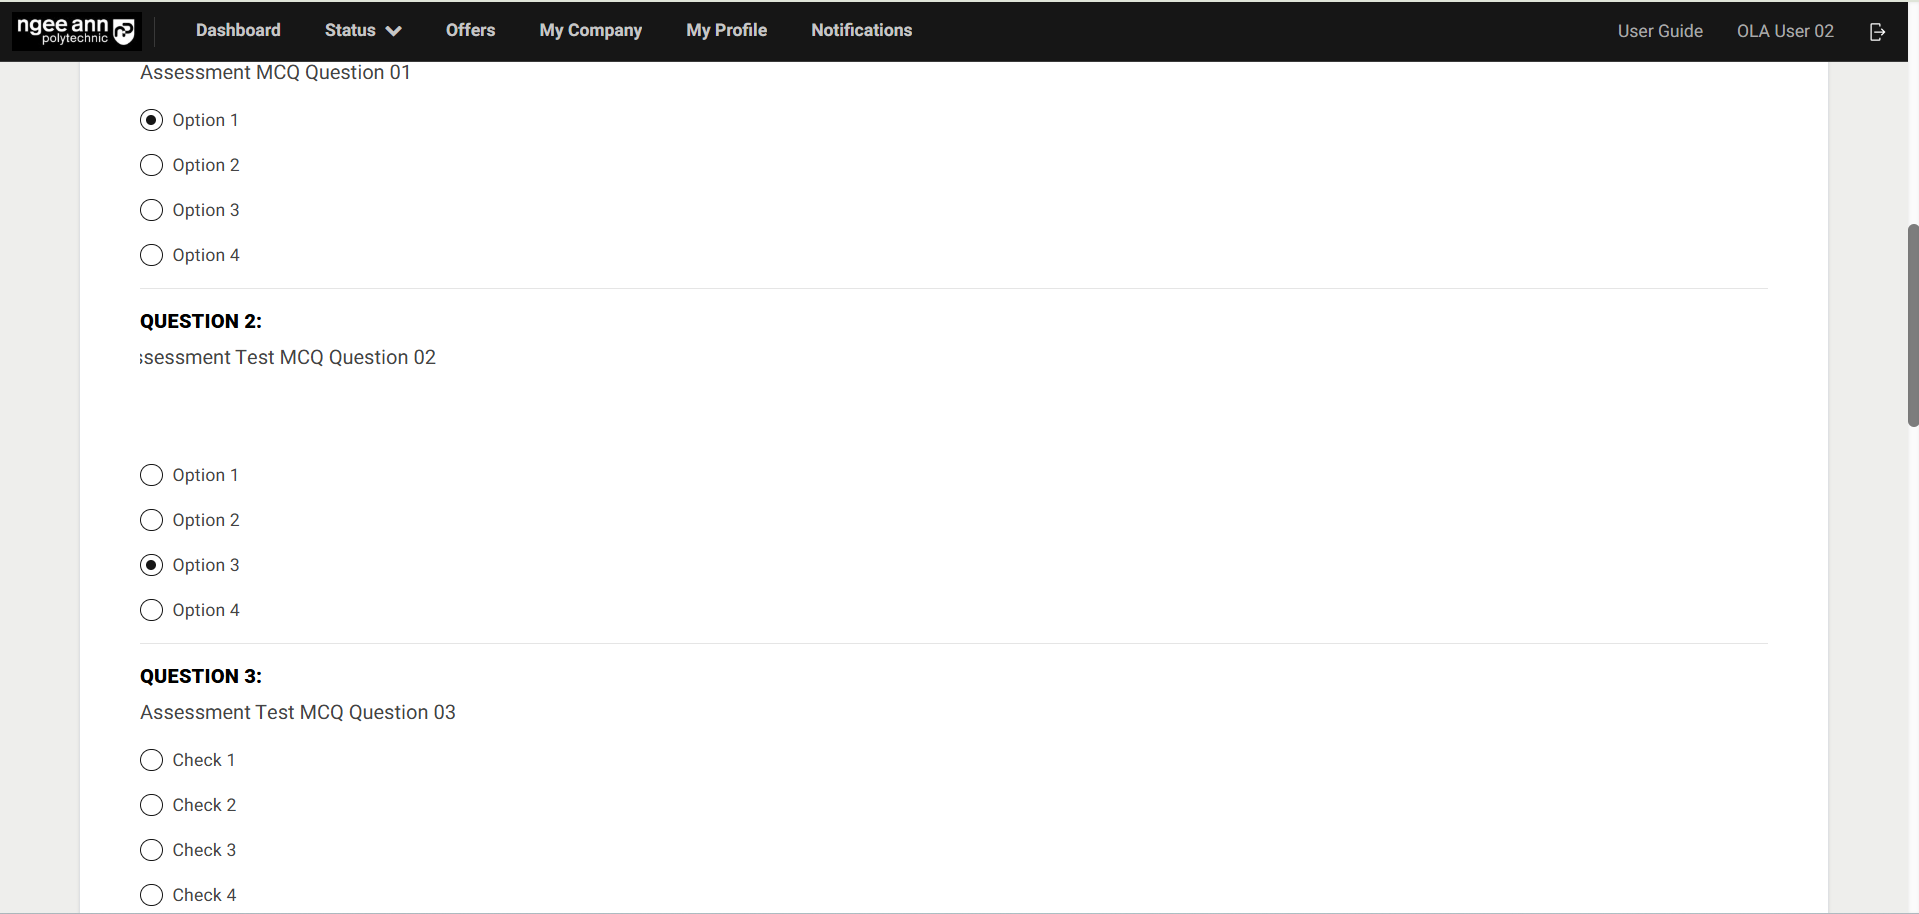
Step 3:
- Make sure respective assessment tagged all questions will be shown in the one page below applicant details box

Step 4:
- As the System Owner, please provide responses to each assessment question.
- All selected or provided responses will be automatically saved.
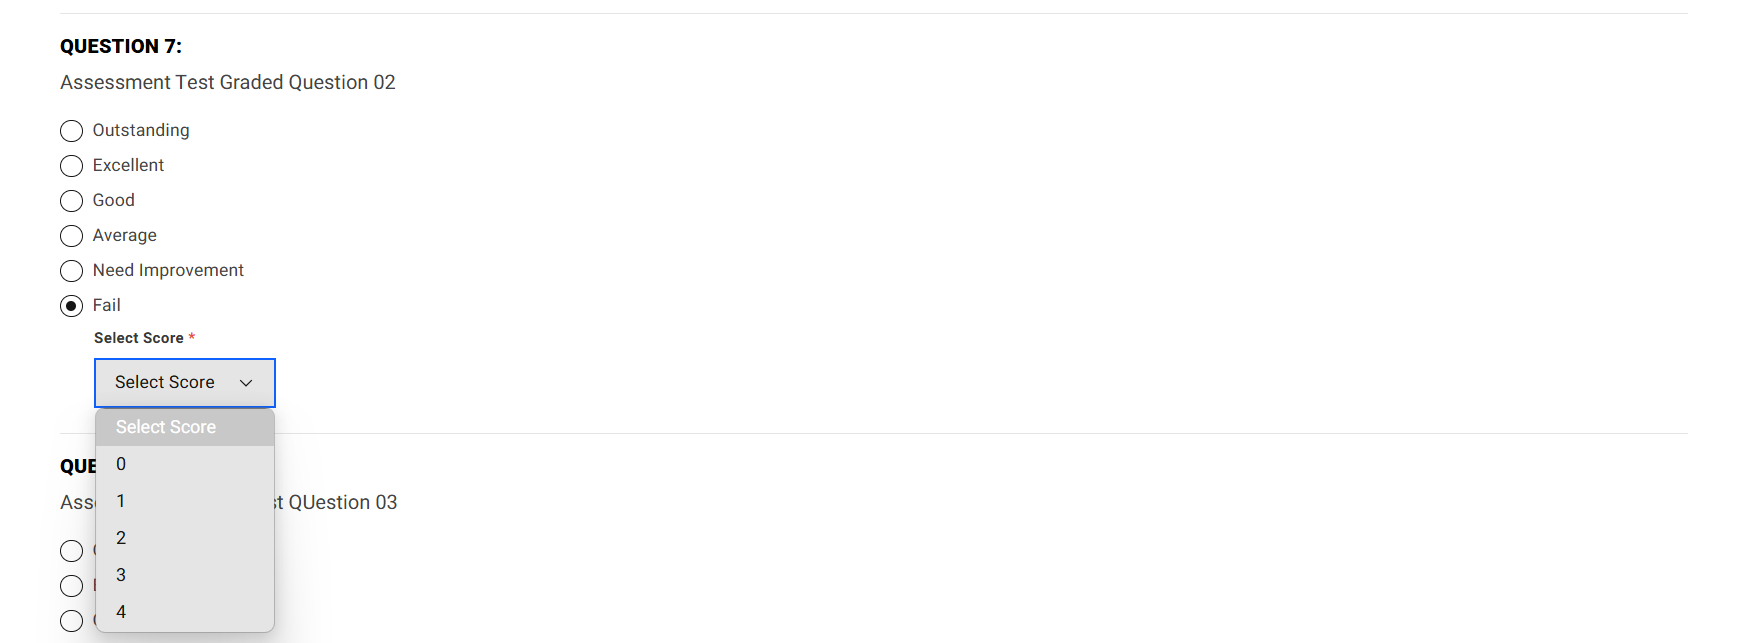
- For graded-type questions, each option will correspond to the following rating scale:
- A = 8 to 10
- B = 7
- C = 6
- D = 5
- F = 0 to 4
- If the System Owner selects either A or F (i.e., the highest or lowest option), a dropdown menu will appear allowing the System Owner to choose a specific rating within the respective range.
- The System Owner must select one rating score for each answer where A or F is chosen.
- The rating selected by the System Owner for each graded response will count toward the student's total score.
Note: Only the System Owner has permission to submit responses for an applicant's tagged assessment. All other institution role users will have view-only access to the submitted responses.


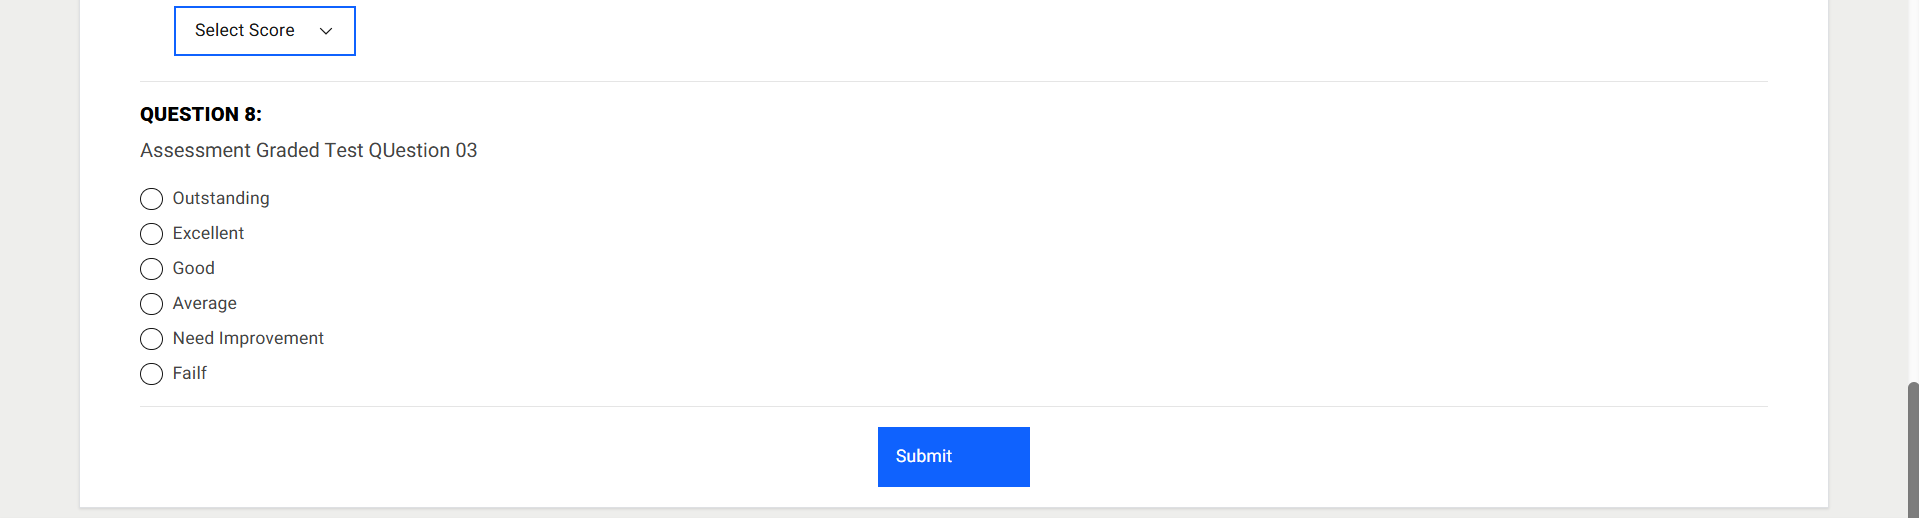
Step 5:
- A “Submit” button will be displayed at the bottom of the page.
- Click the “Submit” button to finalize and submit the assessment responses.
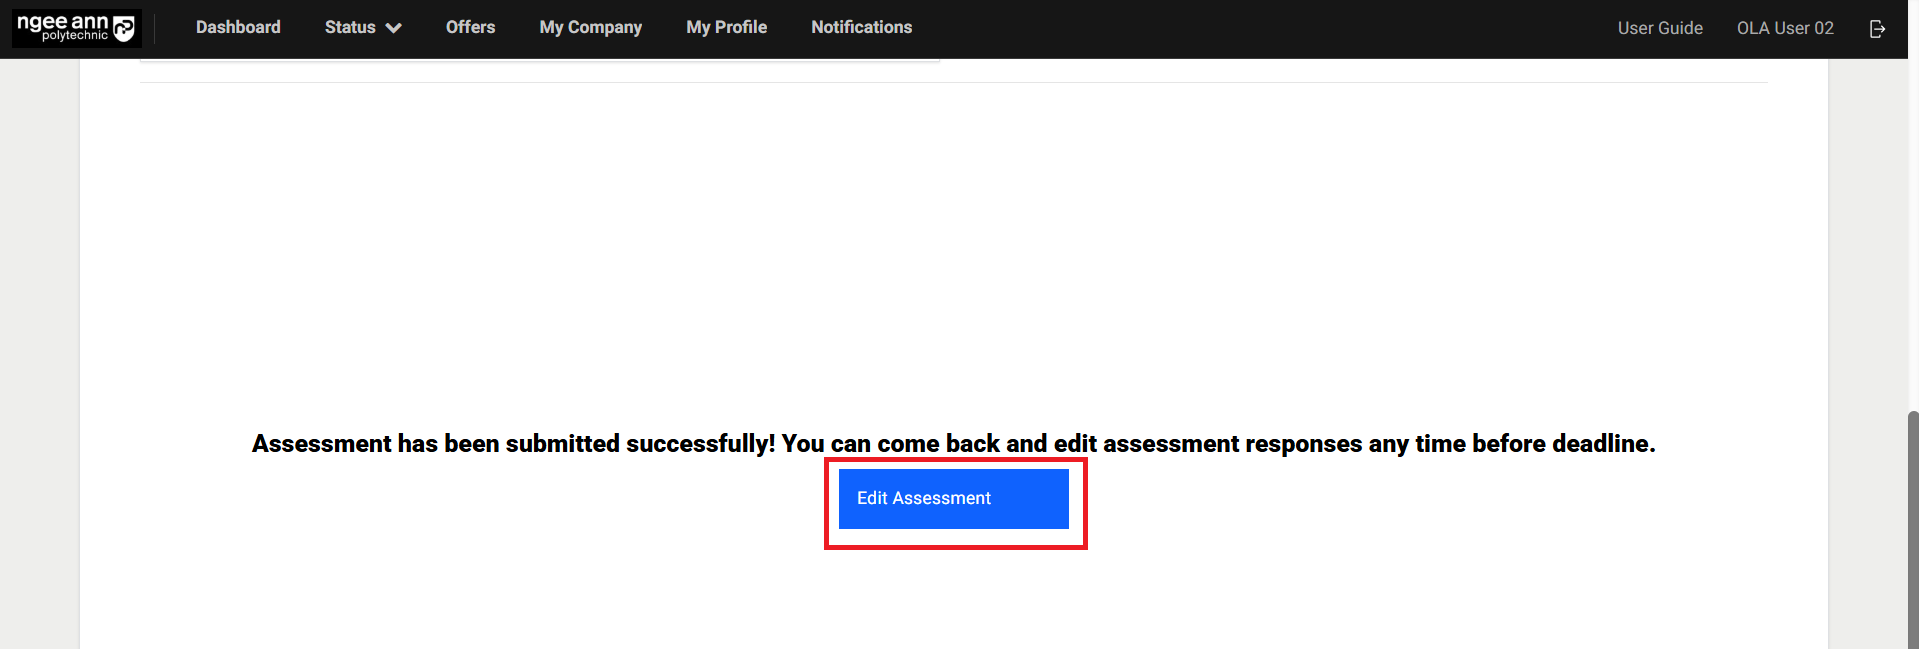
Note:
-
Each assessment question must be answered by the System Owner/Company supervisor. If any question is left unanswered or contains invalid input, a validation error message will be displayed, and the assessment cannot be submitted until all responses are completed correctly.
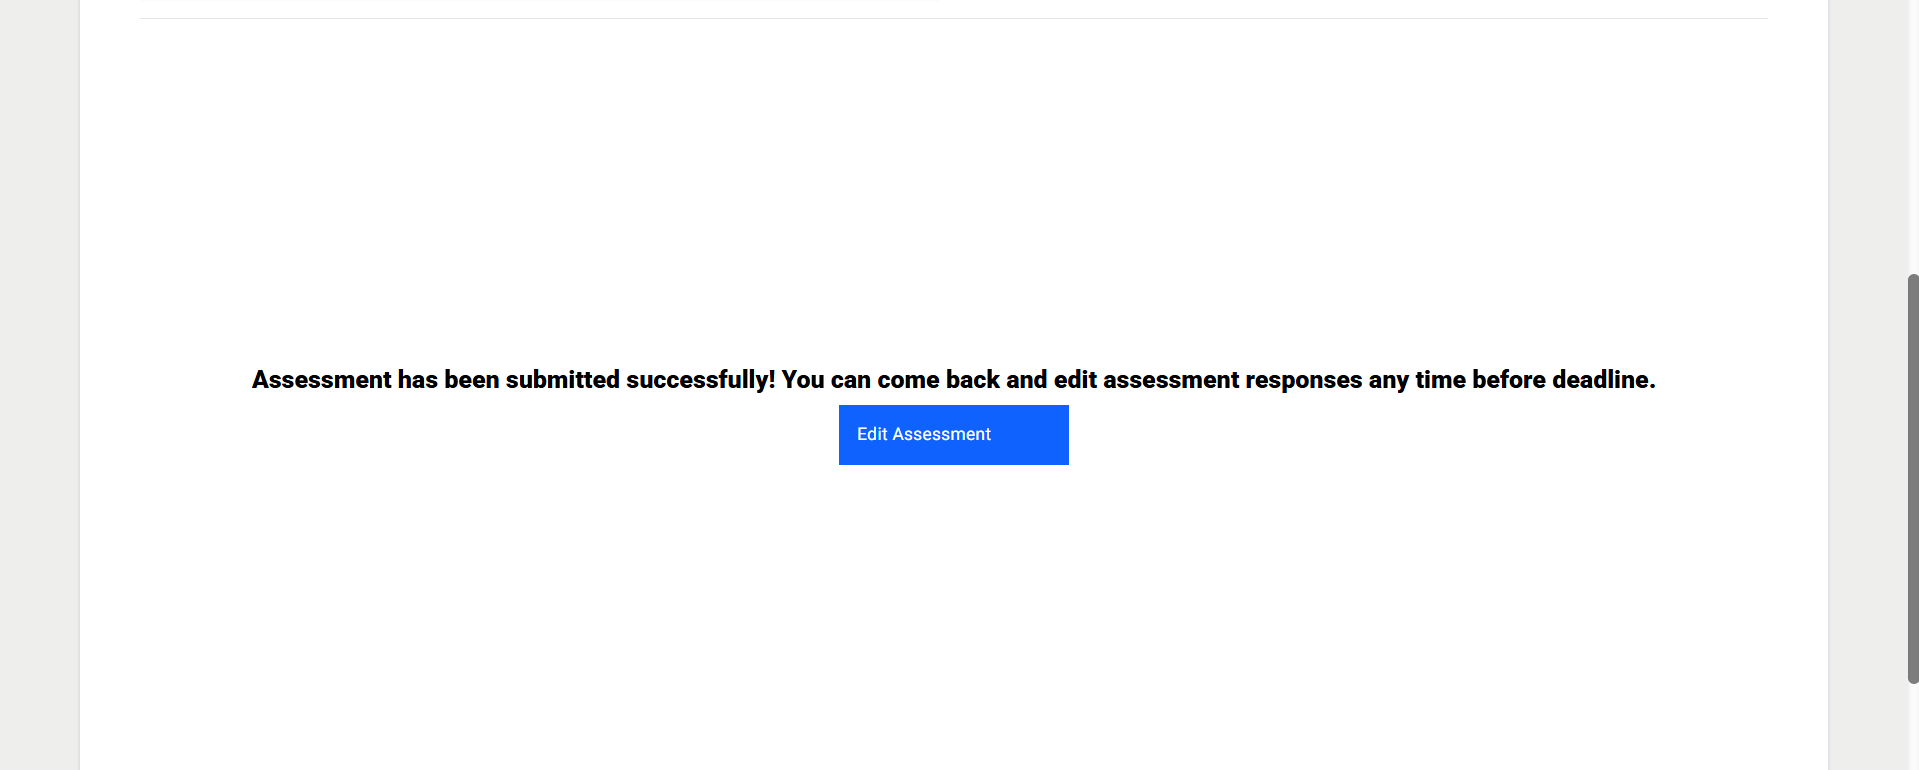
-
“Assessment has been submitted successfully! You can come back and edit assessment responses any time before deadline.” Successes message with “Edit Assessment” button will be shown when system owner submitted assessment responses
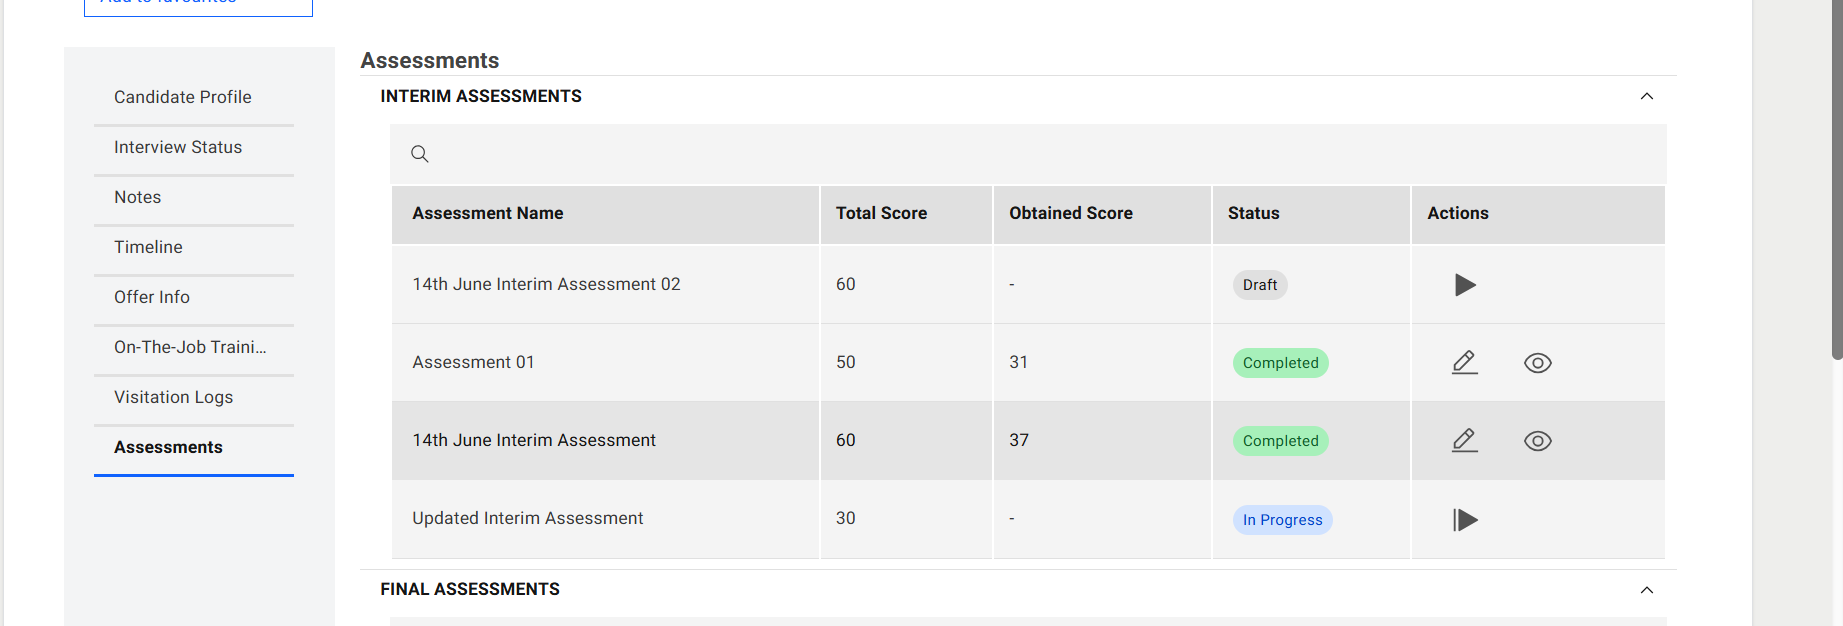
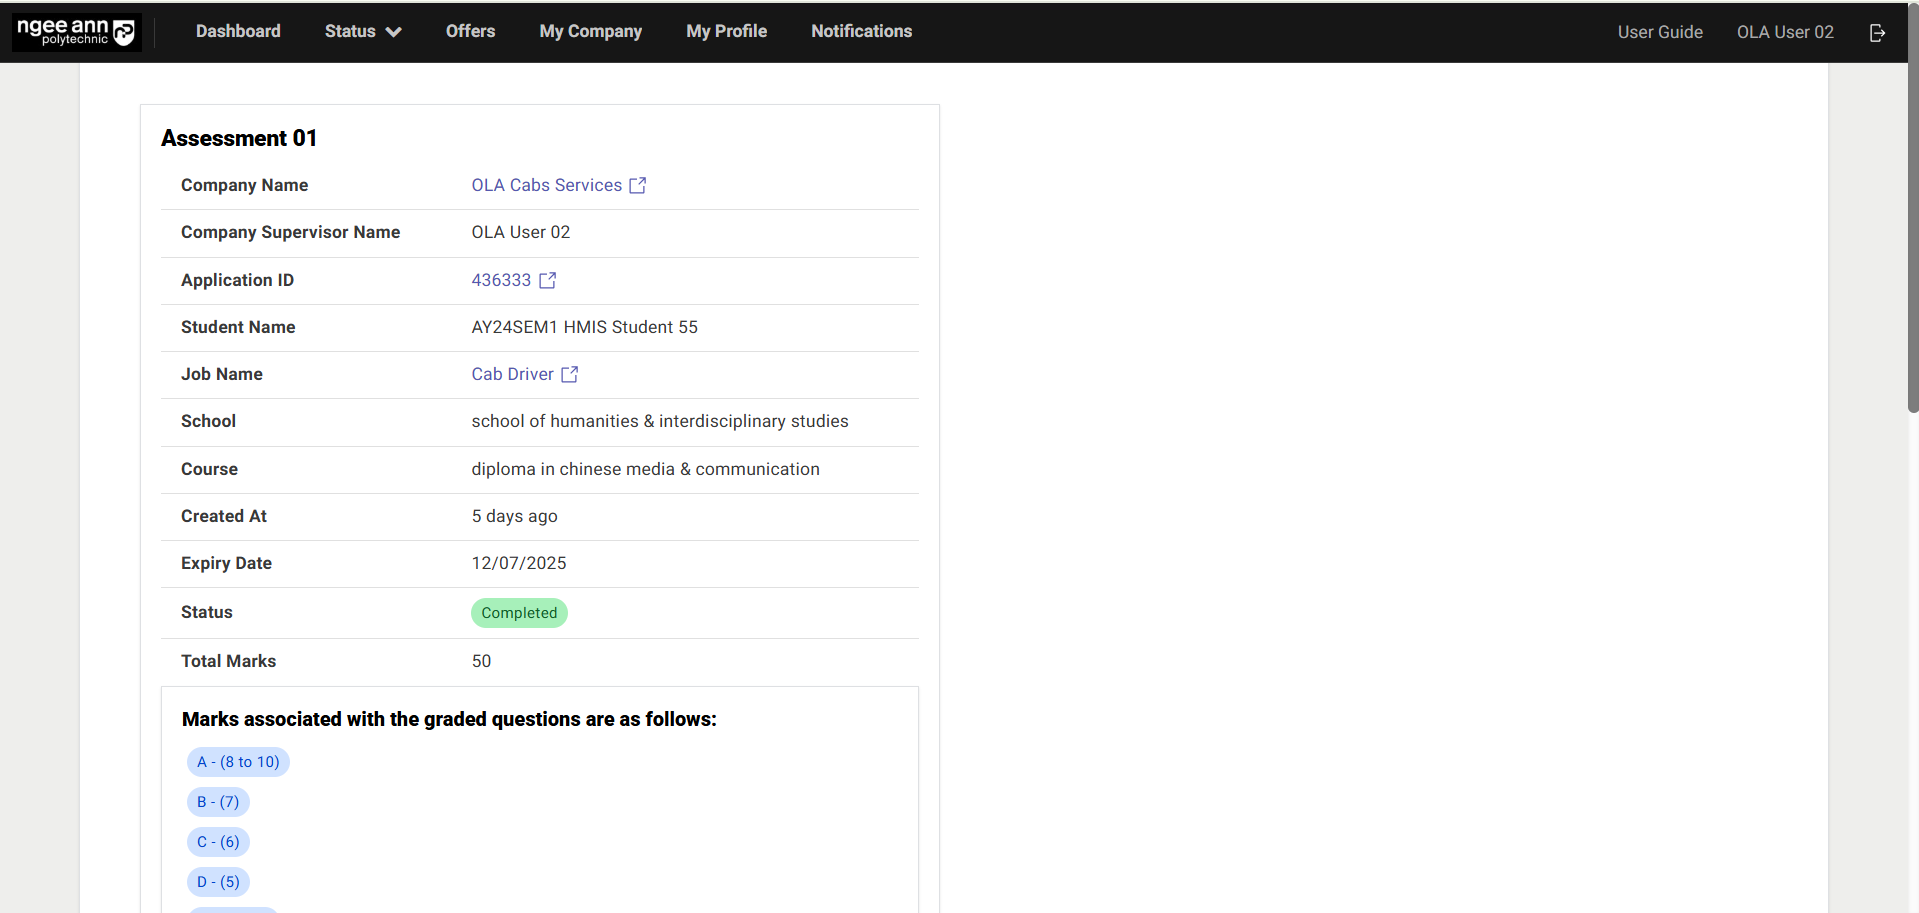
Assessment Table (Interim/Final):
- See the assessment score will be shown in the table.
| Column Name | Description |
|---|---|
| Assessment Name | Displays the name of the assessment assigned to the applicant. |
| Total Score | Represents the maximum possible score for all graded questions in the applicant's tagged assessment. Each graded question carries a maximum of 10 marks. Only graded questions contribute to this total. |
| Obtained Score | Indicates the total score achieved by the applicant, calculated based on the scores assigned by the Company Supervisor/System Owner to the selected options for each graded question. |
| Status | 1. Draft: The assessment has been assigned, but the Company Supervisor/System Owner has not yet started responding. 2. In Progress: The Company Supervisor/System Owner has started responding to the assessment. 3. Completed: The Company Supervisor/System Owner has finished and submitted the assessment. |
| Actions | This column provides action buttons to interact with the assessment, including Start, Edit, Continue, and View. |
Continue Assessment (Interim/Final):
Step 1:
- Click the “Continue Assessment (Video Play)” button located in the Actions column of the table.
- Ensure that you are redirected to the Assessment page.
Note: The “Continue Assessment” button is visible only when the respective assessment is incomplete. It allows the Company Supervisor/System Owner to resume the assessment from where they left off.
Step 2:
- Navigate the supervisor to the Assessment page.
- Answer the assessment questions as required.
Note: Any previously submitted responses will be saved and will persist on the Assessment page for reference or continuation.
Step 3:
- A “Submit” button will be displayed at the bottom of the page.
- Click the “Submit” button to finalize and submit the assessment responses.
- Note: Each assessment question must be answered by the Company Supervisor/System Owner. If any question is left unanswered or contains invalid input, a validation error message will be displayed, and the assessment cannot be submitted until all responses are completed correctly.
- “Assessment has been submitted successfully! You can come back and edit assessment responses any time before deadline.” Successes message with “Edit Assessment” button will be shown when System Owner/Company supervisor submitted assessment responses


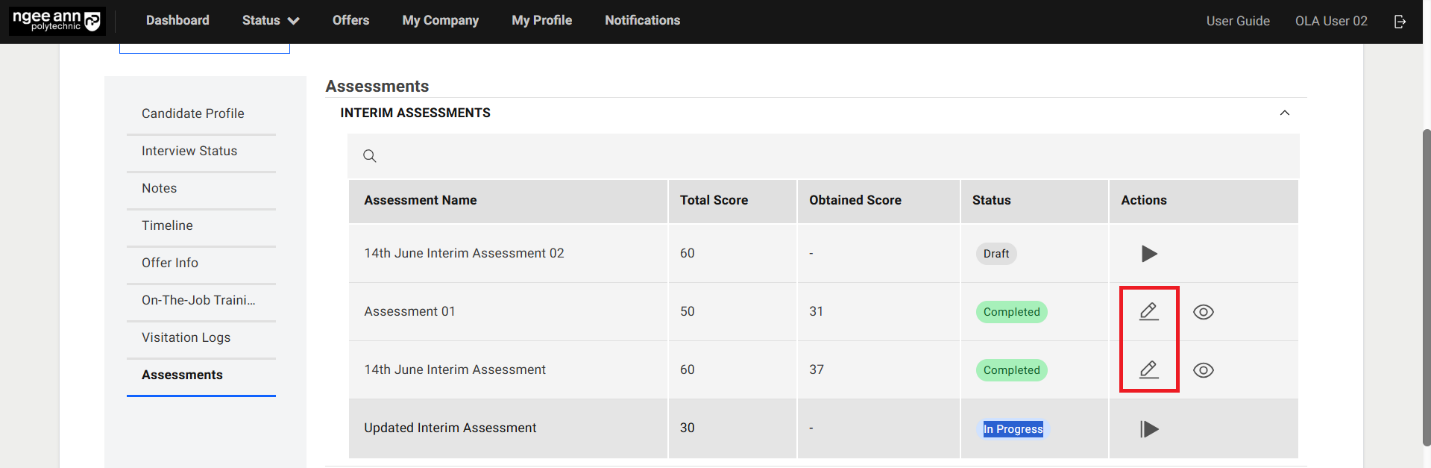
Edit Assessment (Interim/Final):
Step 1:
- Click on the “Edit Assessment (Pencil)” button under “Action” column in the table
- Make sure navigate to “Assessment” page
Step 2:
- Make sure supervisor navigates to “Assessment” page
- Click on the “Edit Assessment” button
Note: “Edit Assessment” button will be shown once Company Supervisor/System Owner finalize and submit answers to the assessment question
Step 3:
- A “Submit” button will be displayed at the bottom of the page.
- Click the “Submit” button to finalize and submit the assessment responses.
- Note: Each assessment question must be answered by the supervisor. If any question is left unanswered or contains invalid input, a validation error message will be displayed, and the assessment cannot be submitted until all responses are completed correctly.
- “Assessment has been submitted successfully! You can come back and edit assessment responses any time before deadline.” Successes message with “Edit Assessment” button will be shown when System Owner/Company supervisor submitted assessment responses


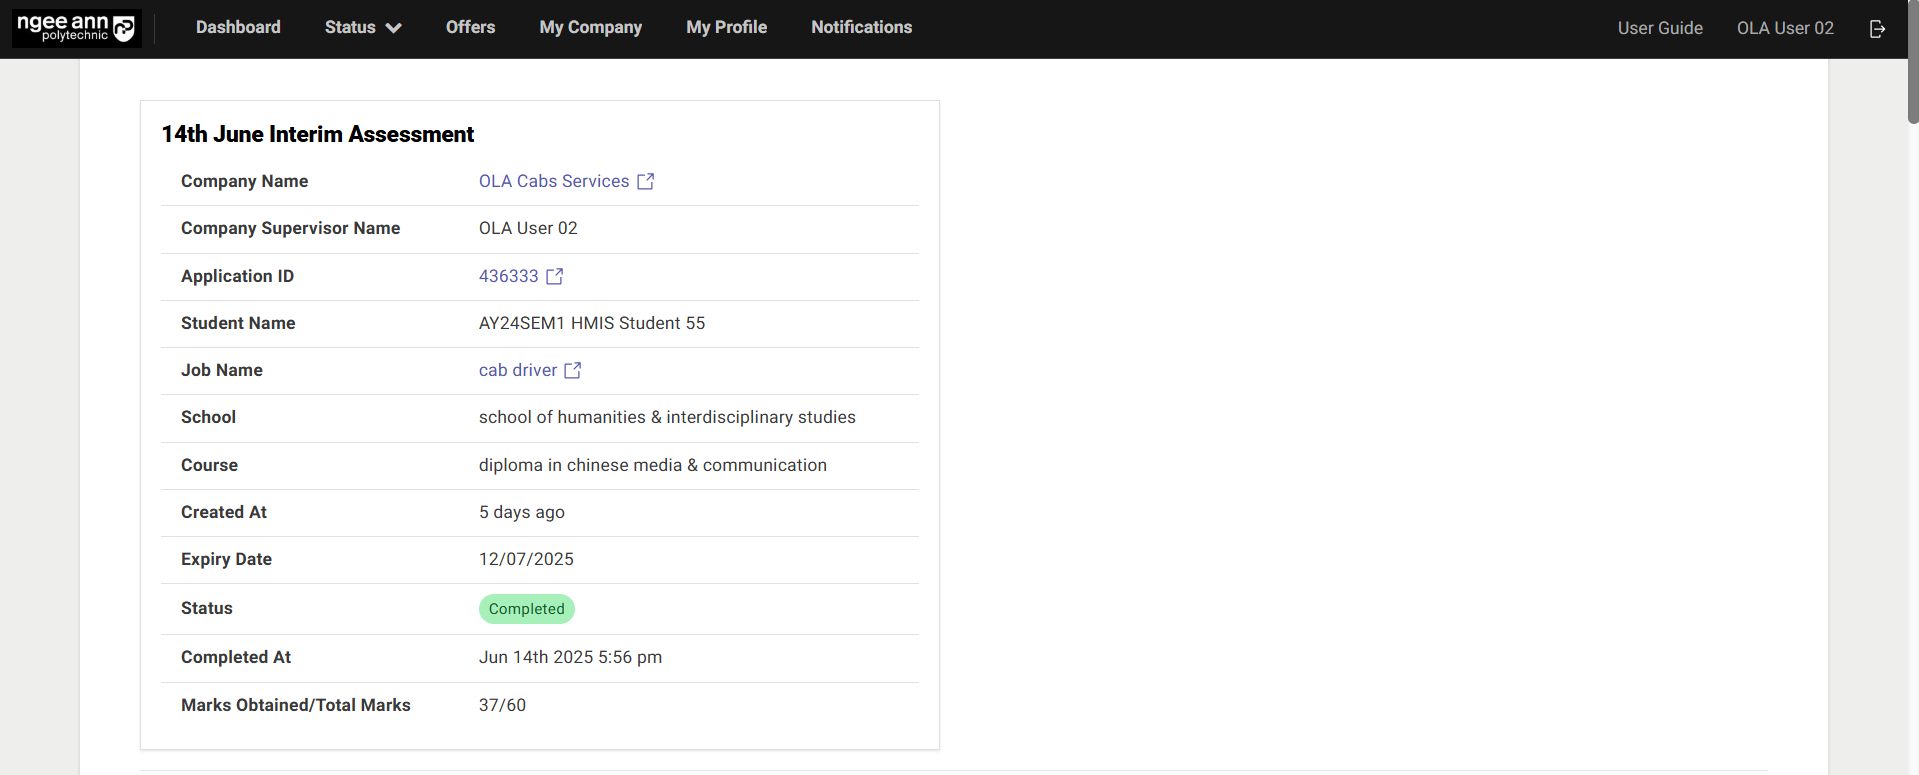
View Assessment (Interim/Final):
Step 1:
- Click the “View (Eye)” button located in the Actions column of the table.
- Ensure that you are redirected to the Assessment page.
Note: The “View (Eye)” icon is only visible when the assessment status is marked as “Completed.”
Step 2:
- Ensure the supervisor navigates to the respective Assessment page.
- Review the saved responses for each assessment question, along with the corresponding answer details.
Allow students to view interim & final assessment results? Toggle Button (School Settings):
Step 1:
- Click on the “Browse” header tab
- Click on the “School” sub tab

- Click on the school’s name link text button under “School Name” column from table
- Click on the “School Settings” section tab from “School Info” page
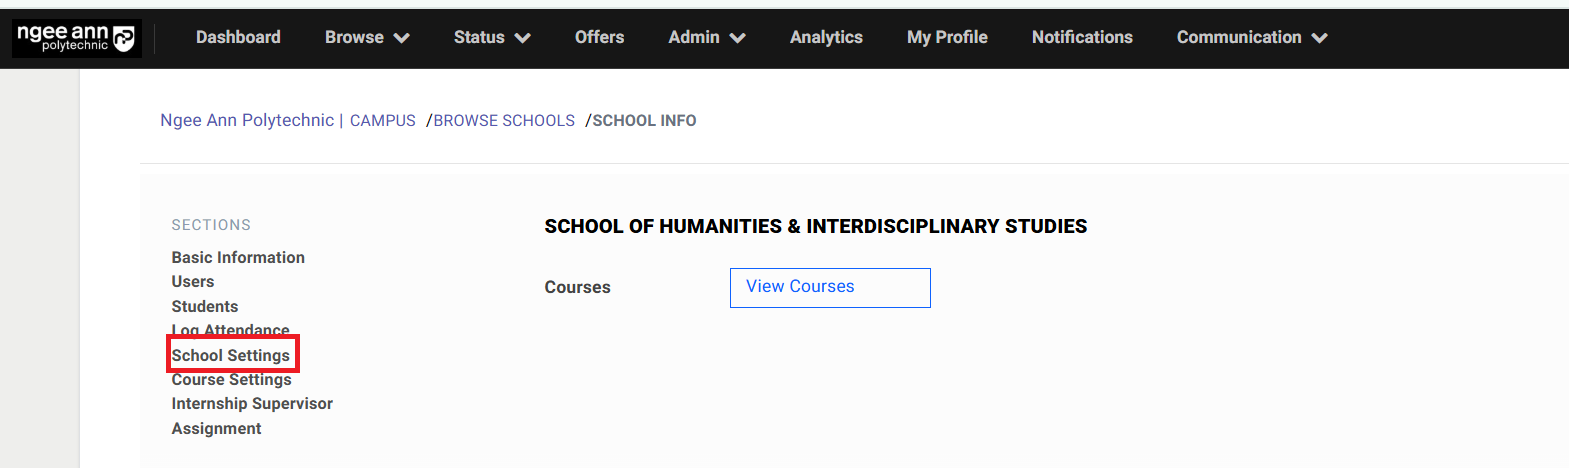
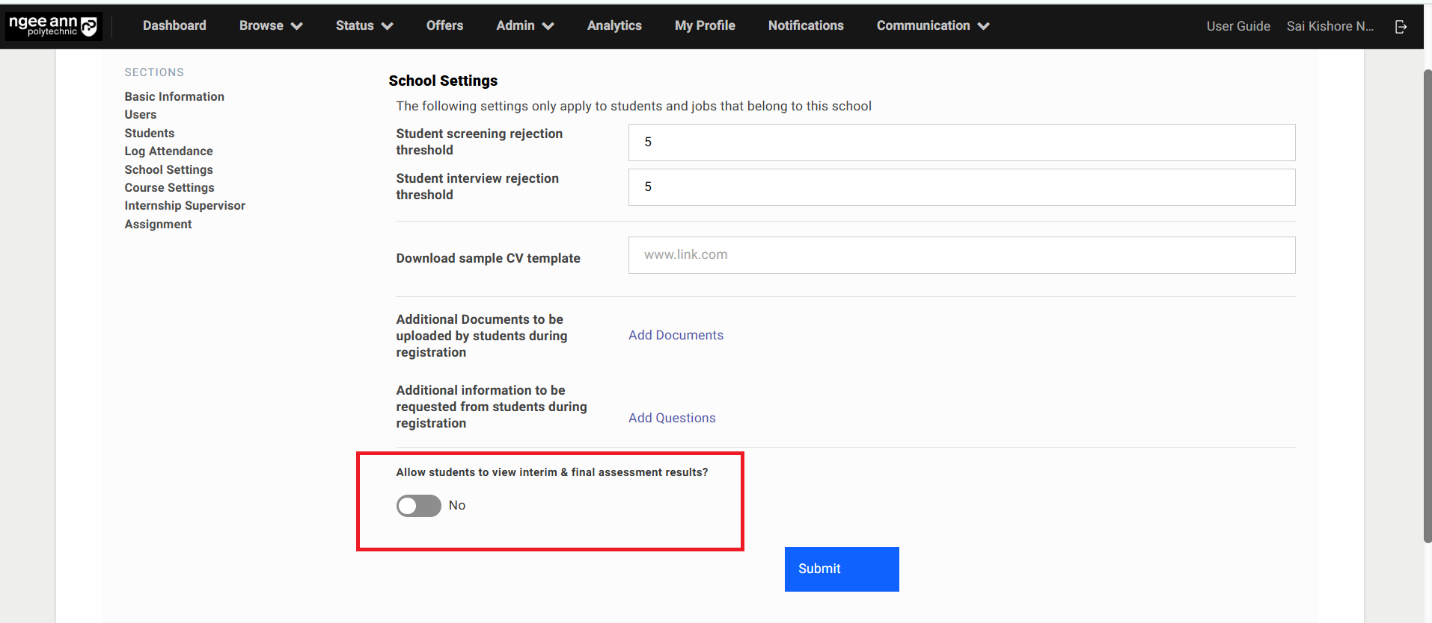
- Make sure able to see “Allow students to view interim & final assessment results?” toggle field
Step 2:
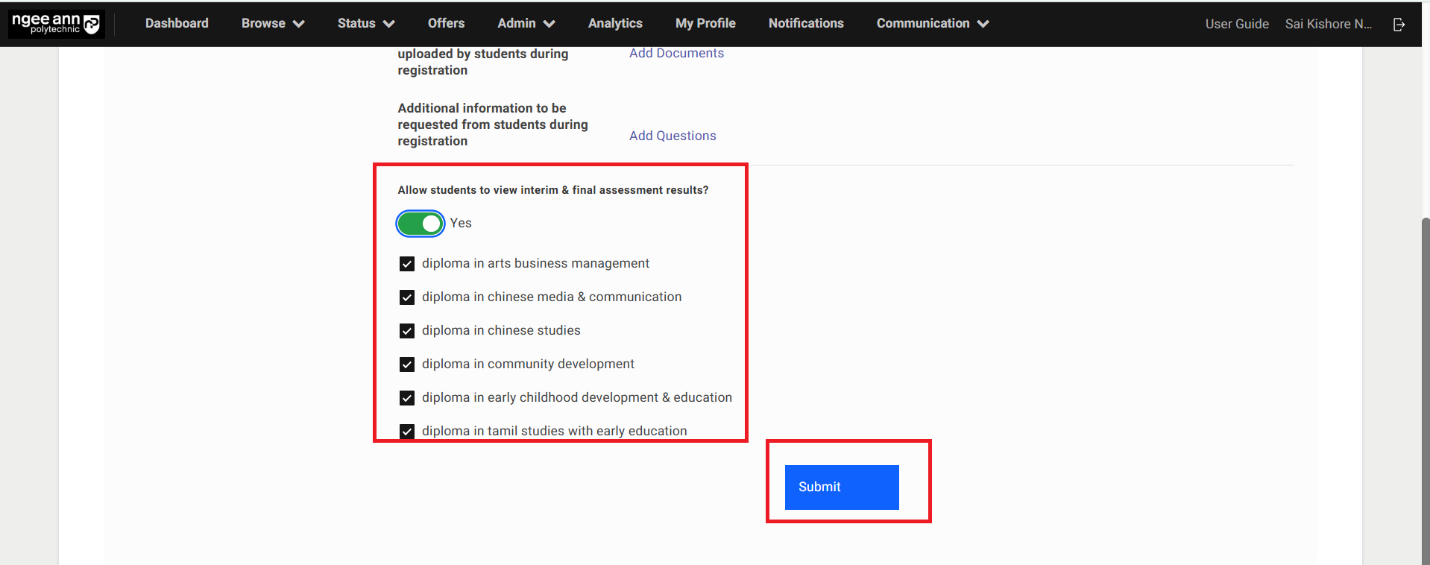
- Toggle the “Allow students to view interim & final assessment results?” switch to “Yes”.
- Ensure the list of courses associated with the respective school is displayed, each with a checkbox that is selected by default.
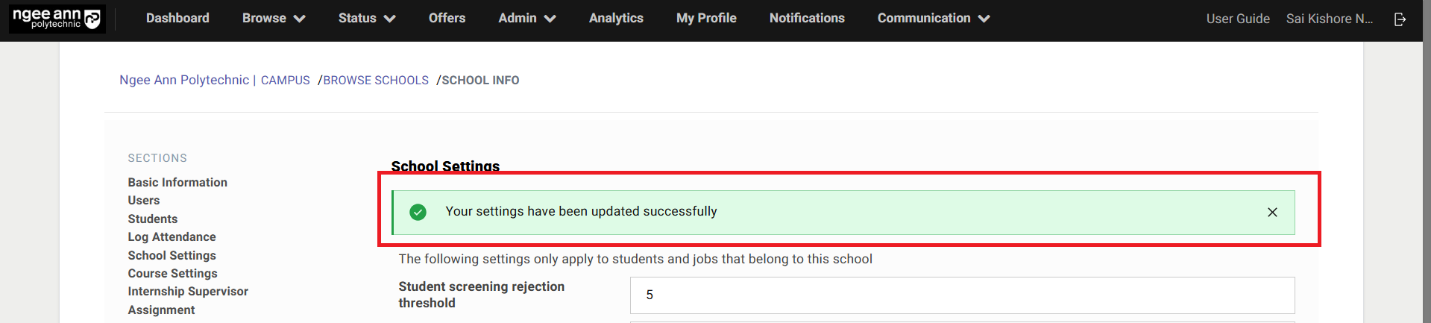
- Click the “Submit” button to save the settings. And successes message will be shown
Notes:
- When the “Allow students to view interim & final assessment results?” toggle is set to “Yes”, and specific courses are selected, students from the corresponding school and courses will be able to view their Interim and Final assessment scores and responses on the “Offer Details” page.
- When the toggle is set to “No”, or if certain courses are not selected, students from the respective schools and courses will not be able to access their Interim and Final assessment scores and responses.
Internship Visitation Logs
Internship Visitation Logs Page
Step 1:
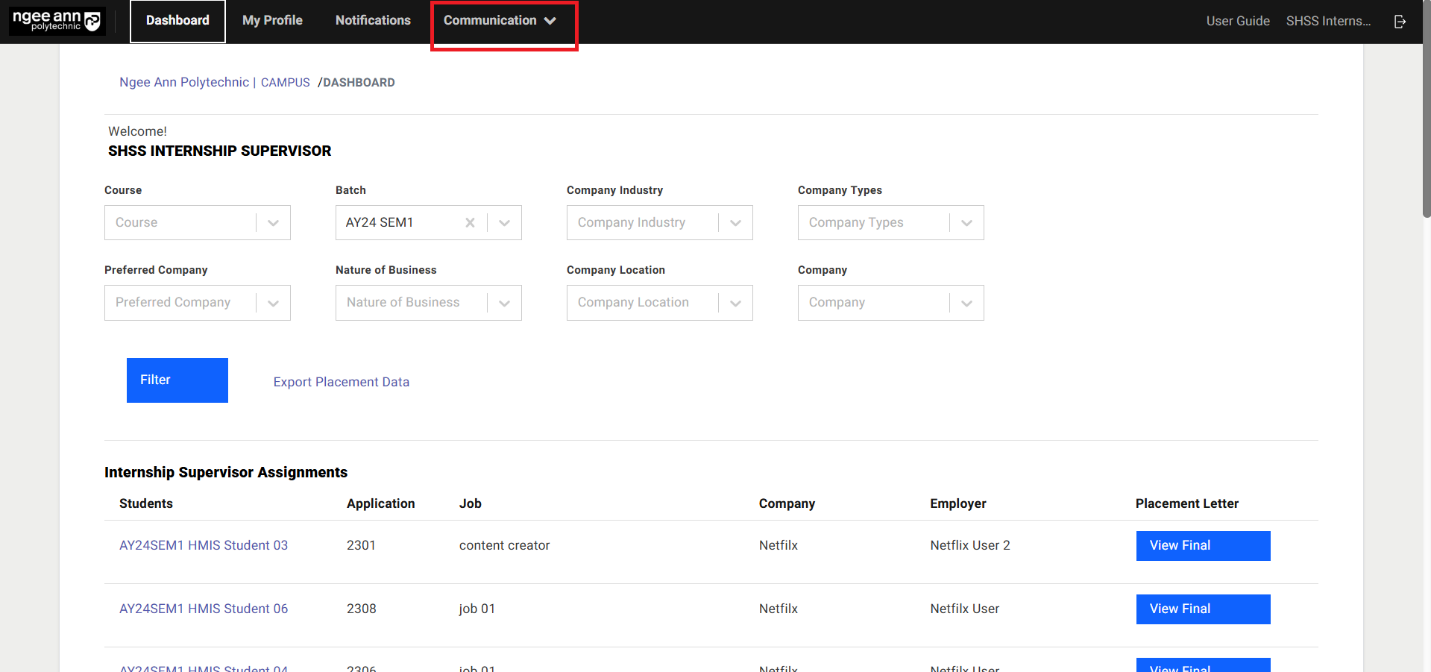
- Click on the "Communication" header tab
- Click on the "Internship Visitation Logs" sub tab
- Make sure navigate to "Internship Visitation Logs" page

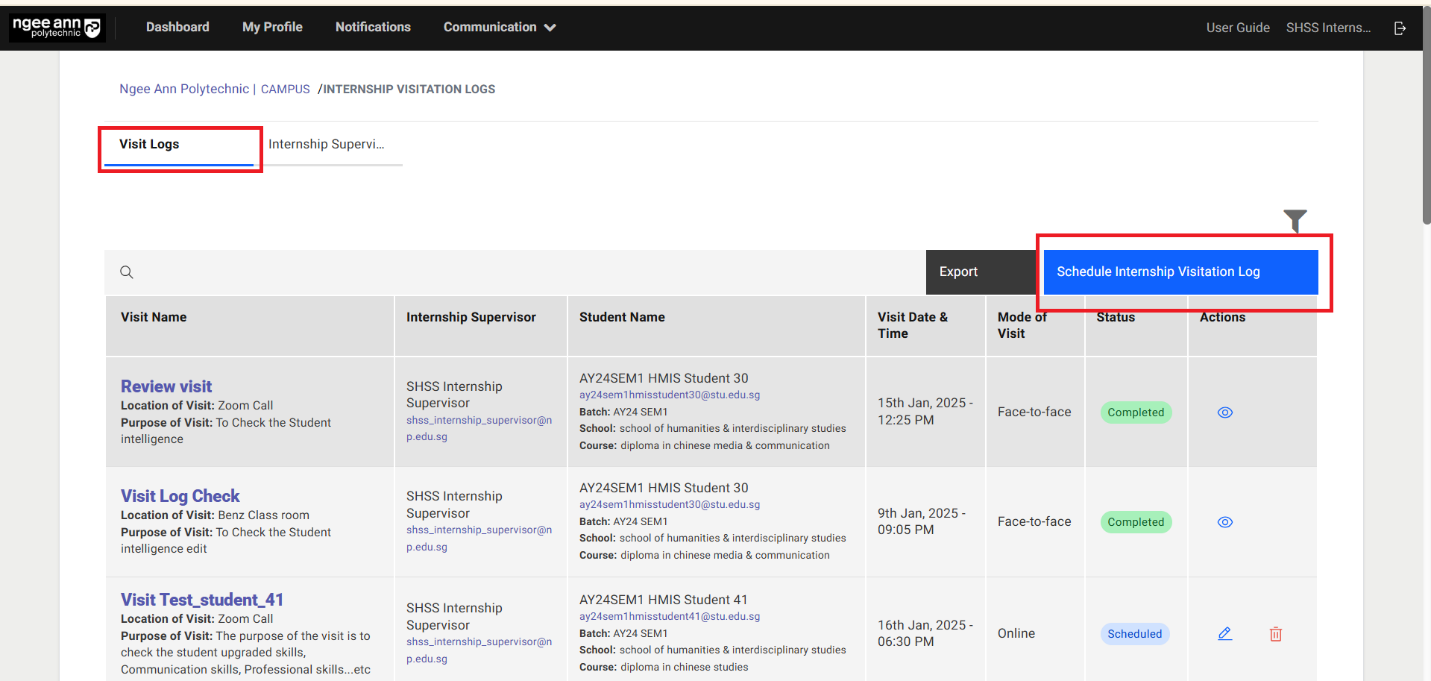
Visit Log Section Tab
Schedule Internship Visitation Log
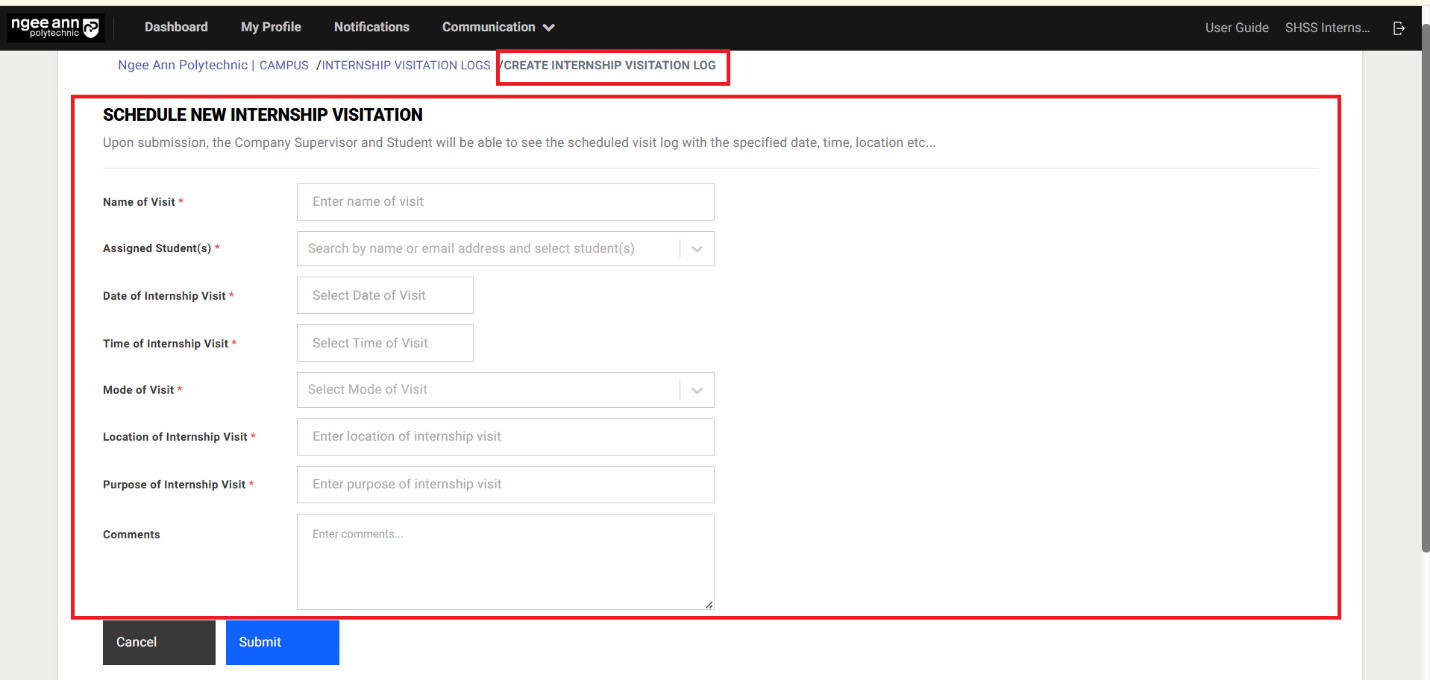
Step 1:
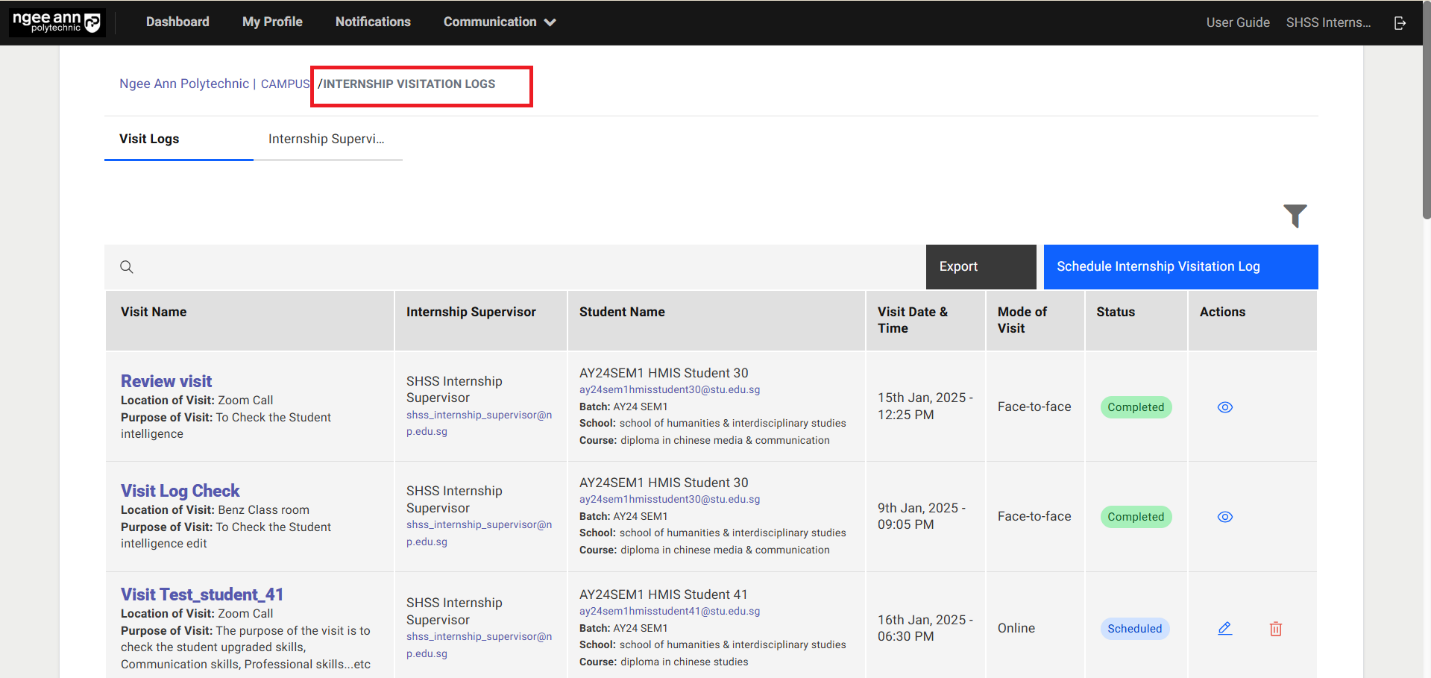
- Click on the "Schedule Internship Visitation Log" button above the table
- Make sure navigate to "Create Internship Visitation log" page
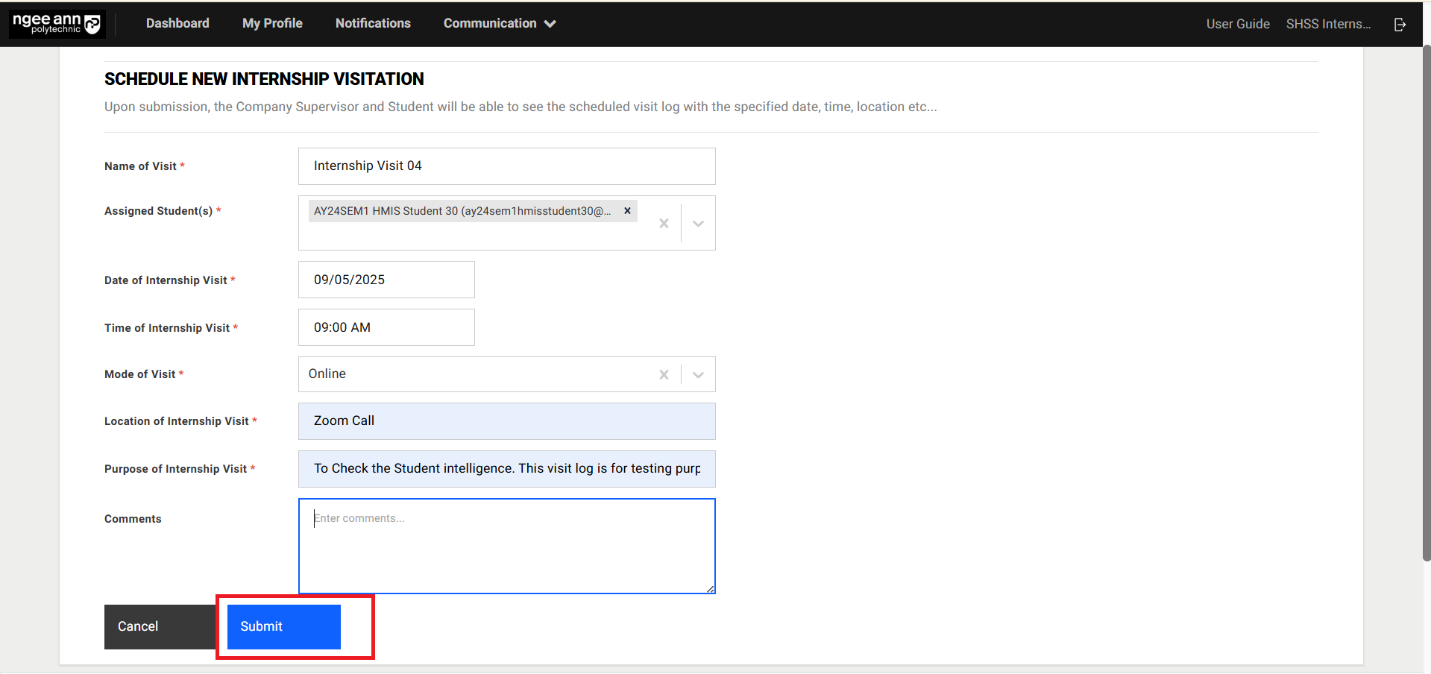
- Enter visit log details into the fields
- Click on the "Submit" button to schedule visit log
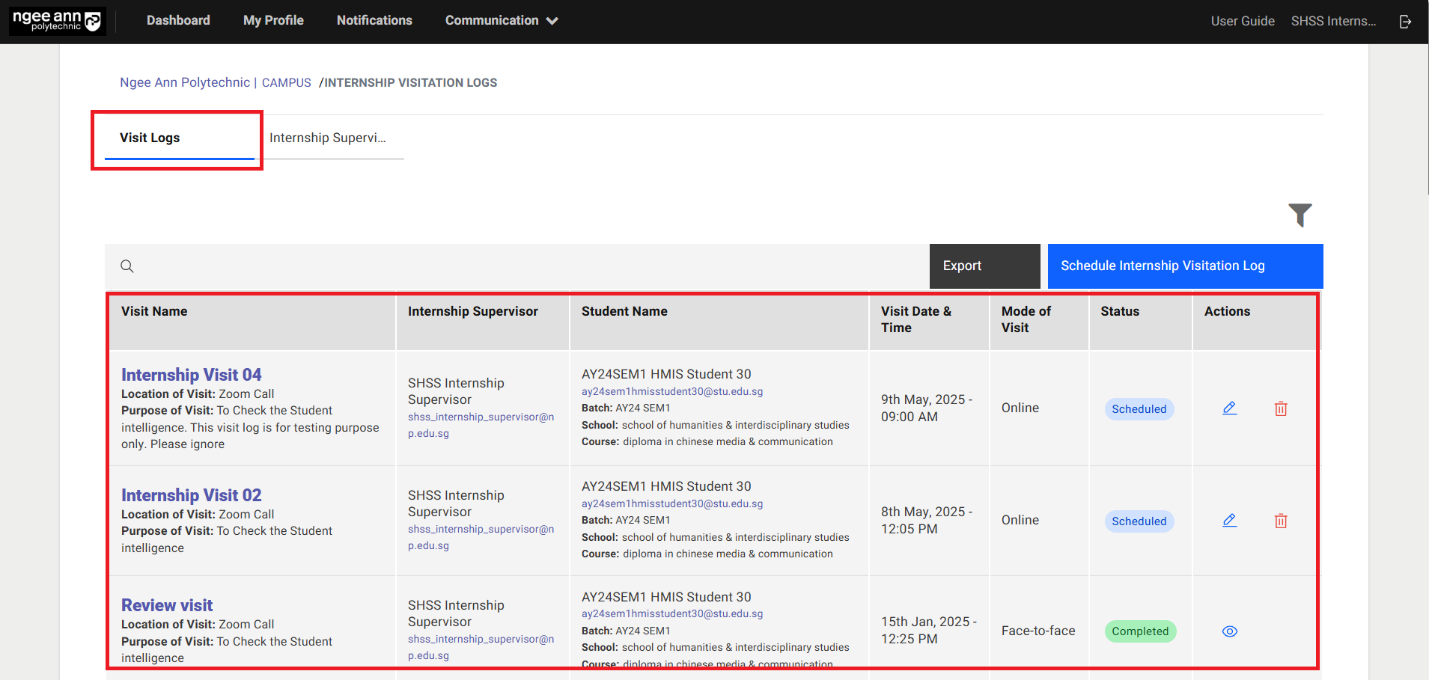
- Make sure successes message will be shown and scheduled visit log will be shown in the table
Note: Only System Owner & Internship Supervisor role users have access to schedule internship visitation logs.

Step 2:
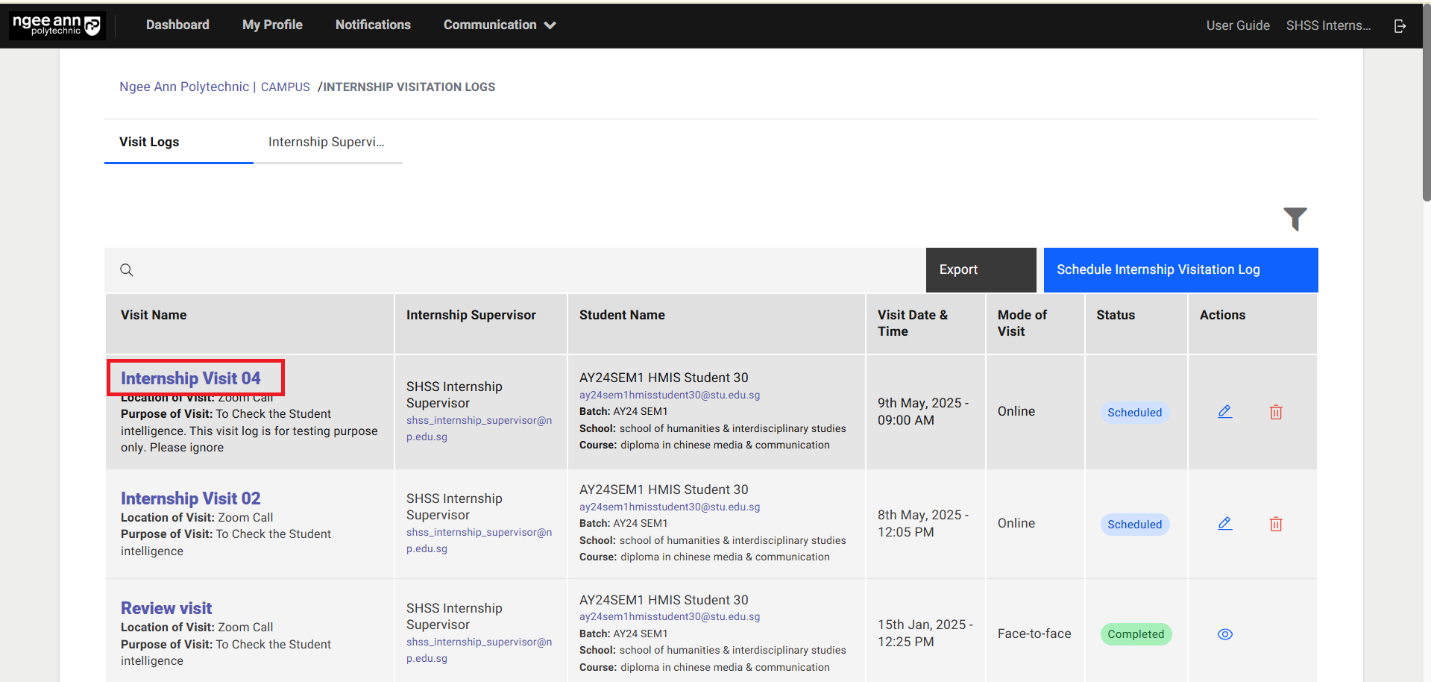
- Scheduled visit logs are shown in the table under "Visit Logs" section tab
- Click on the visit name link text button under "Visit Name" column
- Make sure user navigates to respective applicant "Application Information" page
- See the scheduled visit records data under each column in the table.
Edit Visit Log
Step 1:
- Click on the "Edit (Pencil)" icon under "Actions" column in the table.
- Make sure user navigates to "Edit Internship Visitation Log" page and saved data persist into each field
- Update the data into the fields
- Click on the "Submit" button to save the updated changes and successes message banner will be shown.
Notes:
- Make sure while edit "Assigned Student" dropdown field will be shown disabled with respective student name default selected.
- Make sure once the "Edit (pencil)" icon will not be shown under "Actions" column if respective log has been marked as completed
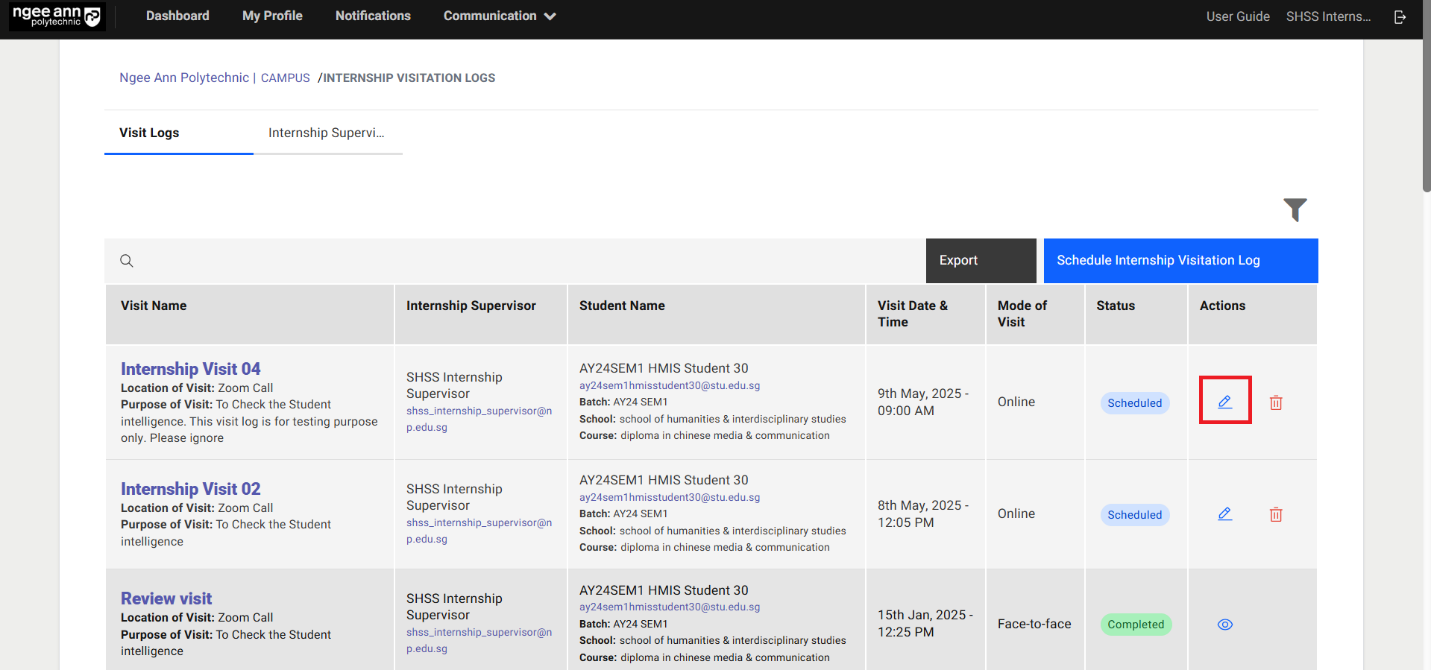
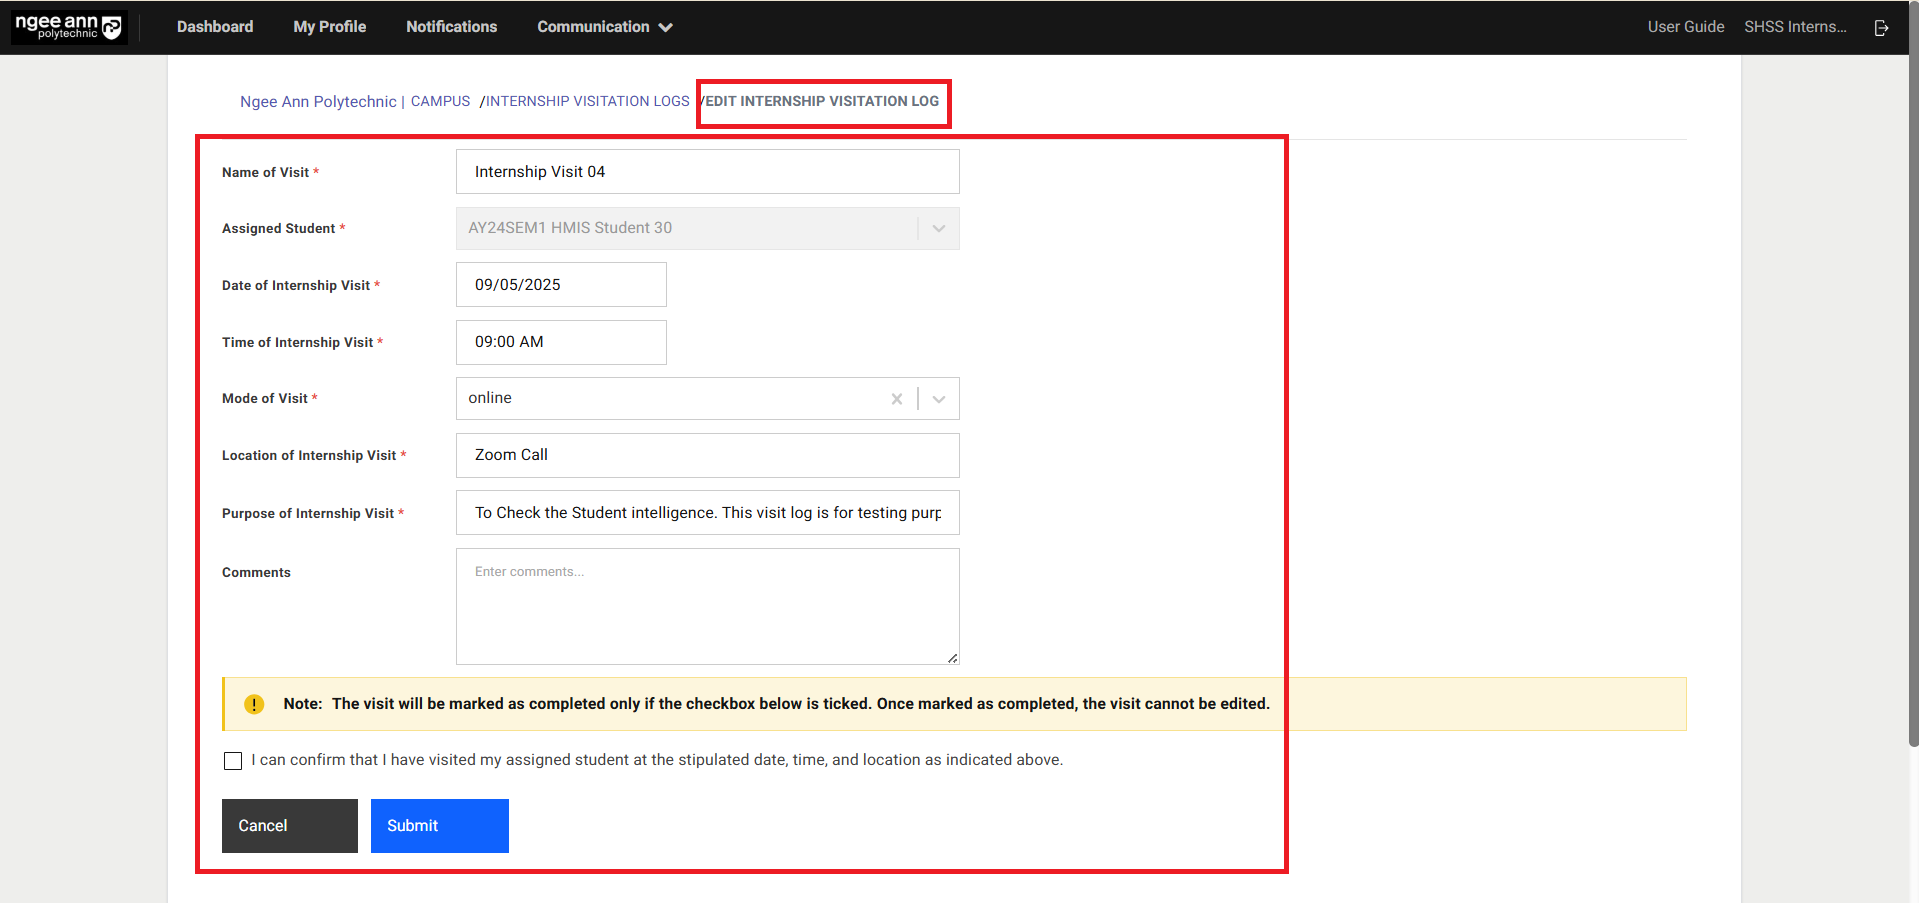
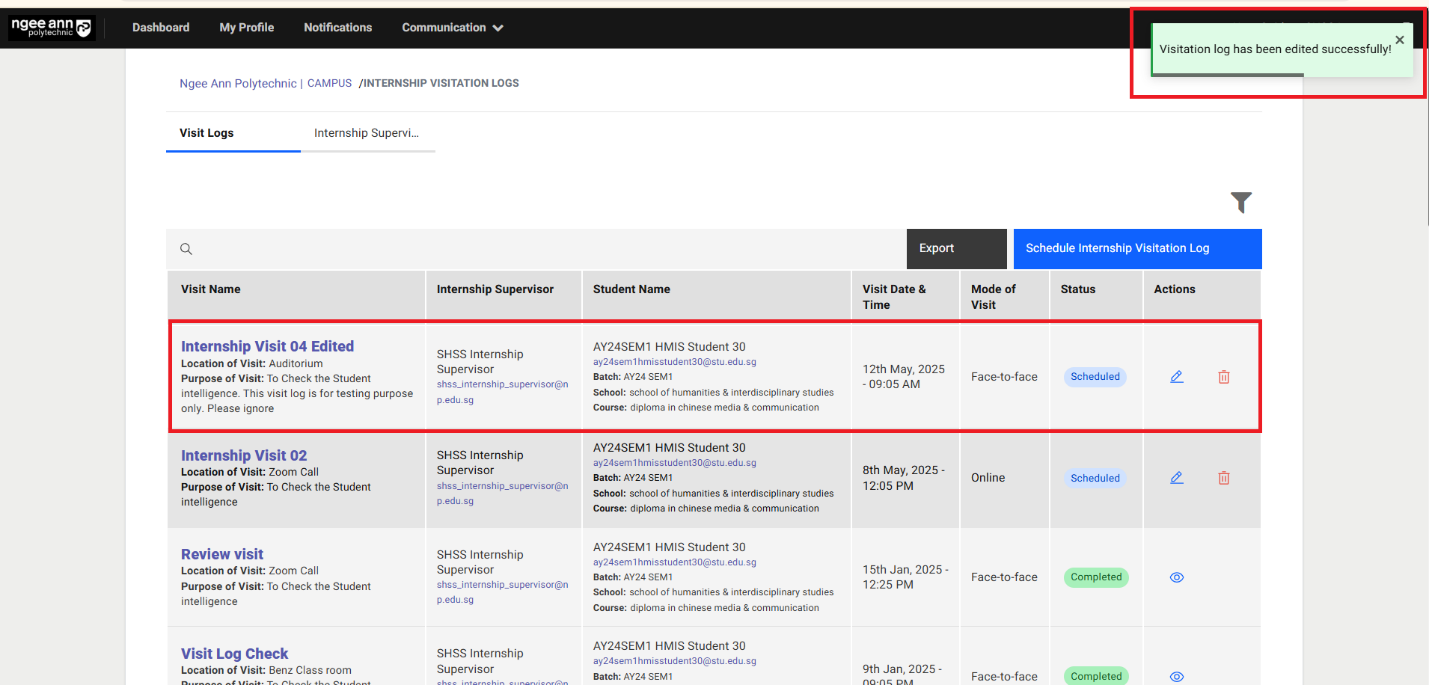
Delete Visit Log
Step 1:
- Click on the "Delete (Trash can)" icon under "Actions" column in the table.
- Click on the "Delete" button from the "Delete Visitation Log" popup.
- Make sure respective visit record will be removed/deleted from the table and successes message will be shown.
Note: Make sure once the "Delete (Trash)" icon will not be shown under "Actions" column if respective log has been marked as completed
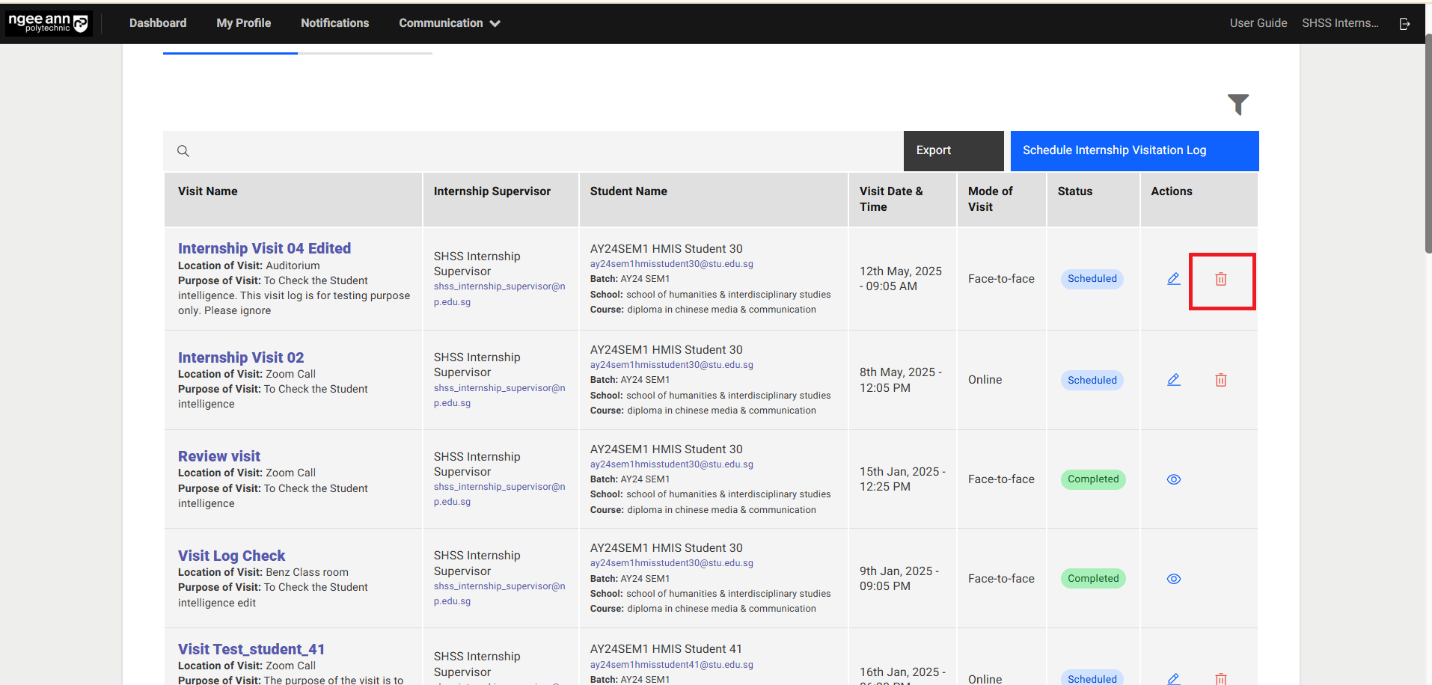

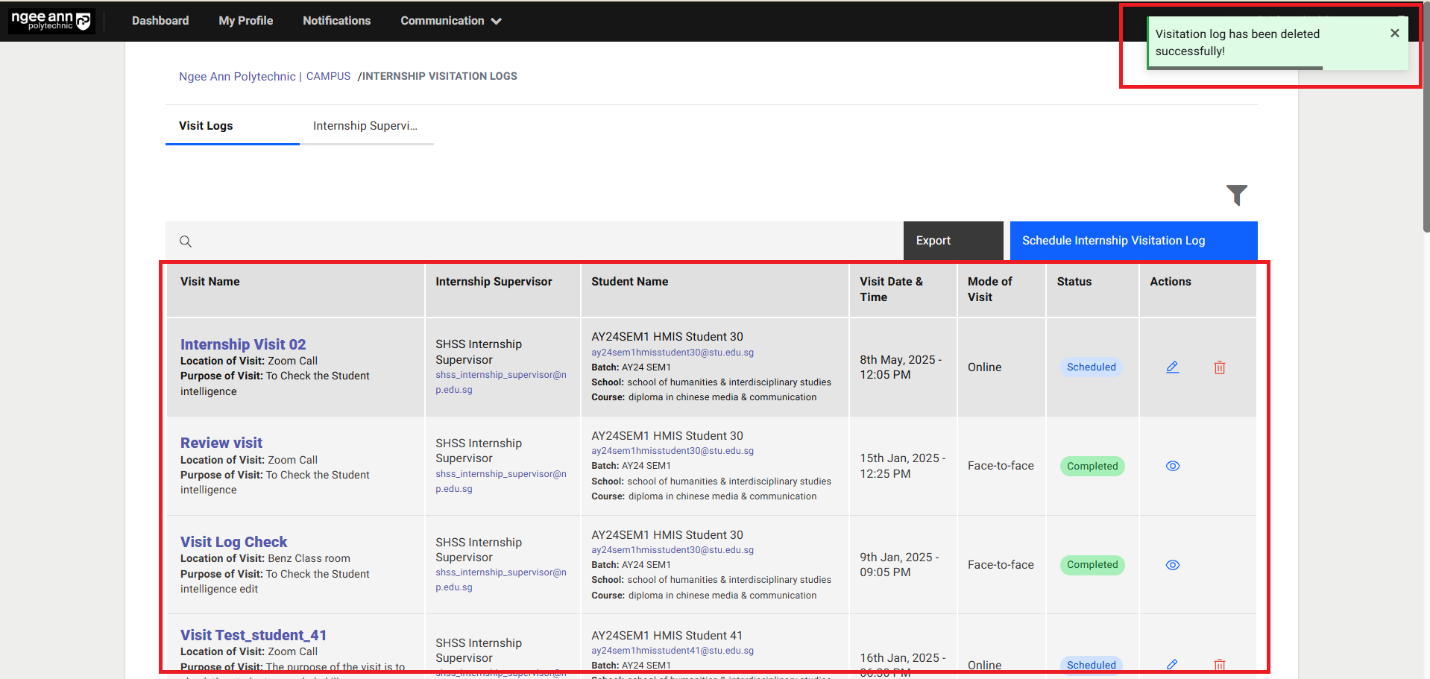
Make Visit Record as Completed
Step 1:
- Click on the "Edit (Pencil)" icon under "Actions" column in the table.
- Make sure user navigates to "Edit Internship Visitation Log" page and saved data persist into each field.
- See Checkbox field with "I can confirm that have visited my assigned student at the stipulated date, time, and location as indicated above" string will be shown
- Select the checkbox and click on the "Submit" button.
- Make sure respective visit log will be marked as completed
- "Completed" tag will be shown under "Status" column in the table

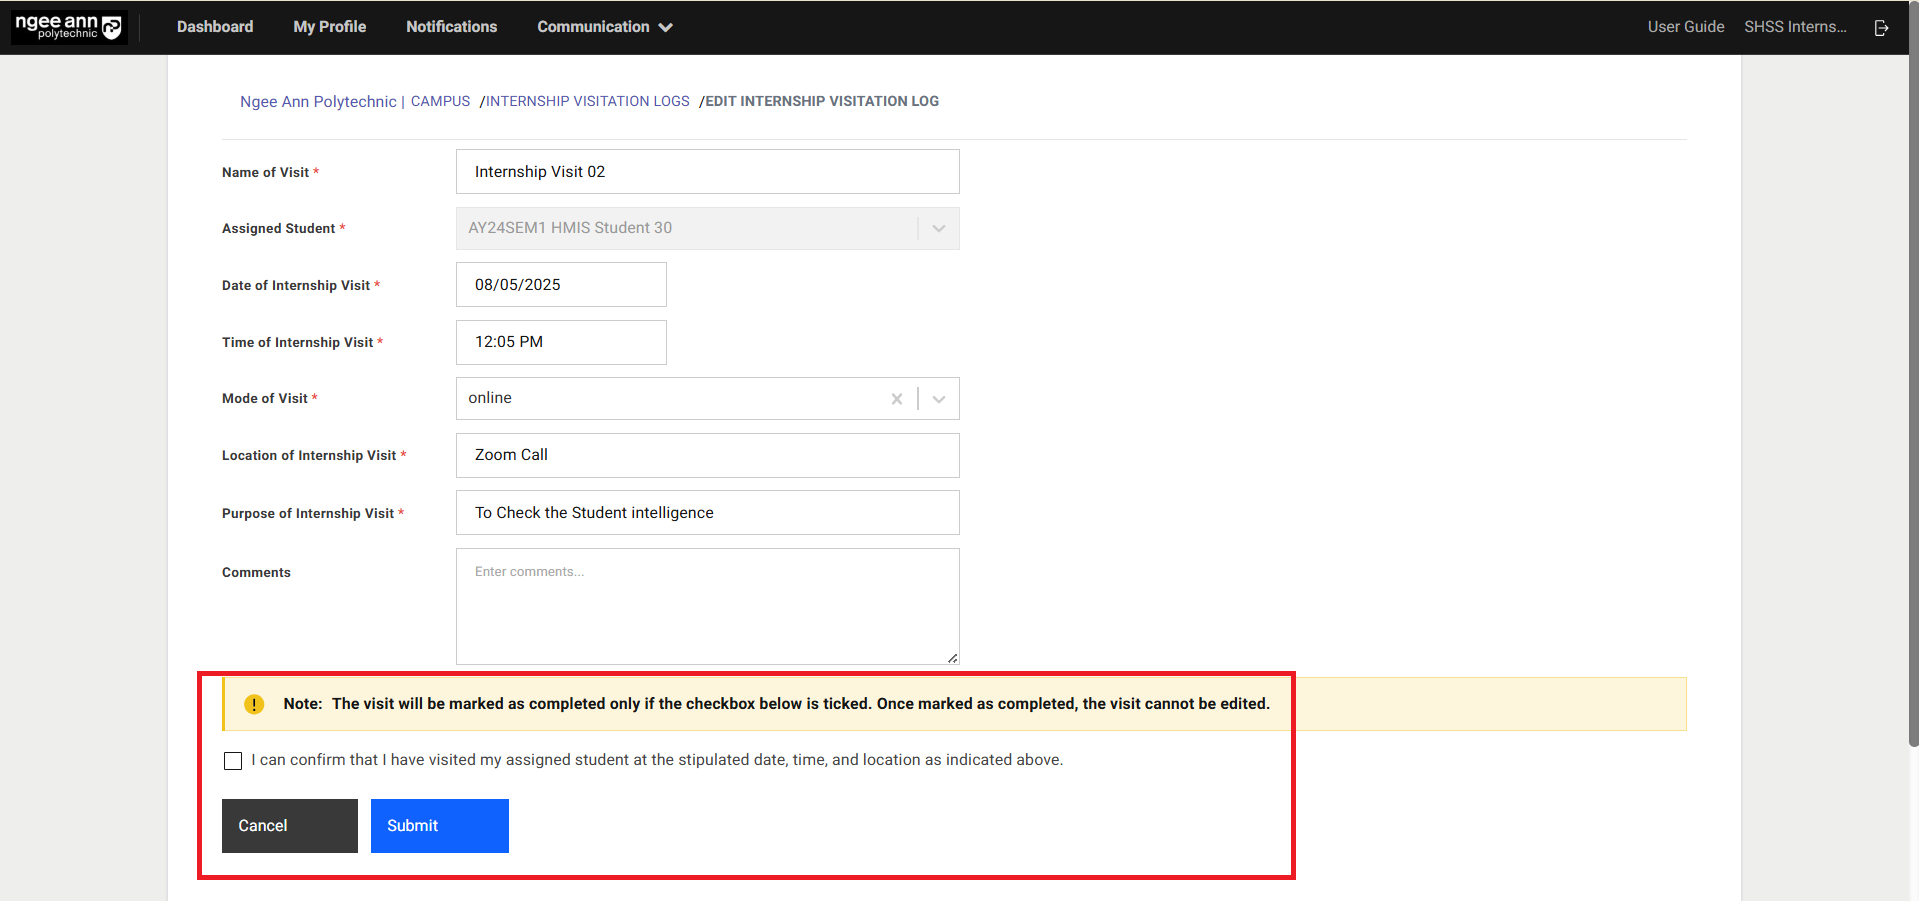

Step 2:
- Click on the "Eye" icon under "Actions" column in the table
- Make sure navigate to "View Internship Visitation Log" page
- Respective visit log details will be persist into the fields
- Click on the "Back" button navigate back to "Internship Visitation Logs" page
Note: Once visit log marked as completed all fields in the "View Internship Visitation Log" page will be shown in disabled state.
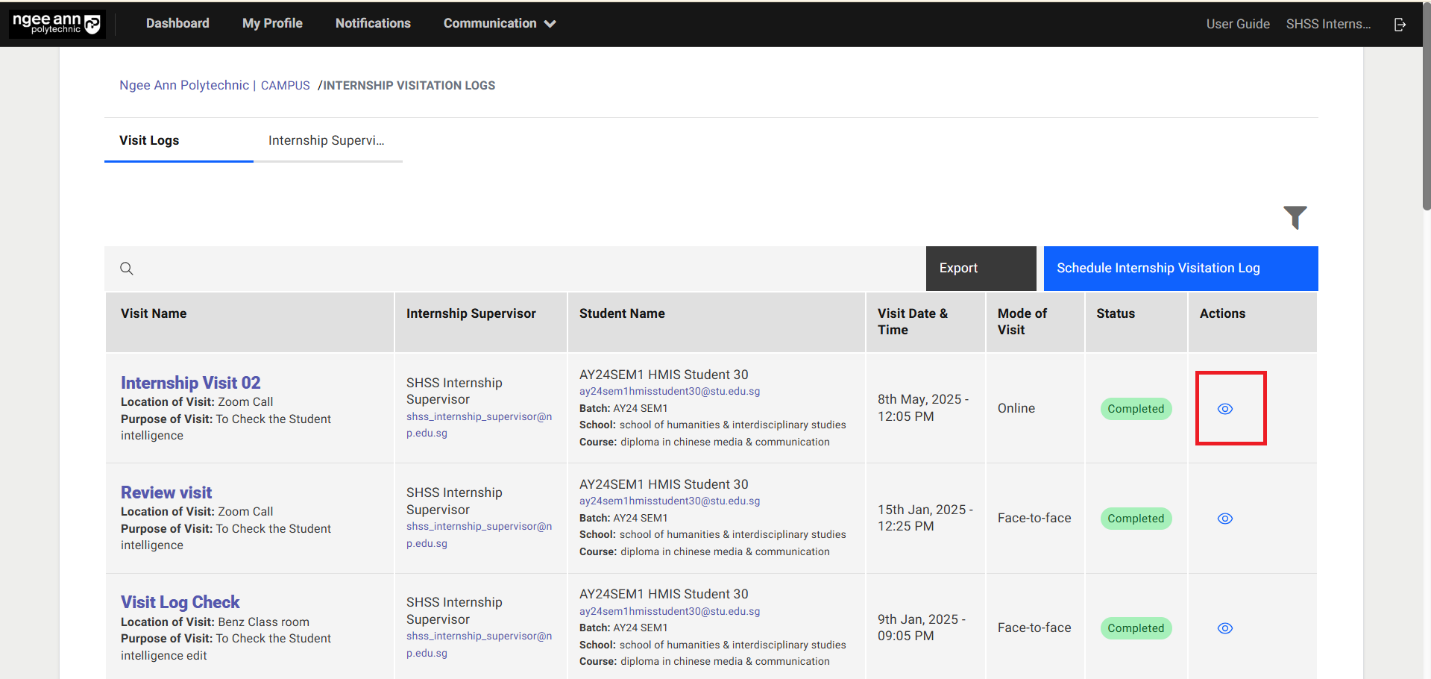
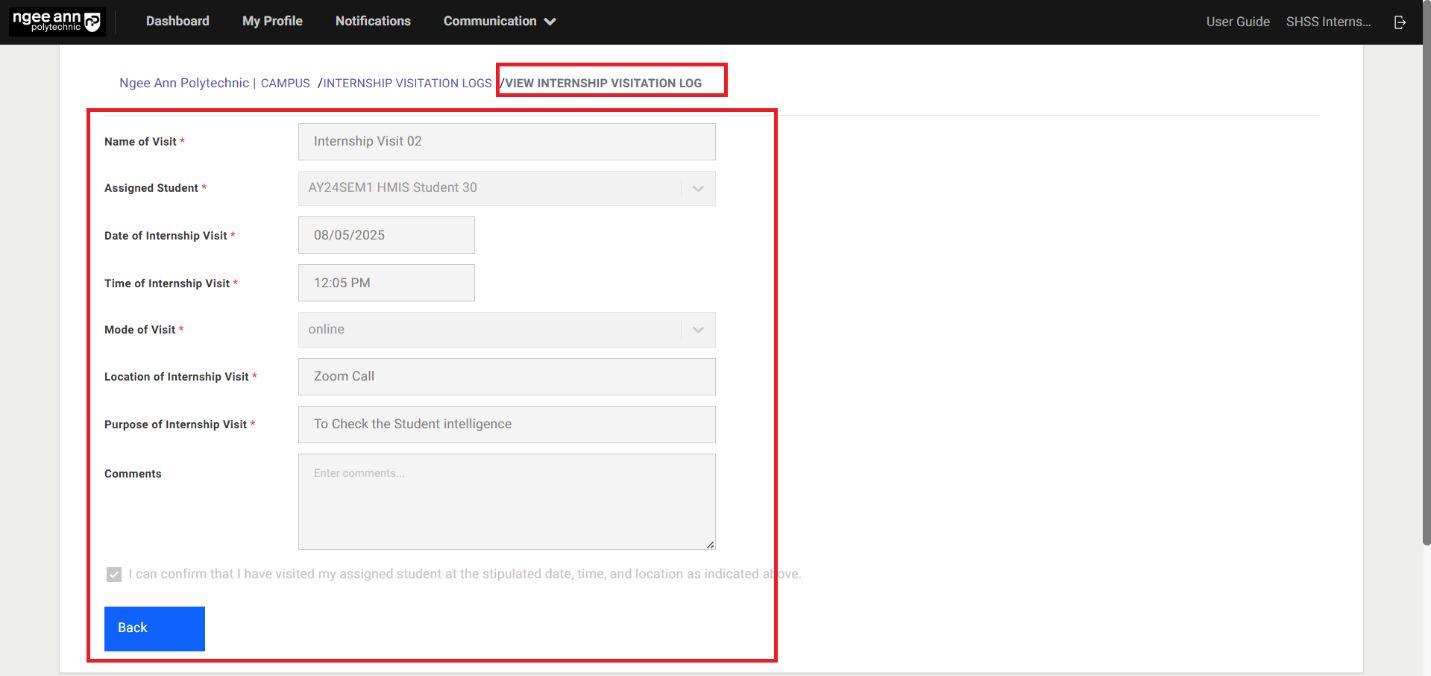
Export Visit Logs
Step 1:
- Click on the "Export" button above the table
- Make sure exported visit log CSV file get downloaded
- Make sure scheduled visit records will be shown in the exported sheet.
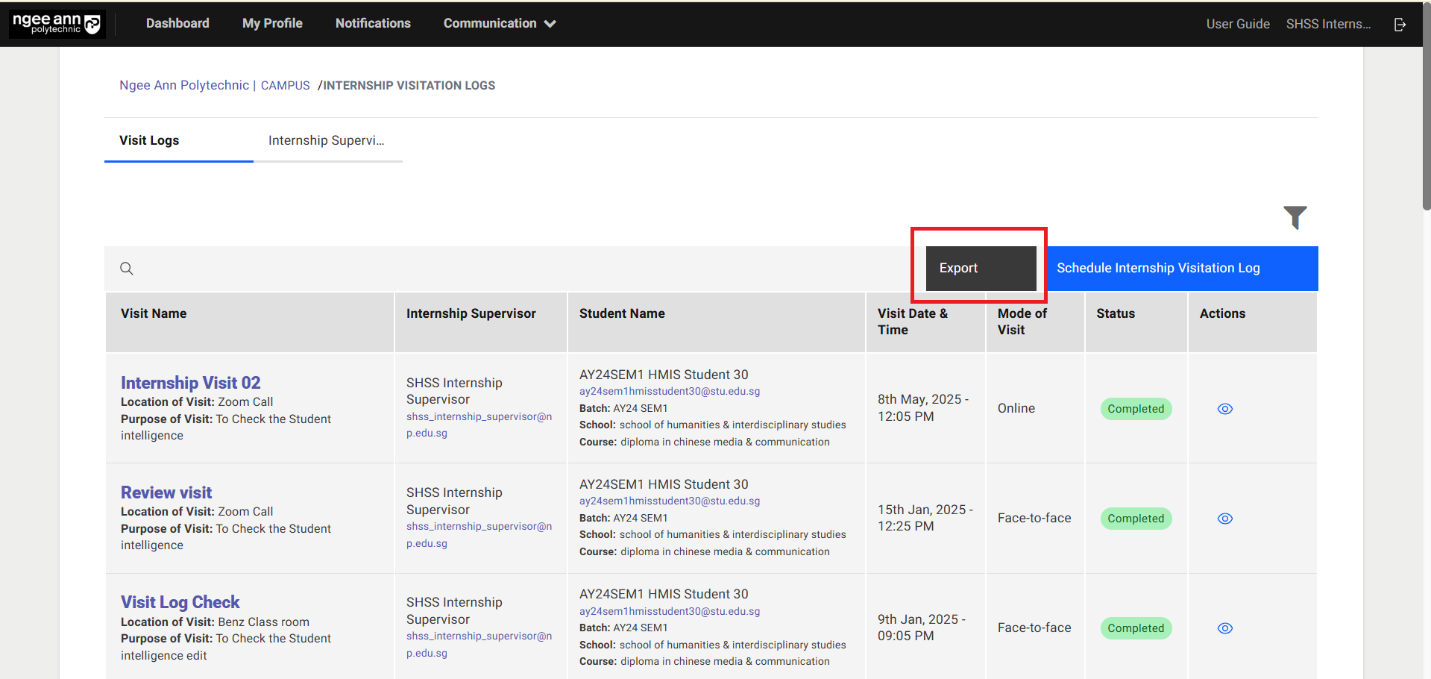
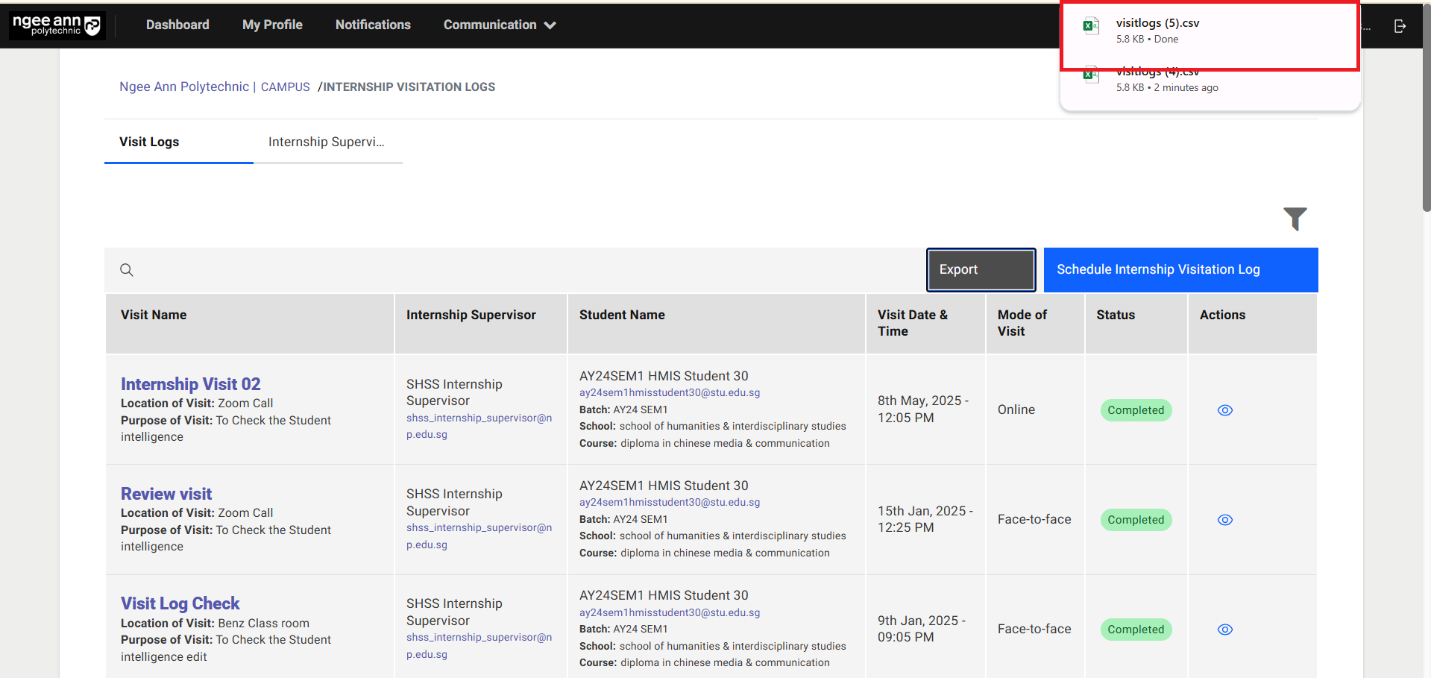
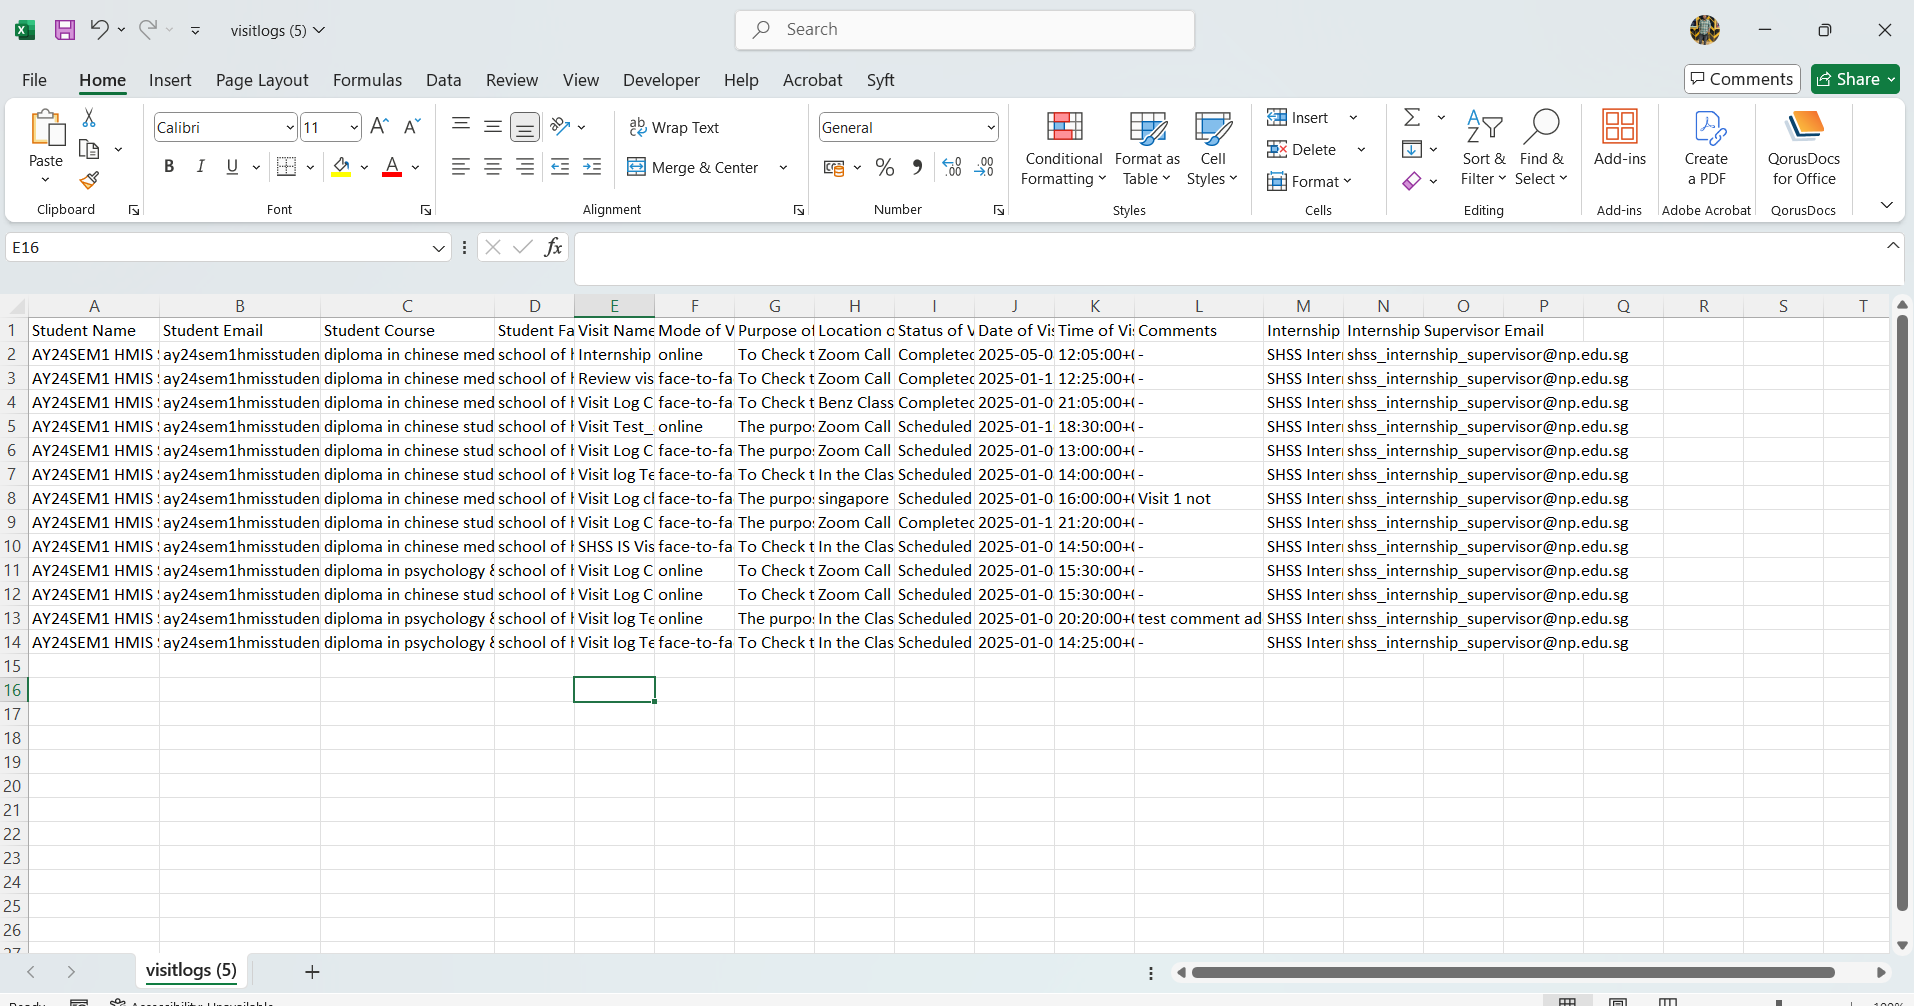
Filters
Step 1:
- Click on the "Filter" icon above the table.
- Make sure "Filter & sort" popup get open with list of filter options
- Click on filter option and apply the filters
- Make visit records data get filtered in the table after applying filters.
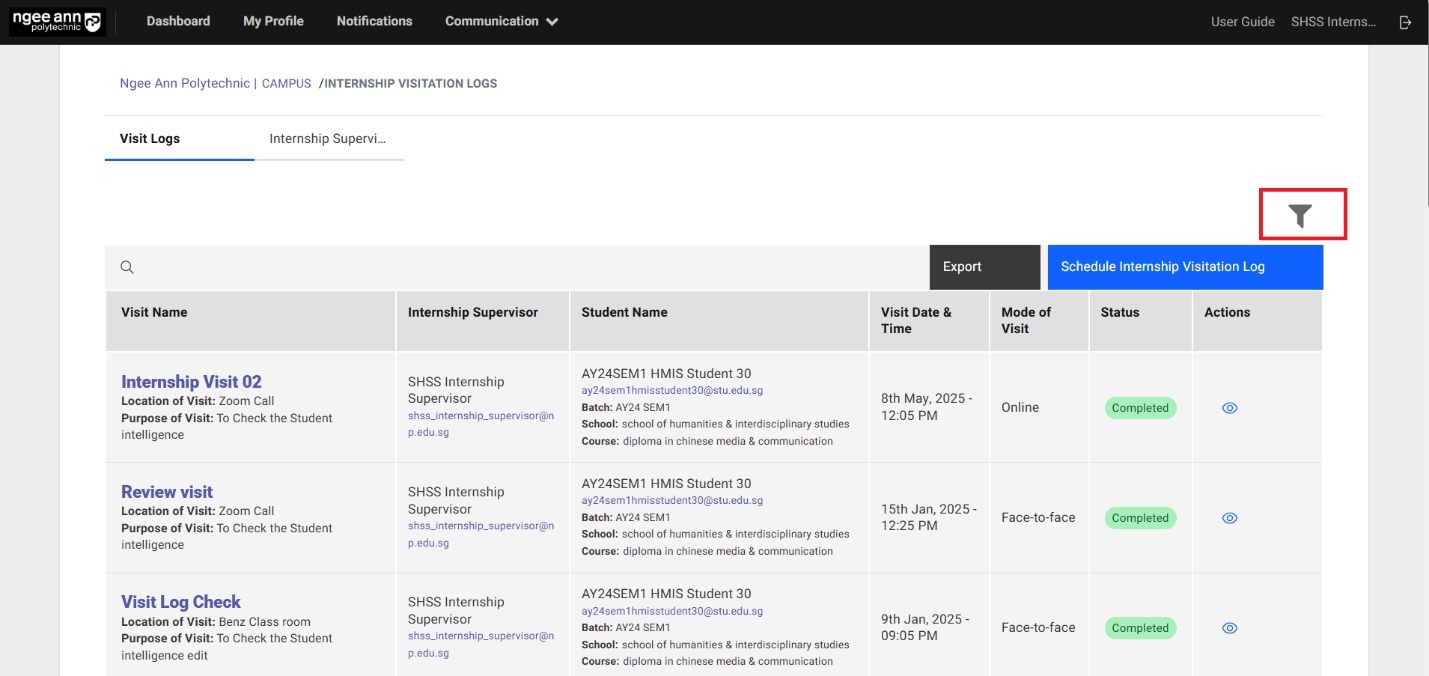
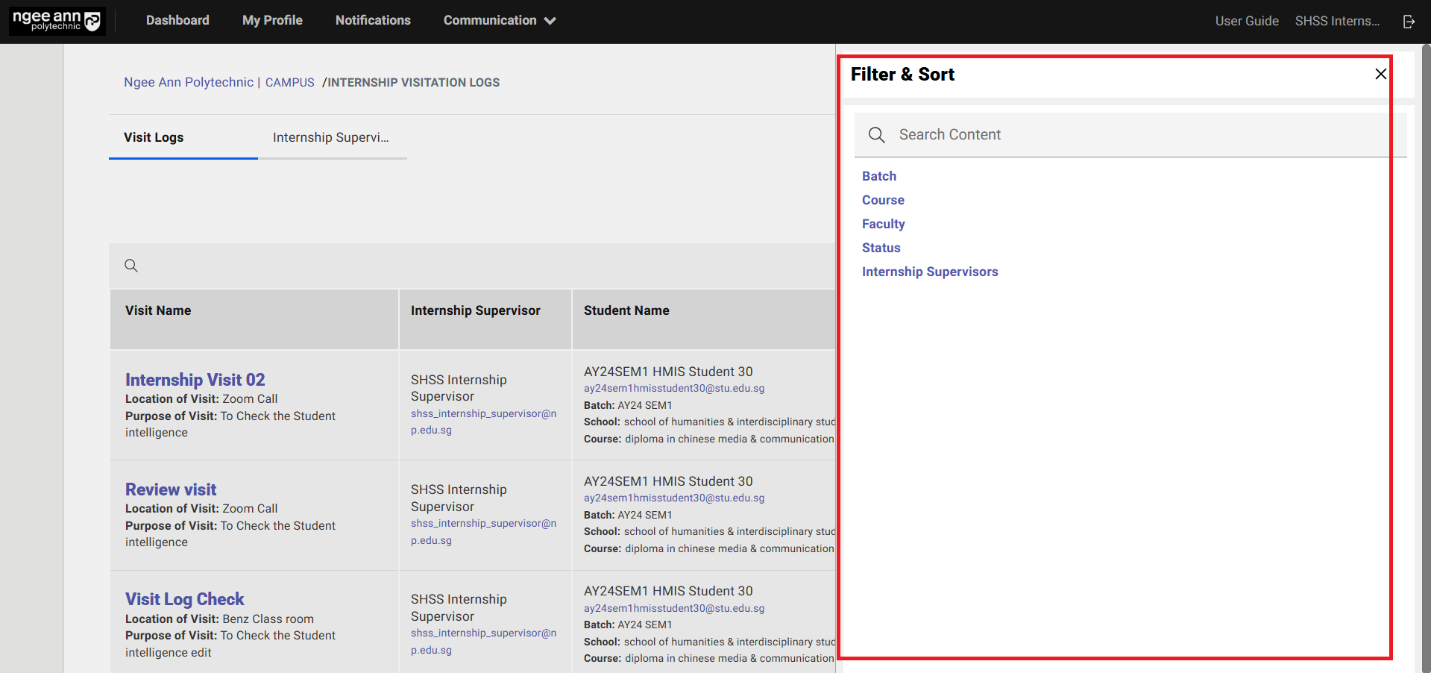
Internship Supervisors Section Tab
Step 1:
- Click on the "Internship Supervisors" section tab under "Internship Visitation Logs" page.
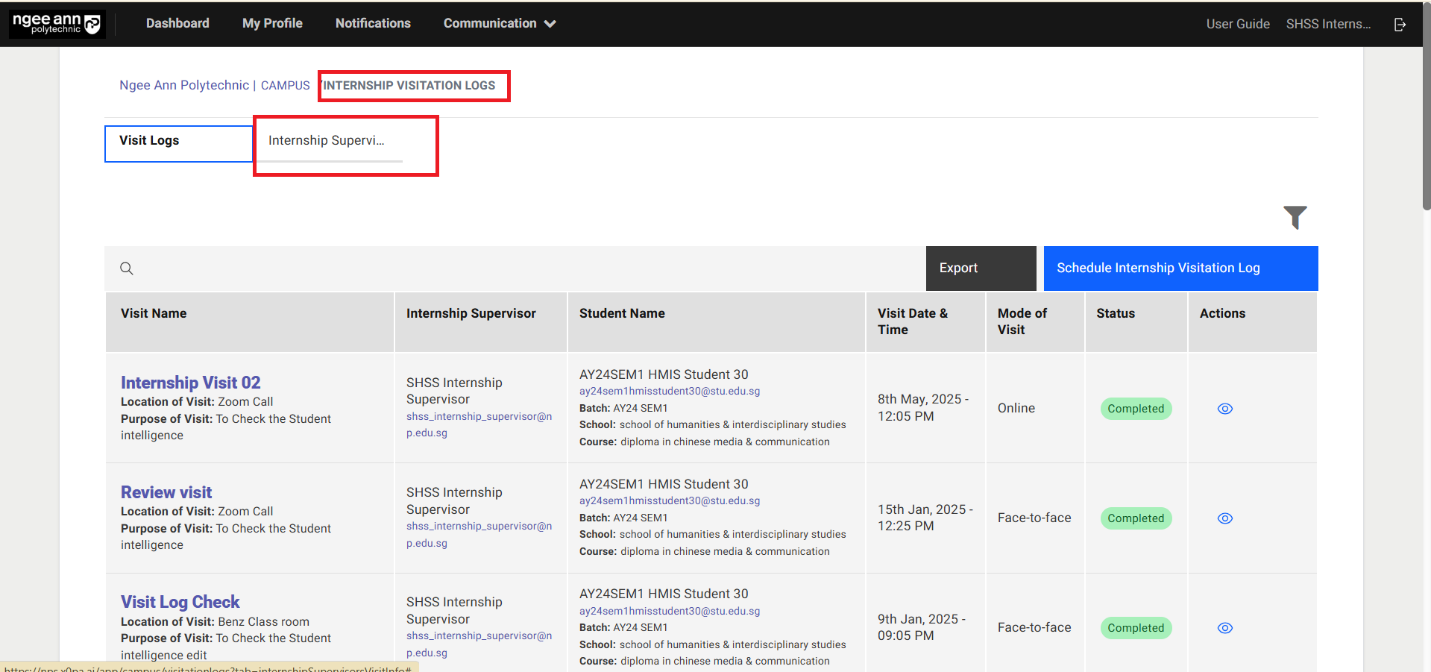
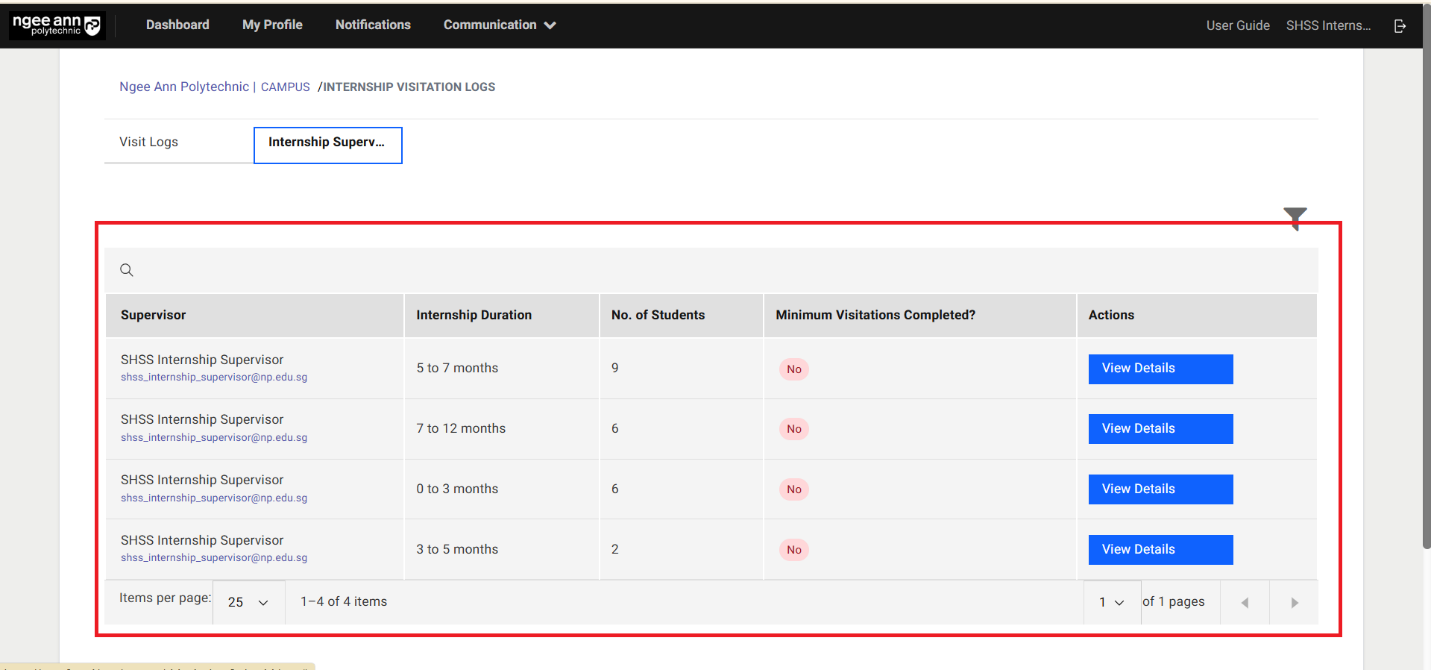
Internship Supervisors Table
Step 1:
| Column Name | Description |
|---|---|
| Supervisor | This column displays the name and email ID of the internship supervisor assigned to the hired interns. |
| Internship Duration | This column shows the internship duration associated with each supervisor's tagged interns. |
| No. Of Students | This column indicates the number of interns assigned to the respective supervisor for the specified internship duration. |
| Minimum Visitations Completed? | This column displays a status of "Yes" or "No": • "Yes" – if all interns tagged to the supervisor for the given internship duration have completed the required visit logs. • "No" – if any intern under the supervisor for that duration has not completed the required visit logs. |
| Actions | This column contains a "View Details" button for each record. Clicking this button will display detailed information about the interns tagged to the selected supervisor. |
Criteria:
| Duration of Internship | Number of Visits |
|---|---|
| 0 to 3 months Internships | 1 |
| 3 to 5 months Internships | 2 |
| 5 to 7 months Internships | 3 |
| 7 to 12 months Internships | 5 |
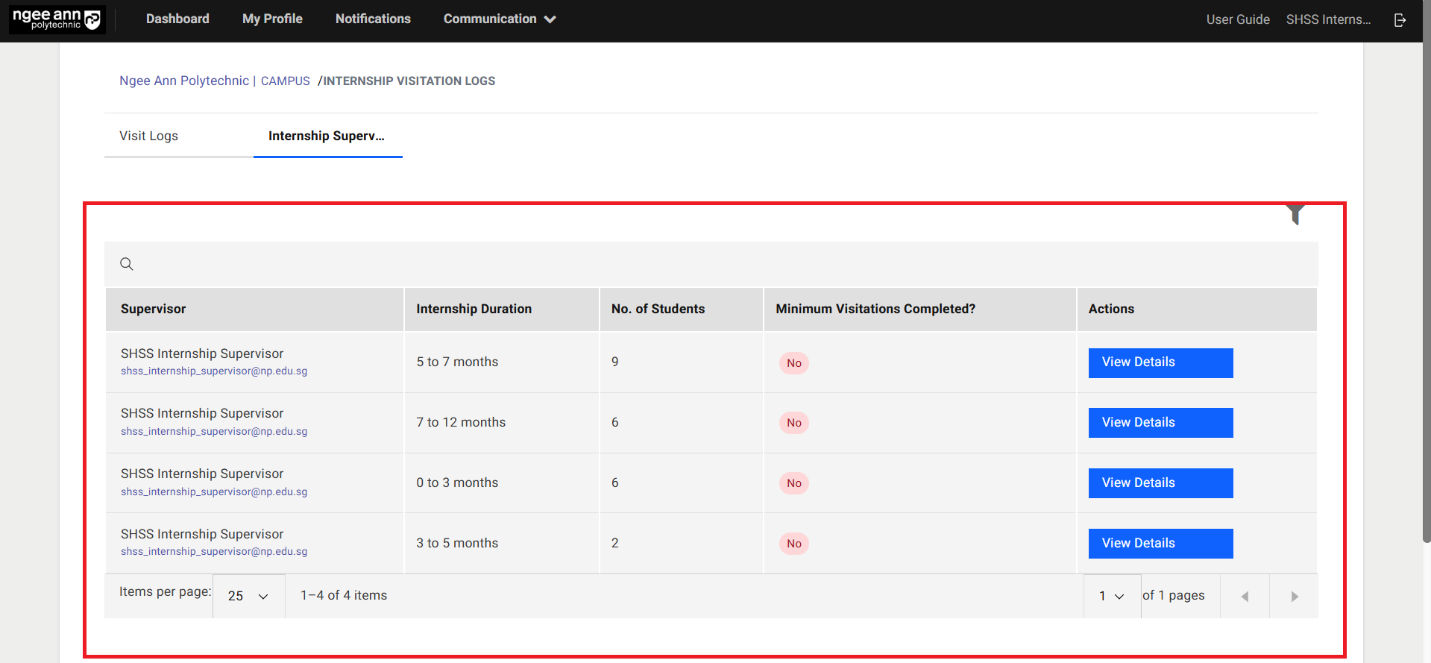
Internship Supervisor Tagged Interns Details Page
Step 1:
- Click on the "View Details" button under "Actions" column in the table
- Make sure navigate to "Details" page.
- Click on the "Close (X)" to close the details page
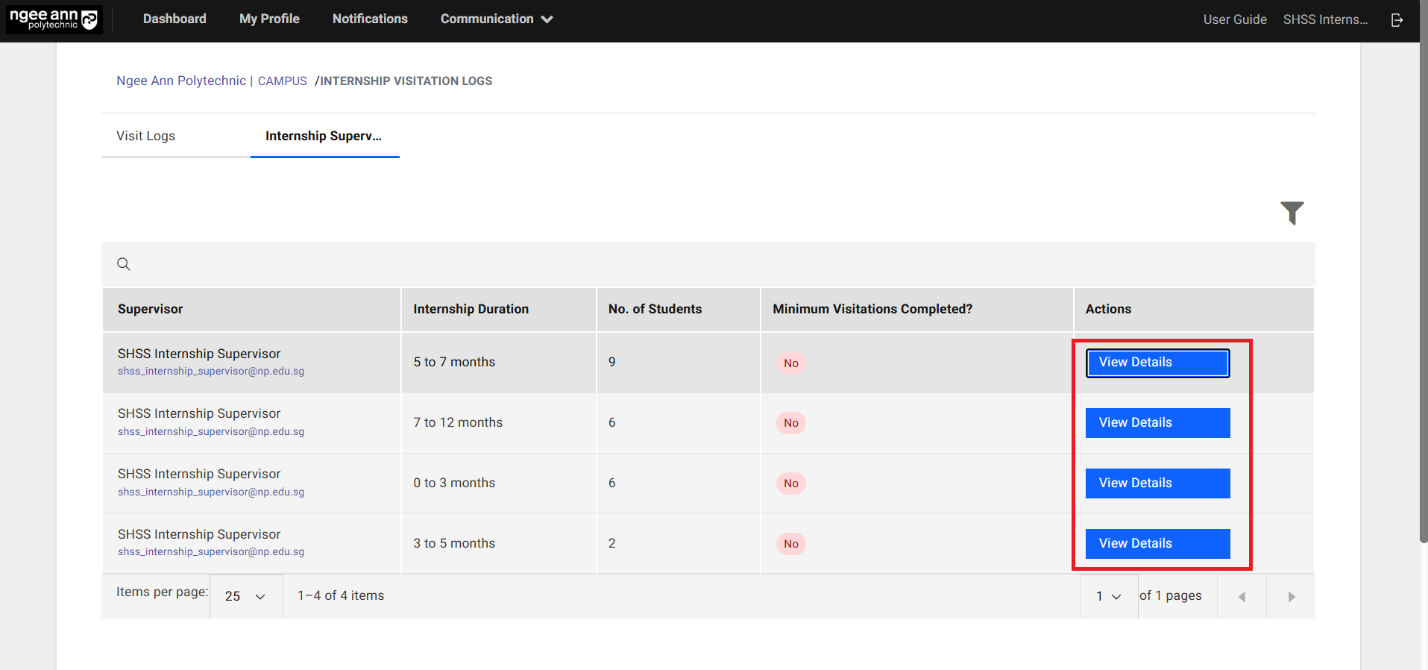
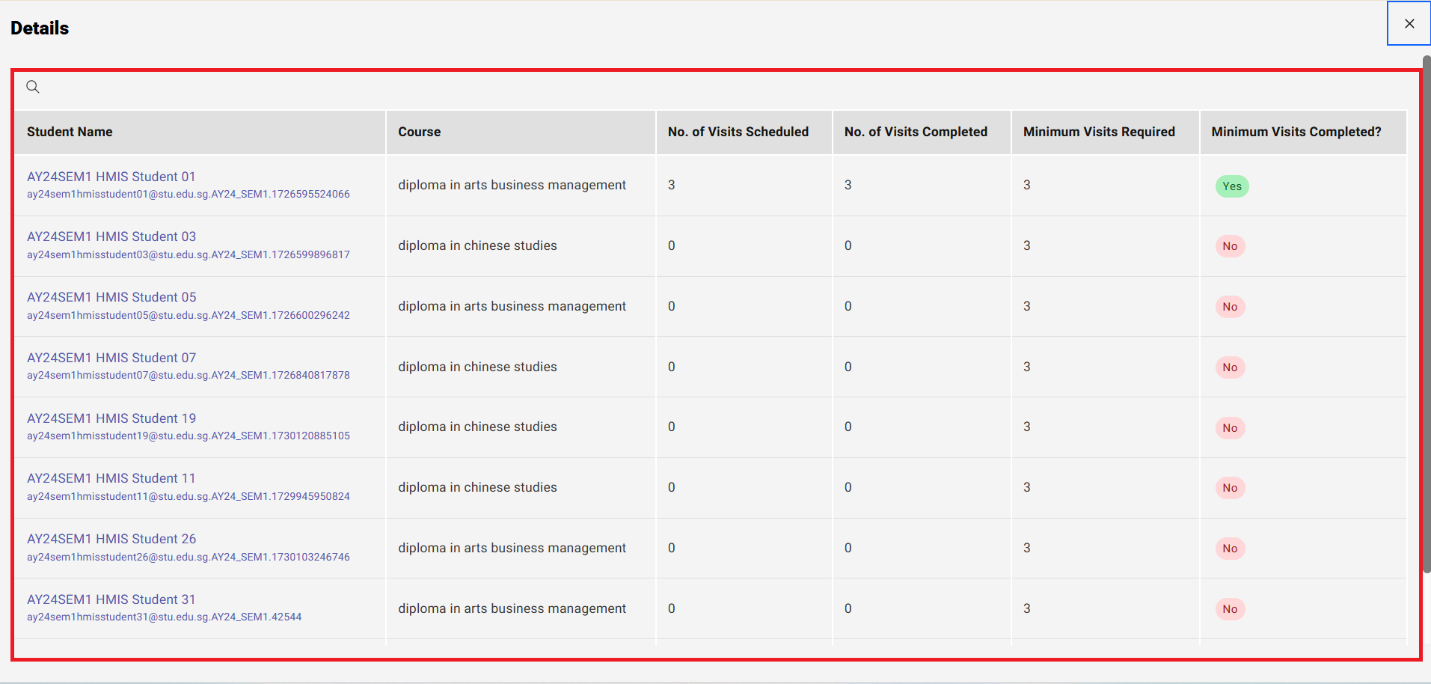
Tagged Interns Details Table
Step 1:
| Column Name | Description |
|---|---|
| Student Name | This column displays the intern's name as a clickable link along with their email address. Clicking the intern's name will navigate the user to the respective intern's "Applicant Information" page. |
| Course | Displays the course associated with the intern. |
| No. of visits Scheduled | Shows the total number of visit logs scheduled for the intern under the respective hired job application. |
| No. of visits Completed | Shows the total number of visit logs completed for the intern under the respective hired job application. |
| Minimum Visits Required | Indicates the minimum number of visits that should be completed based on the intern's internship duration. |
| Minimum Visits Completed? | Displays either "Yes" or "No": • Yes – The intern has completed the minimum required number of visit logs for the internship duration. • No – The intern has not completed the required visit logs for the internship duration. |
Criteria:
| Duration of Internship | Number of Visits |
|---|---|
| 0 to 3 months Internships | 1 |
| 3 to 5 months Internships | 2 |
| 5 to 7 months Internships | 3 |
| 7 to 12 months Internships | 5 |
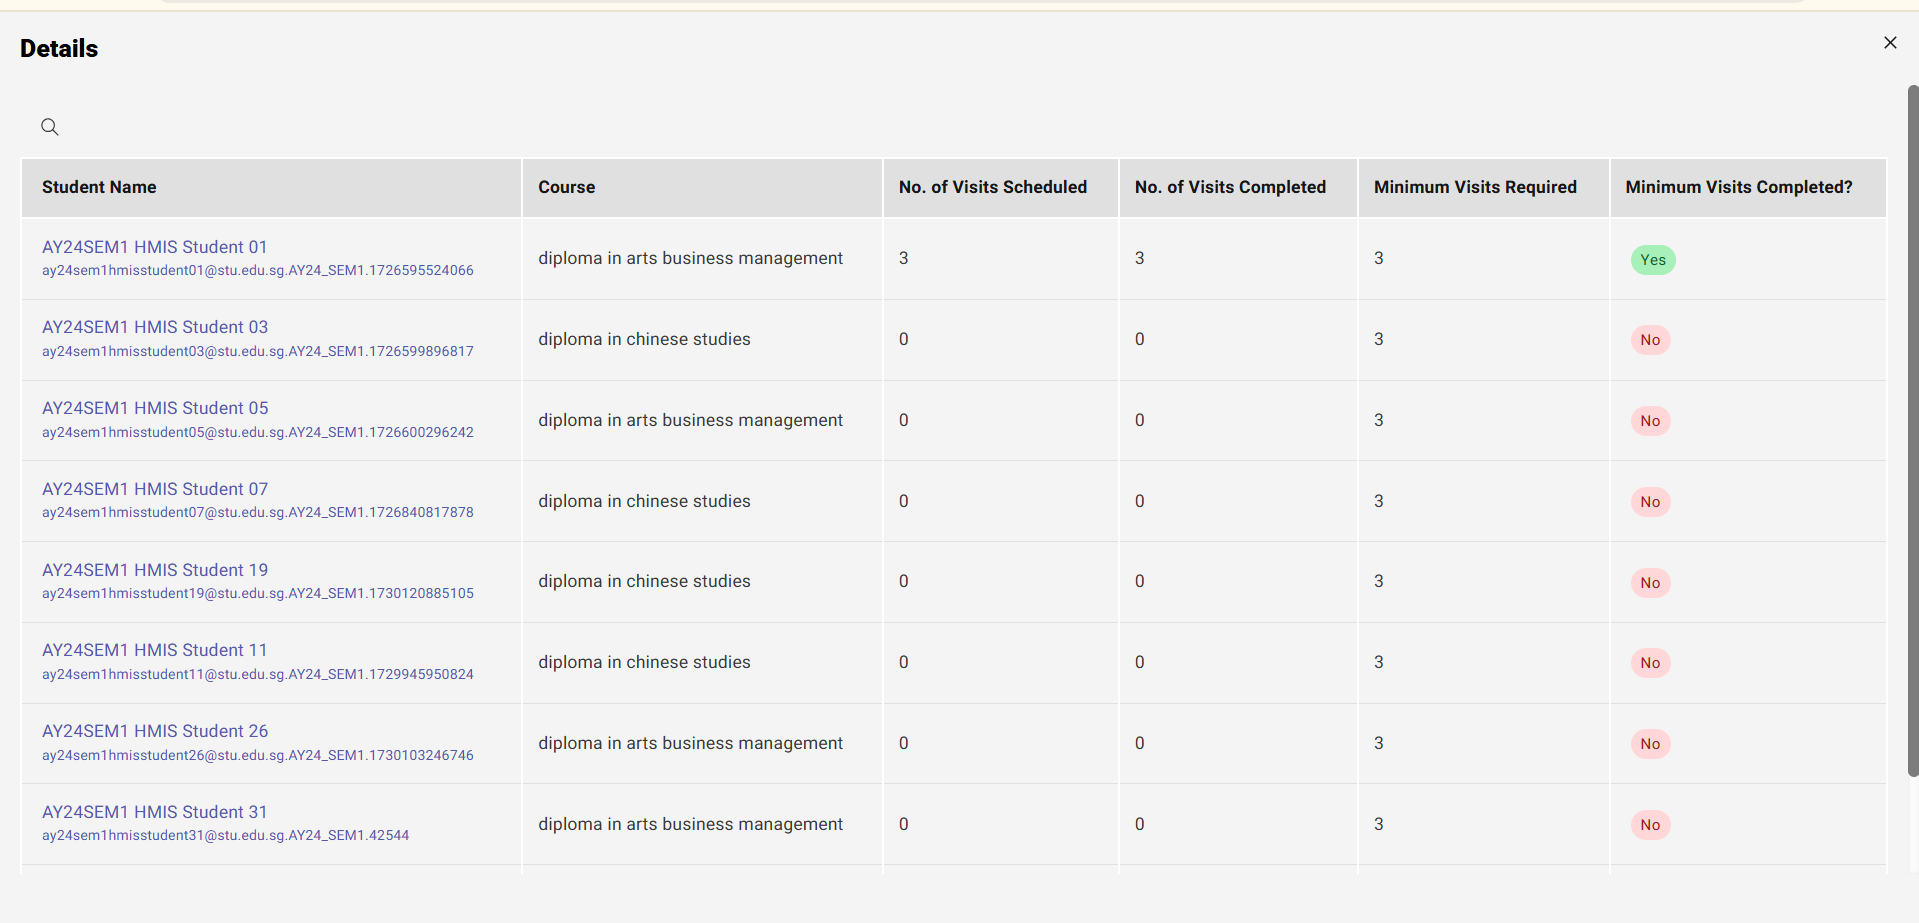
Visitation Log Section Tab in Applicant Information Page
Step 1:
- Click on the assigned/Tagged student name under "Internship Supervisor Assignments" section in the dashboard page.
- Make sure navigate to "Applicant Information" page.
- Click on the "Visitation Logs" section tab
- Make sure "Internship Visitation logs" section will be shown.
Note: "Please note that since this applicant has an internship period of X to Y months, at least Z visits are required." Message banner in the "Applicant Information" page
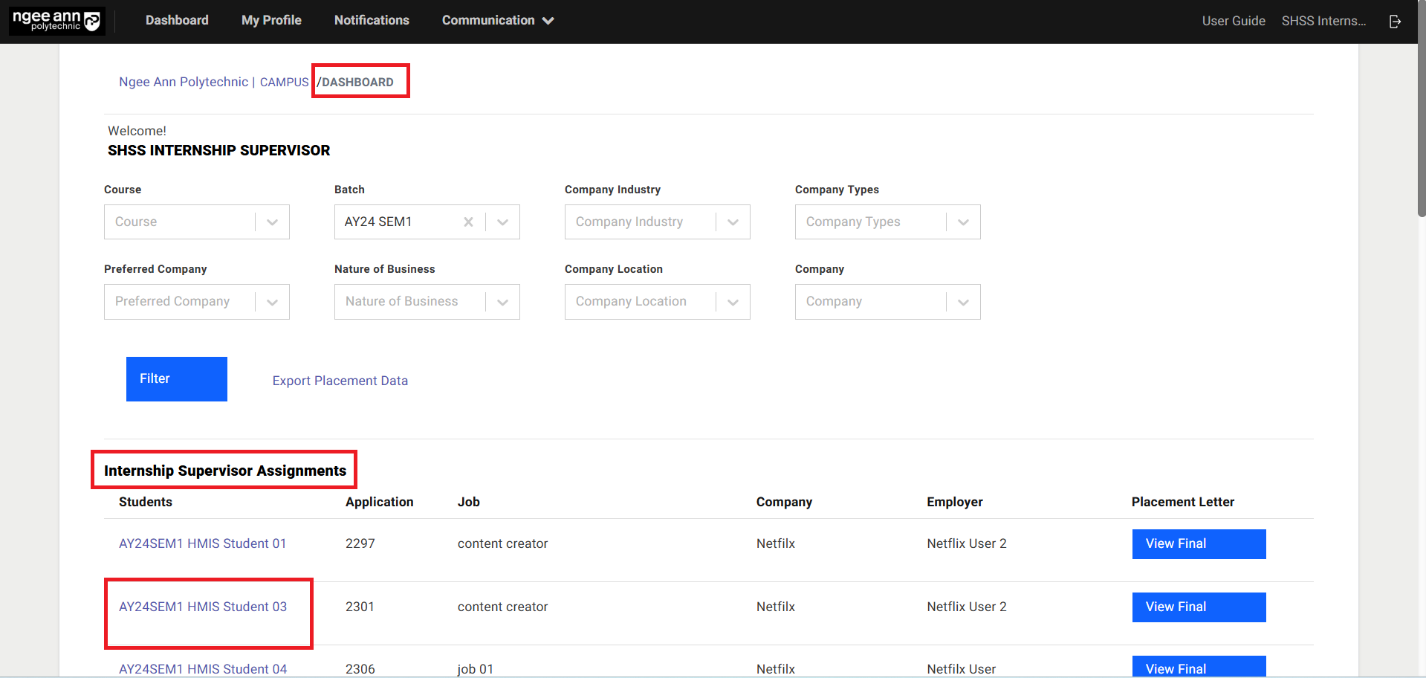
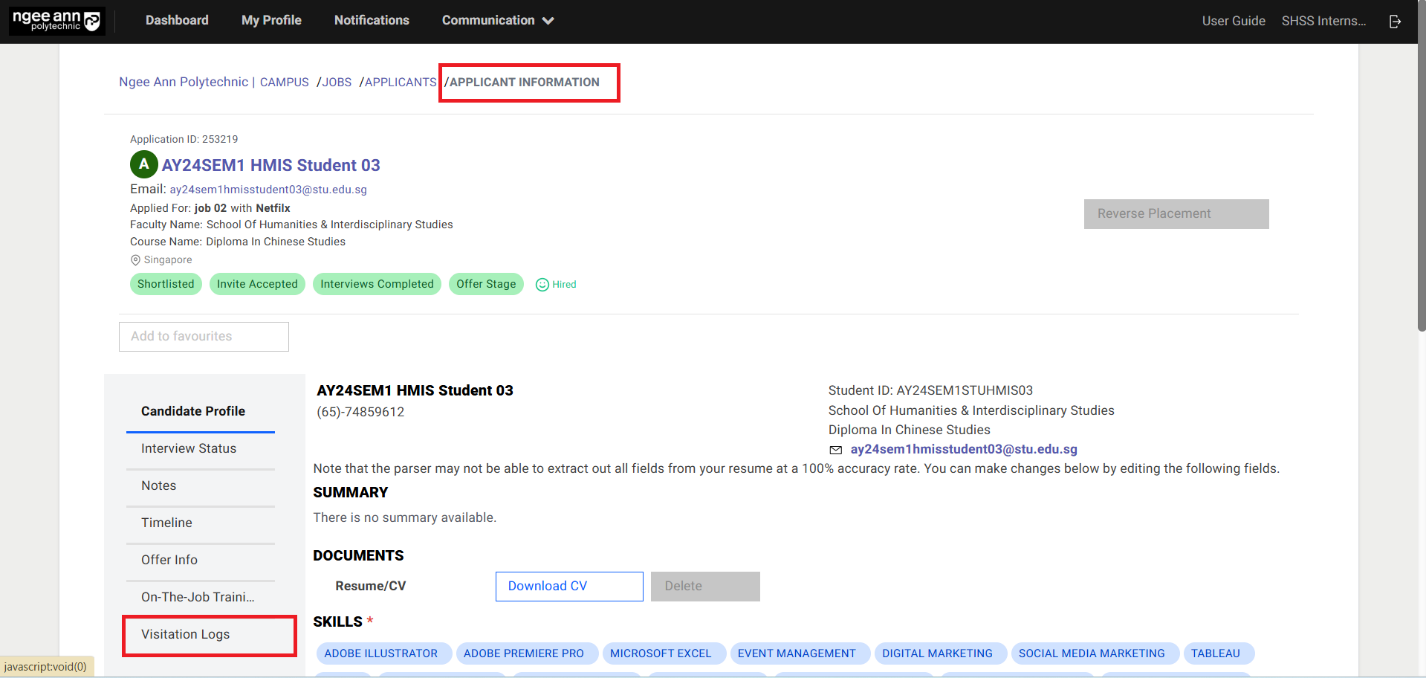
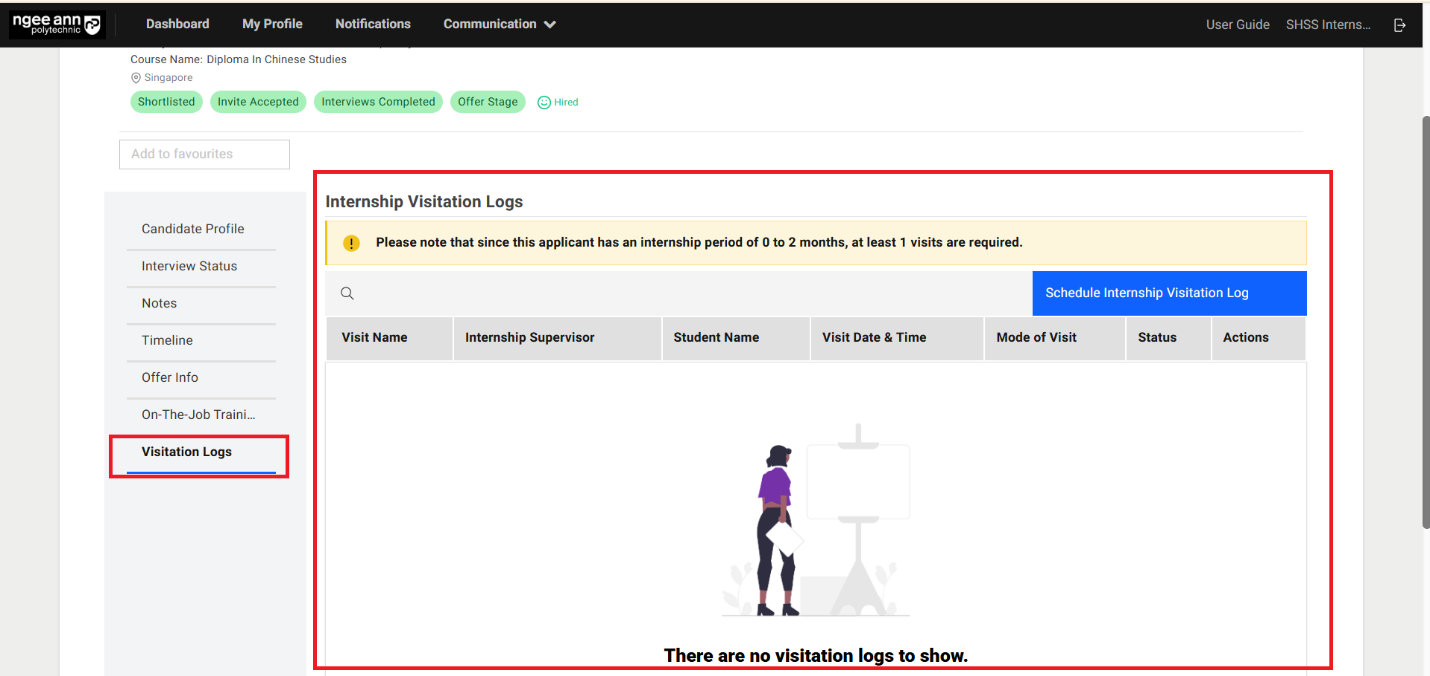
Step 2:
- View the scheduled visit records for each applicant according to their respective hired job in the table.
- Click on the "Schedule Internship Visitation Log" button to schedule a new visit record for the respective applicant.
- Click on the "Export" button to export all visit records for respective applicant
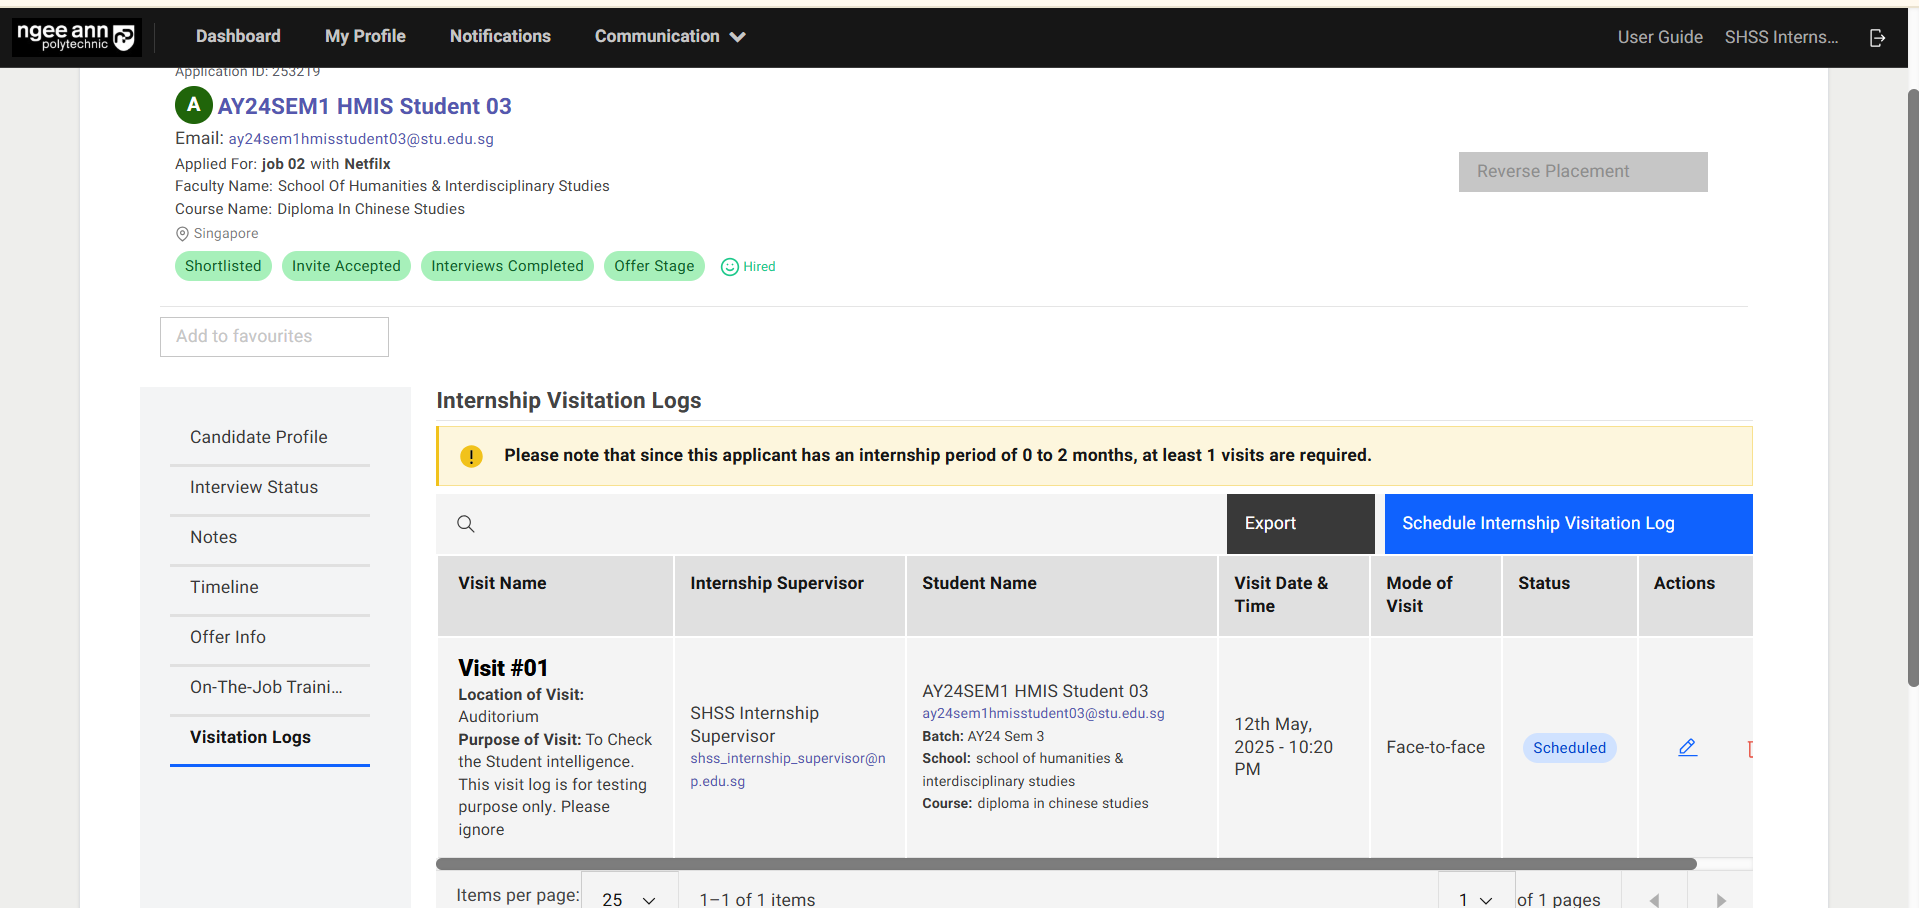
Survey
Survey Page:
Step 1:
- Click on the "Communication"
- Click on the "Survey"
- Navigates to "Survey" page
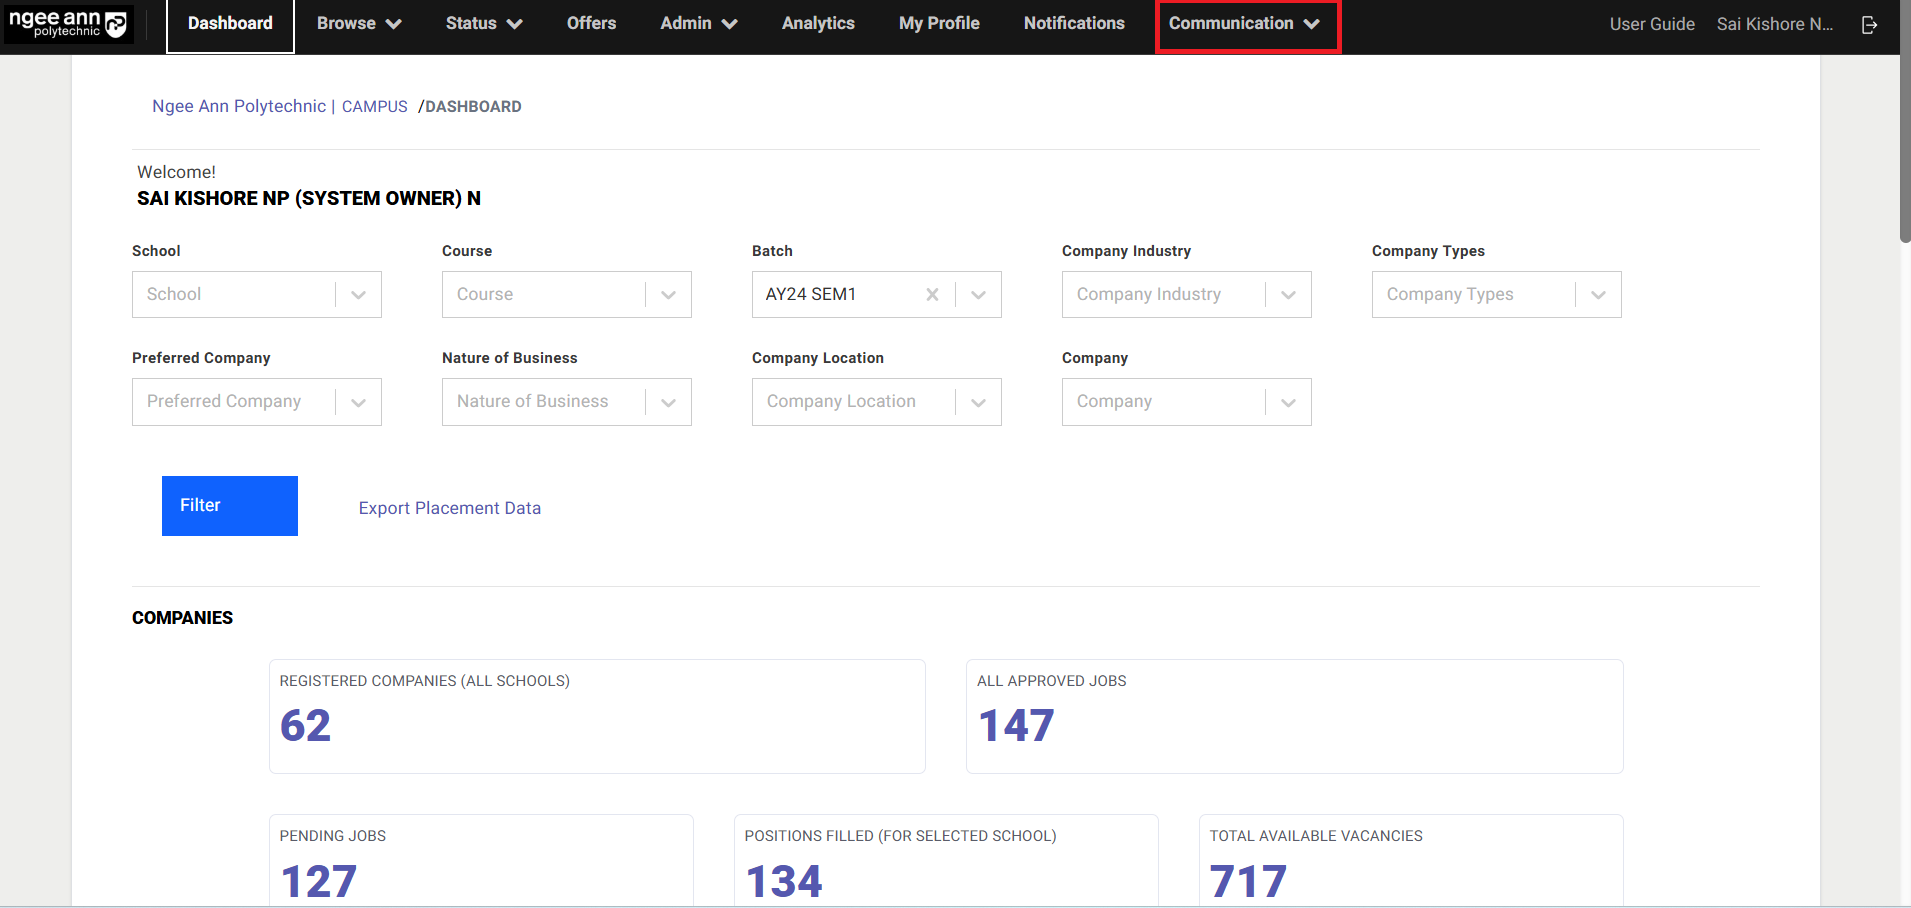
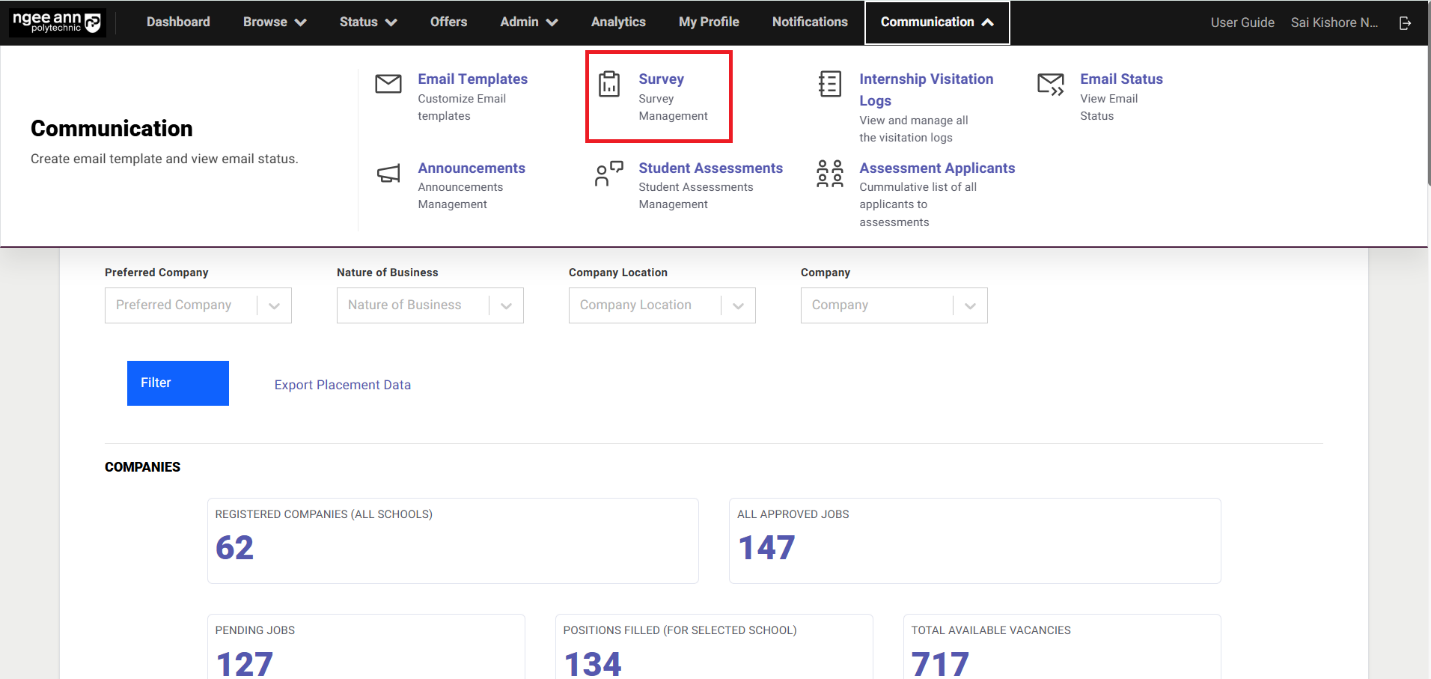
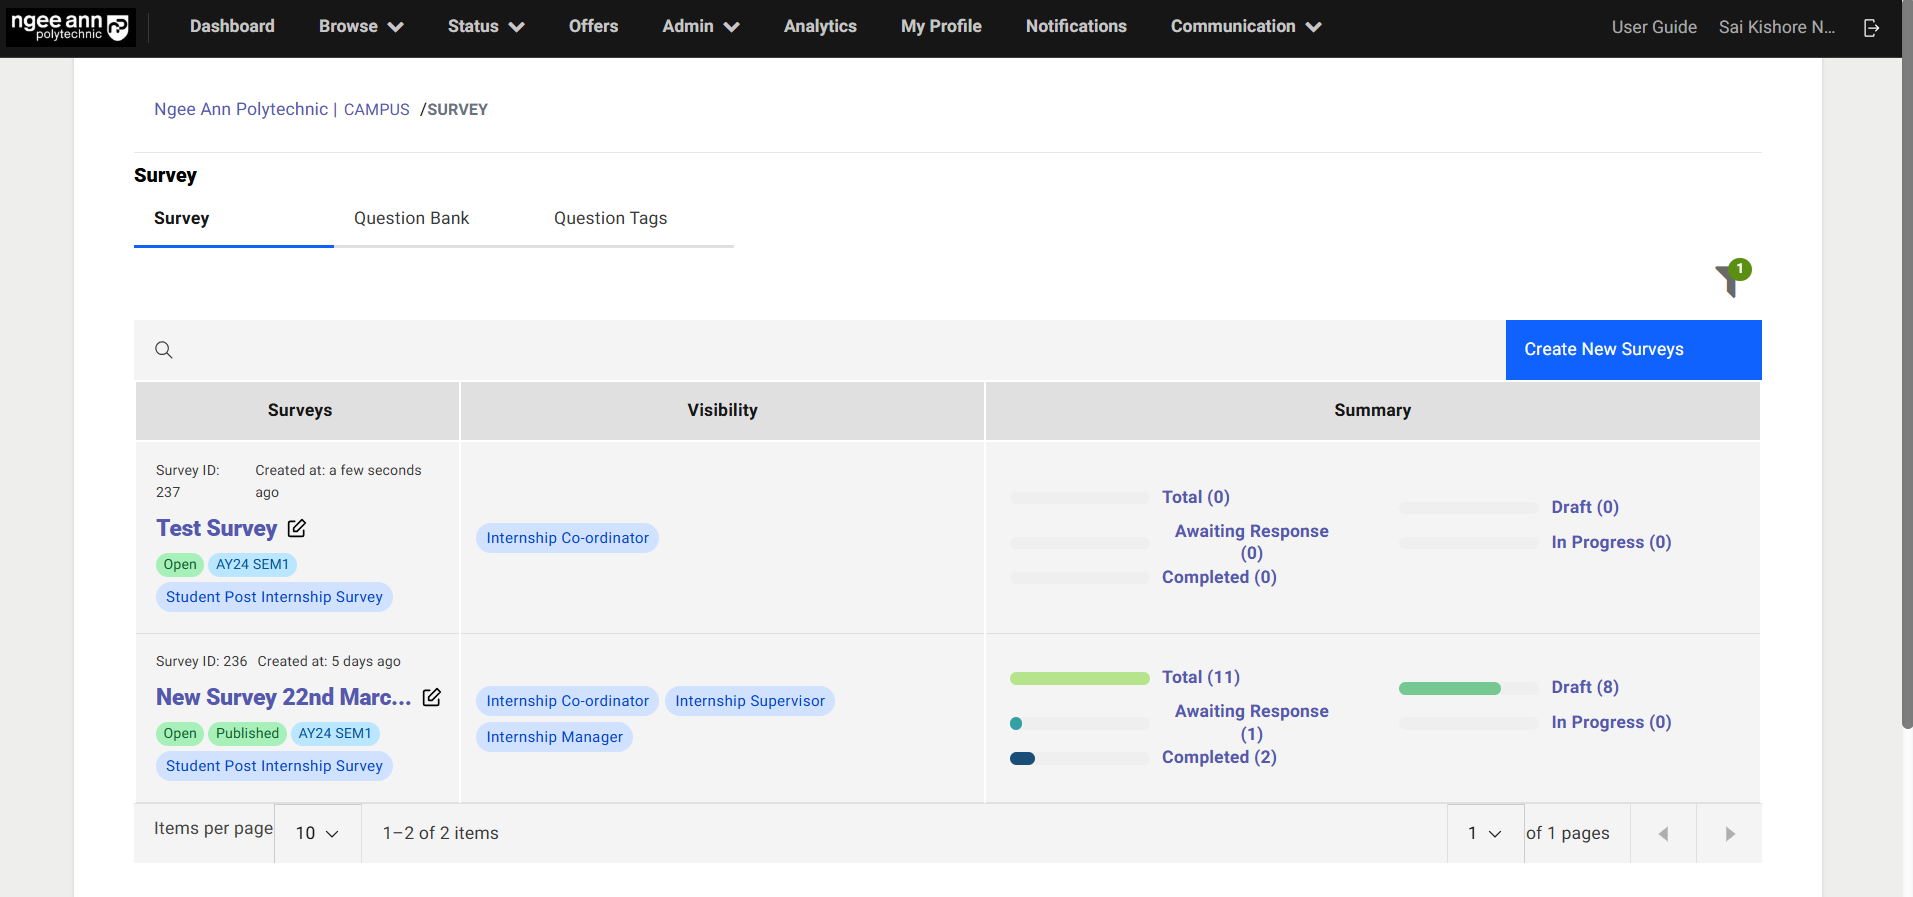
Create Survey:
Step 1:
- Click "Create New Survey" button
- Navigate to "Create Survey" page
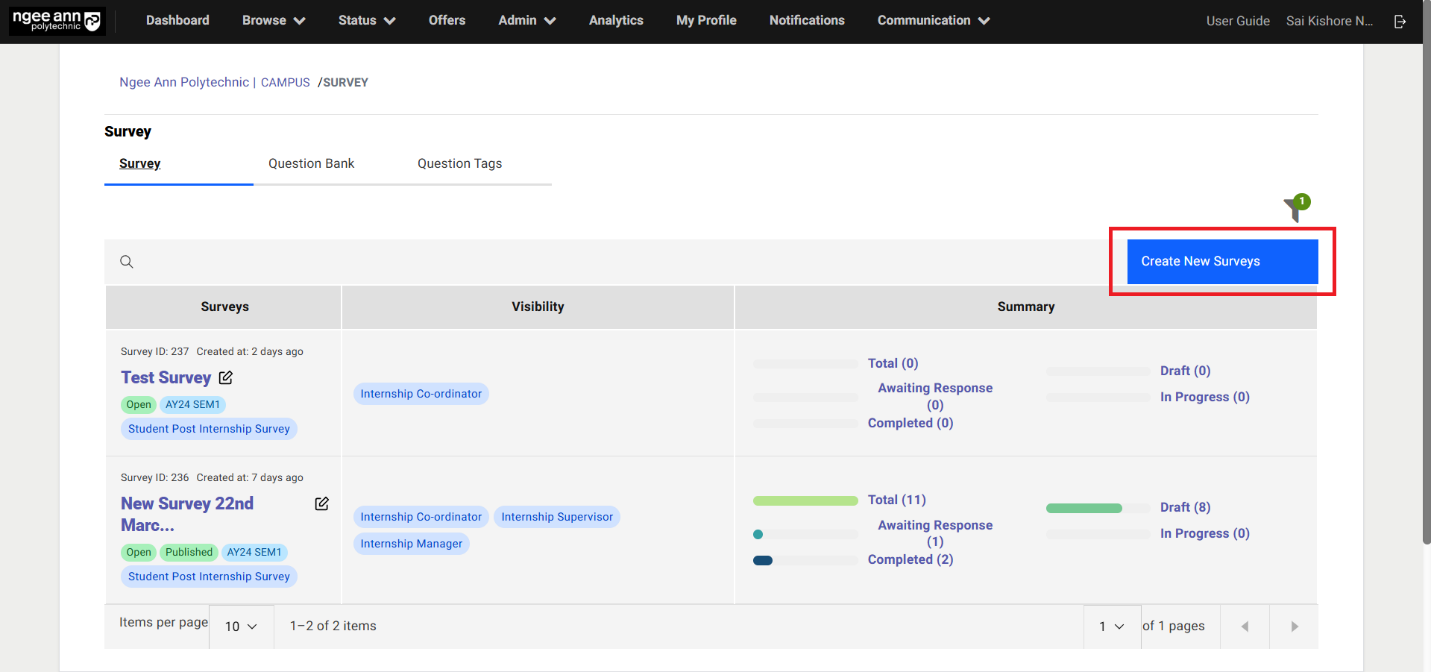

Step 2:
- Enter survey details into the fields
- Click on the "Submit" button to create the survey
Note: If the user enables the "Email Reminders" toggle, sets a reminder start date, and specifies a validation period, the corresponding survey respondents will receive reminders.
| Component Name | Description |
|---|---|
| Survey Name | Enter a name for the survey. |
| Information to Survey Takers | A customizable message (via text editor) displayed to respondents before they begin the survey. |
| Enable Reminders | If enabled, respondents will receive email reminders based on: • Reminder Start Date – When reminders begin. • Validation Period – How long reminders are sent. |
| Start & Expiration Date | Defines the active period of the survey. Respondents can only participate within this timeframe. |
| Batch | List of active semester batches will be shown in the dropdown field |
| Visibility | Restricts survey access to selected roles: • Internship Manager • Internship Co-Ordinator • Internship Supervisor |
| Survey Type | Student Post Internship Survey: This type survey allows only students as respondents into the survey NPIS Post Internship Evaluation: This type survey allows only Internship supervisors who are tagged with interns as respondents Employer Post Internship Survey: This type survey allows only the company supervisor users who are tagged with the interns as respondents Generic Survey: • Institution: This type survey allows only the institution users (System Owner, Internship Mangers, Internship Co-Ordinators, Internship Supervisors, Program Admins) users as respondents • Employers: This type survey allows only the institution users (Company Requestor & Company Supervisors) users as respondents |
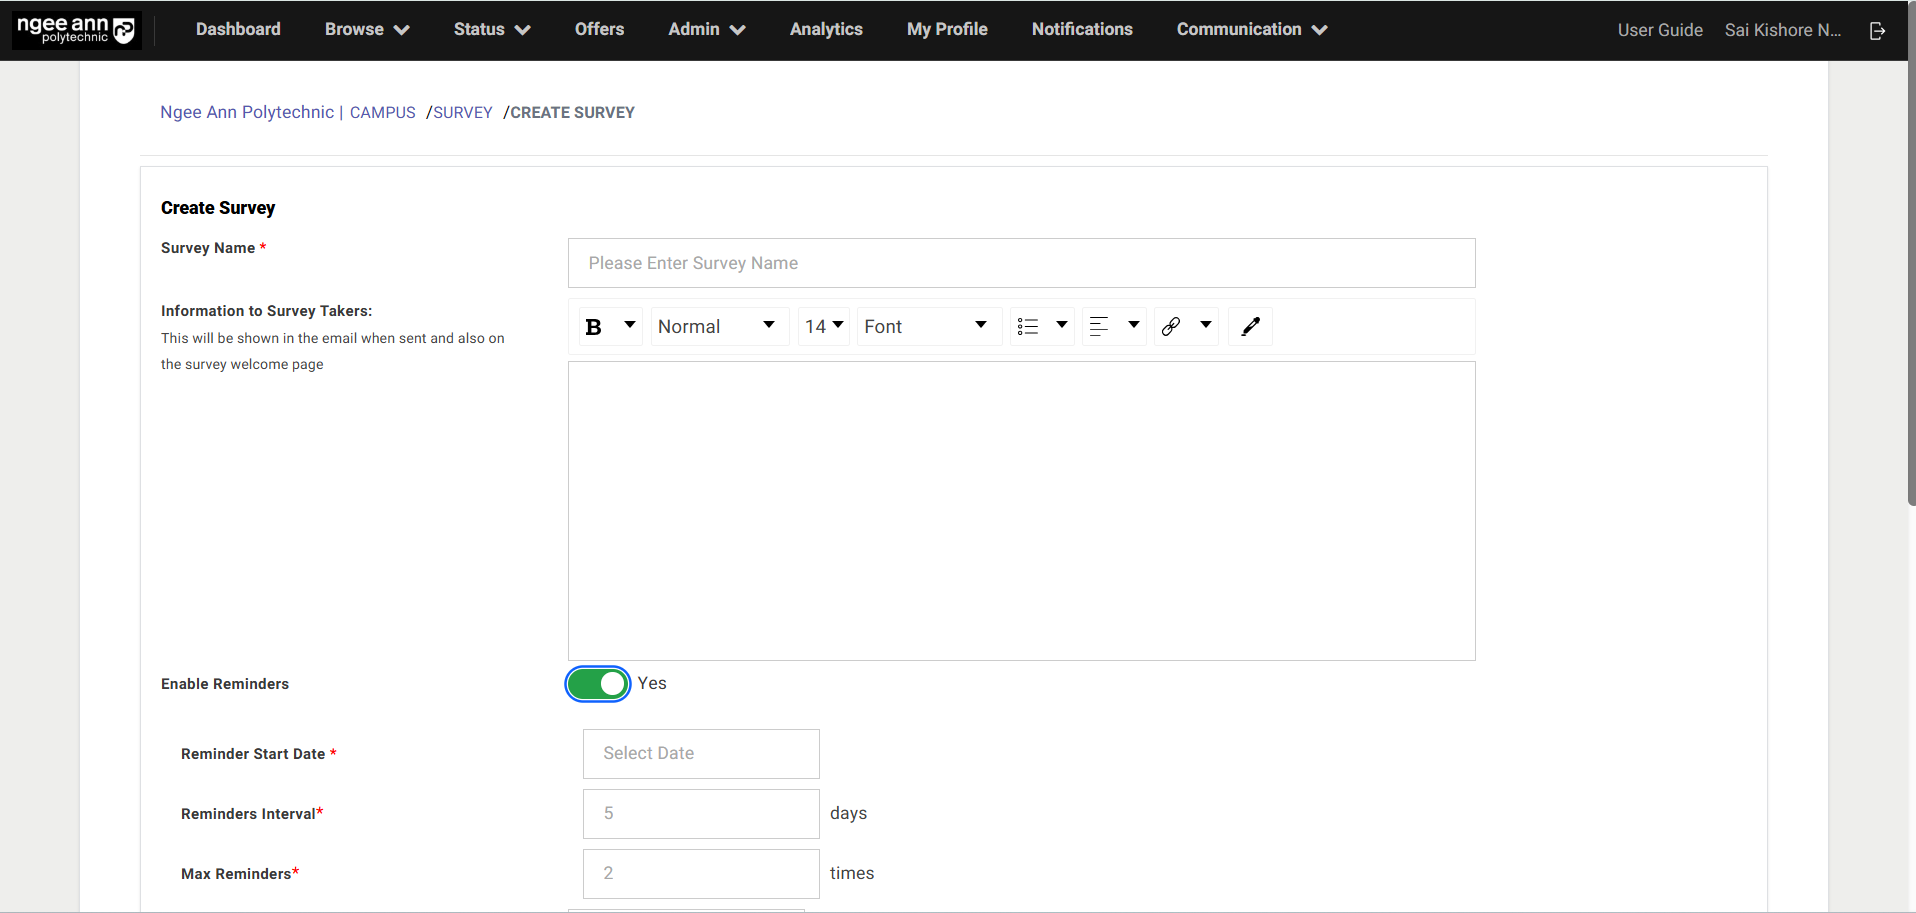

Step 3:
- Successfully created surveys will be shown in the "Survey Table" under "Survey" section tab in the "Survey" page.
- "Survey Created Successfully" successes message banner will be shown.
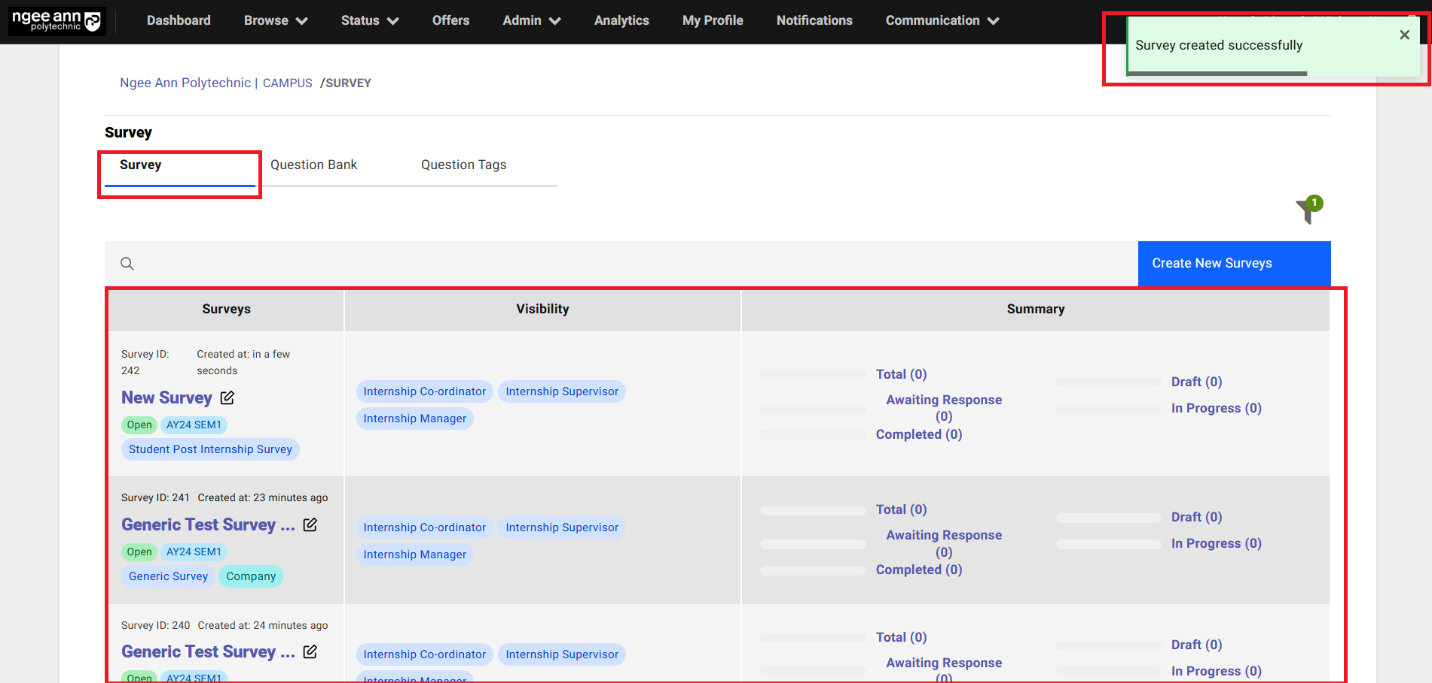
Survey Dashboard:
Step 1:
- Click on the "Survey" Section Tab
- See the successfully created surveys in the dashboard table.
Note: Clicking any status link will redirect you to the "Respondents" tab, where the table automatically filters to show only respondents matching the selected status.
| Column Name | Description |
|---|---|
| Surveys | The "Surveys" column displays the Survey ID, creation timestamp, Survey Name as a clickable text button, Edit icon, Open/Closed status tag, published tag (Only if survey is published), Semester Batch tag, and Survey Type tag. |
| Visibility | The "Visibility" column lists user tags, indicating which role-based users have view access to the respective survey. |
| Summary | The "Summary" column displays the respondent status as clickable link buttons, each showing a count based on the respondents added or saved to the survey. The statuses include: • Total → The total number of respondents added to the survey. • Draft → The number of respondents whose survey invitations have not yet been sent. • Awaiting Response → The number of respondents who have received the survey invitation but have not started responding. • In Progress → The number of respondents who have started the survey but not yet completed it. • Completed → The number of respondents who have finished responding to the survey. Each count reflects real-time updates based on respondent actions. |
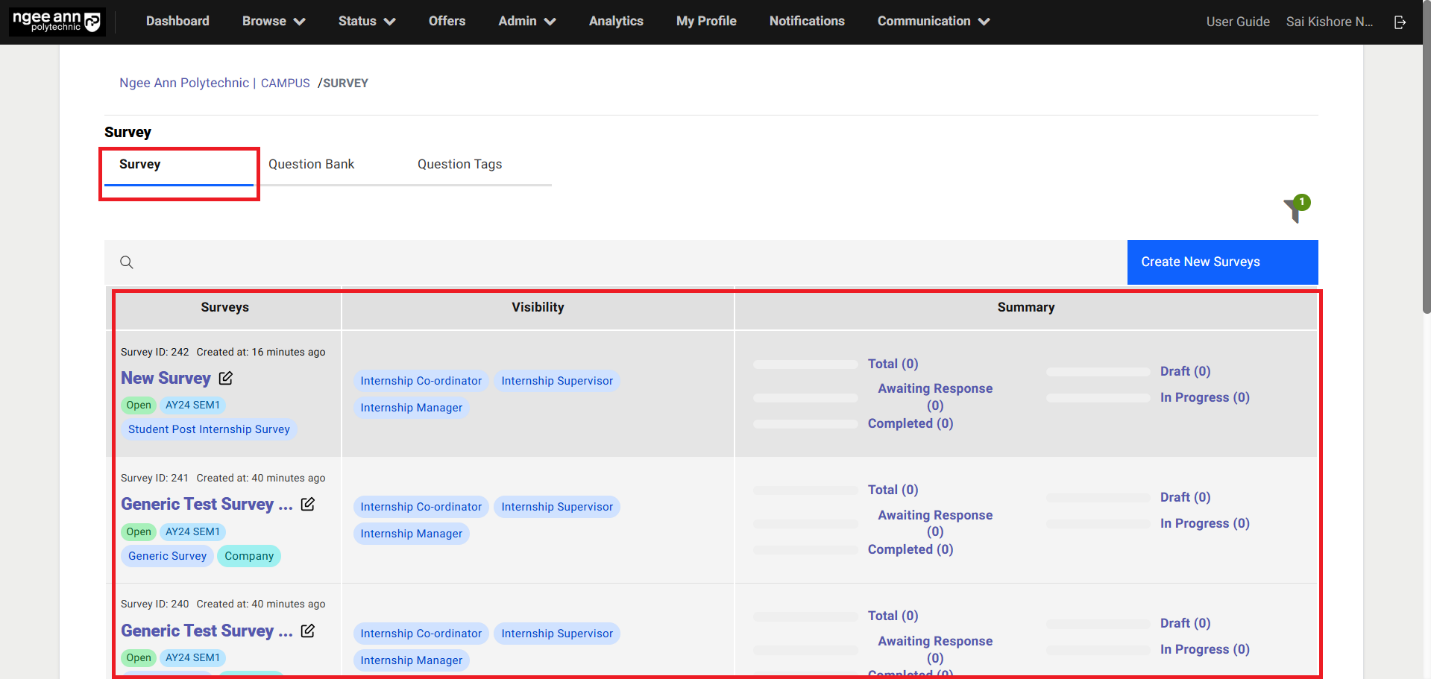
Edit Survey (Before Survey Published):
Step 1:
- Click on the "Edit" icon beside the survey name under "Surveys" column from the table
- Navigates to "Edit Survey" page
- See saved survey data persisted into the fields
- Edit/Update survey details into the fields
- Click on "Submit" button to save the changes successfully
- Updated changes reflected in the table for the survey and successes message banner will be shown

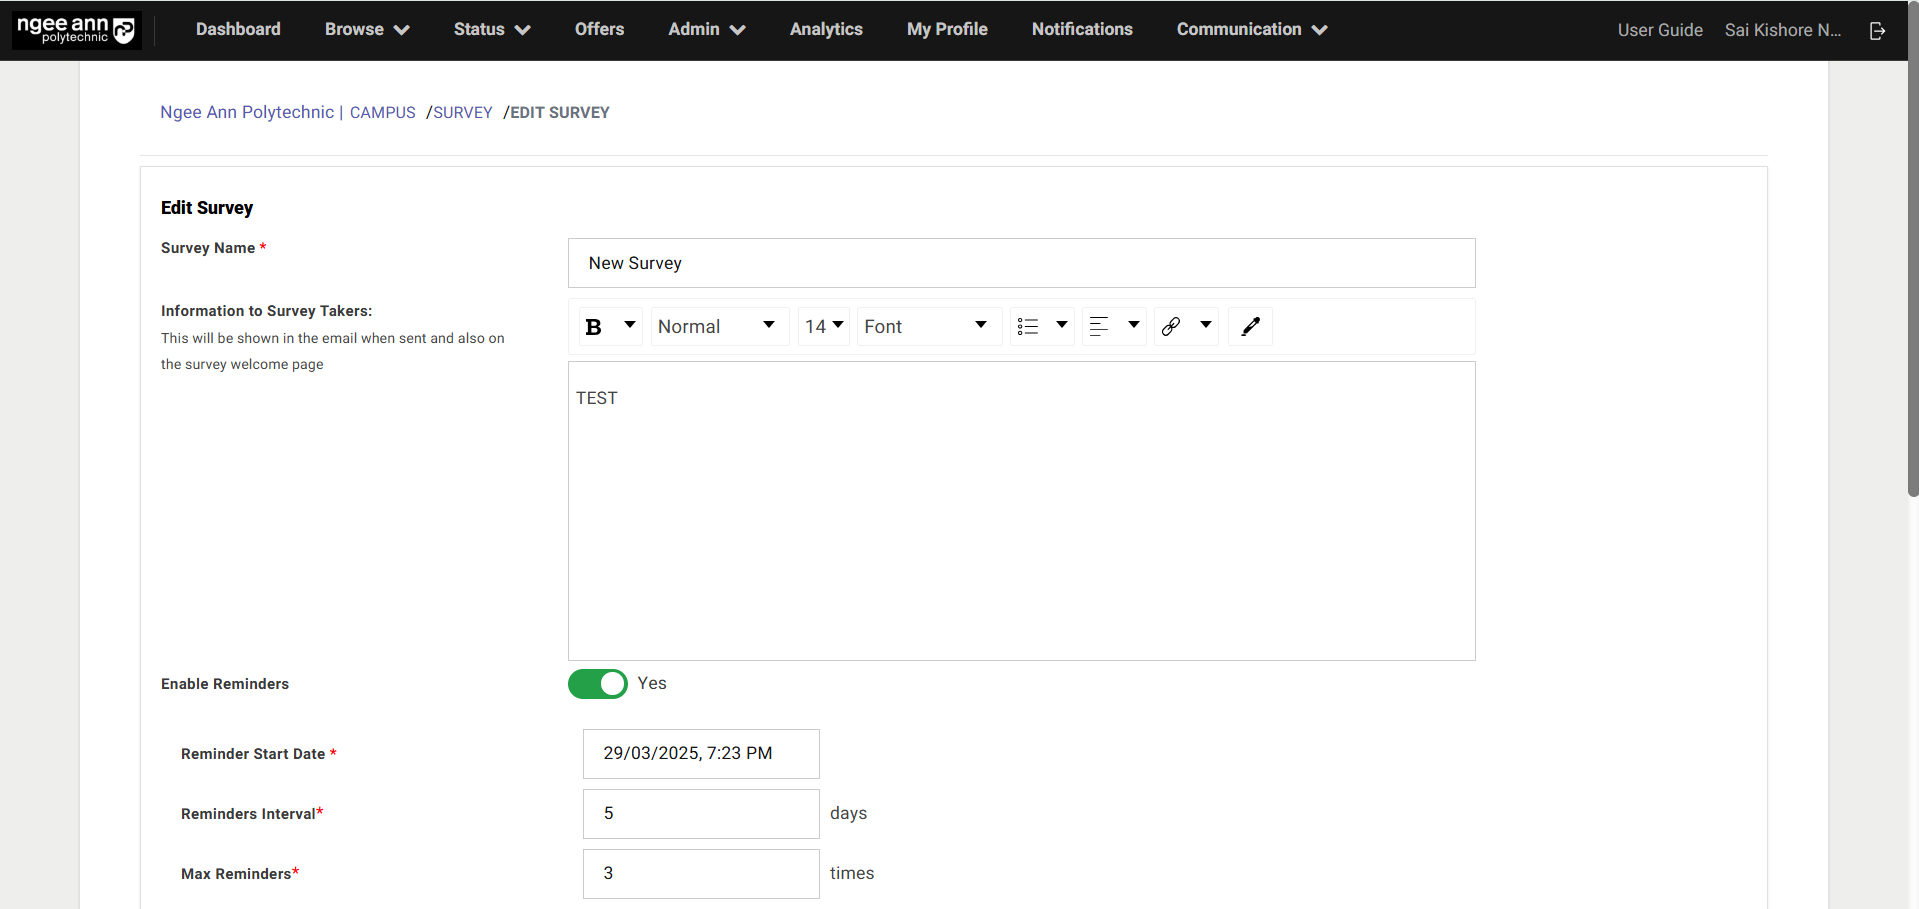
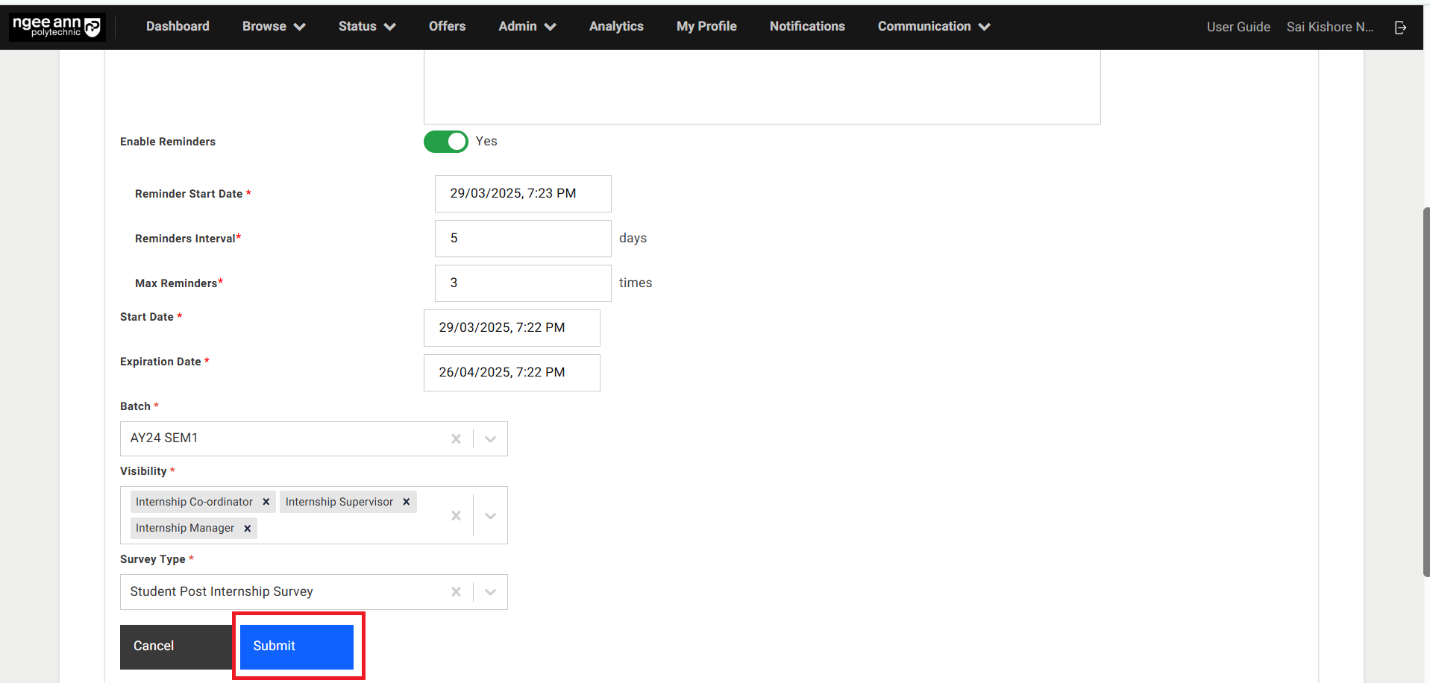
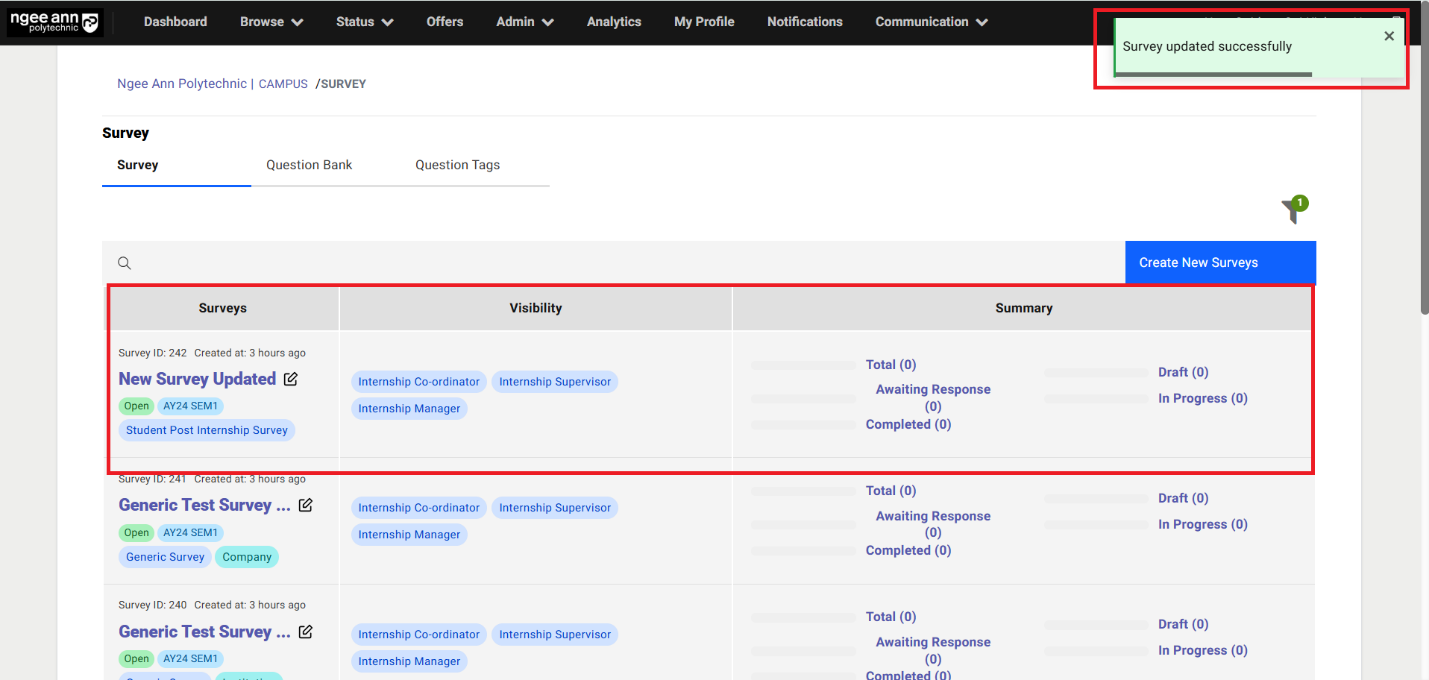
Question Bank Section Tab:
Step 1:
- Click on the "Question Bank" section tab from the "Survey" page
- See the "Question tab table
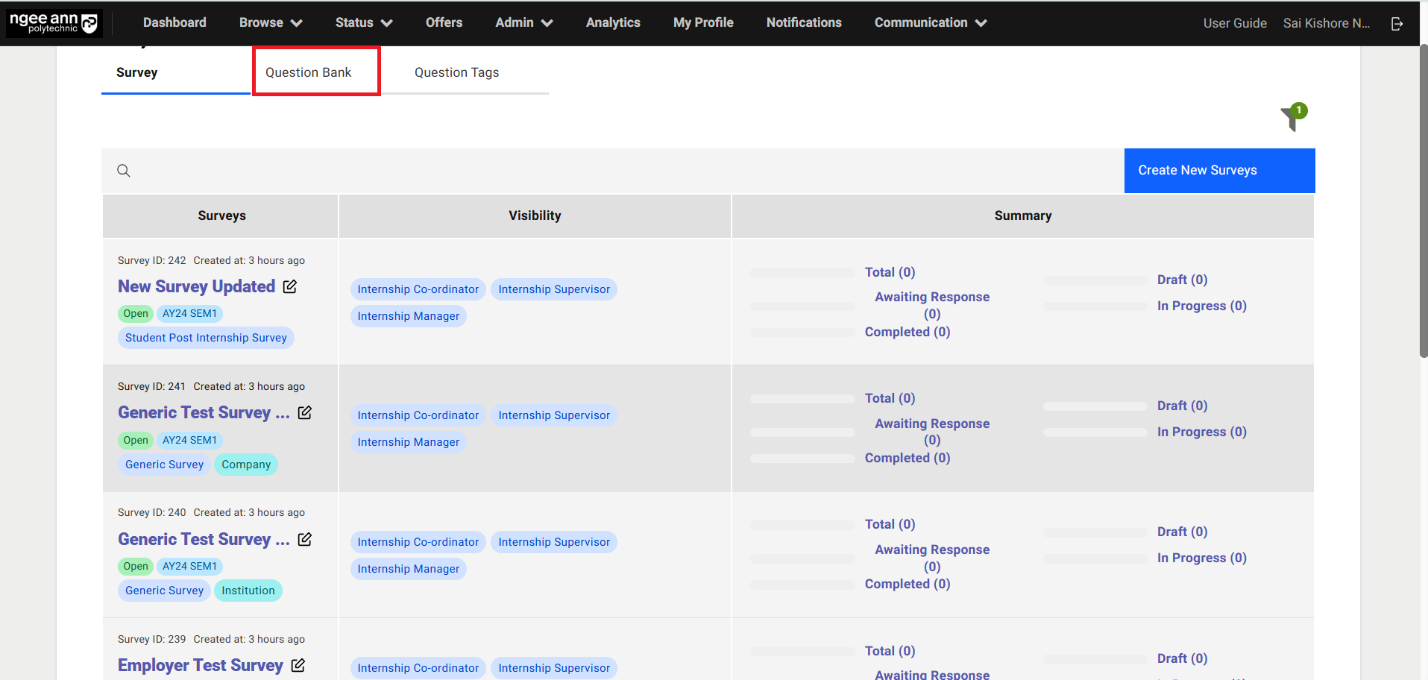
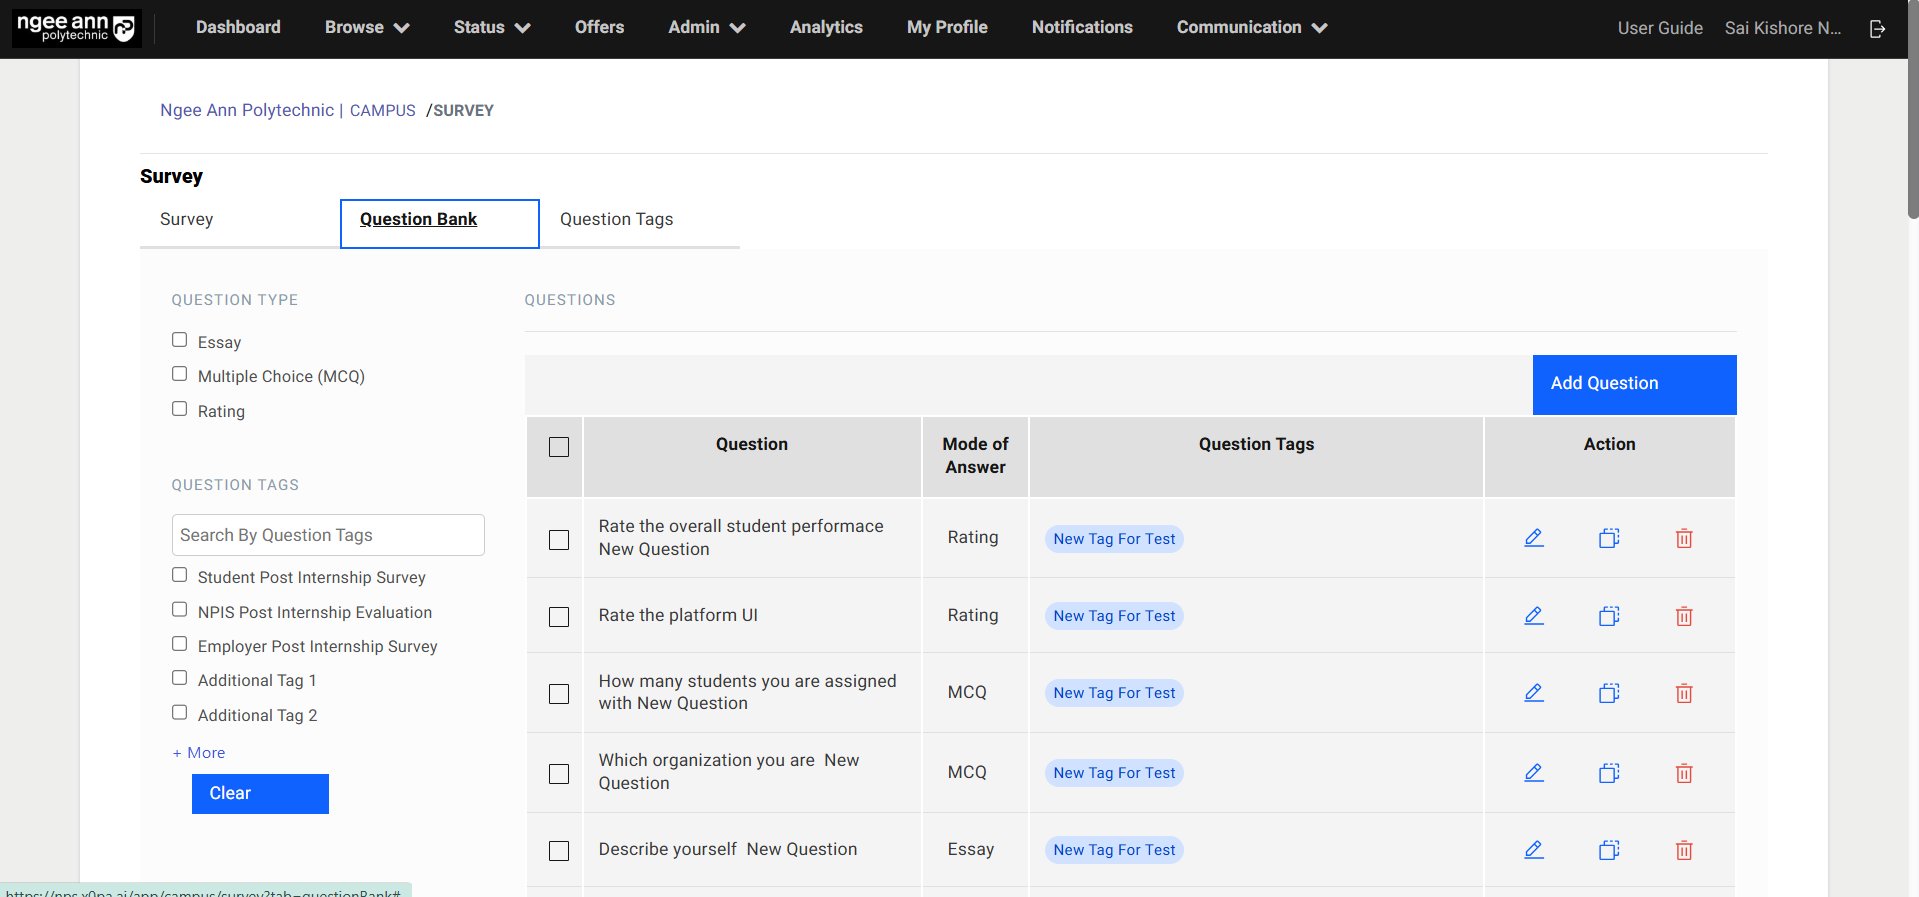
Add Questions:
Step 1:
- Click on the "Add Question" button above the table.
- "Add Question" popup get open
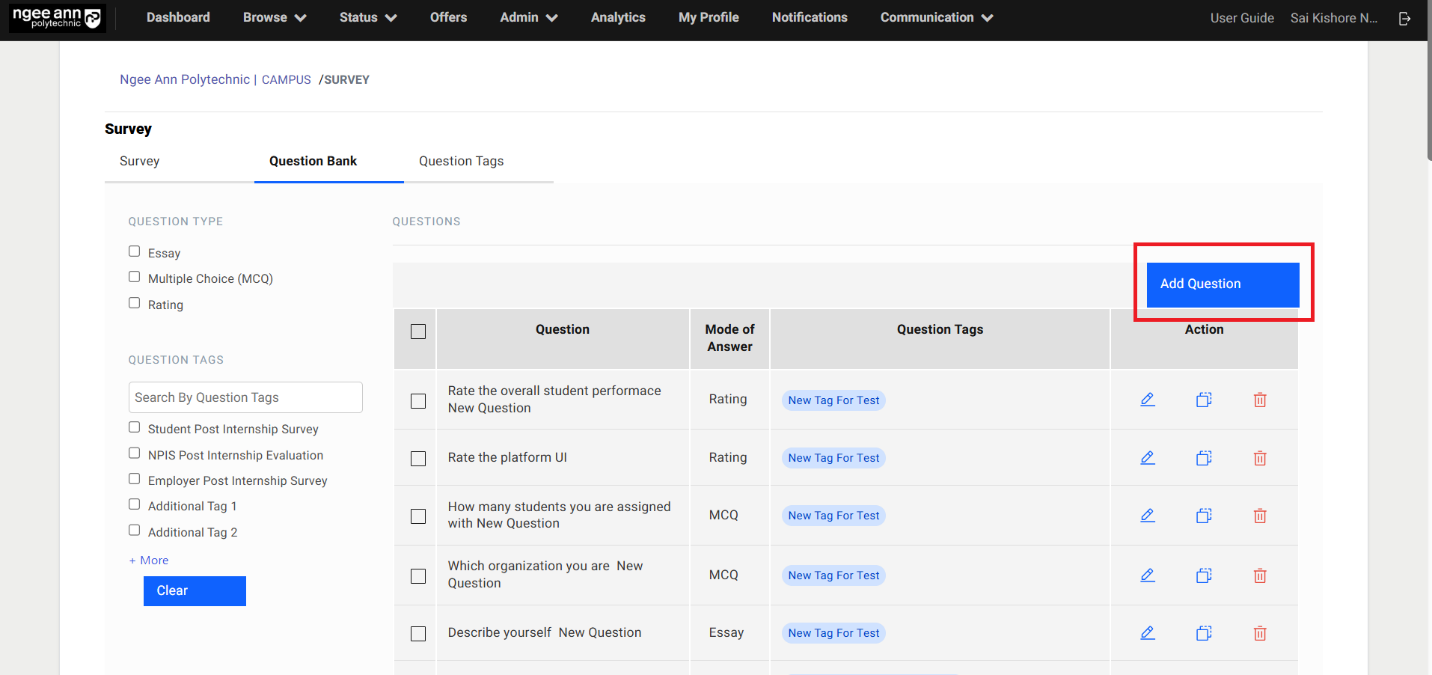
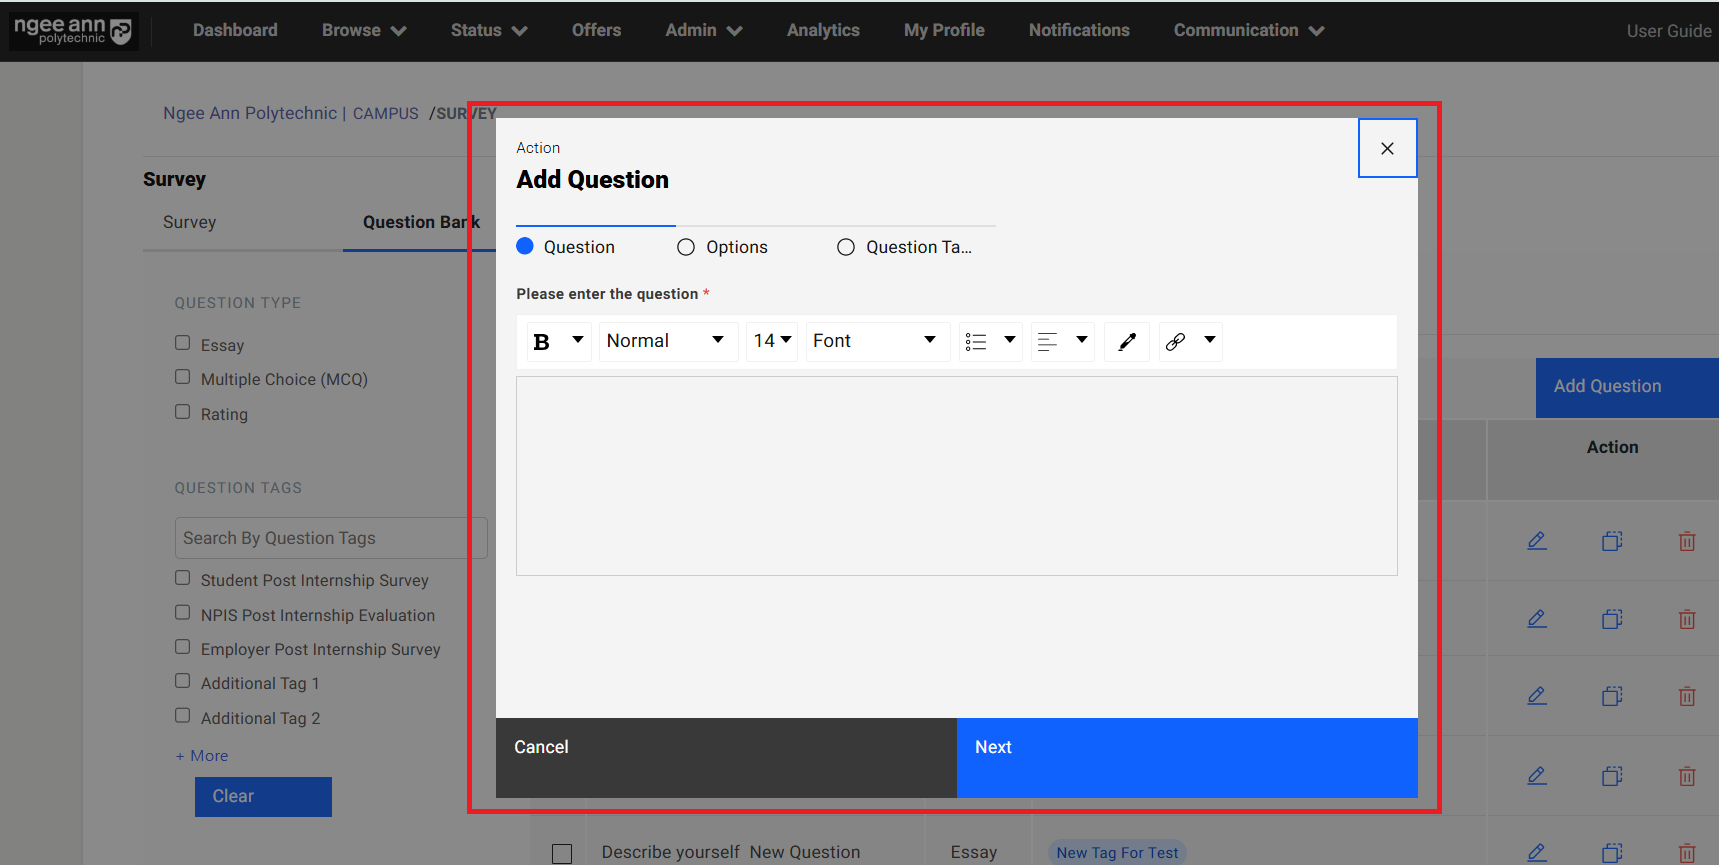
Step 2:
- Enter question name into the "Please enter the question" text editor field under "Question" section tab in the popup
- Click on the "Next" button
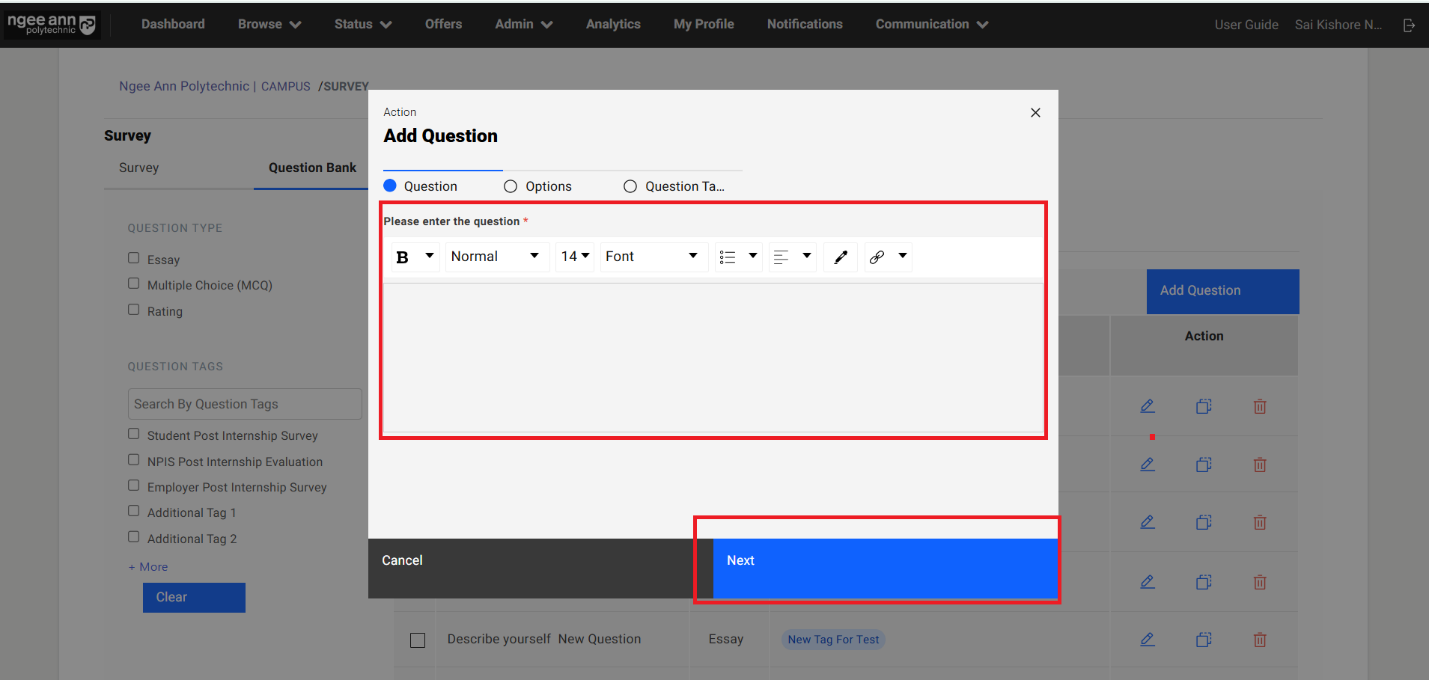
Step 3:
- Navigate to "Options" section tab in the "Add Question" popup
- Select answer type for respective question (Essay/Multiple Choice Question (MCQ)/Rating)
- Enter options data for the selected answer type
- Click on the "Next" button
- Click on the "Back" button to navigate back to "Question" section tab in the "Add Question" popup.
Note:
- Essay Question:
- When an "Essay" question is added to a survey, respondents will see a text box to type their answer.
- The response must adhere to the specified word limits:
- Minimum words required: Ensures the answer meets a minimum length.
- Maximum words allowed: Restricts the answer from exceeding the set limit.
- Multiple Choice Question (MCQ)
- If an "MCQ" is included, respondents must select one option from the provided choices.
- If the question includes the "Show Others Option" setting:
- Respondents selecting "Others" will see an additional text box to specify their answer.
- Rating Question
- A "Rating" question requires respondents to choose one option from the given scale.
- The selected option's score will be recorded and visible to institution administrators for evaluation.
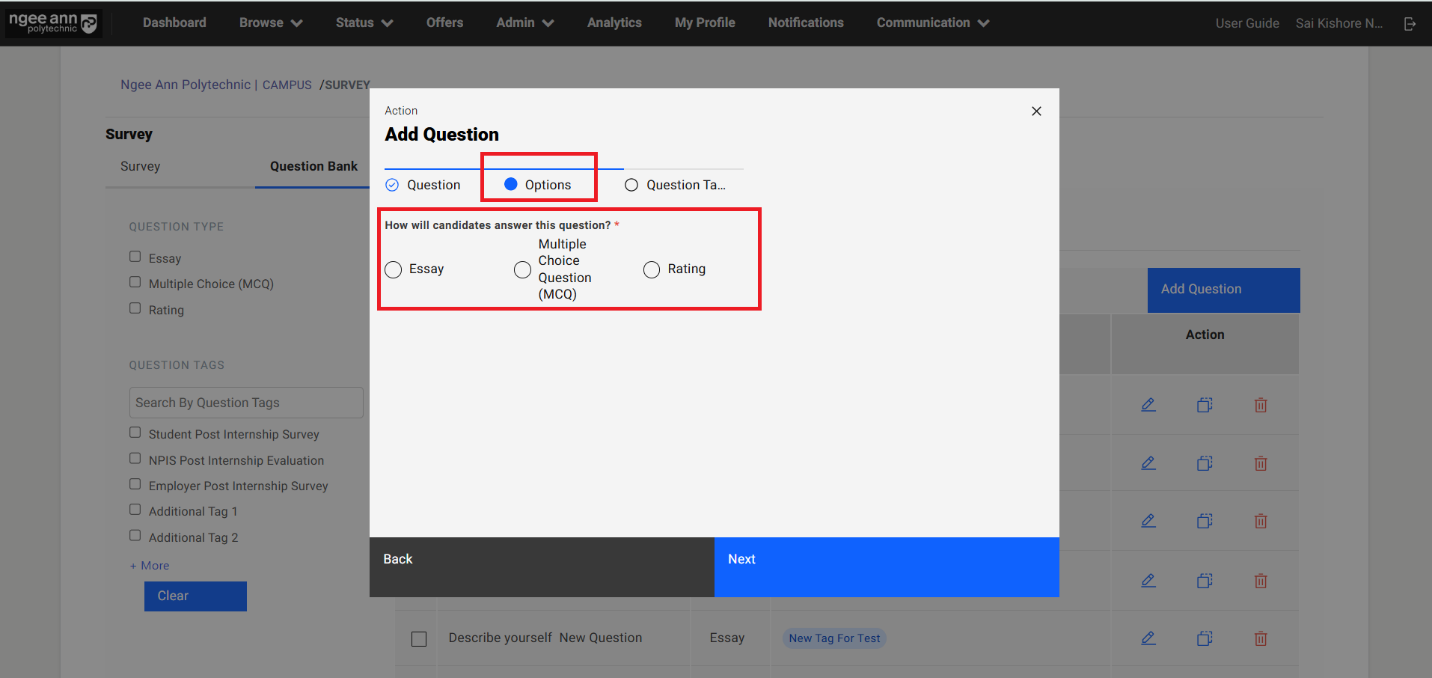
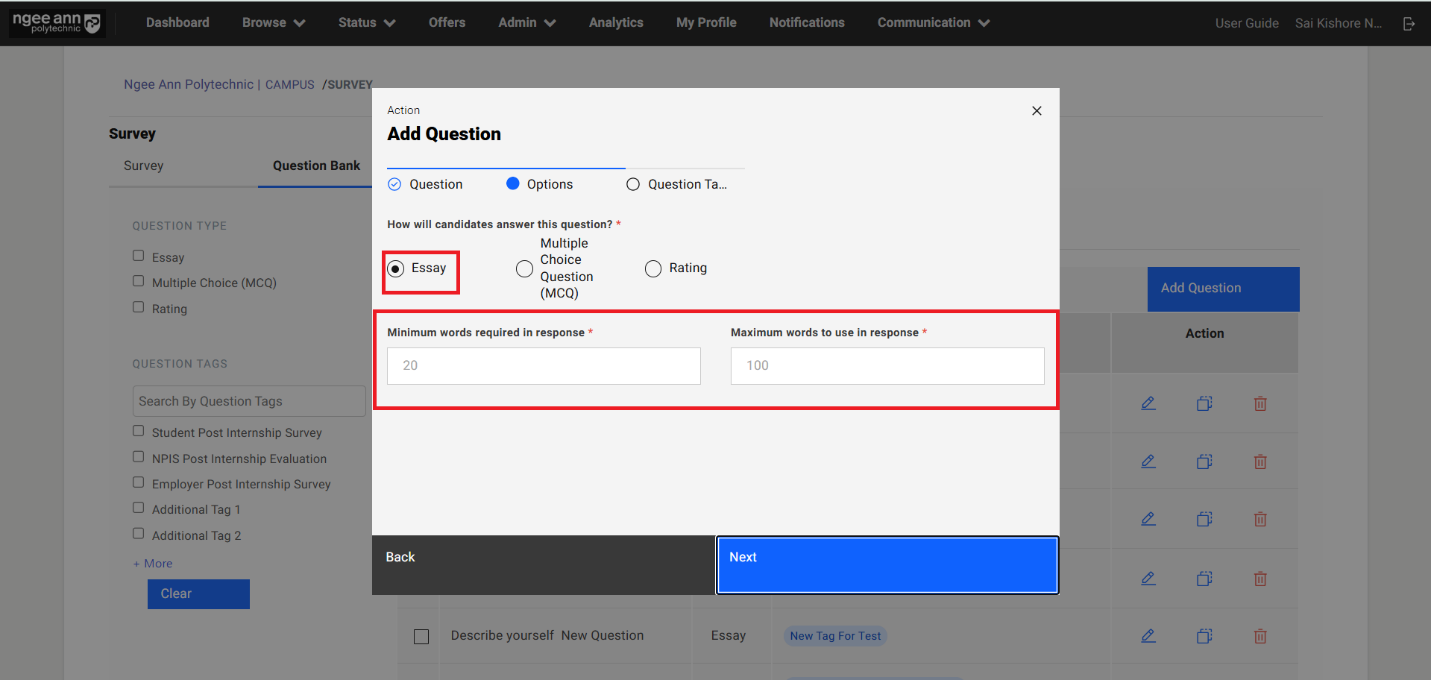
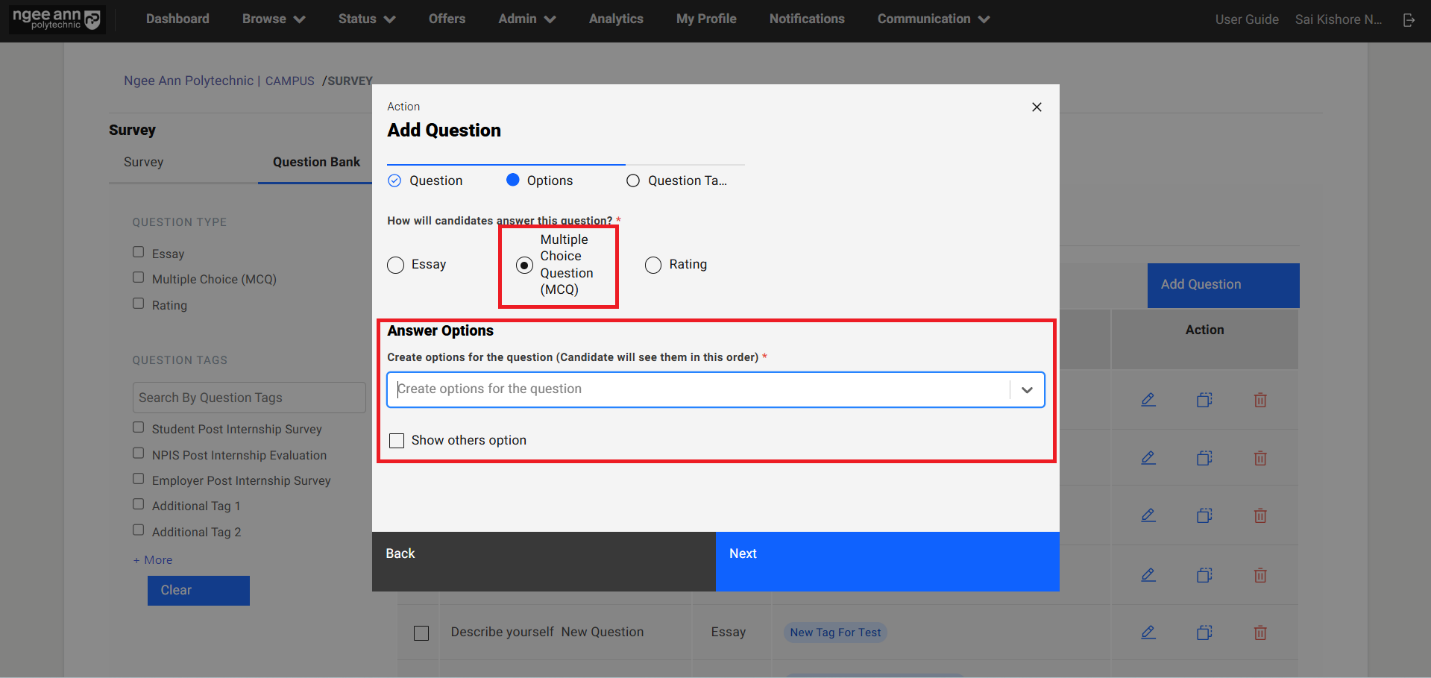
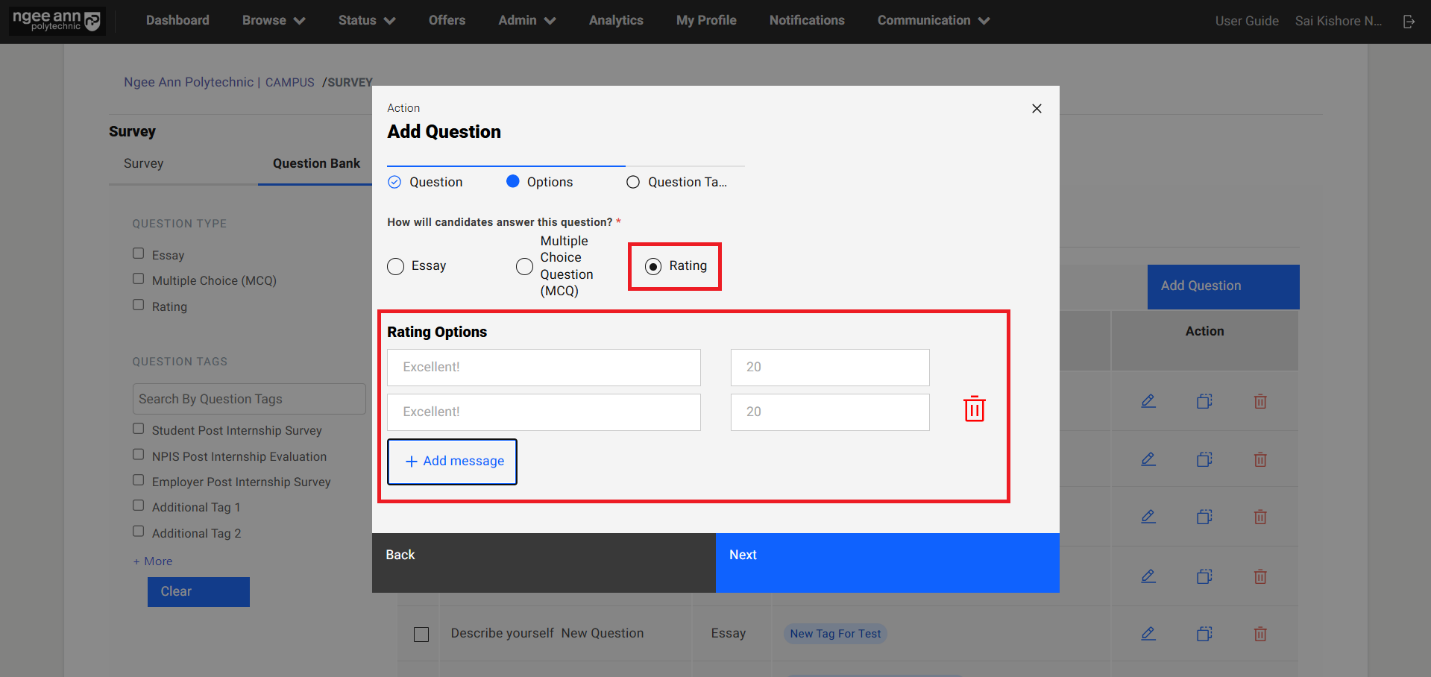
Step 4:
- Navigate to "Question Tags" section tab in the "Add Question" popup
- Click on the "Question Tag(s)" dropdown field
- Select pre-saved list of tags as options from the dropdown field
- Selected tag shown in the dropdown field
- Click on the "Submit" button
- Saved question will be shown in the table and successes message will be shown
- Click on the "Back" button navigate to "Options" section tab in the popup
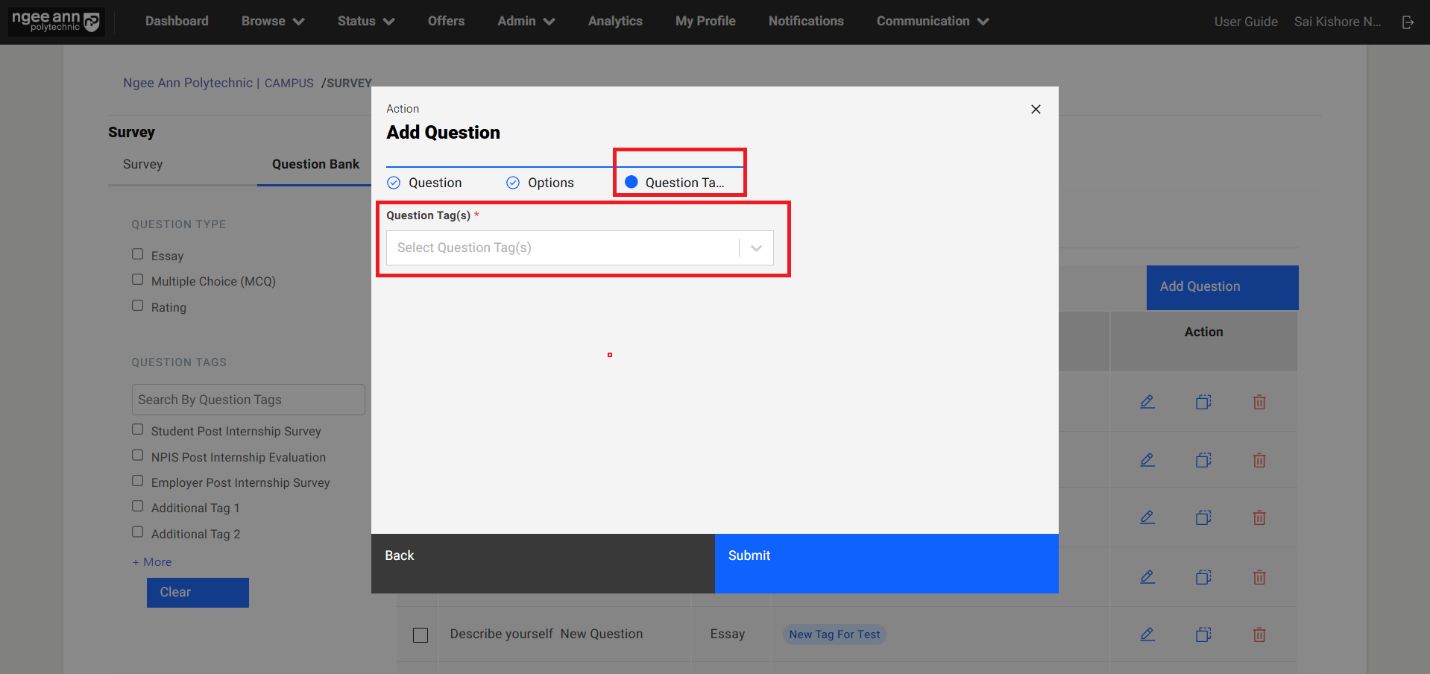
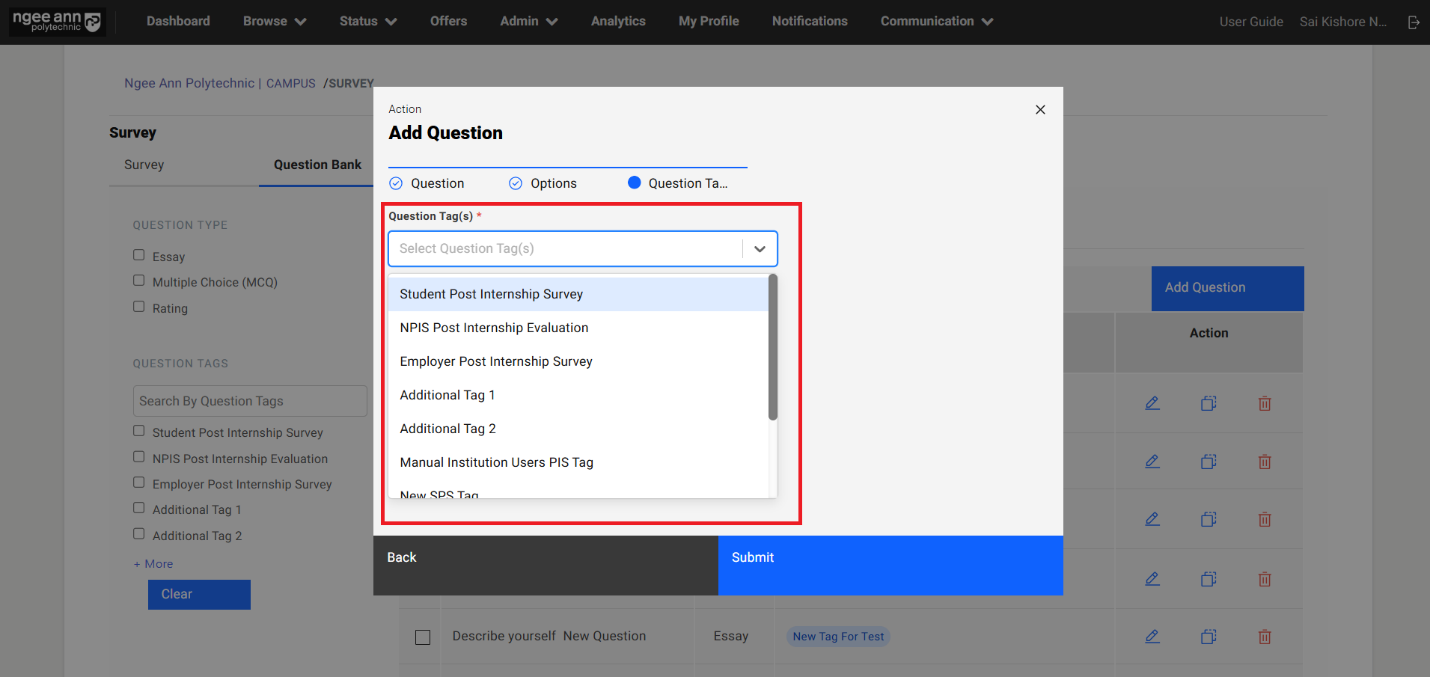
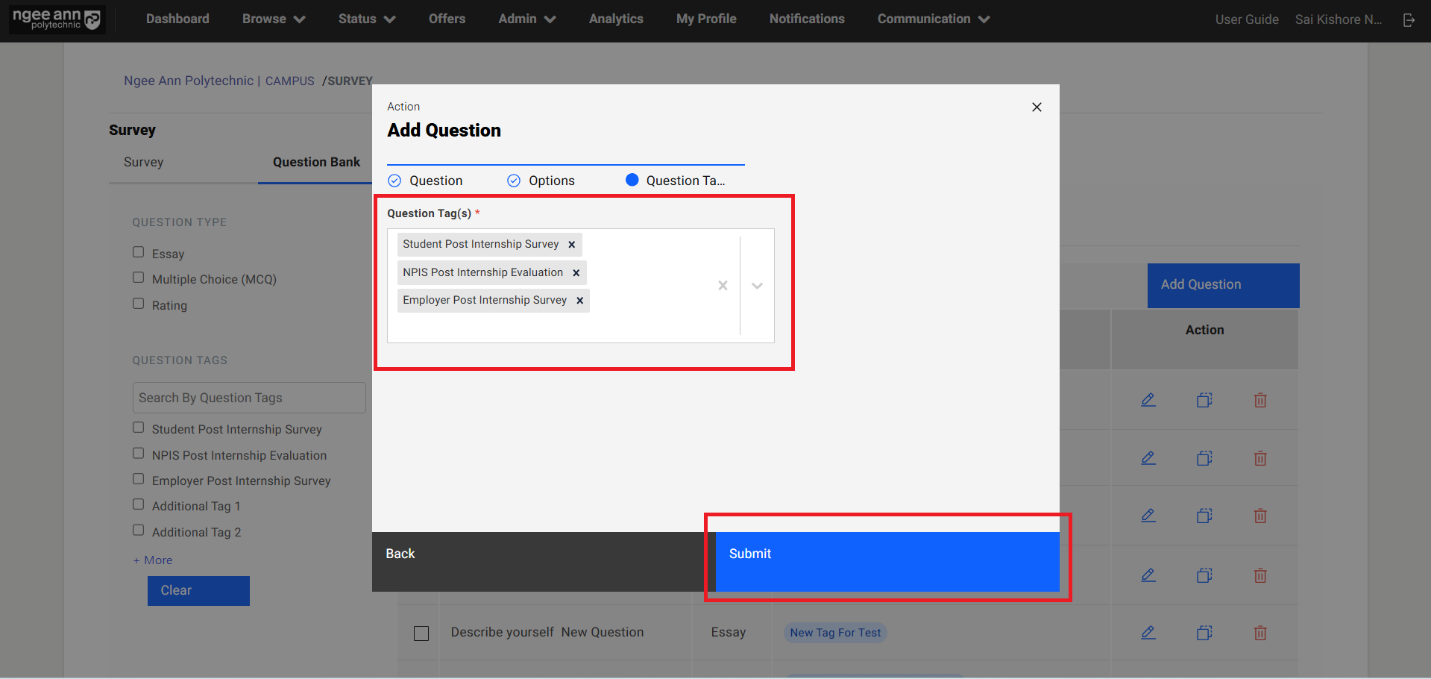
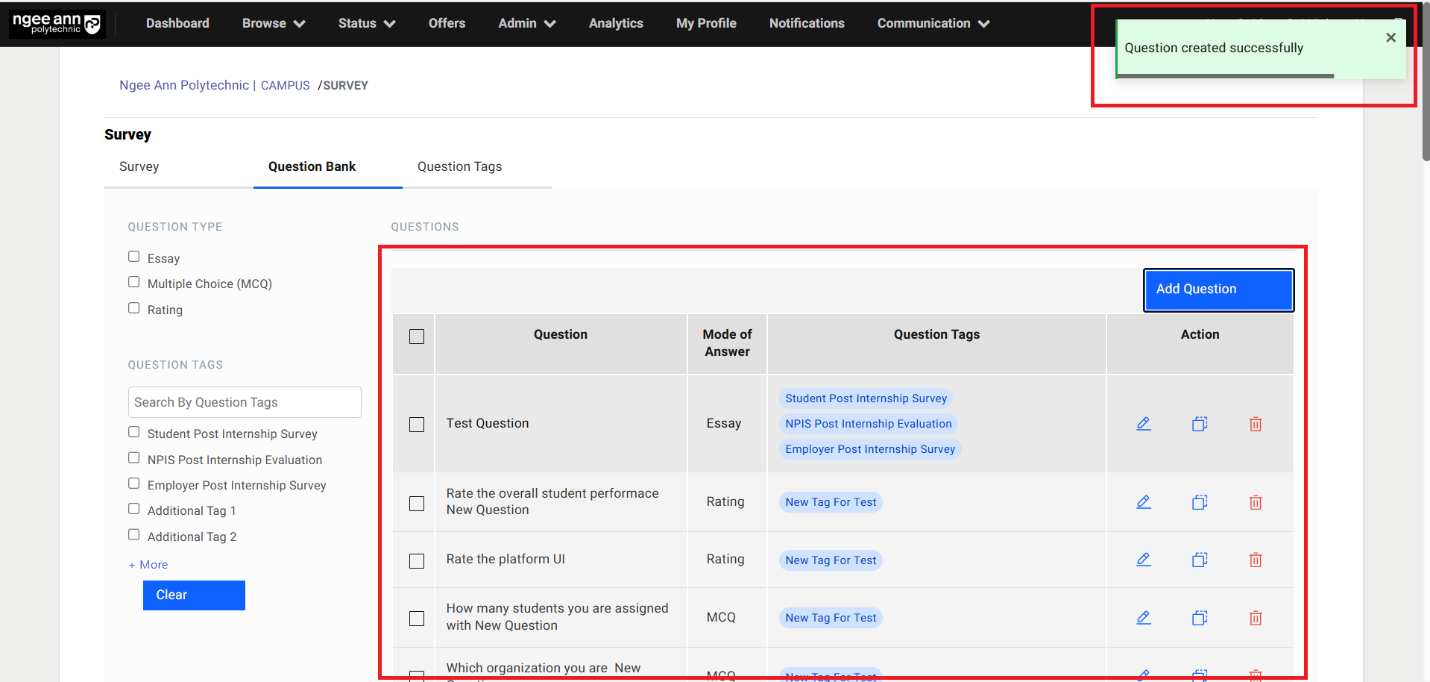
Edit Question:
Step 1:
- Click on the Edit (Pencil) icon under "Action" column in the table
- "Edit Question" popup get open with previous saved question details persisted into the fields in the popup.
- Update the details in the "Edit Question" popup
- Click on the "Submit" button to save the changes
- Make sure updated changes will get reflected in the table for respective question
Note: Make sure while edit the question user will not able to option category for respective question.
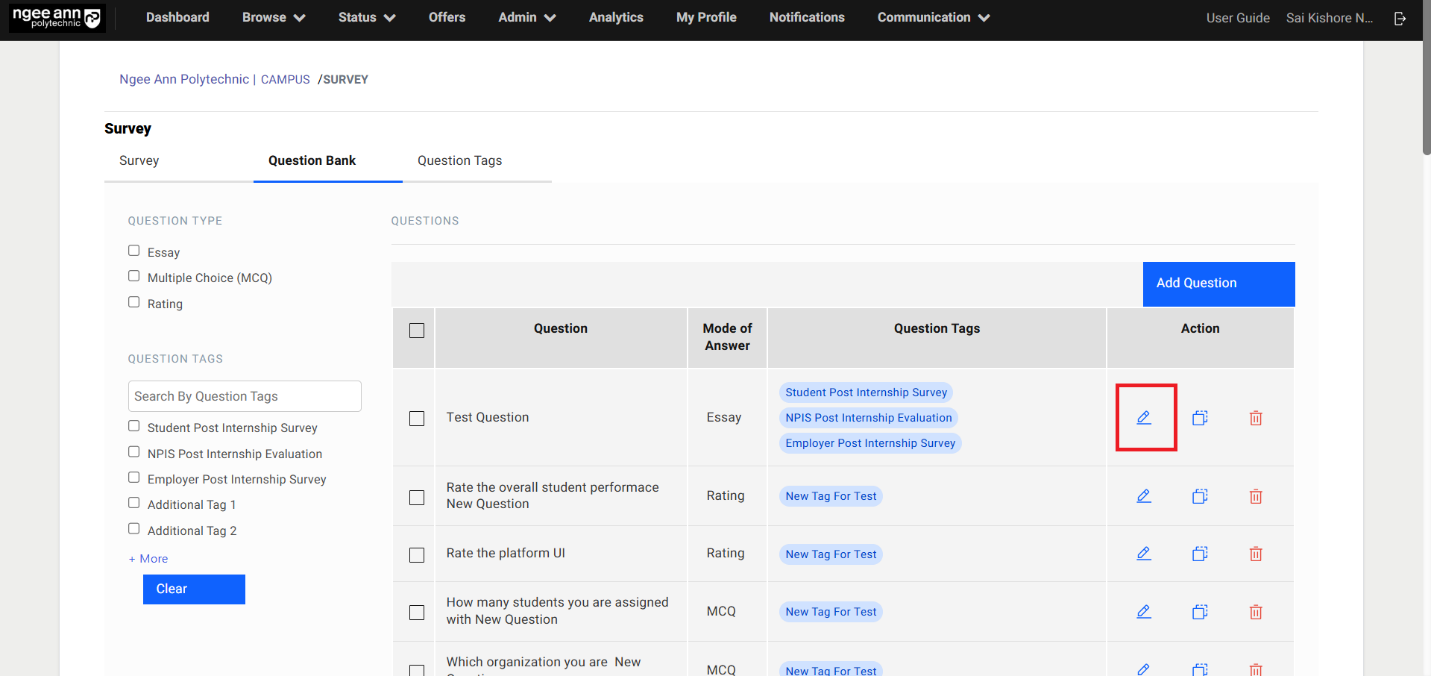
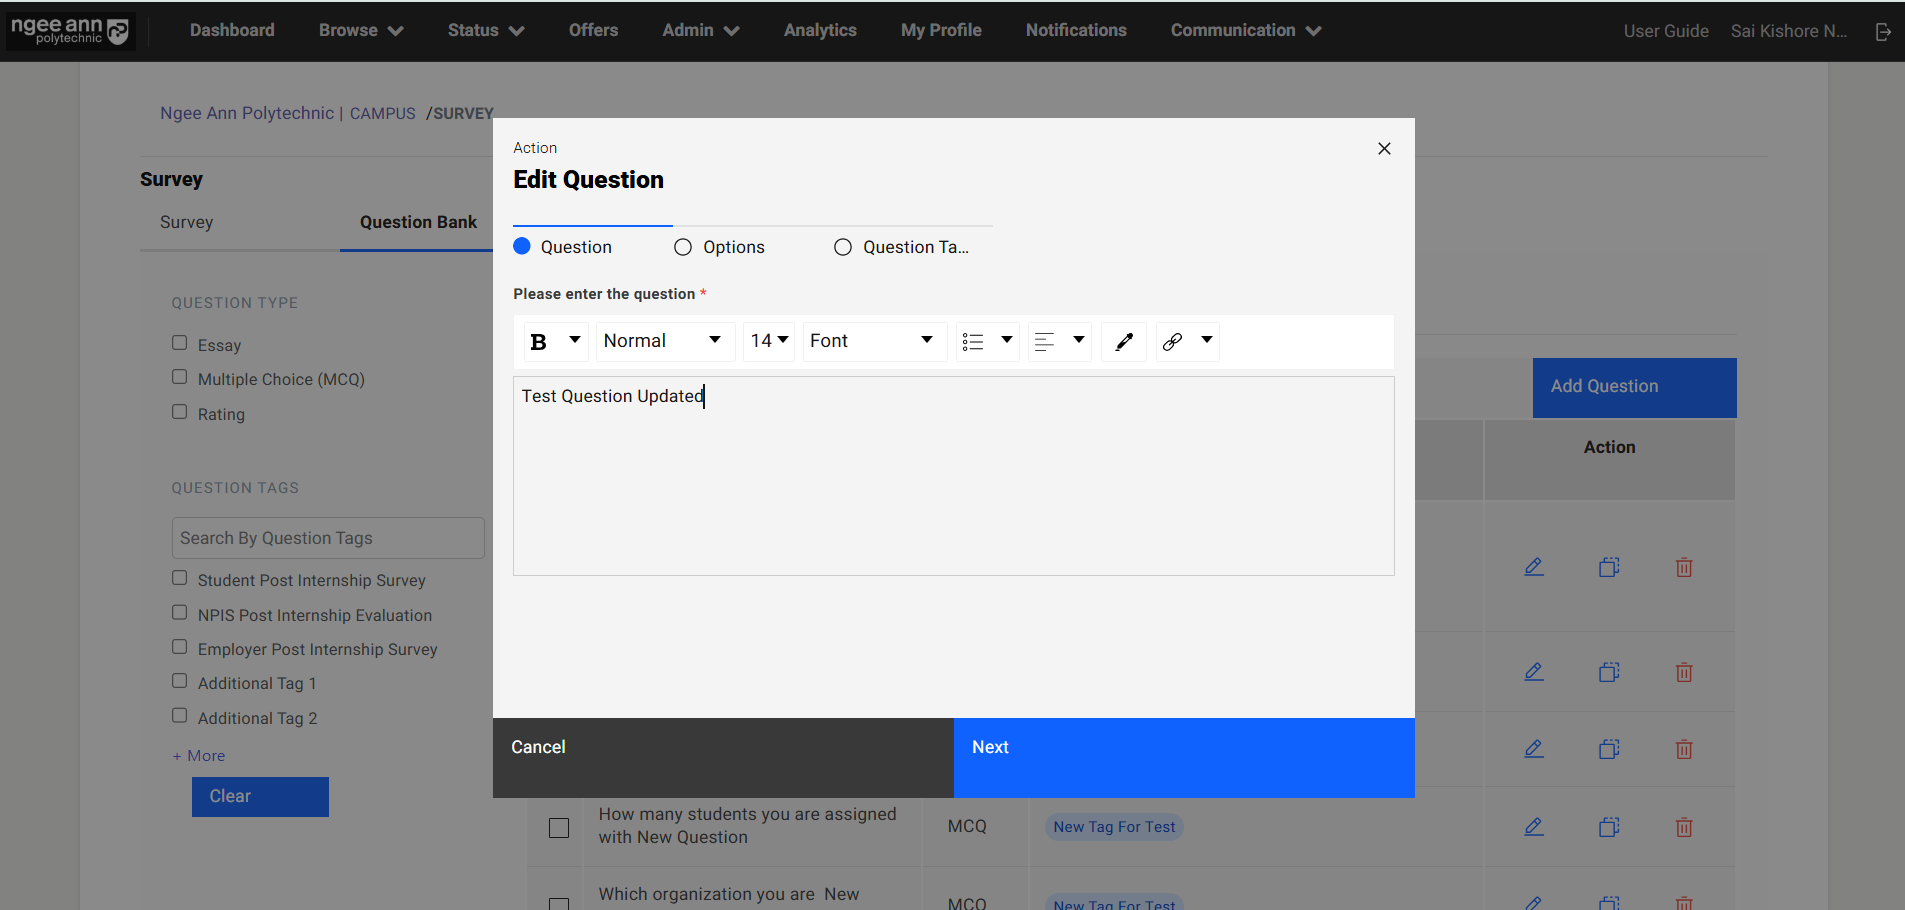
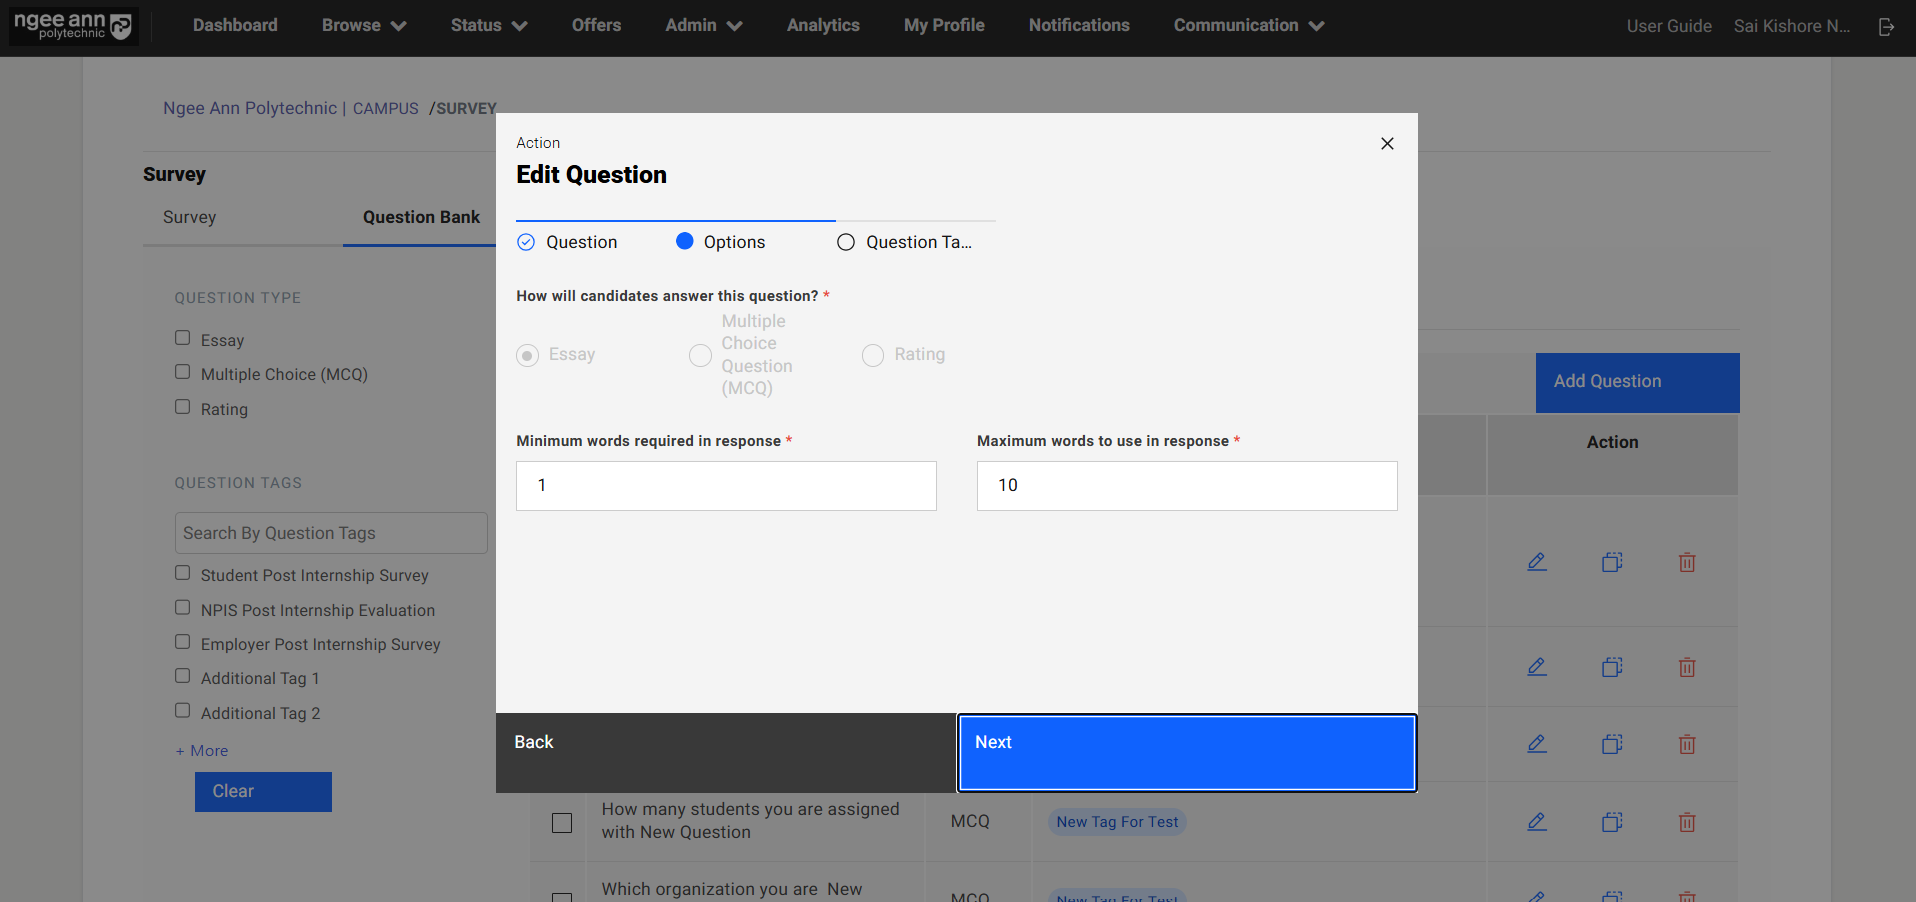
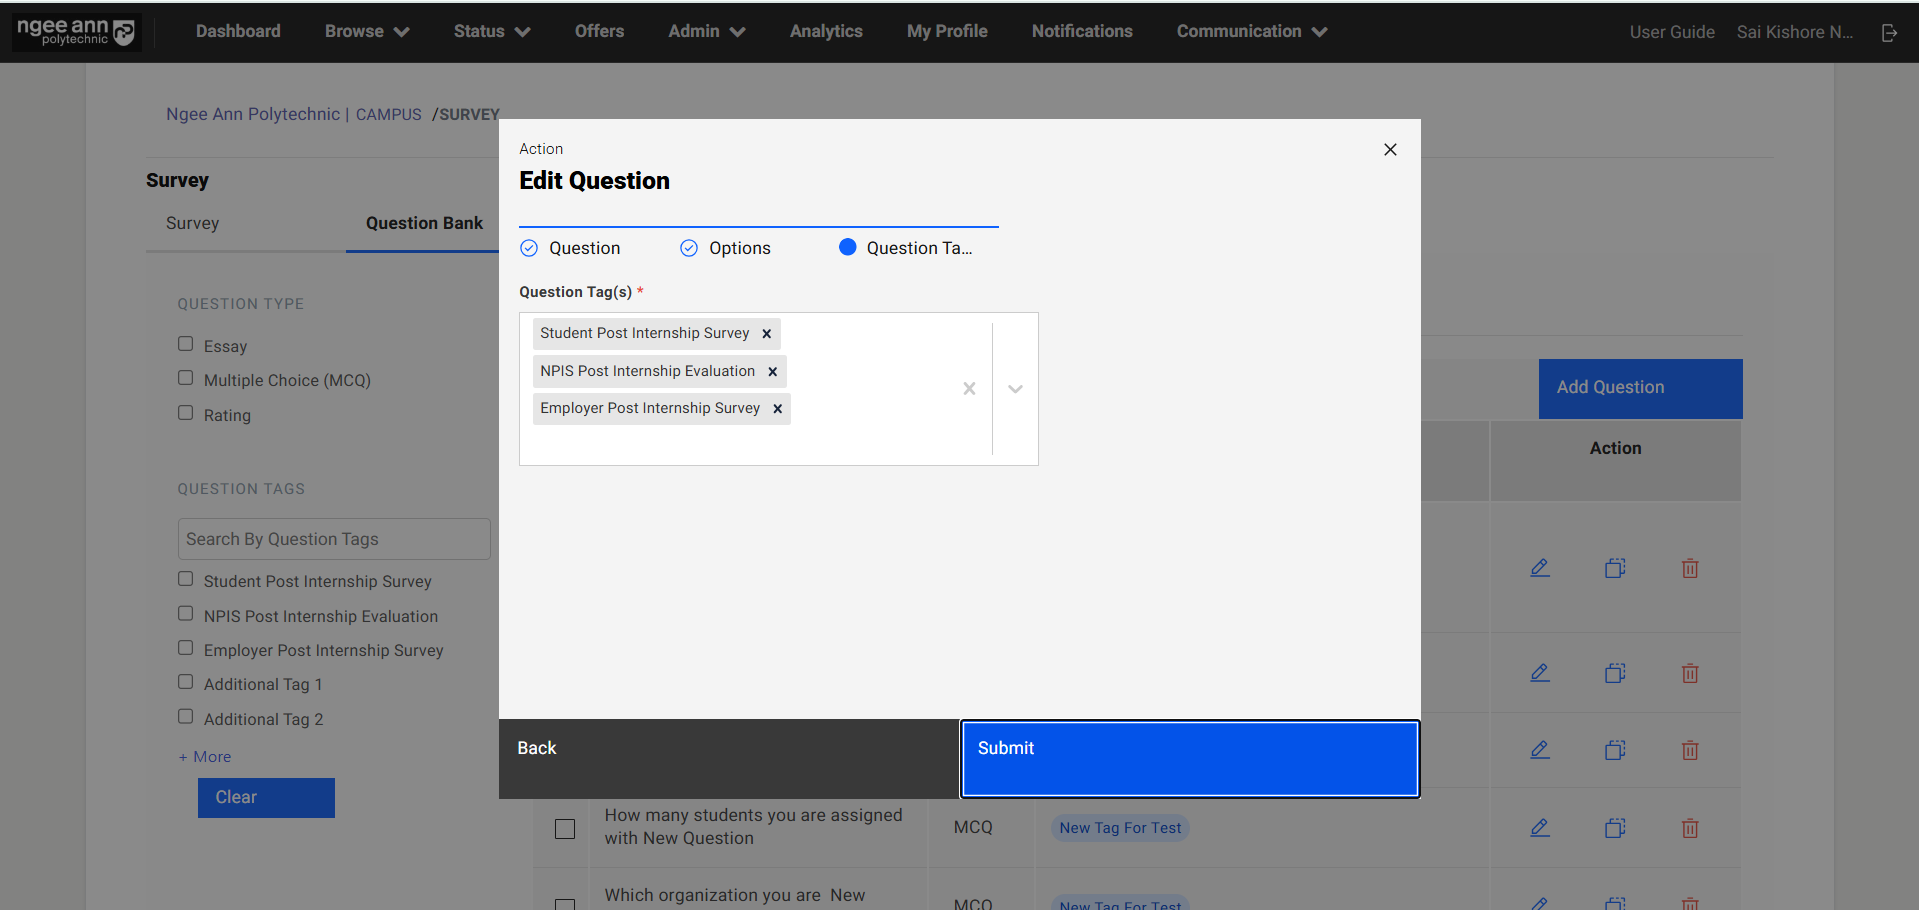
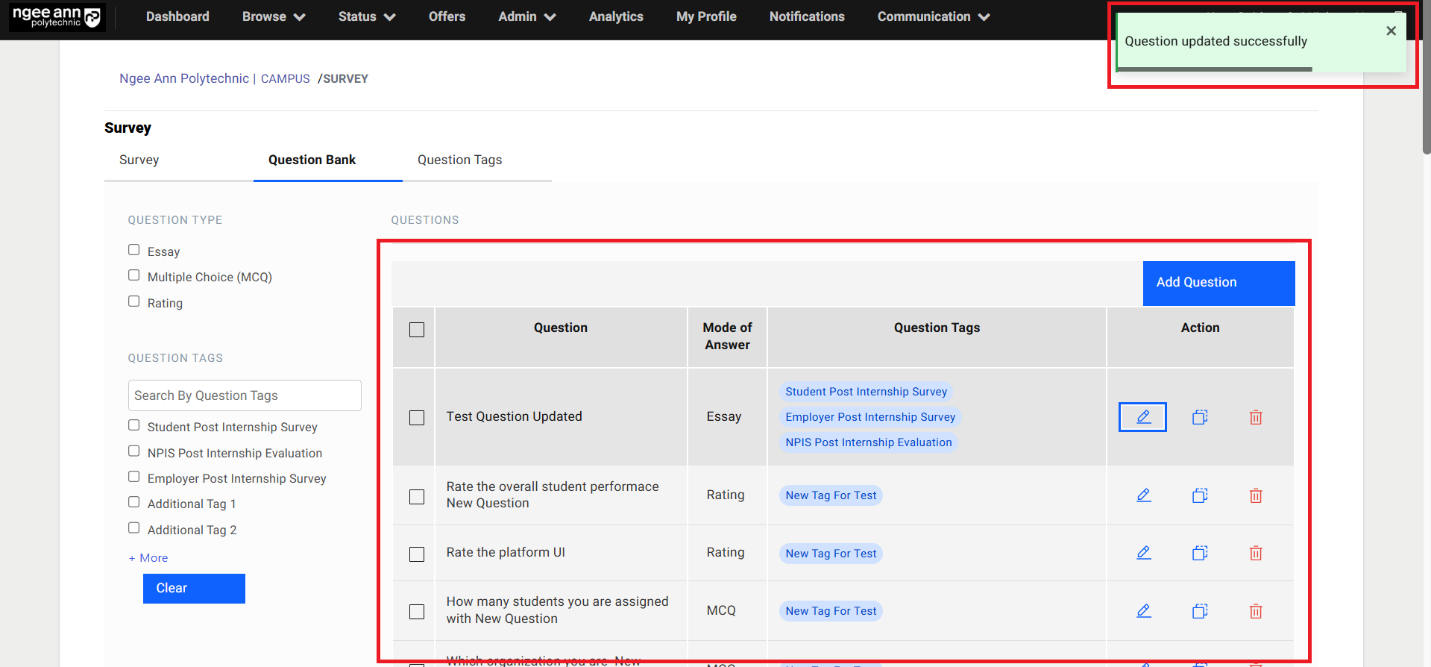
Clone Question:
Step 1:
- Click on the "Clone Question (overlapping squares)" icon from "Action" column for respective question from the table
- "Clone Question" popup get open with respective question details persisted into the fields in the popup.
- Update the question details
- Click on the "Clone" button from popup to clone the question
- Cloned question will be shown in the table and successes message banner will be shown once question cloned successfully
Note:
- Users cannot clone the exact question text, but they can reuse the answer options and question tags.
- While cloning, users can modify the answer option type (EX: Essay to Rating)
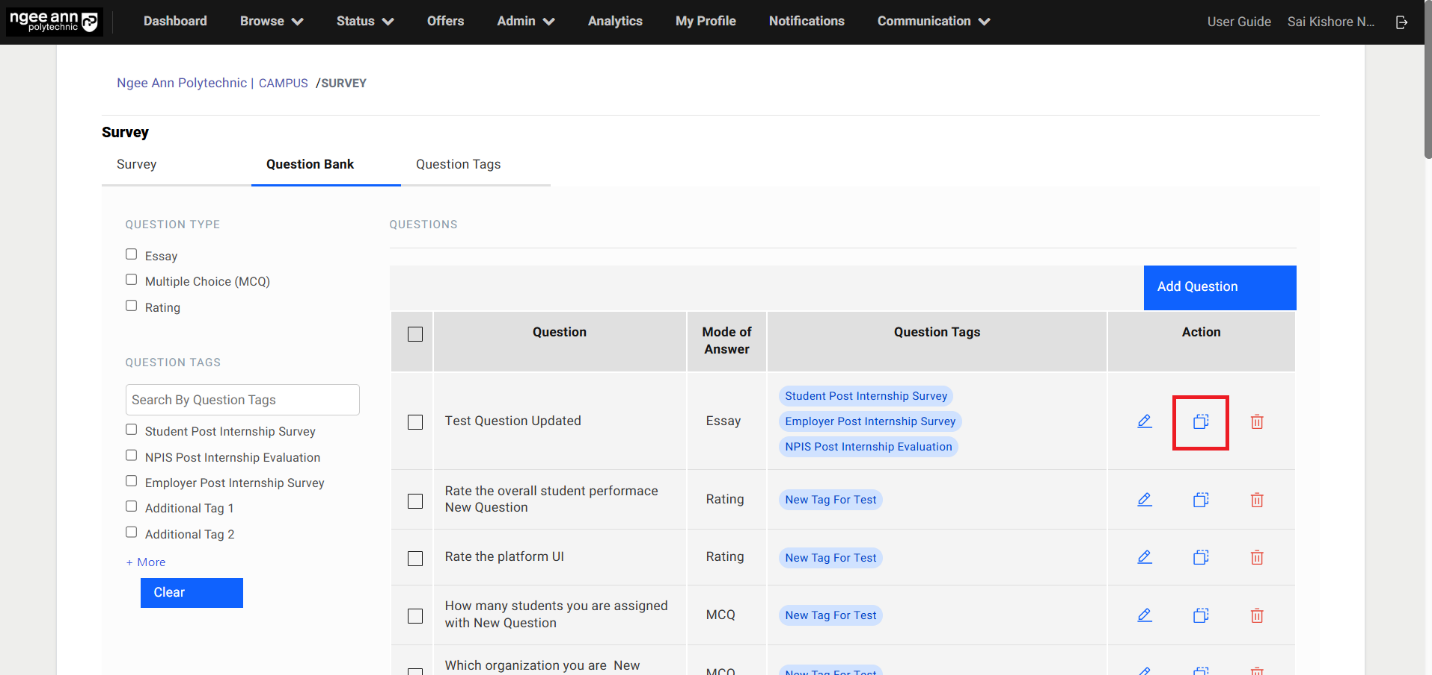
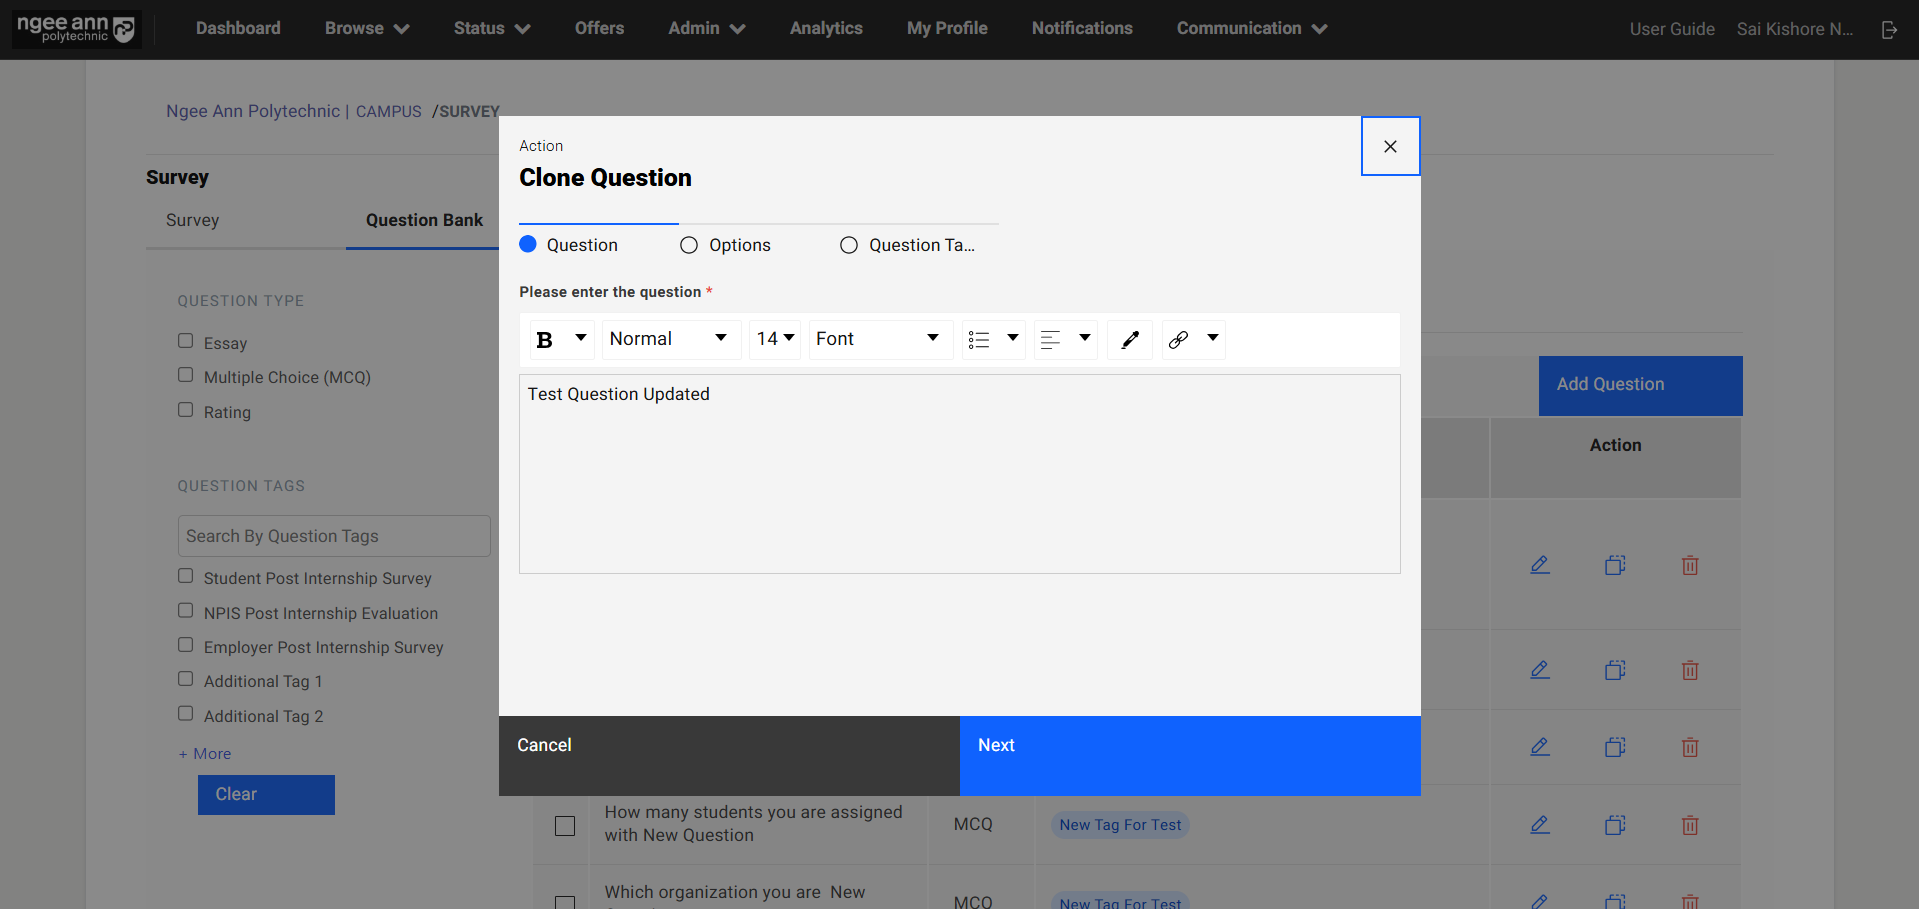
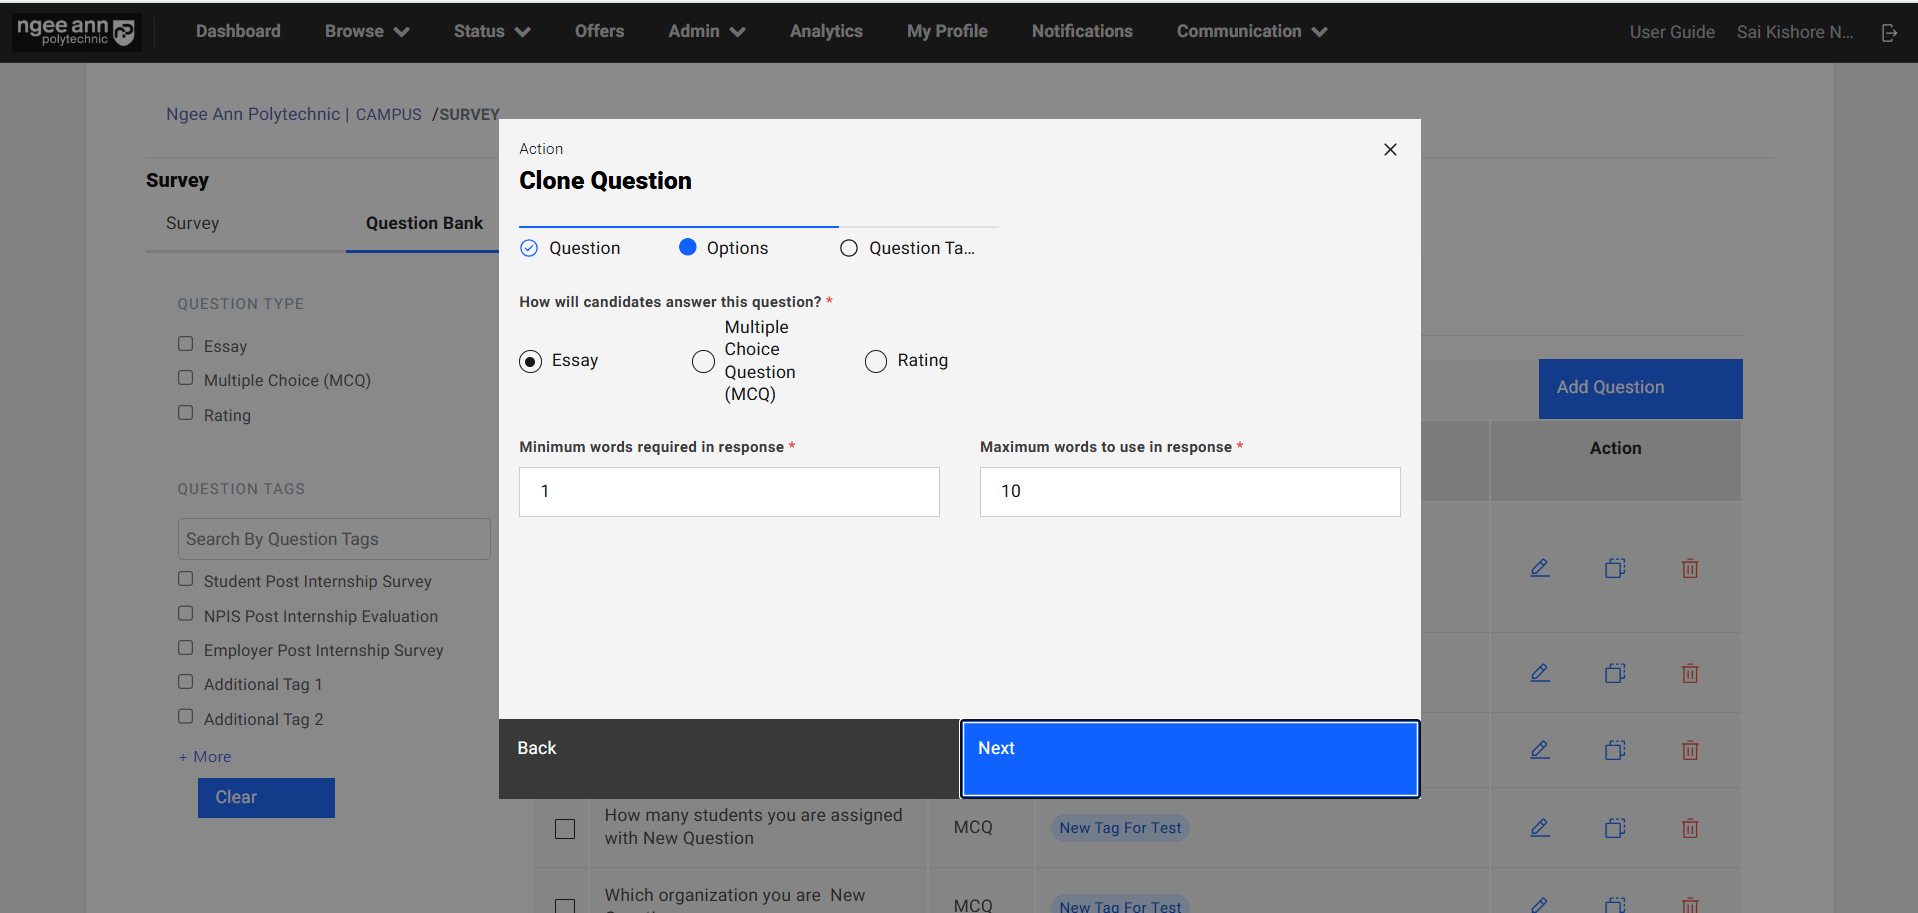
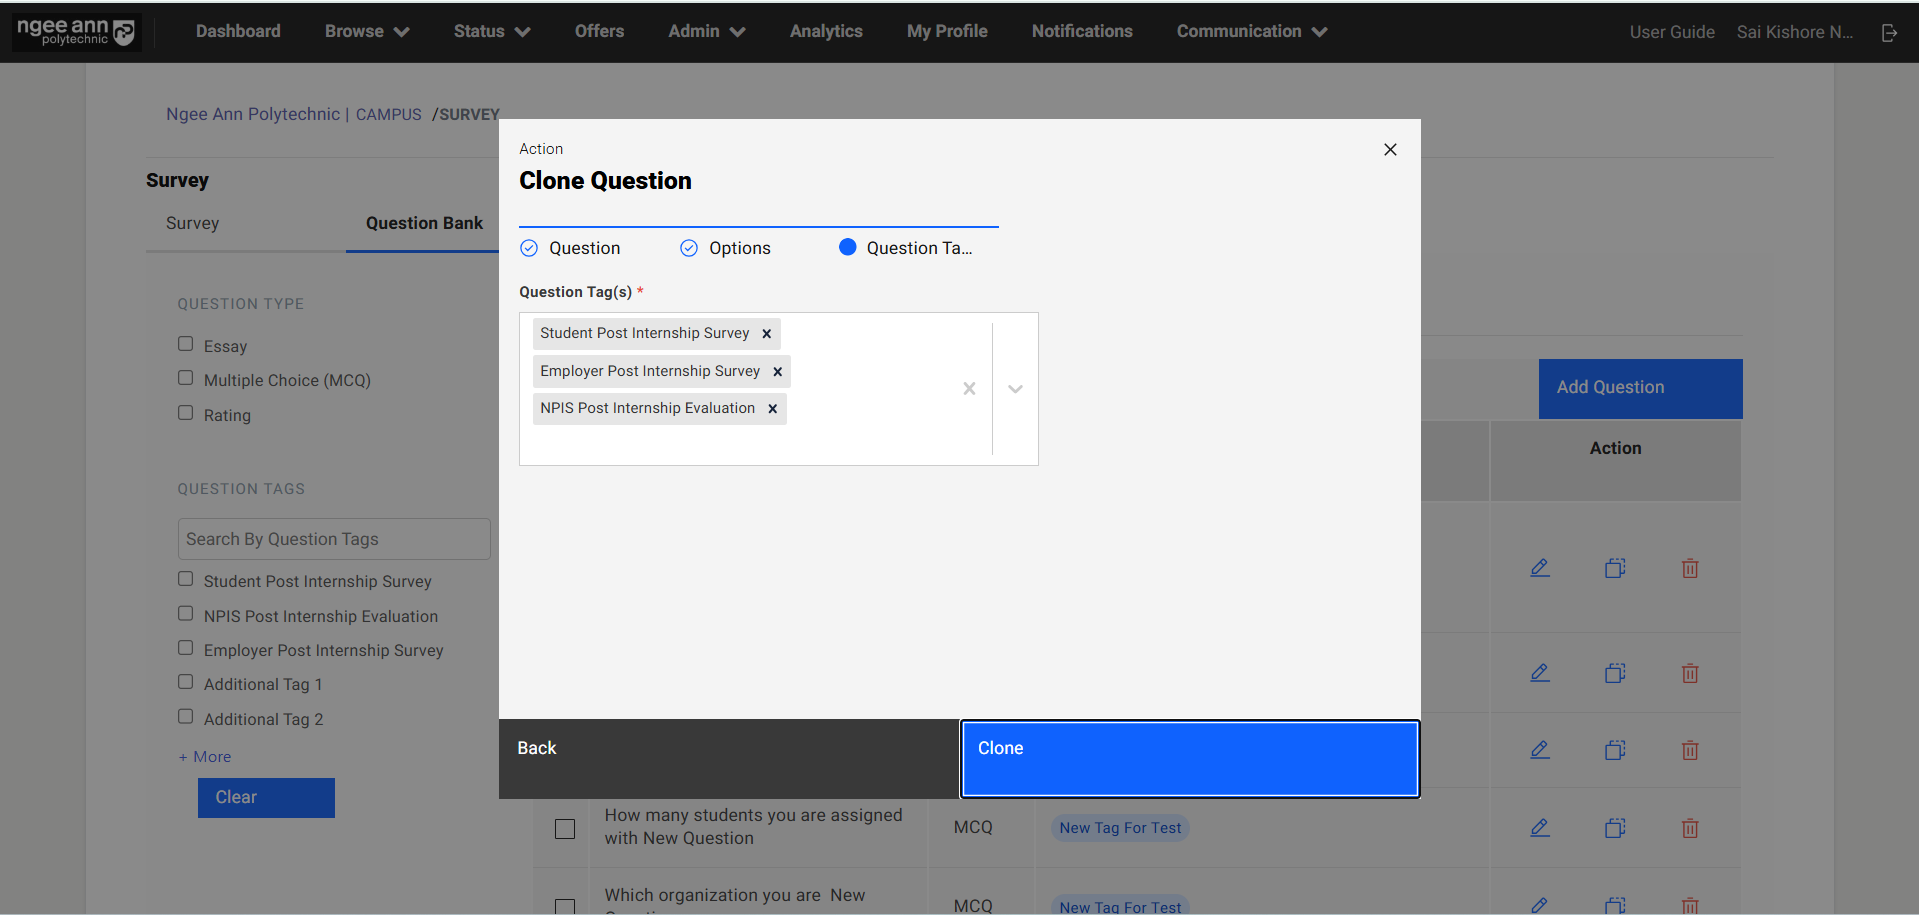
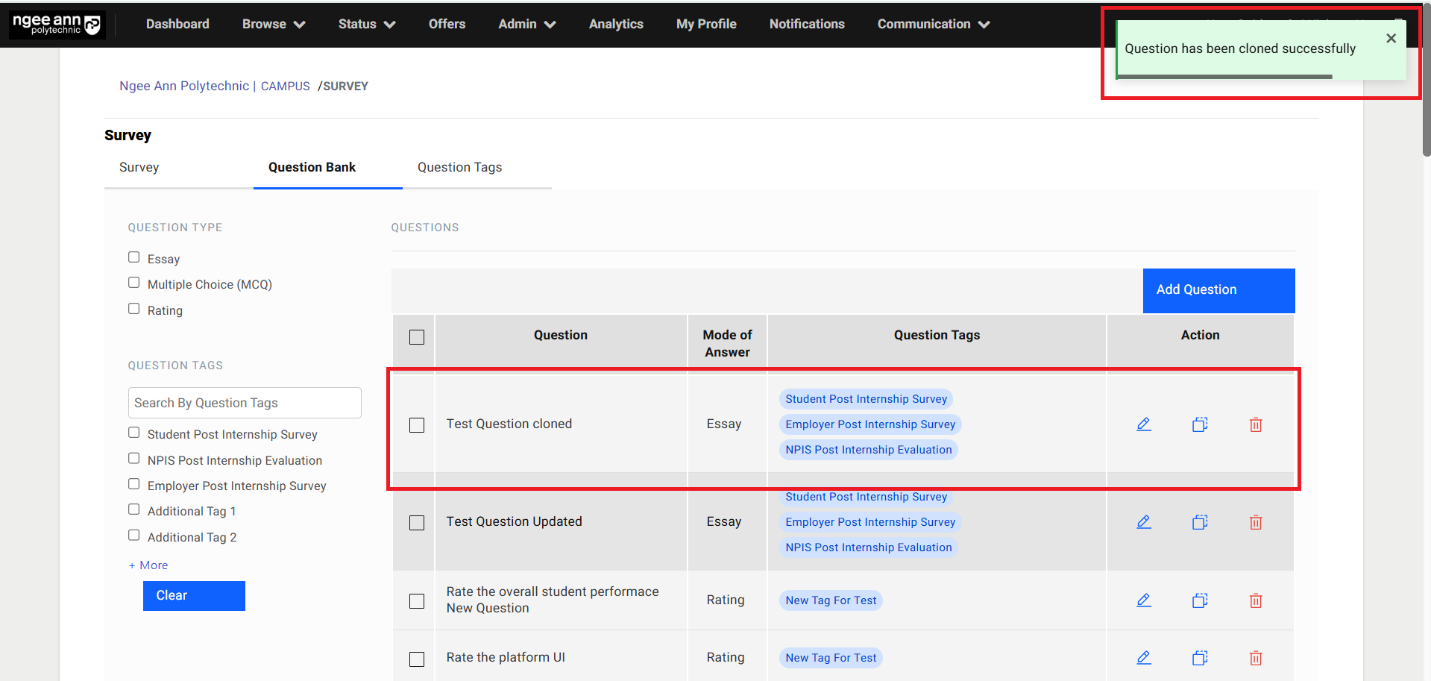
Delete Question:
Step 1:
- Click on the "Delete (Trash)" icon under "Action" column from the table for respective question
- "Delete Question" confirmation popup get open
- Click on "Submit" button from the popup
- Respective question will get deleted from the table successfully and successes message will be shown
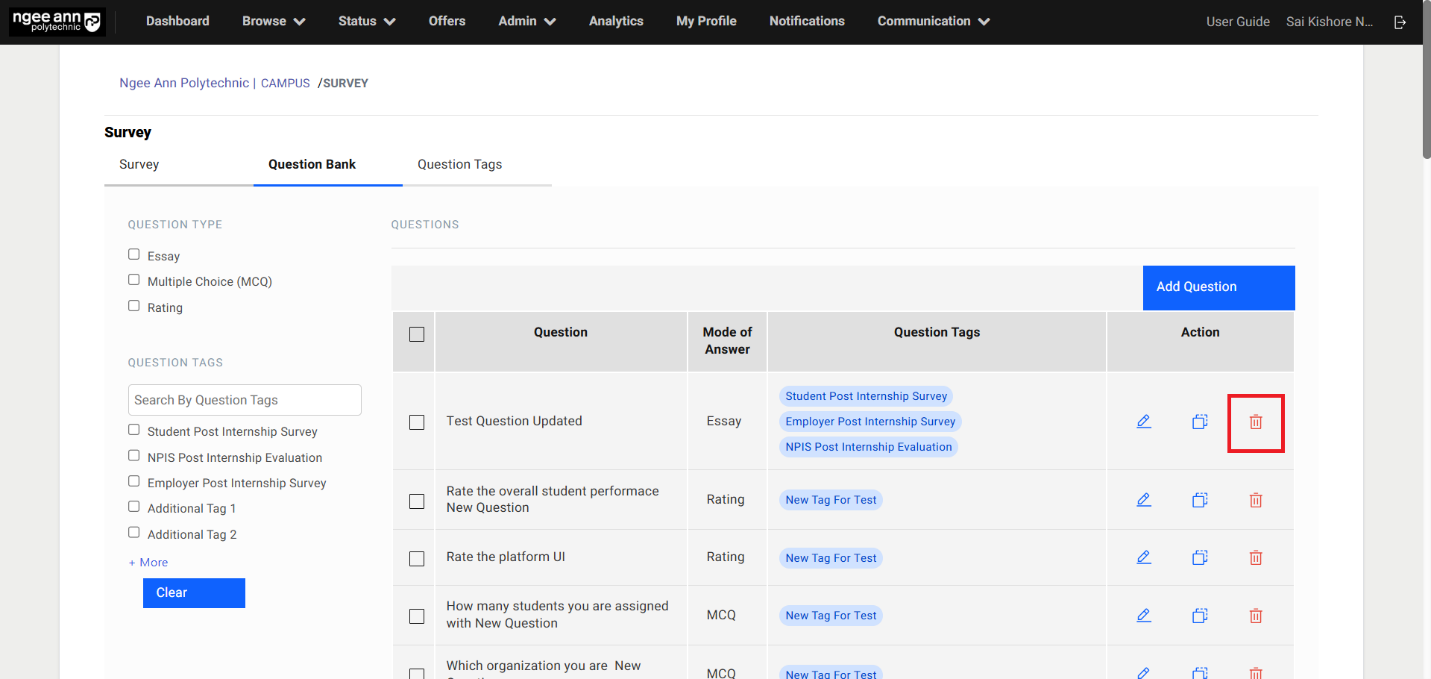
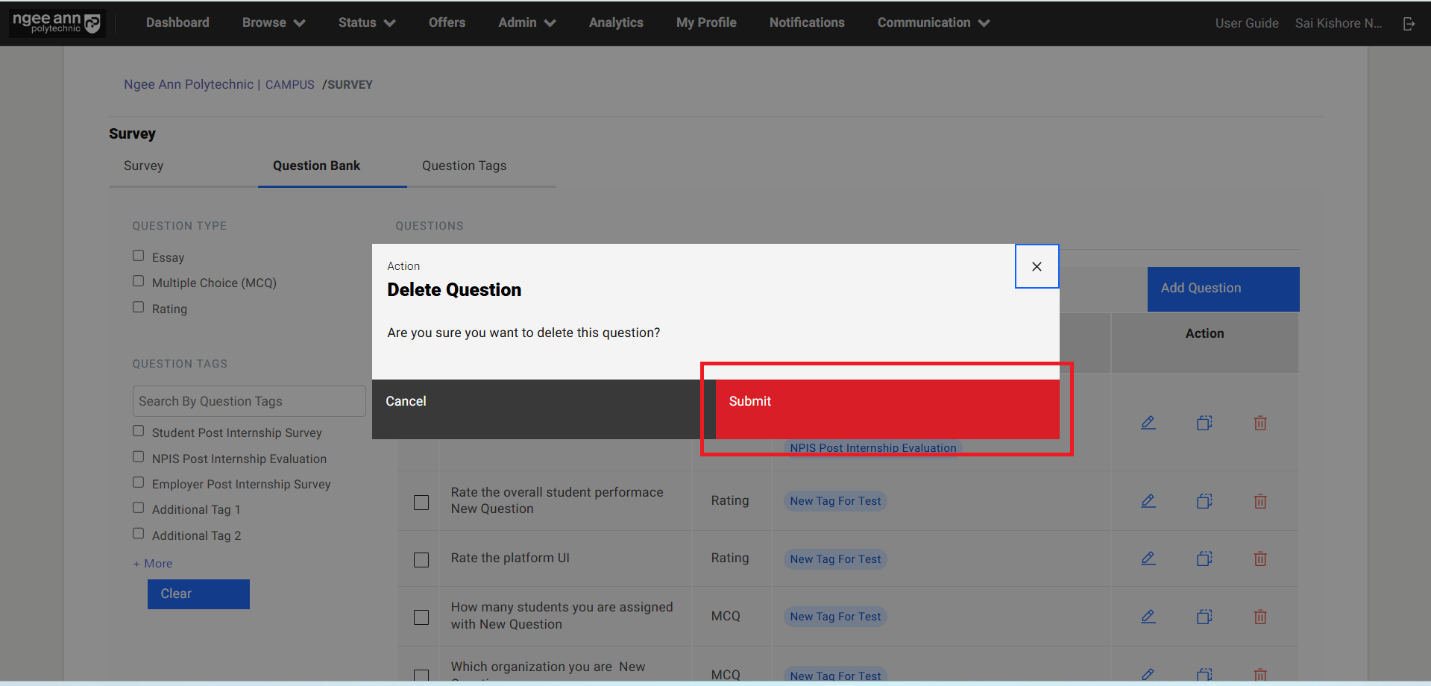
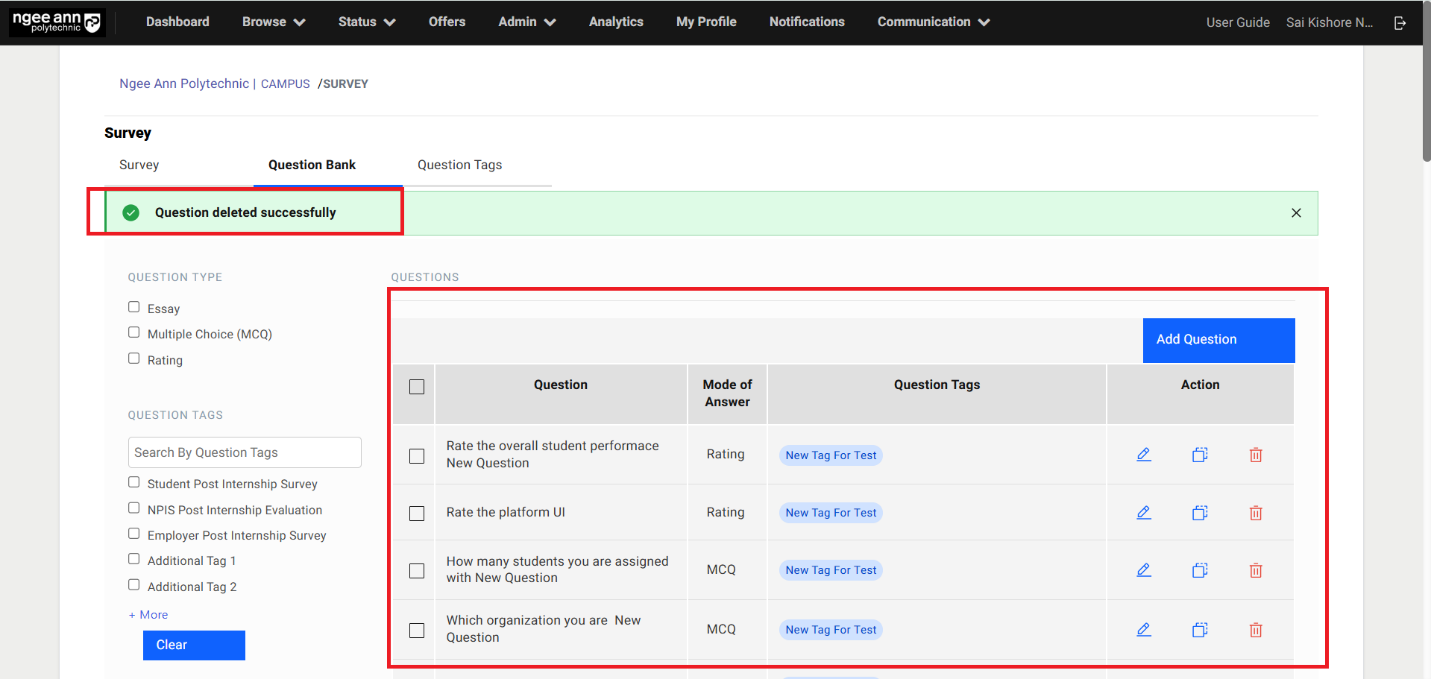
Question Bank Filters:
Step 1:
- See the "Question Type & Question Tags" filters with respective filter options on the left side of the table under "Question Bank" section tab.
- Select your desired filter criteria and apply the filters
- The table will automatically update to display only the filtered questions.
- Click on the "Clear" button to clear the applied filters and total questions will be shown in the table
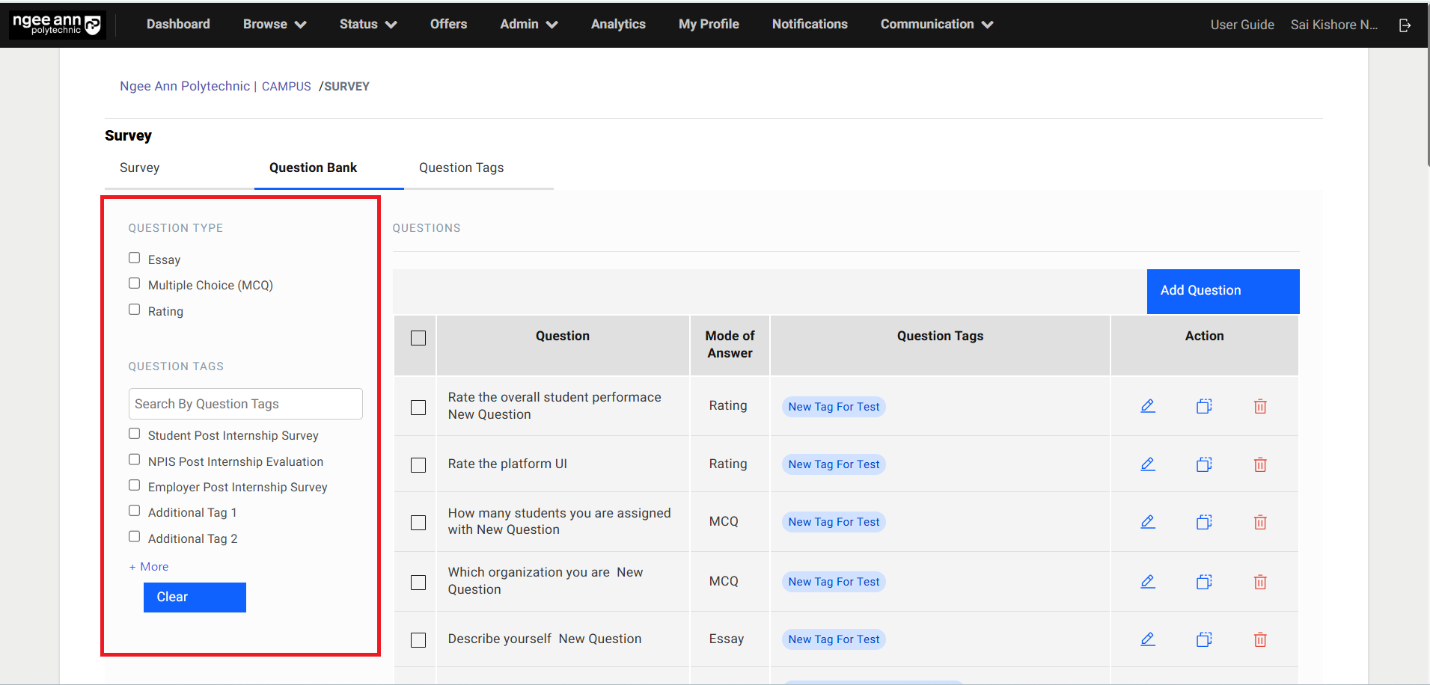
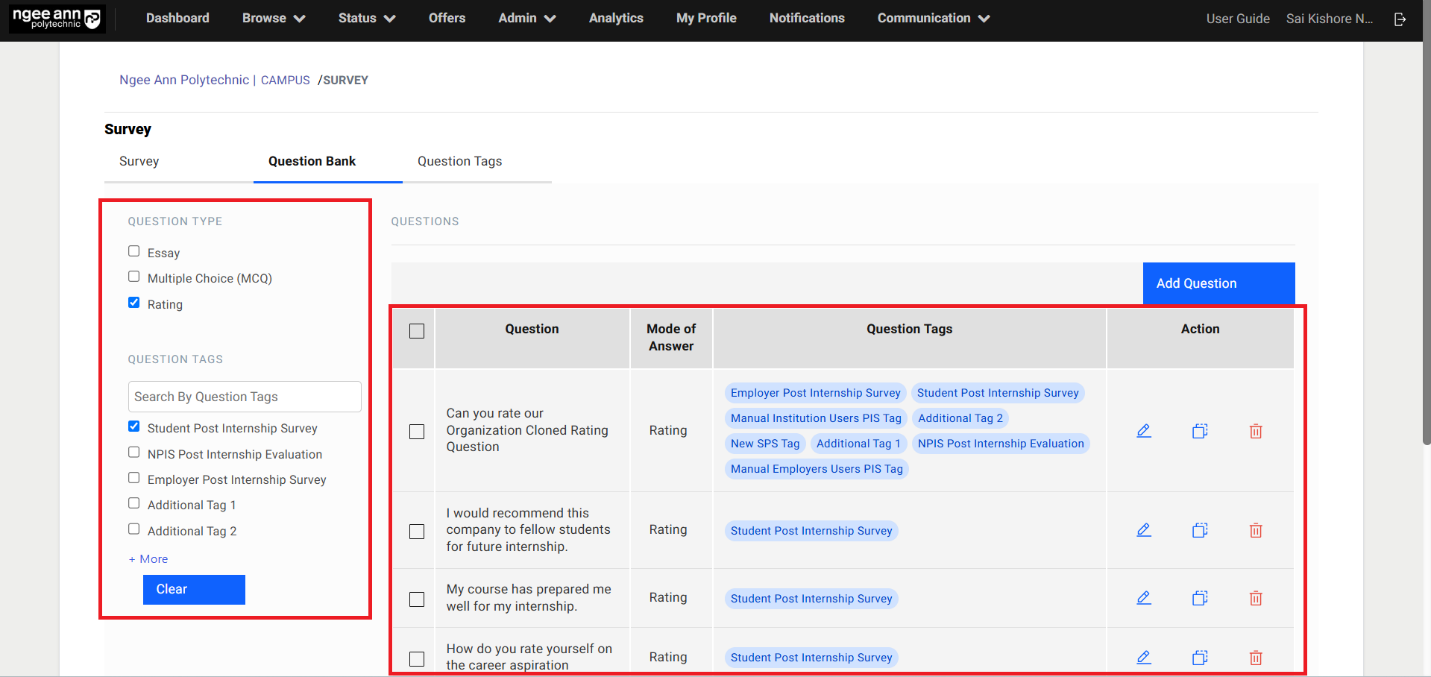
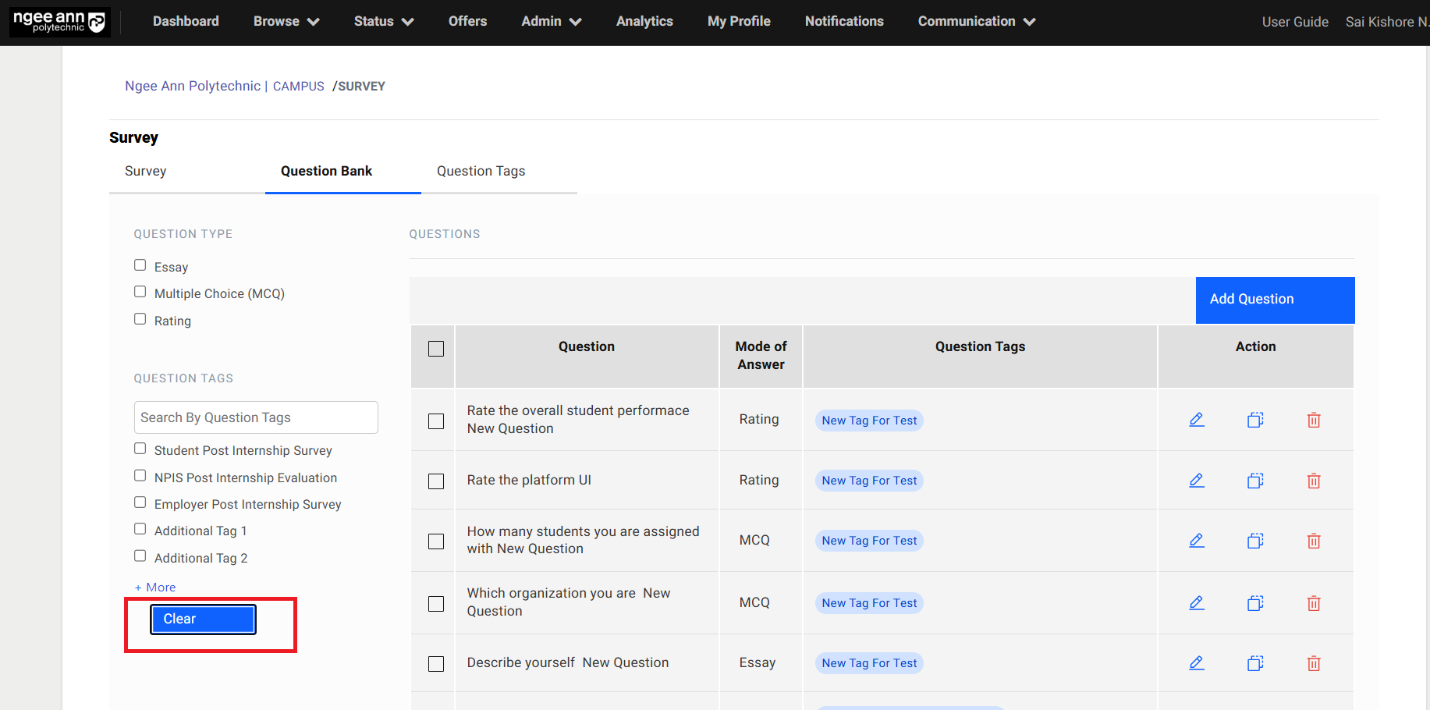
Question Tags Section Tab:
Step 1:
- Click on the "Question Tags" section tab from the "Survey" page
- See the "Question Tags" table
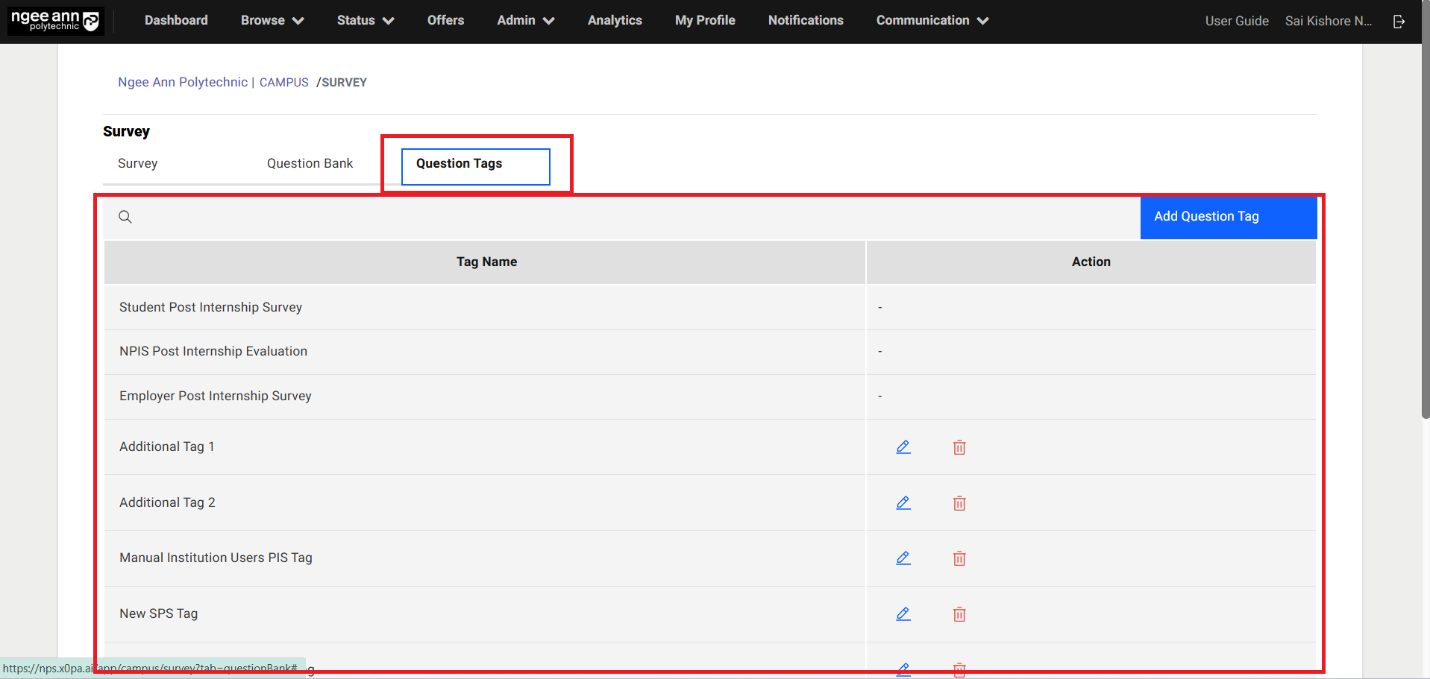
Add Question Tag:
Step 1:
- Click on the "Add Question Tag" button above the table
- "Add Question tag" popup get open
- Enter question tag name into the "Tag Name" text field in the popup.
- Click on the "Submit" button to save the tag and successes message will be shown
- See saved tag will be shown in the table
Note: Student Post Internship Survey, NPIS Post Internship Evaluation, Employer Post Internship Survey tags are default tags which cannot be edited or deleted from the table
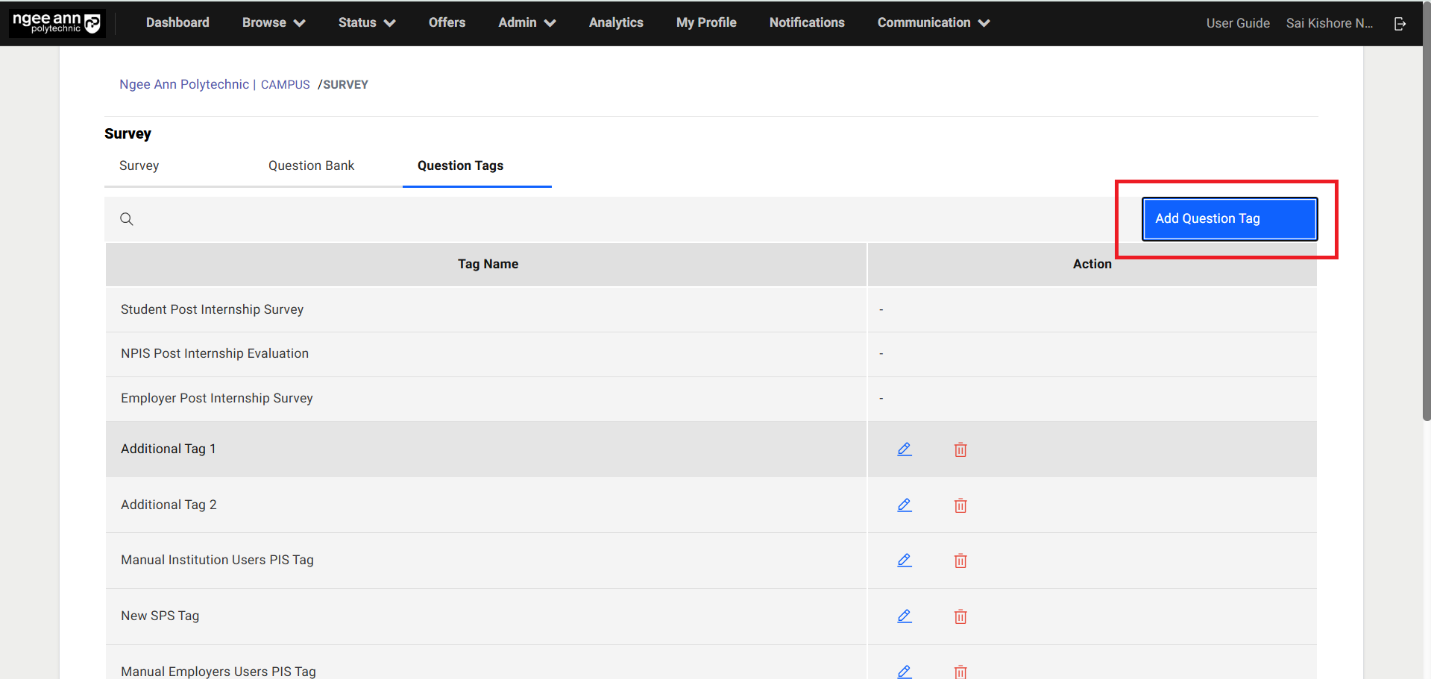
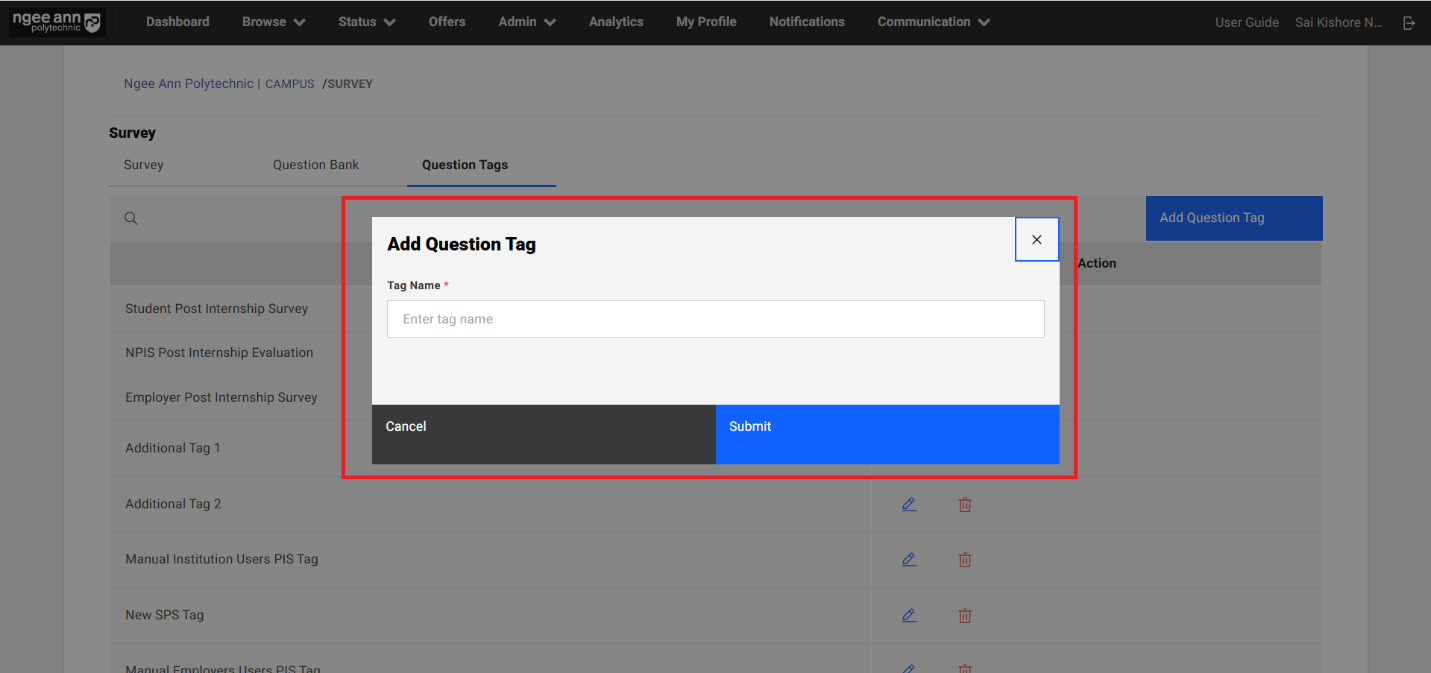
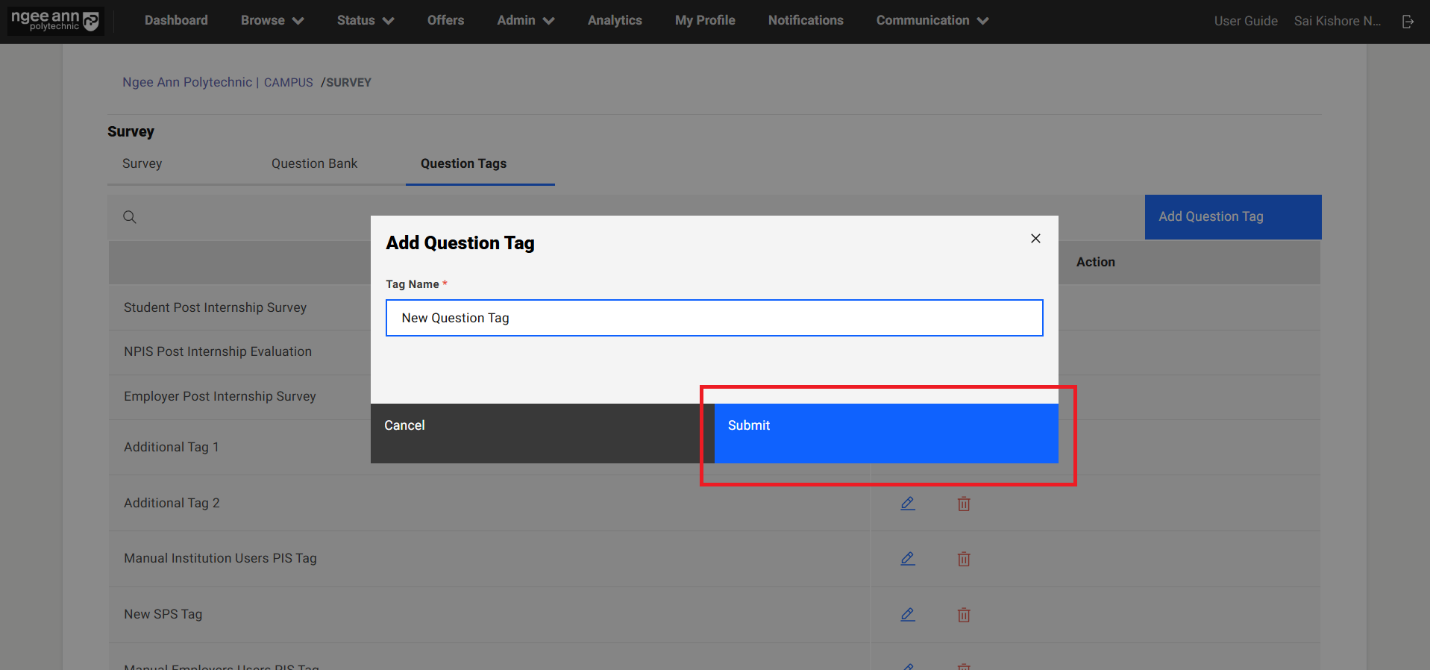
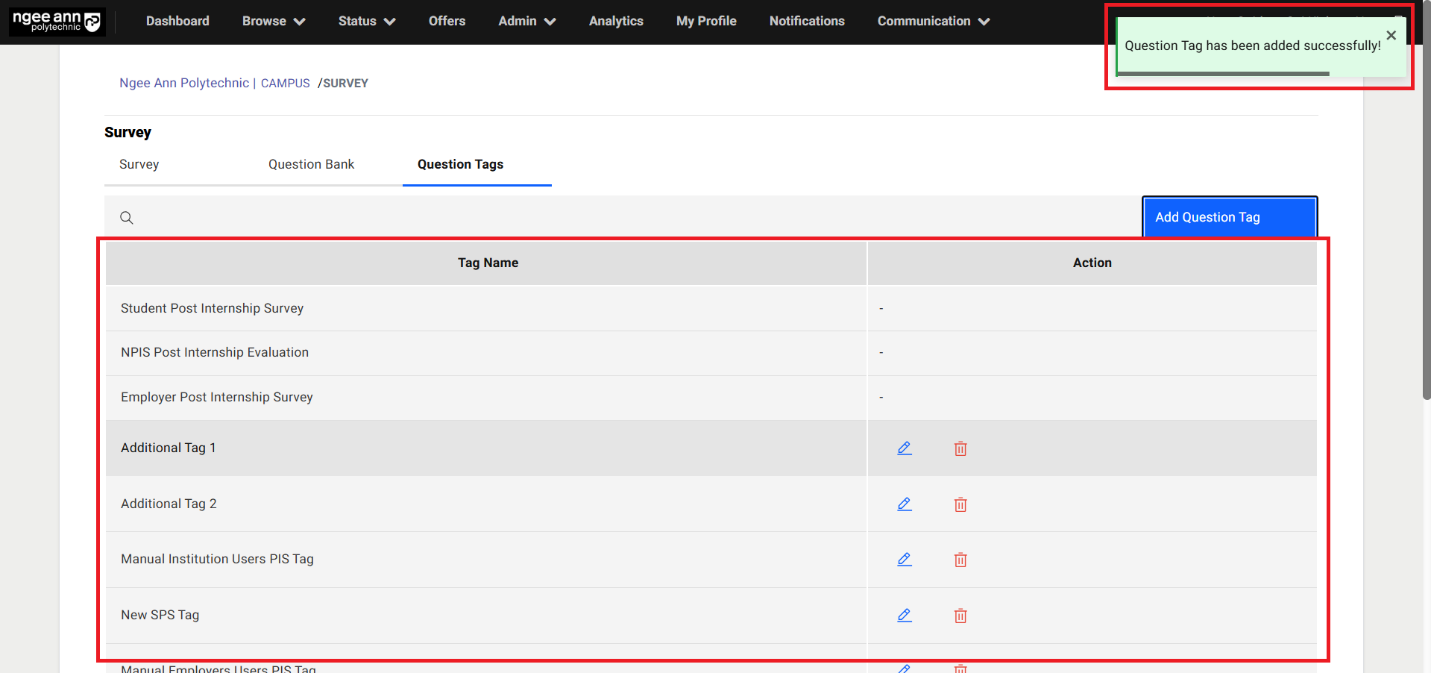
Edit Question Tag:
Step 1:
- Click on the "Edit (pencil)" icon under "Action" column in the table
- "Edit Question Tag" popup get open with saved question tag name persist in the field.
- Update the question tag name from the text field
- Click on the "Submit" button to save the updated tag name and successes message will be shown
- See updated tag name will reflect in the table.
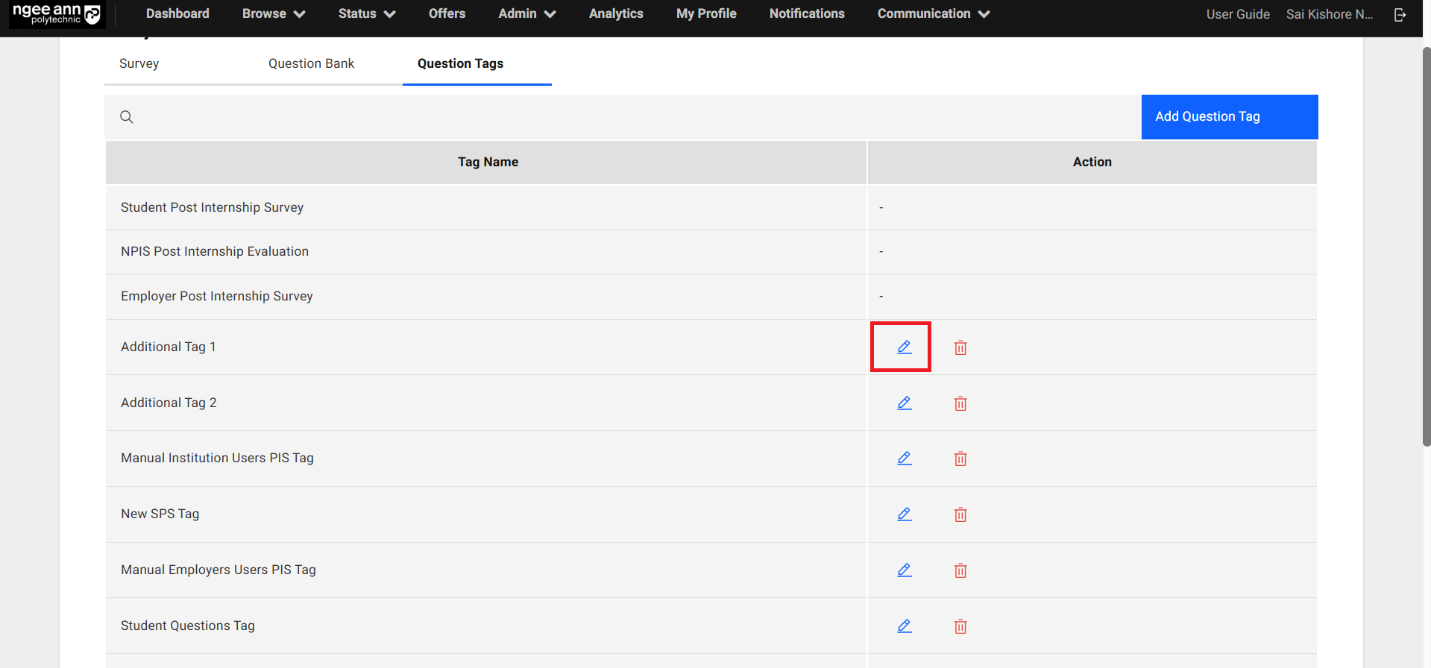

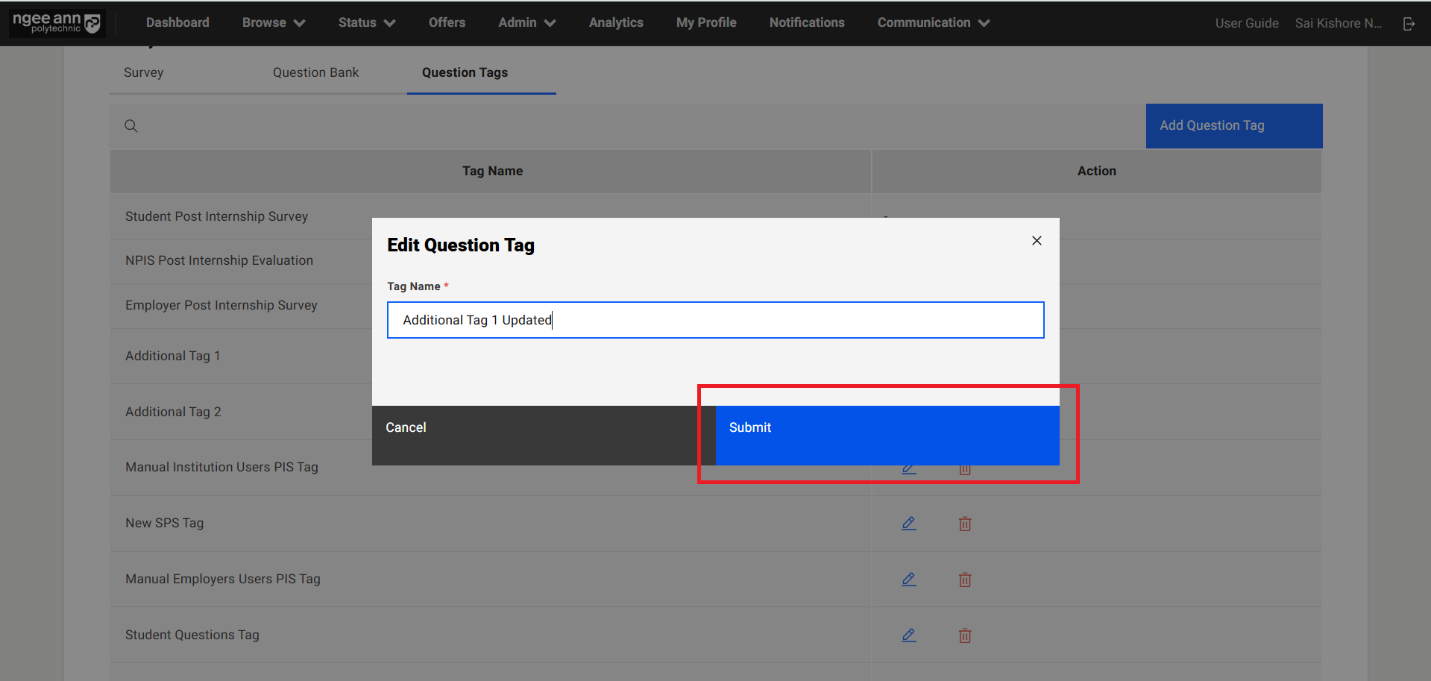
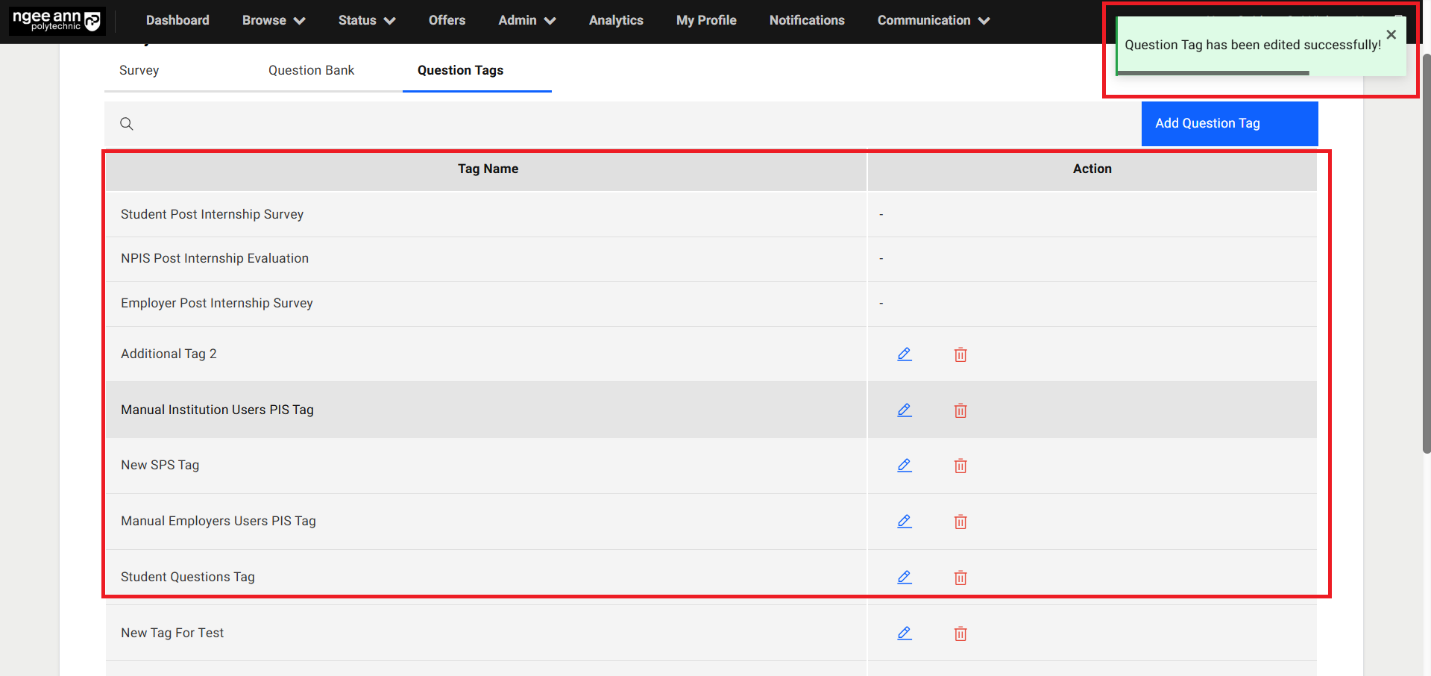
Delete Question Tag:
Step 1:
- Click on the "Delete (Trash)" icon under "Action" column in the table
- "Delete Question Tag" popup get open
- Click on the "Delete" button from the popup and successes message will be shown
- See respective tag will get removed from the table.
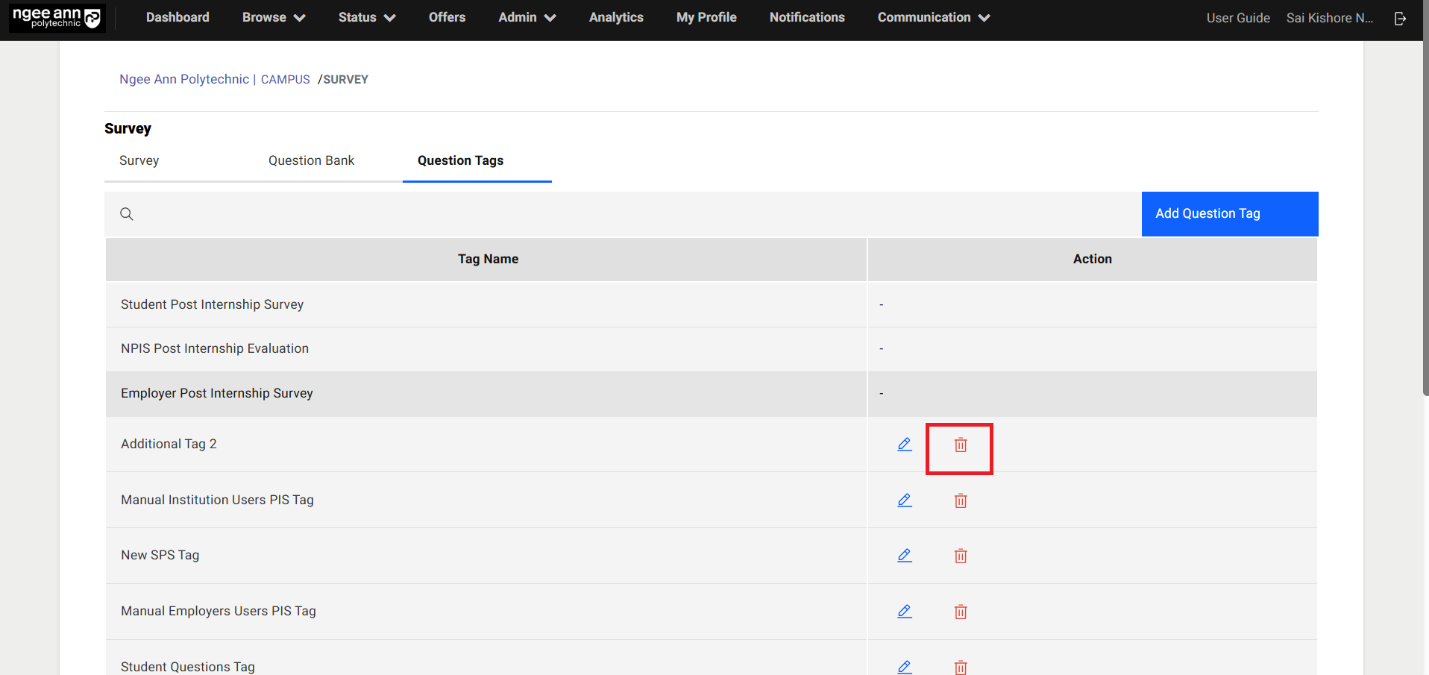

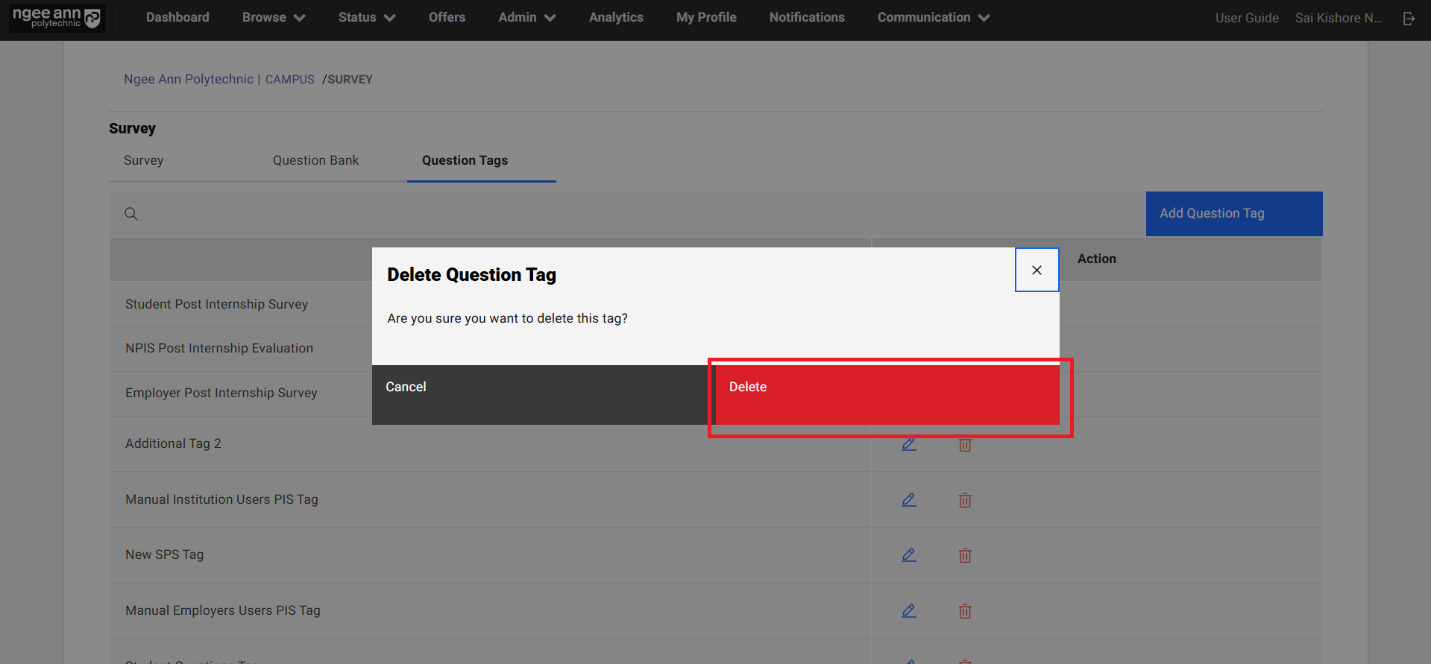
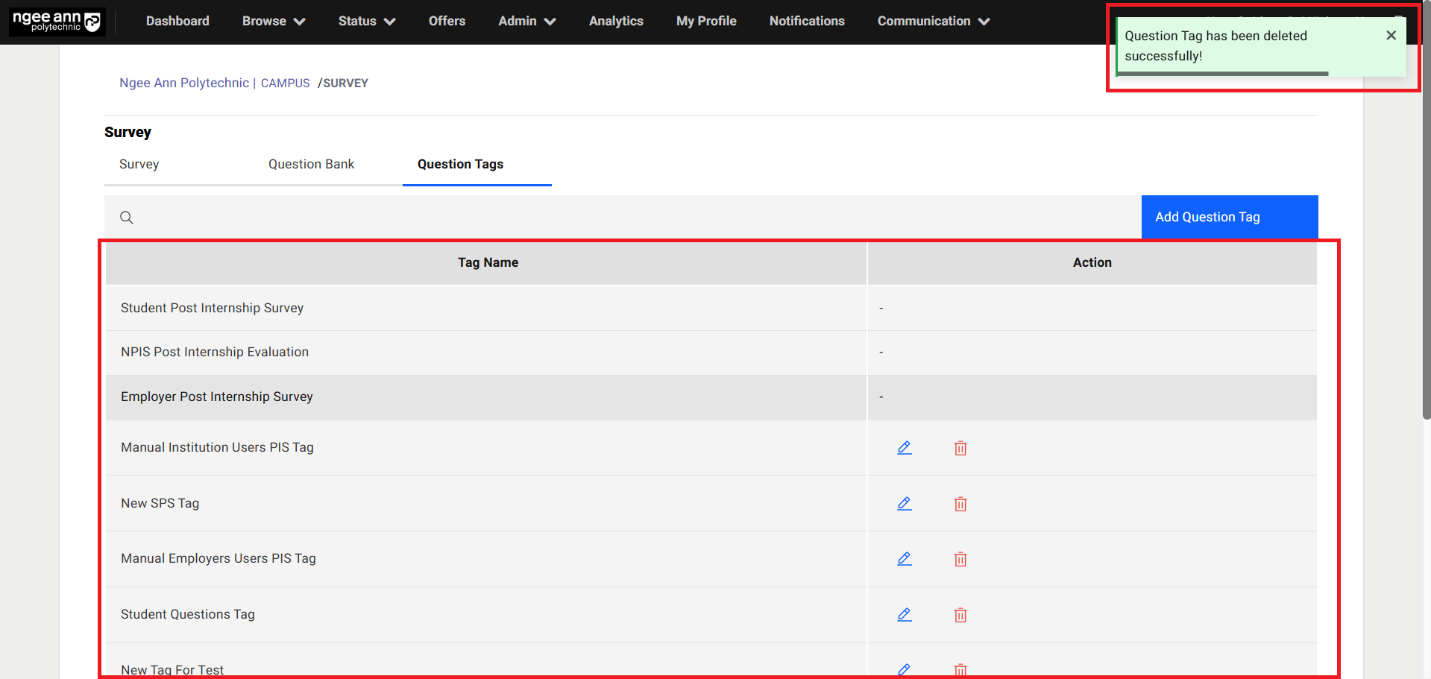
Survey Setup Page:
Step 1:
- Click the 'Survey Name' link (under the 'Surveys' column in the table) located in the 'Survey' tab on the survey page.
- Navigate to respective survey "Survey Setup" page
- See the Survey details in the box
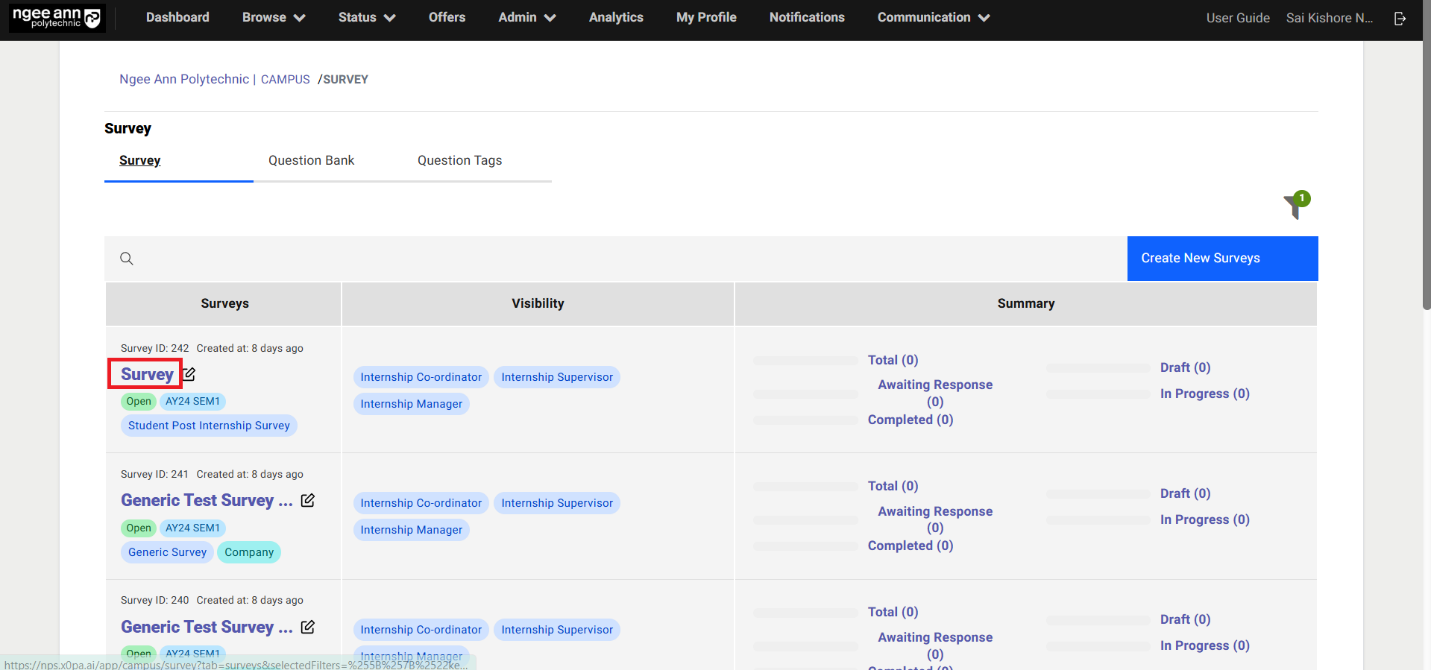

Edit Survey Details from Survey Setup Page (Before Survey Published):
Step 1:
- Click on the "Edit (Pencil)" icon.
- "Edit Survey" page get open with saved survey details persisted into the fields
- Update the details into the fields
- Click on the "Submit" button to save the updated changes for the survey
- Updated changes reflected in the box and successes message will be shown.

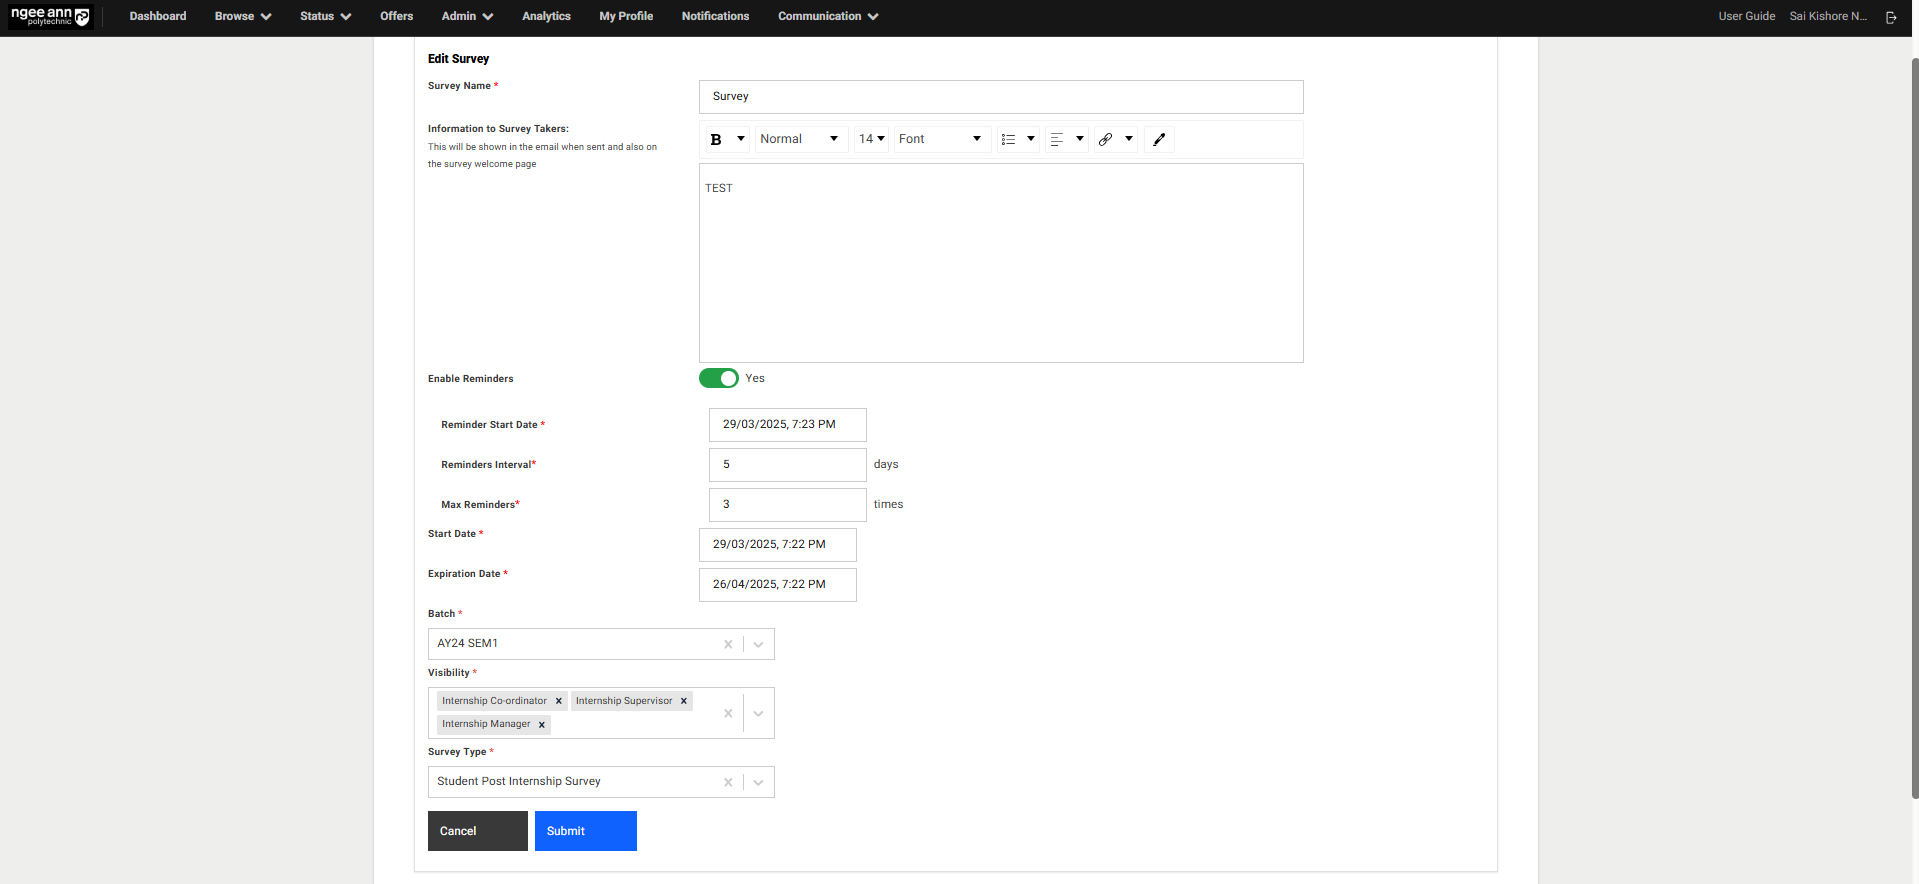
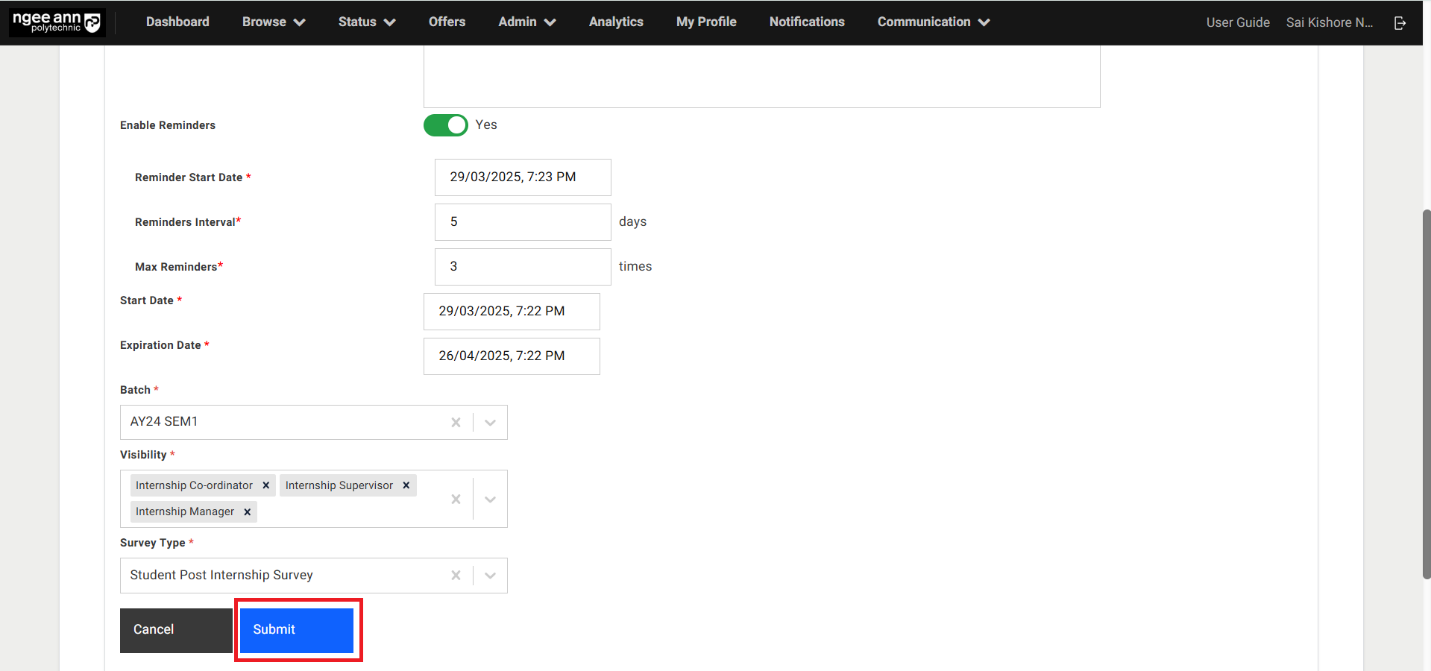
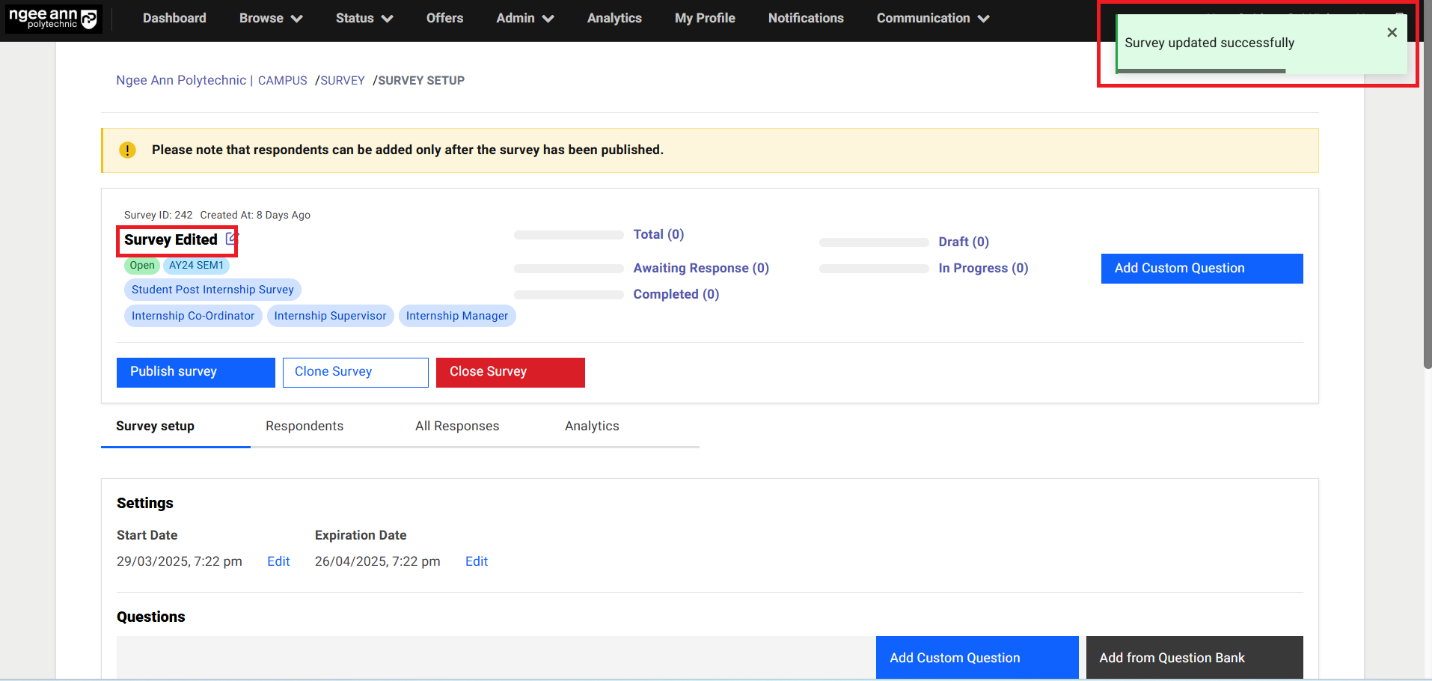
Survey Setup Section tab:
- Click on the "Survey Setup" section tab from "Survey Setup" page
- Under "Survey Setup" section tab "Settings & Questions" section are shown.
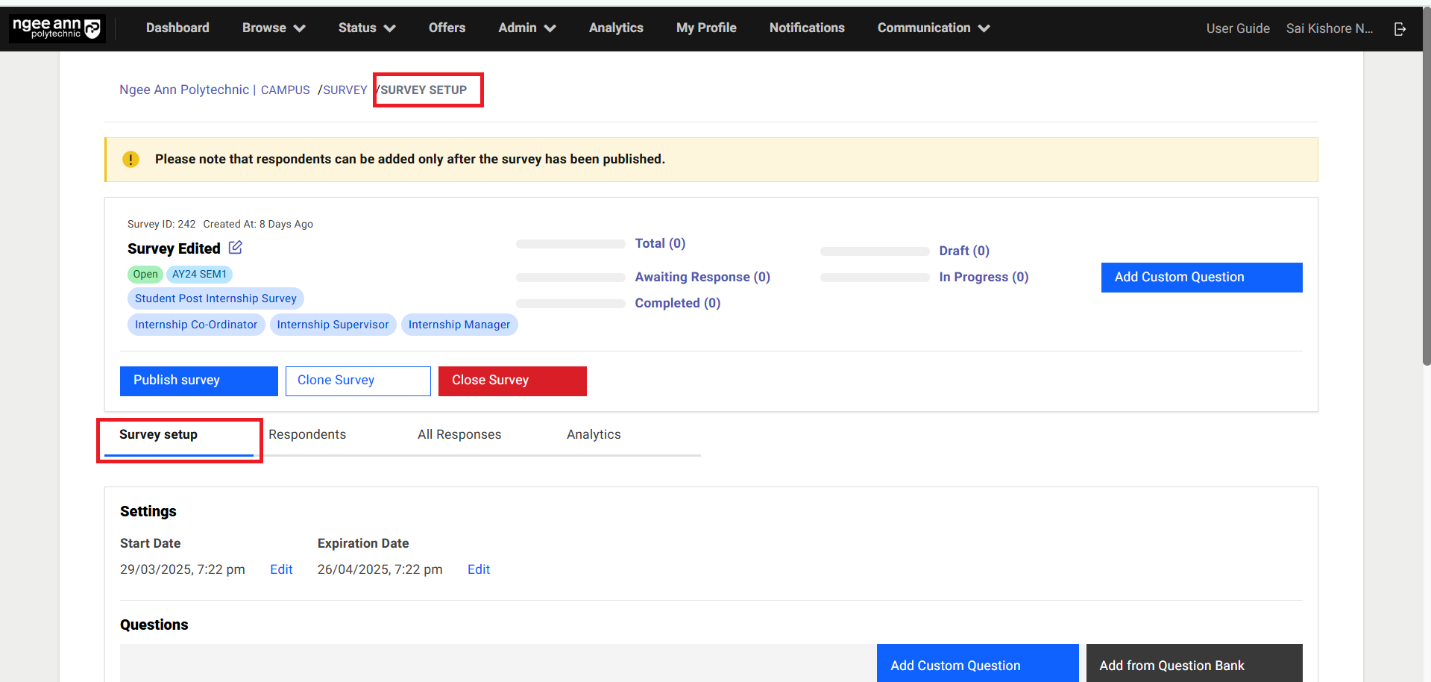
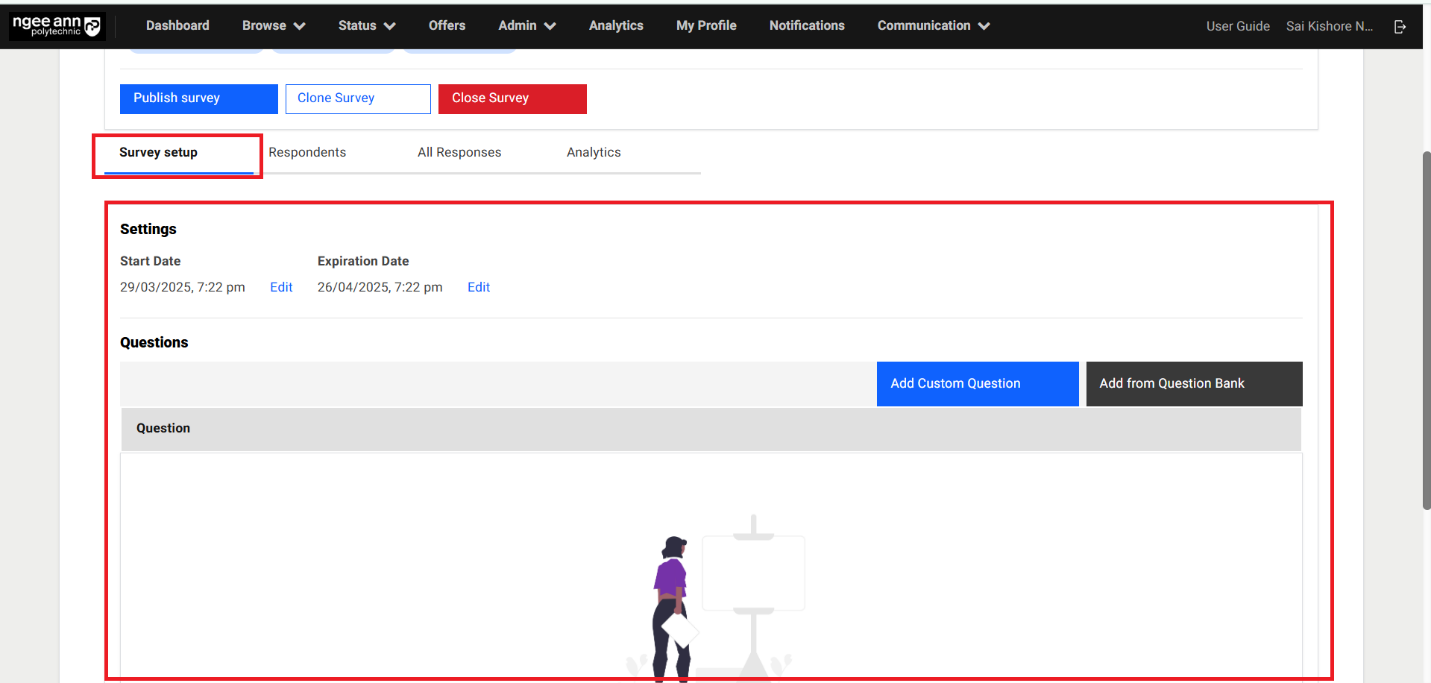
Settings Section:
Step 1:
- See respective survey saved Start & Expiration Date fields are shown
- Click on the Edit button
- "Start Date & Expiration Date" popup get open
- Update the Date & Time from the fields
- Click on "Submit" button to save the dates and successes message will be shown
- Updated dates is shown under "Start & Expiration Date" field under "Settings" section
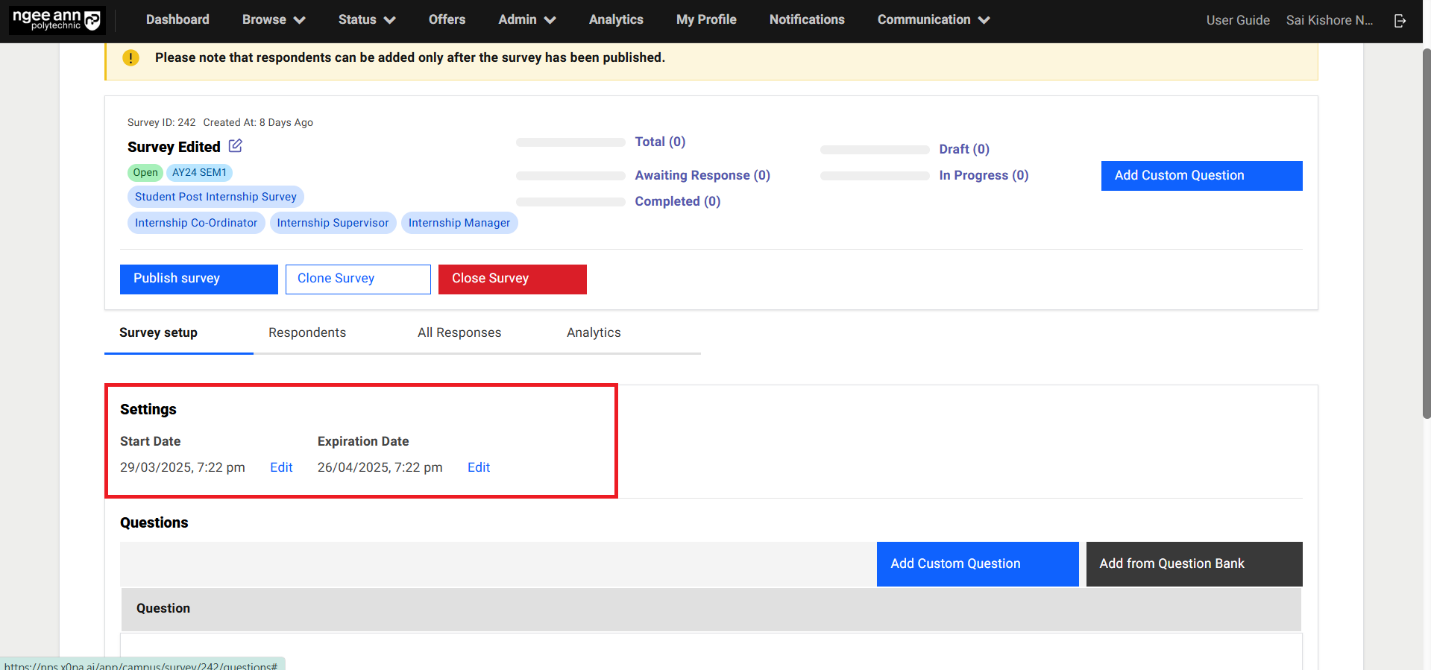
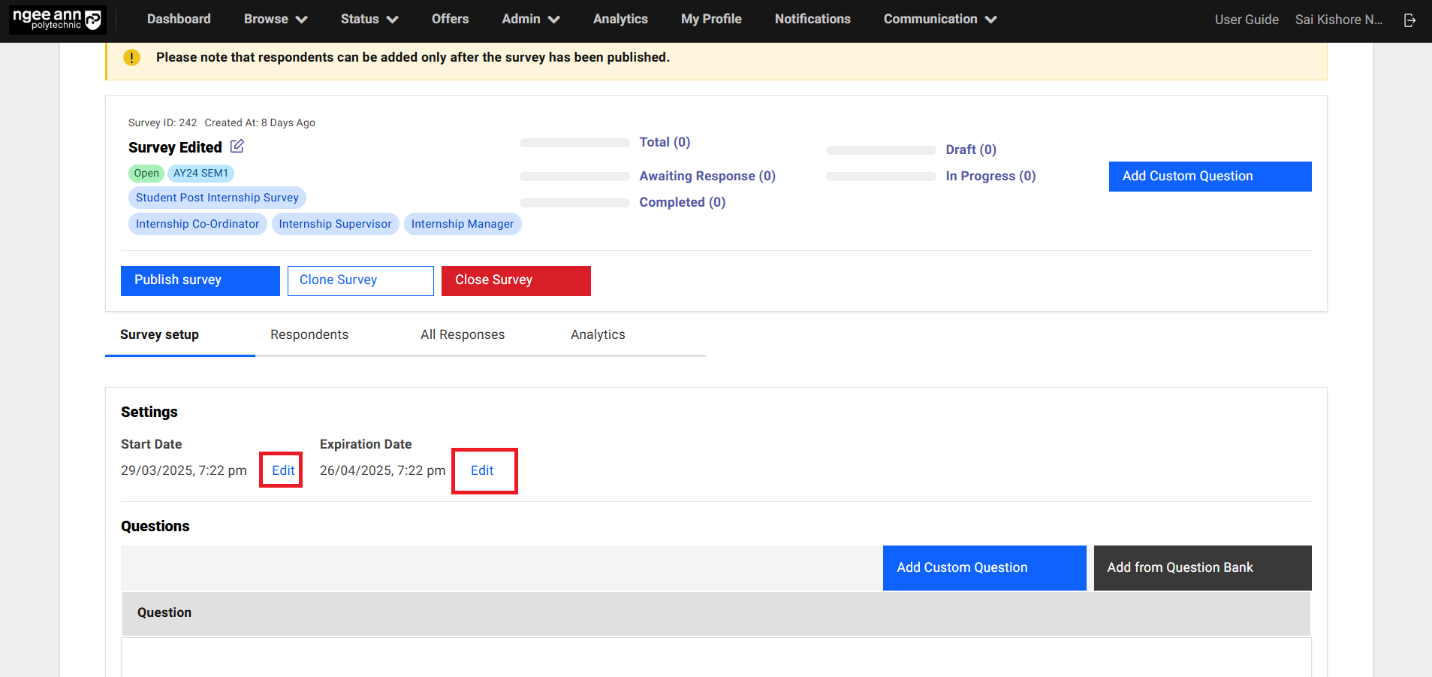
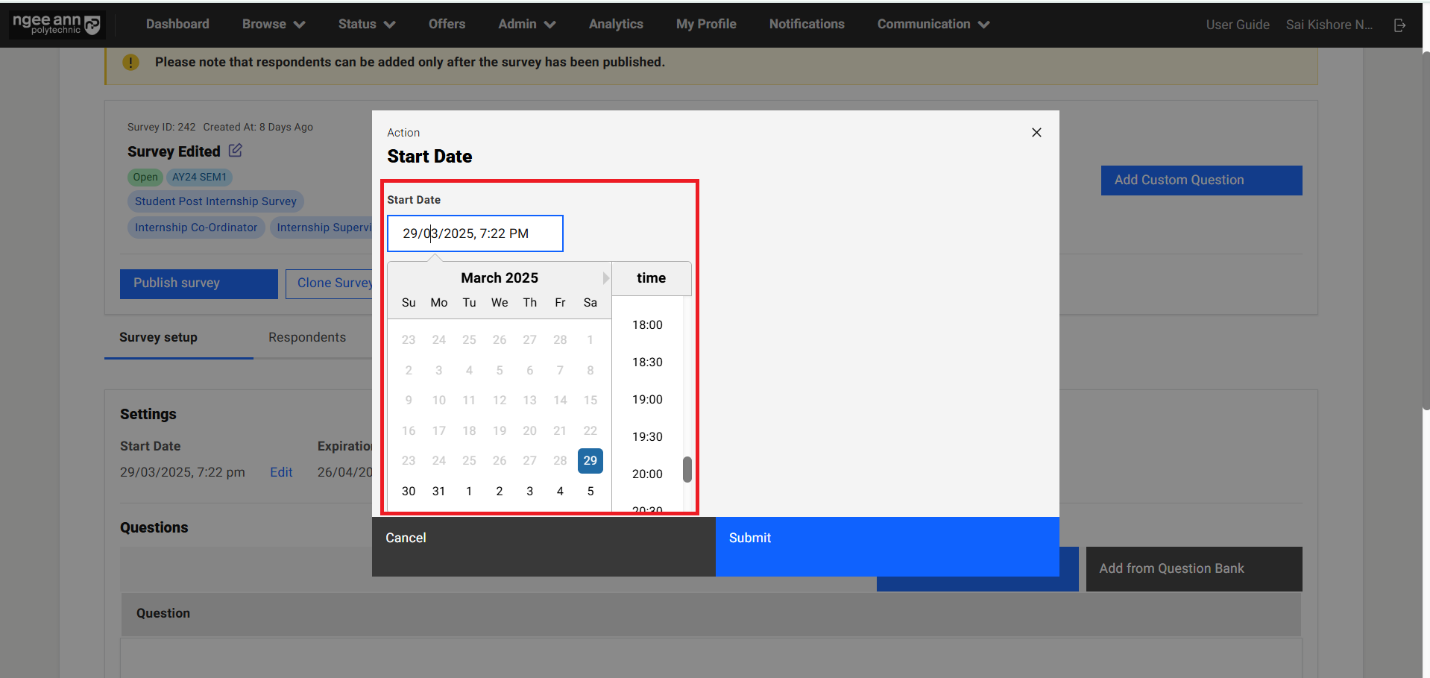

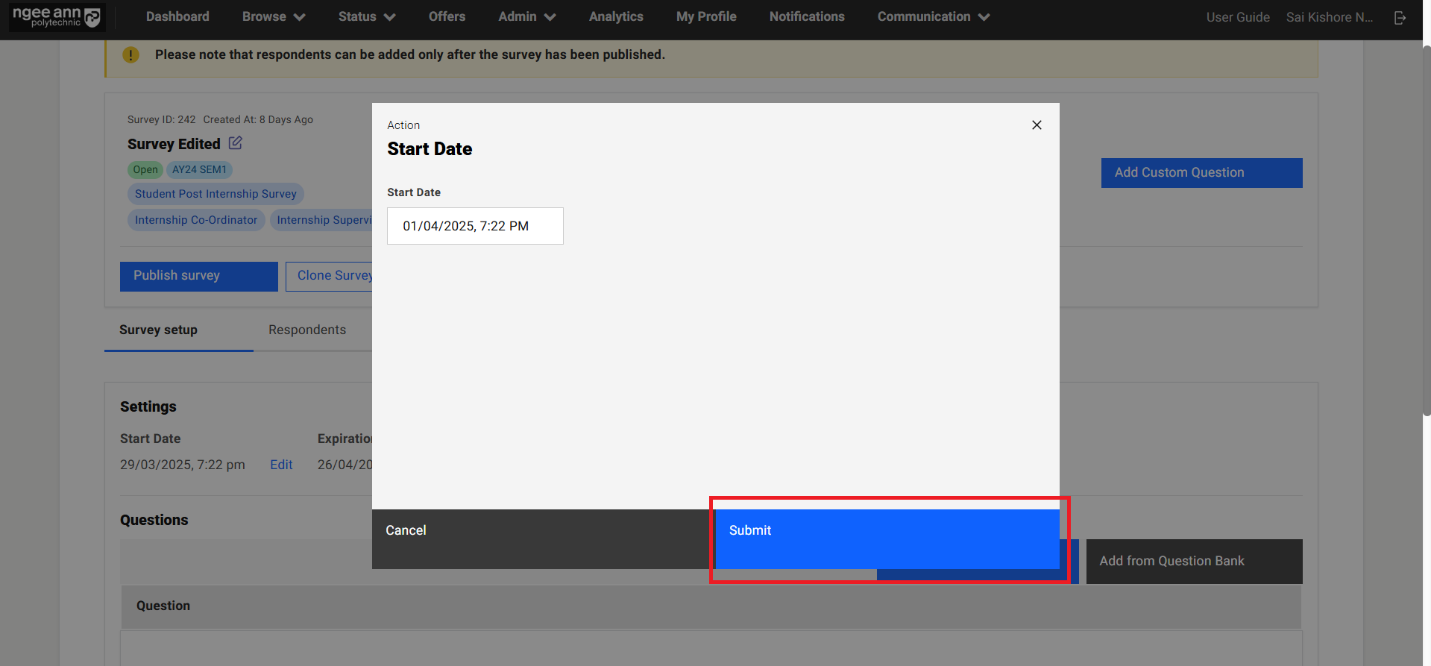
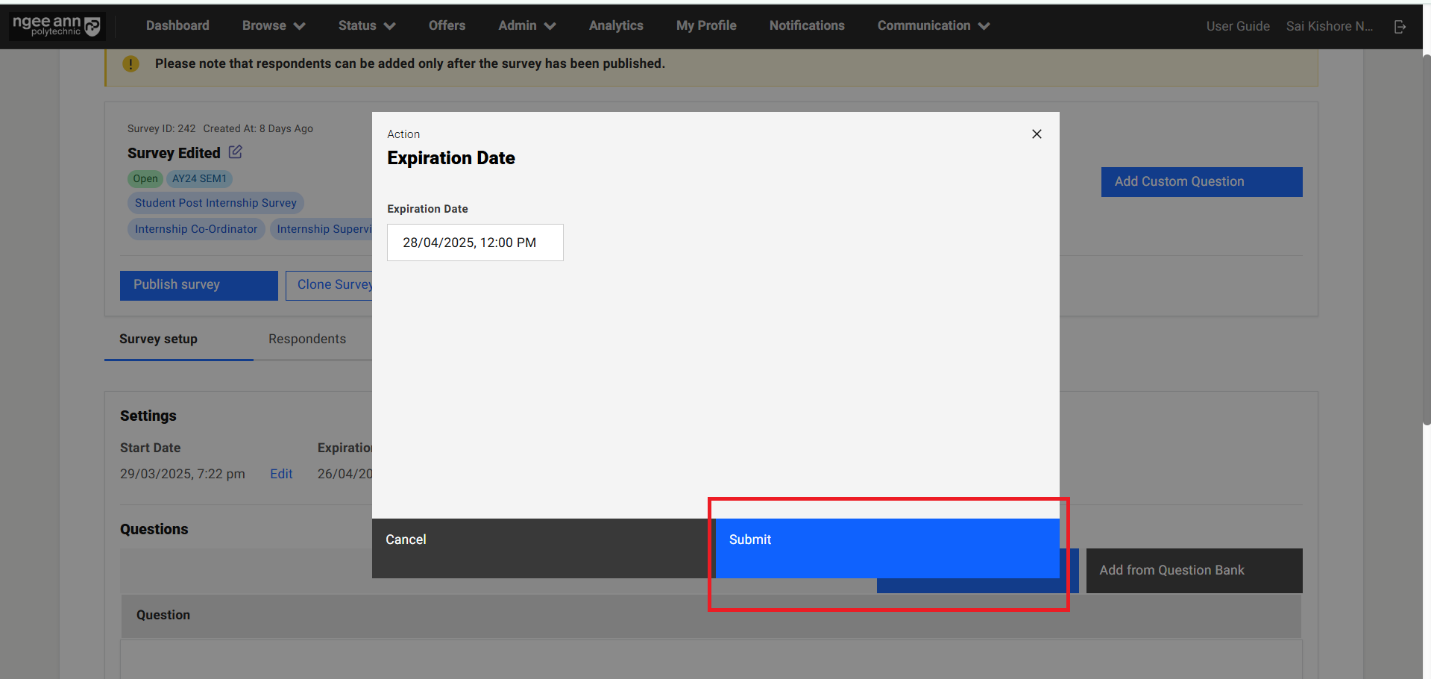
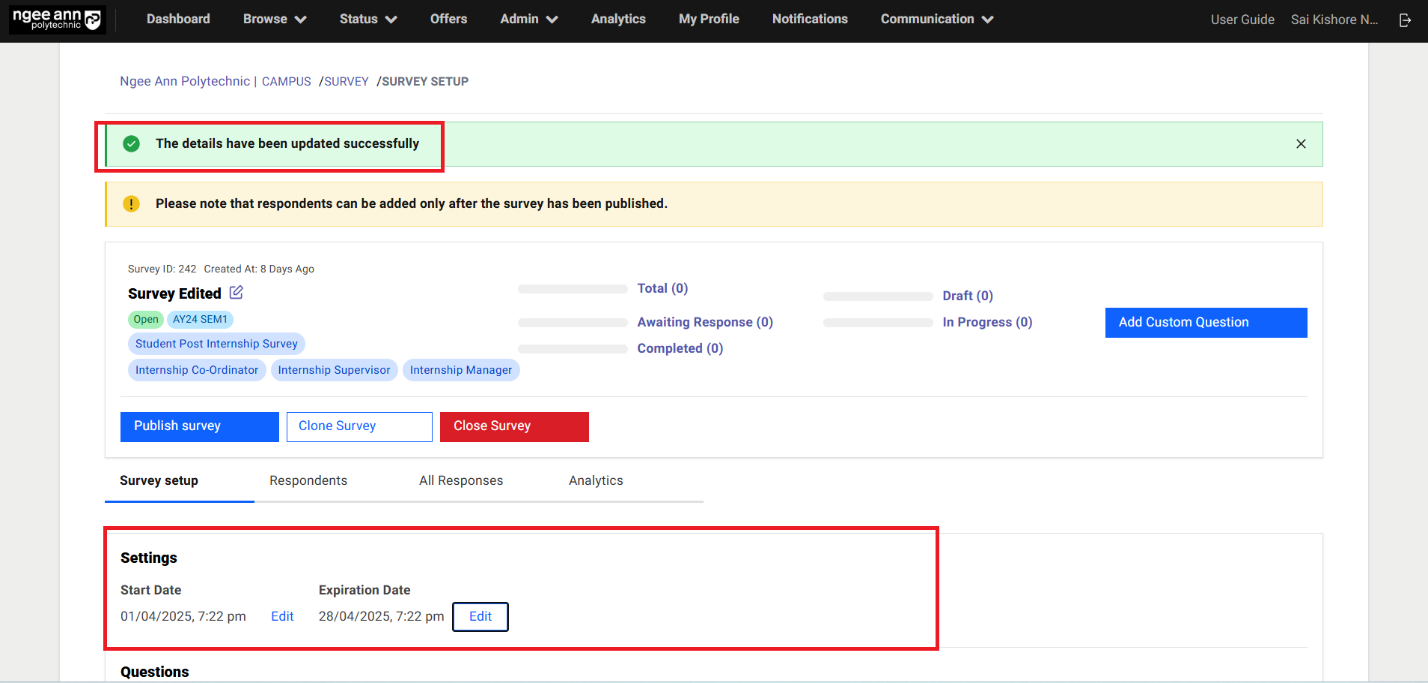
Questions Section:
Step 1:
- See "Questions" section below "Settings" section under "Survey Setup" section tab
- See "Add Custom Question & Add from Question Bank" buttons will be shown in the "Questions" section
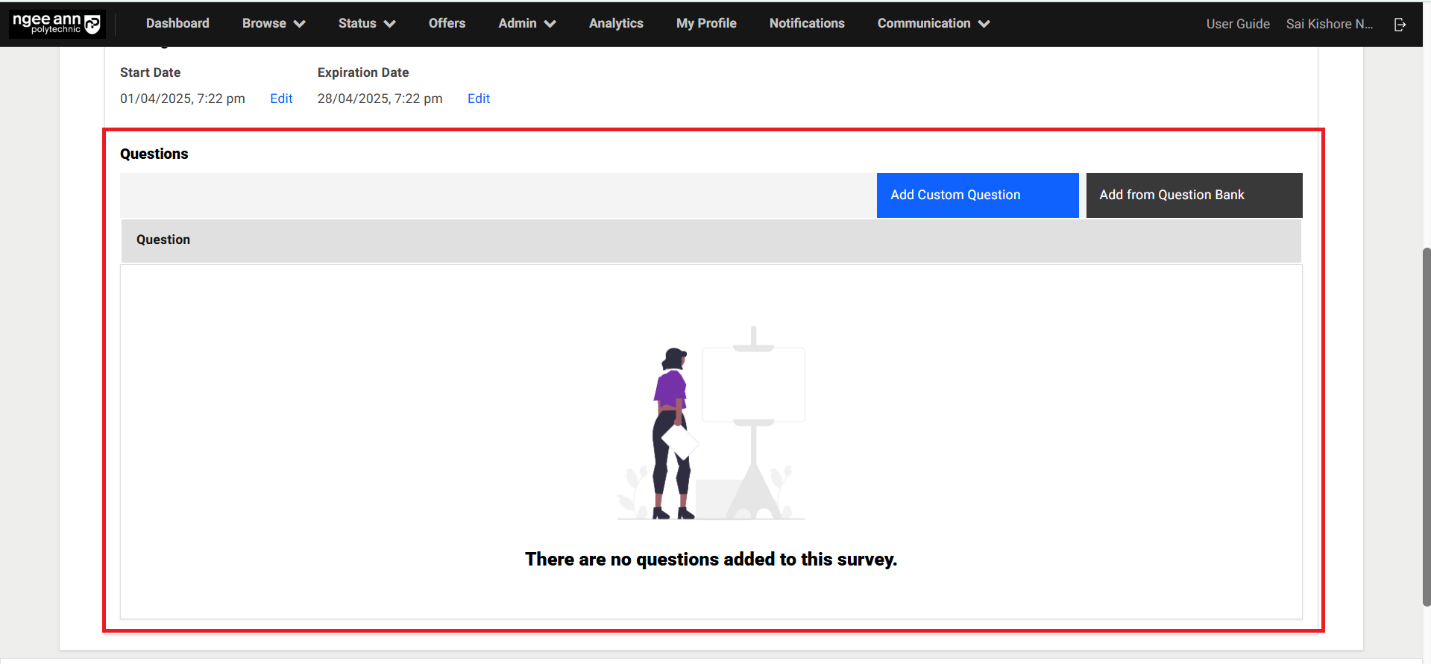
Add Custom Question:
Step 1:
- Click on the "Add Custom Question" button
- Add Question popup get open
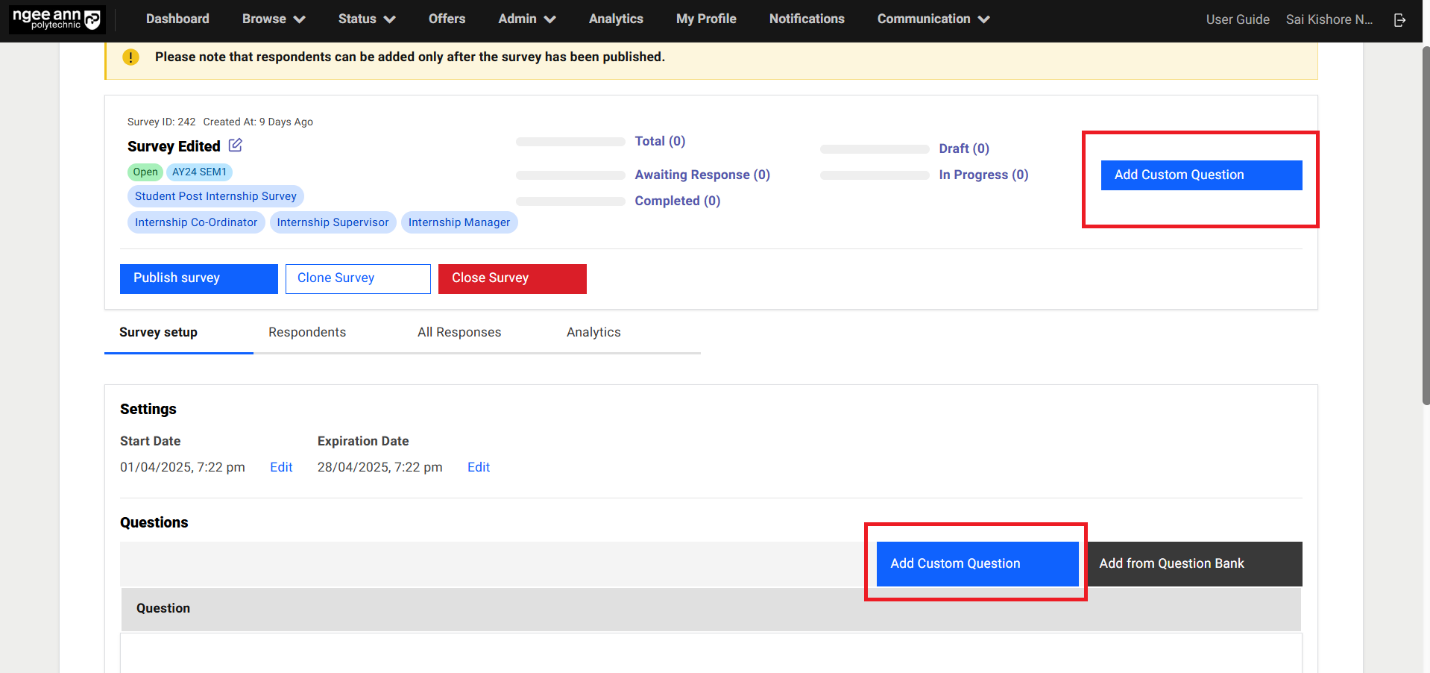
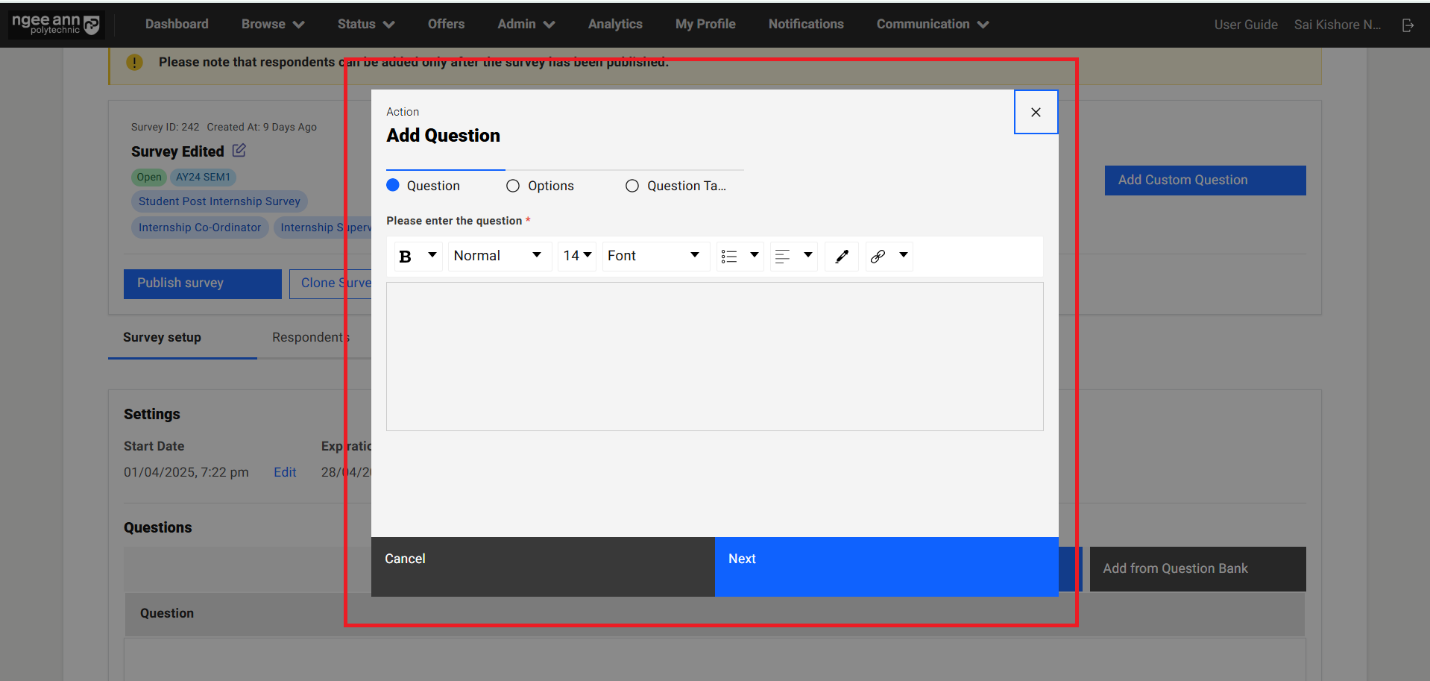
Step 2:
- Enter question name into the "Please enter the question" text editor field under "Question" section tab in the popup
- Click on the "Next" button
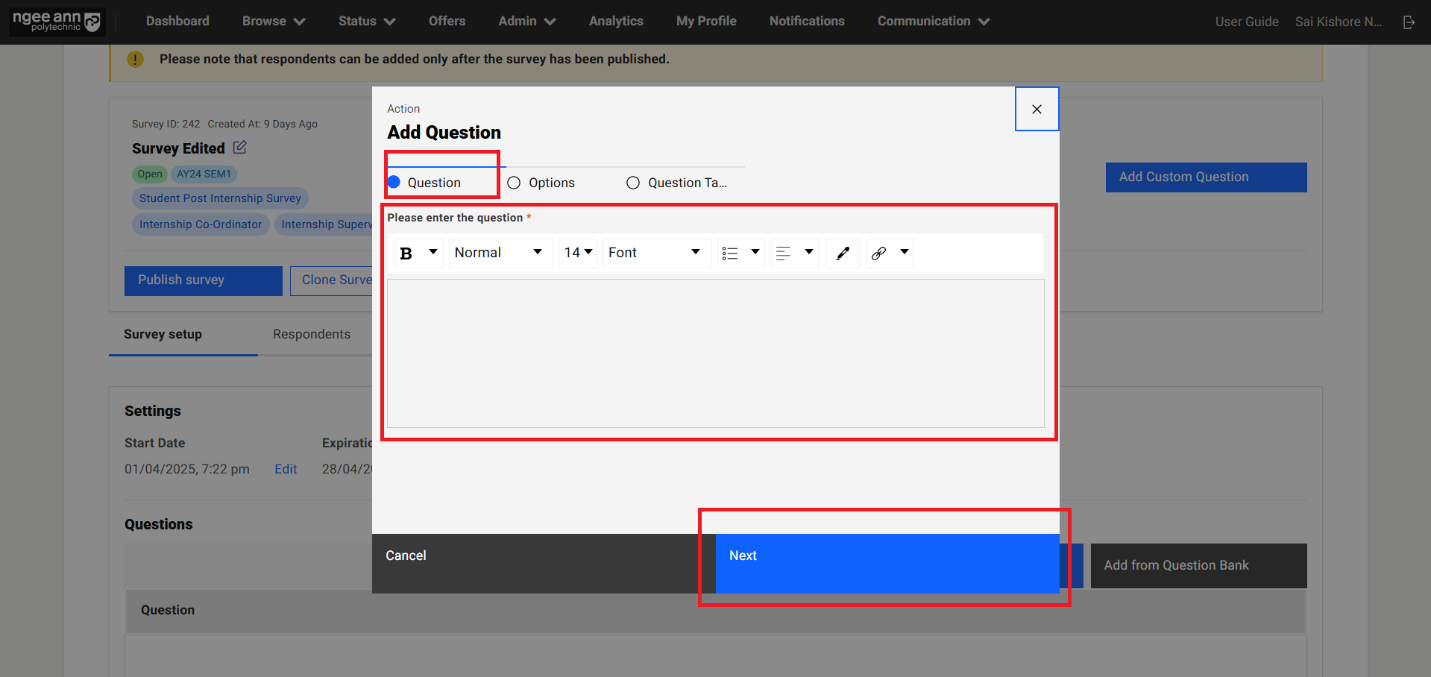
Step 3:
- Navigate to "Options" section tab in the "Add Question" popup
- Select answer type for respective question (Essay/Multiple Choice Question (MCQ)/Rating)
- Enter options data for the selected answer type
- Click on the "Next" button
- Click on the "Back" button to navigate back to "Question" section tab in the "Add Question" popup.
Note:
- Essay Question:
- When an "Essay" question is added to a survey, respondents will see a text box to type their answer.
- The response must adhere to the specified word limits:
- Minimum words required: Ensures the answer meets a minimum length.
- Maximum words allowed: Restricts the answer from exceeding the set limit.
- Multiple Choice Question (MCQ)
- If an "MCQ" is included, respondents must select one option from the provided choices.
- If the question includes the "Show Others Option" setting:
- Respondents selecting "Others" will see an additional text box to specify their answer.
- Rating Question
- A "Rating" question requires respondents to choose one option from the given scale.
- The selected option's score will be recorded and visible to institution administrators for evaluation.
- Click on the "+ Add Message" button, then Option text field and score number fields will be shown and "Delete (Trash)" button will be shown
- Click on the "Delete (Trash)" button for the option then respective option will get deleted from the popup
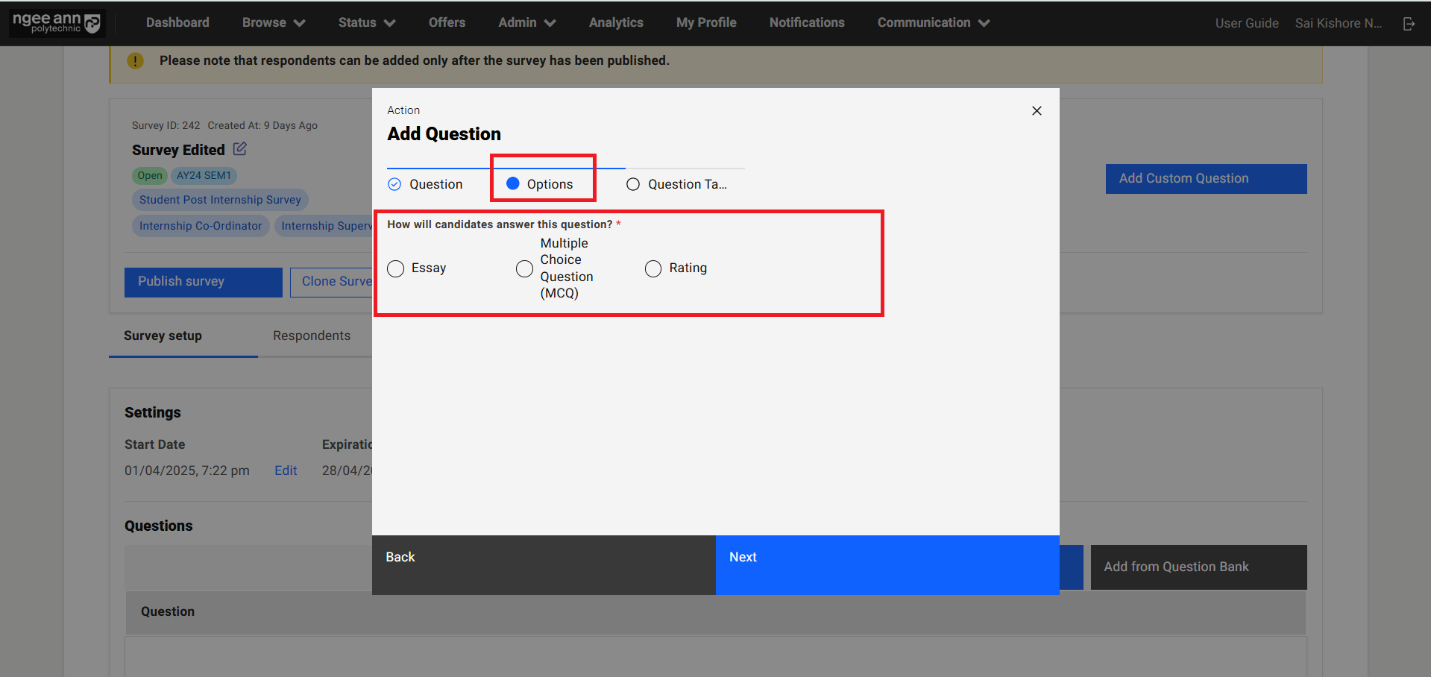
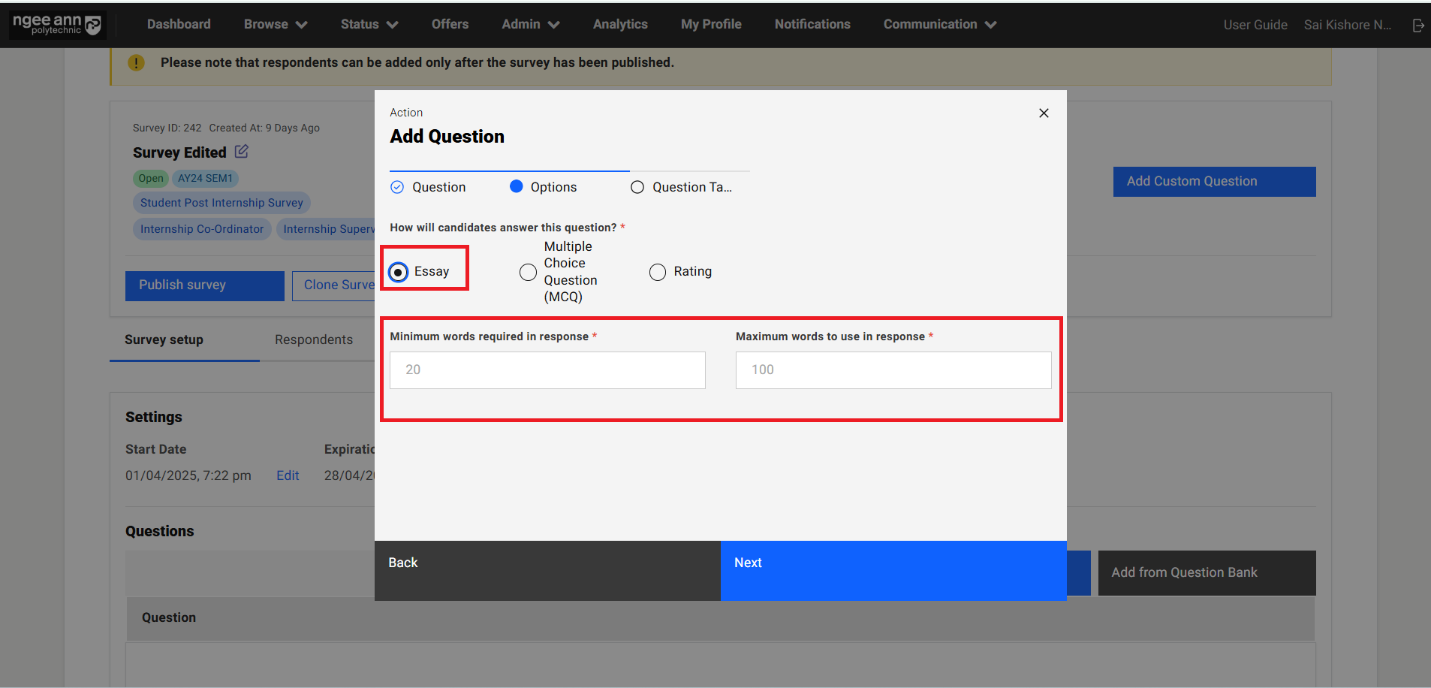
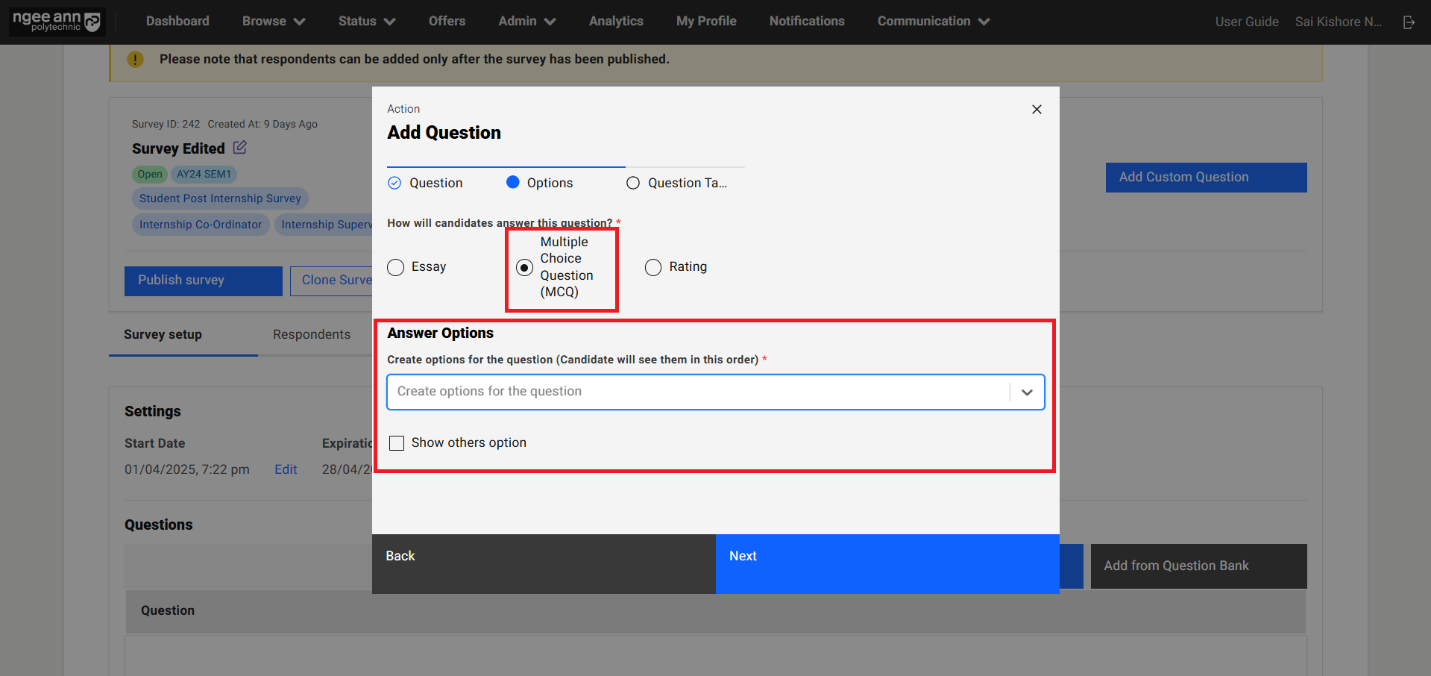
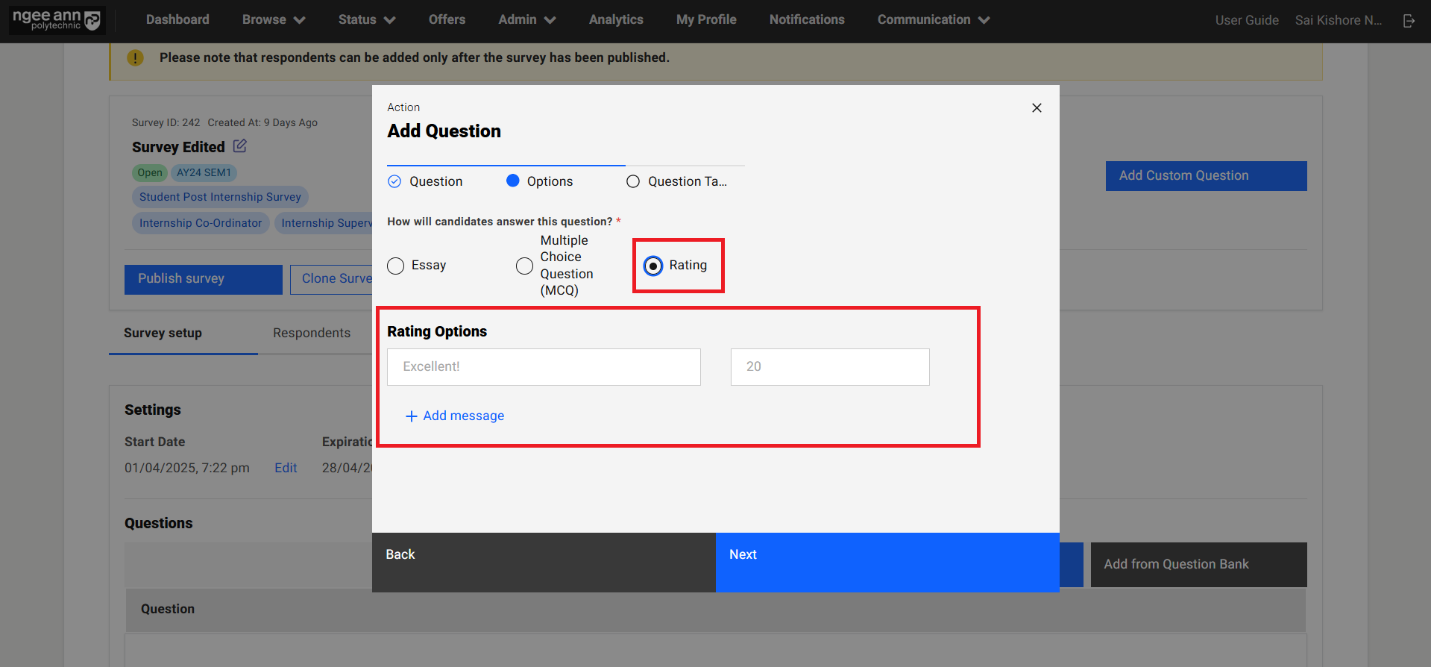
Step 4:
- Navigate to "Question Tags" section tab in the "Add Question" popup
- Click on the "Question Tag(s)" dropdown field
- Select pre-saved list of tags as options from the dropdown field
- Selected tag shown in the dropdown field
- Click on the "Submit" button
- Saved question will be shown in the "Questions" section under "Survey Setup" section tab and also successes message will be shown
- Click on the "Back" button navigate to "Options" section tab in the popup
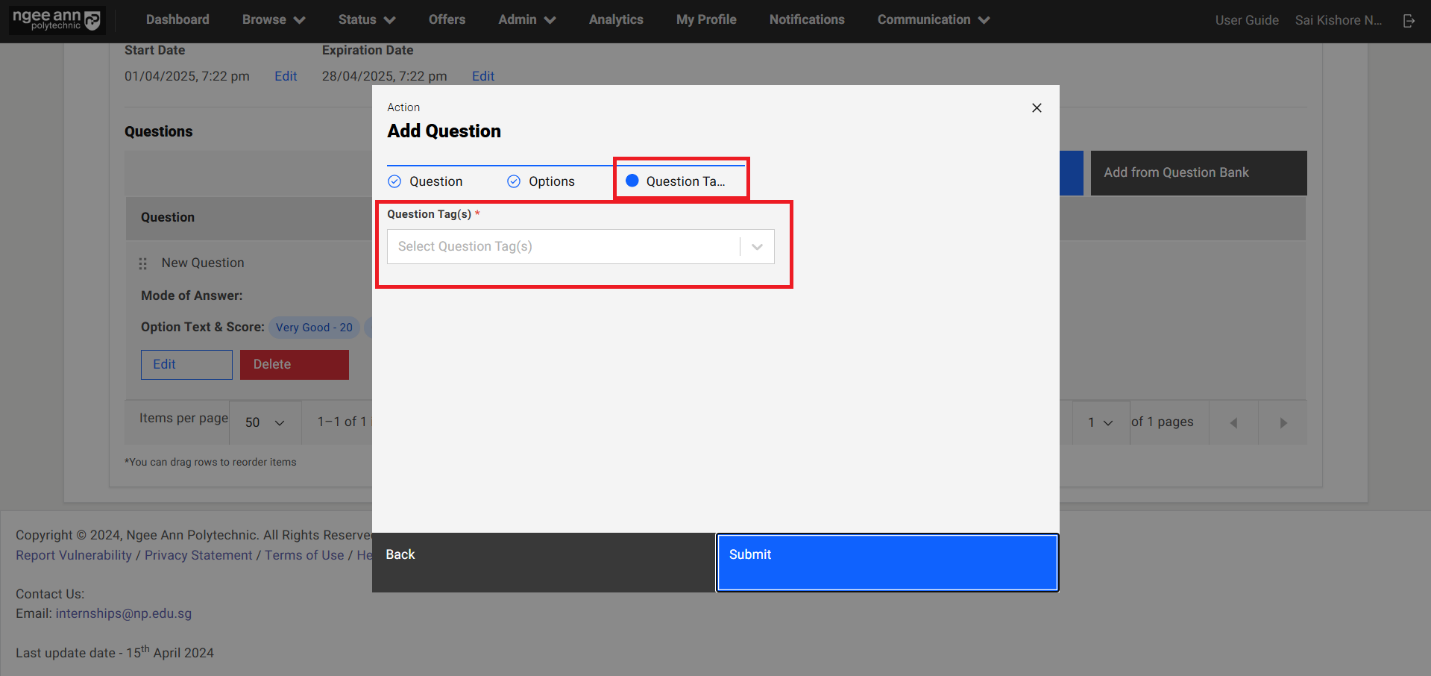
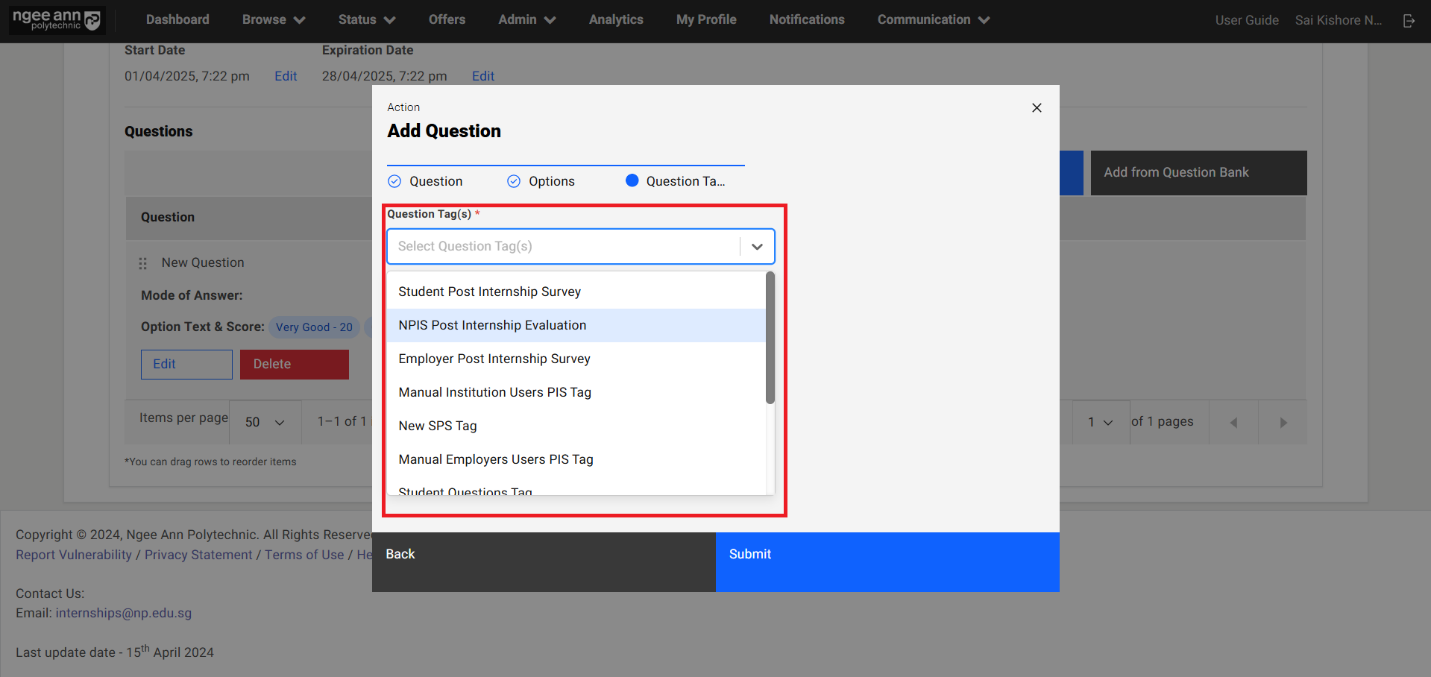
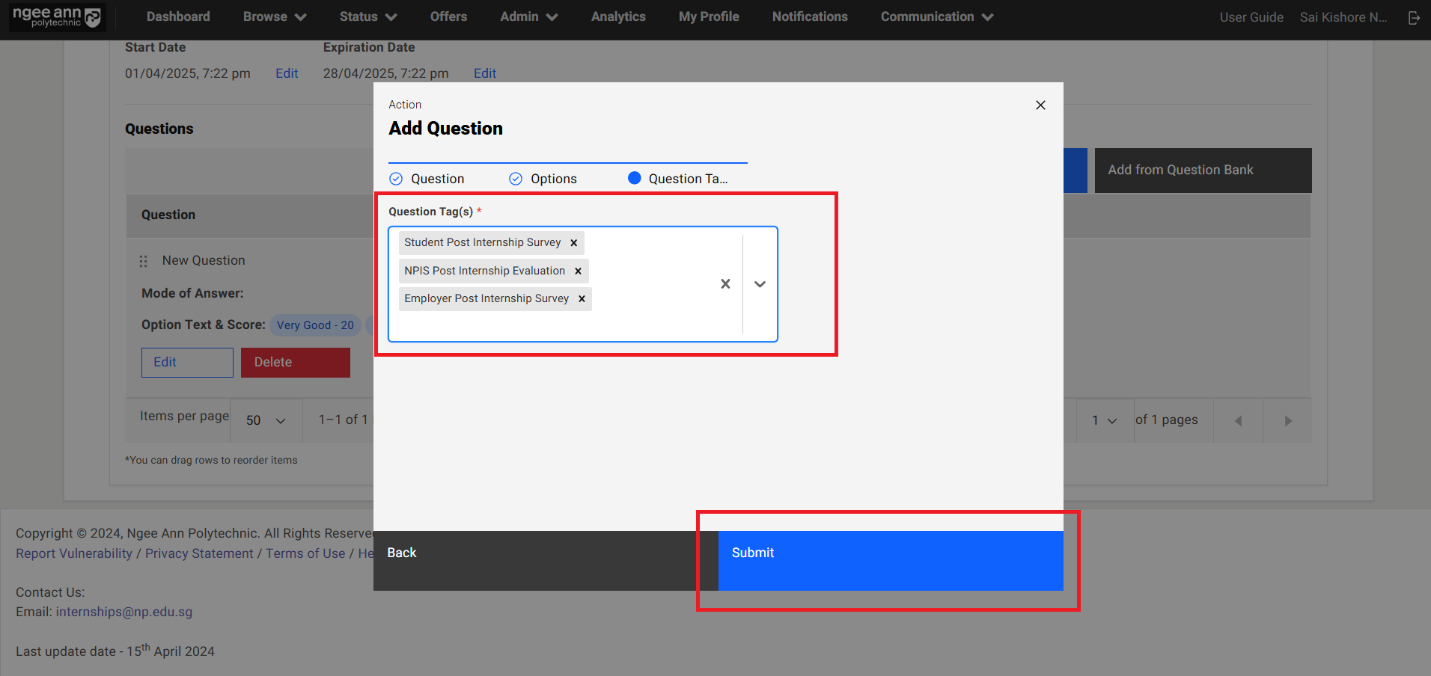
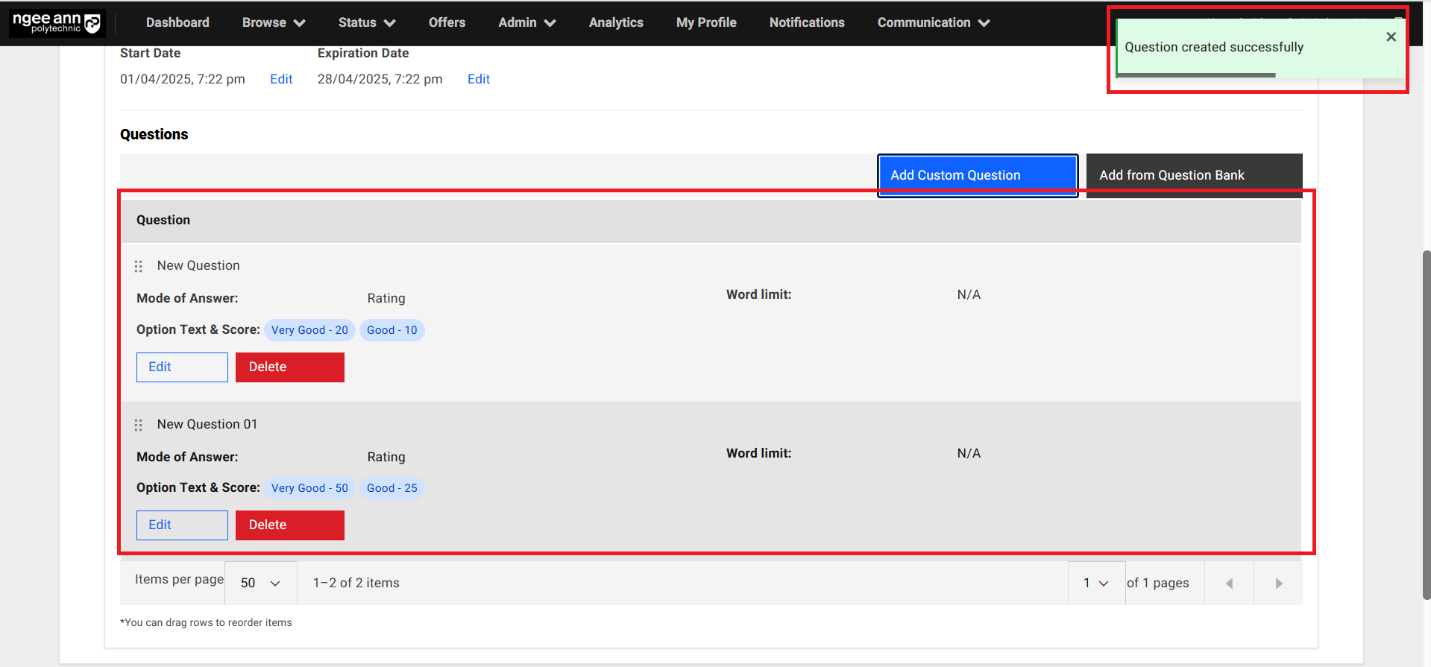
Edit Questions:
Step 1:
- Click on the "Edit" button inside the question card below "Questions" section
- "Edit Question" popup get open with previous saved question details persisted into the fields in the popup.
- Update the details in the "Edit Question" popup
- Click on the "Submit" button to save the changes
- Make sure updated changes will get reflected in the table for respective question
Note: Make sure while edit the question user will not able to change option category for respective question.
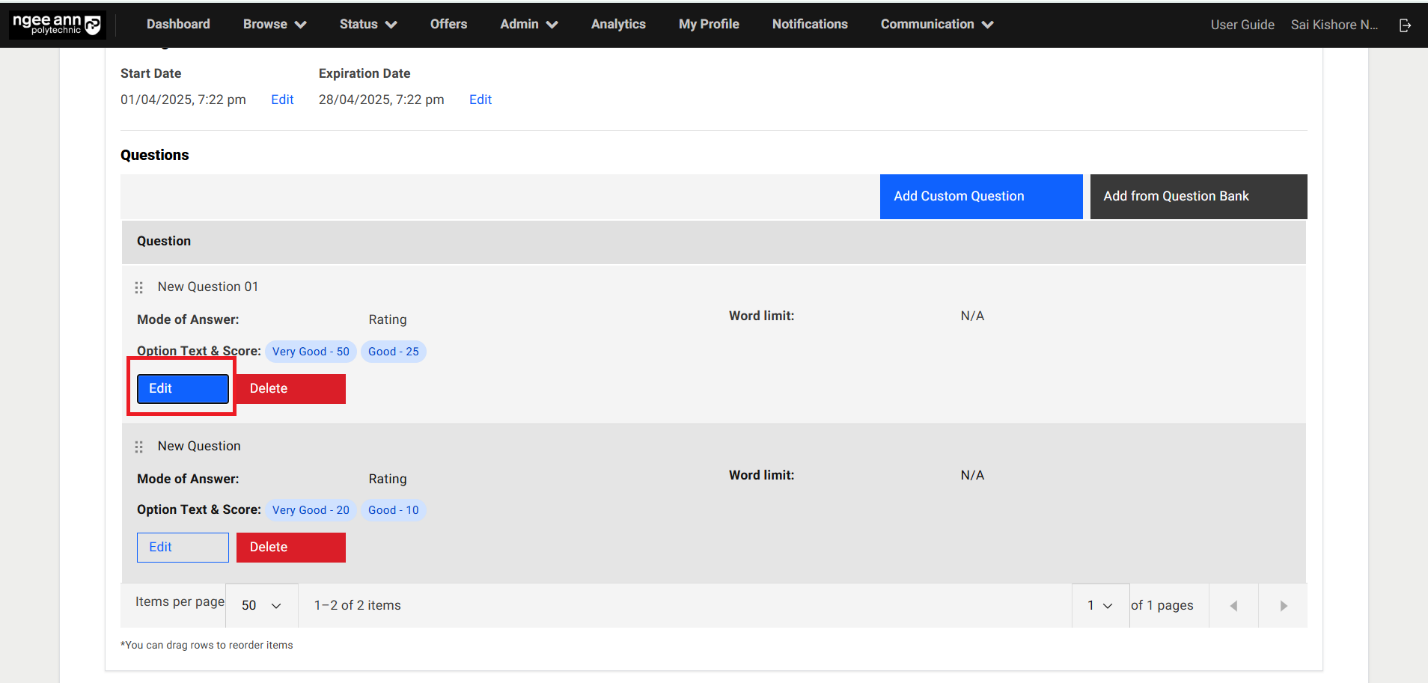

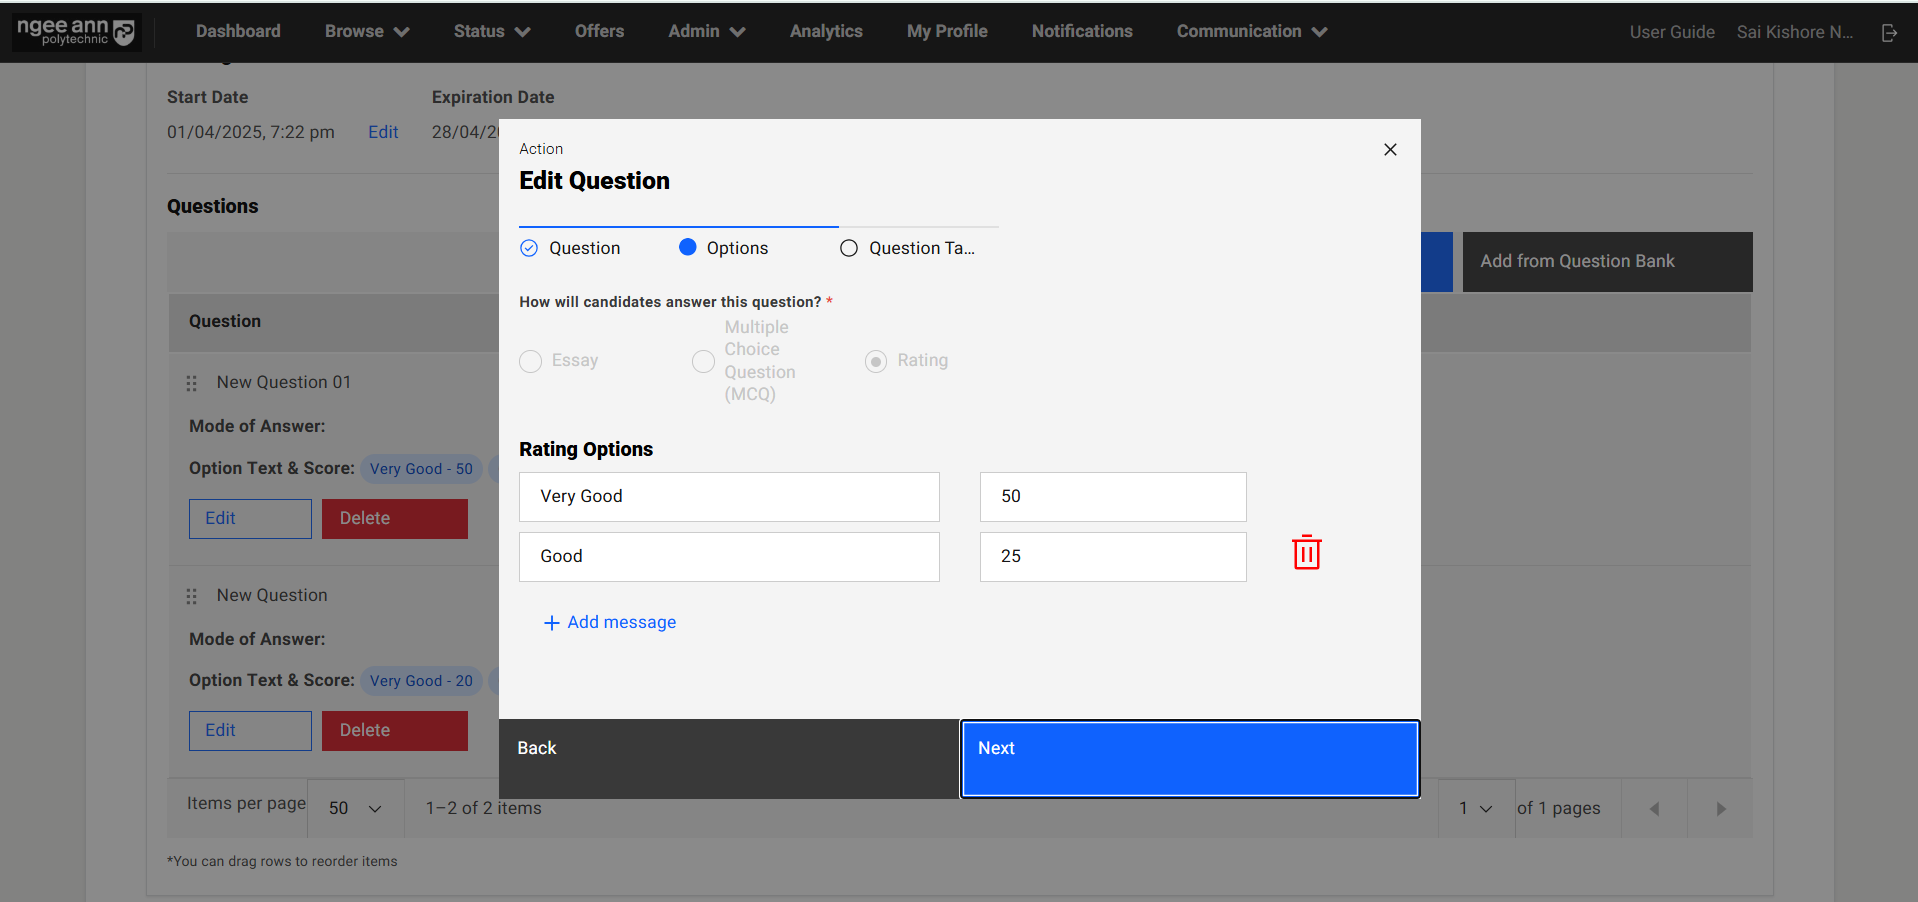
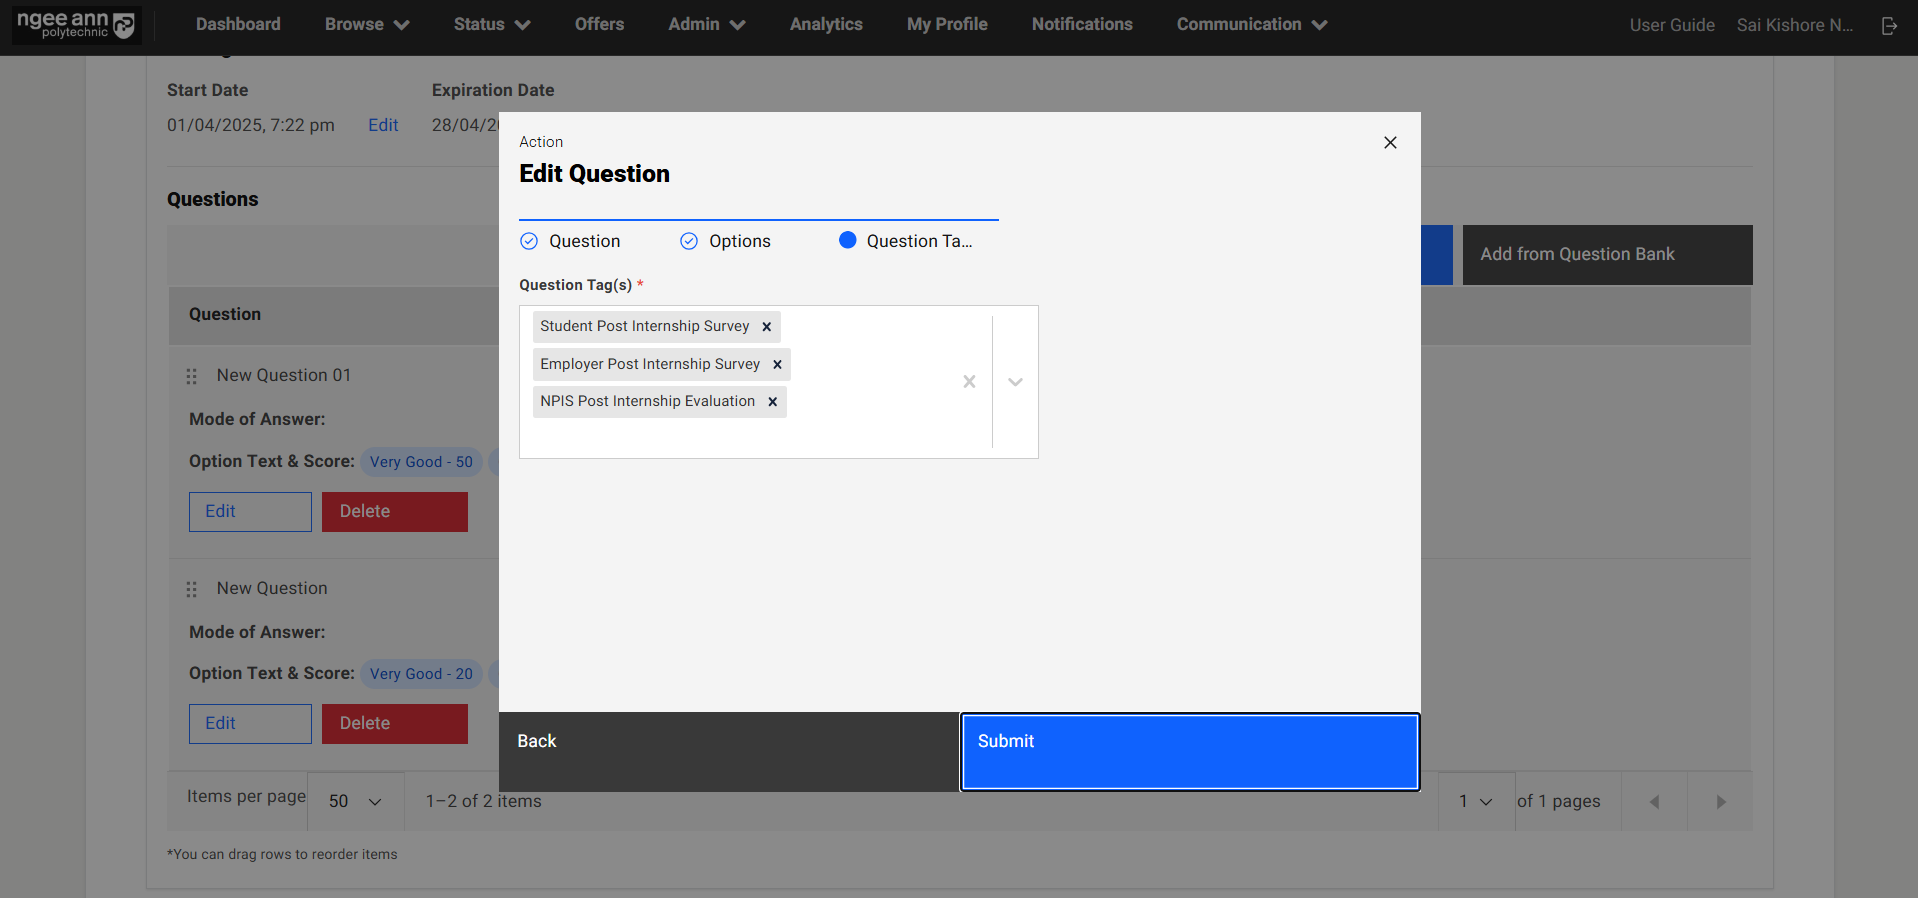

Delete Question:
Step 1:
- Click on the "Delete" button beside the "Edit" button in the question card.
- "Delete Question" confirmation popup gets open
- Click on "Submit" button from the popup
- Respective question card will get deleted from the table successfully and successes message will be shown.
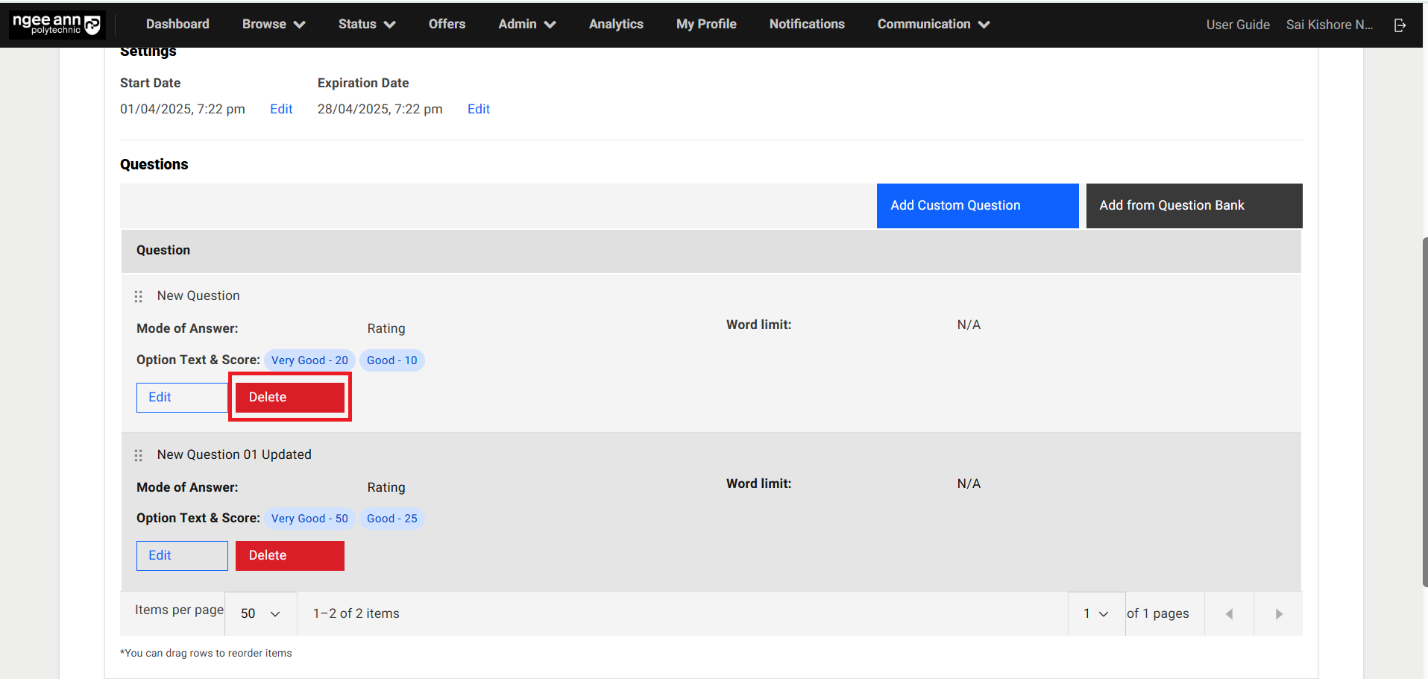

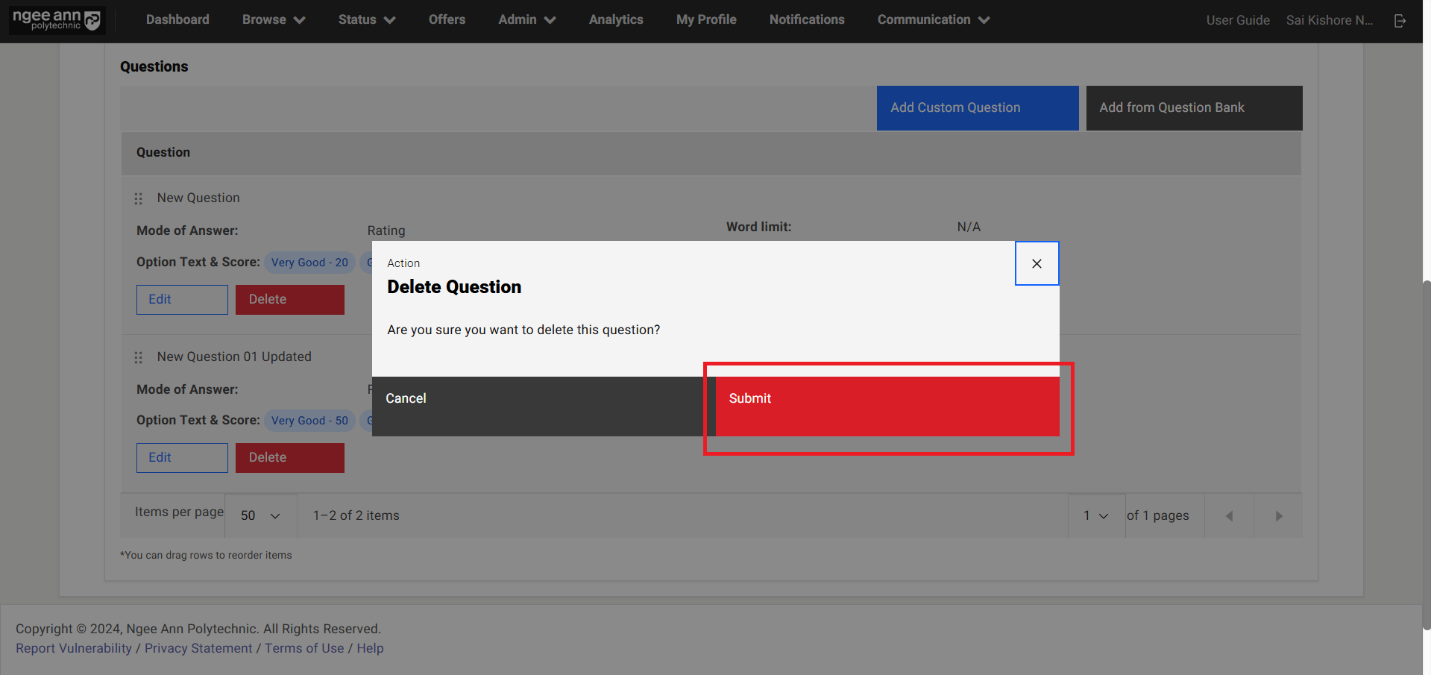
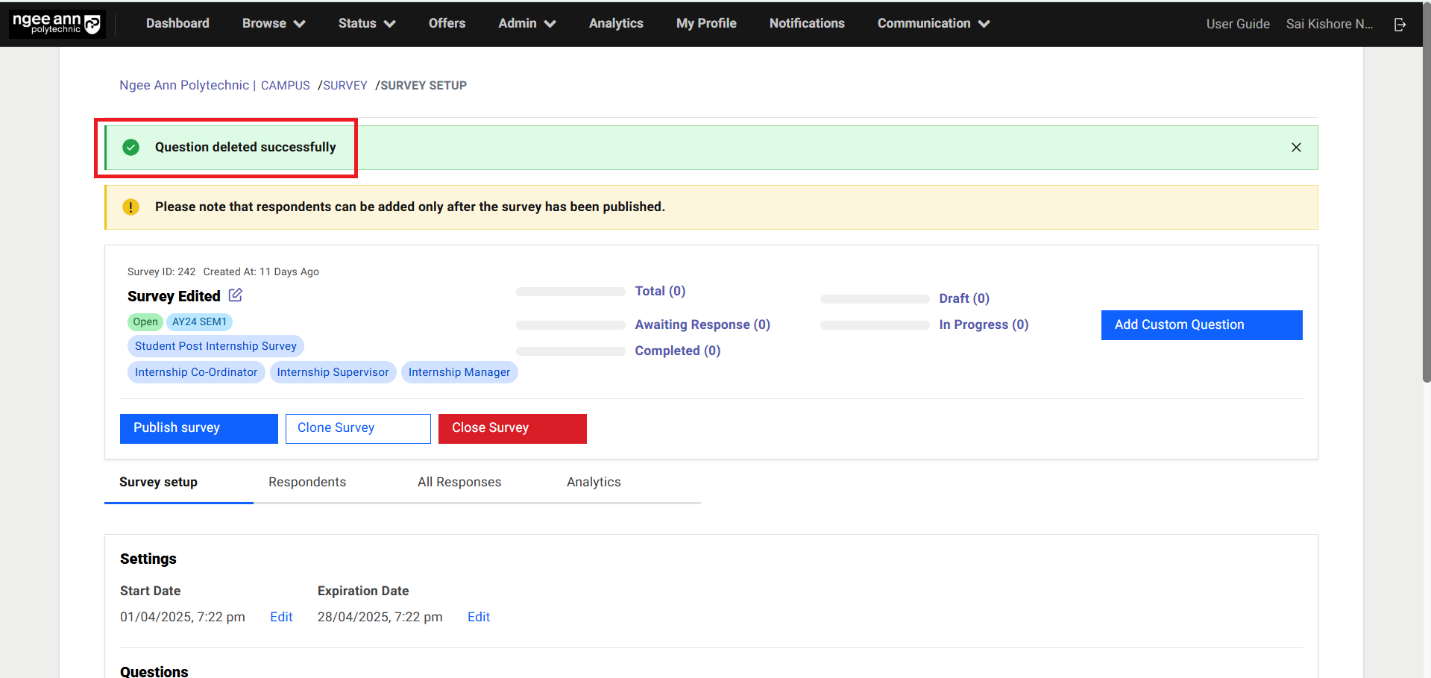
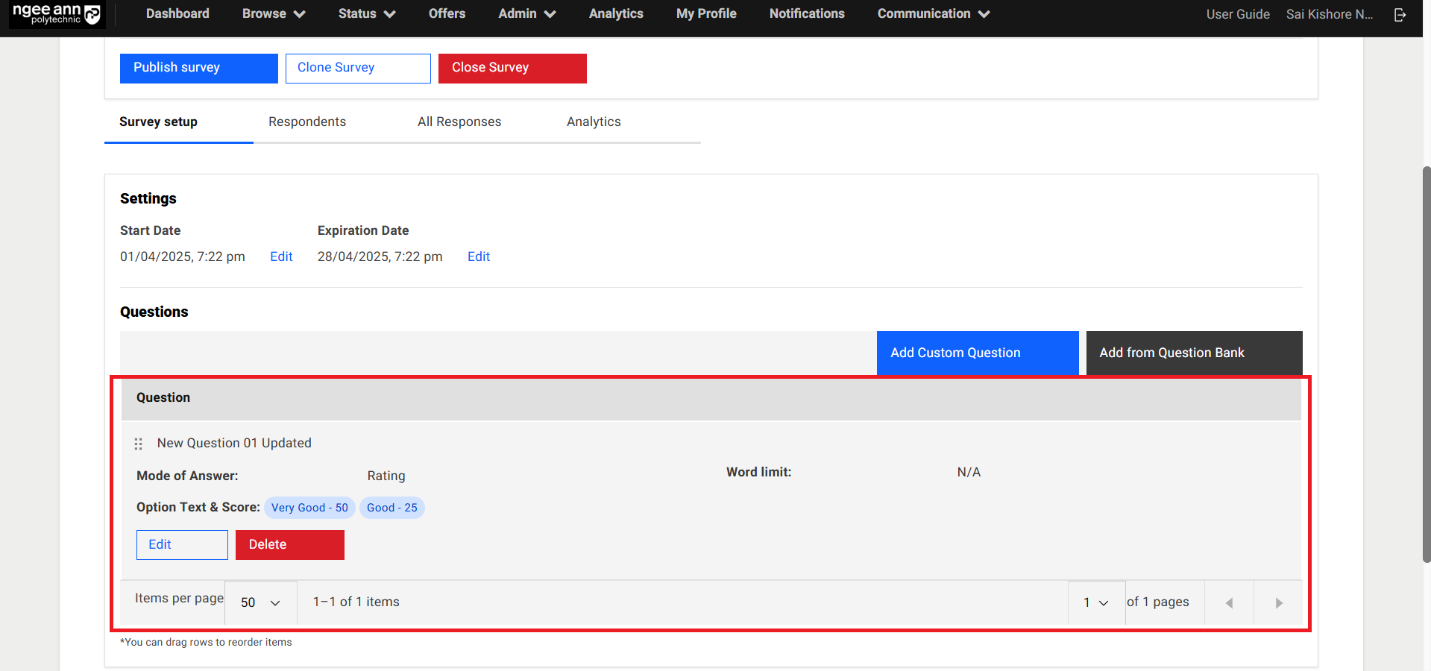
Add From Question Bank:
Step 1:
- Click on the "Add from Question Bank" button
- "Add Question from Question Bank" popup get open
- See the table will have list of saved questions
- Apply the "Question Type &Question Tags" filters from filters section.
- Click on the "Clear" button from filter section. Make sure applied filters get removed from the filter
- Select questions from the table
- Click on the "Add" list option button
- "Add Question from Question Bank" popup get closed and navigate back to "Survey Setup" page.
- See saved questions added to the survey and respective questions shown in the "Questions" section under "Survey Setup" section tab.

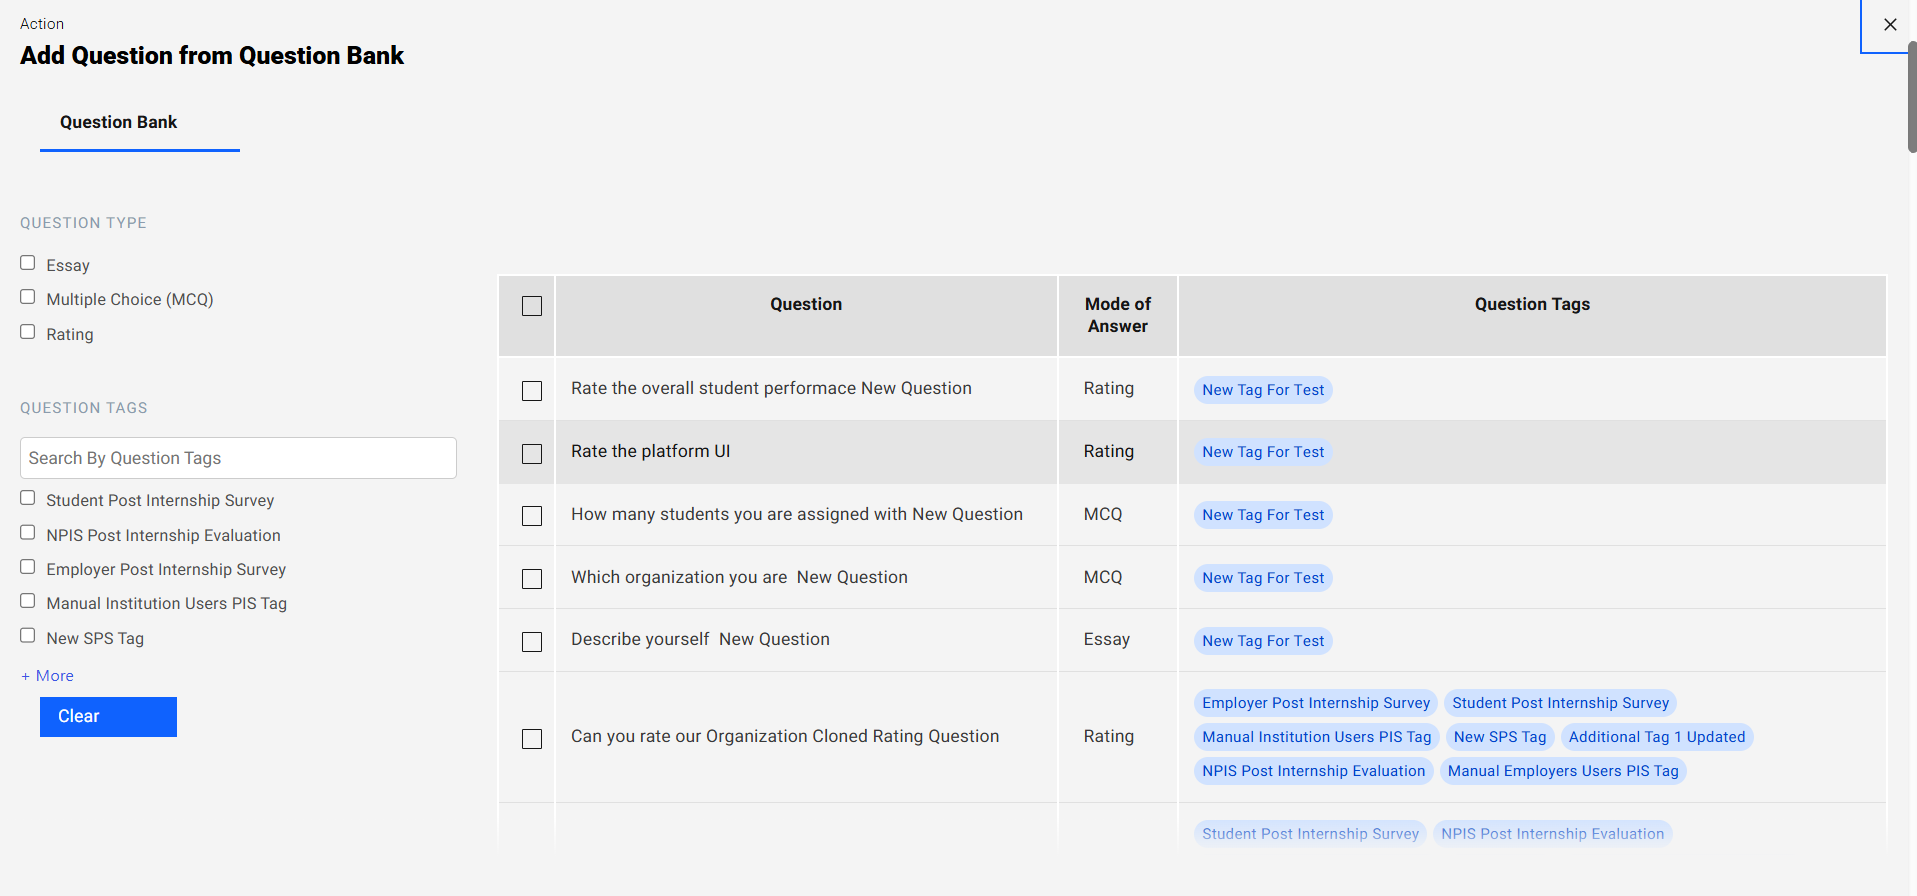
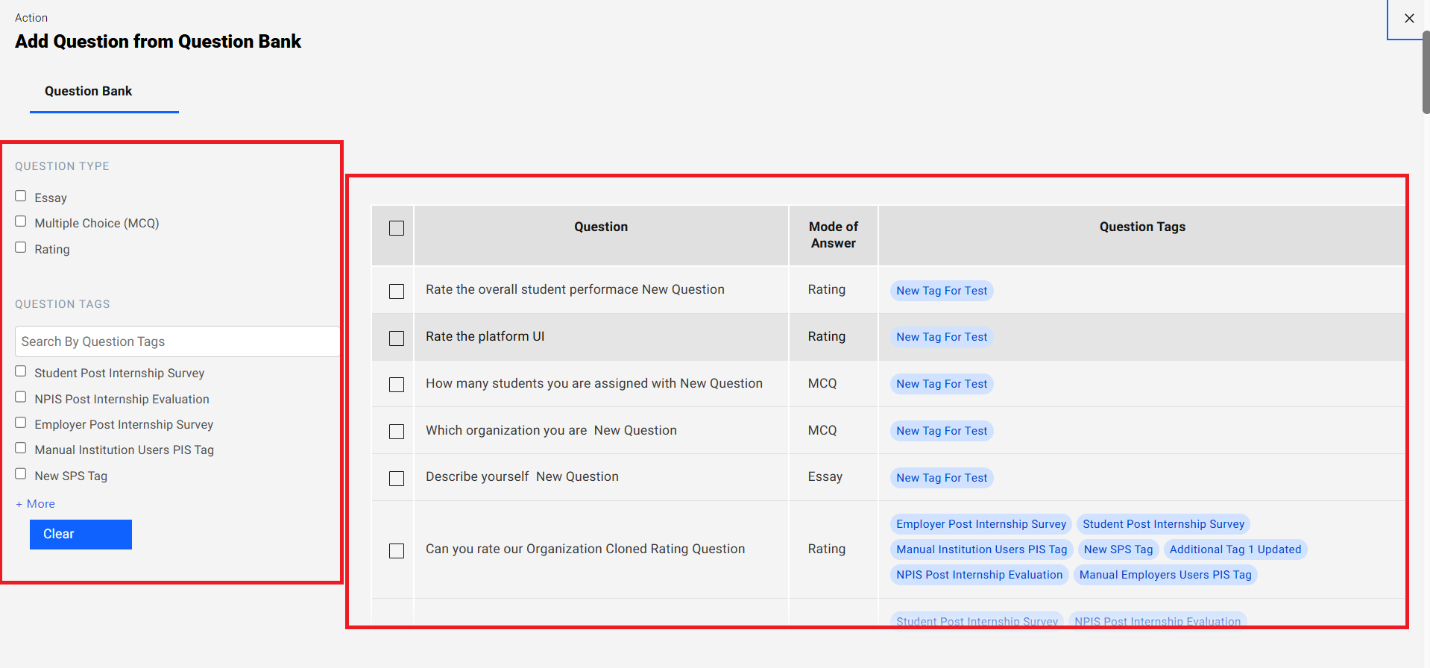
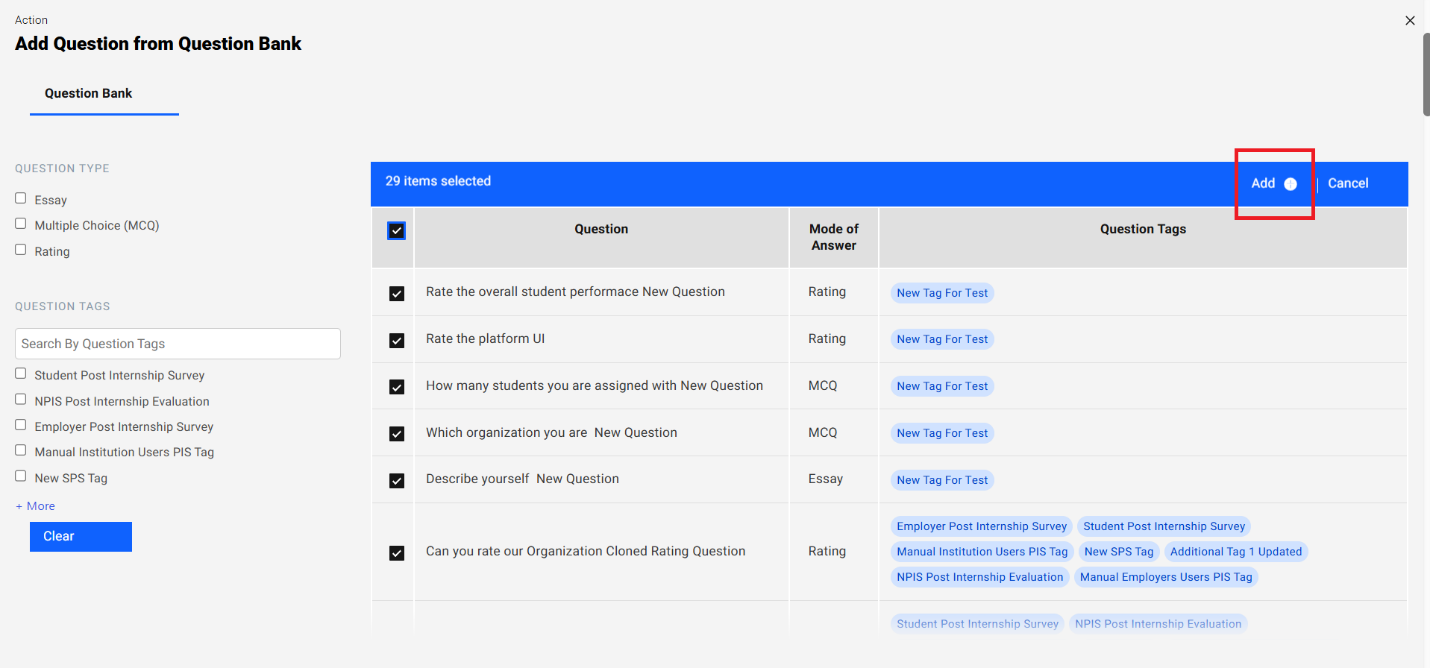
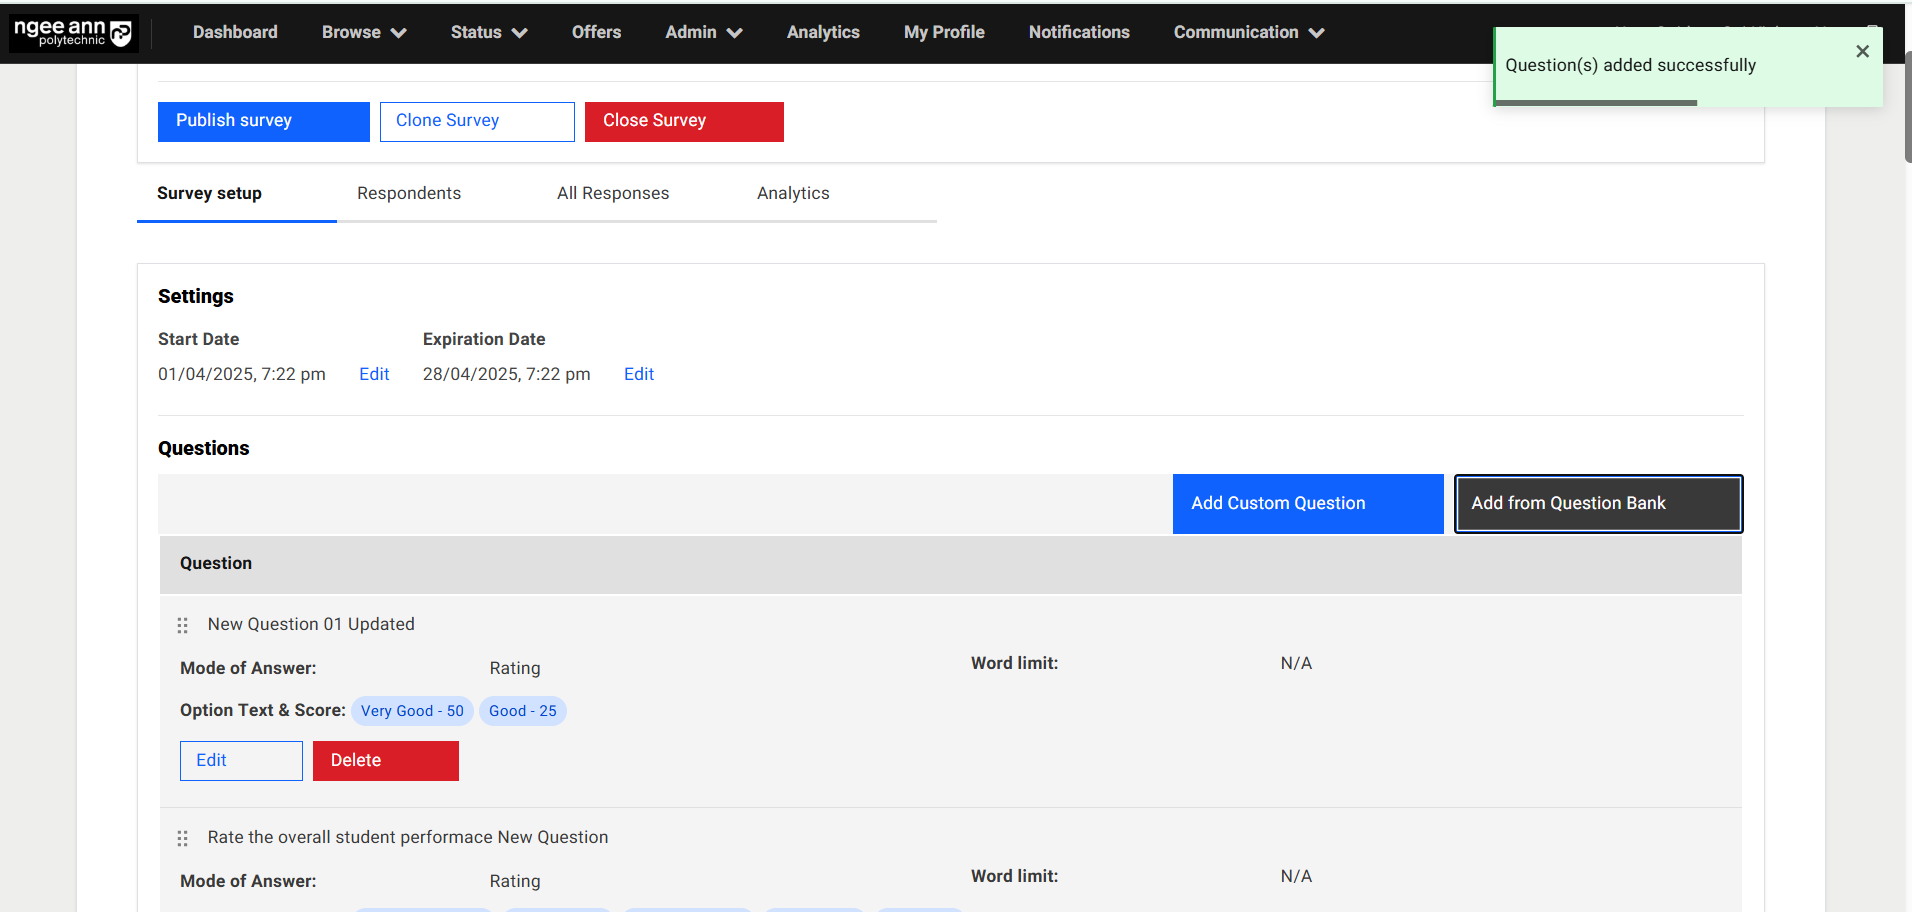
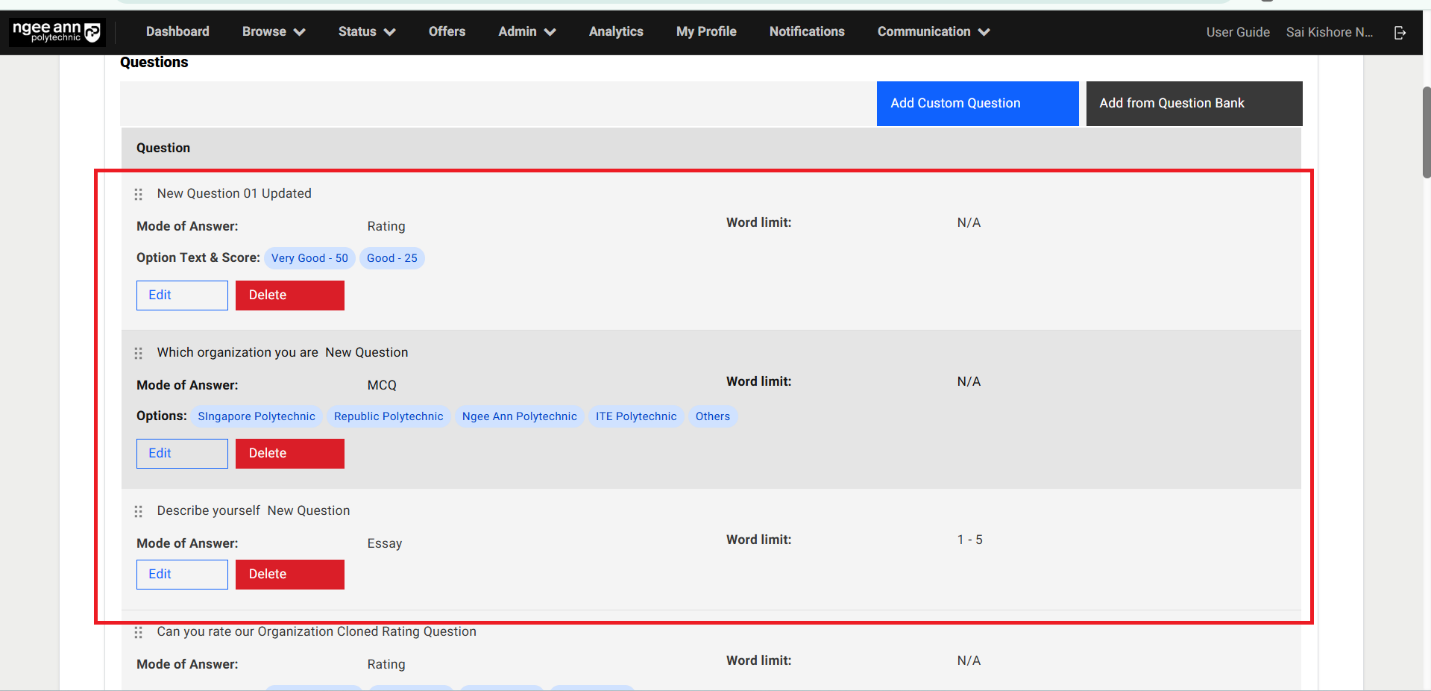
Publish Survey:
Step 1:
- Click on the "Publish Survey" button
- Make sure "Publish Survey" popup get open
- Click on the "Publish Survey" button from popup to publish the survey
- Make sure respective survey get published and successes message banner will be shown
Note:
- "Please note that respondents can be added only after the survey has been published." Message will be shown before survey is published.
- Once survey is published then user not able to Edit/Delete the added questions for respective survey under "Survey Setup" section tab

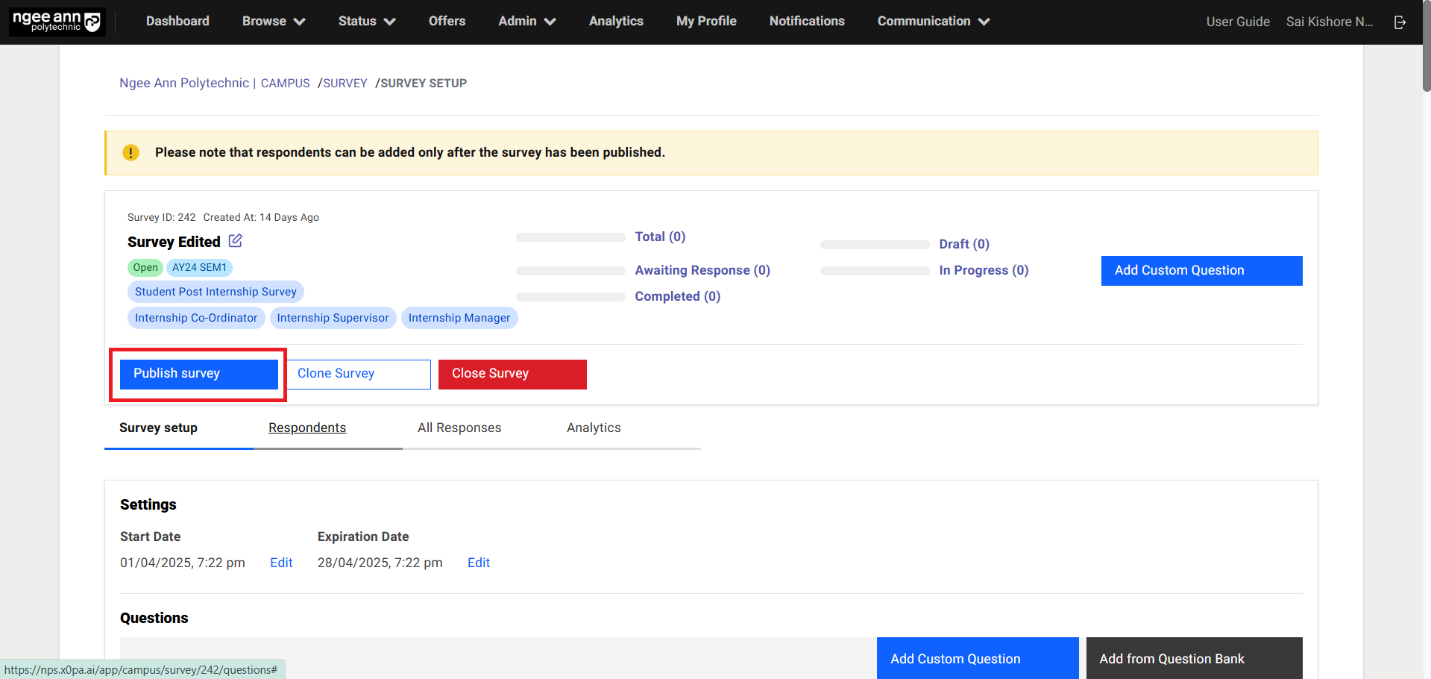
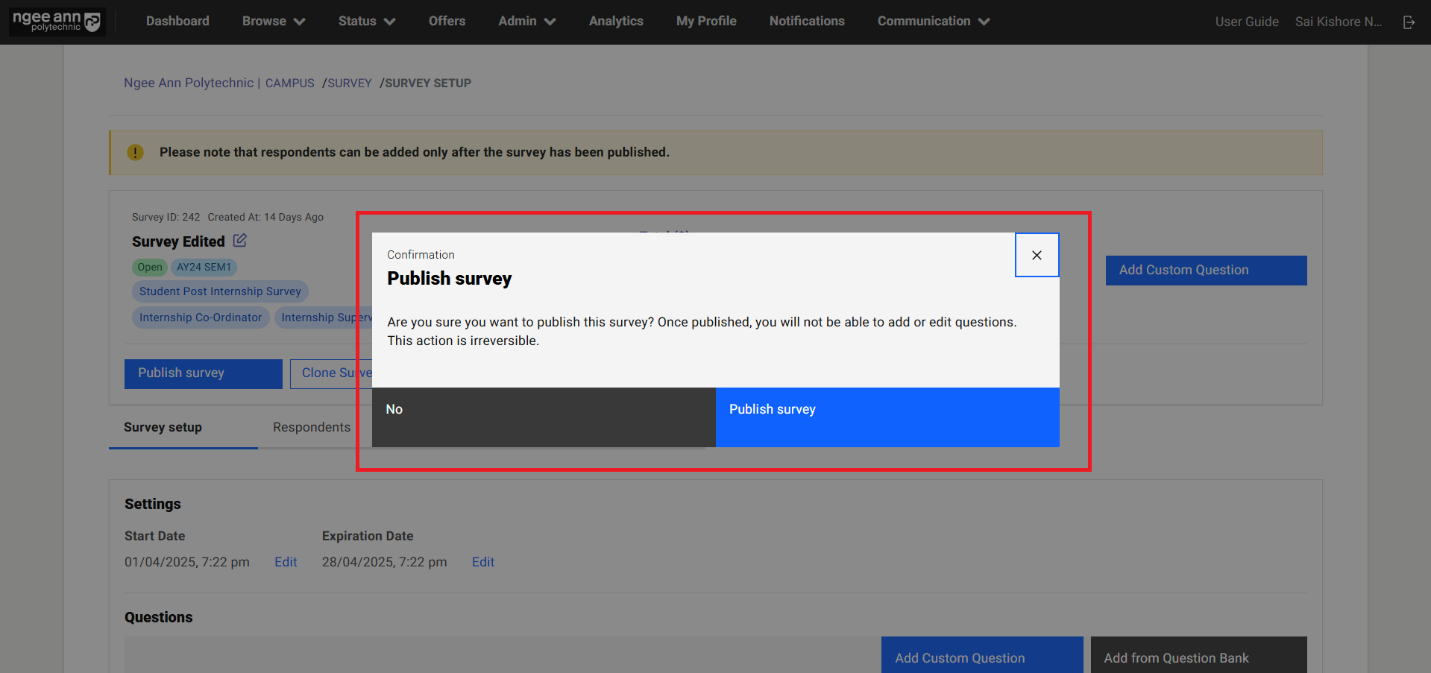
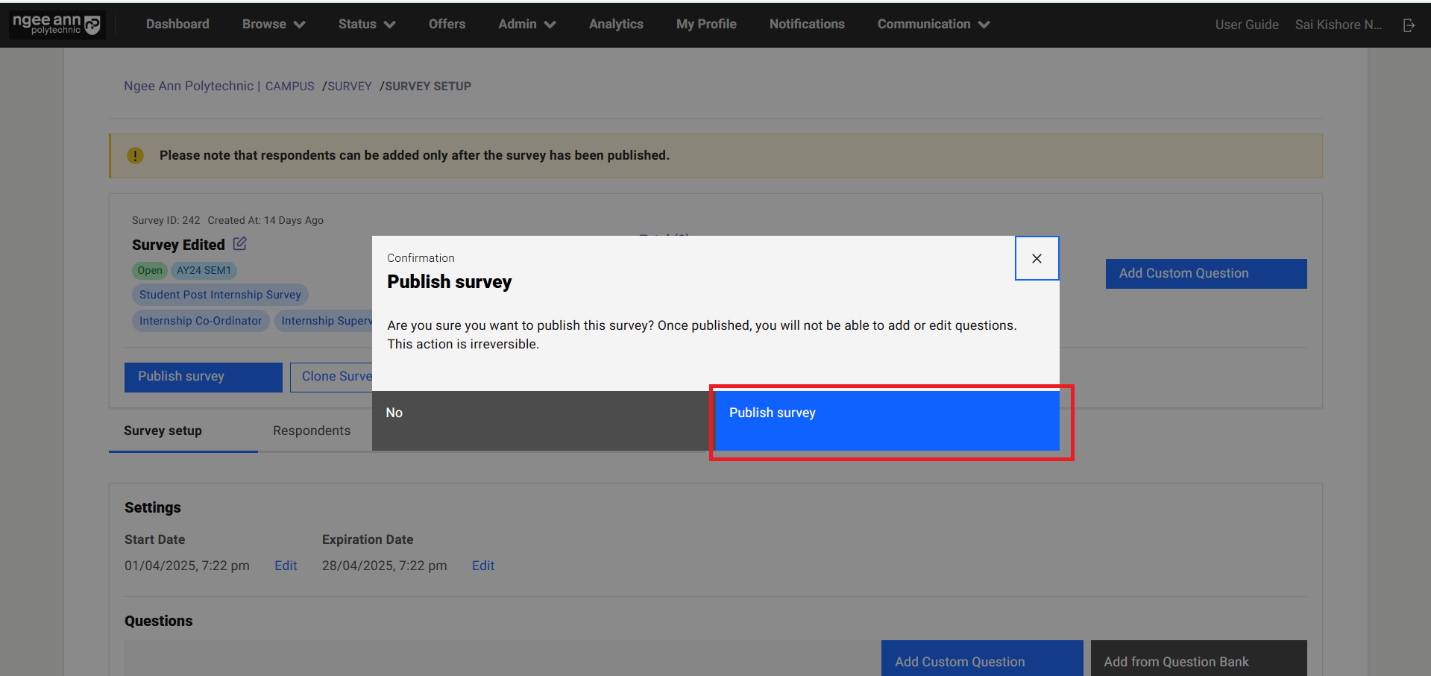
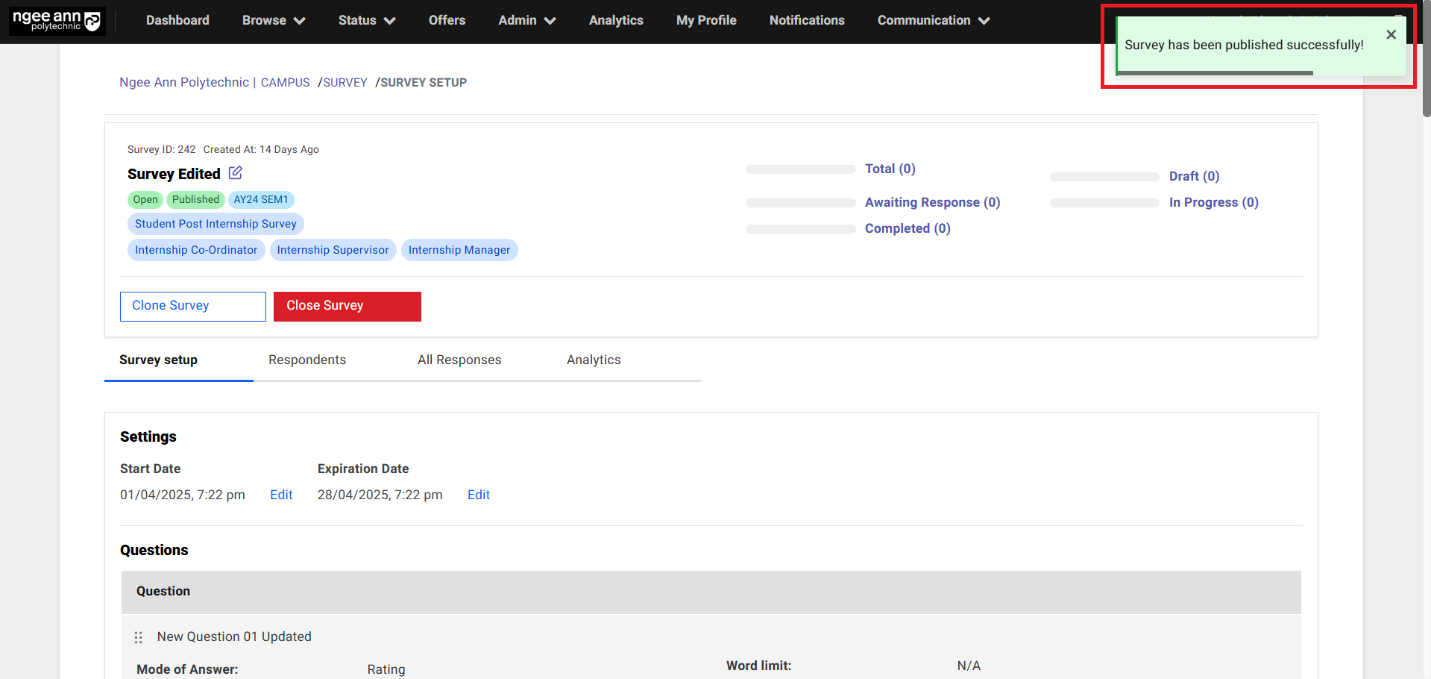
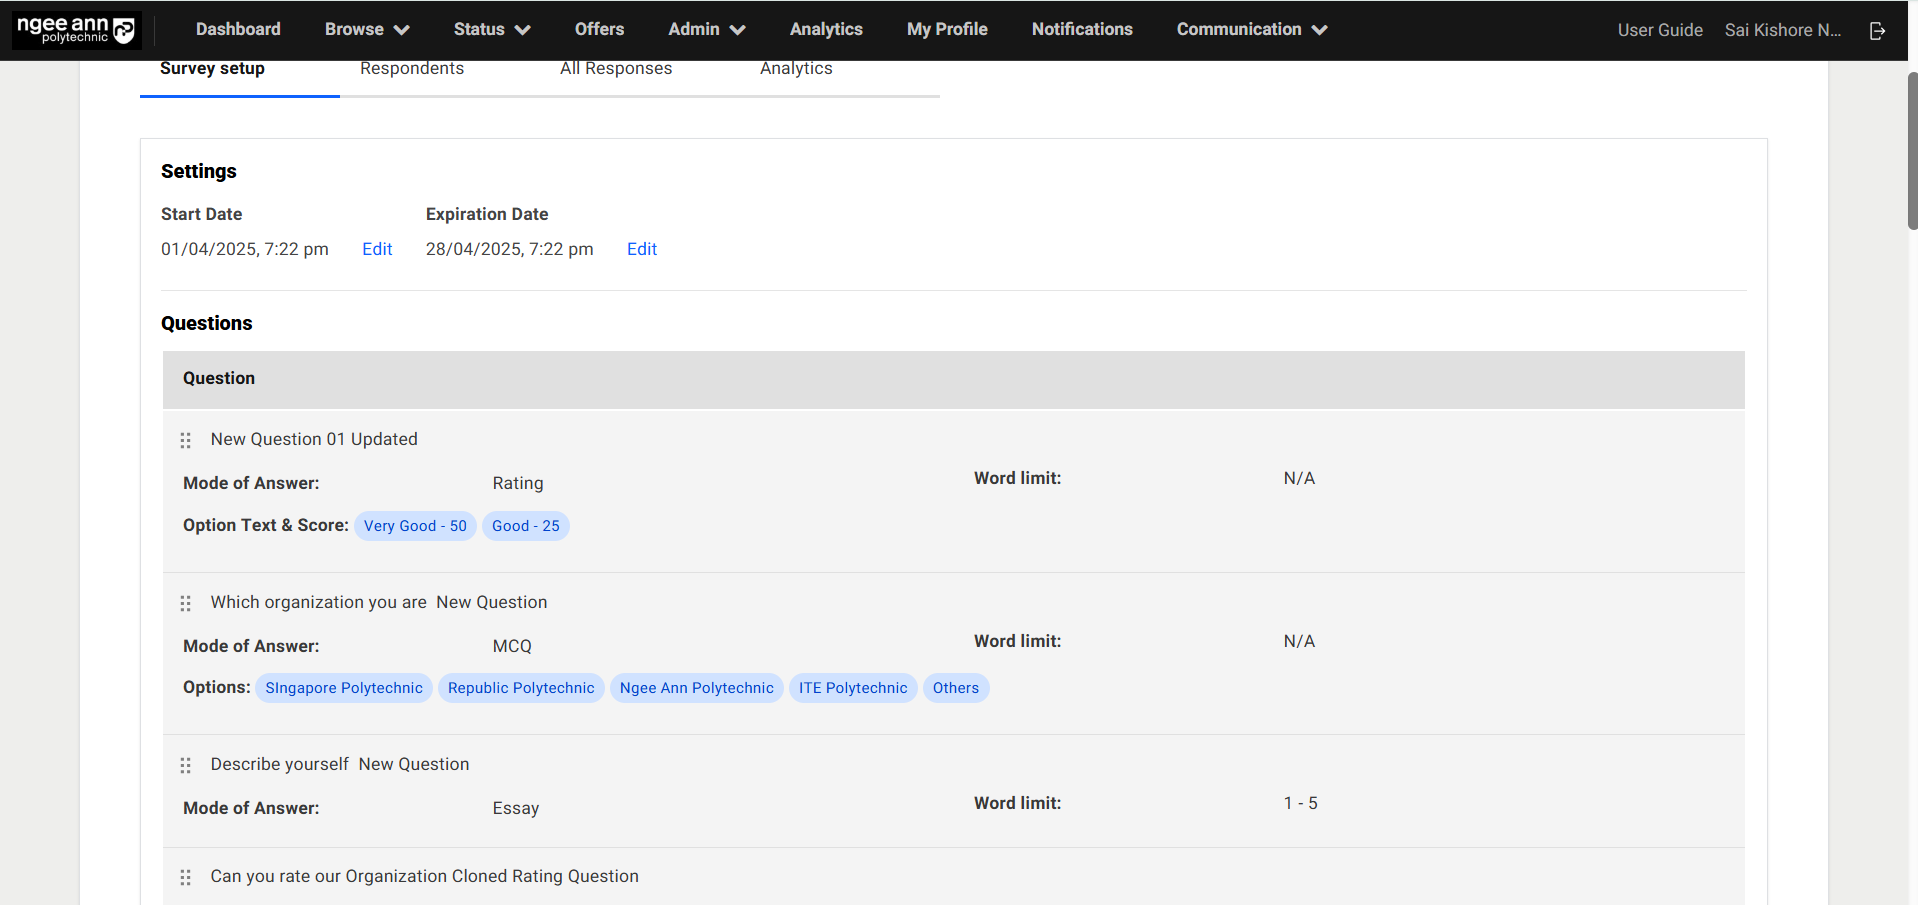
Edit Survey (After Survey Published):
Step 1:
- Click on the "Edit" icon beside survey name
- Navigate to "Edit Survey" page
- Update details into the fields
- Click on the "submit" button
- Updated changes reflect on the respective survey
Note: Batch, Visibility, Survey Type fields will be non-editable fields when user edit the published survey from the "Edit Survey" page.
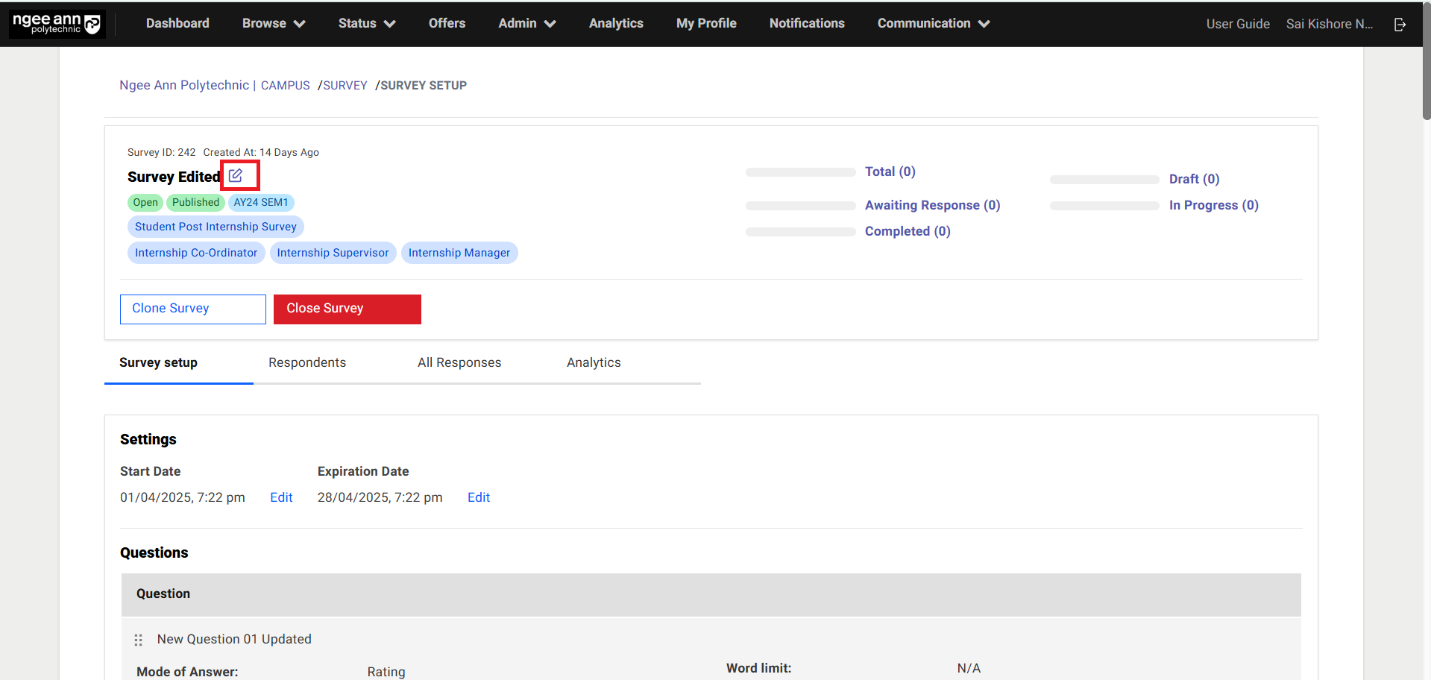

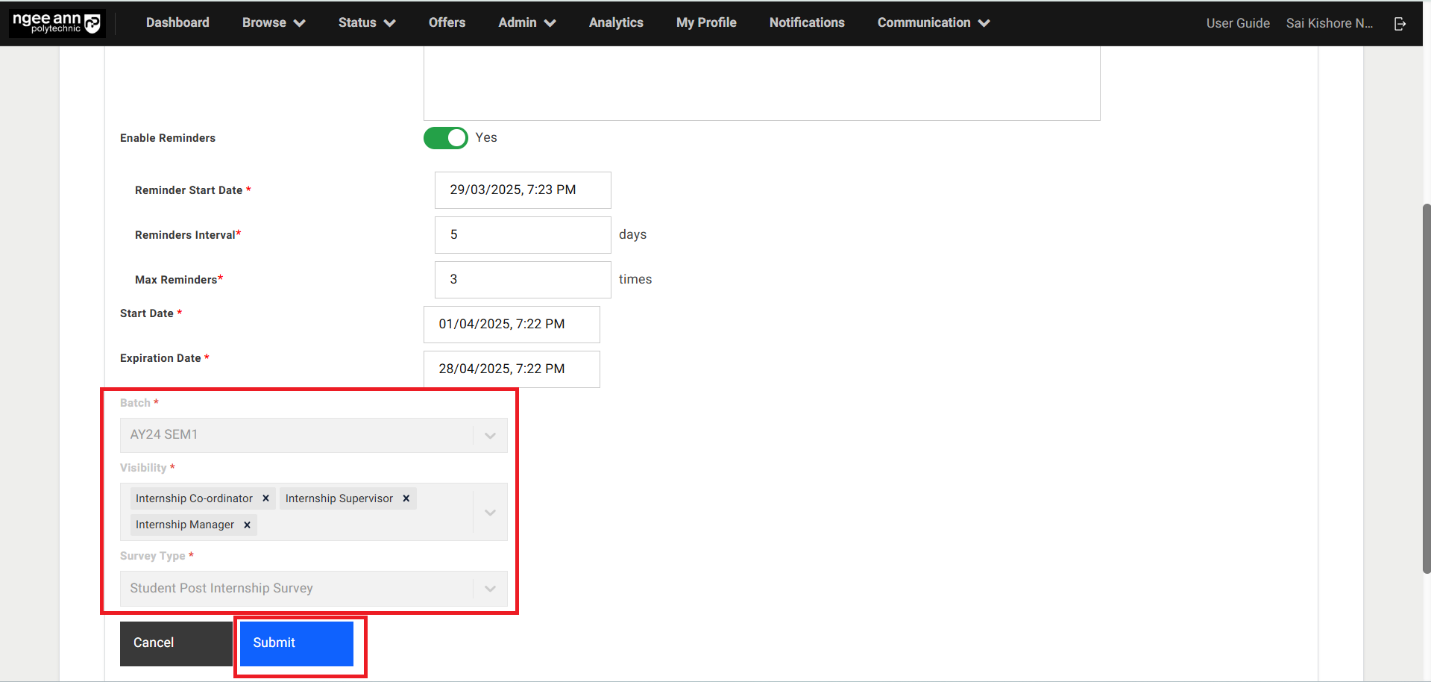
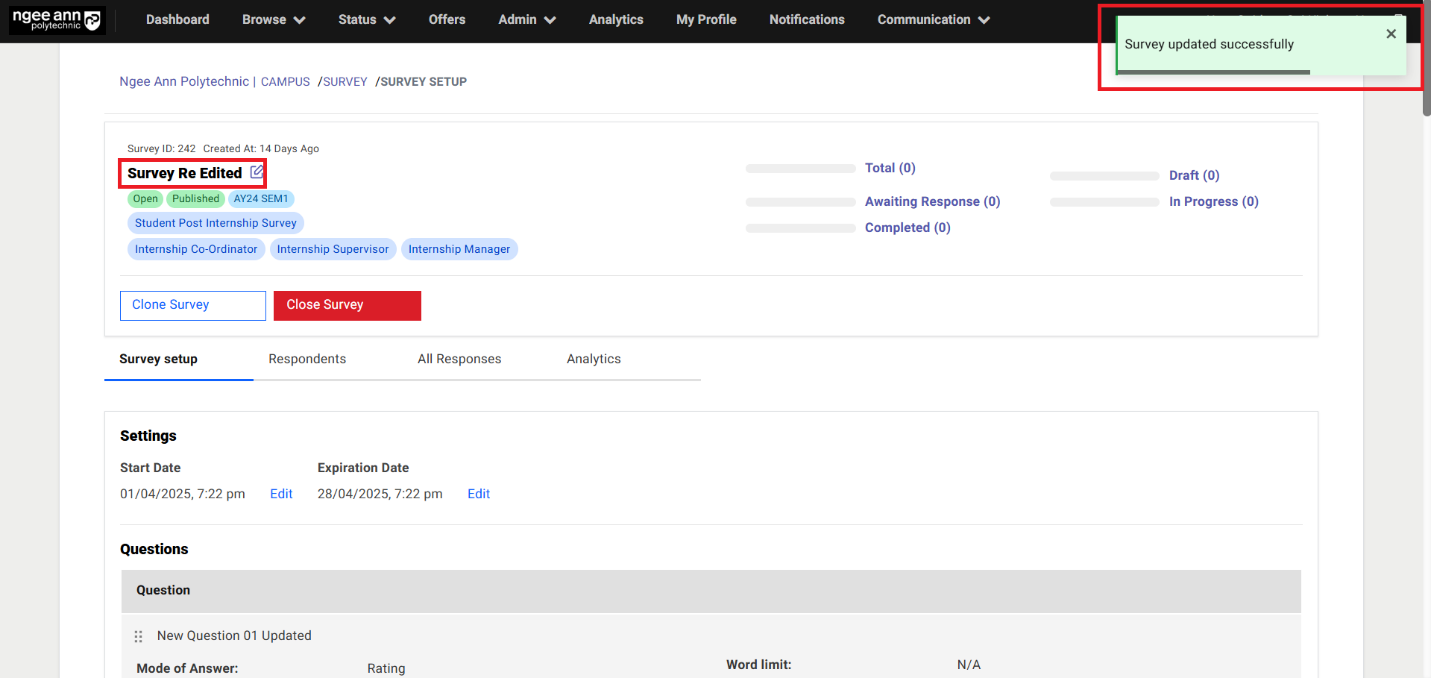
Respondents Section Tab:
Step 1:
- Click on the "Respondents" section tab
- Make sure respondents table will be shown
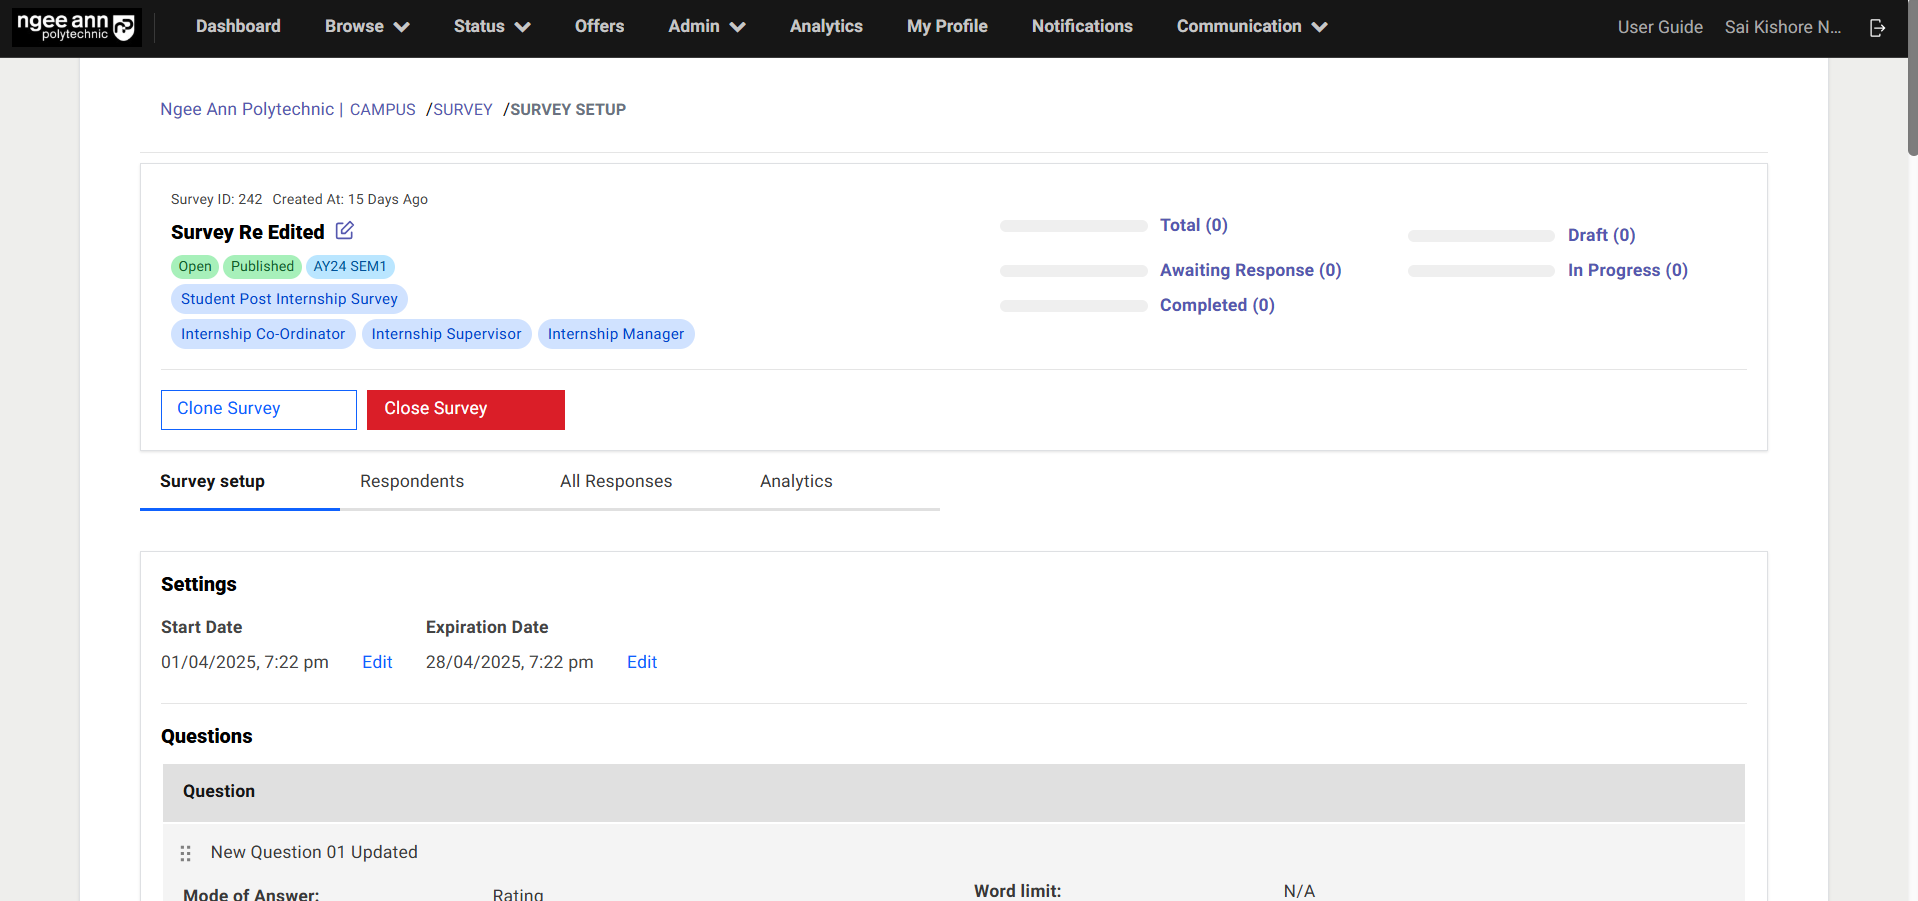
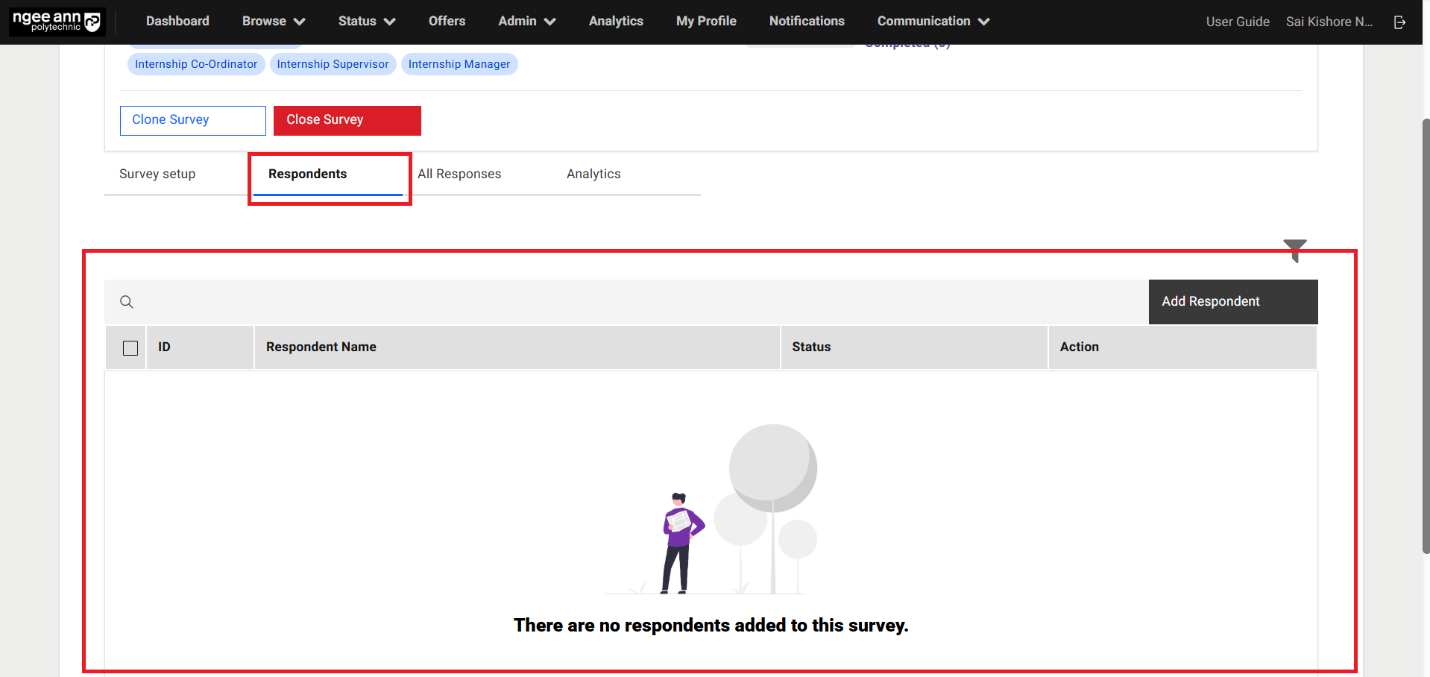
Add Respondents to the Survey:
Step 1:
- Click on the "Add Respondent" button
- Make sure navigate to respective user's page
- If it is a "Student Post Internship Survey" survey then user navigates to "Student" page when click on the "Add Respondent" button.
- If it is a "NPIS Post Internship Evaluation/Generic Survey (Institution)" survey then user navigates to "Institution Users" page when user click on the "Add Respondent" button.
- If it is a "Employer Post Internship Survey/Generic Survey (Employer)" survey then user navigates to "Employee" page when user click on the "Add Respondent" button.

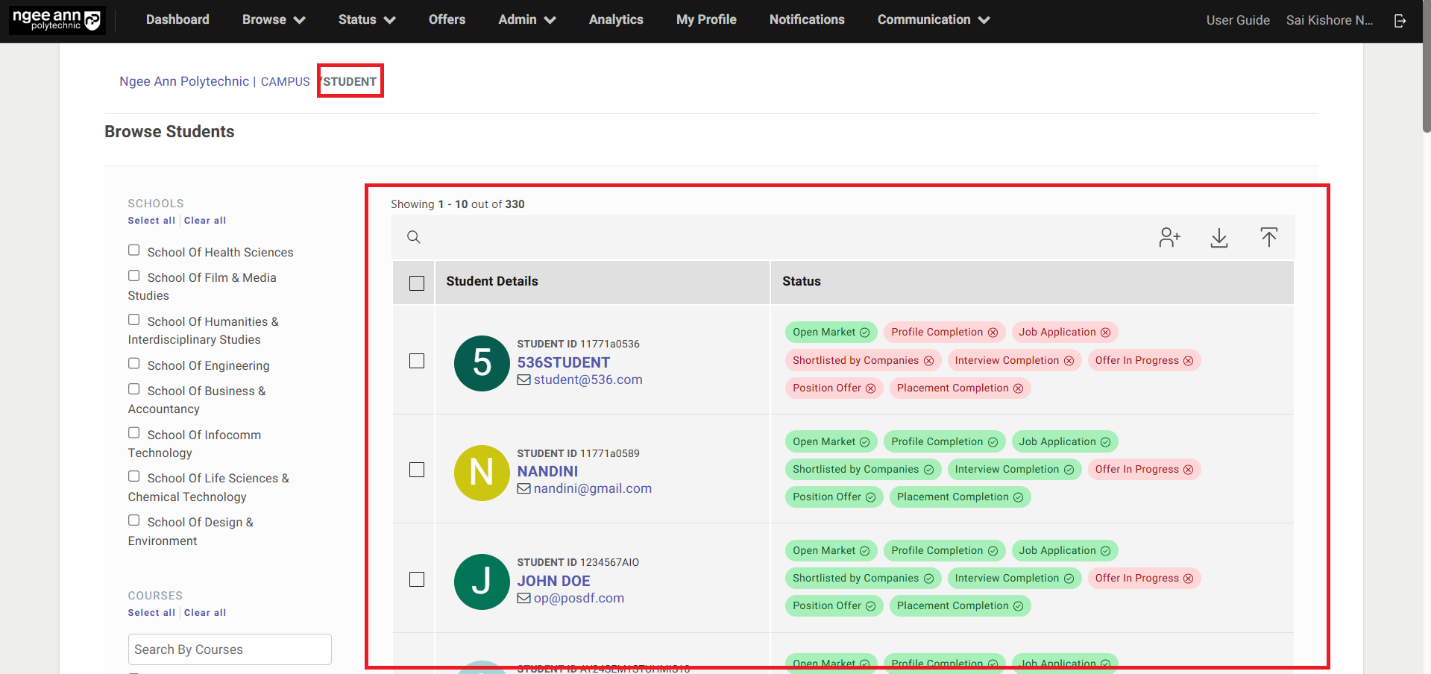
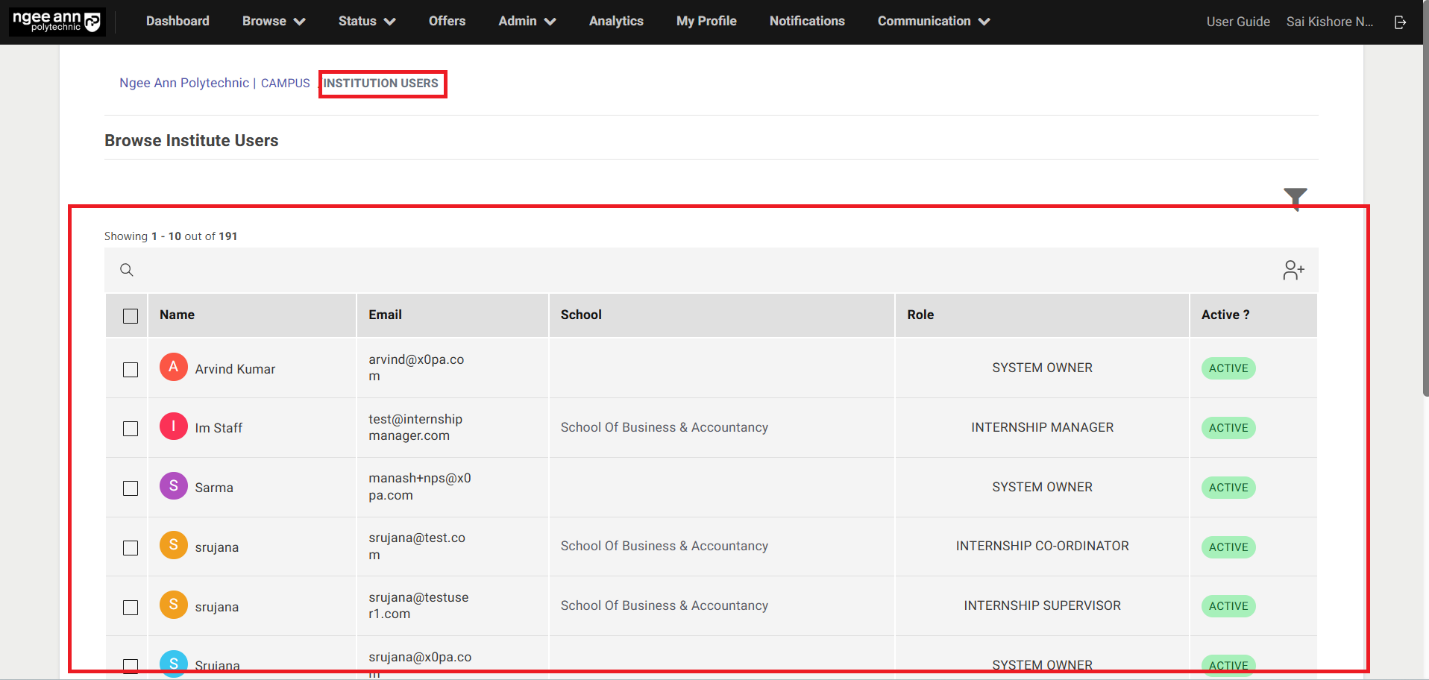
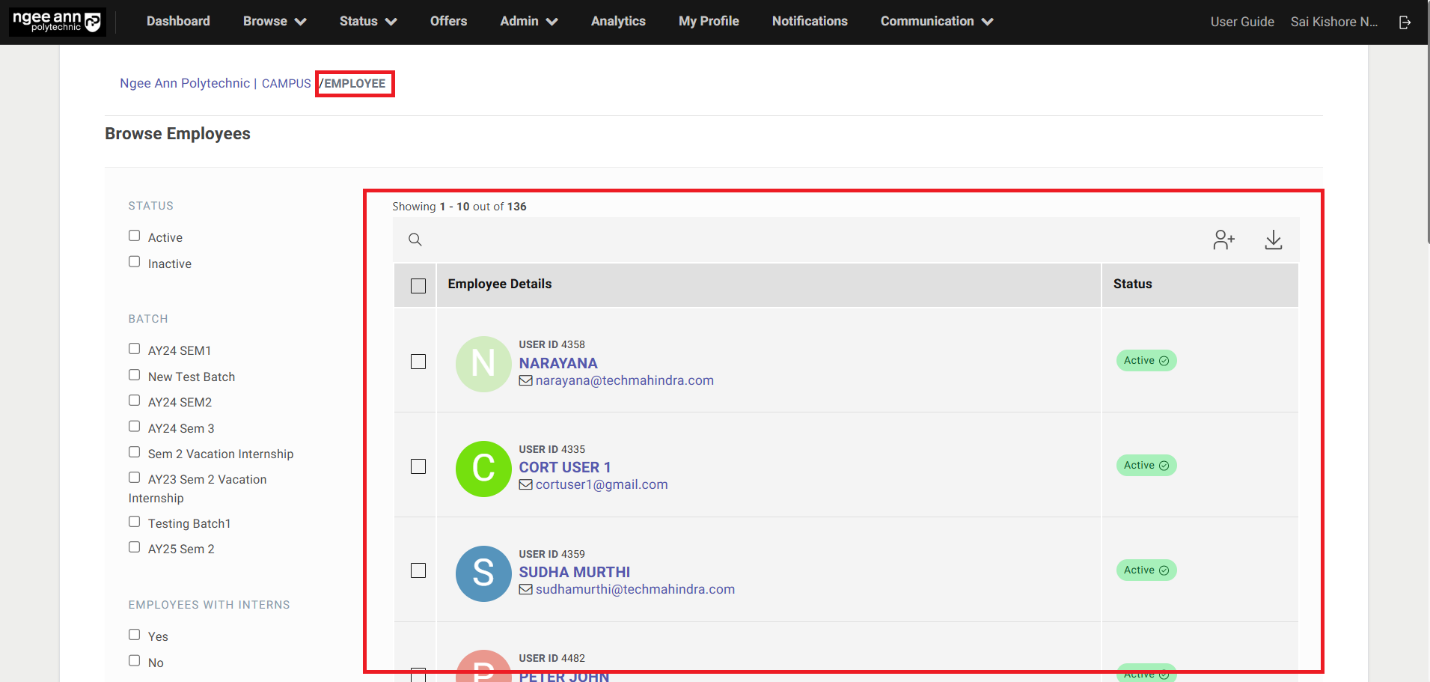
Step 2:
- Add Respondents to the "Student Post Internship Survey" type survey
- Add Respondents by selecting from the table:
- Select Students (Respondents) from the table
- Make sure "X items Selected" string with "Add to Survey" list option button will be displayed above the table
- "Add respondents to survey" popup get open with "Select Survey" dropdown fields in the popup
- See list of the published surveys of respective survey type will be shown when in the dropdown fields as options
- Select the published survey from the dropdown field
- Click on the "Submit" button from the popup
- Make sure successes message banner will be shown and respondents will be added to the survey correctly.
- Added respondents will be shown in the "Respondents" table under "Survey Setup" section tab in the "Survey Setup" page
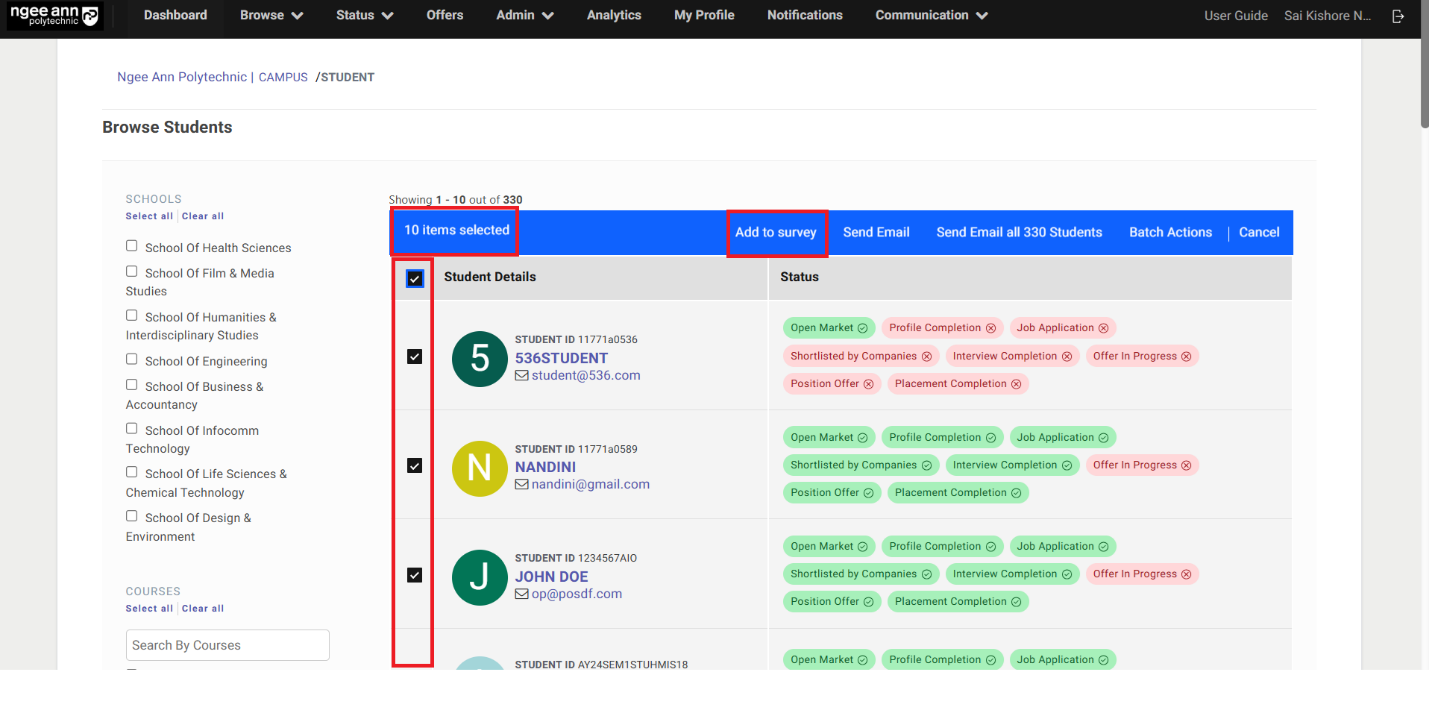
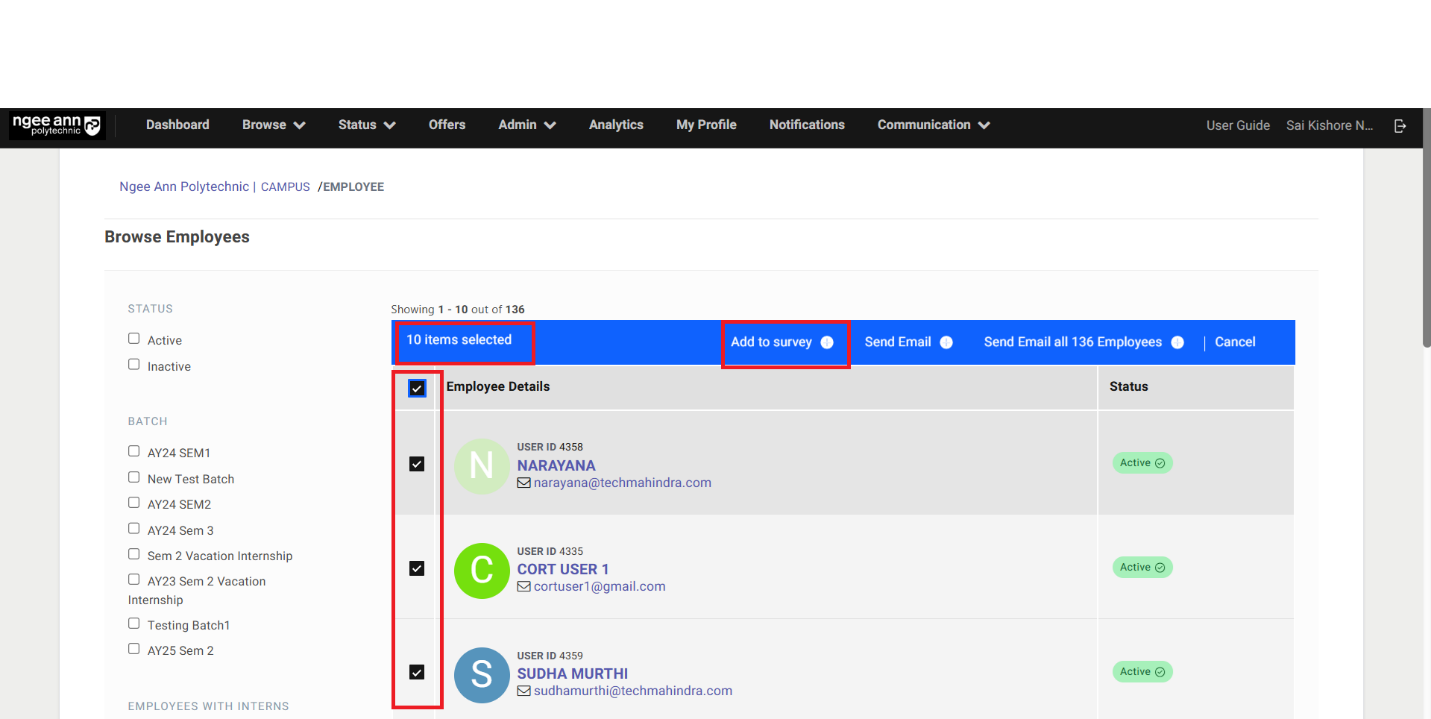
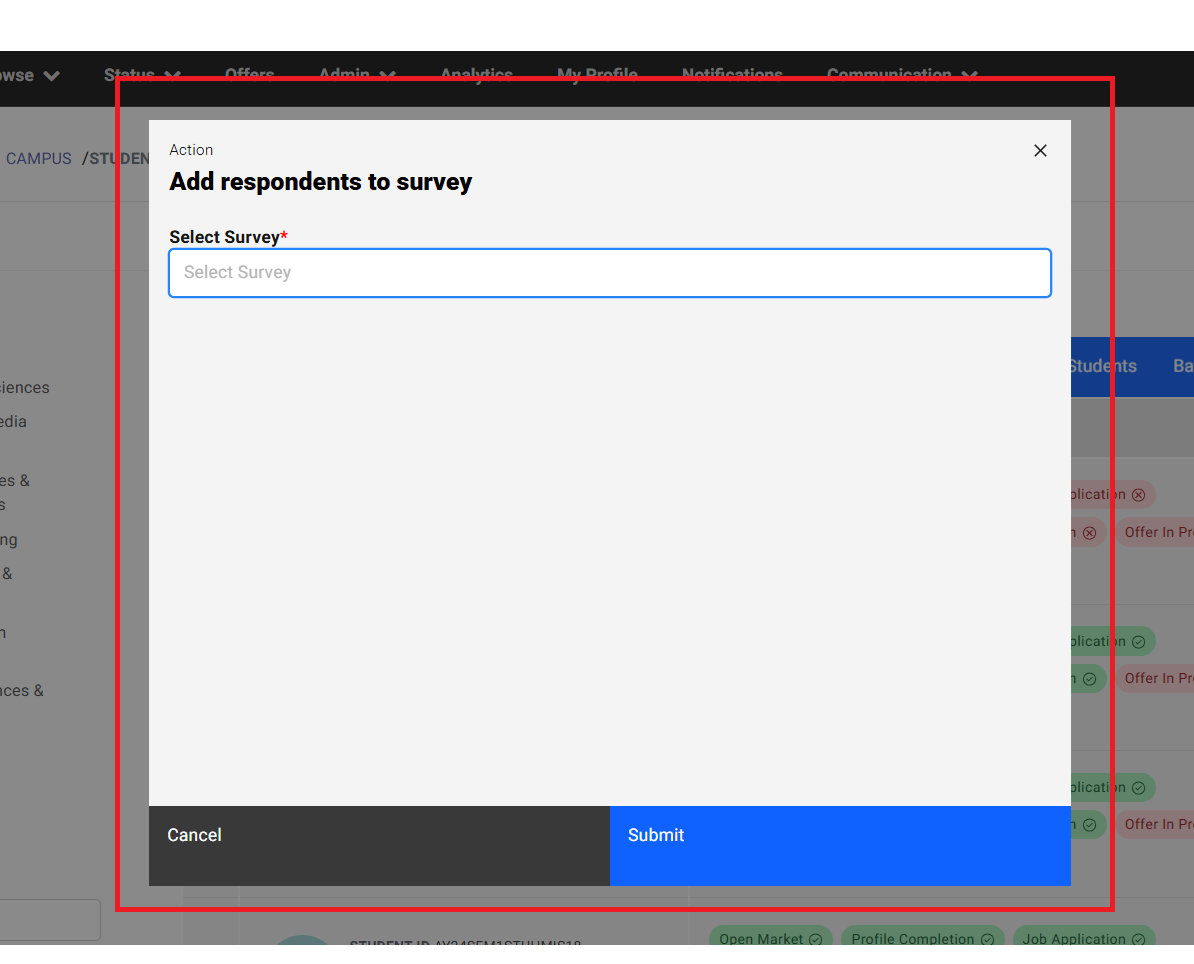
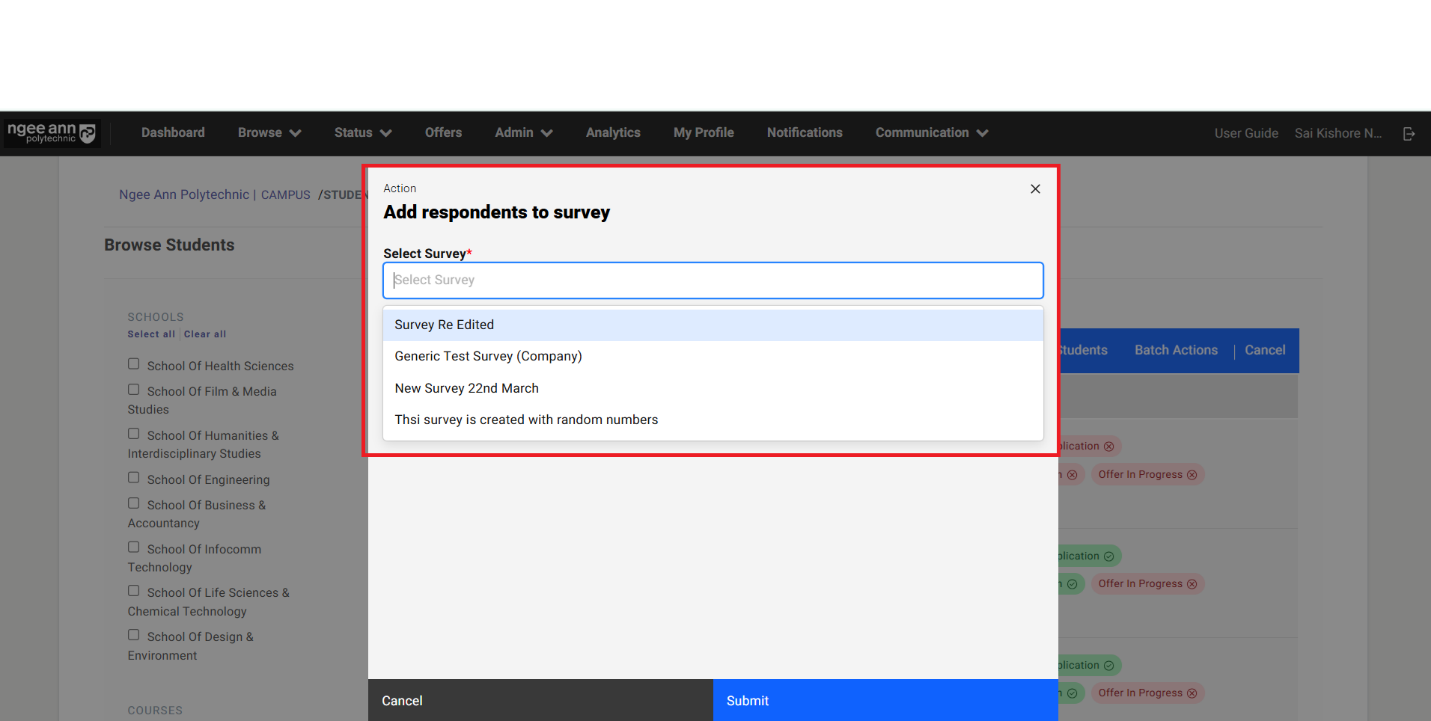
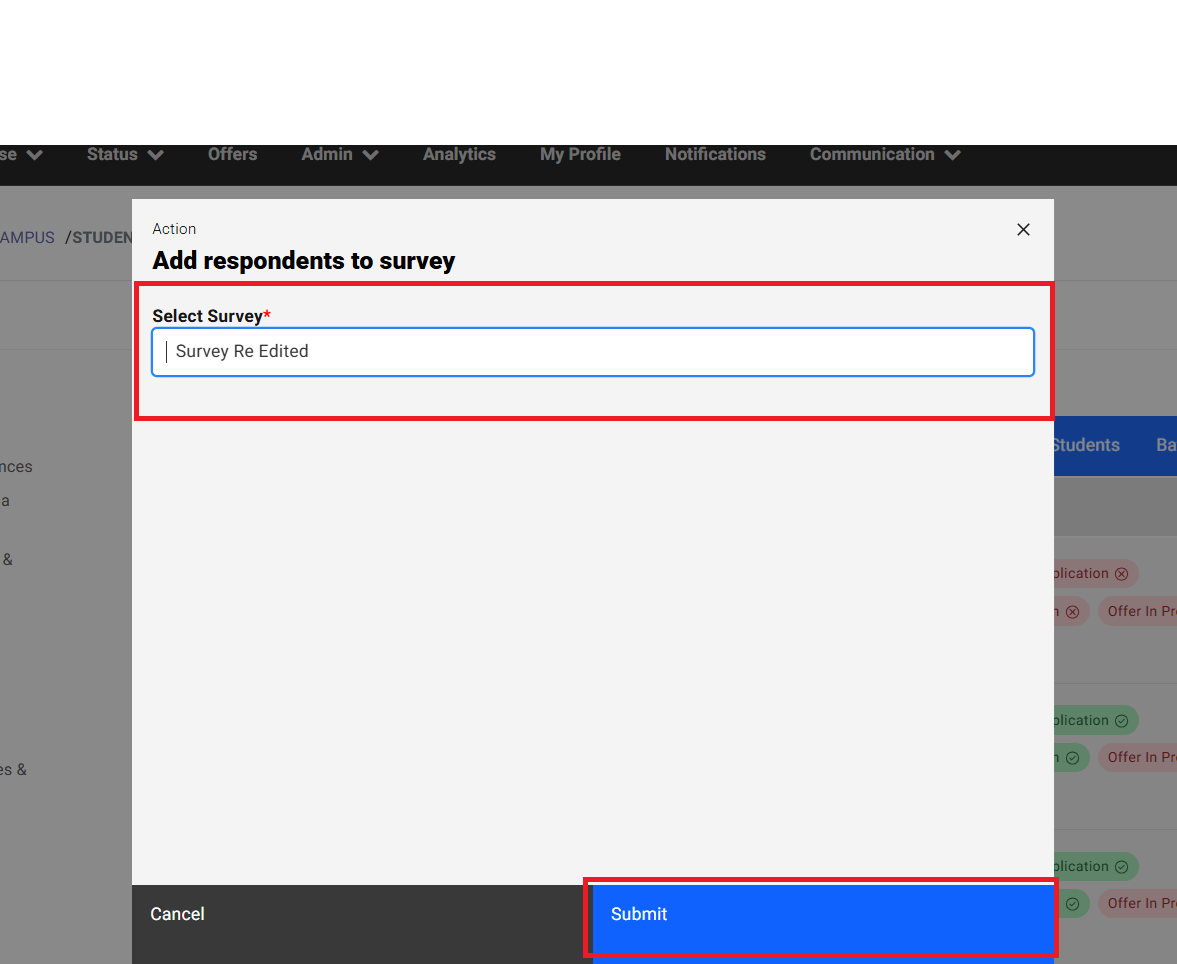


- Add respondents to the "Student Post Internship Survey" in bulk
- Add Respondents to survey in bulk from student's page:
- Click on the "Add all X number students to survey" button above the table
- "Add respondents to survey" popup get open with "Select Survey" dropdown fields in the popup
- See list of the published surveys of respective survey type will be shown when in the dropdown fields as options
- Select the published survey from the dropdown field
- Click on the "Submit" button from the popup
- Make sure successes message banner will be shown and respondents will be added to the survey correctly.
- Added respondents will be shown in the "Respondents" table under "Survey Setup" section tab in the "Survey Setup" page
Note: Users can apply filters and add multiple filtered students as survey respondents in bulk.
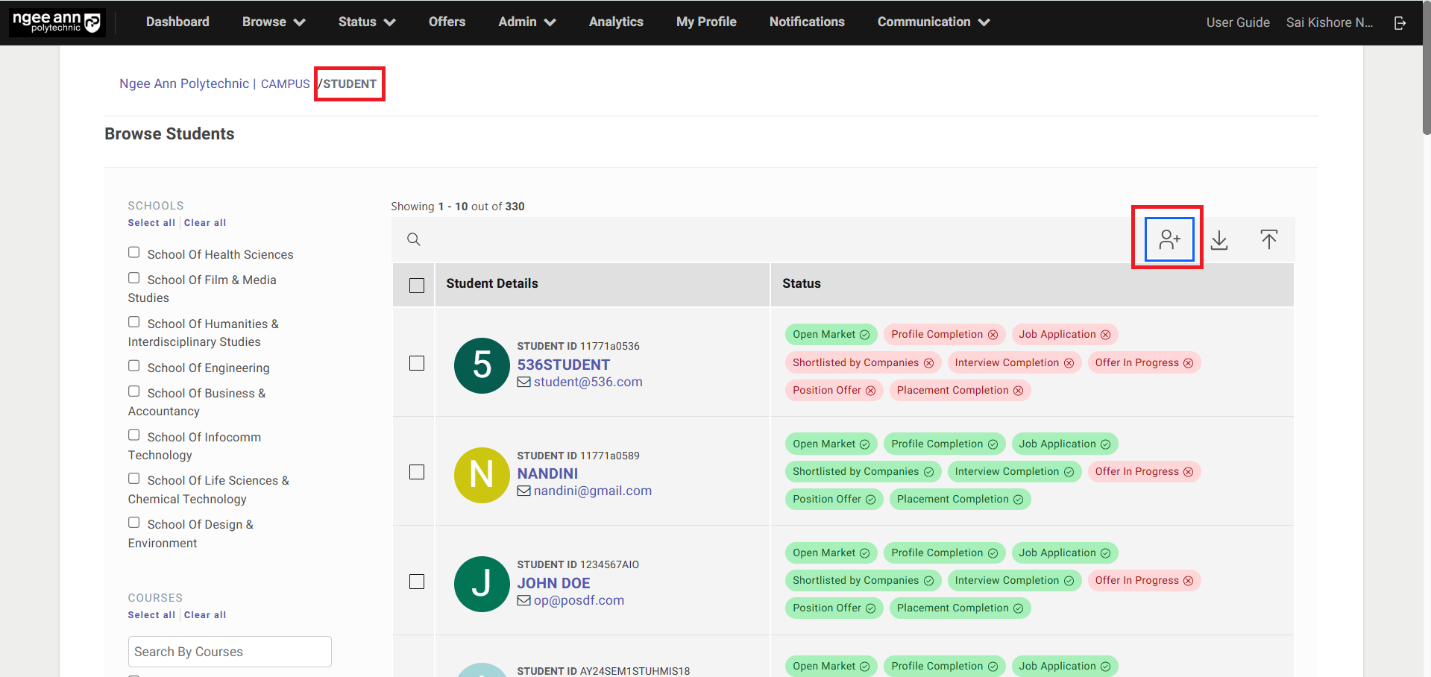
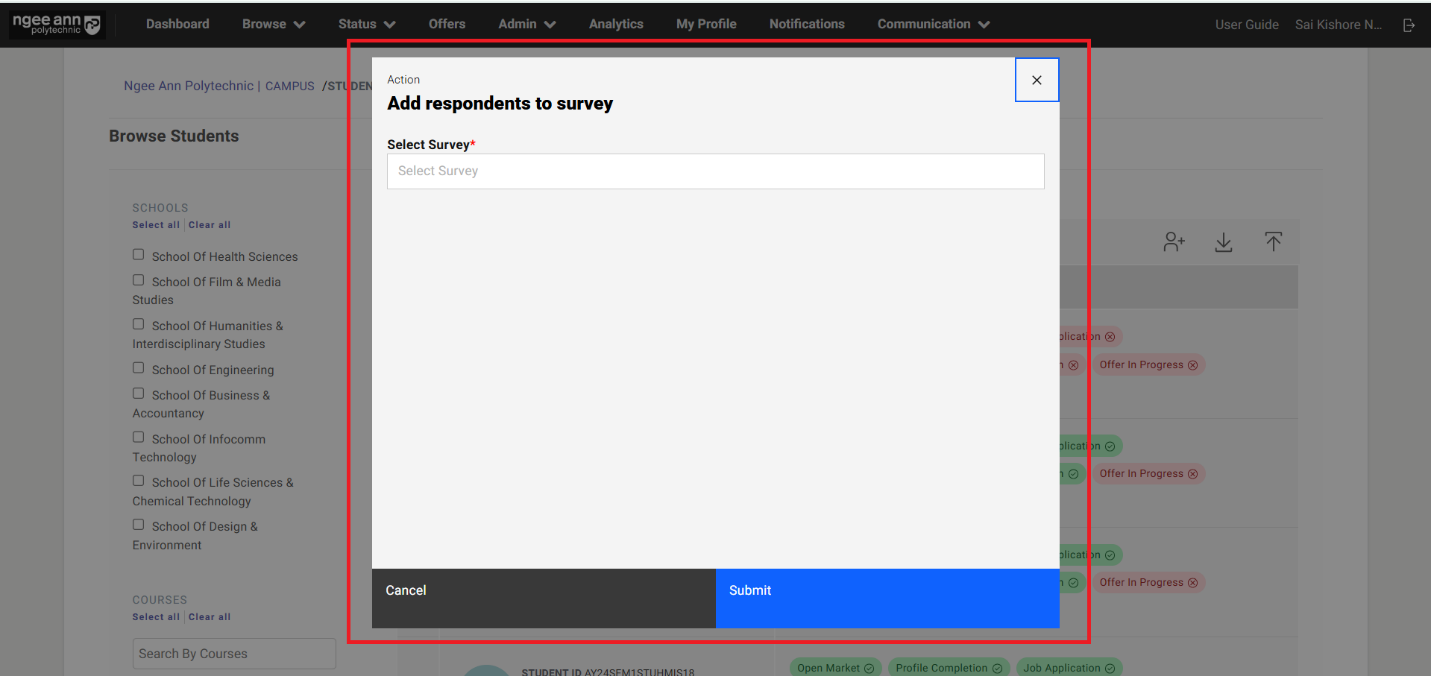
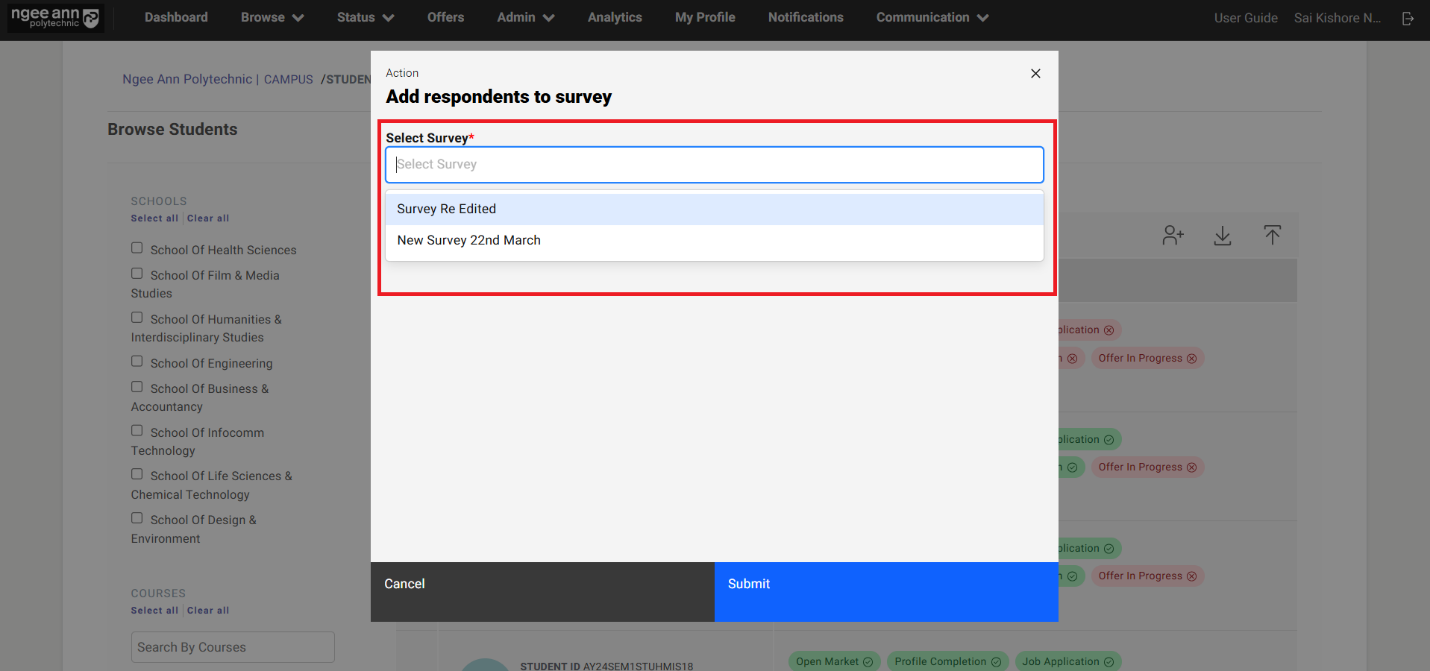
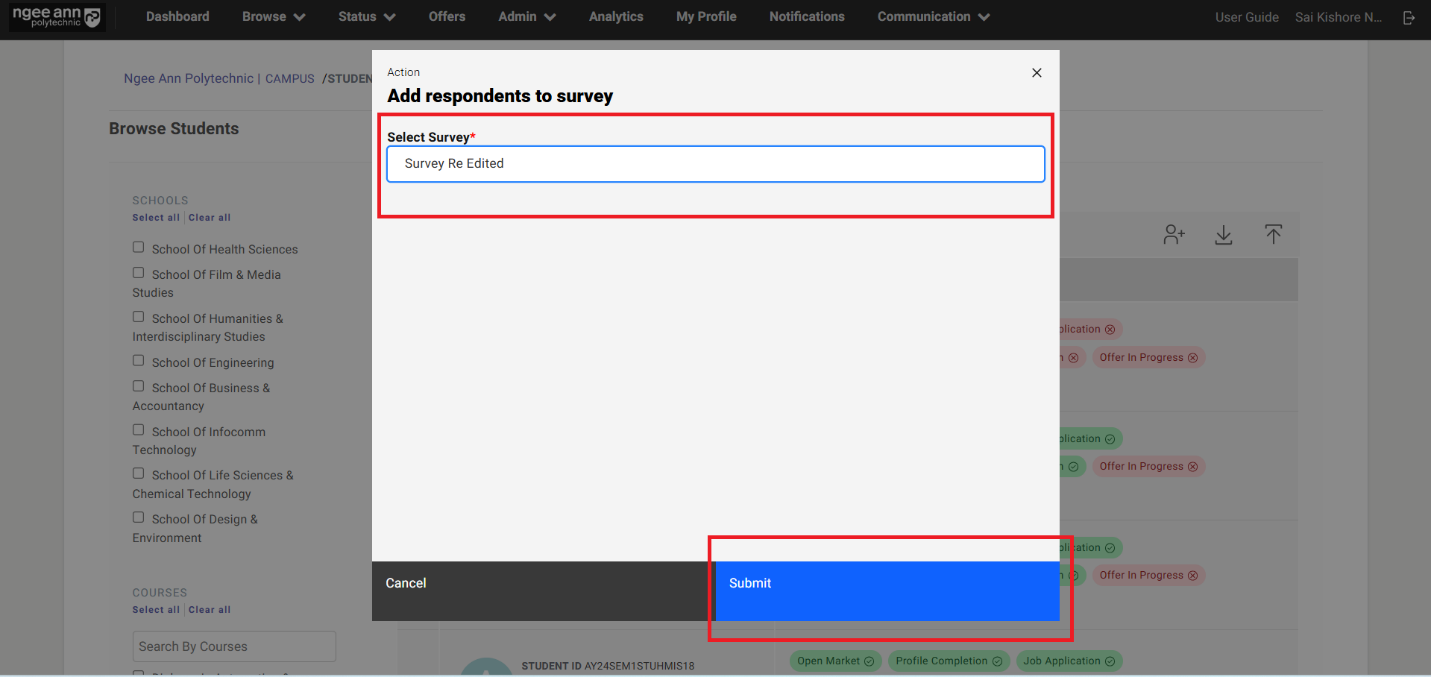

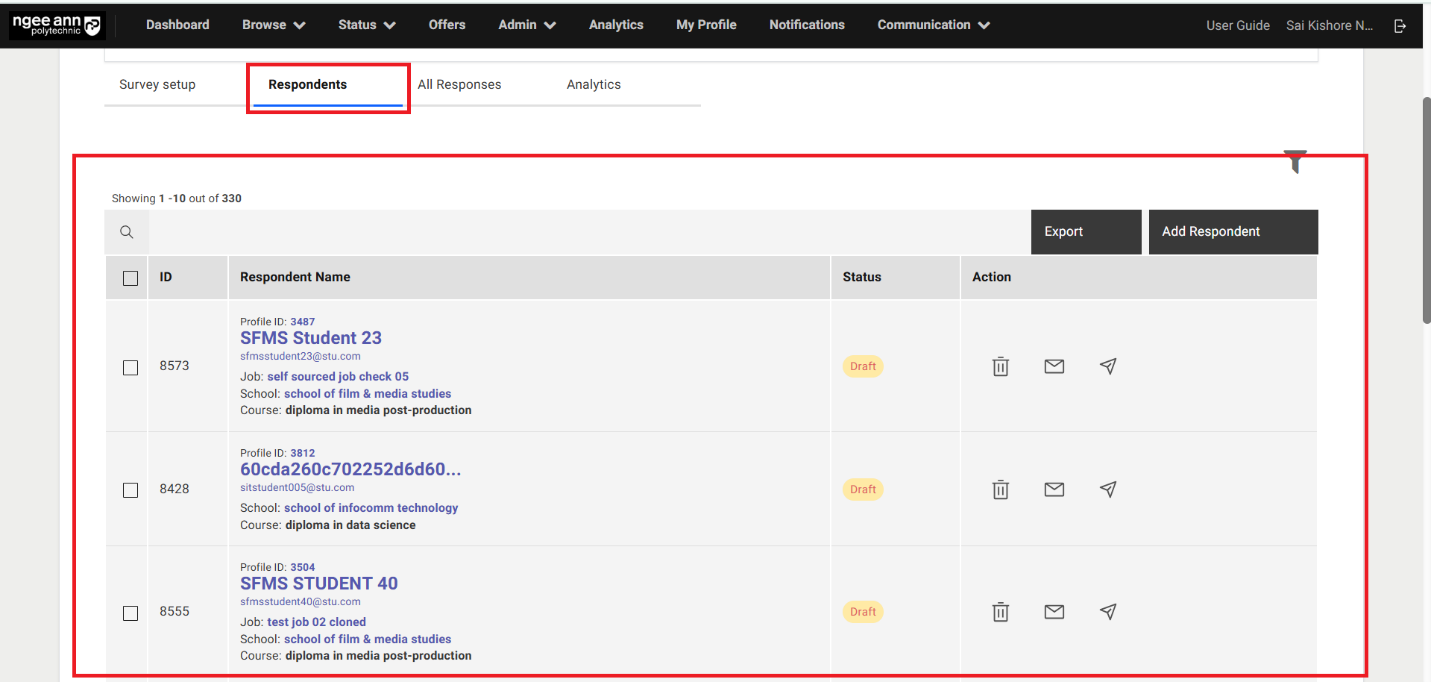
Step 3: Note:
-
Users can only add "Internship Supervisor" users (who are tagged with hired interns) as respondents to the "NPIS Post Internship Evaluation" survey. If they attempt to add other users, a validation error message will be displayed.
-
The system automatically applies the default filter "Internship Supervisors with interns: Yes" when adding respondents to this survey type.
-
Add Respondents to the "NPIS Post Internship Evaluation" type survey.
- Add Respondents by selecting from the table:
- Select Institution Users (Respondents) from the table
- Make sure "X items Selected" string with "Add to Survey" list option button will be displayed above the table
- "Add respondents to survey" popup get open with "Select Survey" dropdown fields in the popup
- See list of the published surveys of respective survey type will be shown when in the dropdown fields as options
- Select the published survey from the dropdown field
- Click on the "Submit" button from the popup
- Make sure successes message banner will be shown and respondents will be added to the survey correctly.
- Added respondents will be shown in the "Respondents" table under "Survey Setup" section tab in the "Survey Setup" page
Note:
- If an internship supervisor is associated with multiple hired interns across different companies, the "Respondents" table will display one entry per unique company (only for companies with hired and tagged interns).
- School/Company names are clickable and will navigate to their respective pages with relevant data.
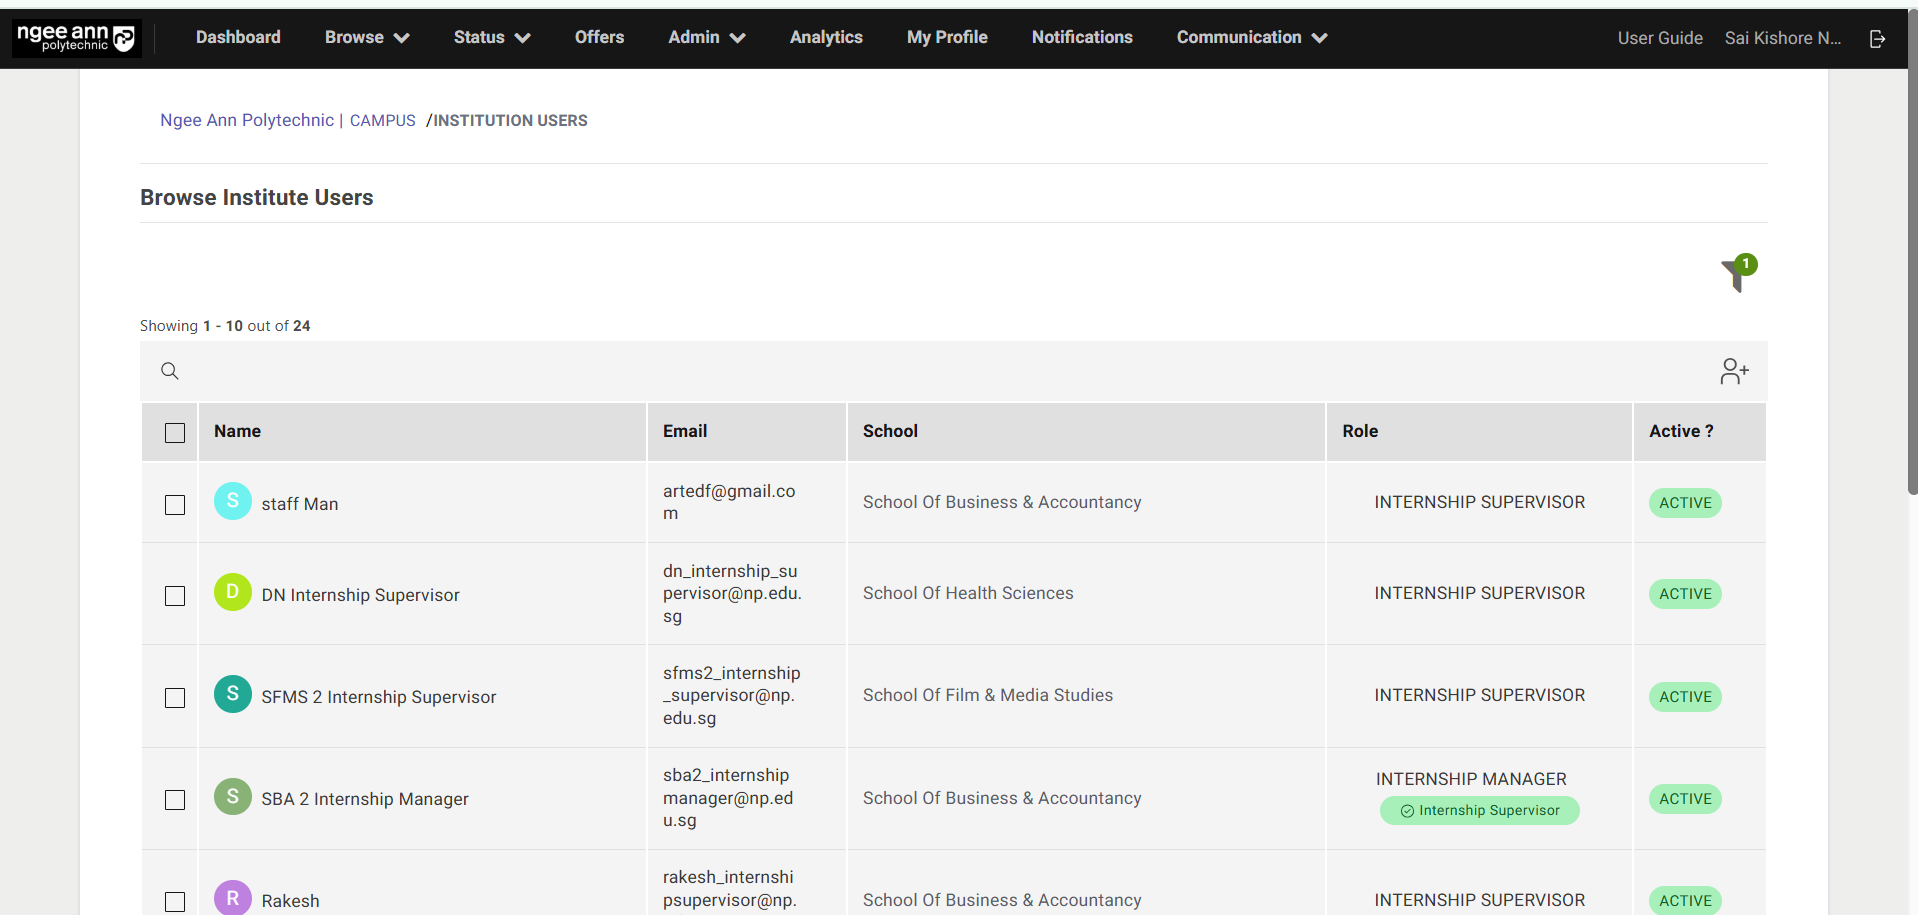
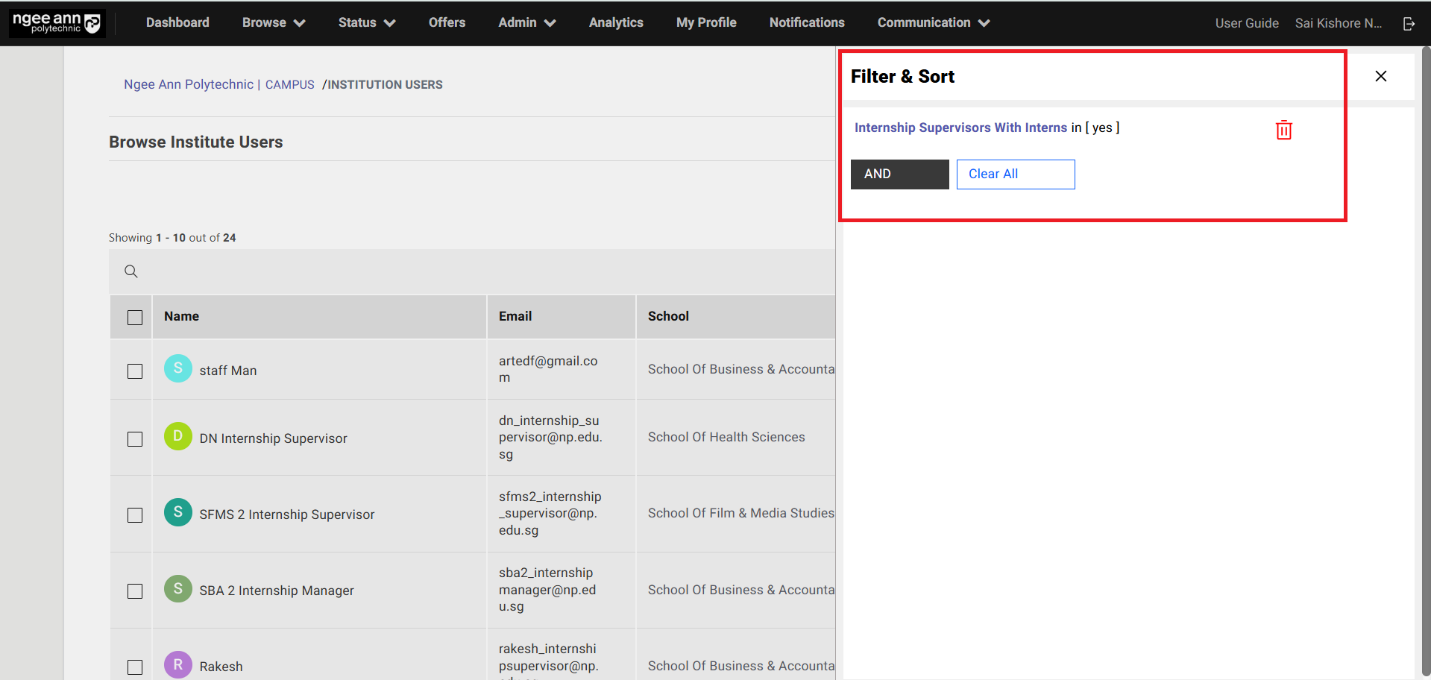
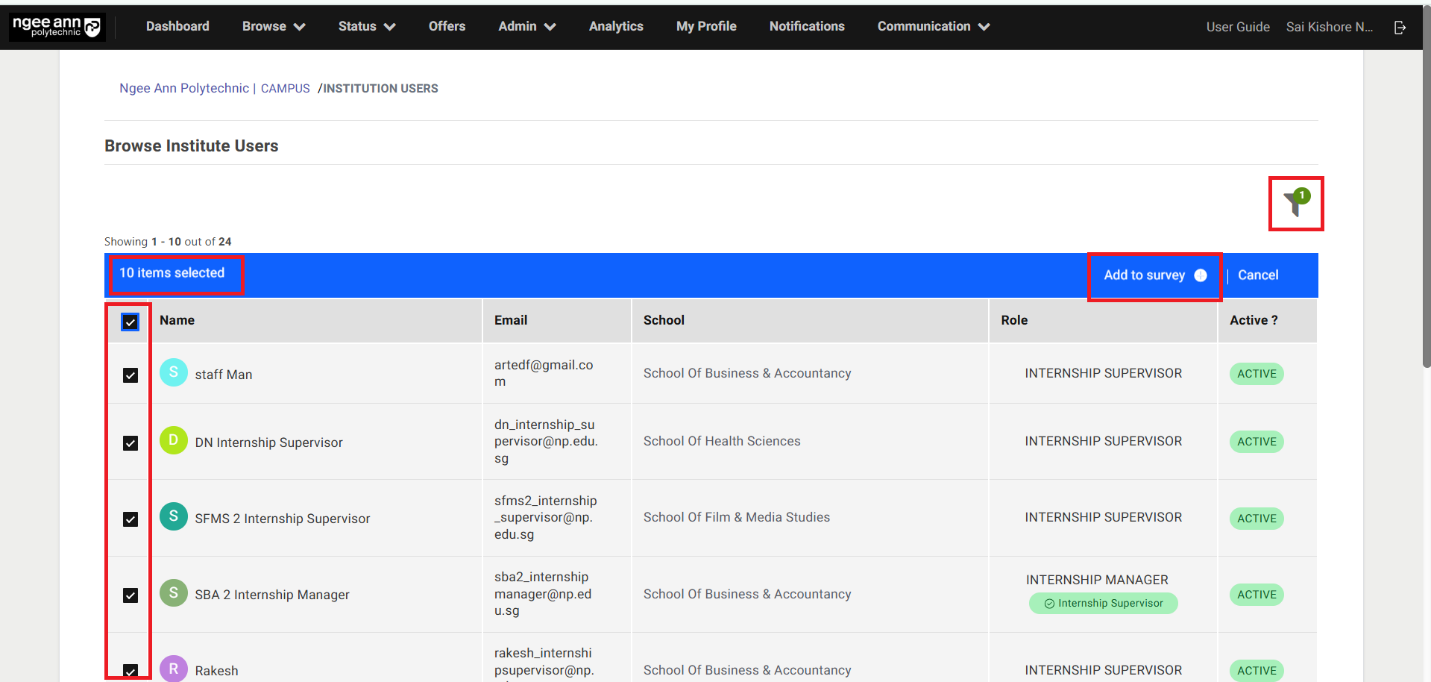
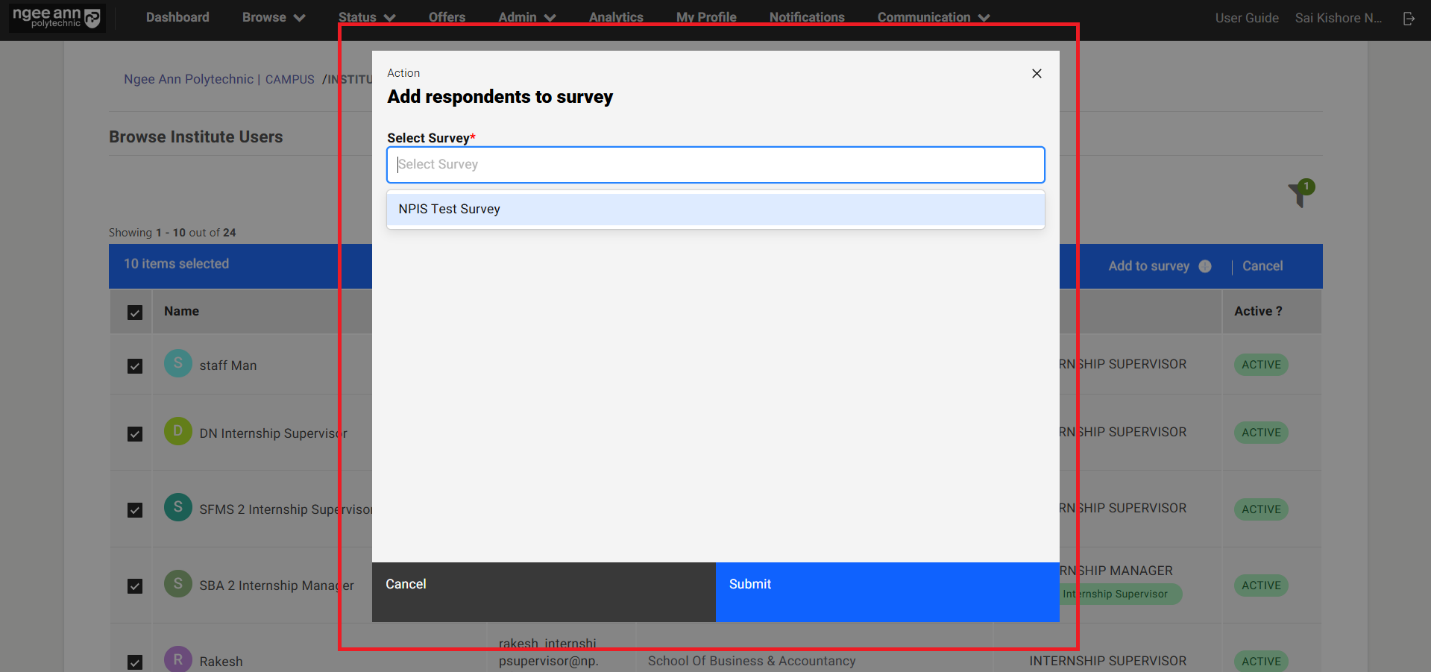

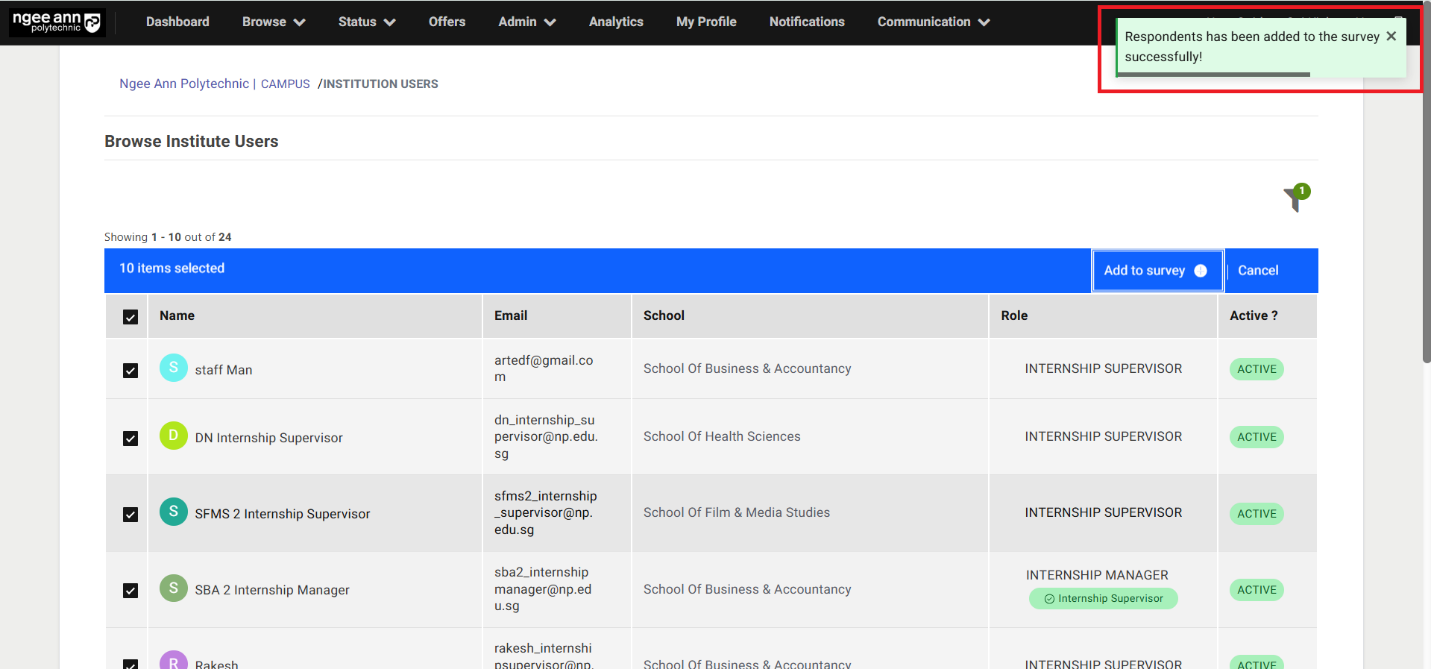
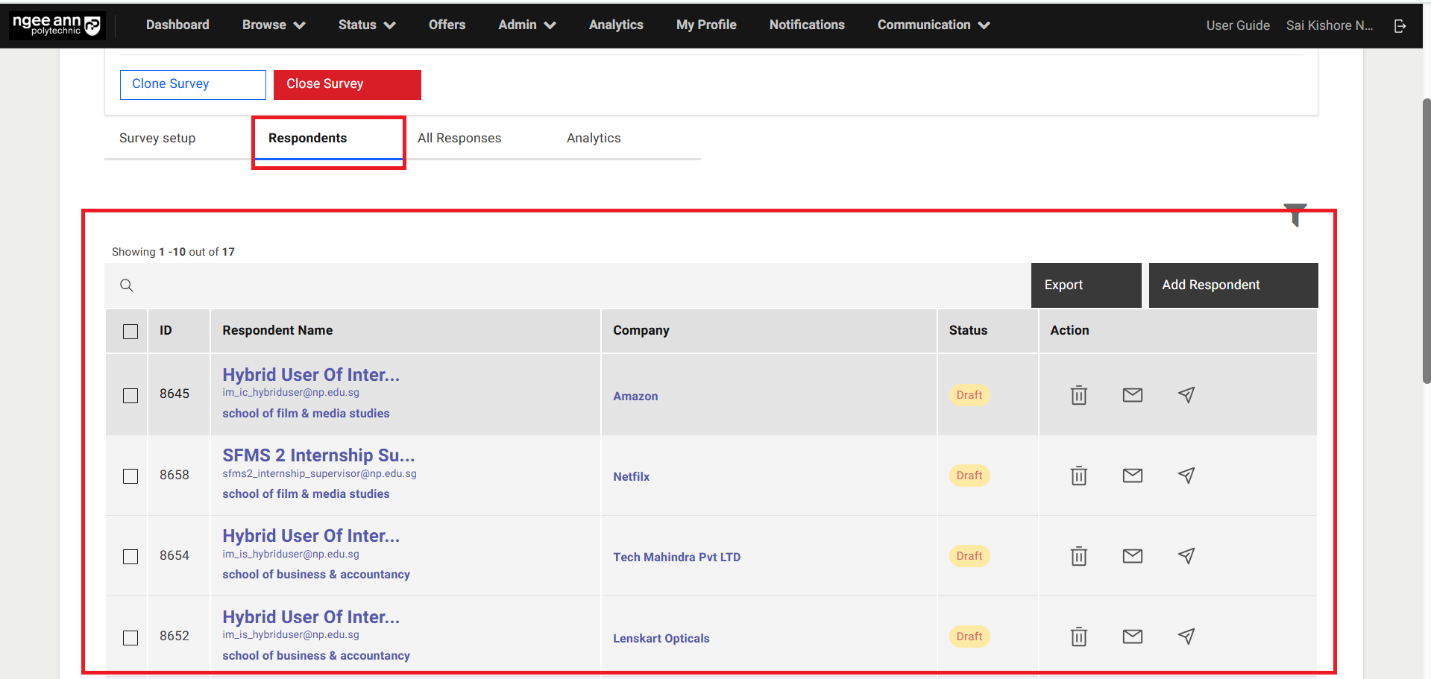
- Add respondents to the "NPIS Post Internship Evaluation" in bulk
- Add Respondents to survey in bulk from Institution Users page:
- Click on the "Add all X number students to survey" button above the table
- "Add respondents to survey" popup get open with "Select Survey" dropdown fields in the popup
- See list of the published surveys of respective survey type will be shown when in the dropdown fields as options
- Select the published survey from the dropdown field
- Click on the "Submit" button from the popup
- Make sure successes message banner will be shown and respondents will be added to the survey correctly.
- Added respondents will be shown in the "Respondents" table under "Survey Setup" section tab in the "Survey Setup" page
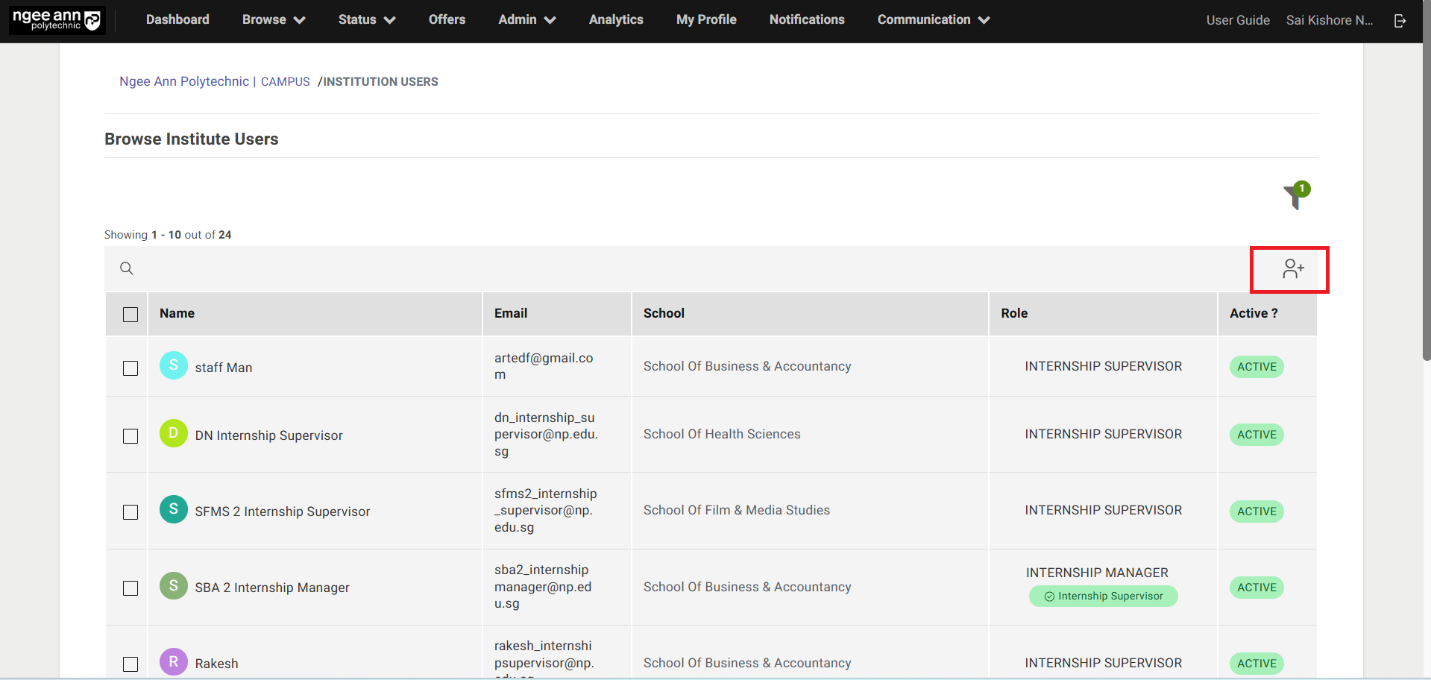
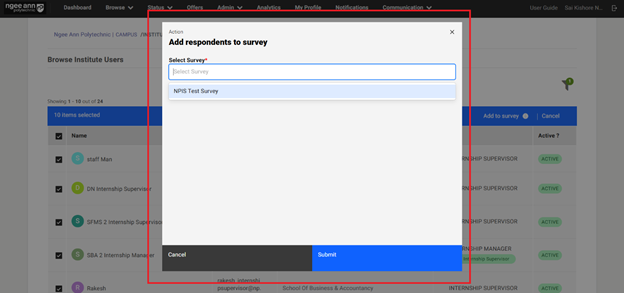
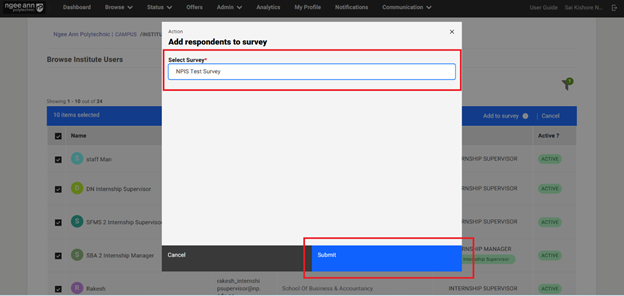
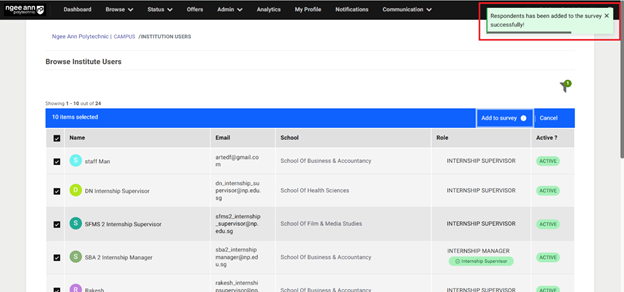
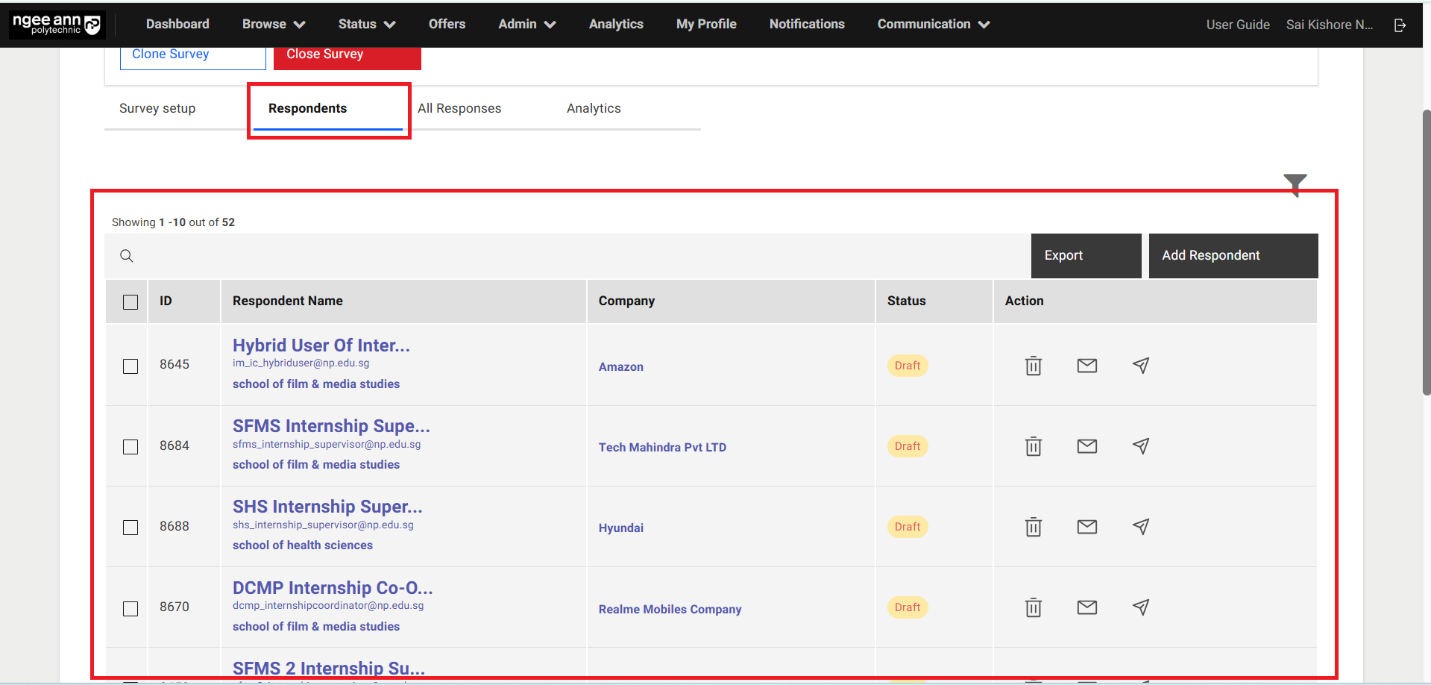
Step 4:
Note:
- Users can only add "Company Supervisor" users (who are tagged with hired interns) as respondents to the "Employer Post Internship Survey" survey. If they attempt to add other users, a validation error message will be displayed.
- The system automatically applies the default filter "Company Supervisors with interns: Yes" when adding respondents to this survey type.
- Add Respondents to the "Employer Post Internship Survey" type survey.
- Add Respondents by selecting from the table:
- Select Institution Users (Respondents) from the table
- Make sure "X items Selected" string with "Add to Survey" list option button will be displayed above the table
- "Add respondents to survey" popup get open with "Select Survey" dropdown fields in the popup
- See list of the published surveys of respective survey type will be shown when in the dropdown fields as options
- Select the published survey from the dropdown field
- Click on the "Submit" button from the popup
- Make sure successes message banner will be shown and respondents will be added to the survey correctly.
- Added respondents will be shown in the "Respondents" table under "Survey Setup" section tab in the "Survey Setup" page
Note:
- If a company supervisor is associated with multiple hired interns, each intern will appear as a separate entry in the survey's "Respondents" table.
- Company Name, Profile ID, Job Name, and School Name are clickable links that redirect to their respective pages with filtered data.
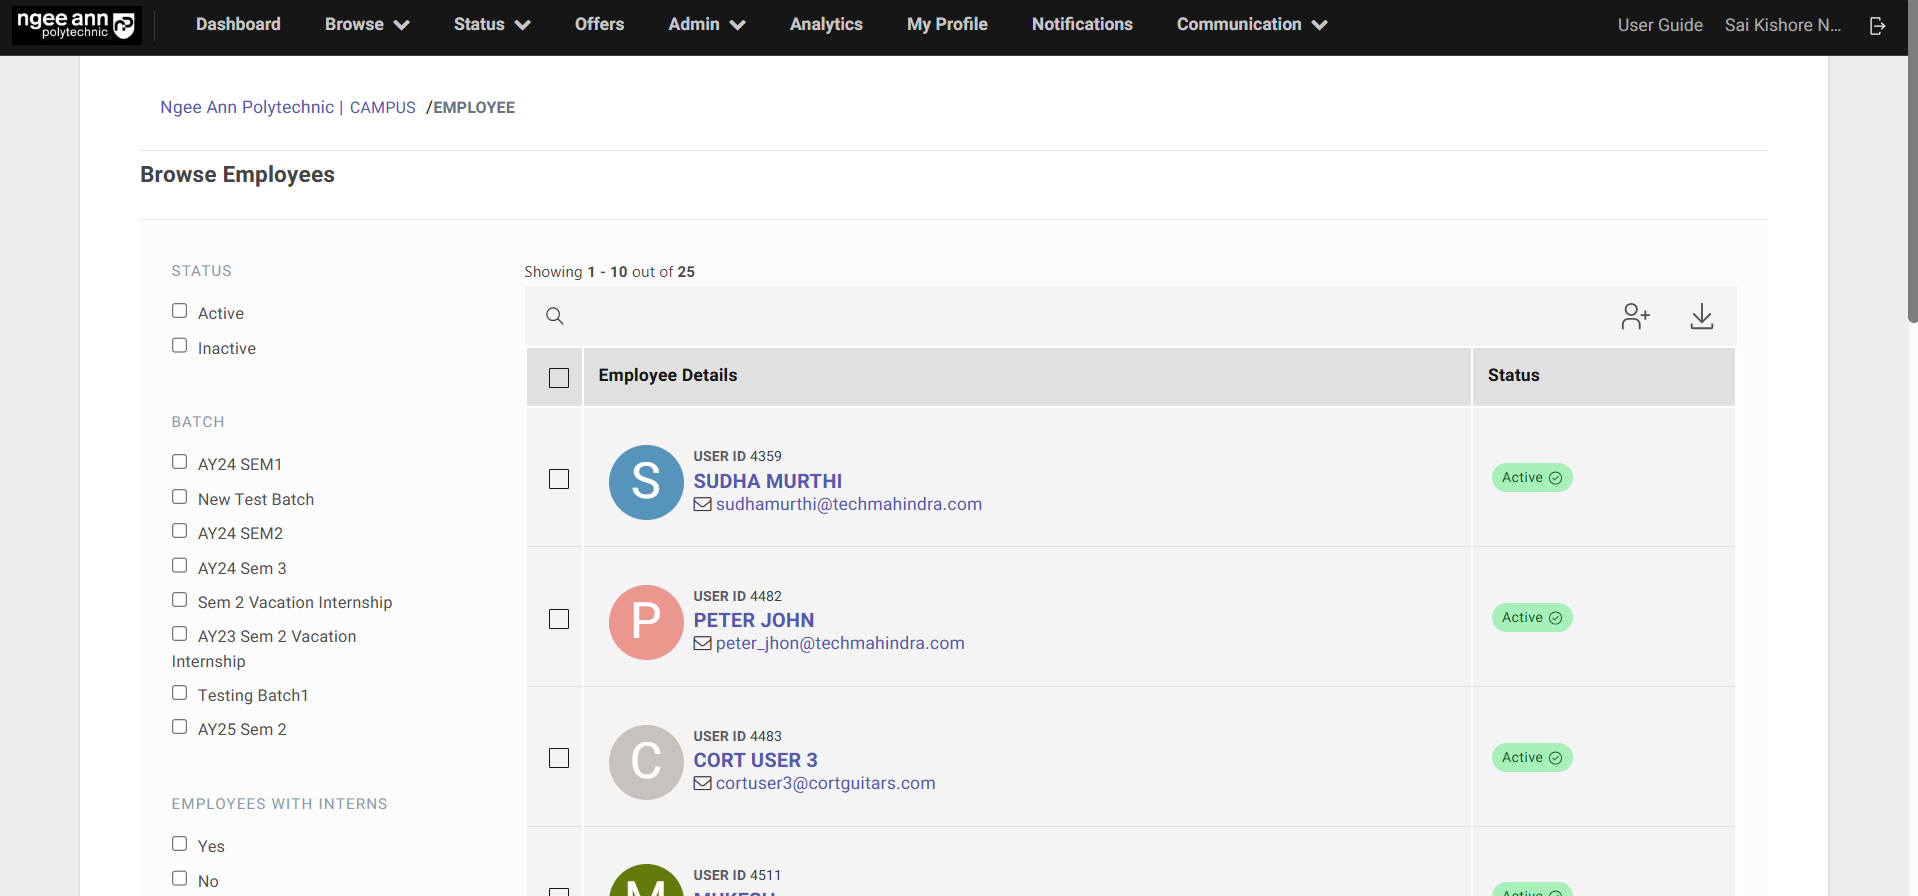
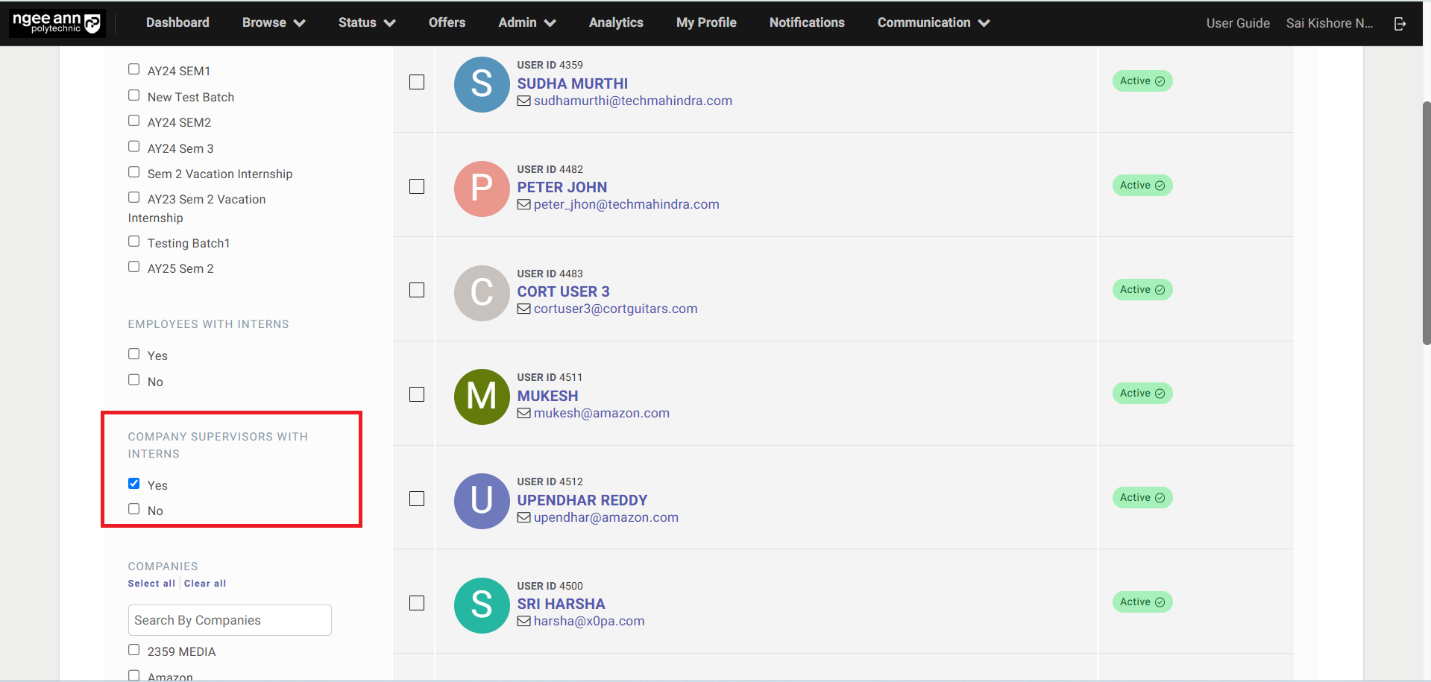
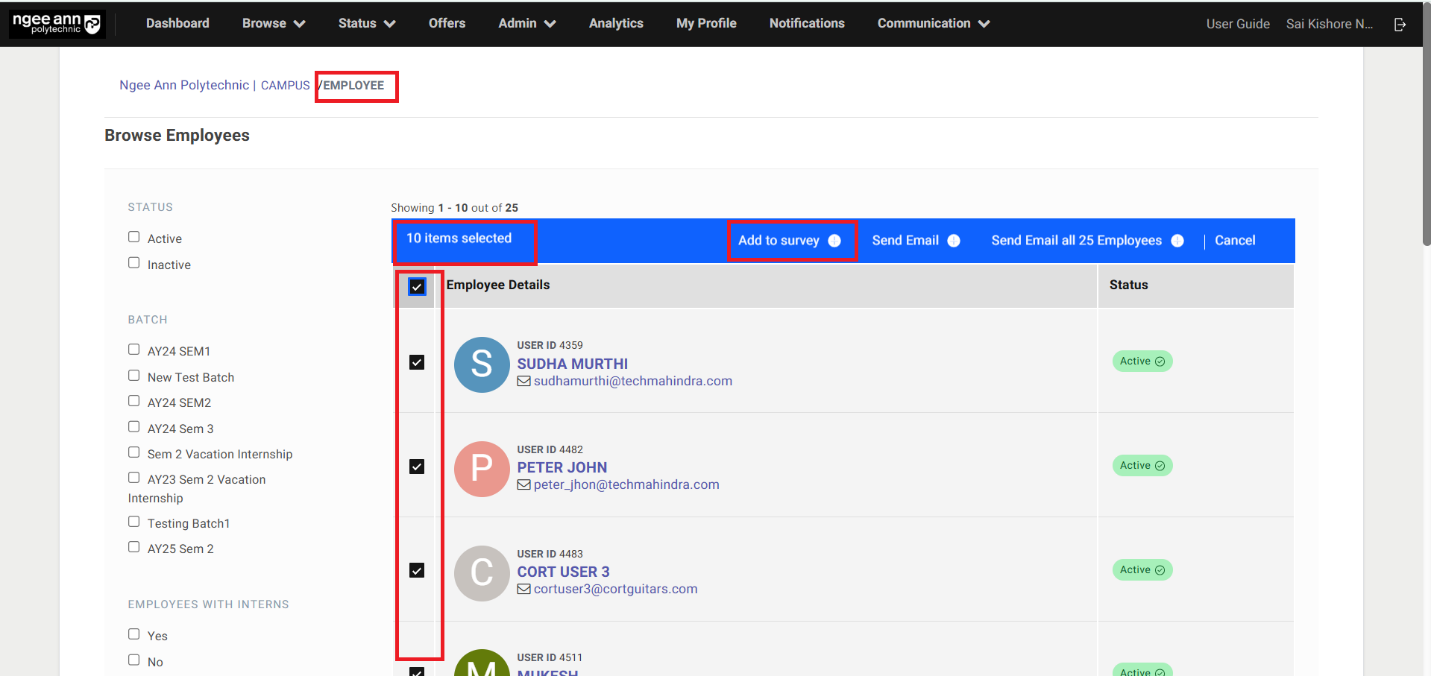


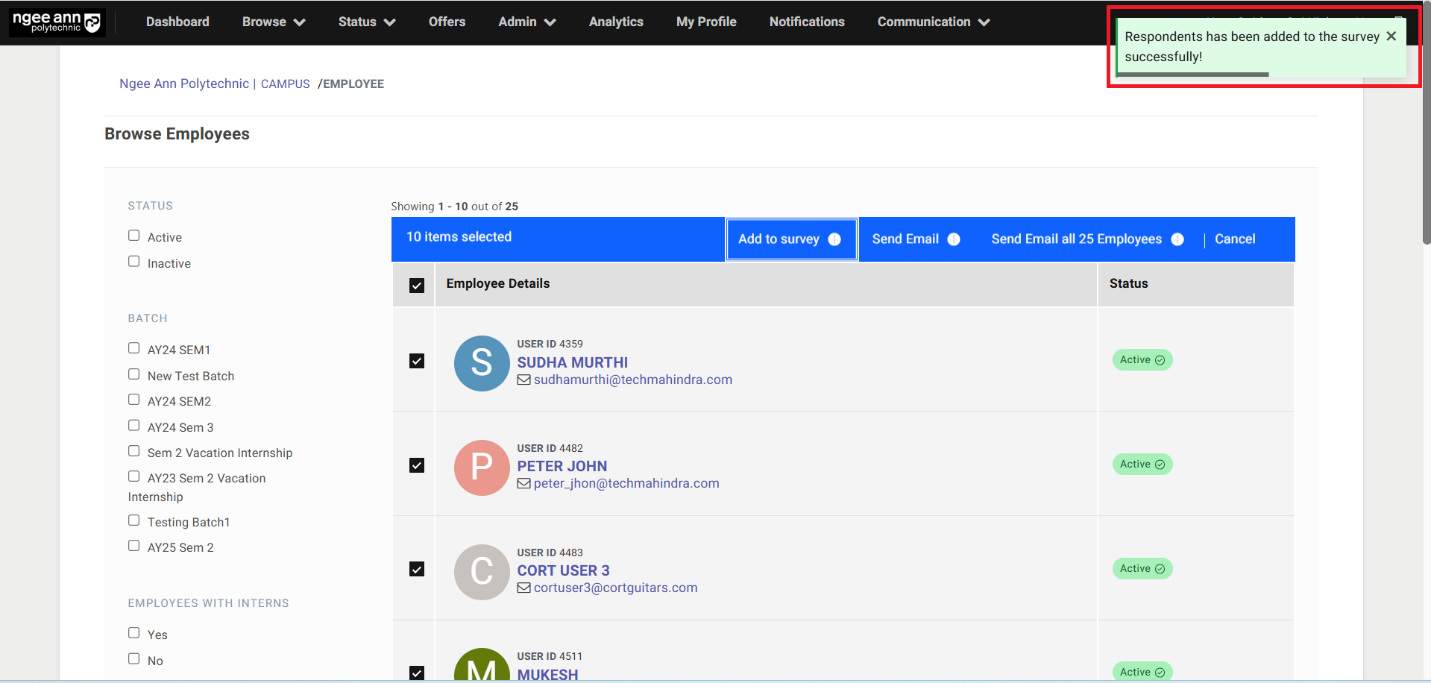
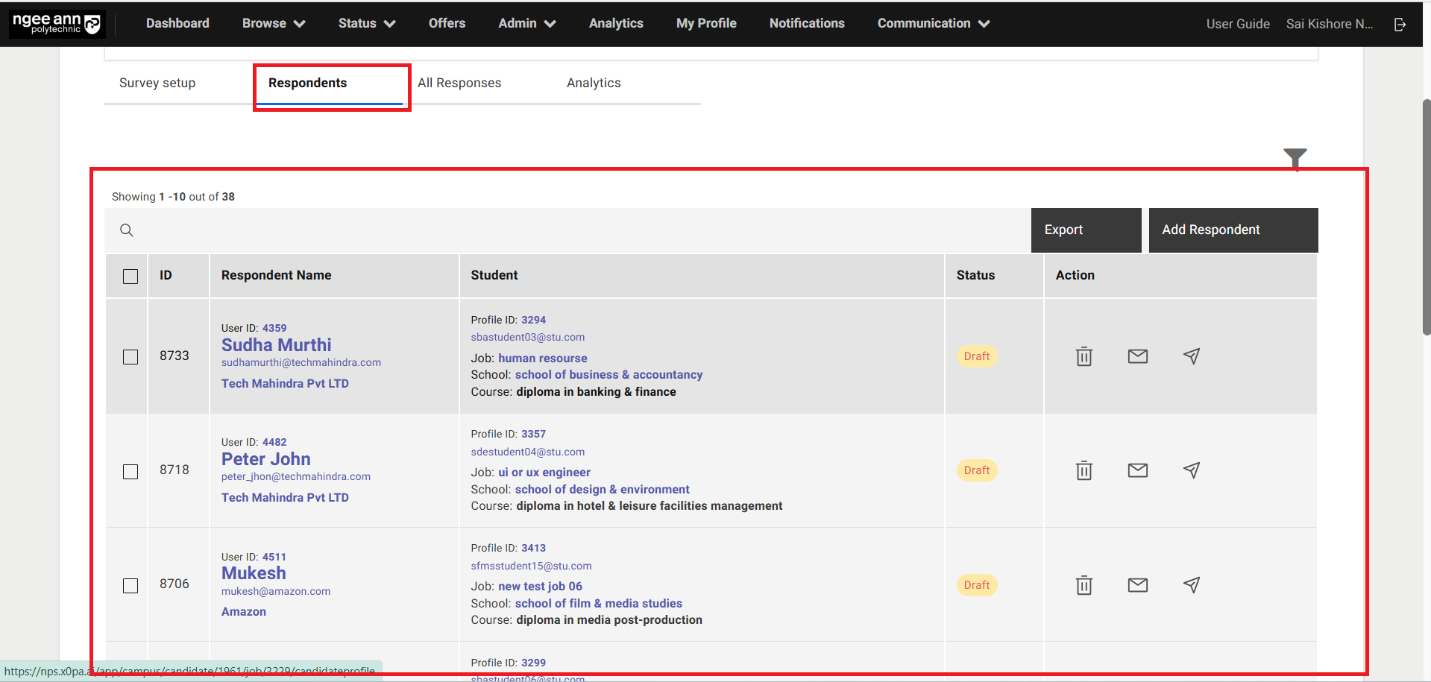
- Add respondents to the "Employer Post Internship Survey" in bulk
- Add Respondents to survey in bulk from Employee page:
- Click on the "Add all X number students to survey" button above the table
- "Add respondents to survey" popup get open with "Select Survey" dropdown fields in the popup
- See list of the published surveys of respective survey type will be shown when in the dropdown fields as options
- Select the published survey from the dropdown field
- Click on the "Submit" button from the popup
- Make sure successes message banner will be shown and respondents will be added to the survey correctly.
- Added respondents will be shown in the "Respondents" table under "Survey Setup" section tab in the "Survey Setup" page
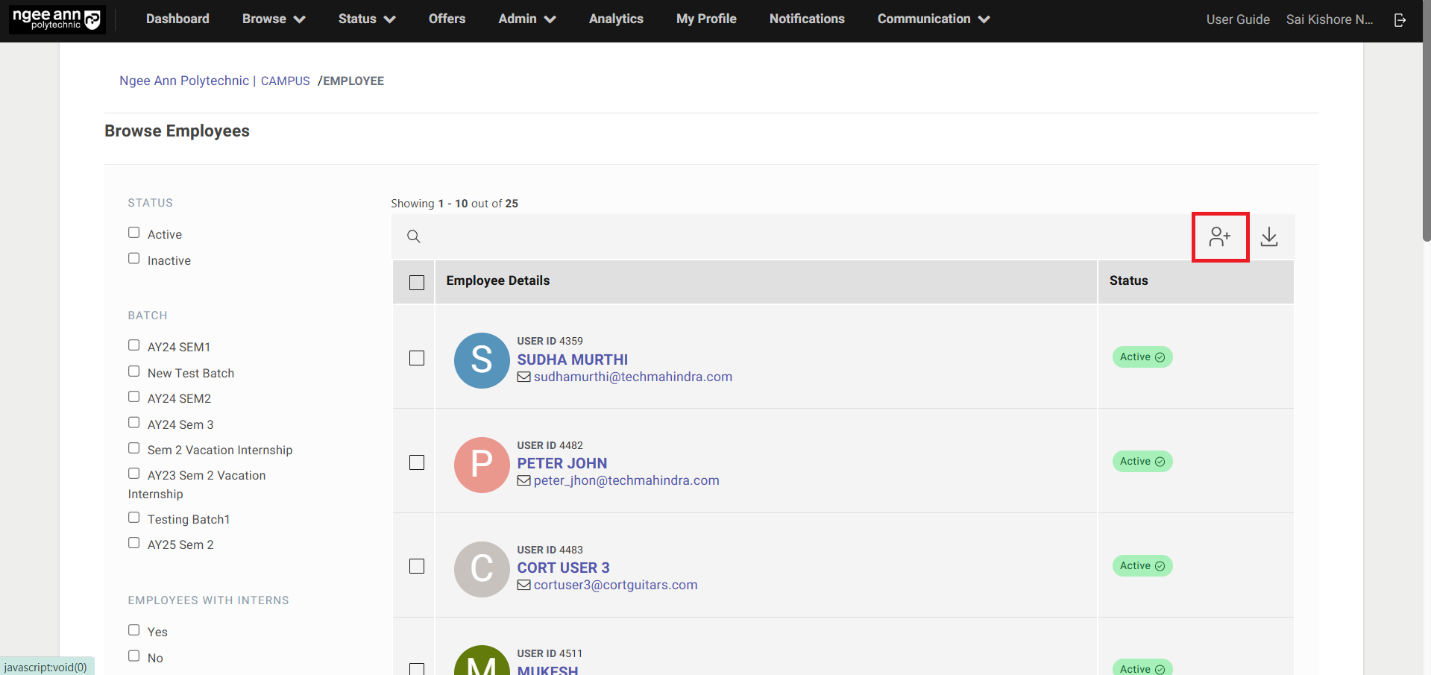

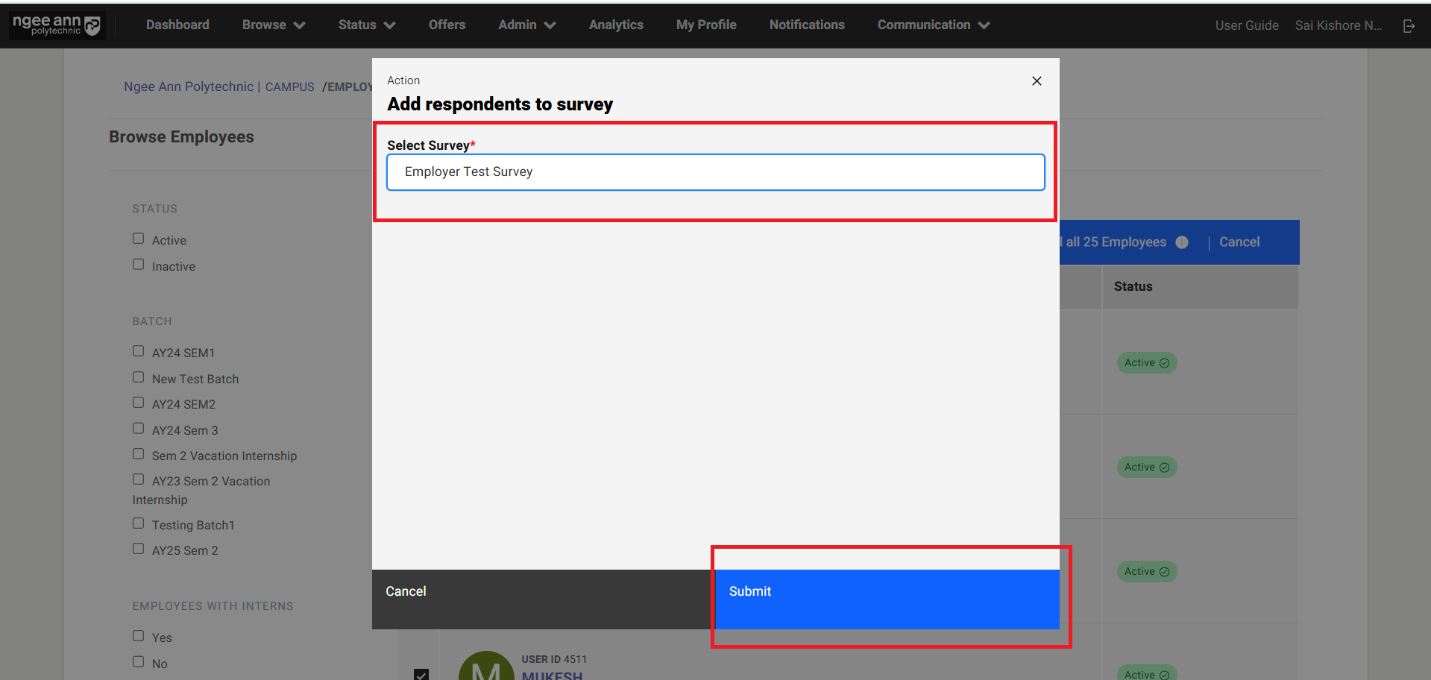


Step 5:
-
Add Respondents to the "Generic Survey" type survey.
- Add Respondents by selecting from the table:
- Select Institution/Company Users (Respondents) from the table
- Make sure "X items Selected" string with "Add to Survey" list option button will be displayed above the table
- "Add respondents to survey" popup get open with "Select Survey" dropdown fields in the popup
- See list of the published surveys of respective survey type will be shown when in the dropdown fields as options
- Select the published survey from the dropdown field
- Click on the "Submit" button from the popup
- Make sure successes message banner will be shown and respondents will be added to the survey correctly.
- Added respondents will be shown in the "Respondents" table under "Survey Setup" section tab in the "Survey Setup" page
-
Add respondents to the "Generic Survey" in bulk
- Add Respondents to survey in bulk from Institution Users/Employee page:
- Click on the "Add all X number students to survey" button above the table
- "Add respondents to survey" popup get open with "Select Survey" dropdown fields in the popup
- See list of the published surveys of respective survey type will be shown when in the dropdown fields as options
- Select the published survey from the dropdown field
- Click on the "Submit" button from the popup
- Make sure successes message banner will be shown and respondents will be added to the survey correctly.
- Added respondents will be shown in the "Respondents" table under "Survey Setup" section tab in the "Survey Setup" page
Note:
- In Generic (Institution/Company) survey user can add all users to the survey.
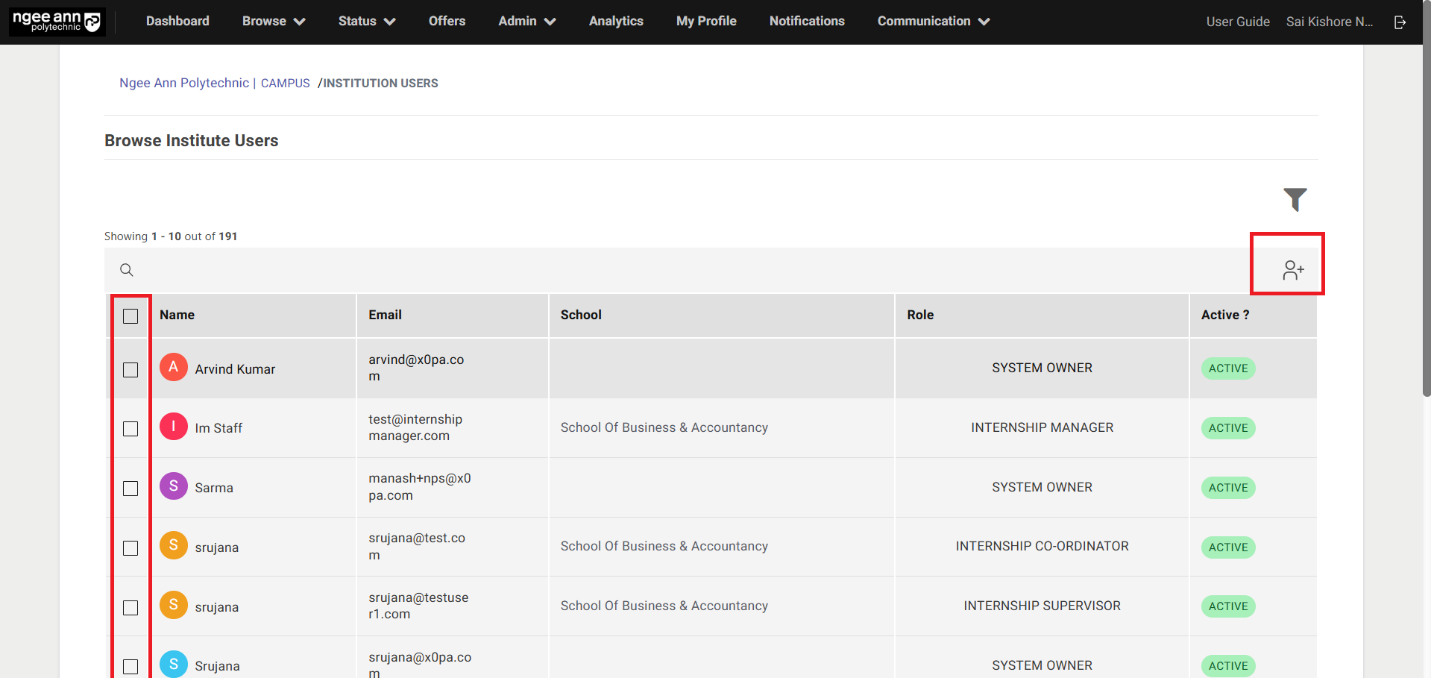
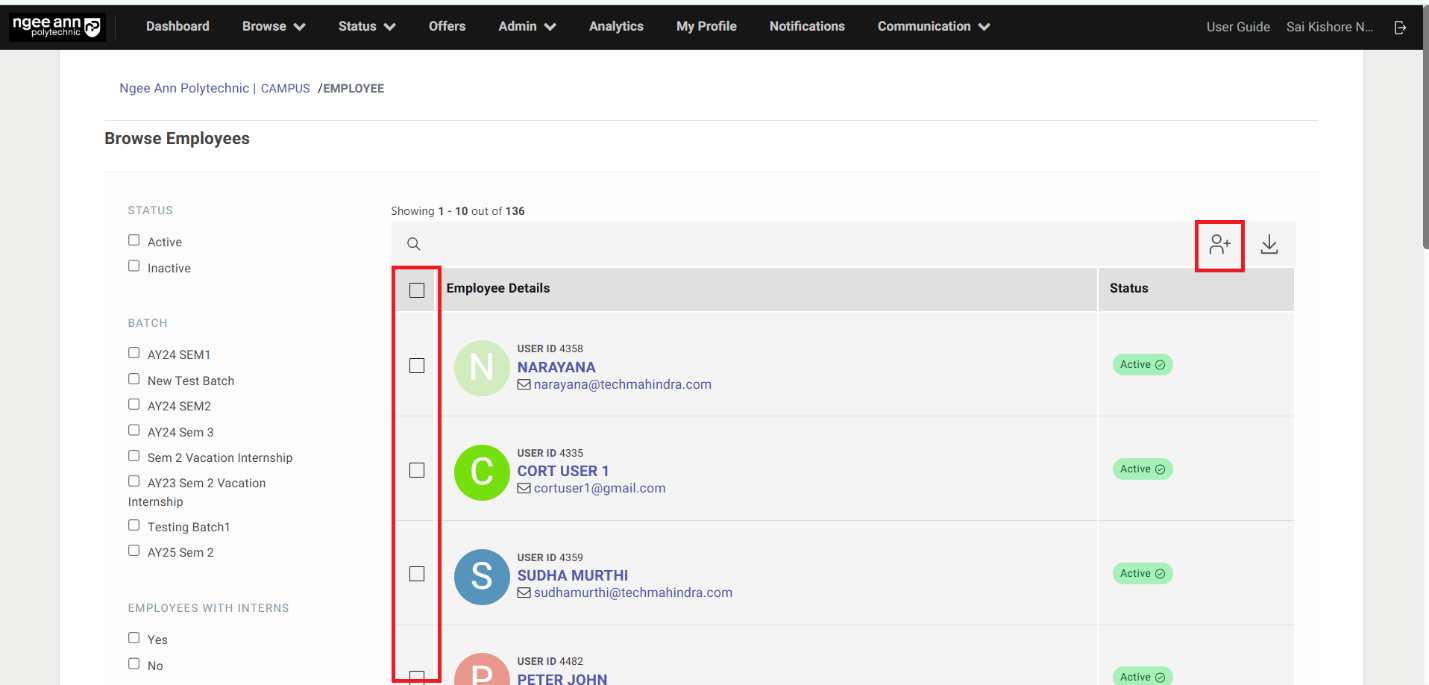
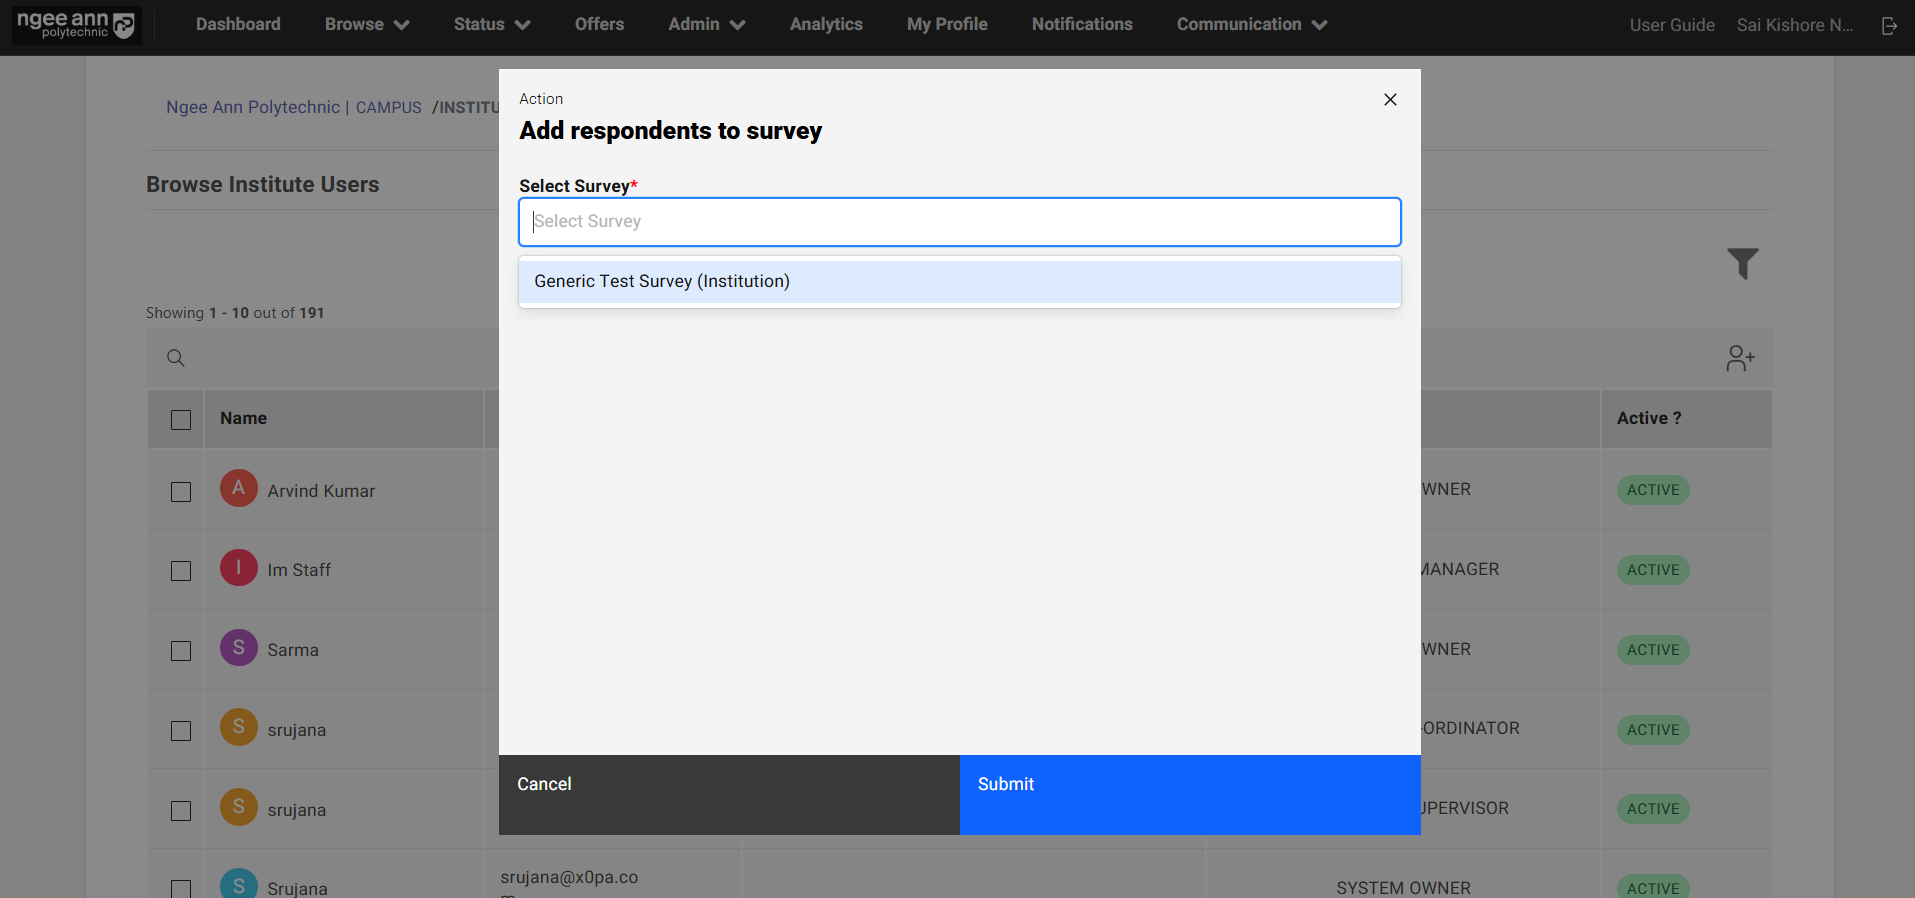
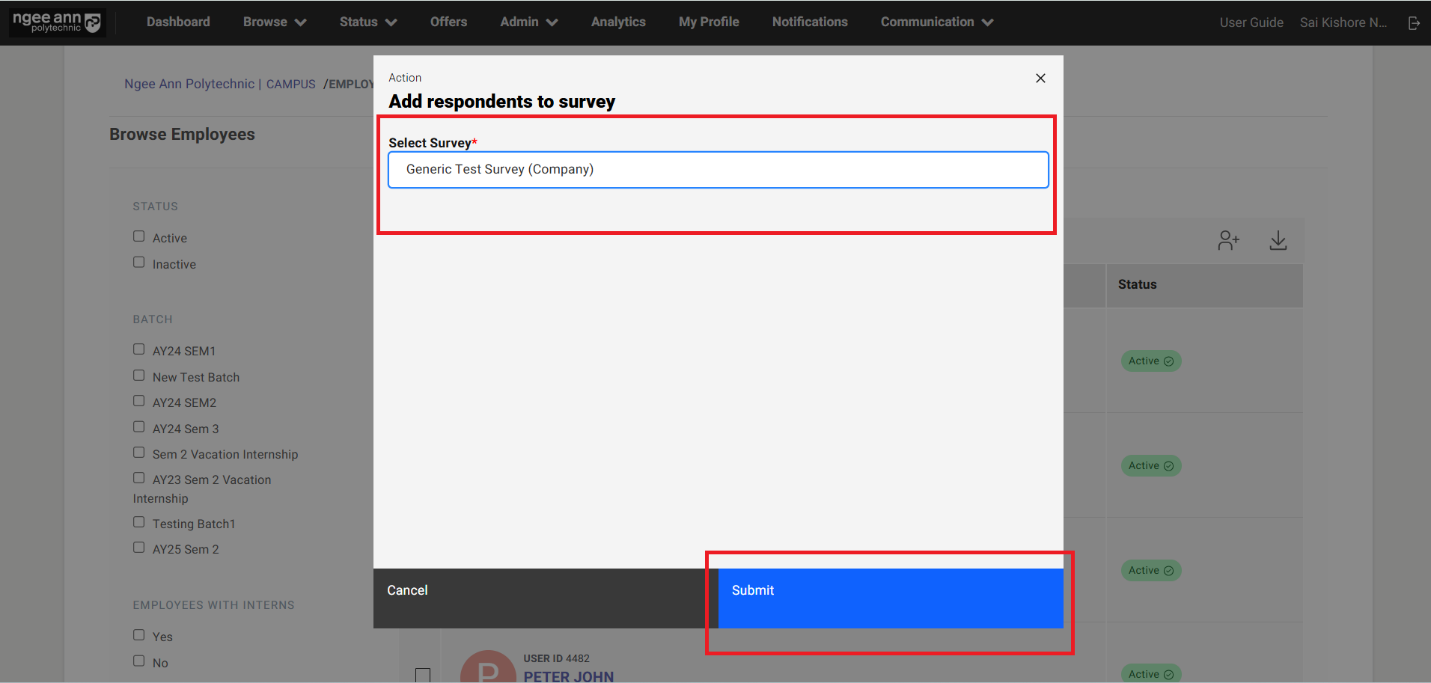
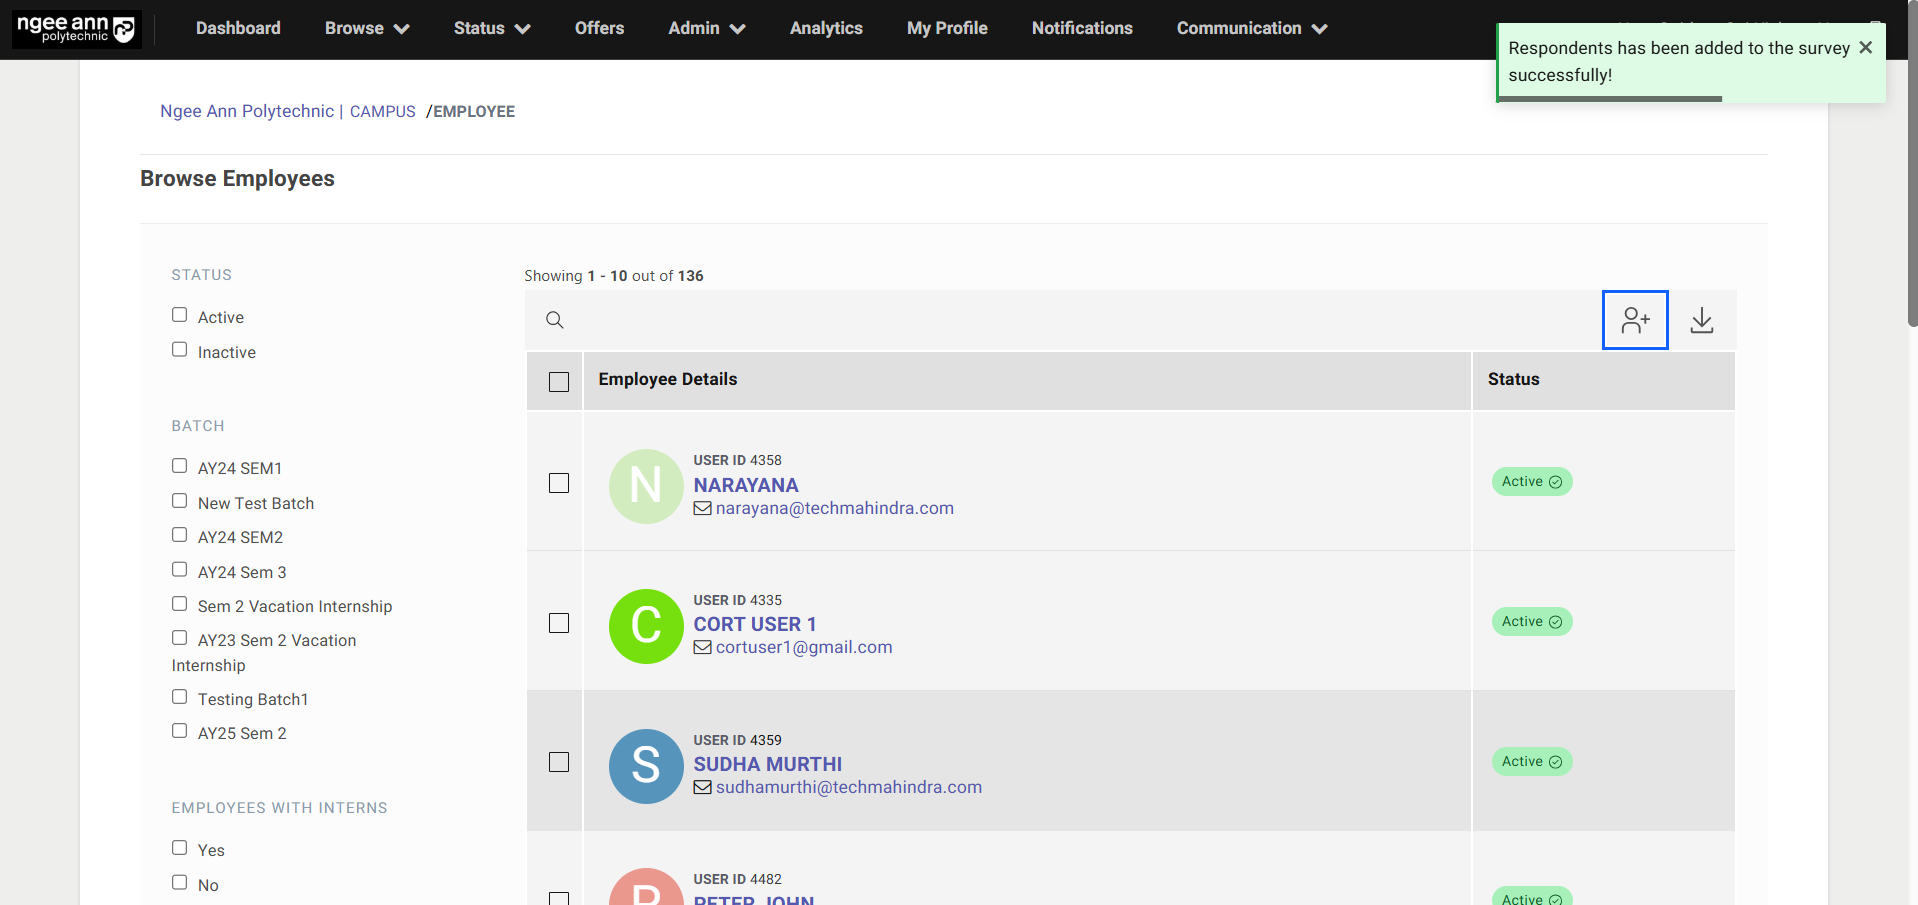

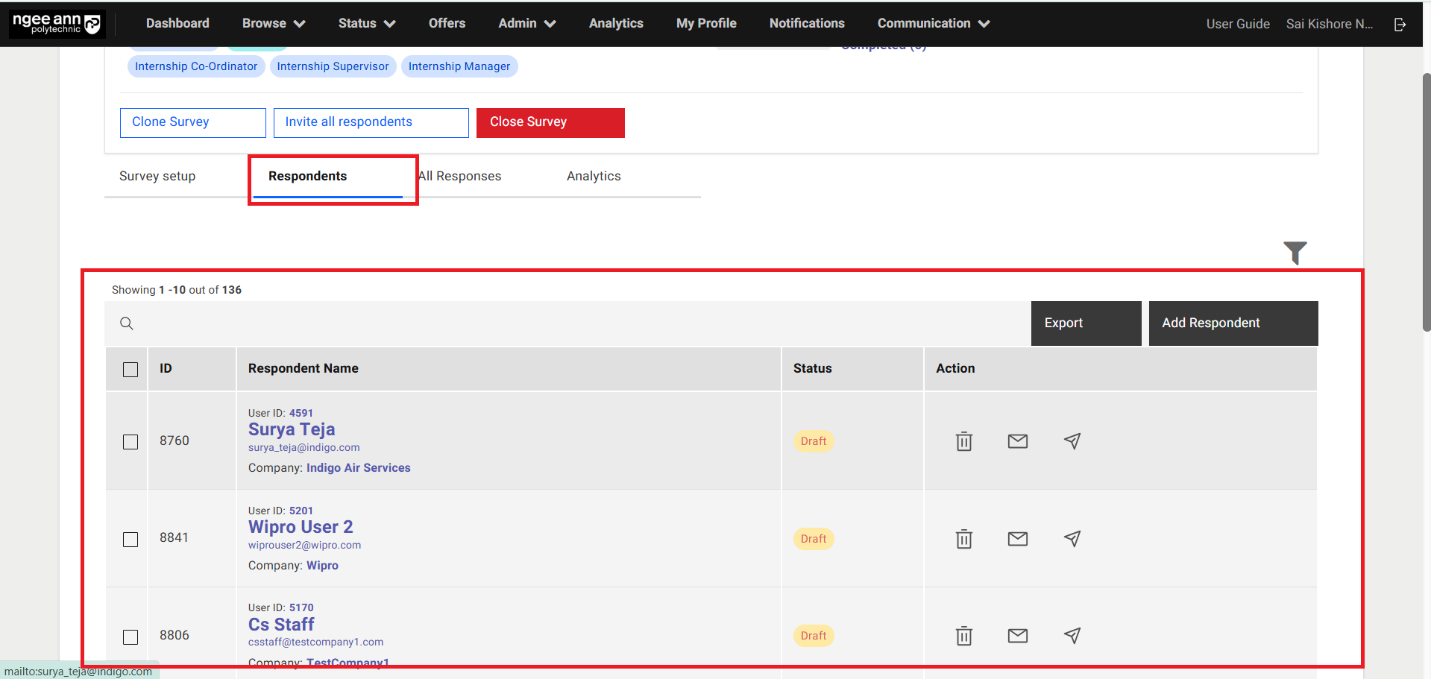
Send Invitation to Respondents:
Step 1: Send Invitation to respondents individually:
- Click on the "Send Invite" button under "Action" column in the table
- Click on the "Invite" button from "Invite Respondents" popup
- Survey invitation will be sent to respective respondent successfully and successes message banner will be shown.
Note: "Send Invite" button will not be shown under "Action" column once respondents started answering to the survey
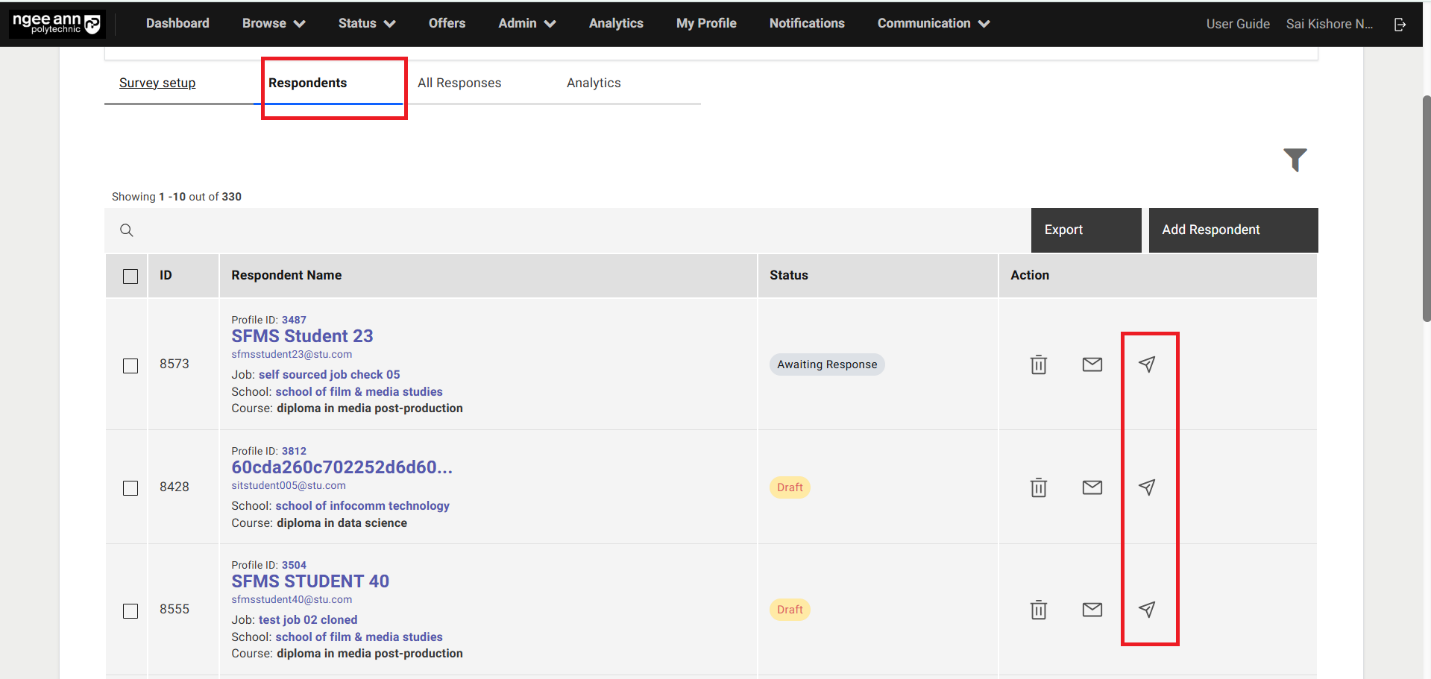
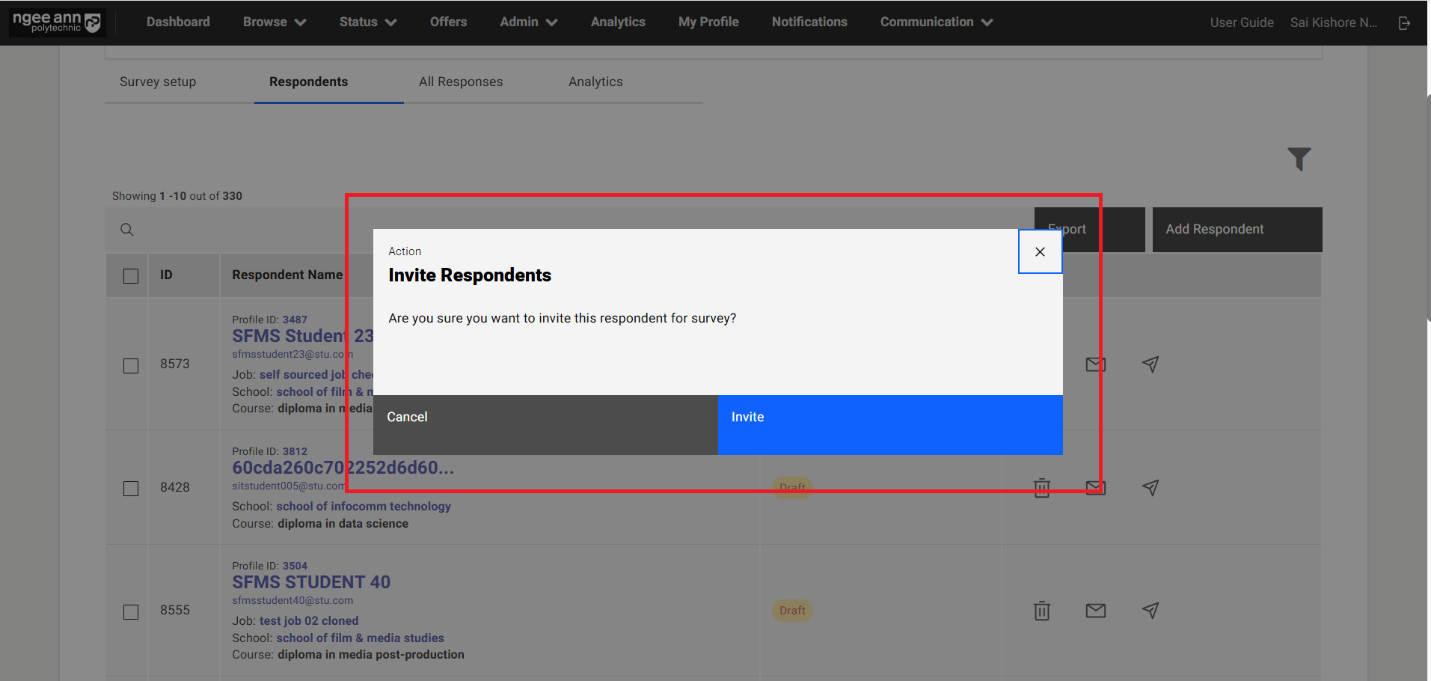
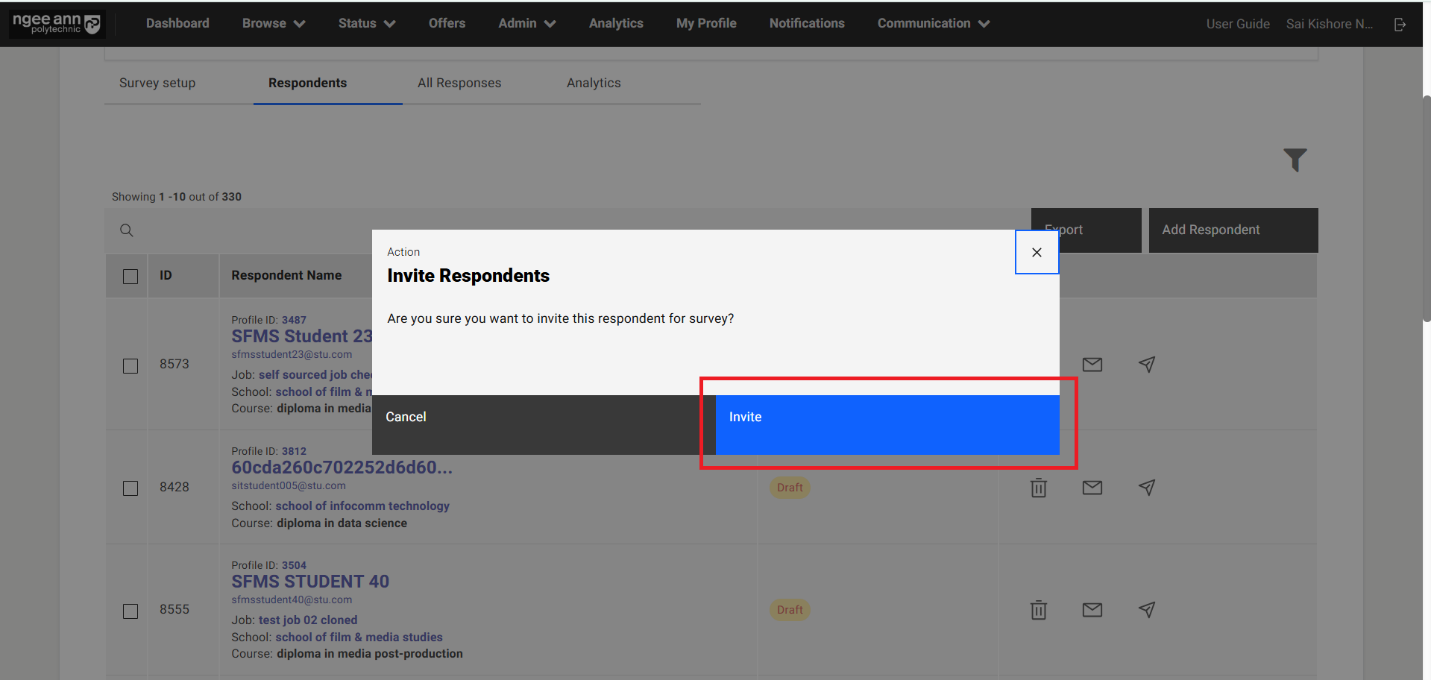
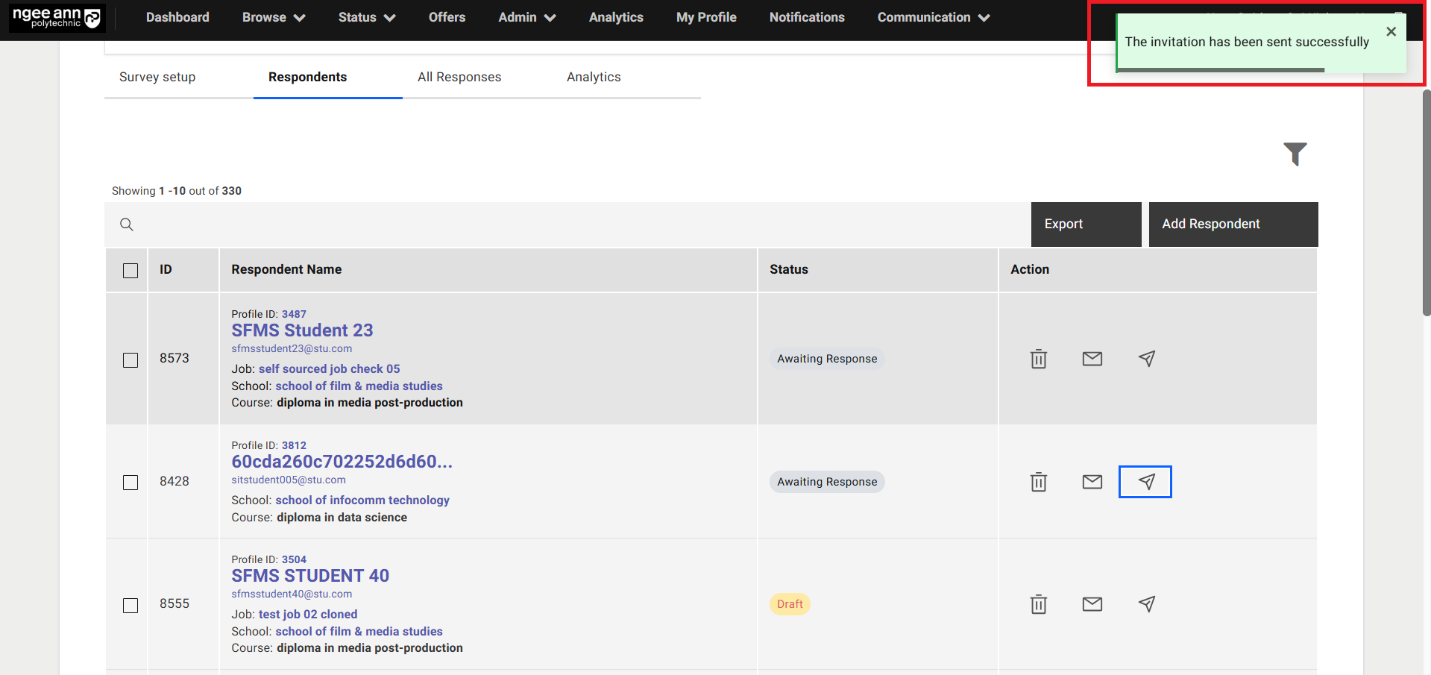
Step 2: Send Invitations to respondents in bulk:
- Select respondents from the table
- Make sure "Send Invite" button will be shown above the table
- Click on the "Invite" button from "Invite Respondents" popup
- Survey invitation will be sent to respective respondent successfully and successes message banner will be shown.
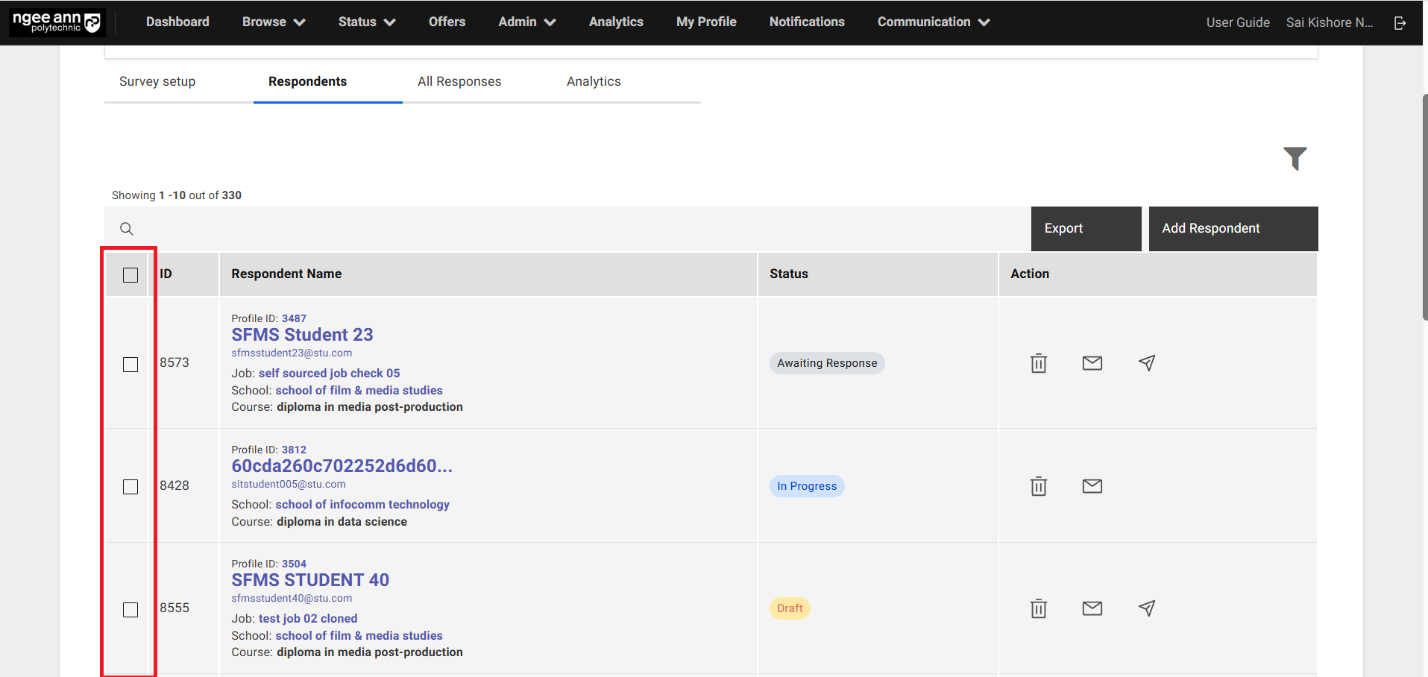
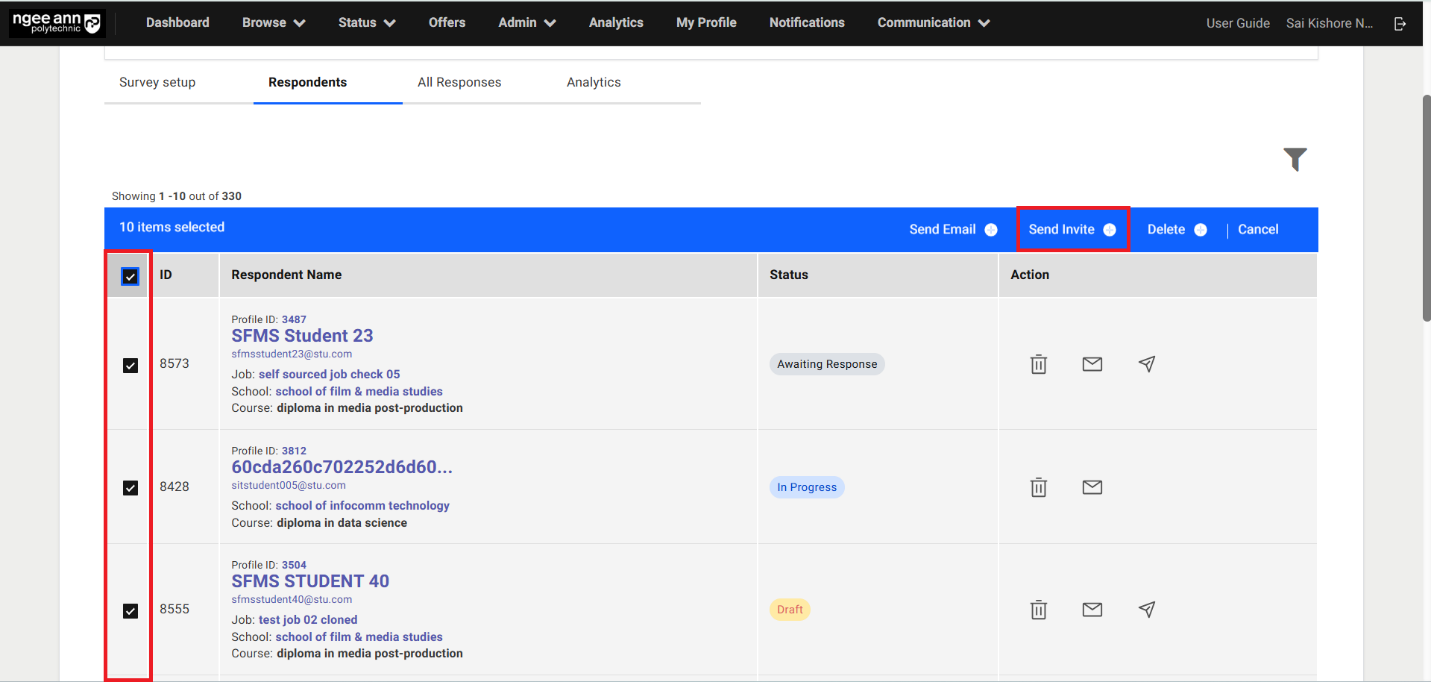
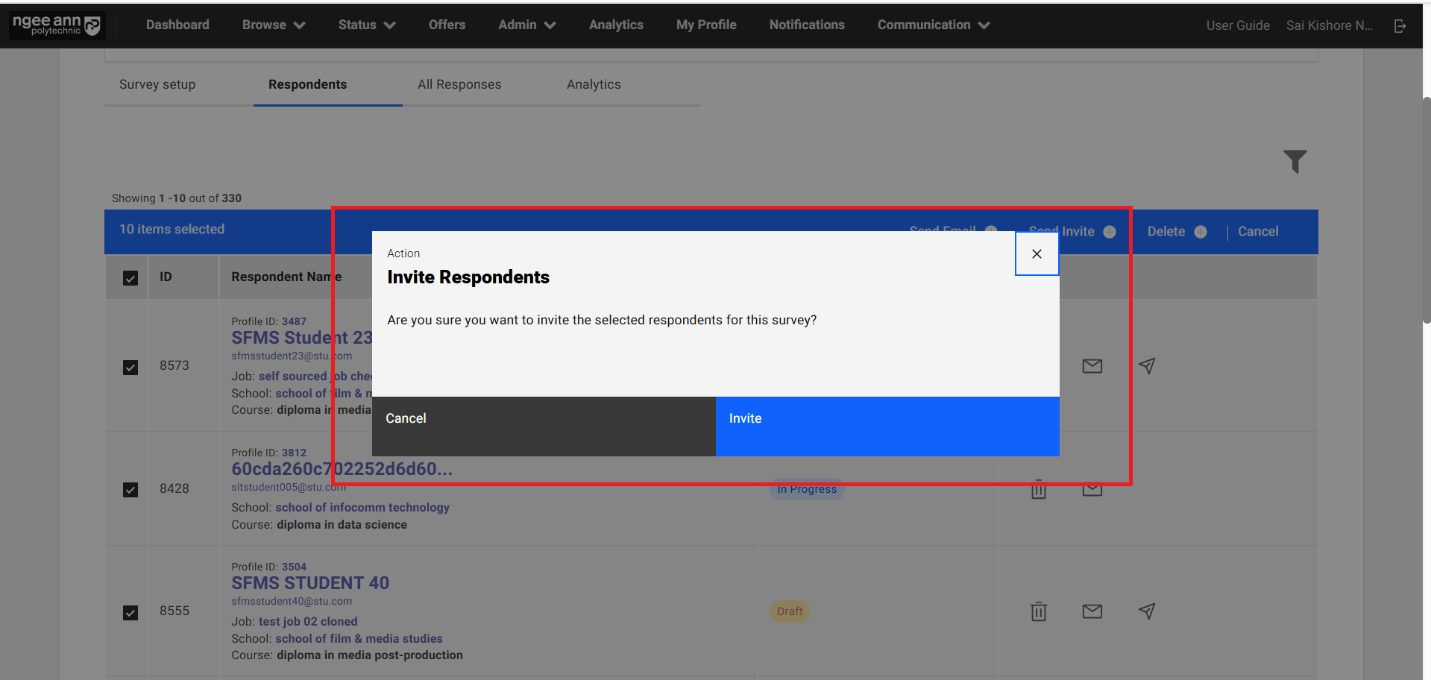
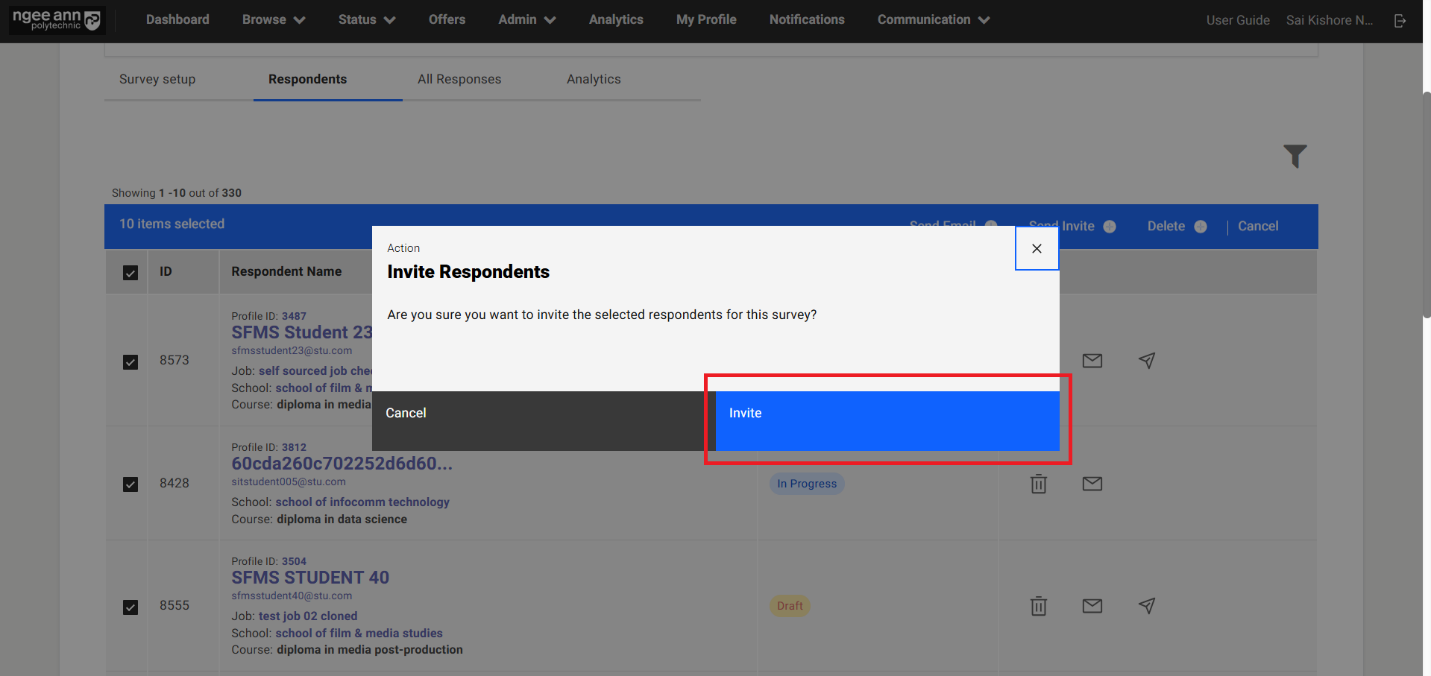
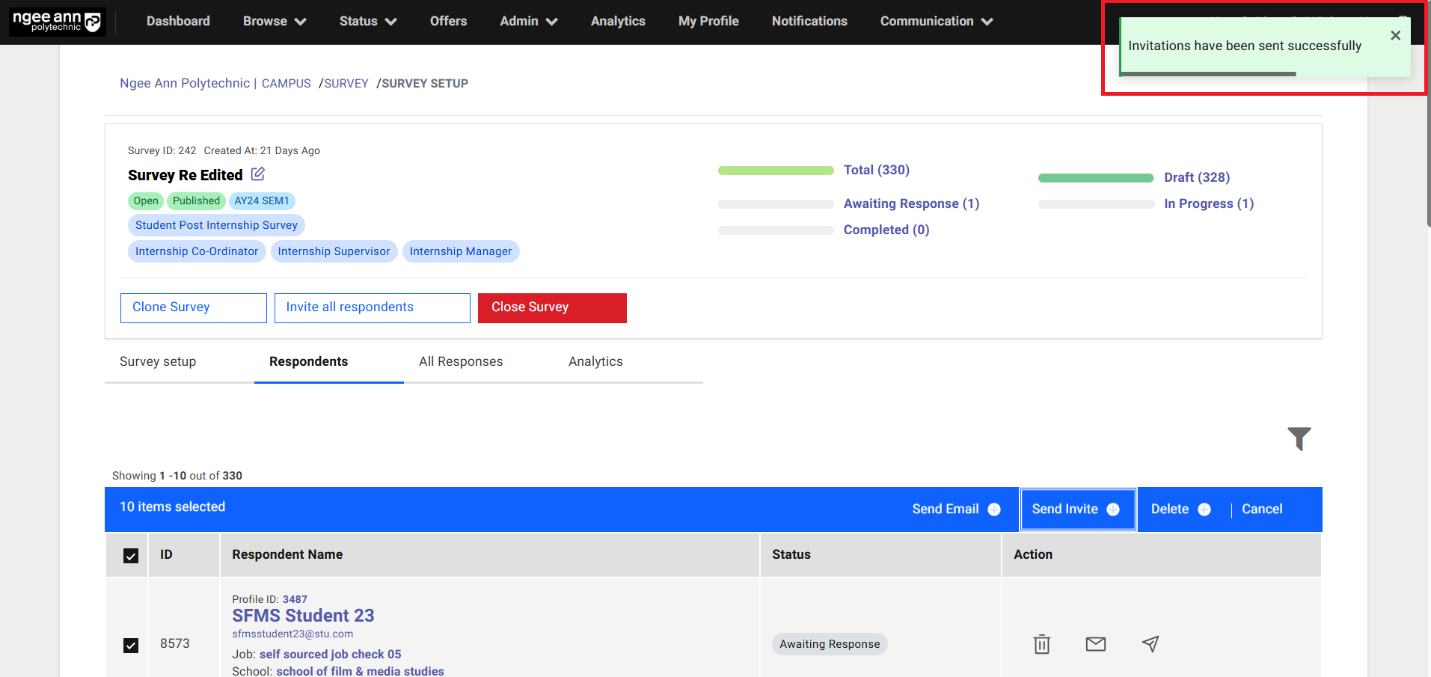
Step 3: Send Invitation to all respondent's bulk:
- Click on the "Invite all respondents" button
- Click on the "Invite" button from "Invite Respondents" popup
- Survey invitation will be sent to all respondents successfully and successes message banner will be shown.
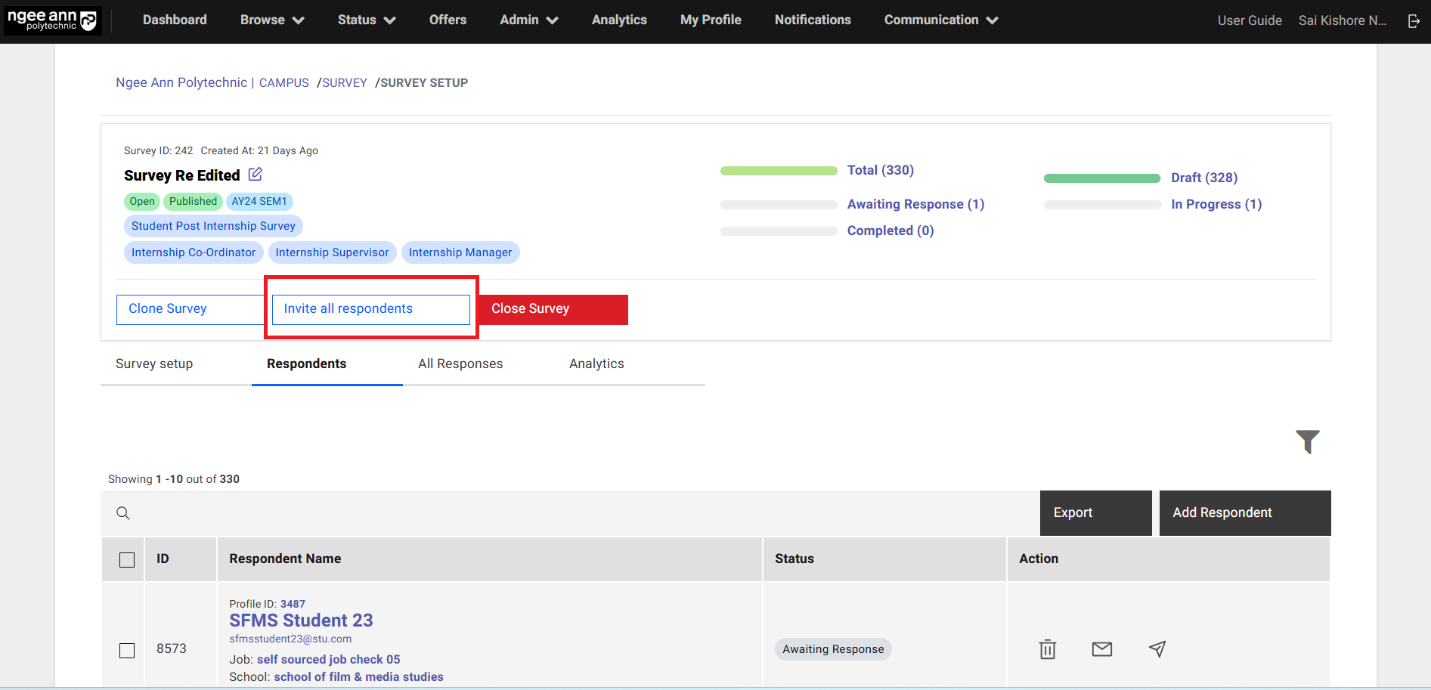

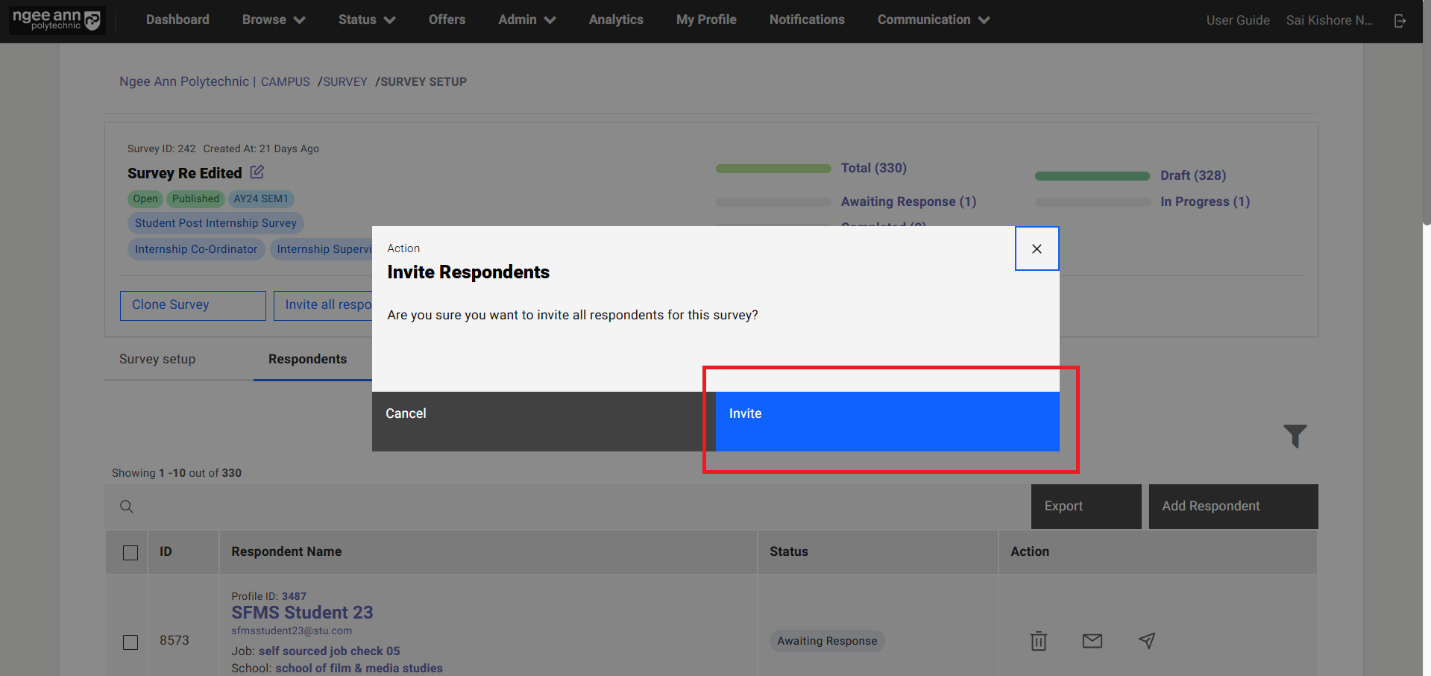
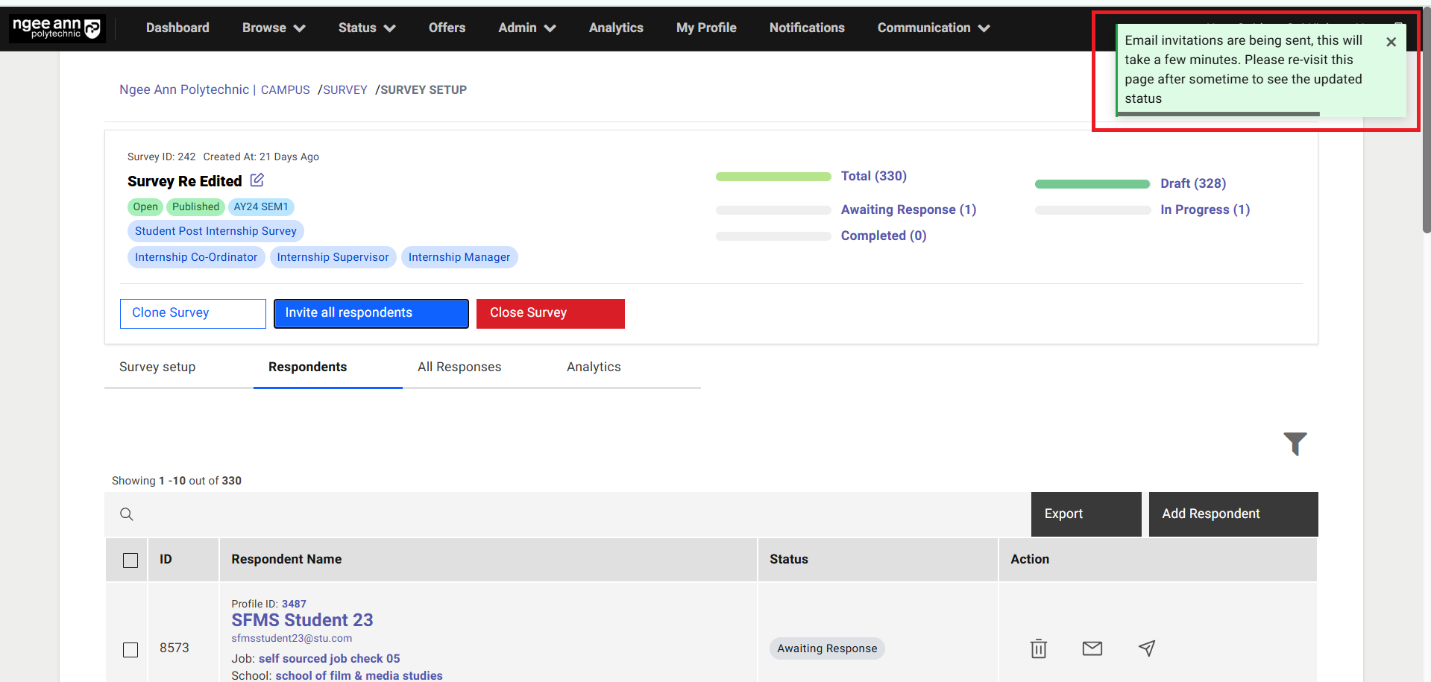
Resend Invite to Respondent:
Step 1:
- Click on the respondent's name link text button under "Respondent Name" column in the table
- Navigate to respective respondent page
- Click on the "Resend Invite" button.
- Click on the "Submit" button from the "Resent Invite to Respondent" popup
- Successes message will be shown and respective respondent will receive then survey invitation notification mail
Note: Admin can Resend invite to the respondent only when respondent status is under "Awaiting Response"
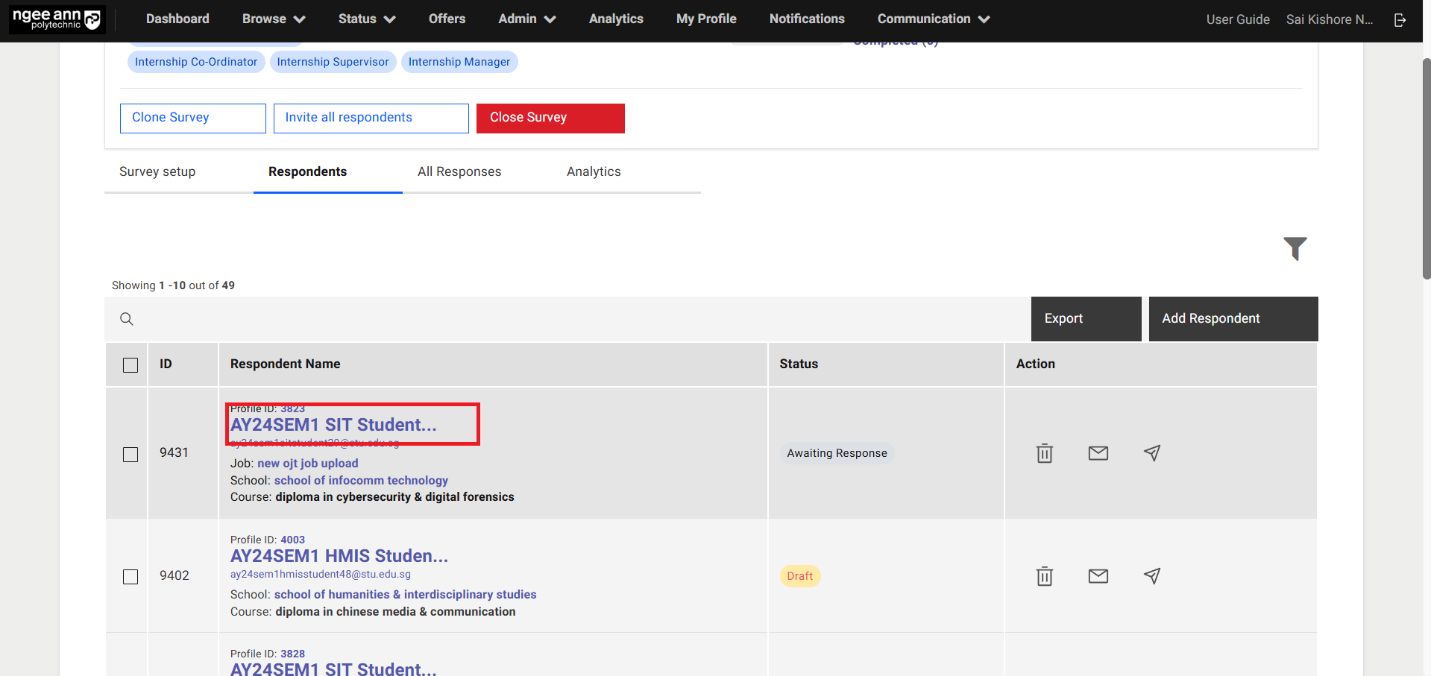
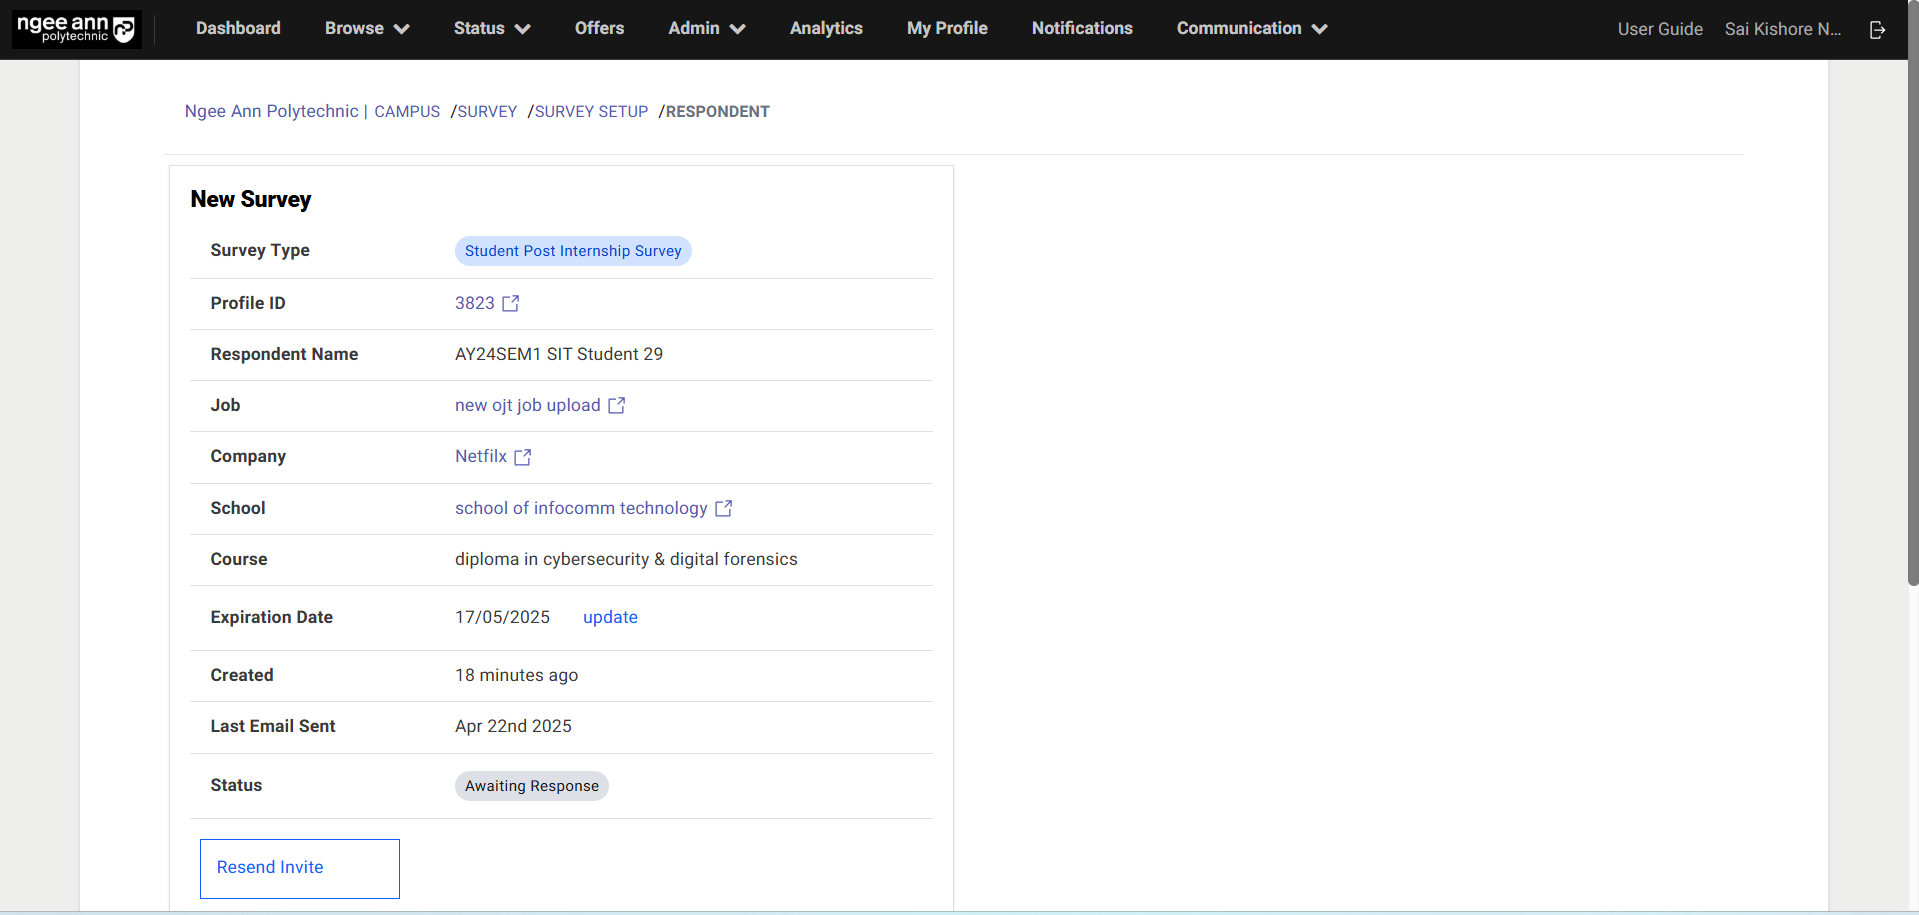
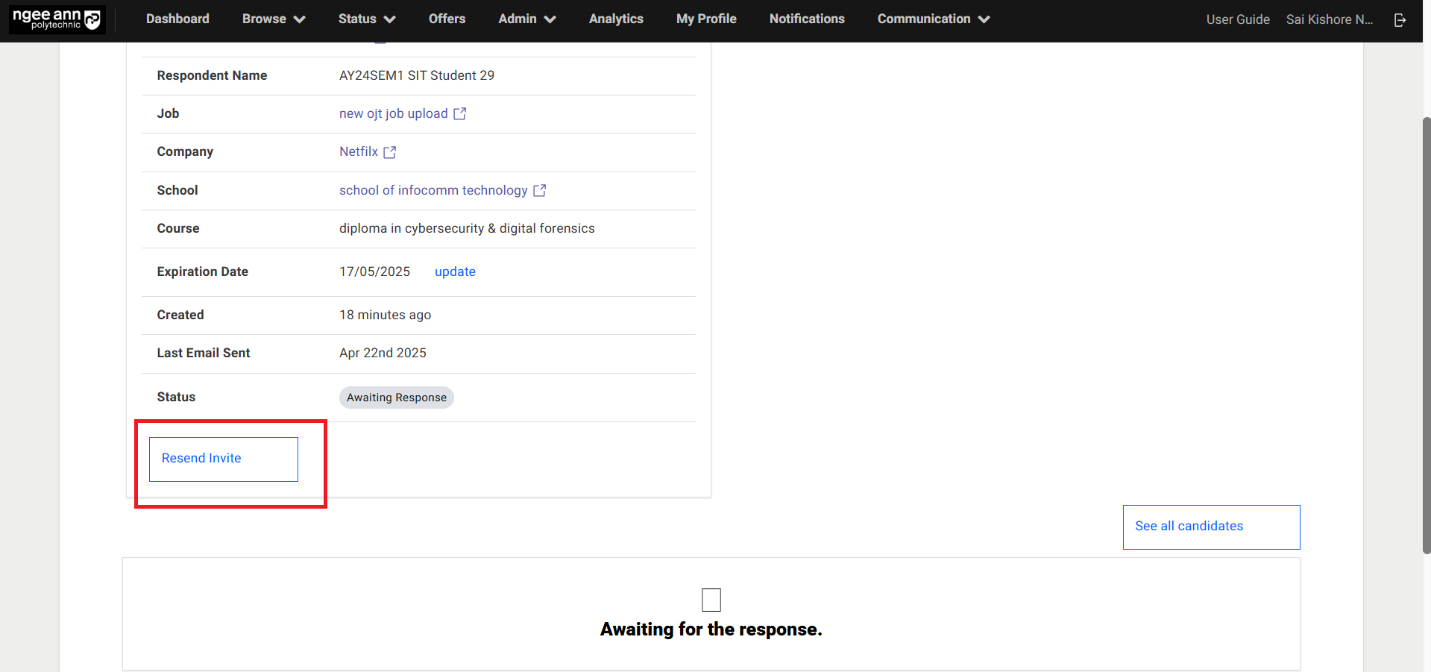
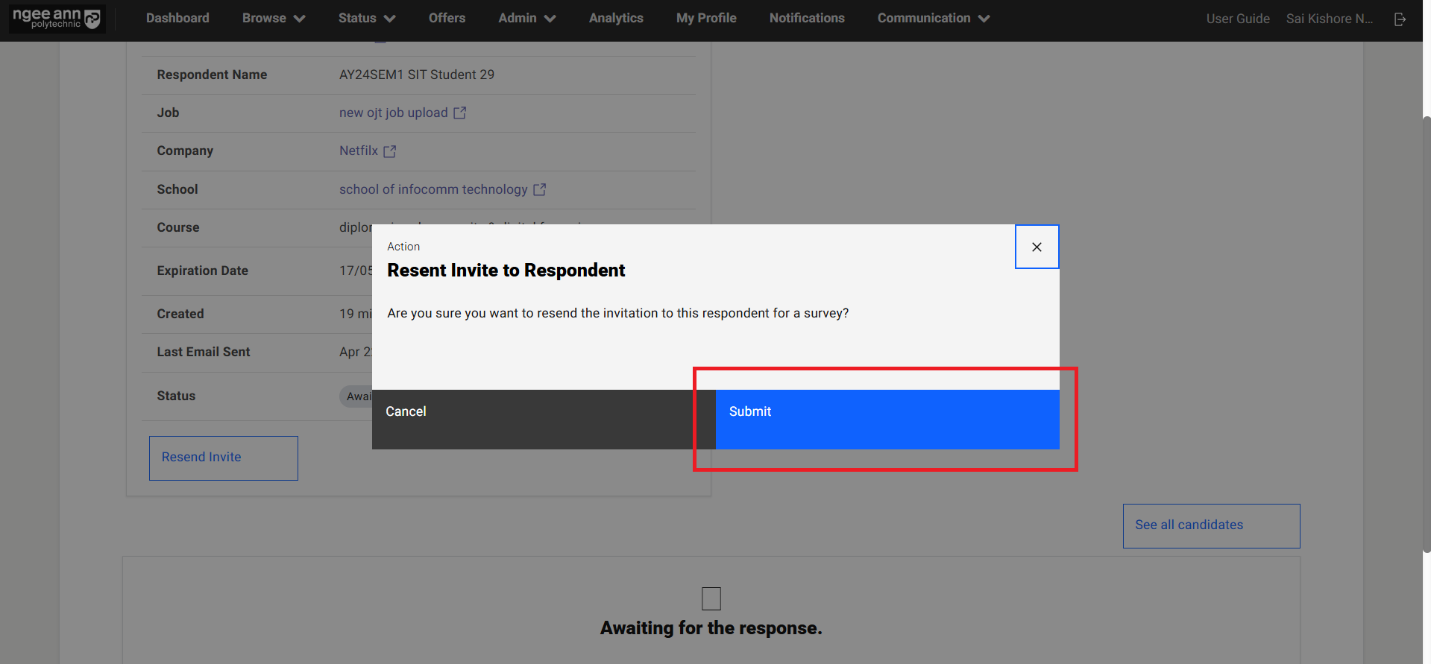
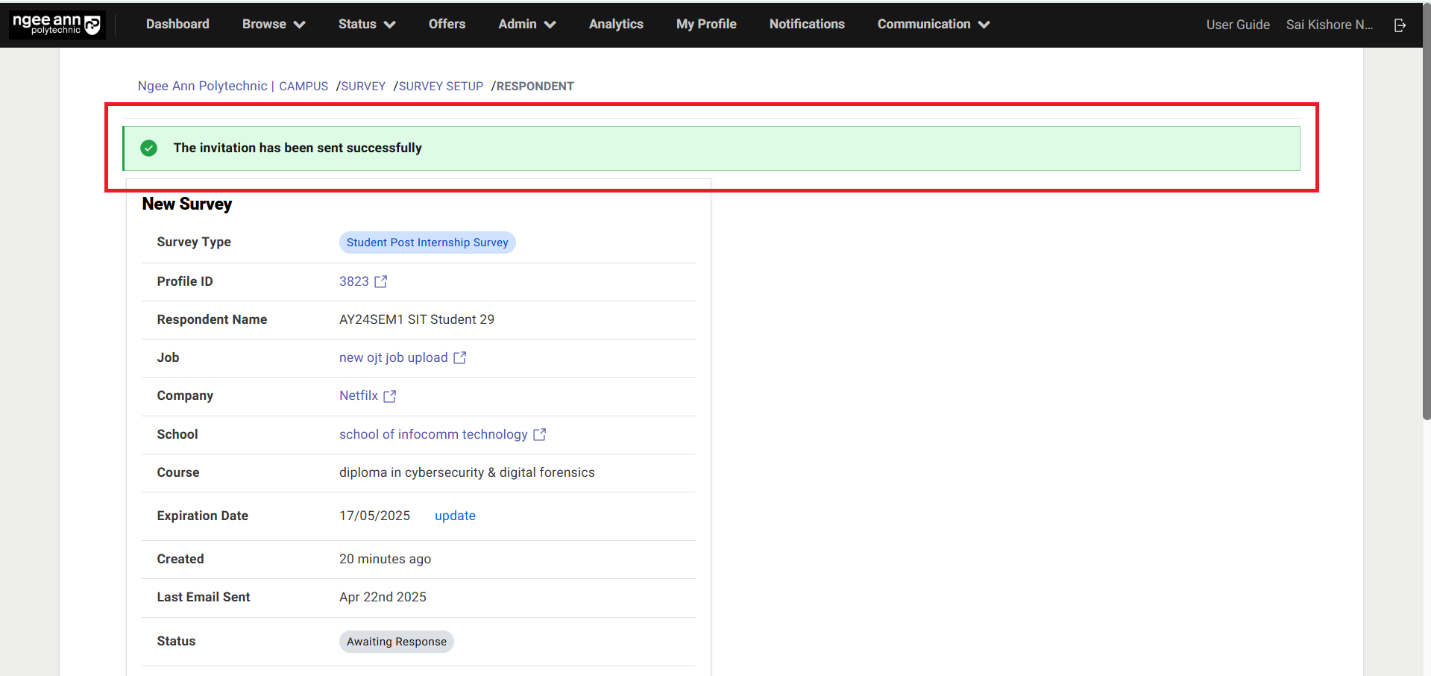
Status:
| Status | Description |
|---|---|
| Draft | The respondent has been added to the survey but has not yet been invited. |
| Awaiting Response | The survey invitation has been sent, but the respondent has not yet started answering. |
| In Progress | The respondent has begun answering the survey but has not yet completed it. |
| Completed | The respondent has finished answering the survey. |
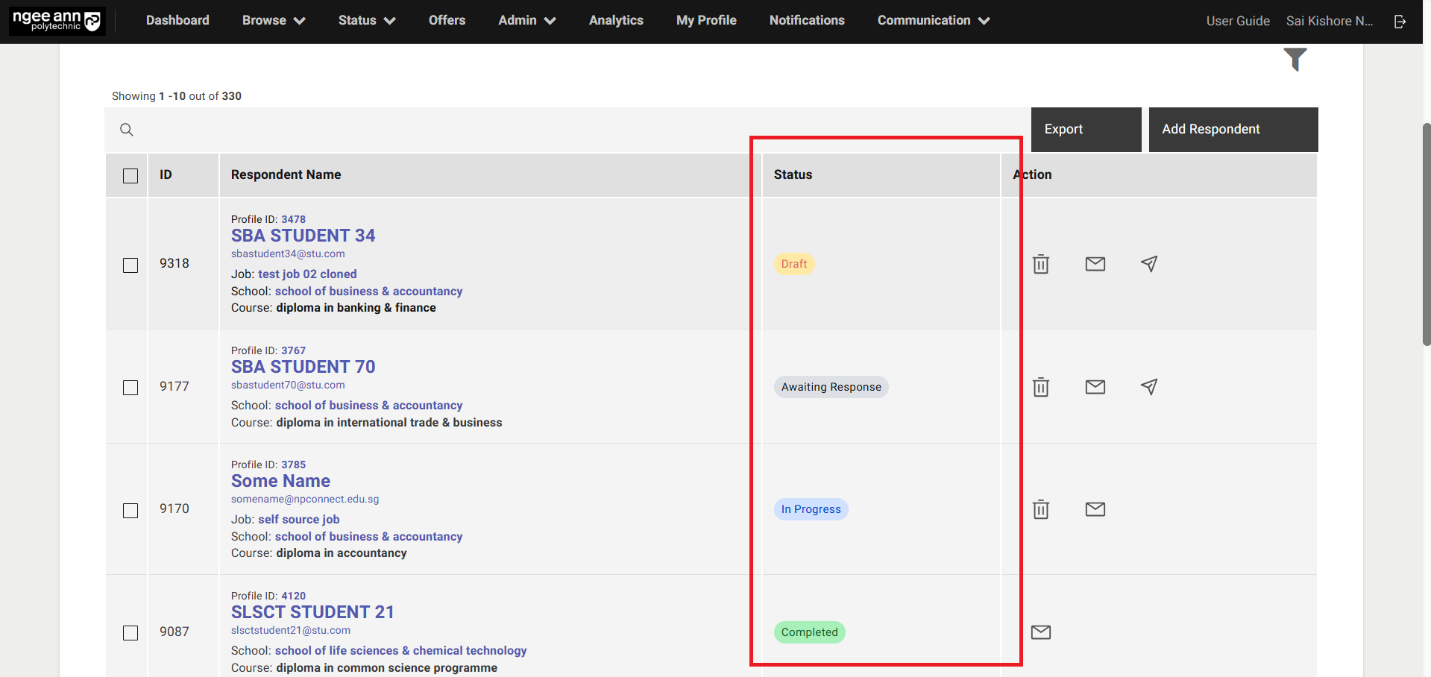
Survey Templates:
Step 1: Survey Templates section tab
- Click on the "Communication" header tab
- Click on the "Email Templates". Make sure navigate to "Email Templates" page
- Click on the "Survey Templates" section tab
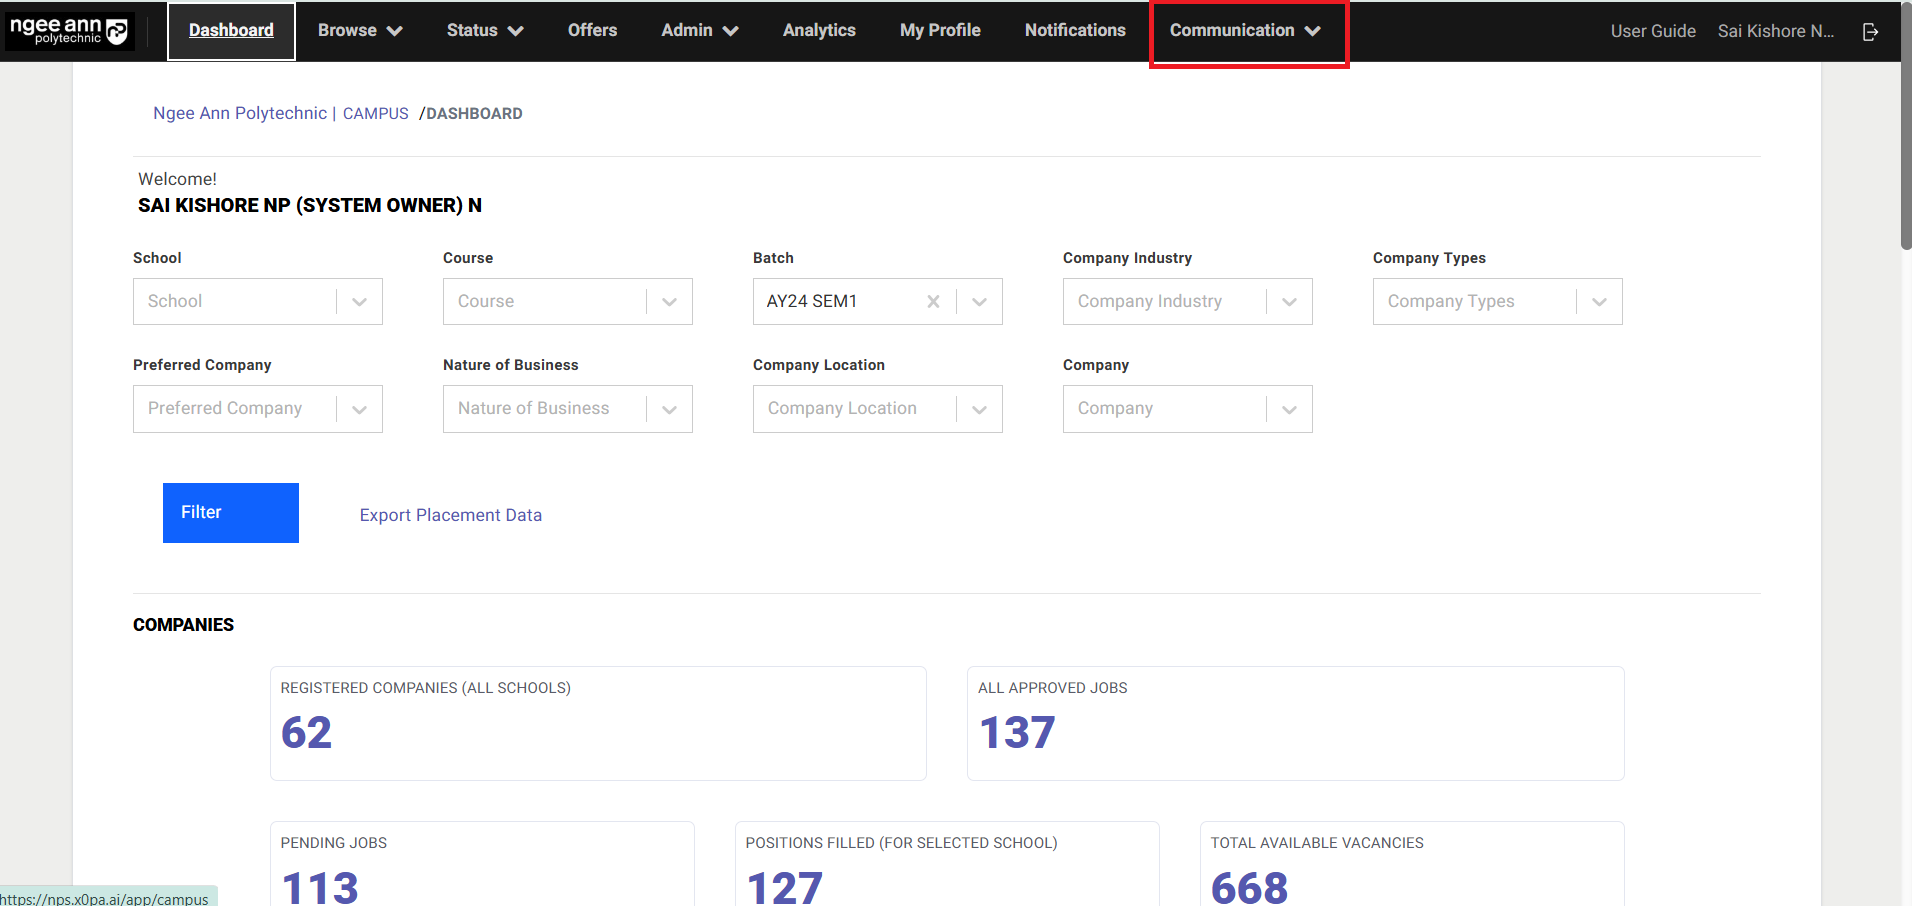
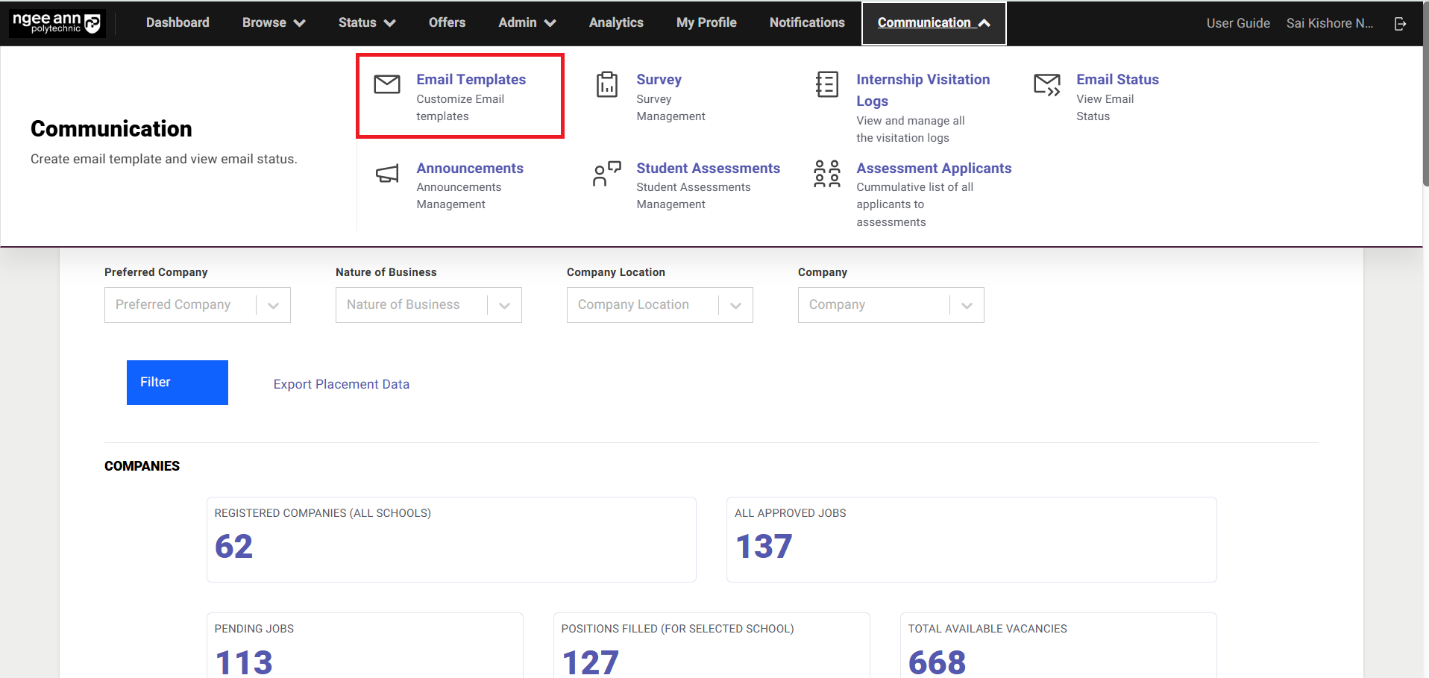
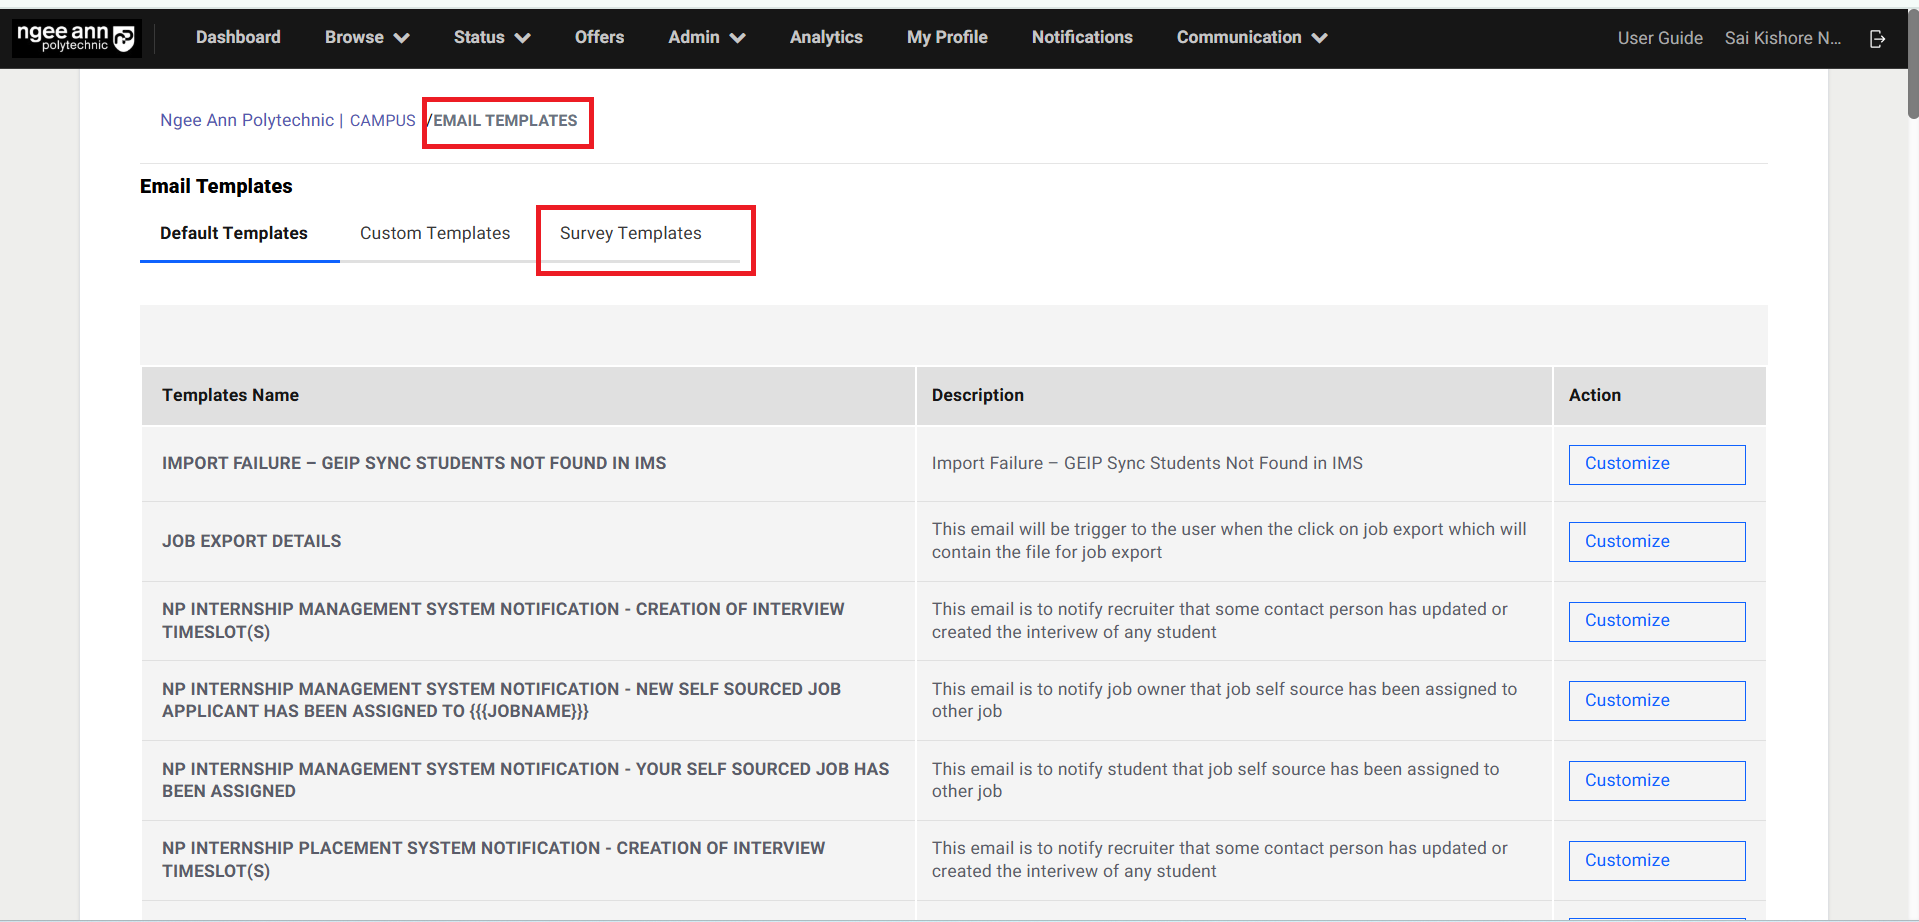
Step 2: Add Survey Template
- Click on the "Add Survey Template" button under survey templates section tab.
- Make sure navigate to "Customize" page
- Enter template details into the fields
- Click on the "Save Template" button to save
- Click on the "Send Test Email" button
- Make sure respective mail will be generated as test mail
- Click on the "Preview Email"
- Make sure respective mail will be opened as dummy email to preview email content.
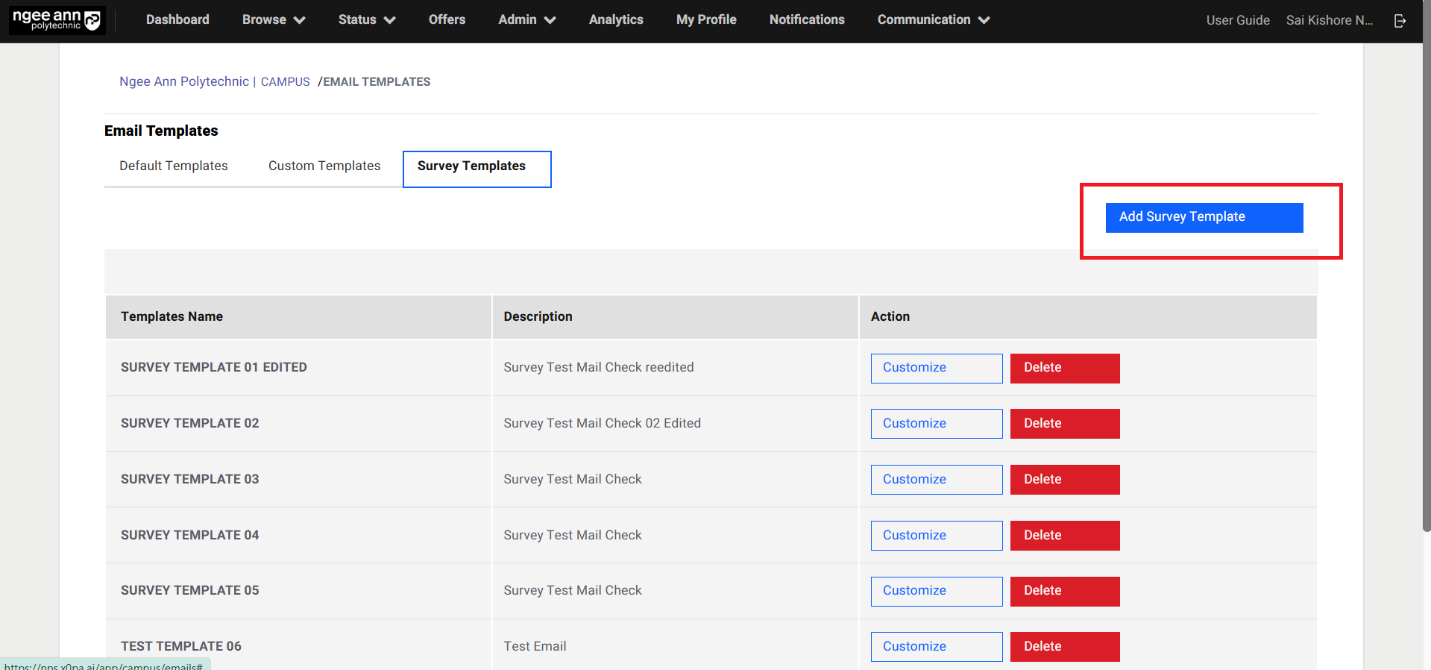
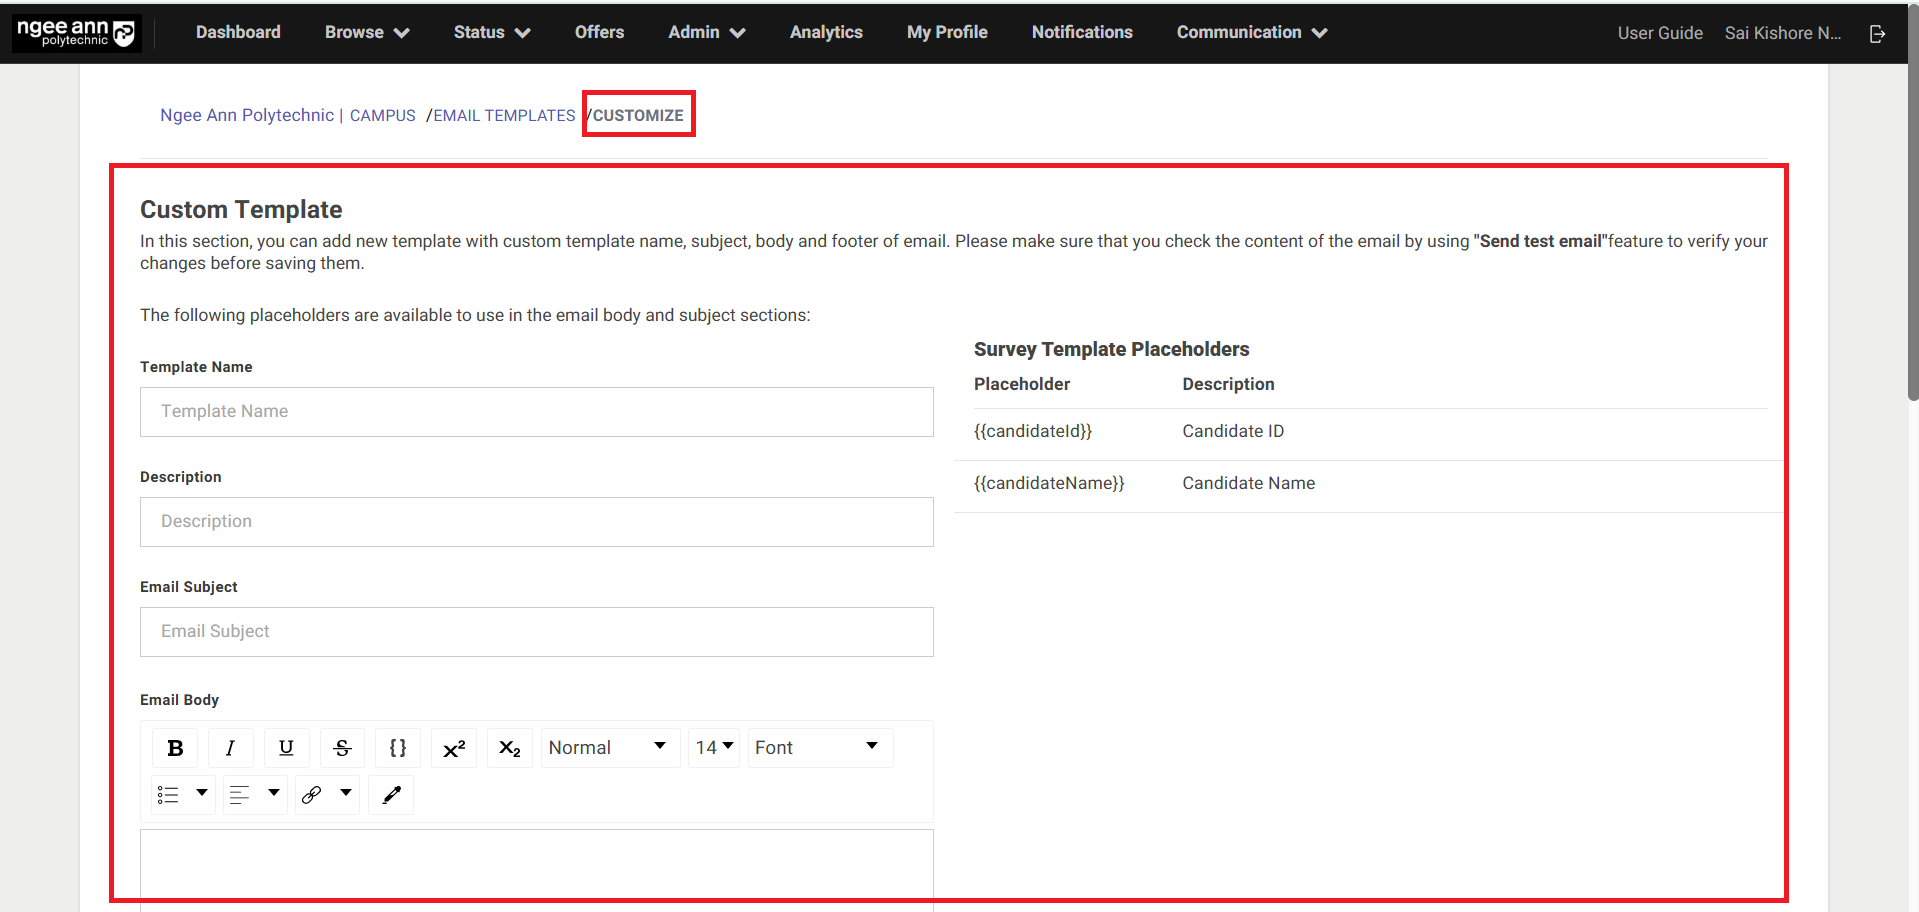
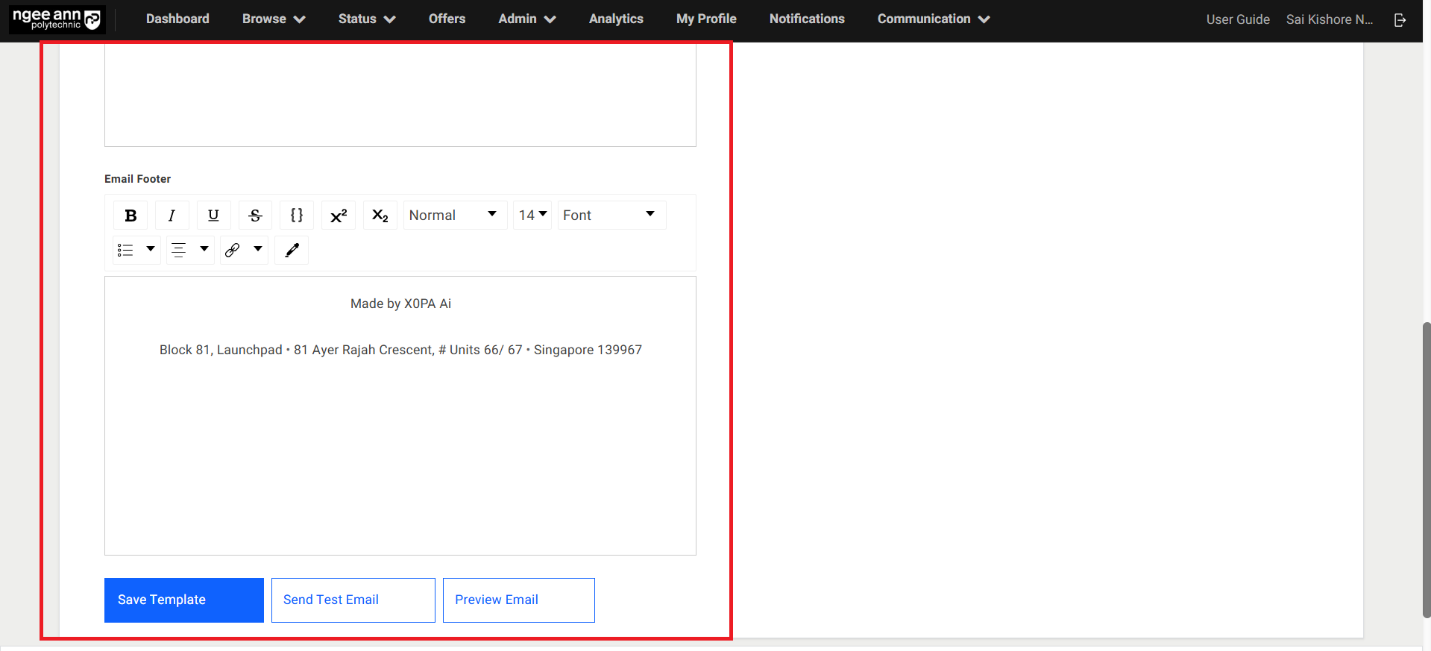
Send Email to Respondent:
Step 1: Send Email to respondent individually
- Click on the "Send Email to Respondent" button under "Action" column under "Respondent" section tab in the "Survey Setup" page
- Click on the "Email Template" dropdown field from "Send Email to Respondent" popup
- Select the template from the dropdown field
- Click on the "Send" button to send email to respective respondent with selected template.
- Make sure email sent to respondent successfully and successes message will be shown.
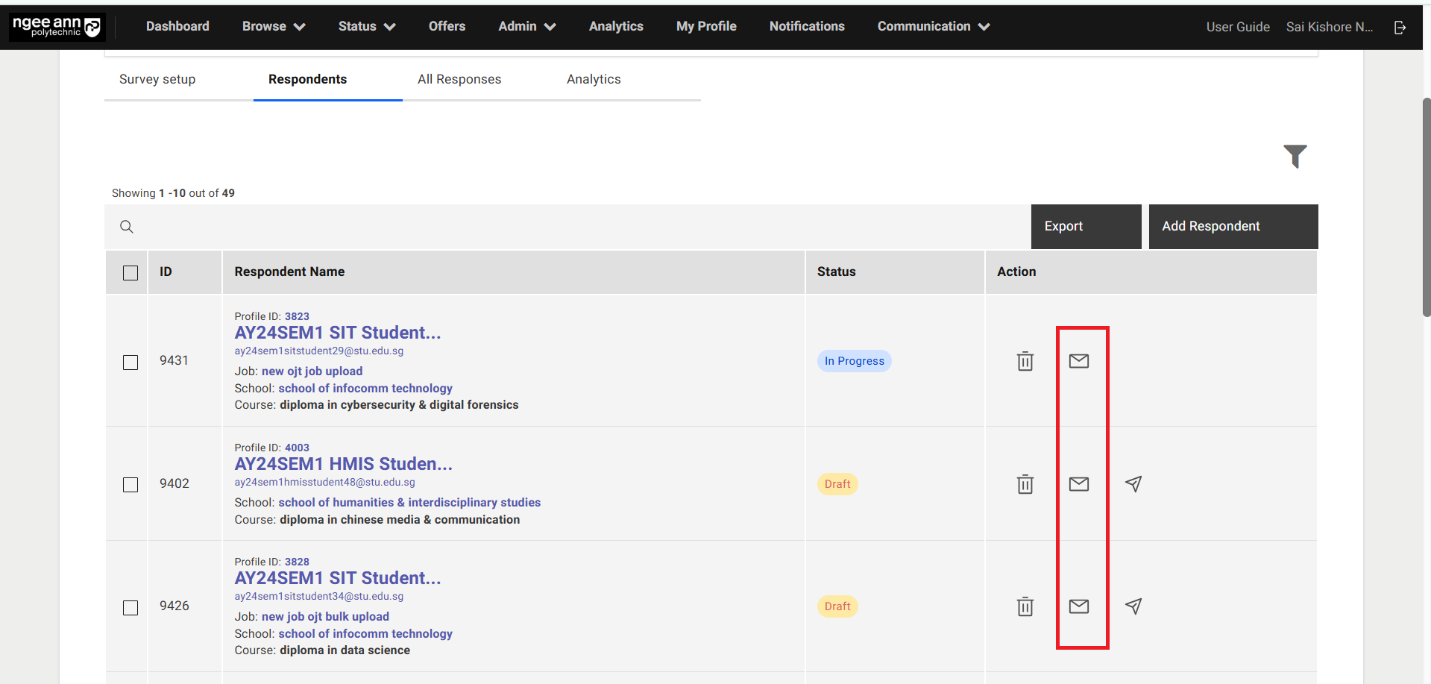
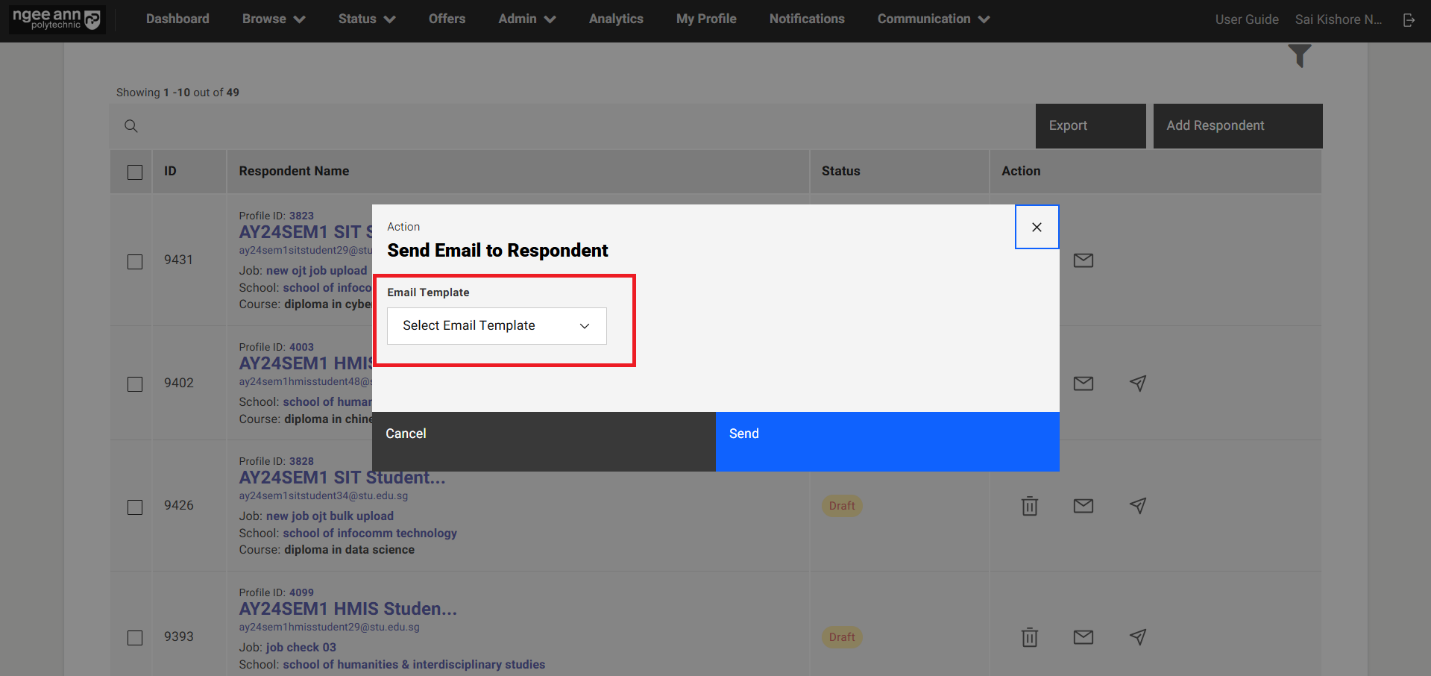
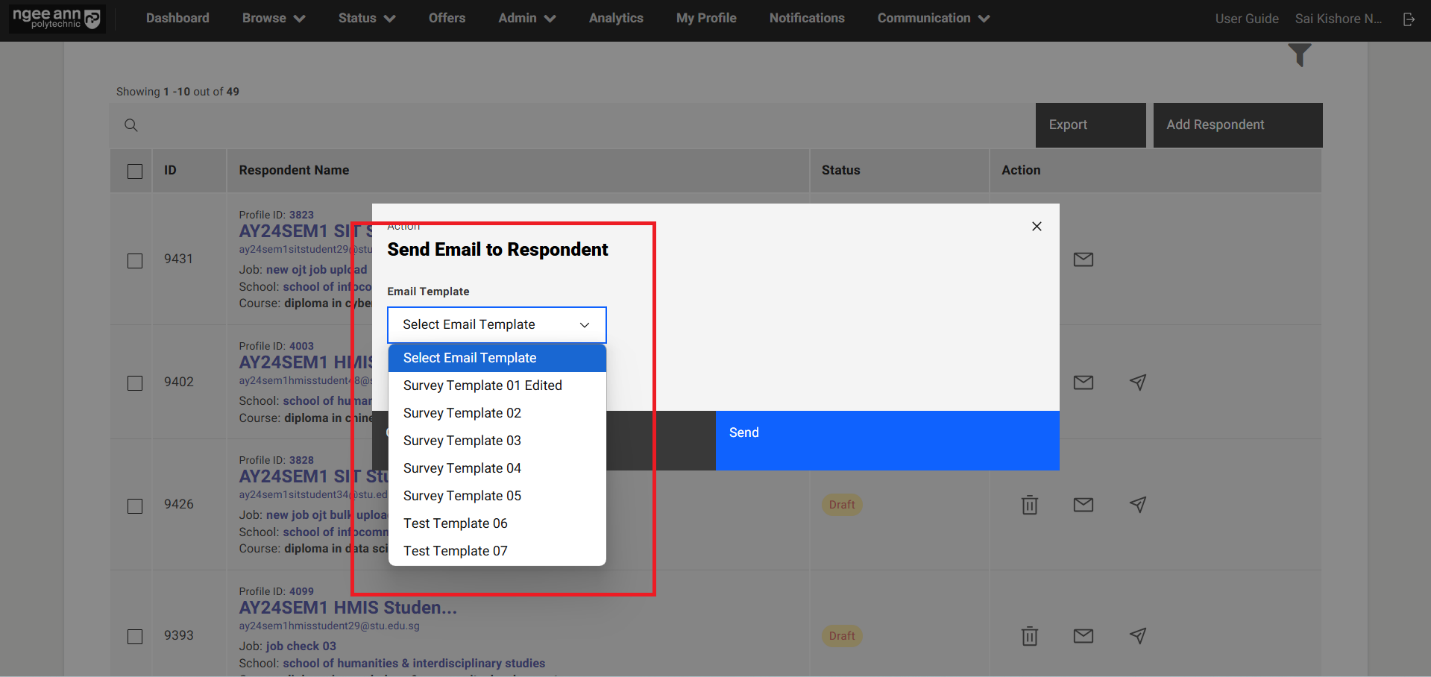
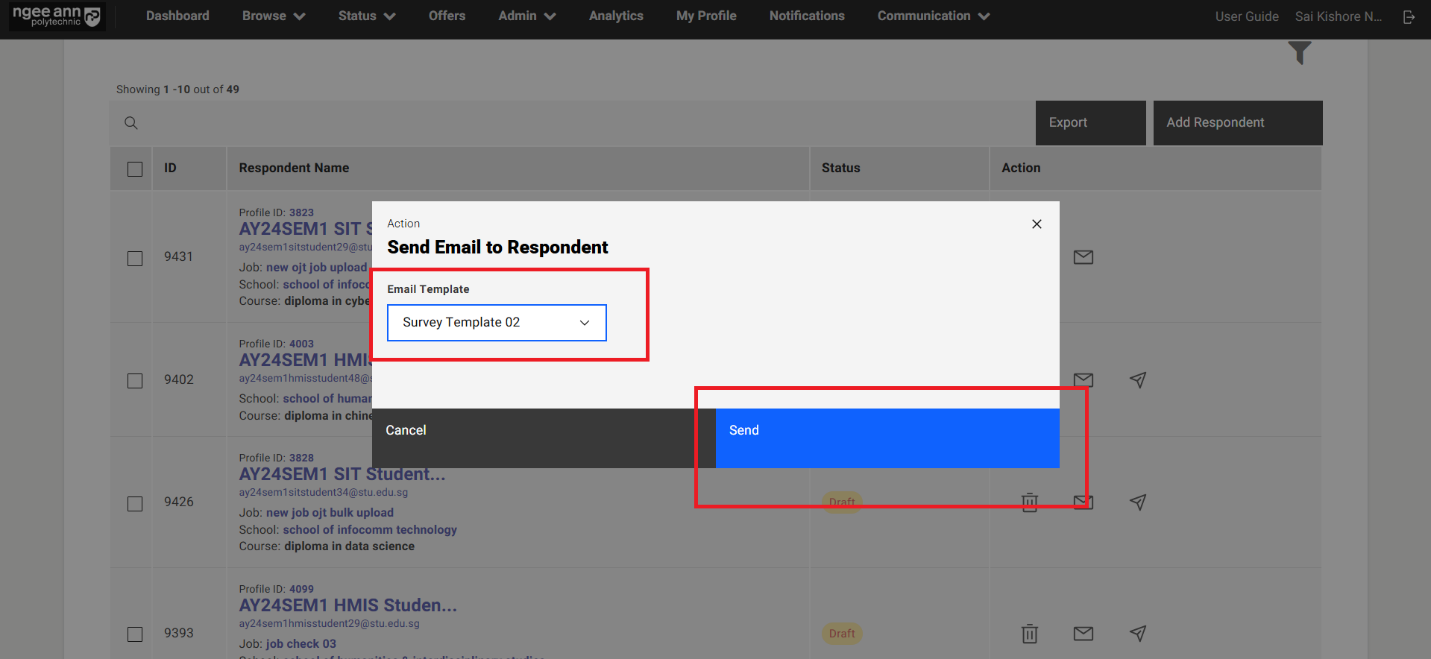
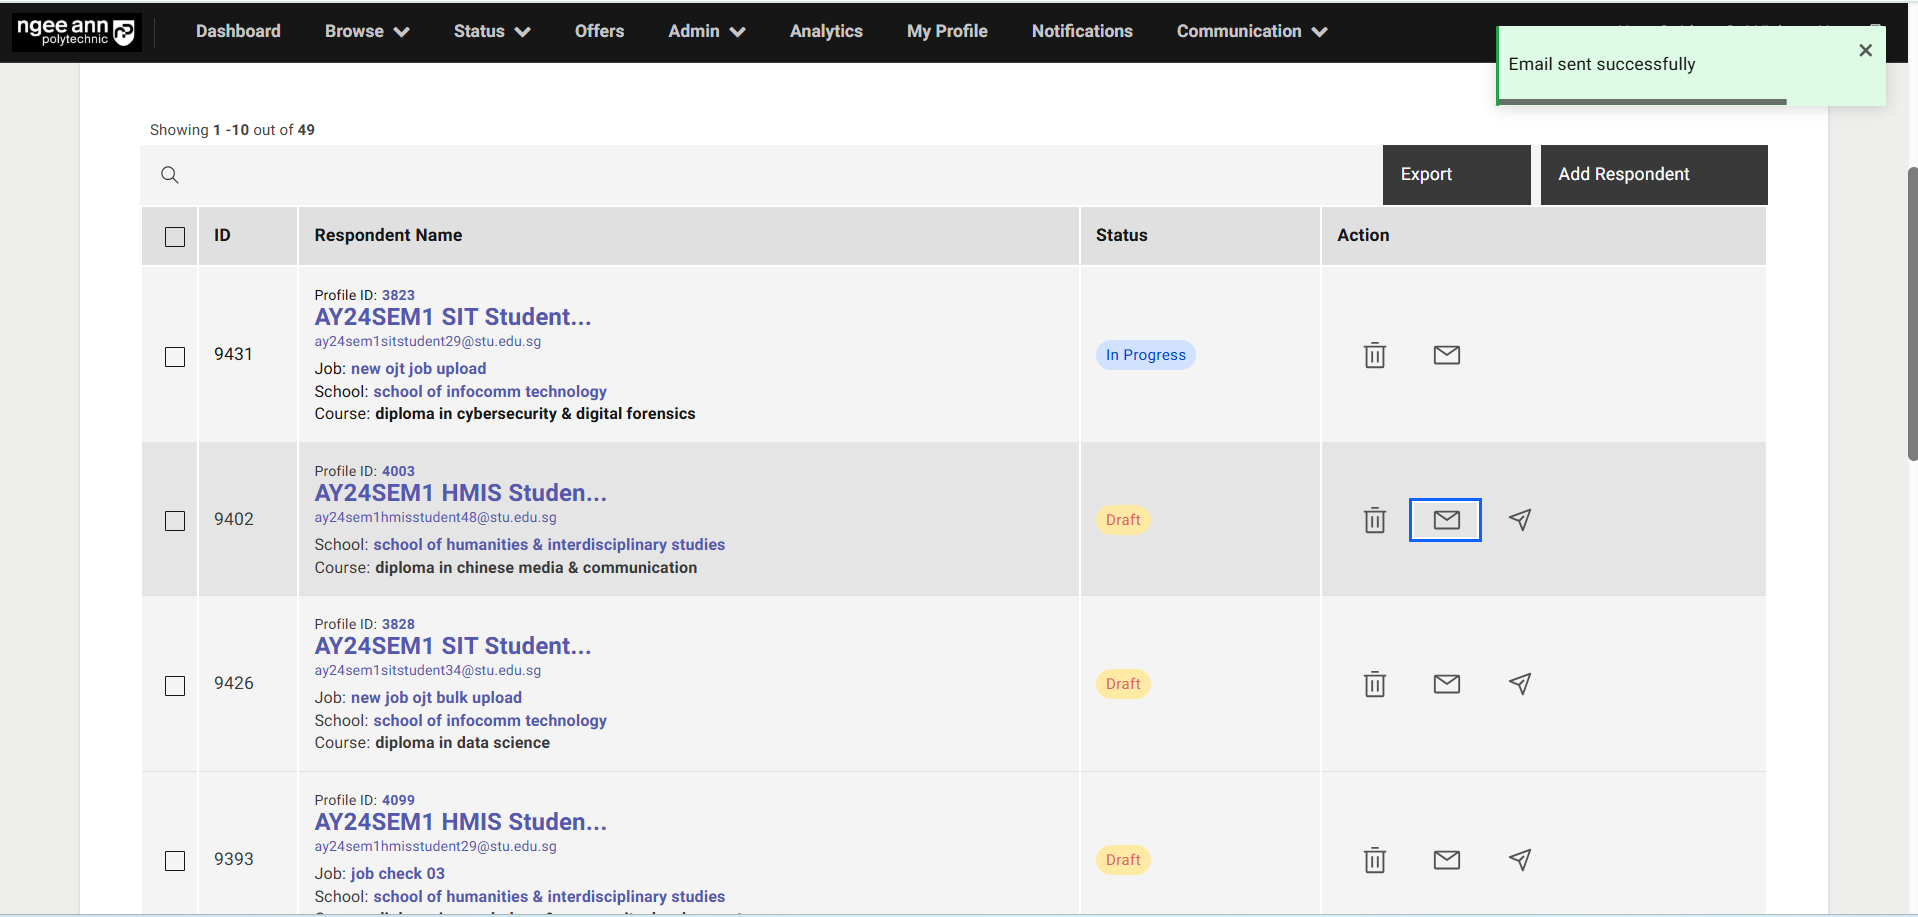
Step 2: Send Email to Respondents in bulk
- Select Respondents from the table
- Click on the "Send Email" list option button above the table
- Click on the "Email Template" dropdown field from "Send Email to Respondent" popup
- Select the template from the dropdown field
- Click on the "Send" button to send email to respective respondent with selected template.
- Make sure email sent to respondent successfully and successes message will be shown.
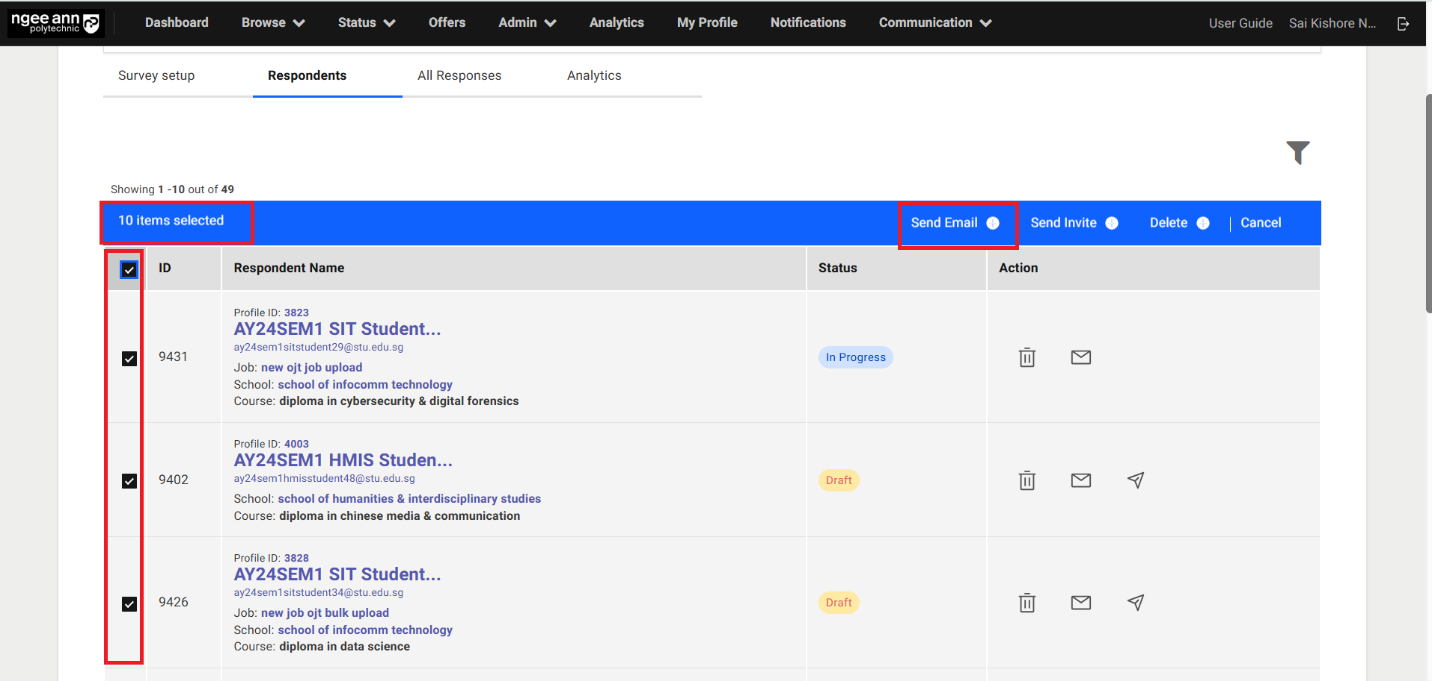
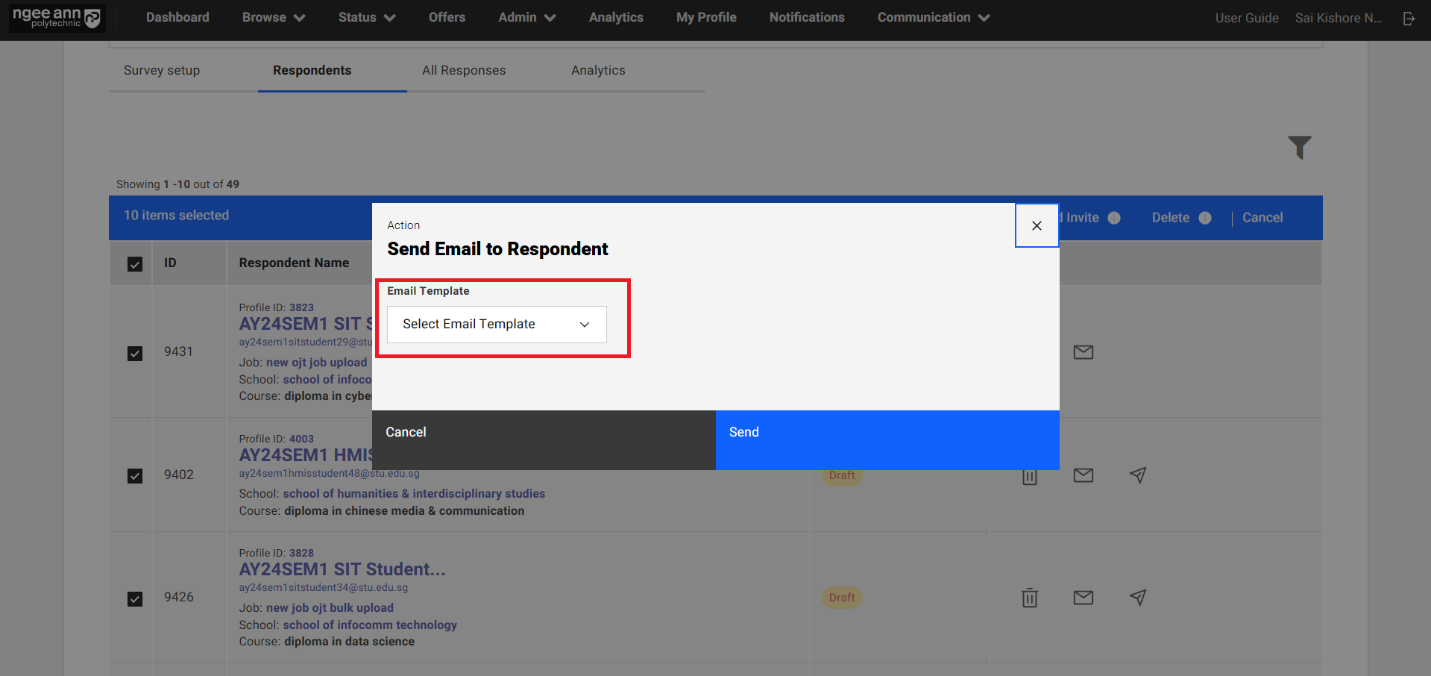
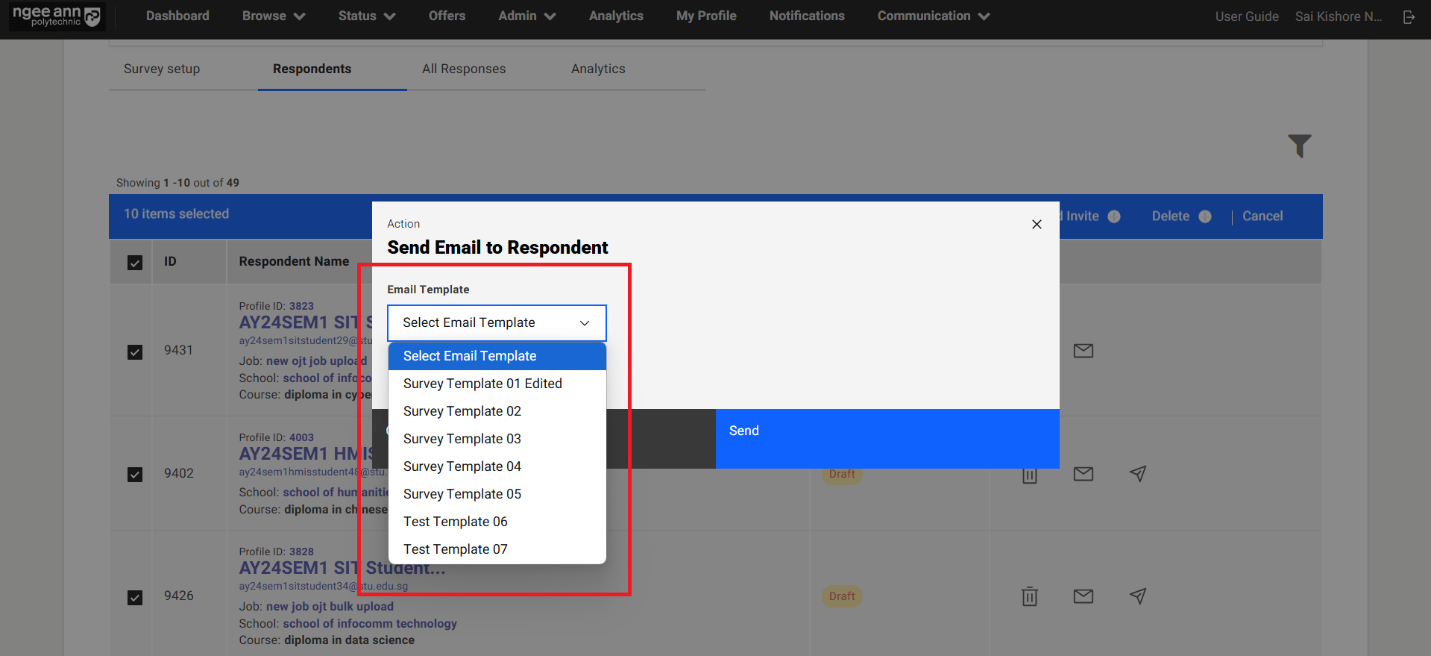
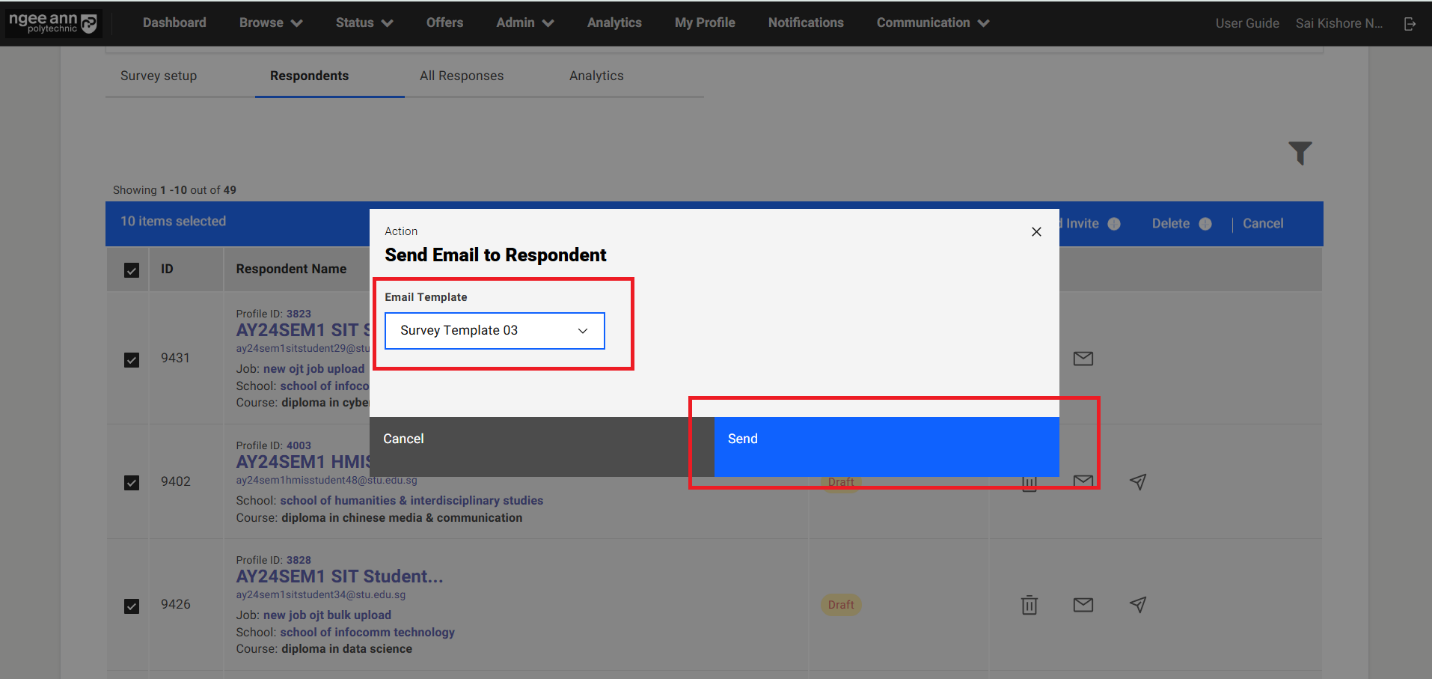
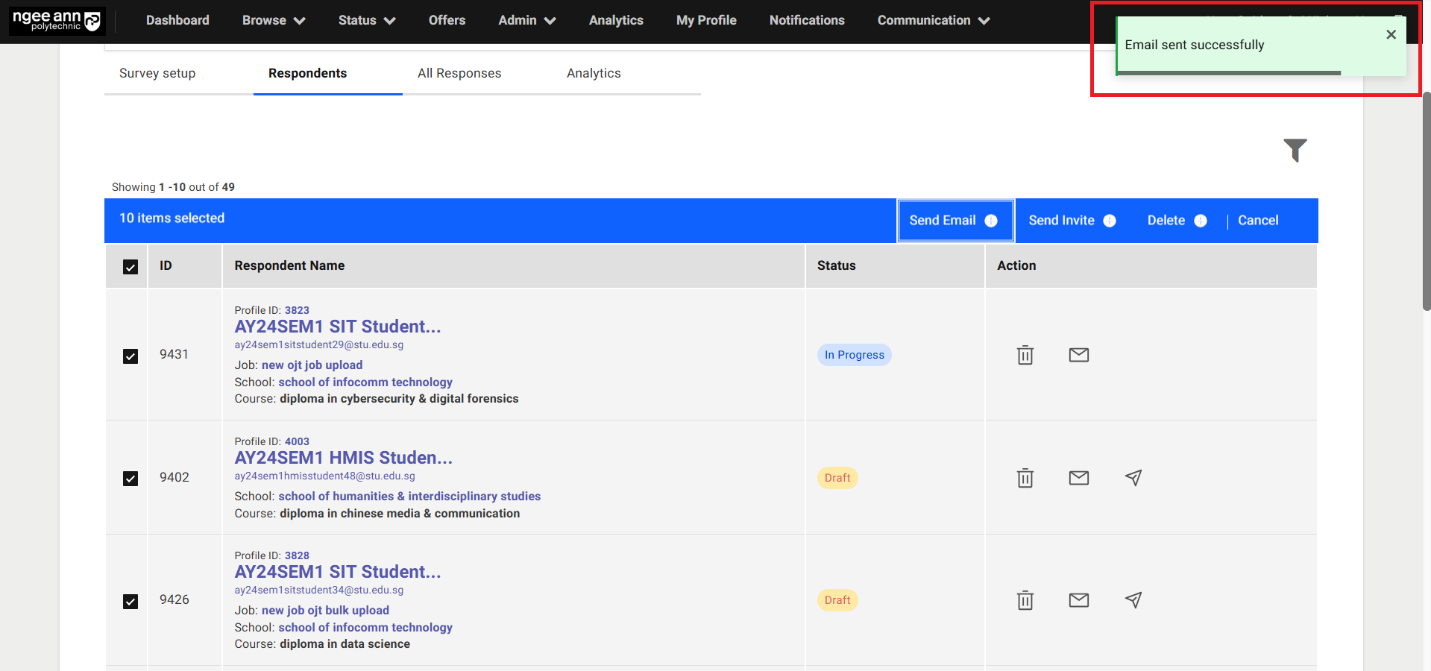
Delete Respondent:
Step 1: Delete Respondents individually
- Click on the "Delete (Trash Icon)" under "Action" column
- Click on the "Submit" button from the "Delete Respondents" popup
- Make sure respective respondent will get deleted from the survey and successes message will be shown
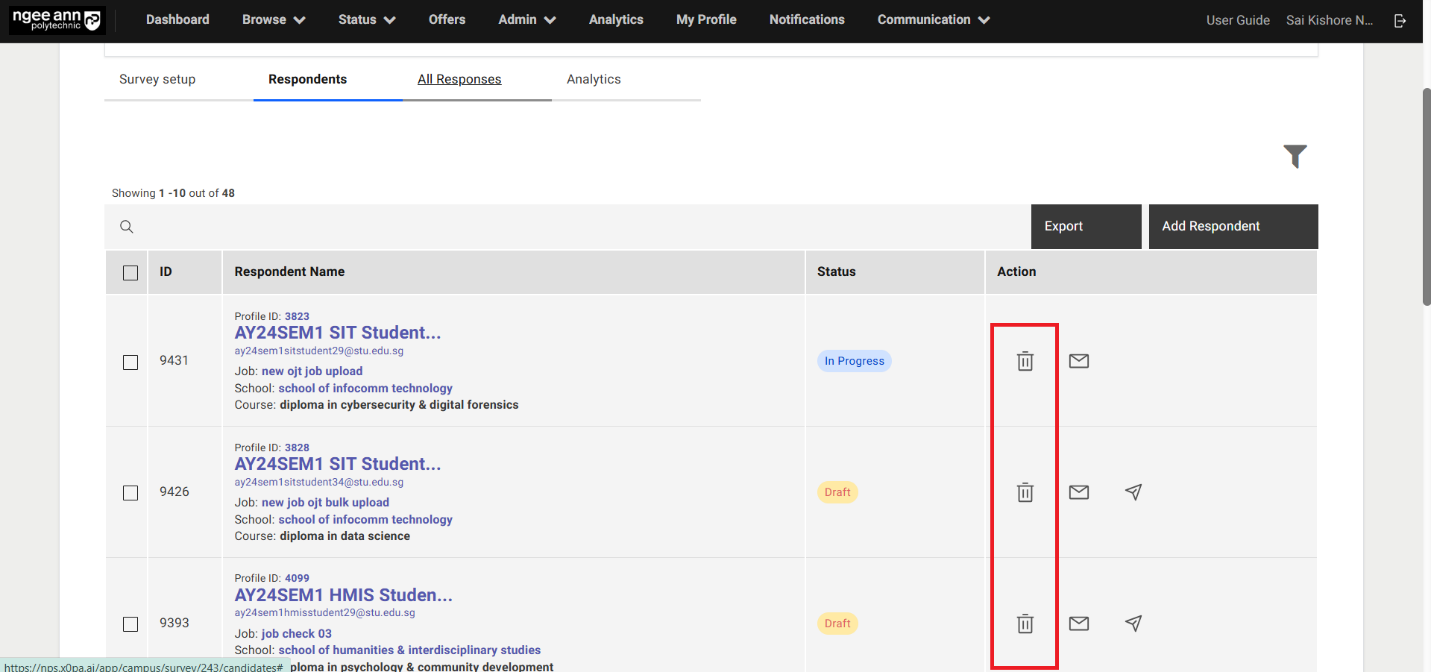
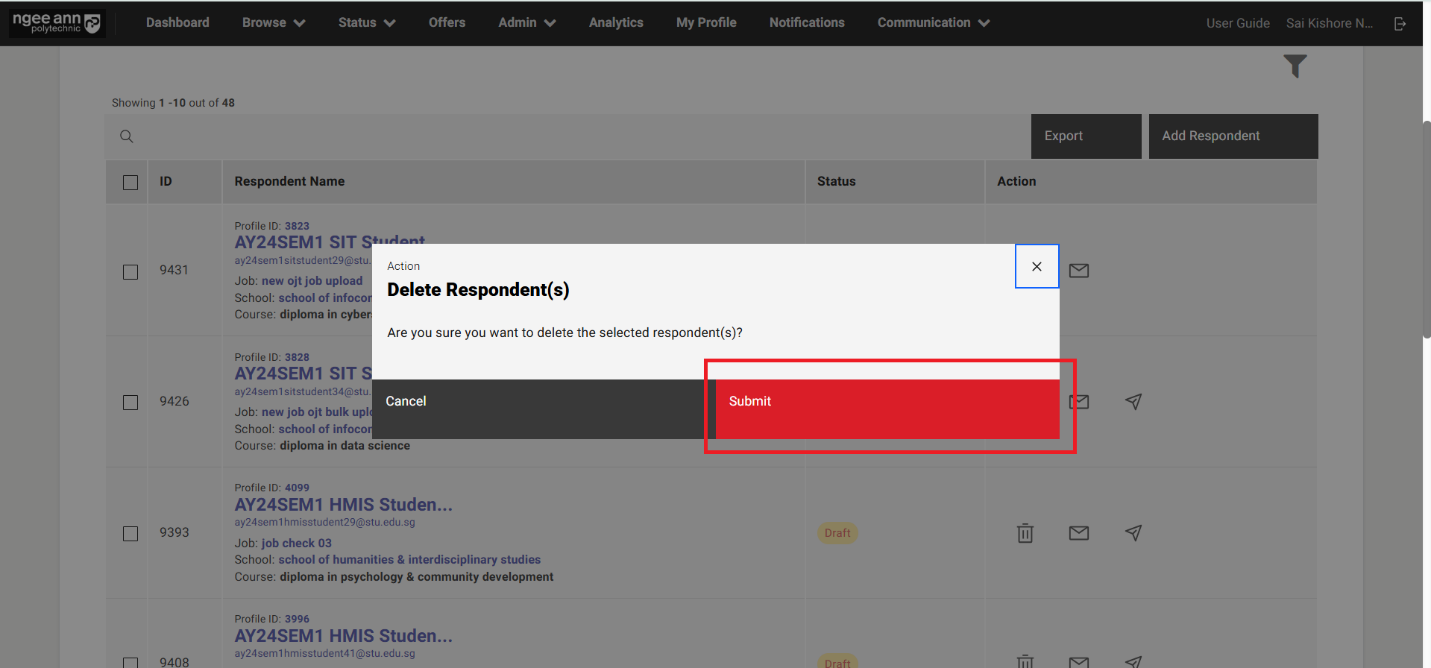
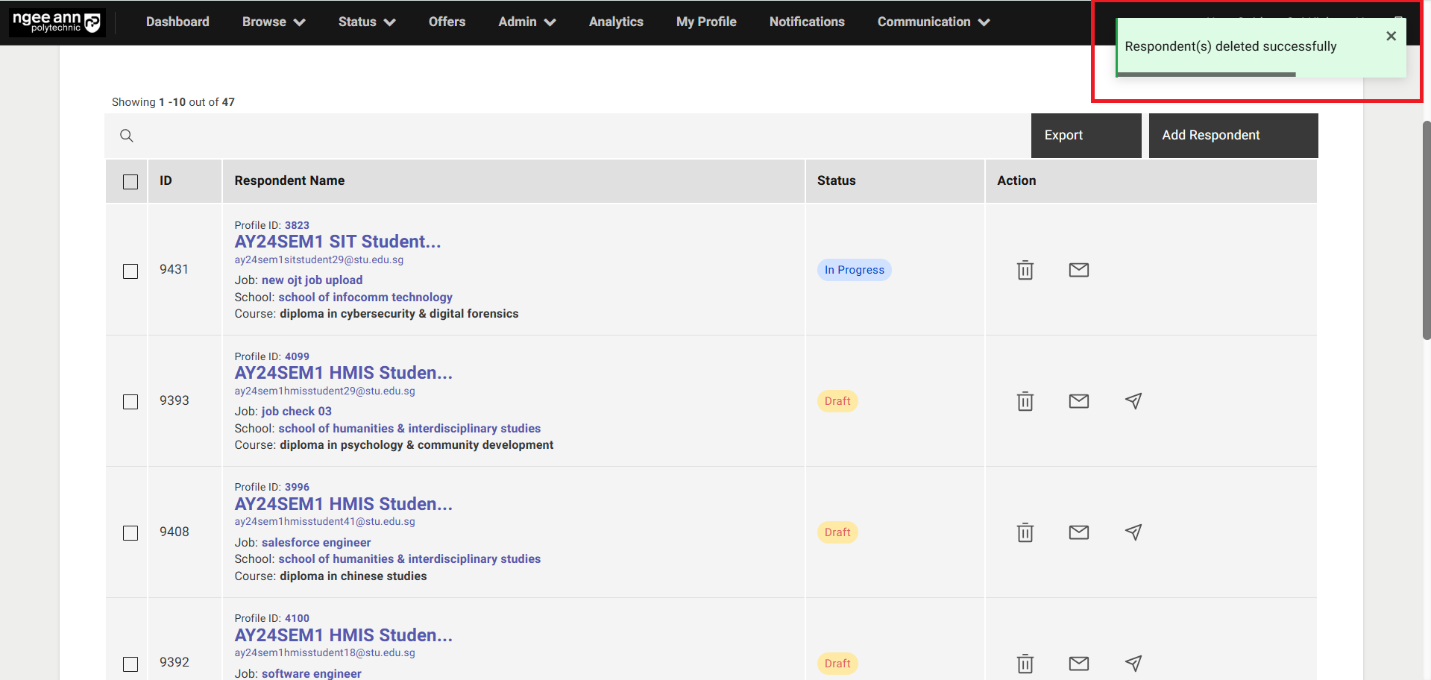
Step 2: Delete Respondents in Bulk
- Select respondents from the table
- Make sure "Delete" list option button will be shown above the table
- Click on the "Delete" list option button
- Click on the "Submit" button from the "Delete Respondents" popup
- Make sure respective selected respondents will get deleted from the table and successes message will also be shown.
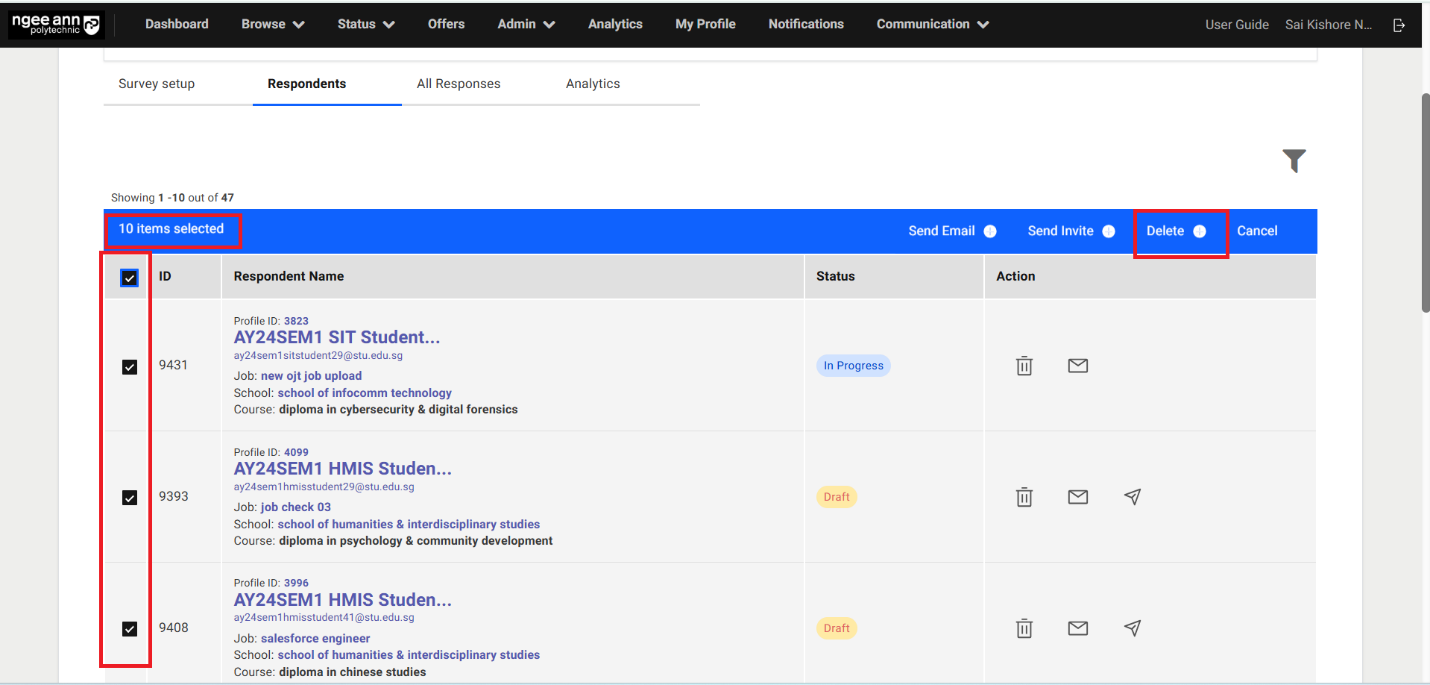
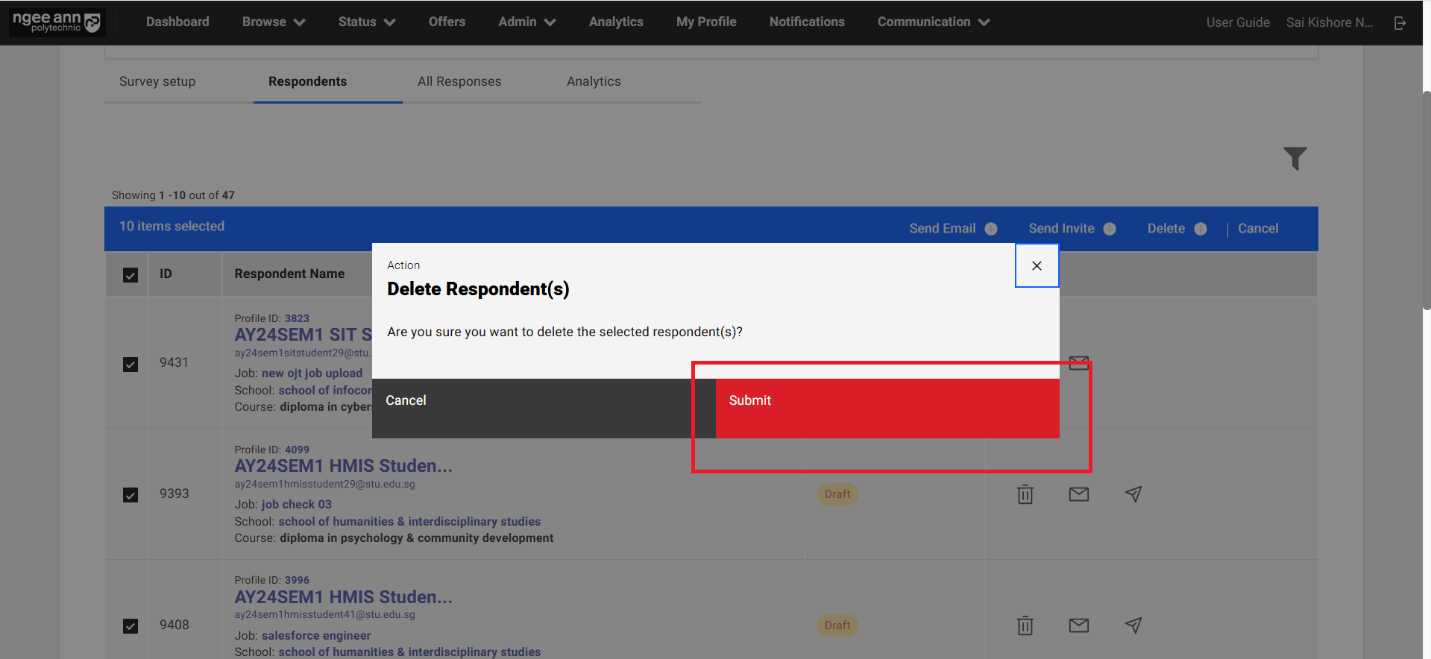
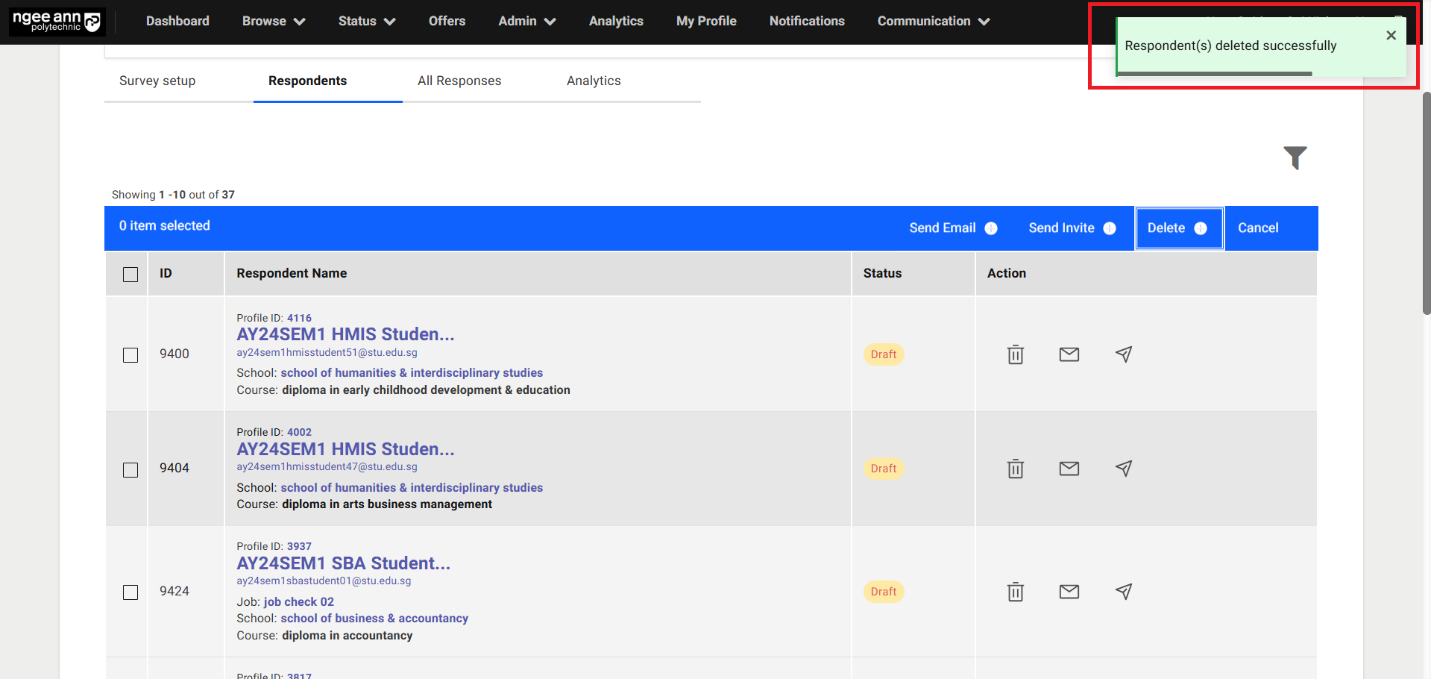
Export:
Step 1:
- Click on the "Export" button above the table
- Make sure successes message will be shown and export file will be sent to your registered mail.
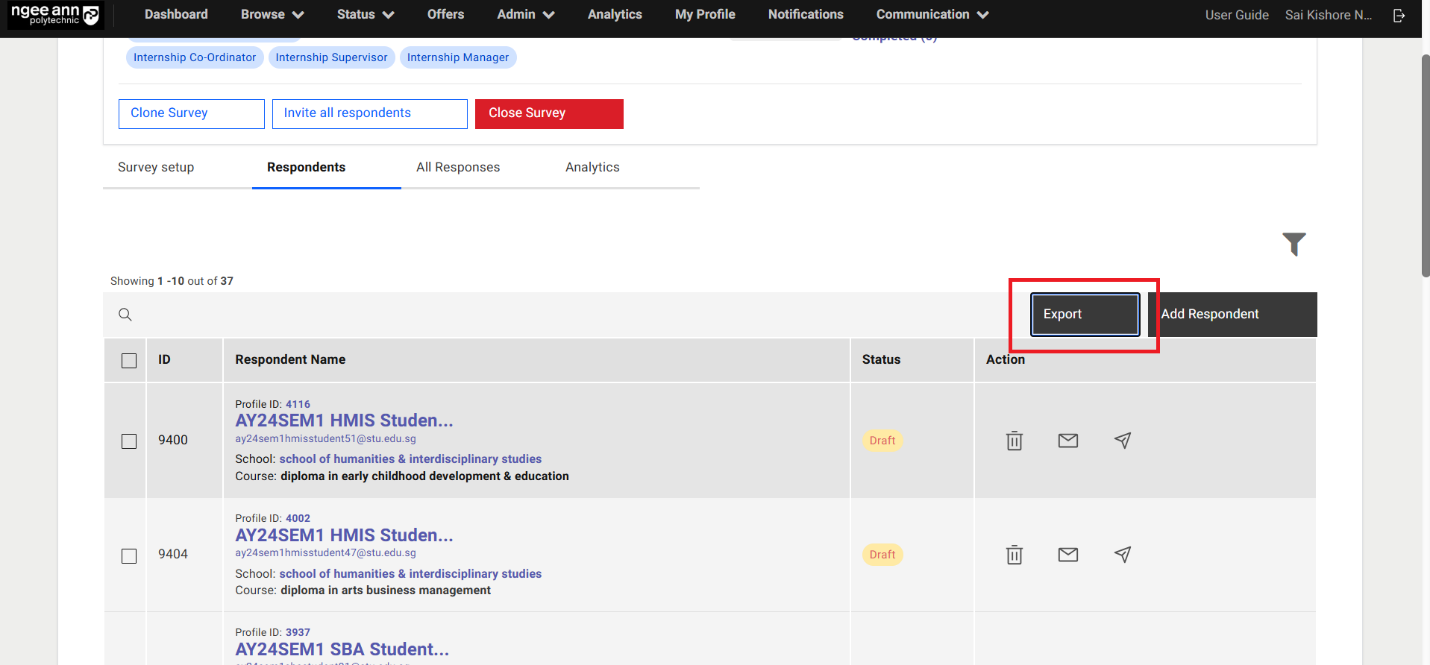
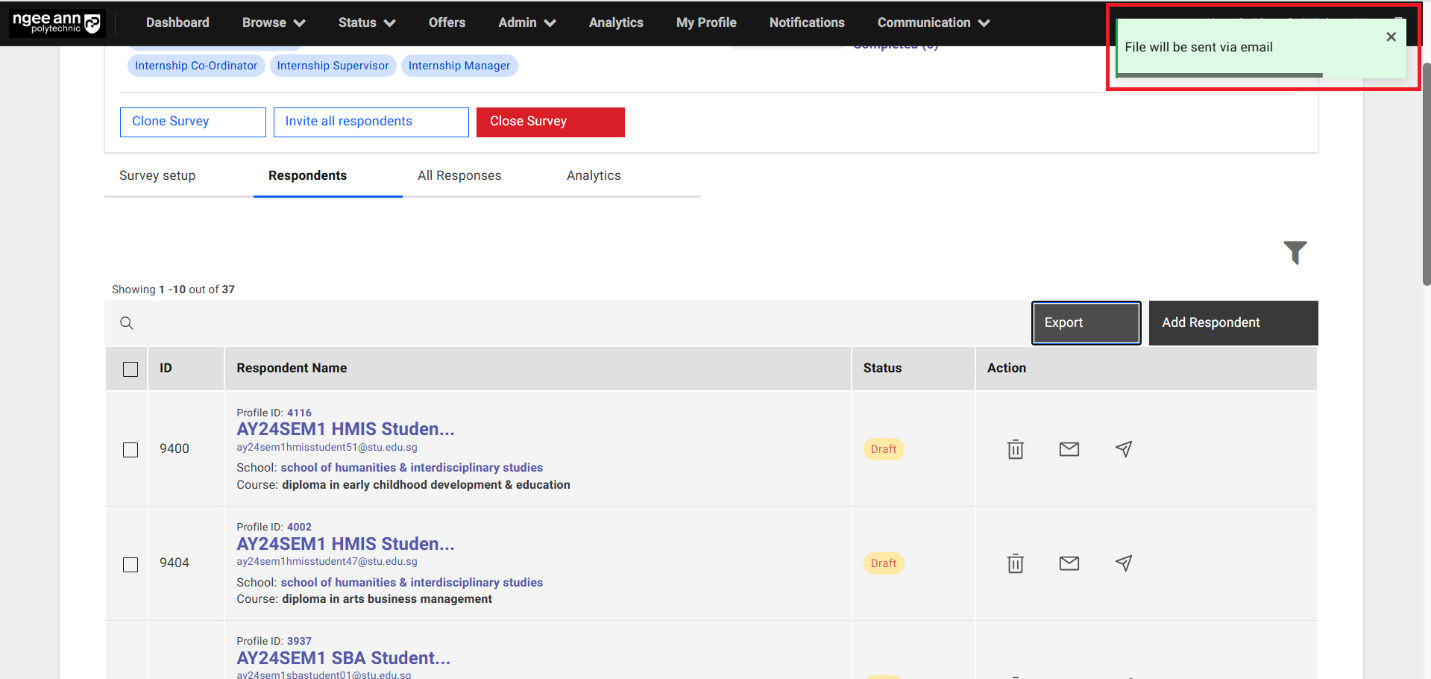
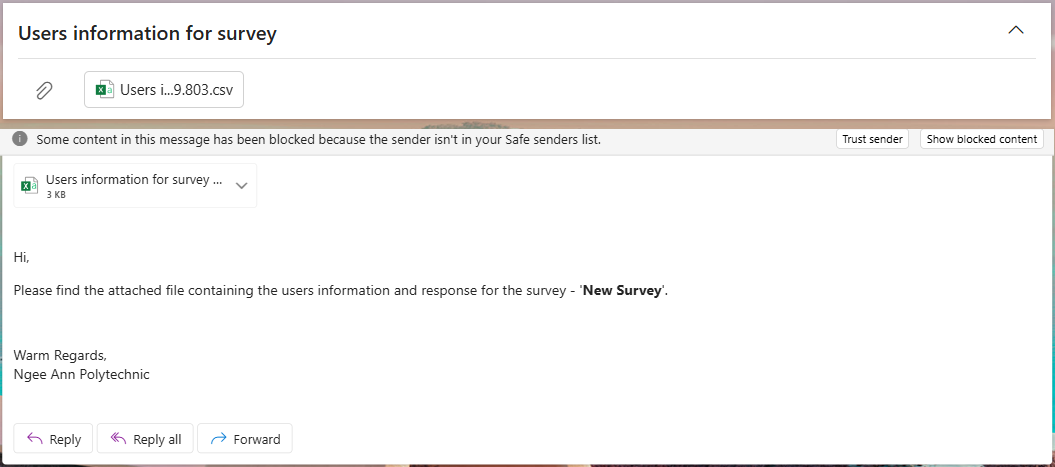
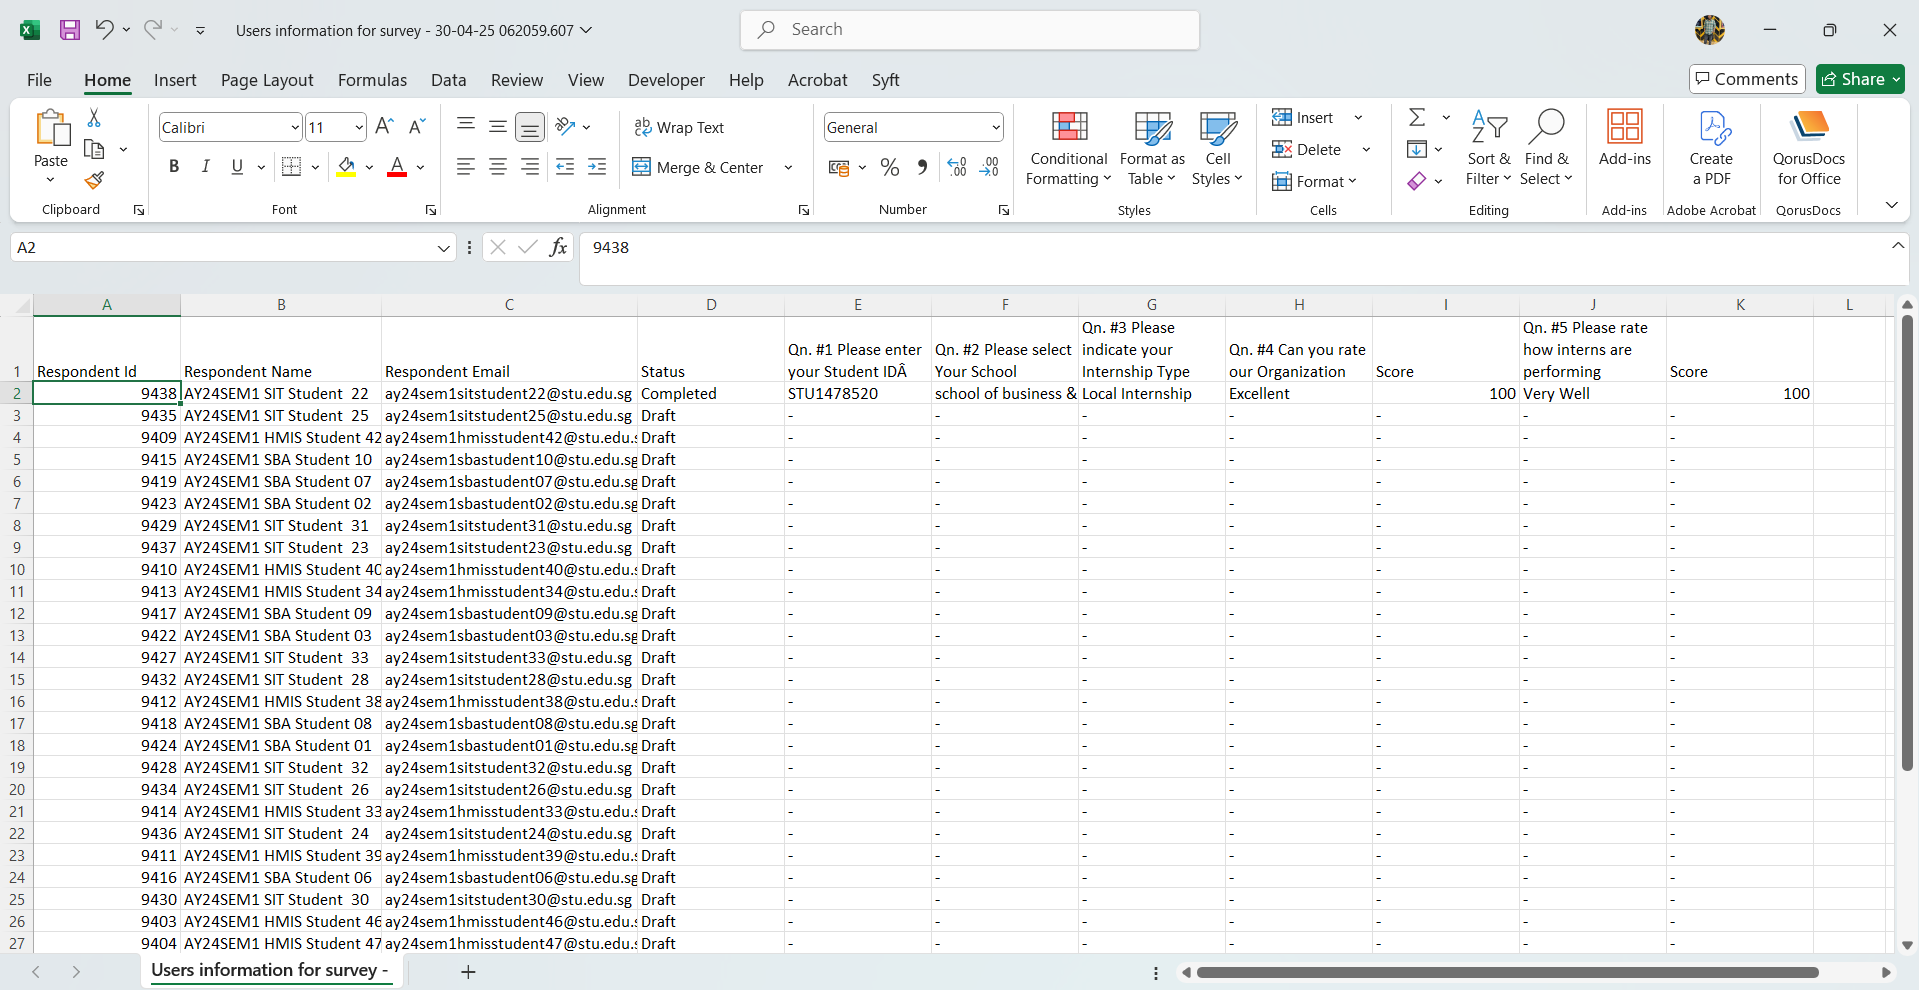
Filters:
Step 1:
- Click on the "Filter" icon above the table.
- Make sure "Filter & sort" popup get open with list of filter options
- Click on filter option and apply the filters
- Make respondents data get filtered in the table after applying filters
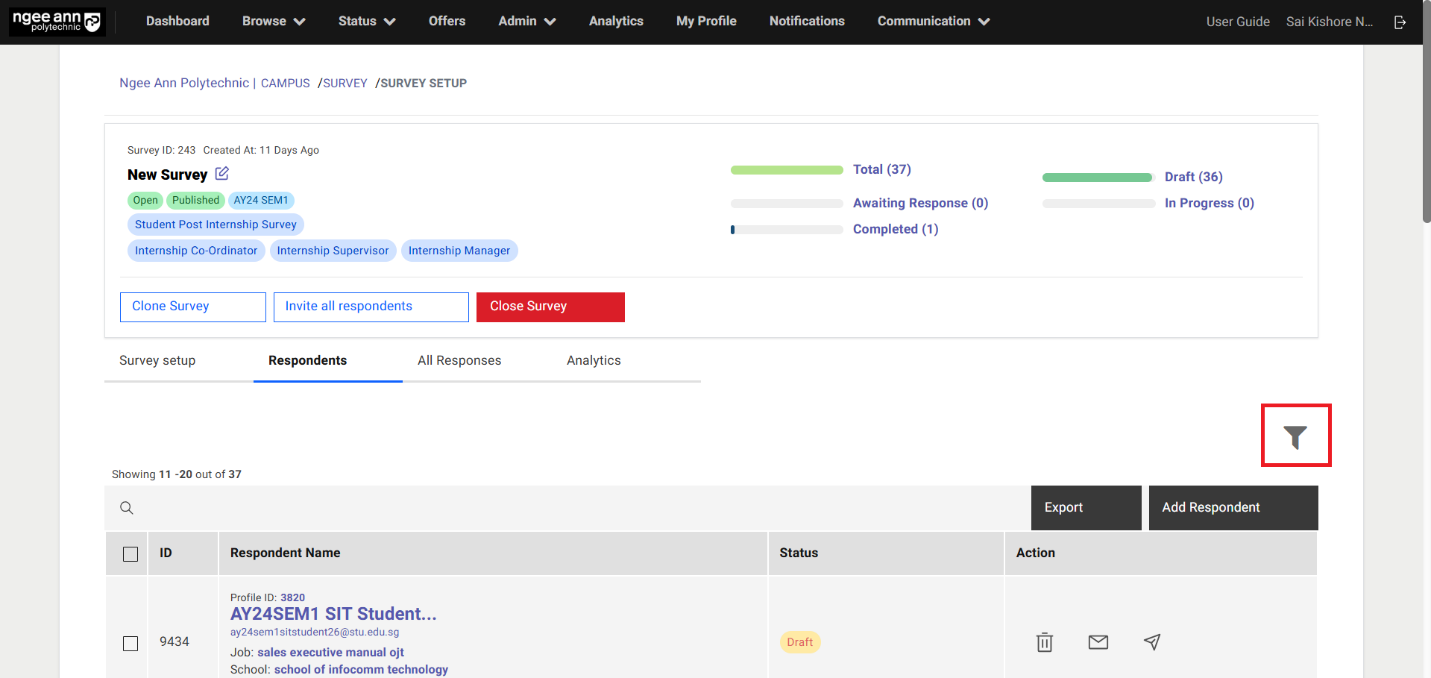

Respondents Page:
Step 1:
- Click on the respondent's name under "Respondent" name from the table under "Respondents" section tab
- Make sure navigate to respective respondent's "Respondent" page.
Note: Make sure respondent's names are clickable only when status is "In progress, Completed"
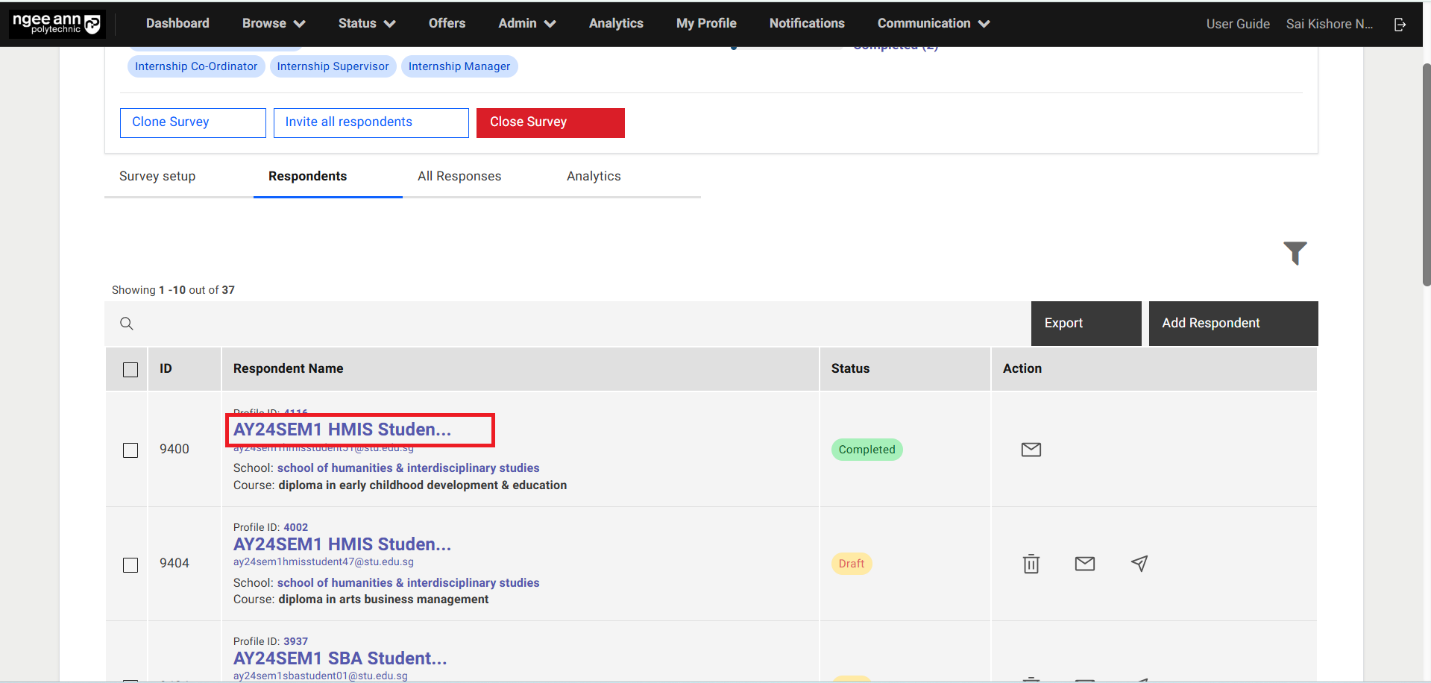
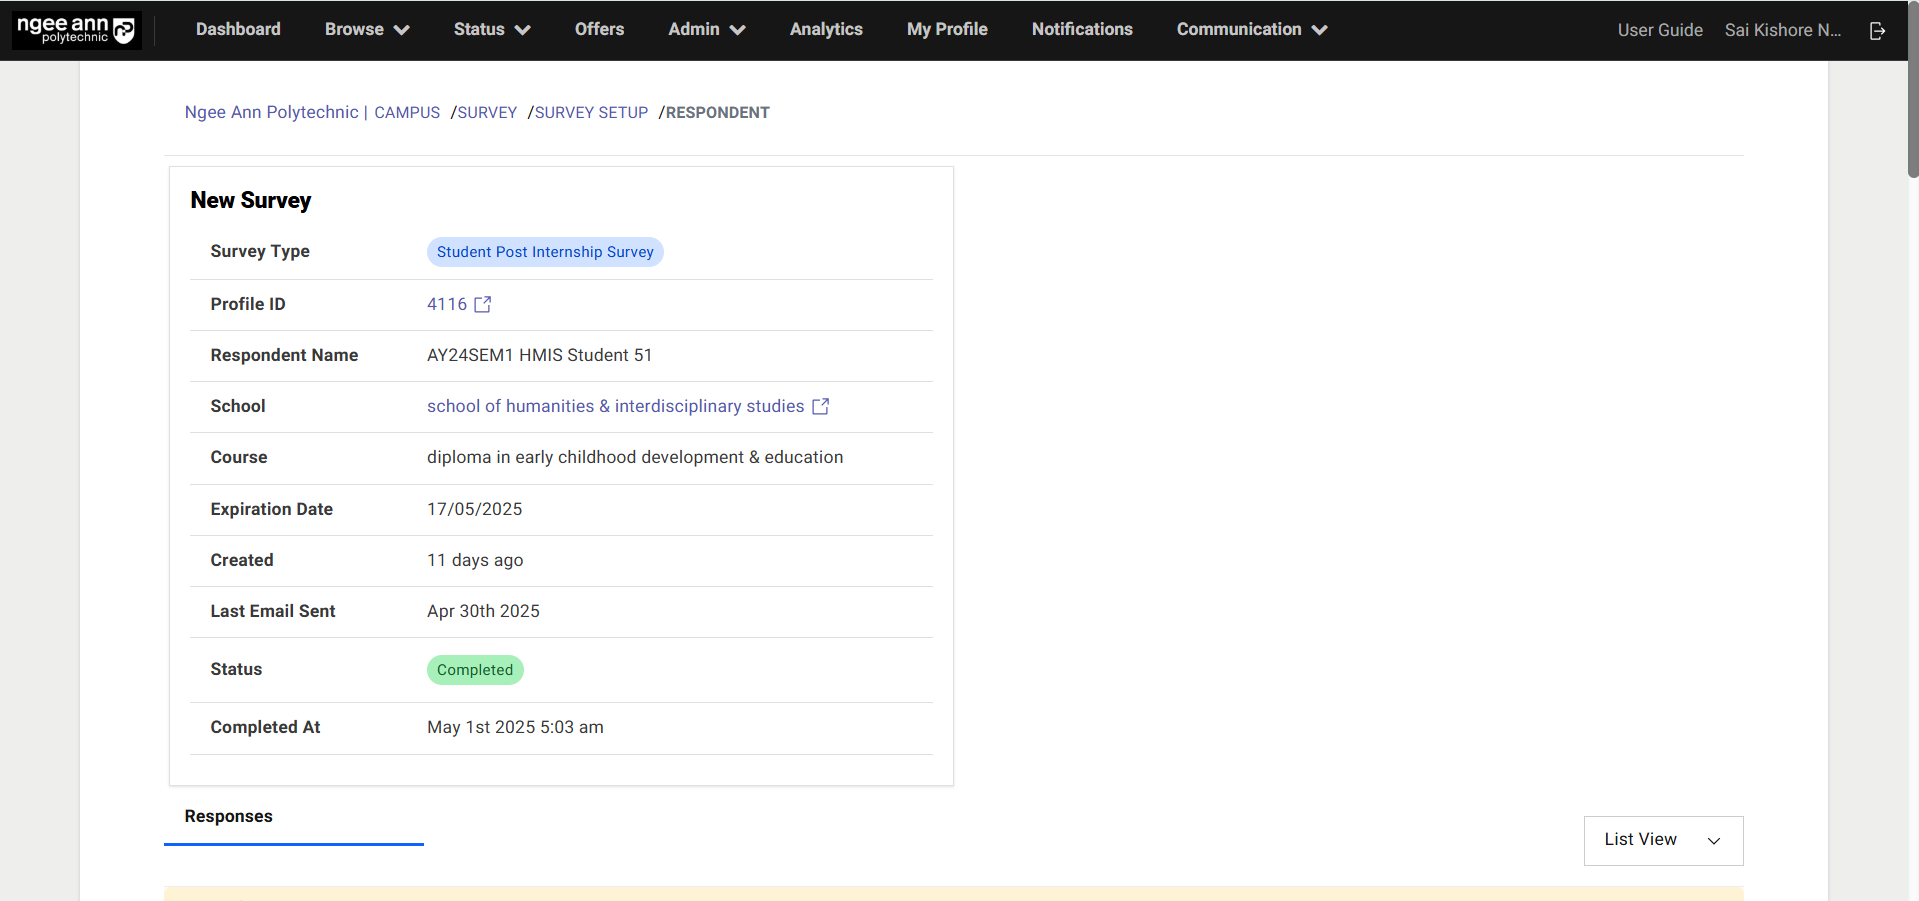
Step 2:
- See respective respondent details box in the "Respondent" page
- See "Responses" section will be shown below the details box
- See the list of respective survey questions and respondent responses will be shown under "Responses" section tab.
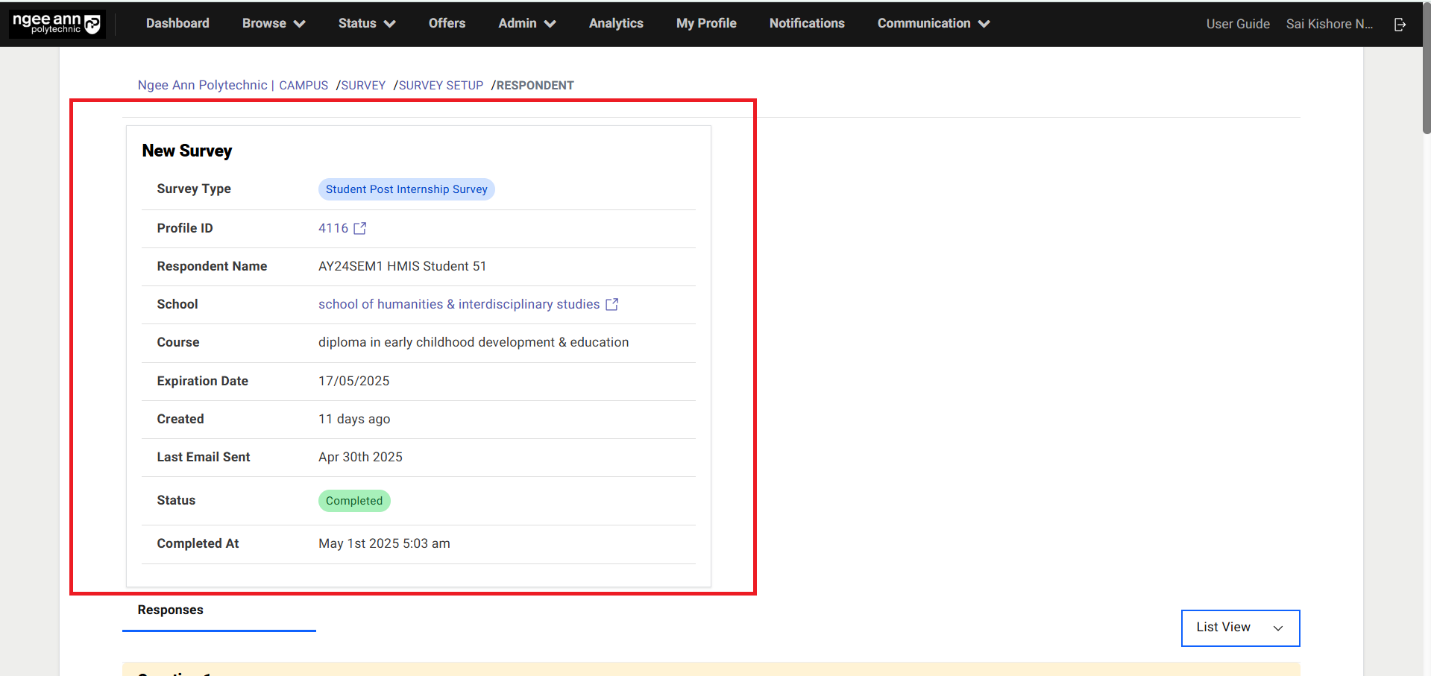
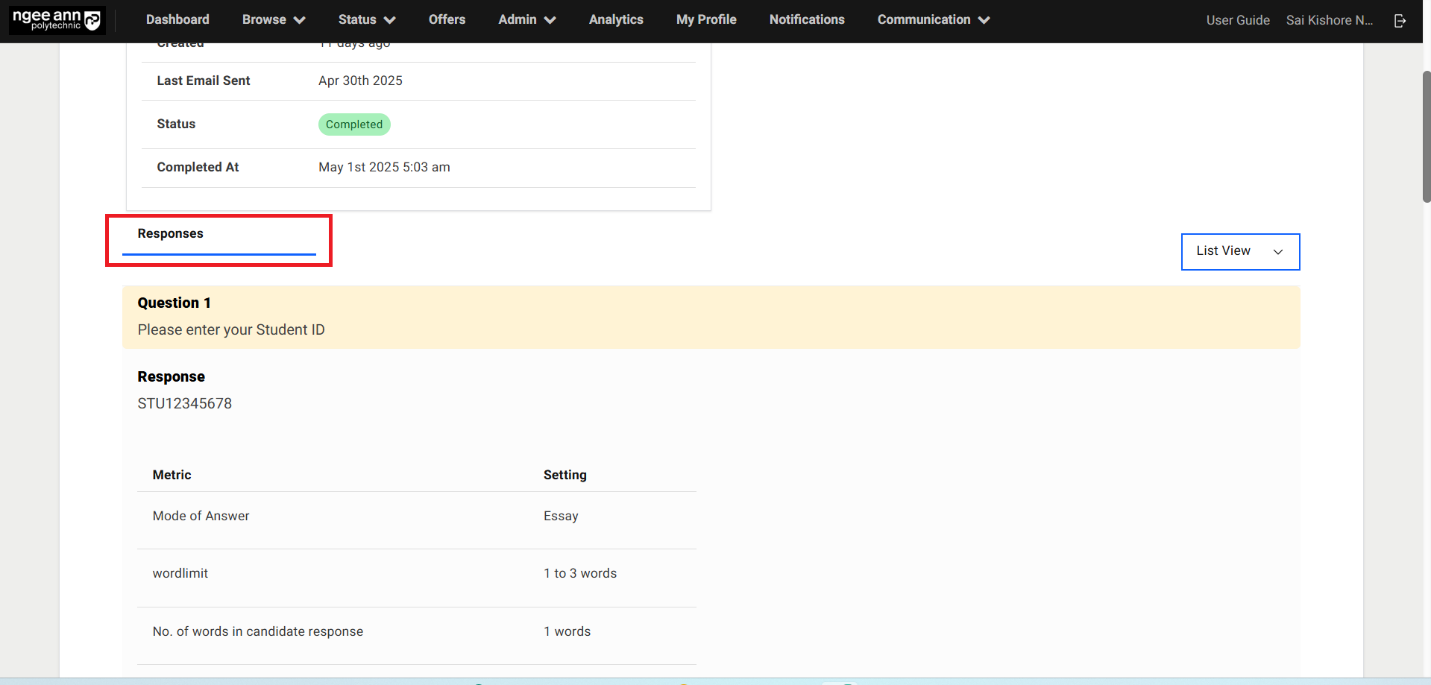
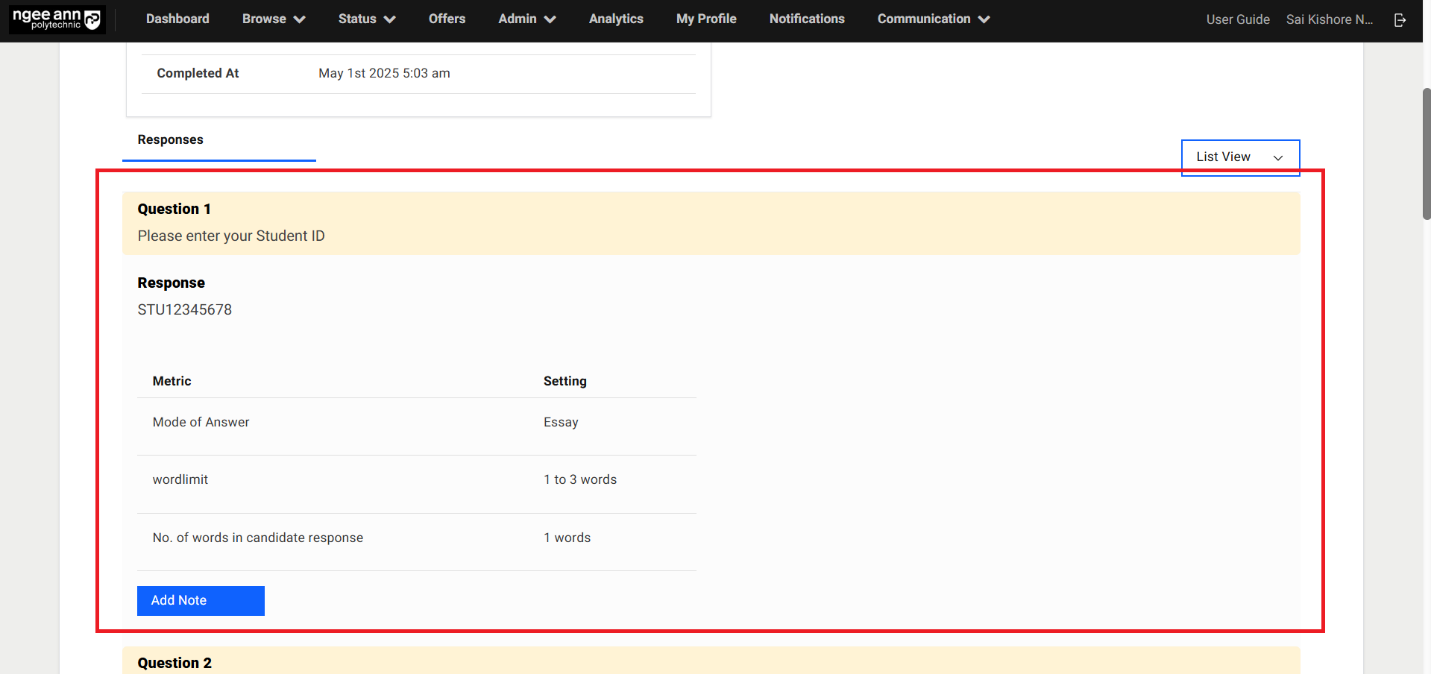

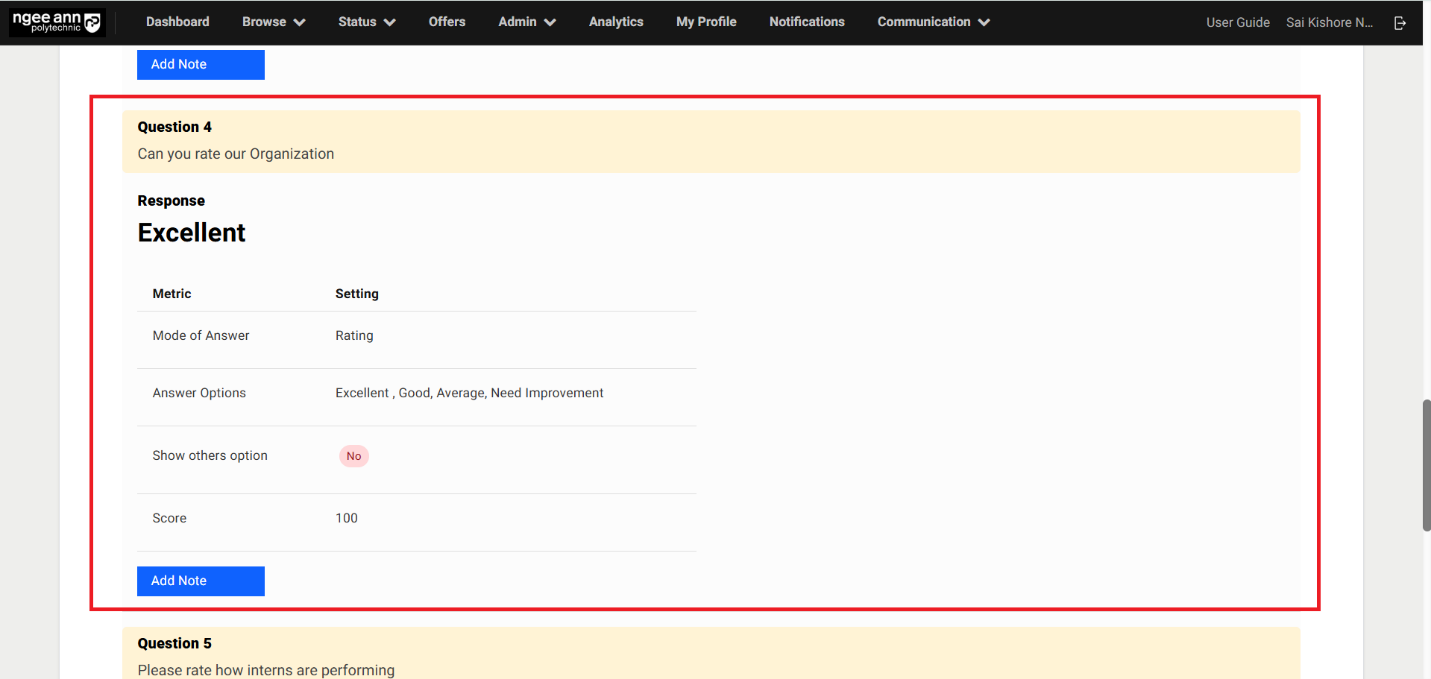
Step 3:
- Click on the view filter below the respondent details box
- Make sure able to see List View & Mini View options
- Make sure based on the selected view from the filter survey questions and respondent responses will be shown
- Under "Mini View" user will see next question when click on the "Next" button
- User will able to see previous question when user click on the "Previous" button
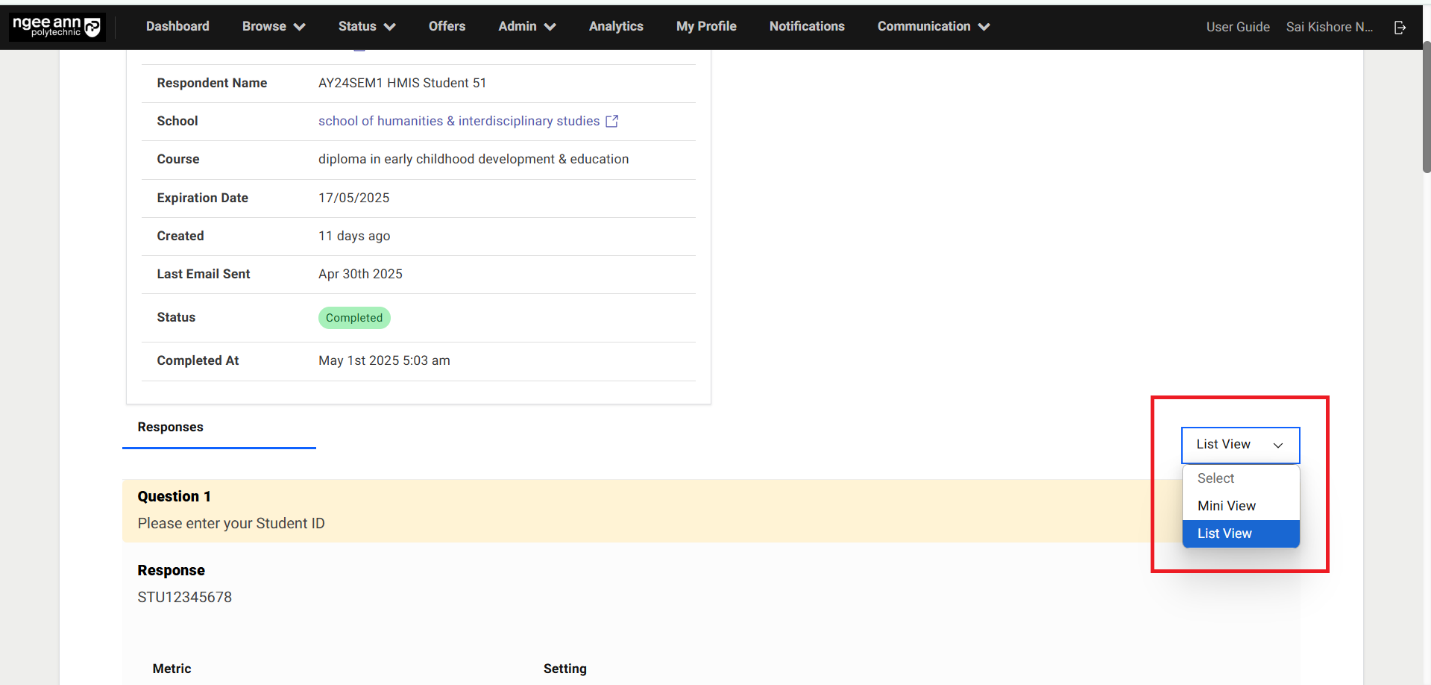
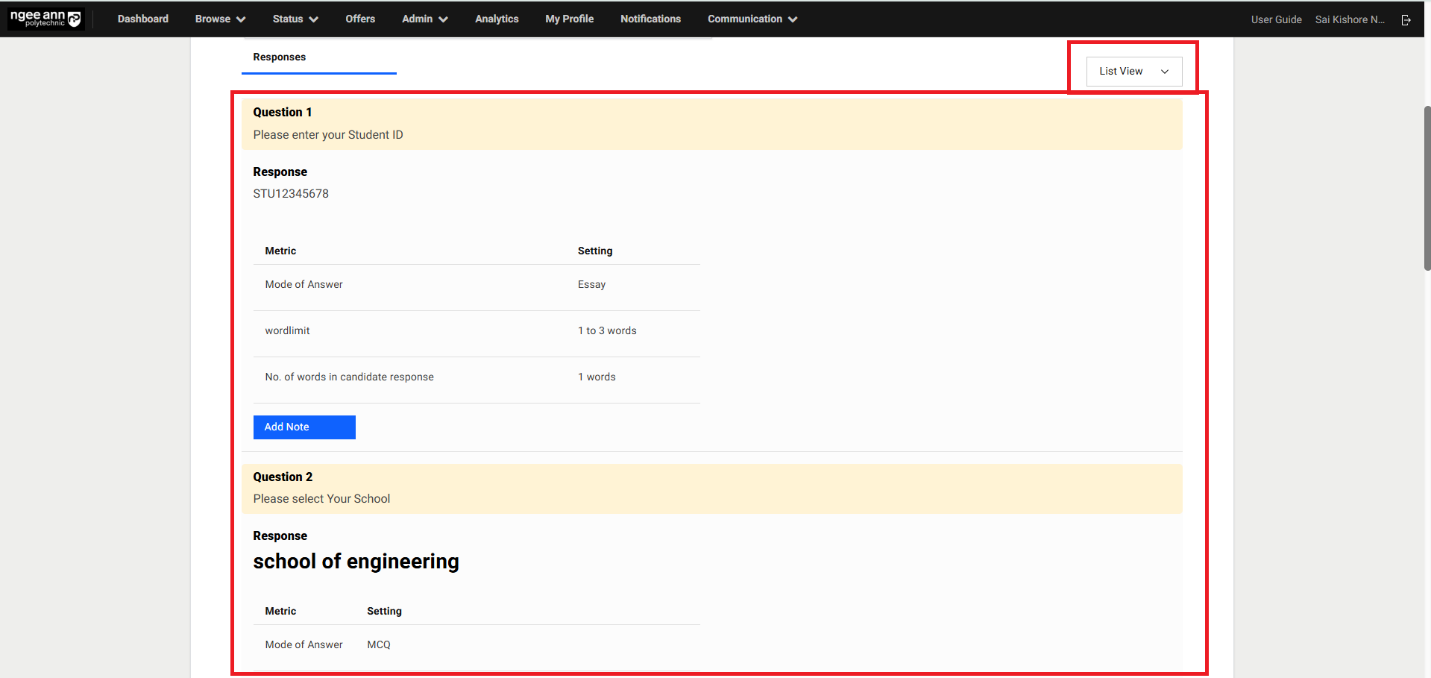
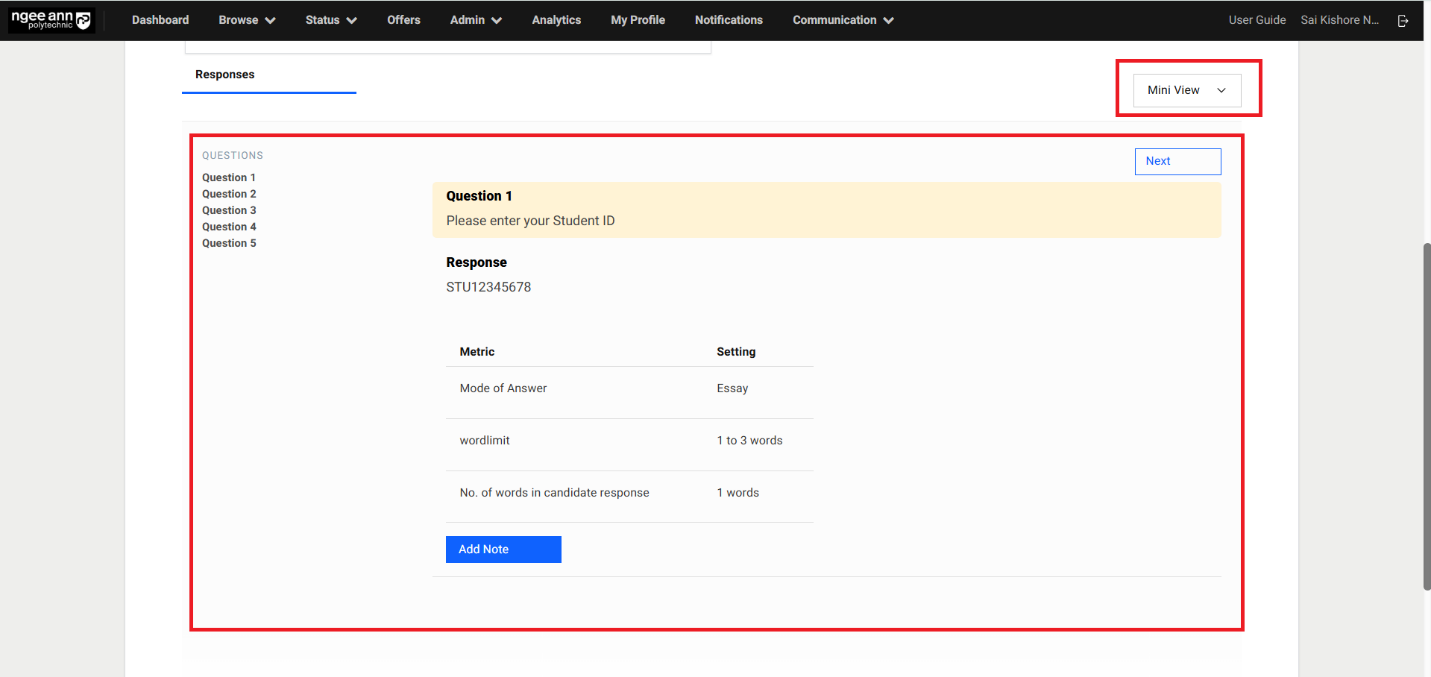
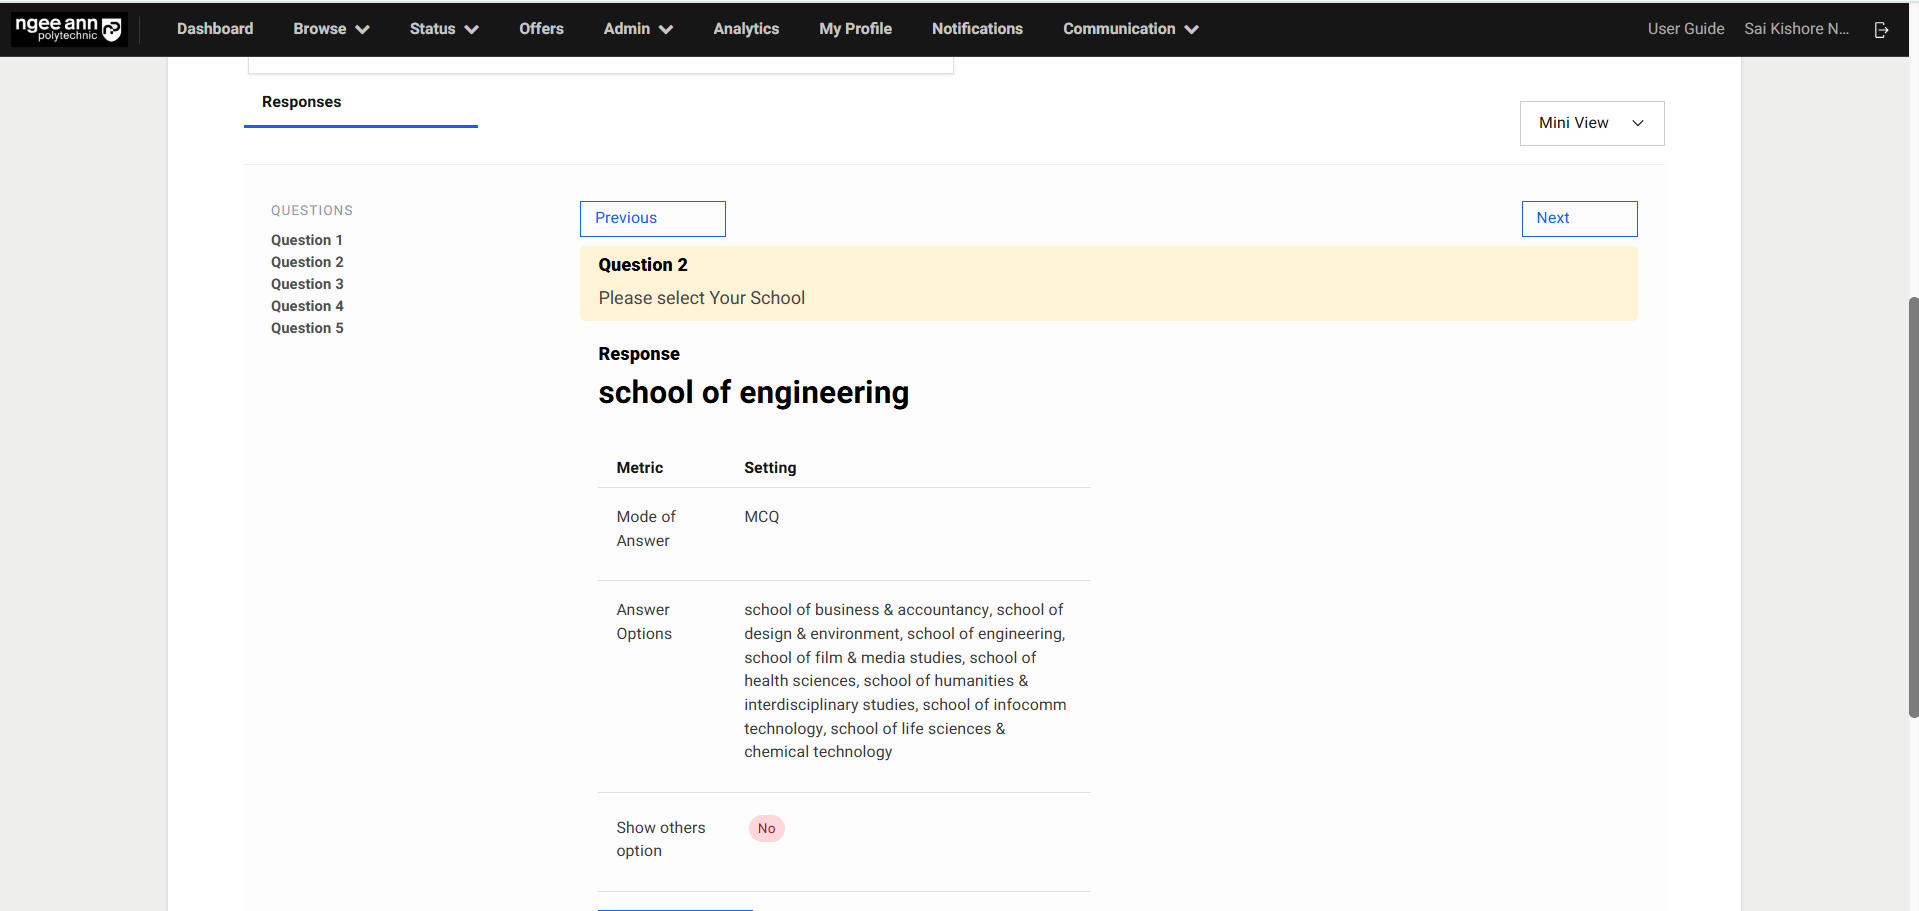
Add Notes to Responses:
Step 1:
- Click on the "Add Note" button
- Enter message/notes in the text field under "Add Note" popup
- Type "@ X staff user name" then respective user suggestion list will be shown
- Select the staff user from the list
- Click on the "submit" button
- Make sure notes will be added to respective question respondent's response and also mentioned user will receive the notification mail of note message once submitted also successes message will be shown.
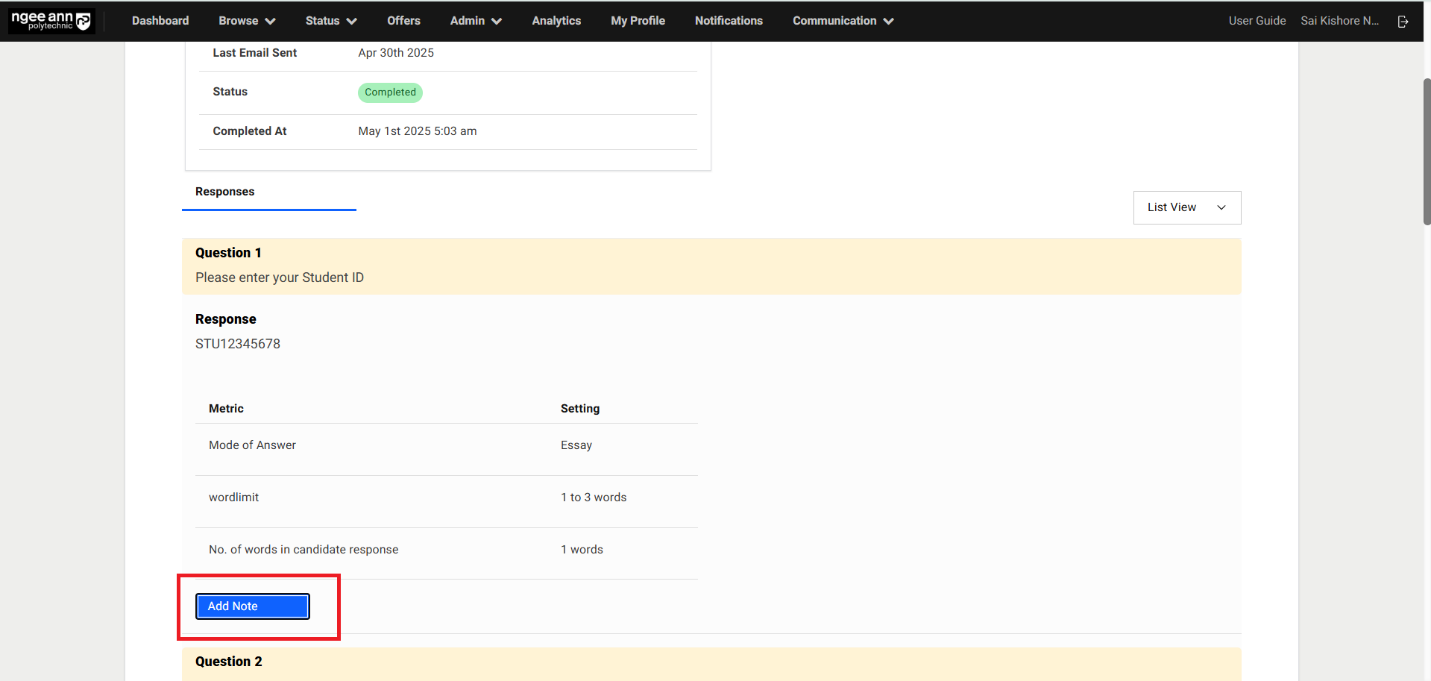
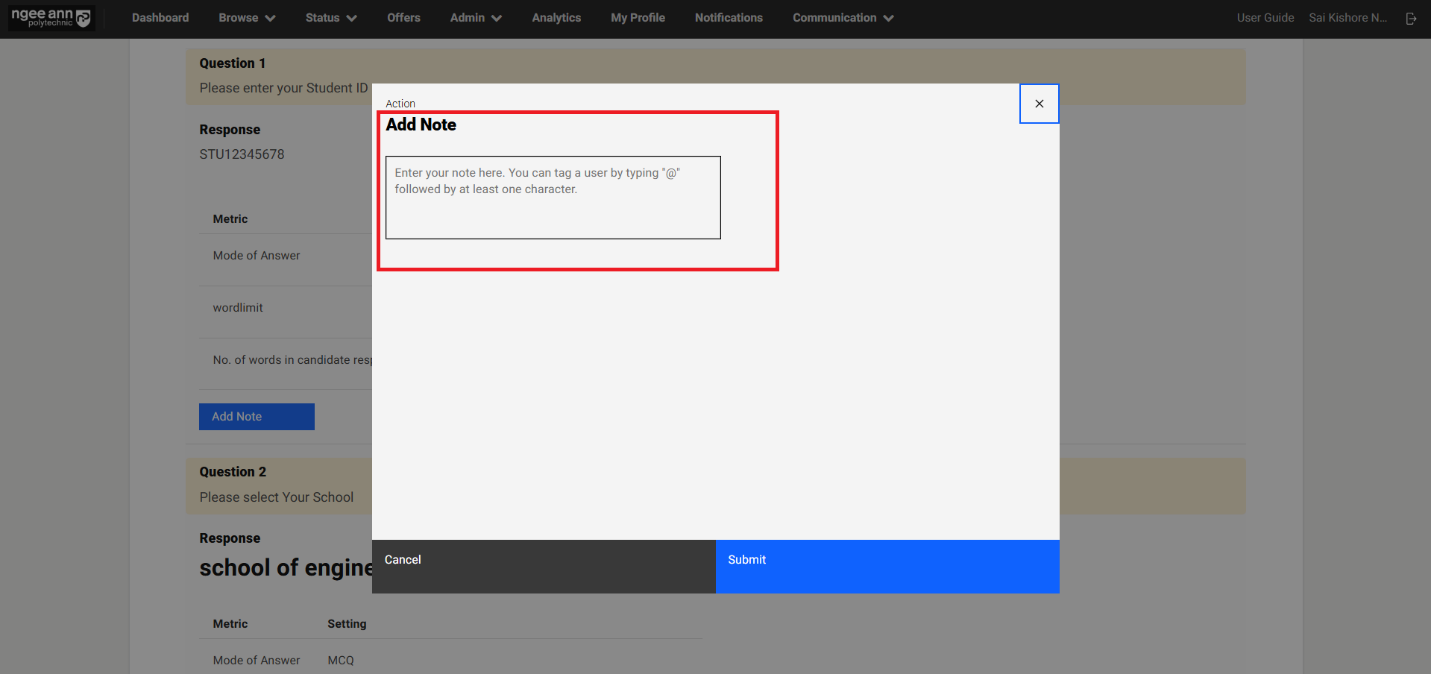
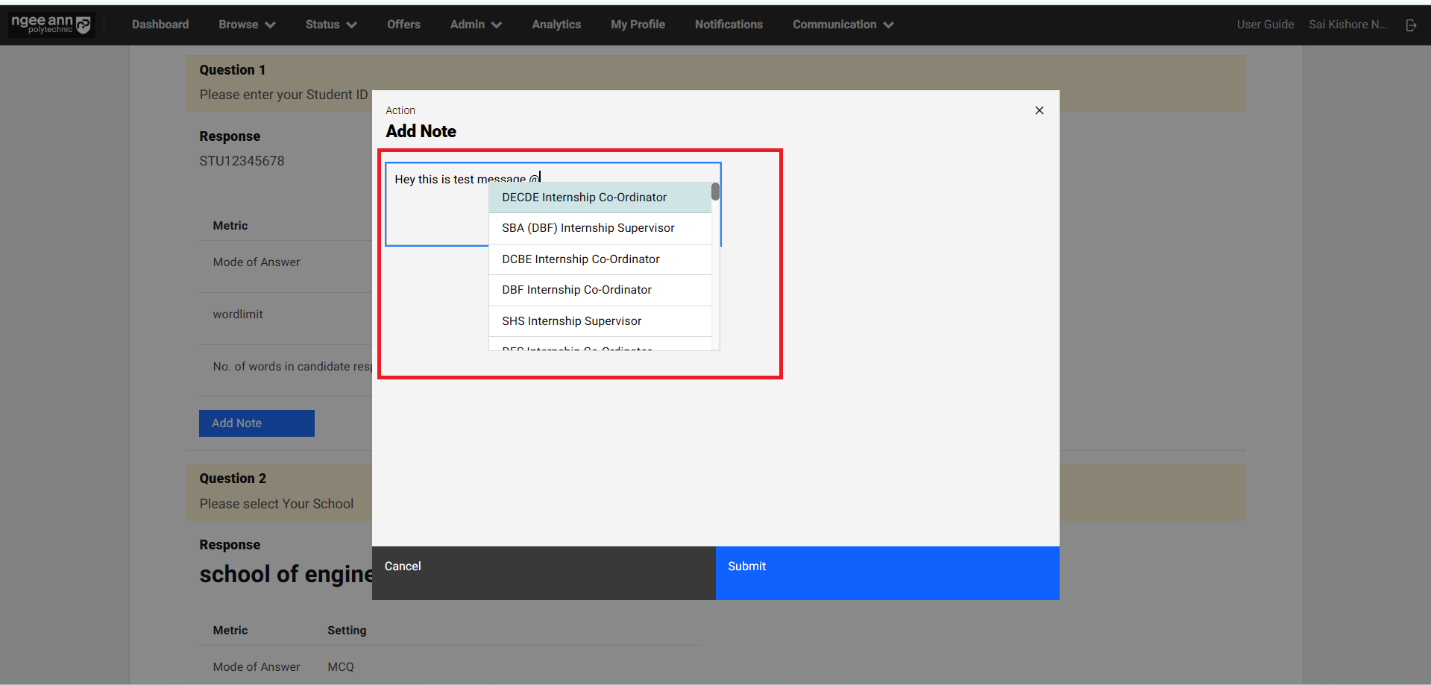
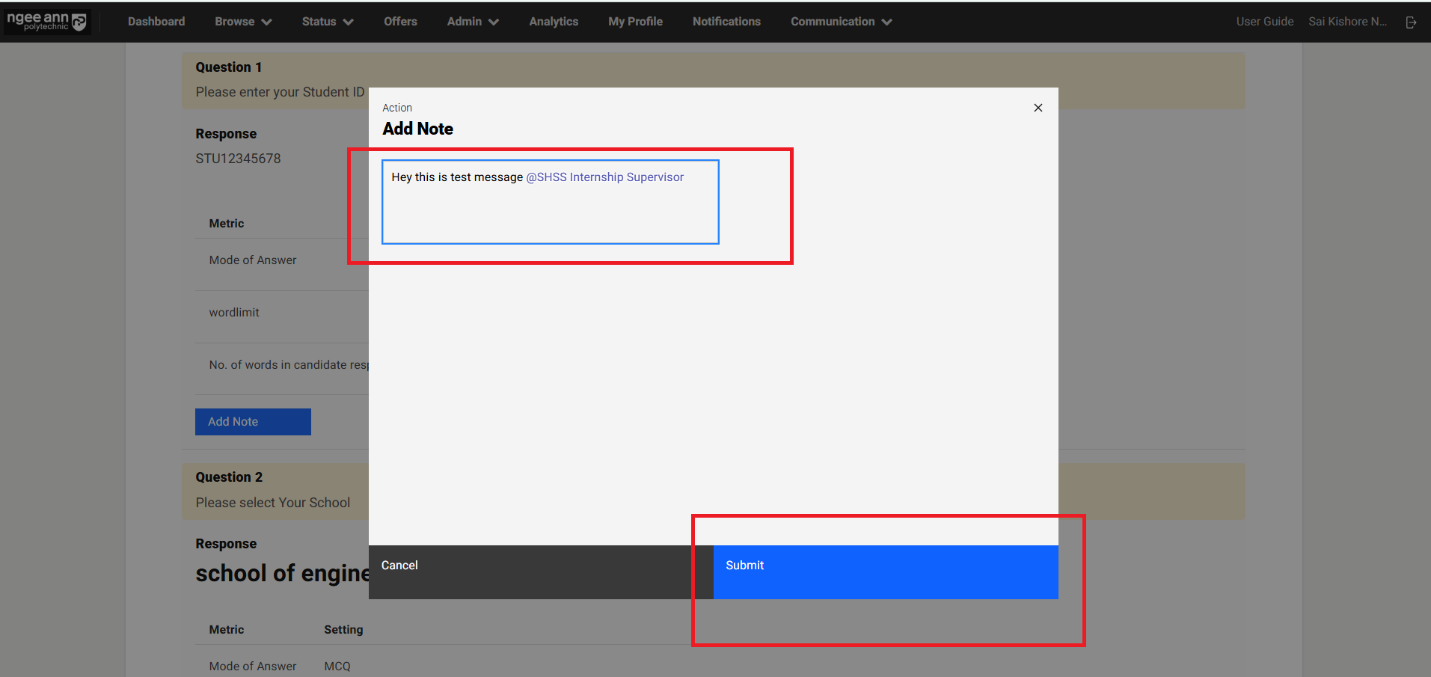
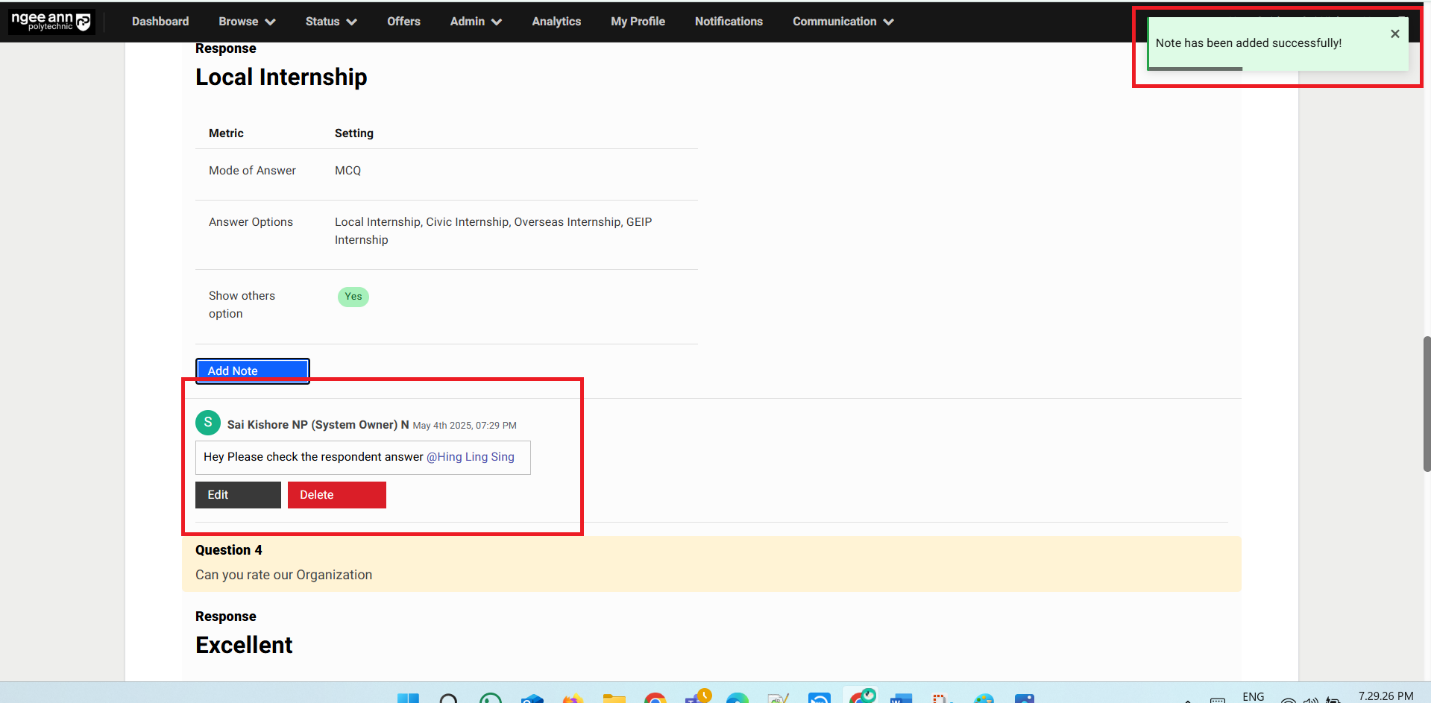
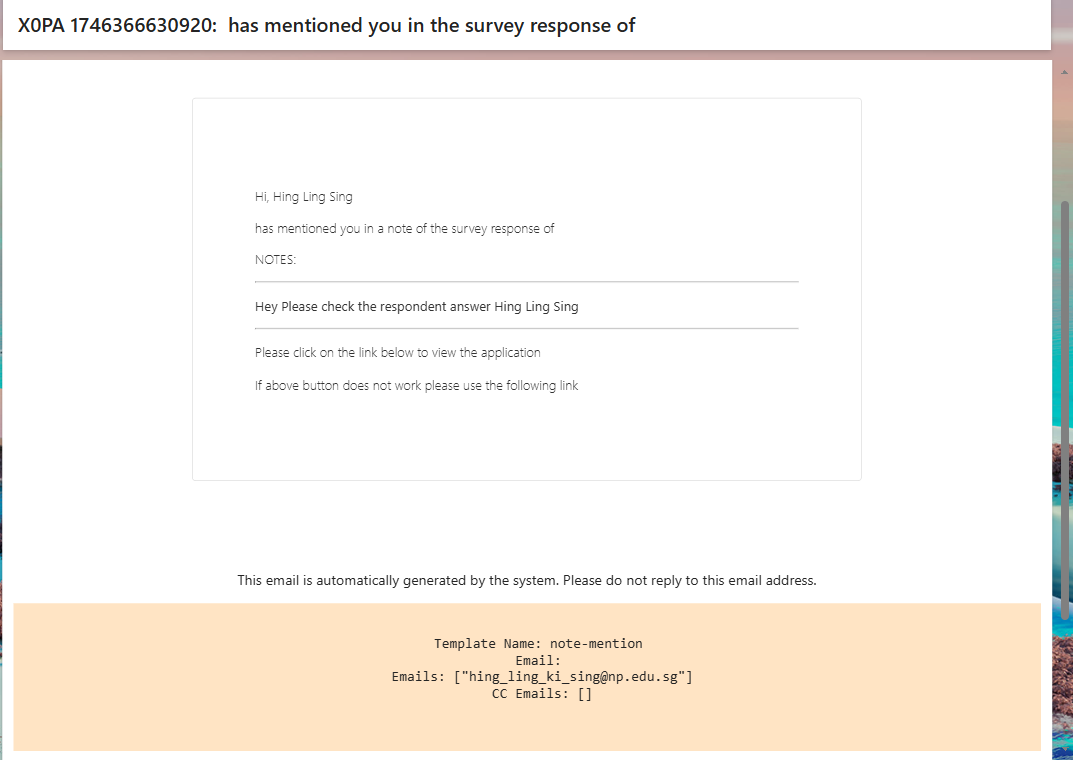
Edit Notes:
Step 1:
- Click on the "Edit" button below the added notes
- Added/saved notes will be persisted in the text field under "Edit Notes" popup
- Edit/update the notes from the text field
- Click on the "Submit" button to save the notes and successes message will be shown
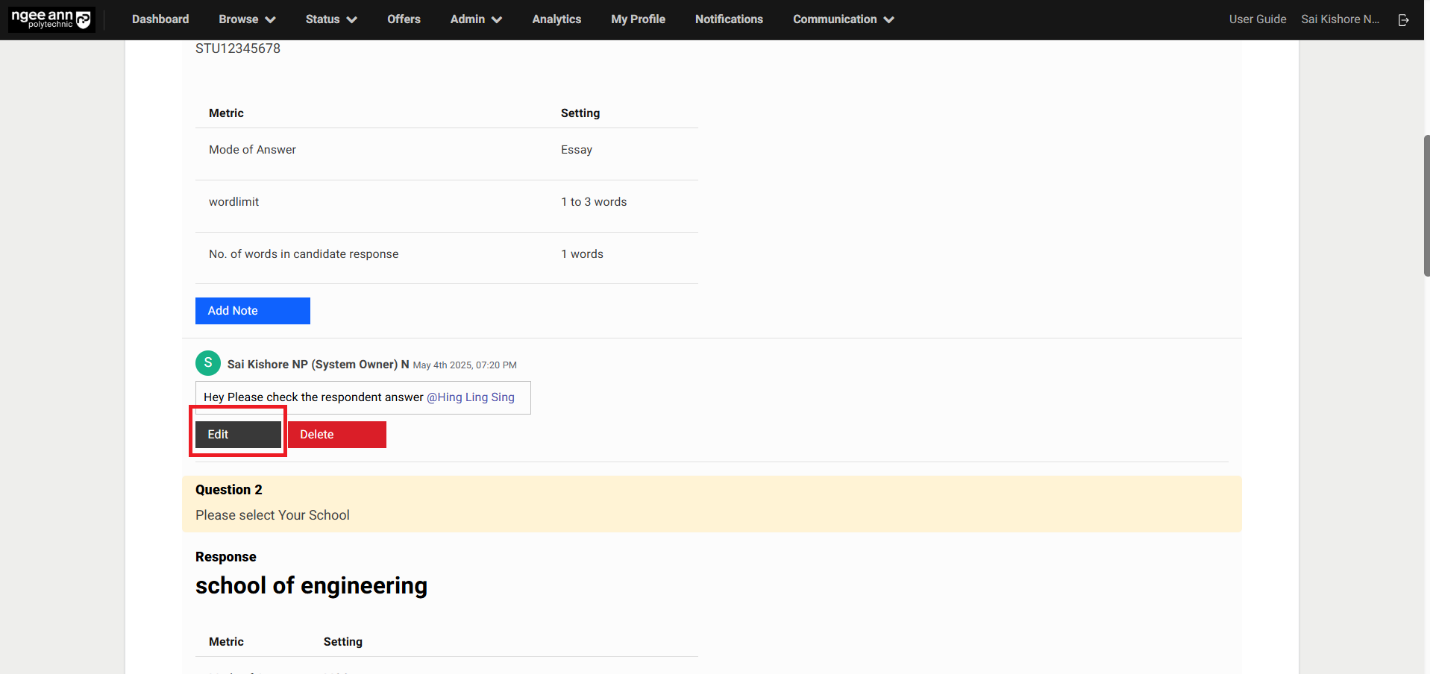
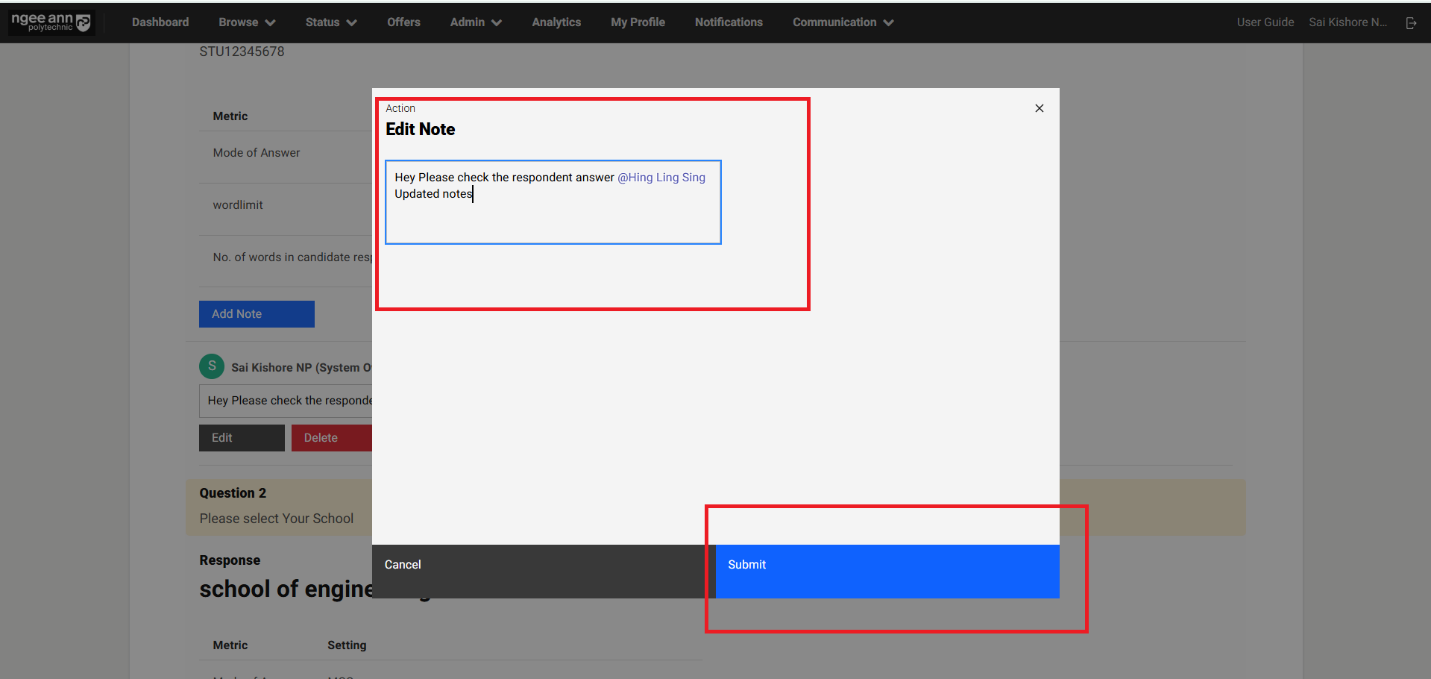
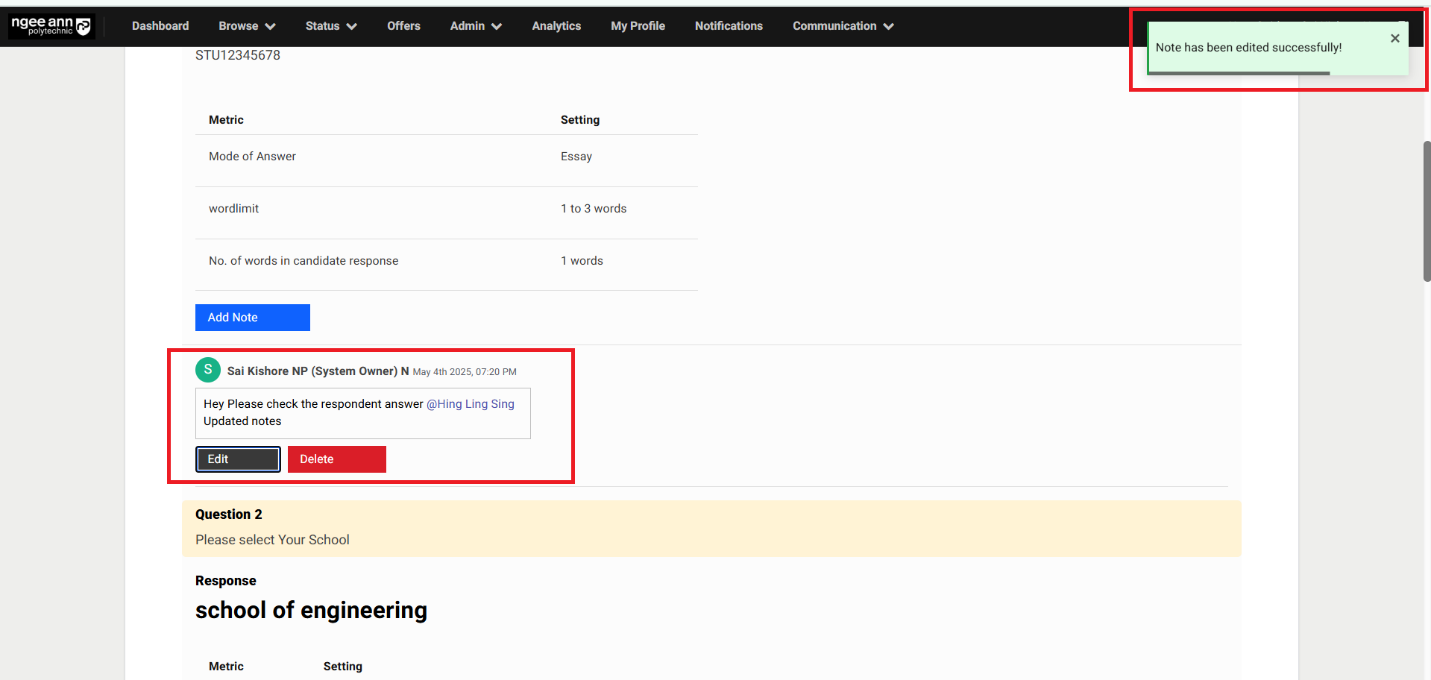
Delete Notes:
Step 1:
- Click on the "Delete" button below the added notes
- Click on the "Delete" button from the "Delete Note" confirmation popup
- Make sure respective notes will be deleted for response and successes message will be shown.
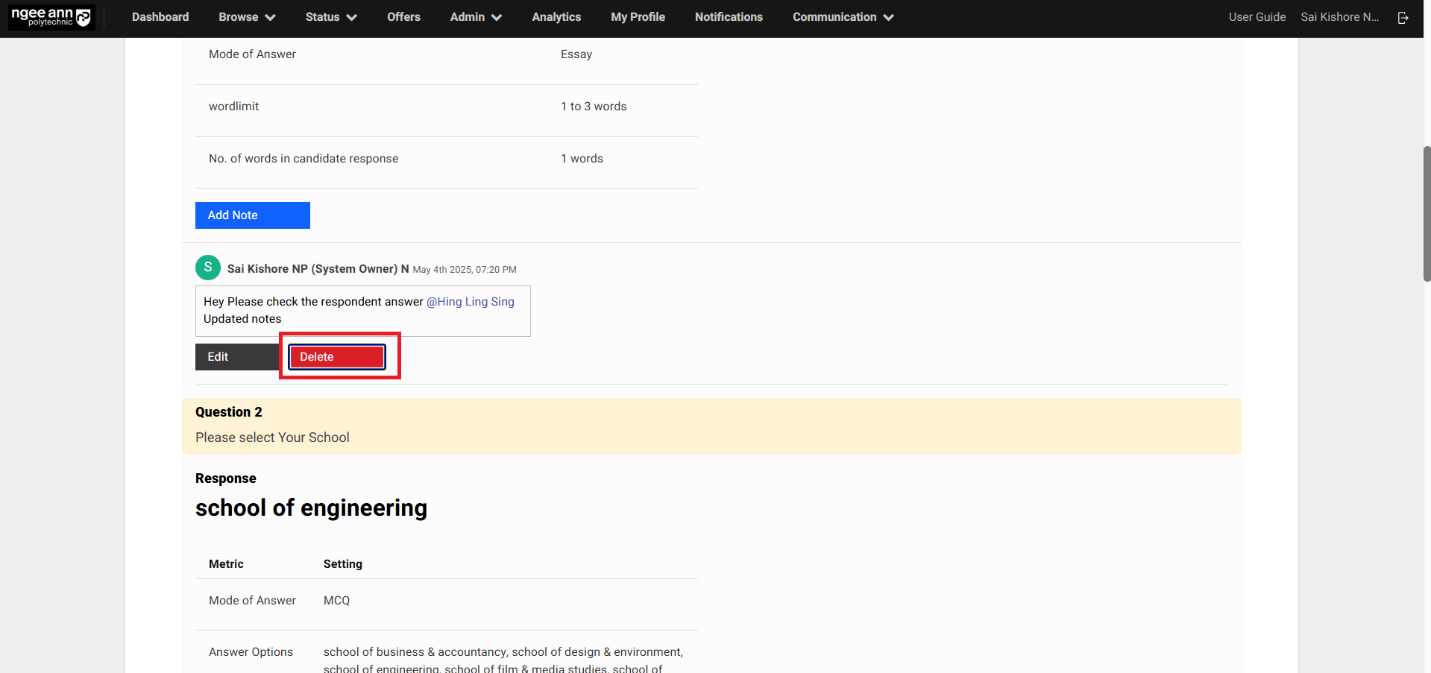
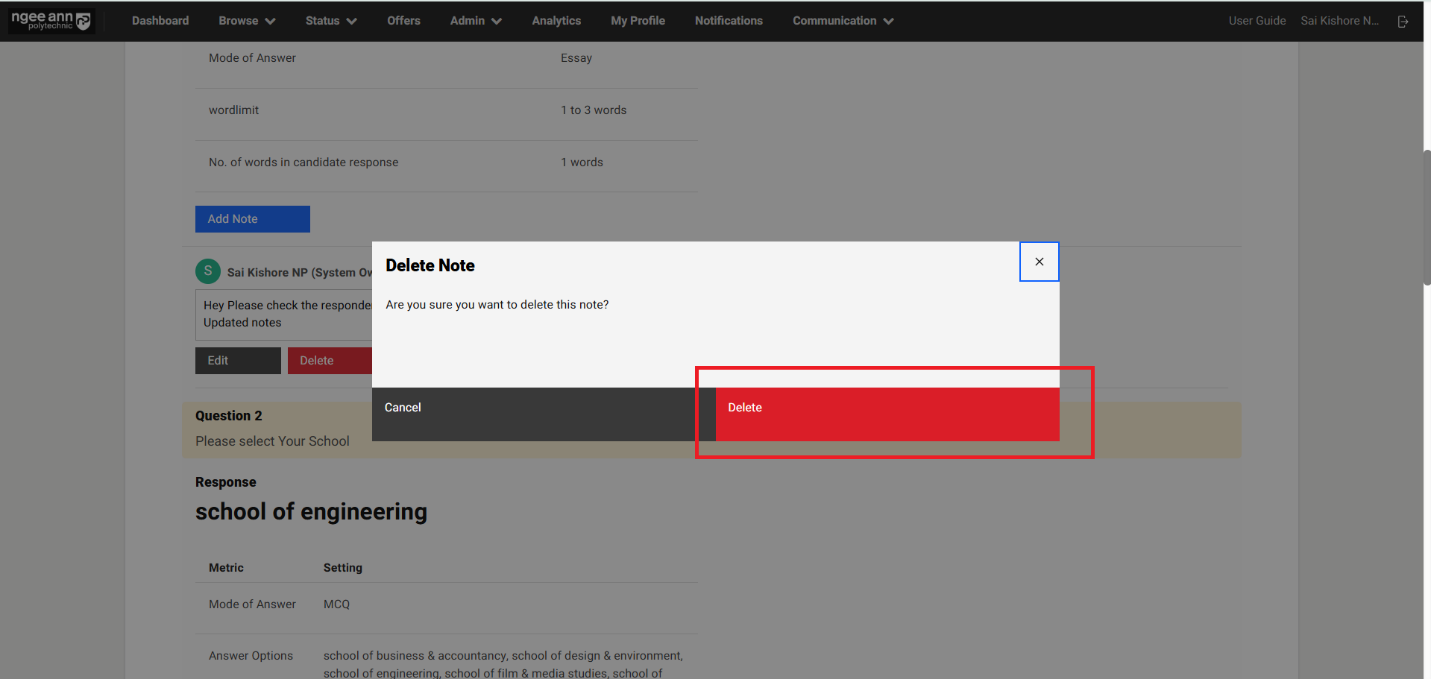
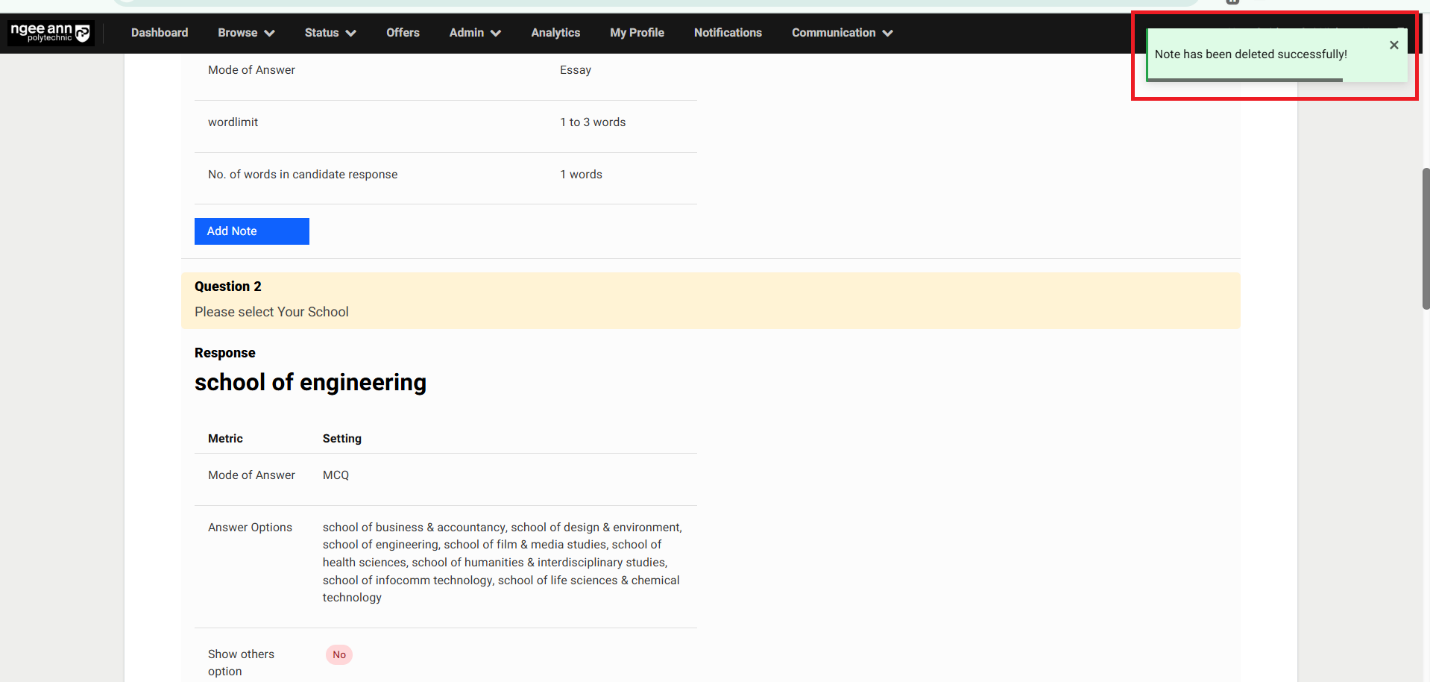
All Responses Section Tab:
Step 1:
- Click on the "All Responses" section tab under "Survey Setup" page
- Make sure Respondent details and respondent's responses for the survey will be shown in the table under each column
Note: Only Multiple-Choice Questions & Rating type questions and respondent responses are shown in the table under "All Responses" section tab
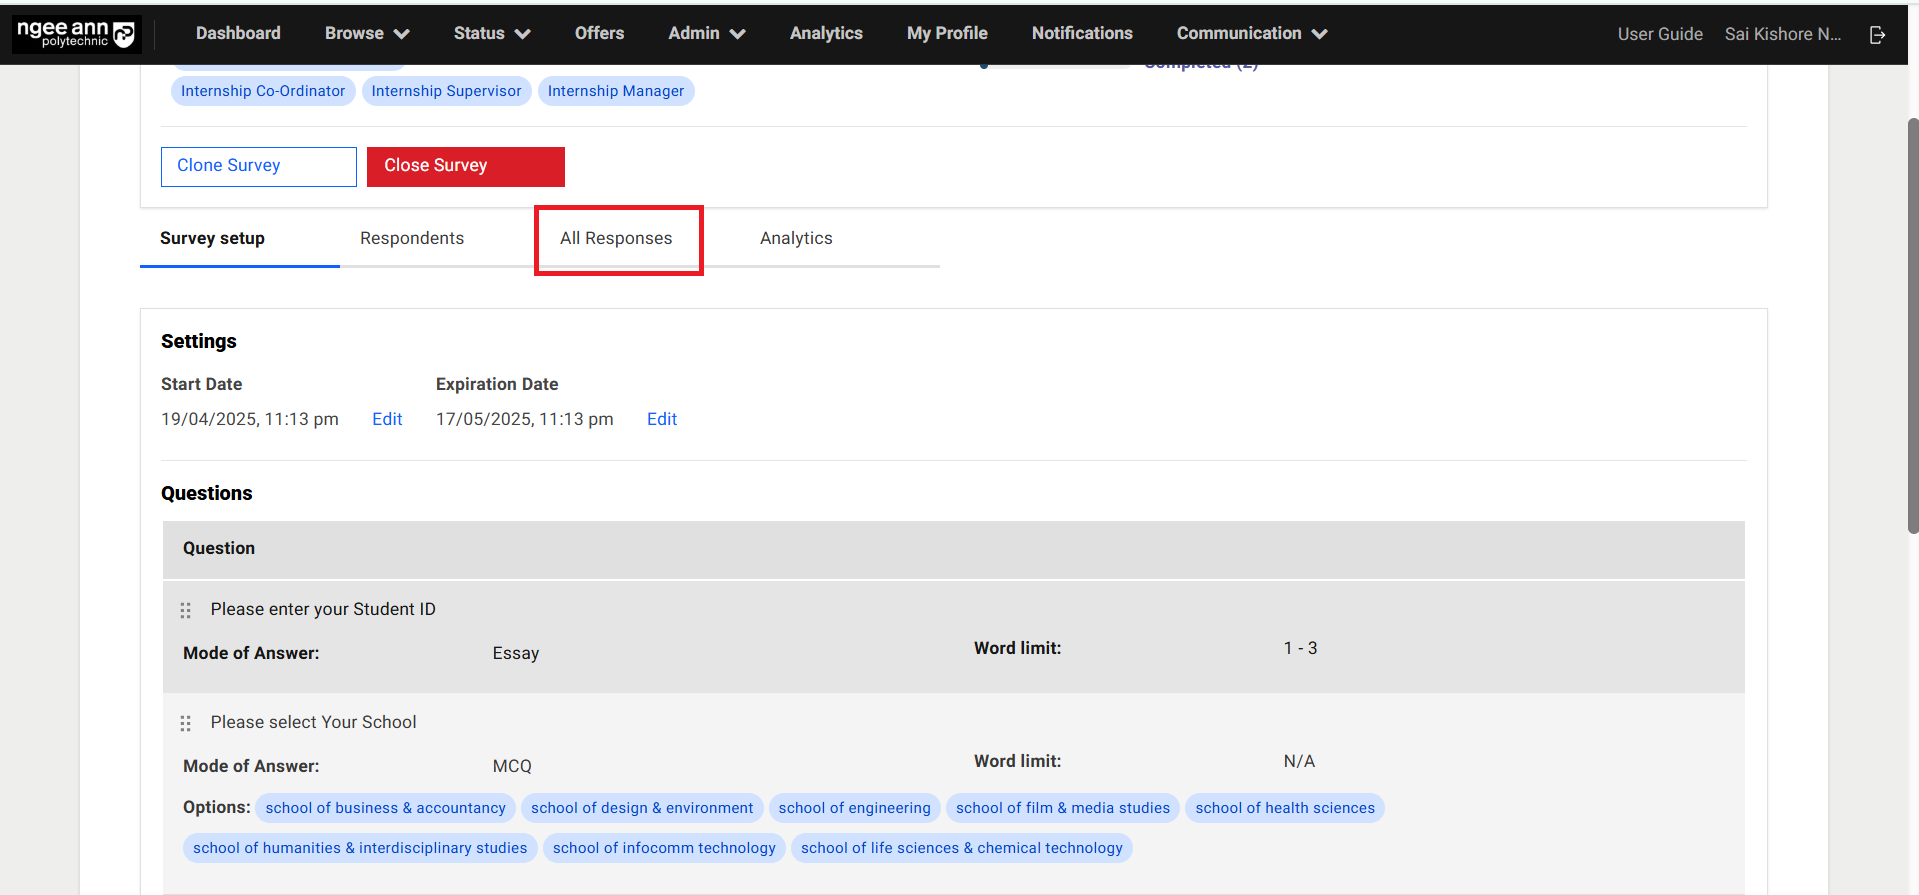
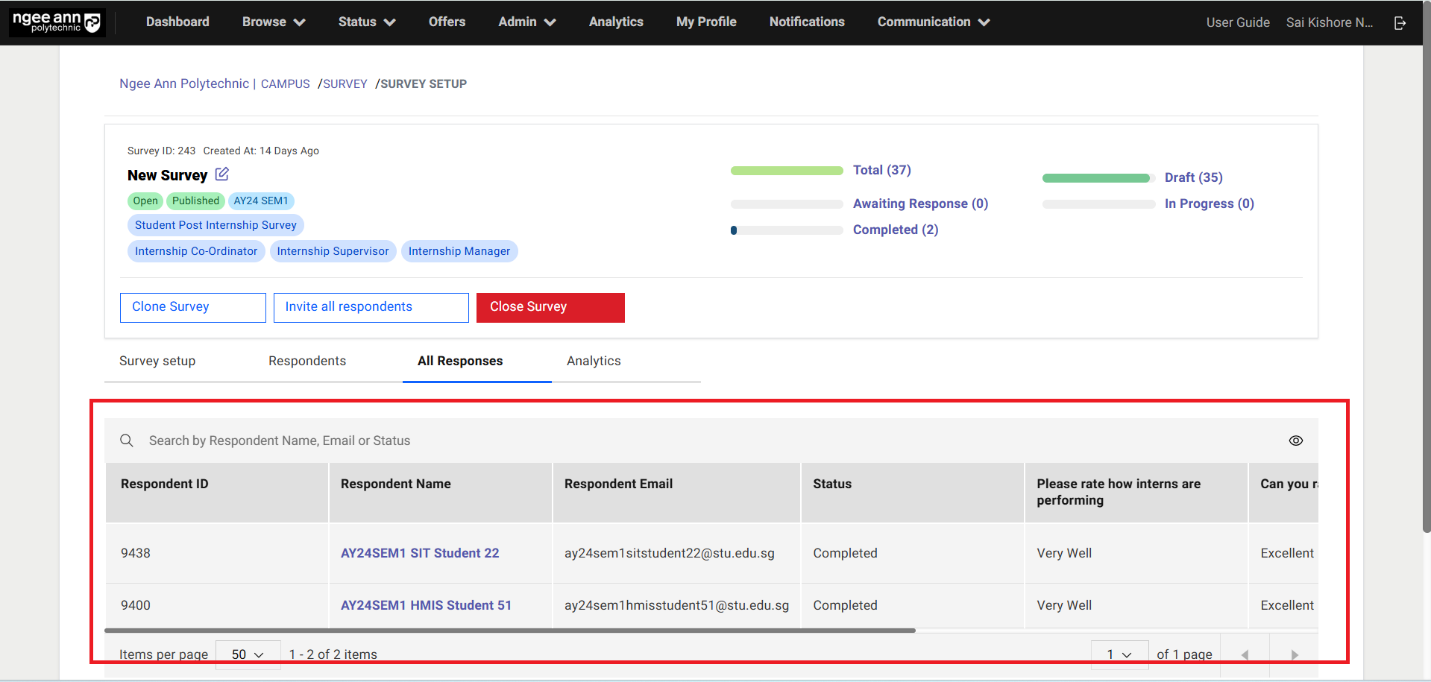
Step 2:
- Click on the "Eye" icon above the table
- Make sure column filters will be shown
- For each MCQ & Rating type questions and status columns filters will be shown with respective filter options
- When the column filters are applied then respective data will be shown in the table
- Click on the respondent's name under "Respondent Name" column navigate to respective respondent "Respondent" page.

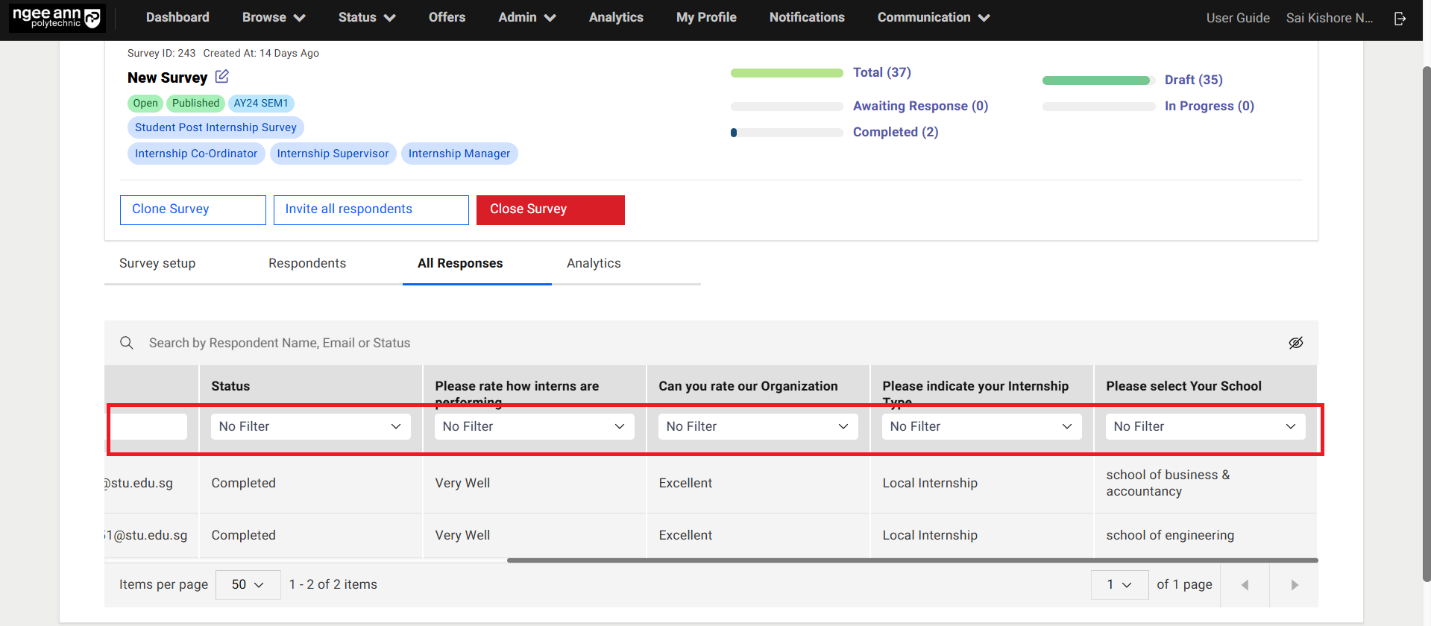
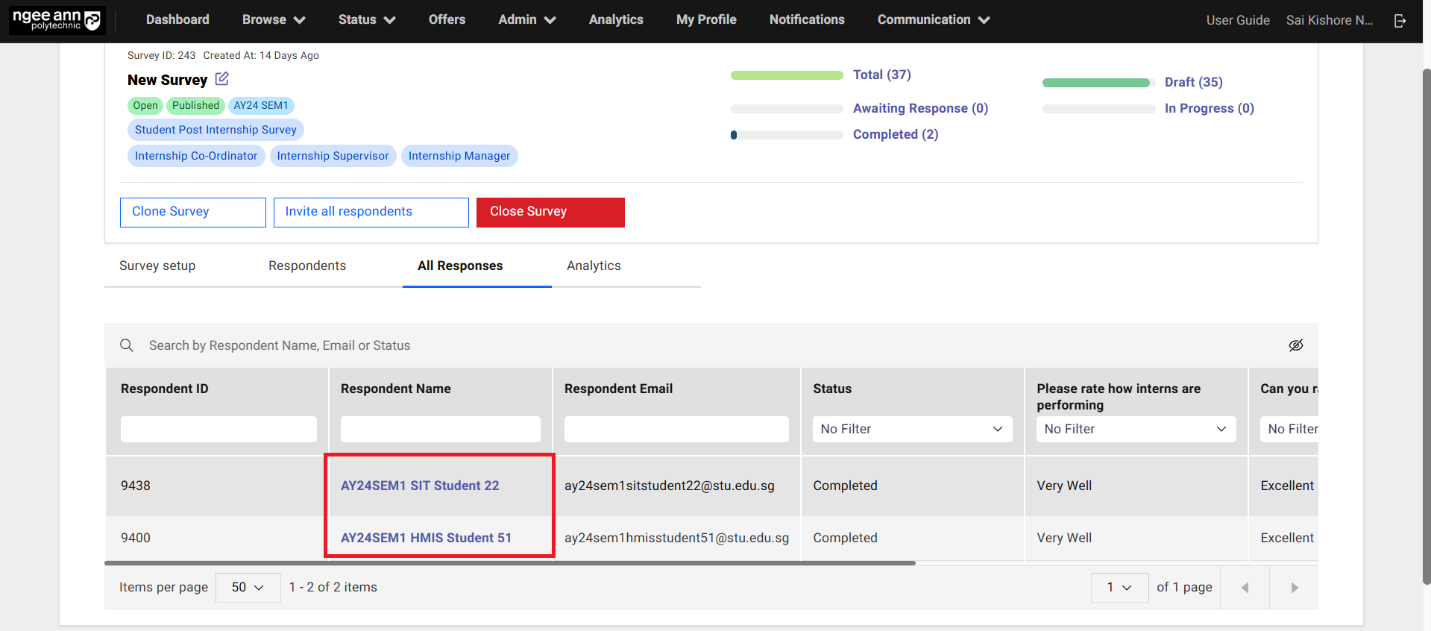
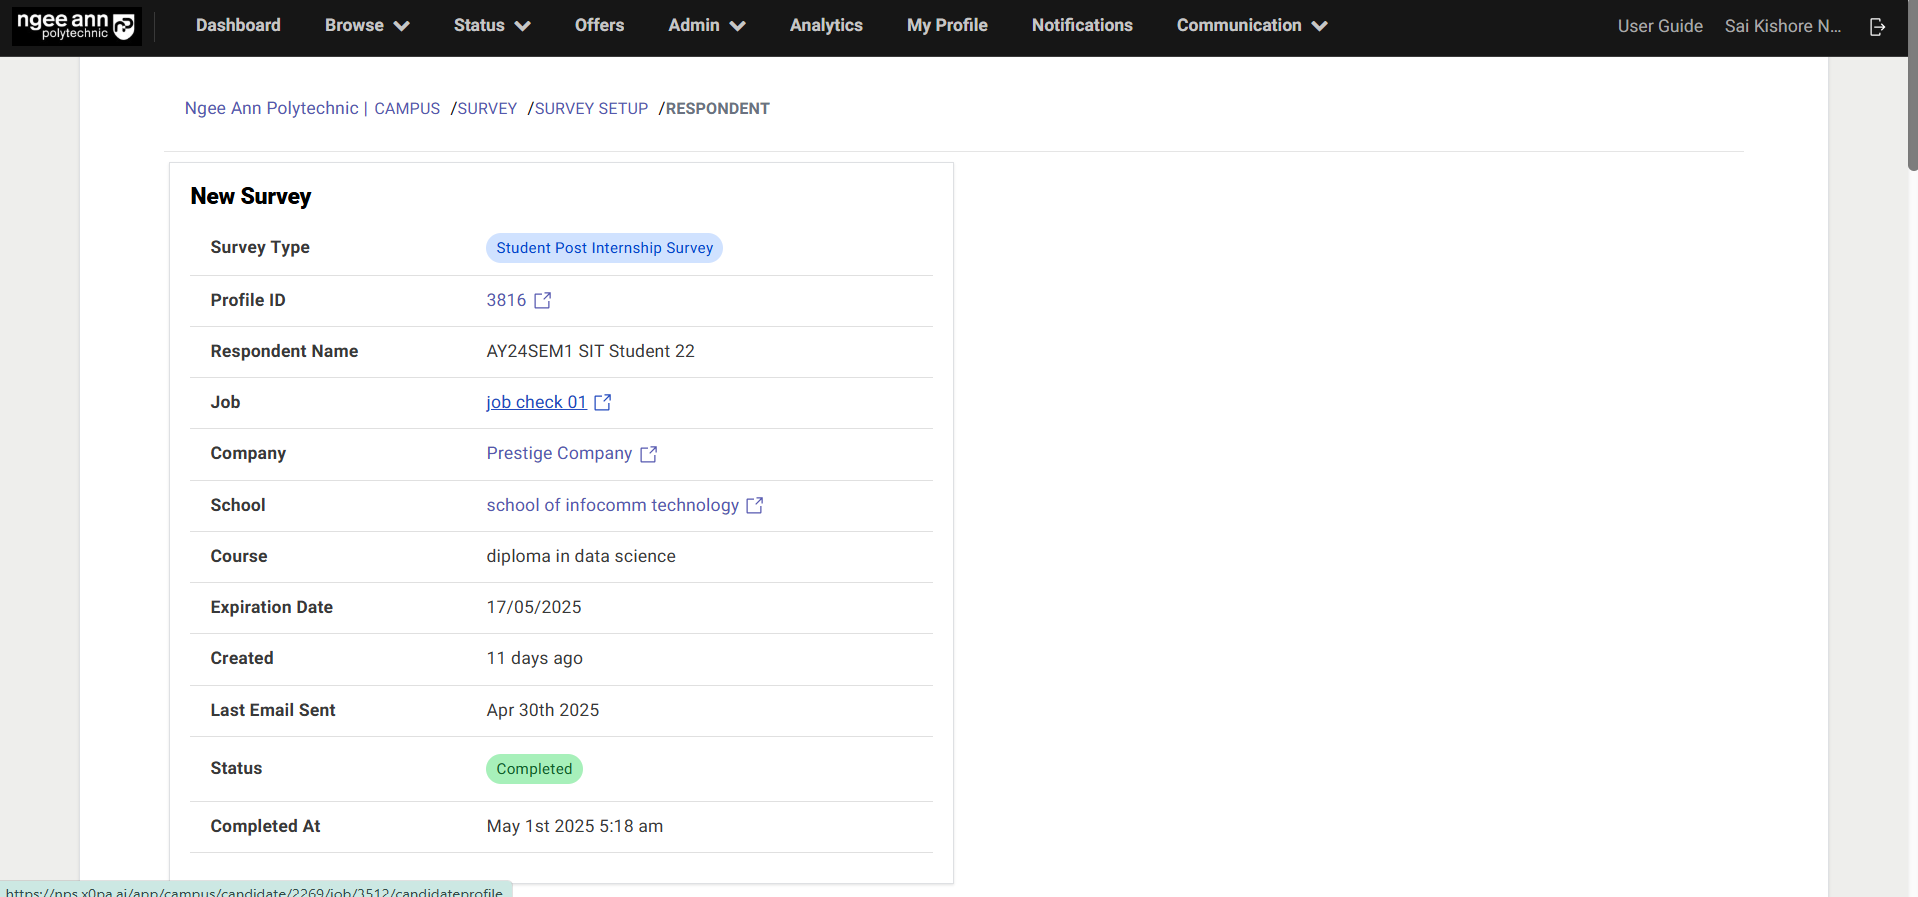
Analytics Section Tab:
Step 1:
- Click on the "Analytics" section tab
- Click on the "Question" dropdown field
- Select question from the dropdown field
- All respondent answers for each survey will be displayed as graphs, organized by question within each survey.
- Click on the "Group By" dropdown field
- Select School/Course option from the dropdown field
- Respondent answers will be displayed as graphs for respective survey question, with responses grouped by the school and course tagged by each respondent.
Note:
- Only MCQ and Rating type questions will appear in the "Questions" dropdown.
- "School & Course" grouping will apply only to respondents with the student role.
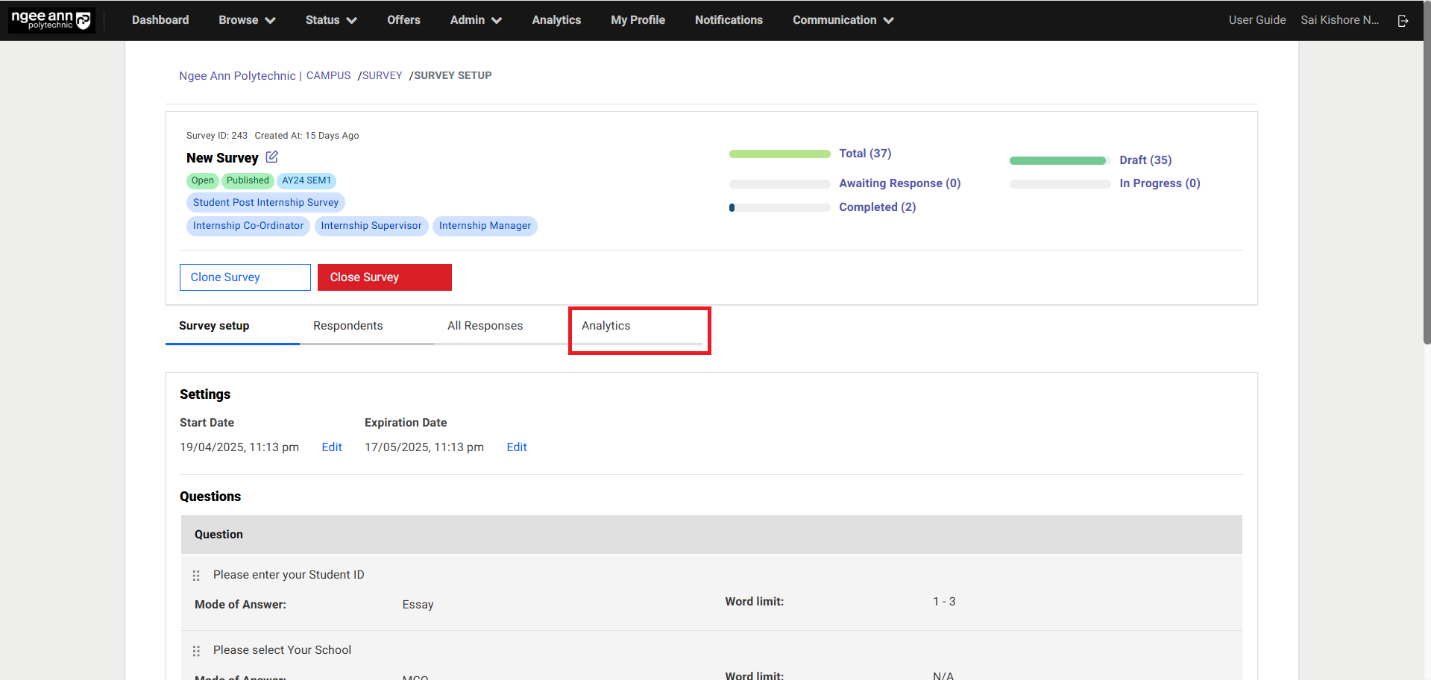
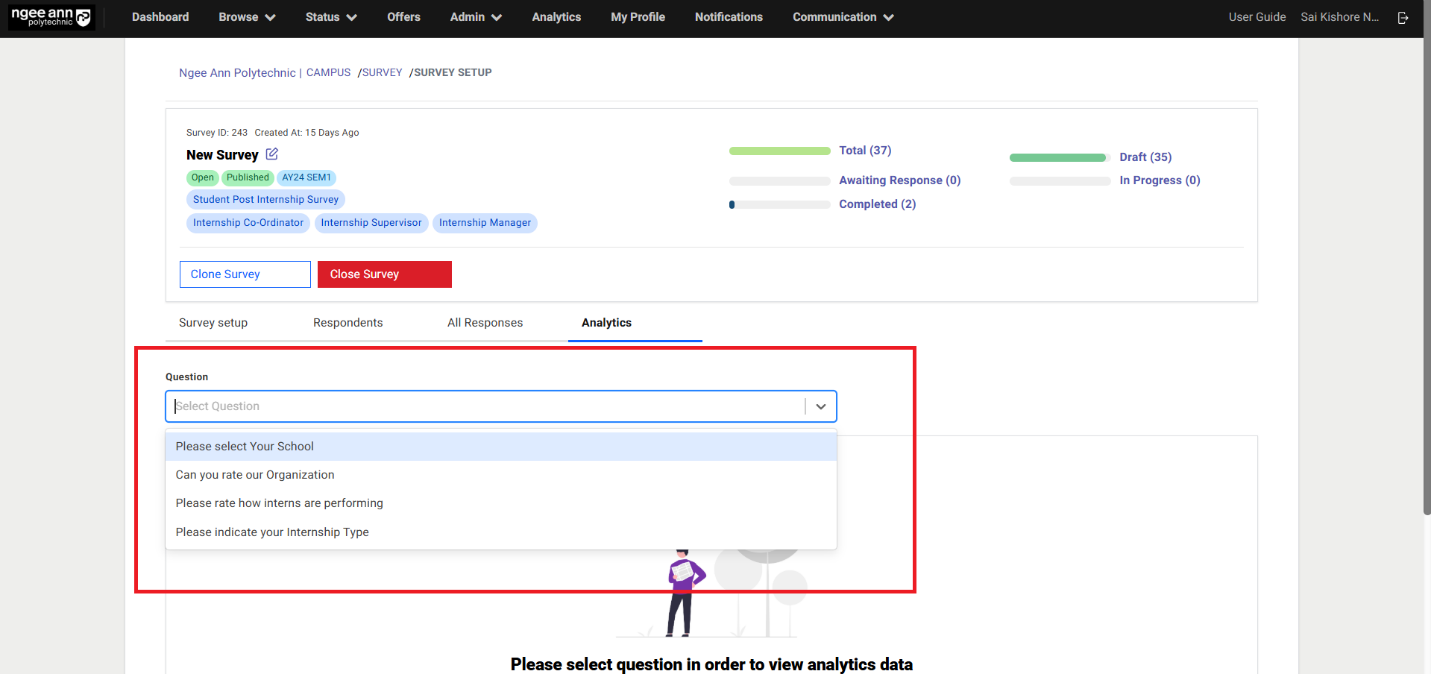
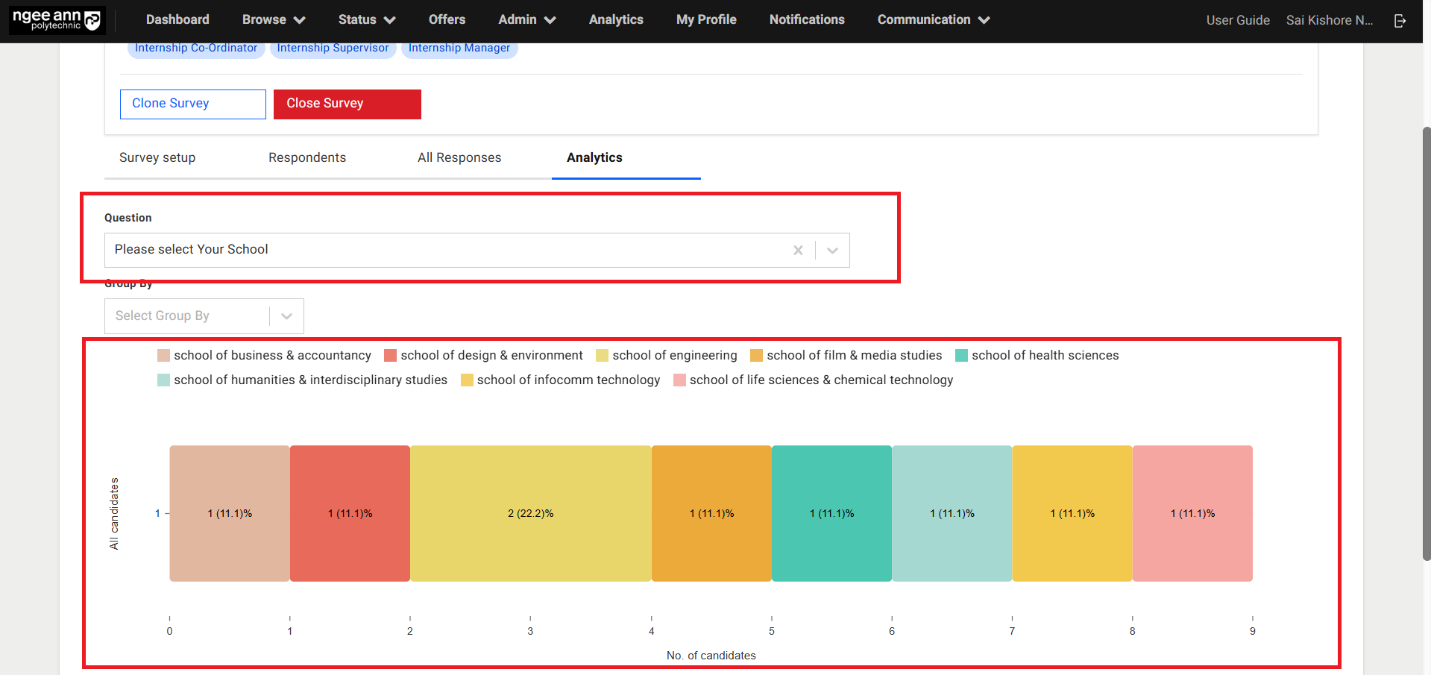
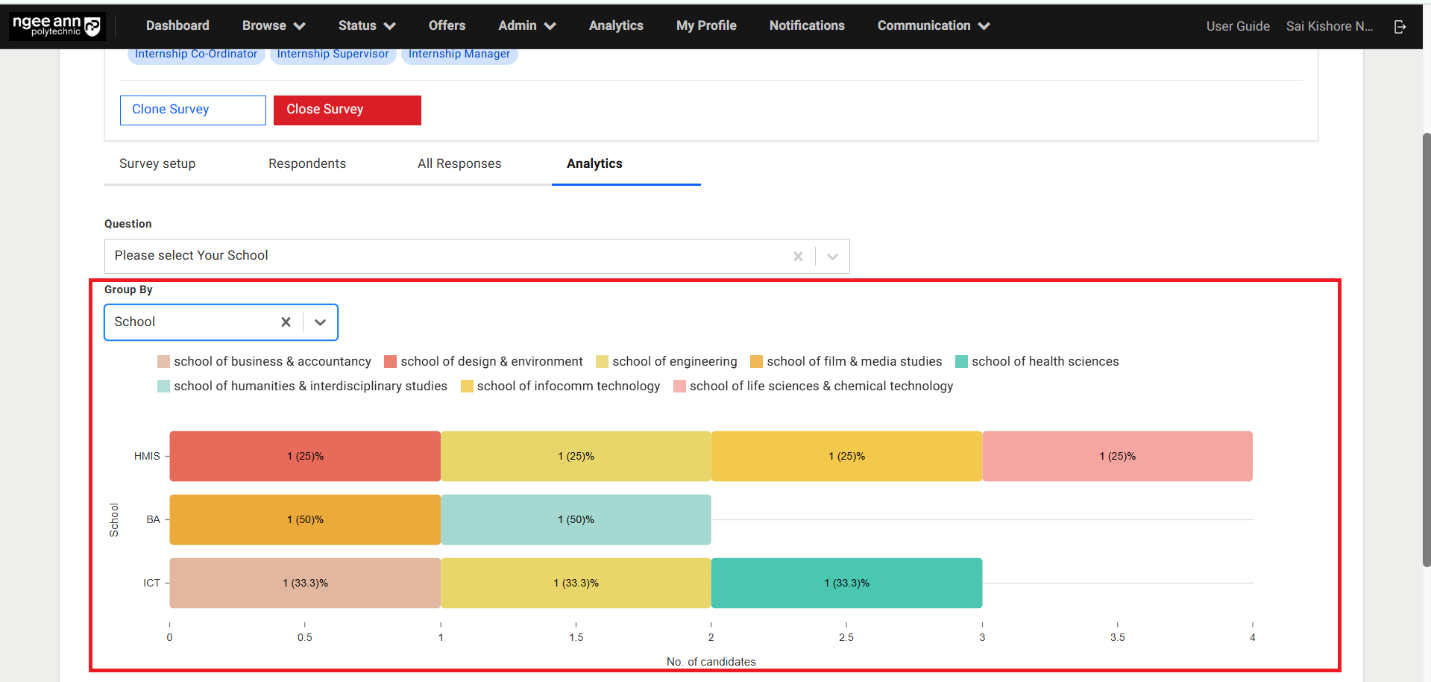
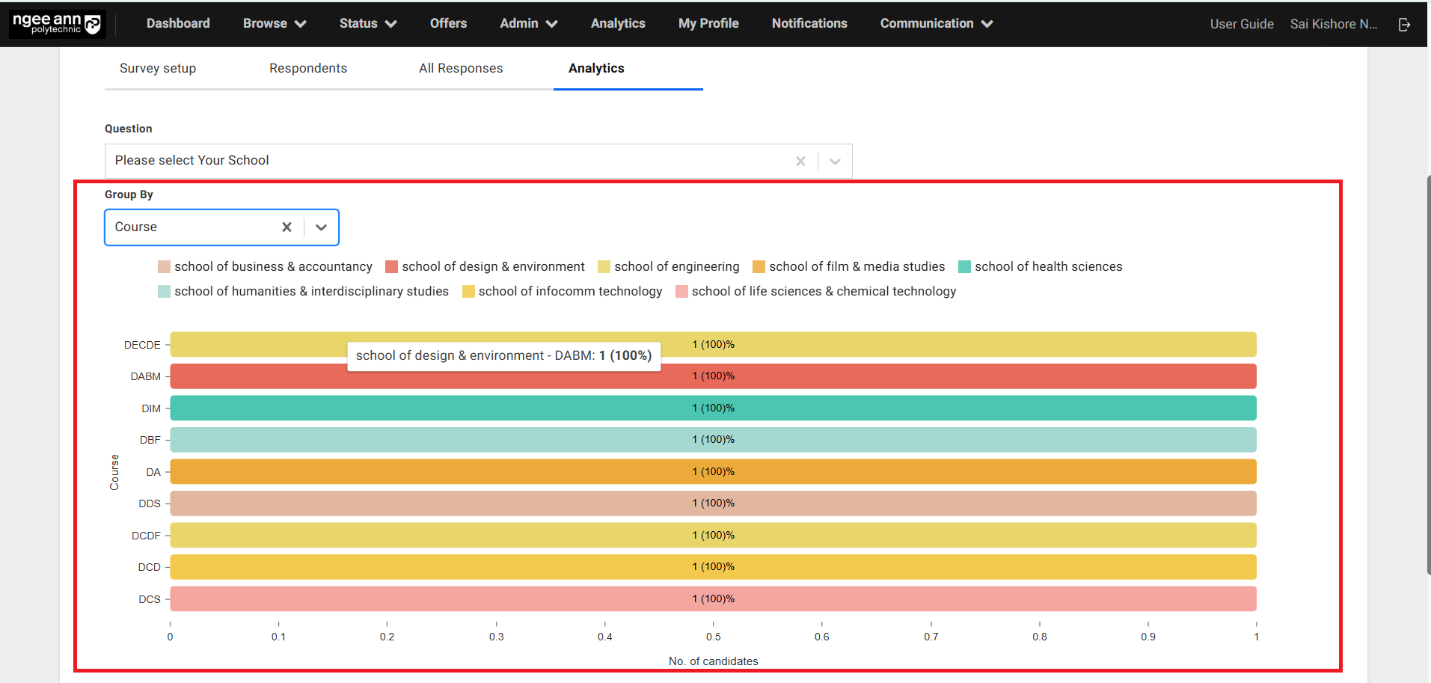
Clone Survey:
Step 1:
- Click the "Clone Survey" button.
- In the "Clone Survey" popup, click the "Yes" button to confirm.
- Verify that the selected survey is successfully cloned.
Note: Cloning a survey will also clone all associated questions.

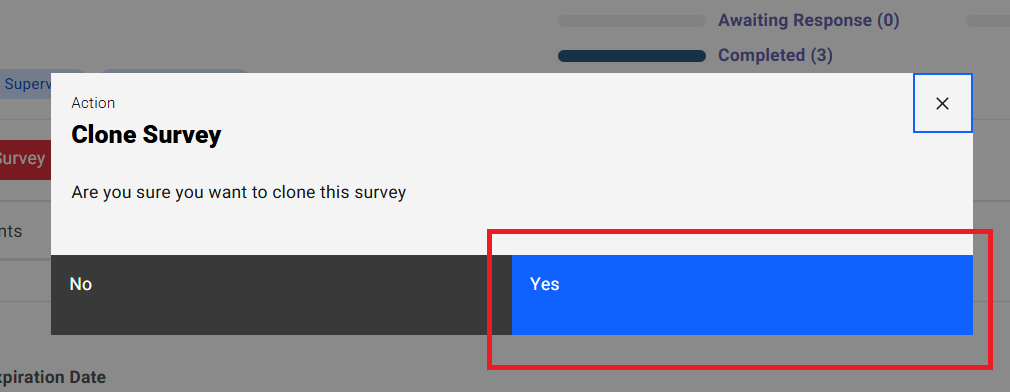
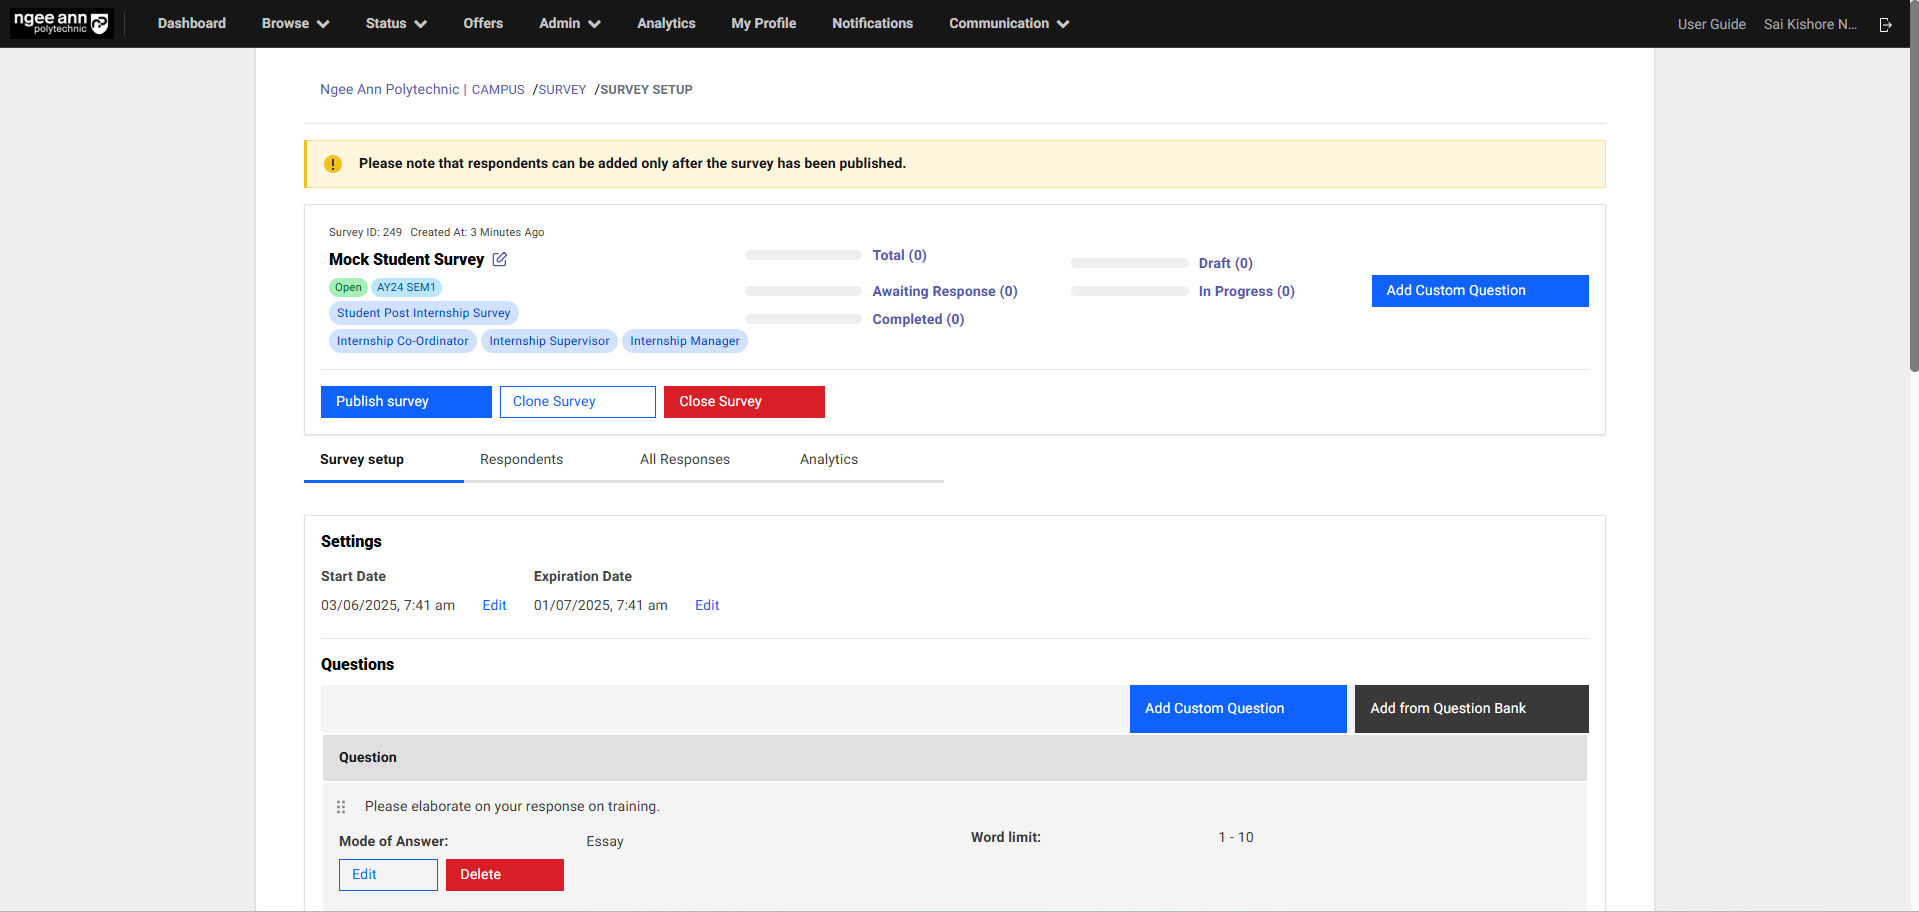
Close Survey:
Step 1:
- Click the "Close Survey" button.
- In the "Close Survey" popup, click the "Yes" button to confirm.
- Verify that the selected survey is successfully closed and successes message will be shown
Note:
- The "Close Survey" button is only visible when the survey is open.
- The survey will automatically close once it reaches its expiration time.
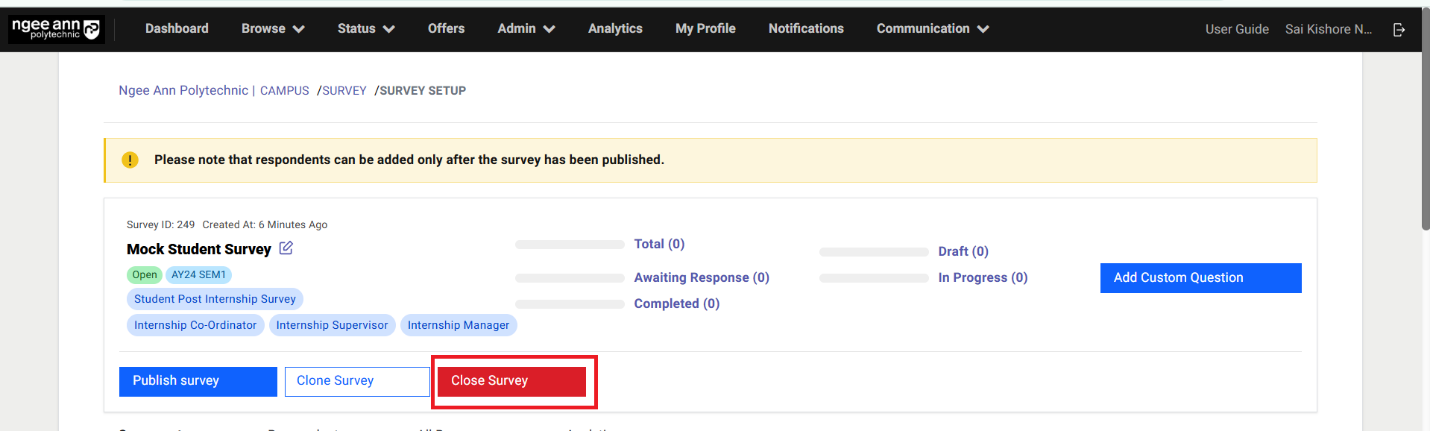
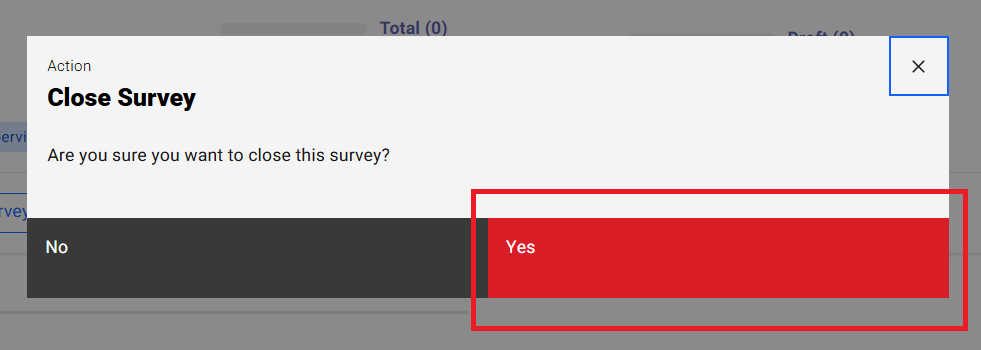
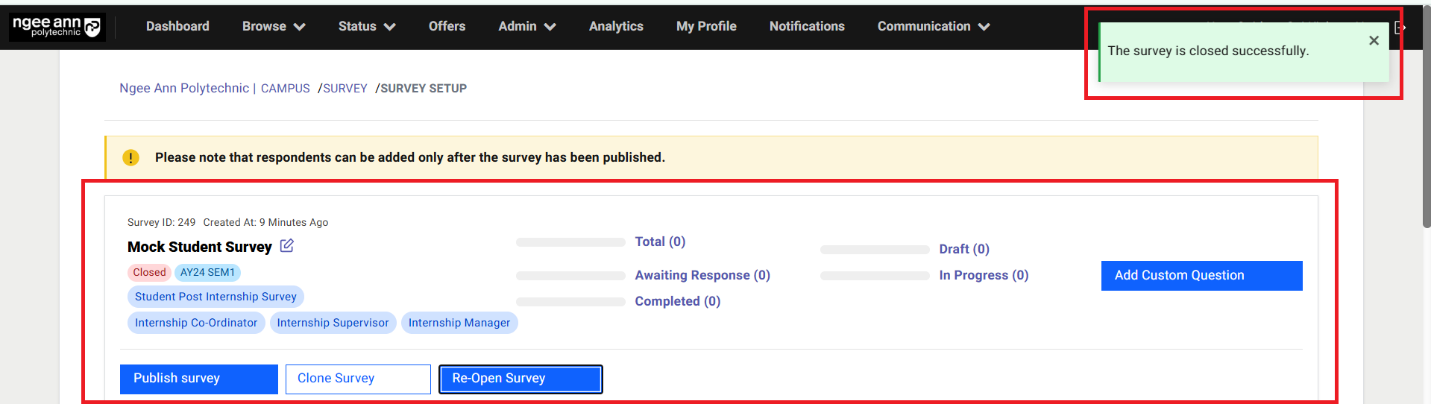
Re-Open Survey:
Step 1:
- Click on the "Re-Open Survey" button
- Click on the "Yes" button from the "Open Survey" popup
- Make sure respective survey get reopened and start & End dates will be set accordingly.
- Make sure successes message will be shown once survey re-opened.
Note:
- The "Re-Open Survey" button is only visible when the survey is Closed.
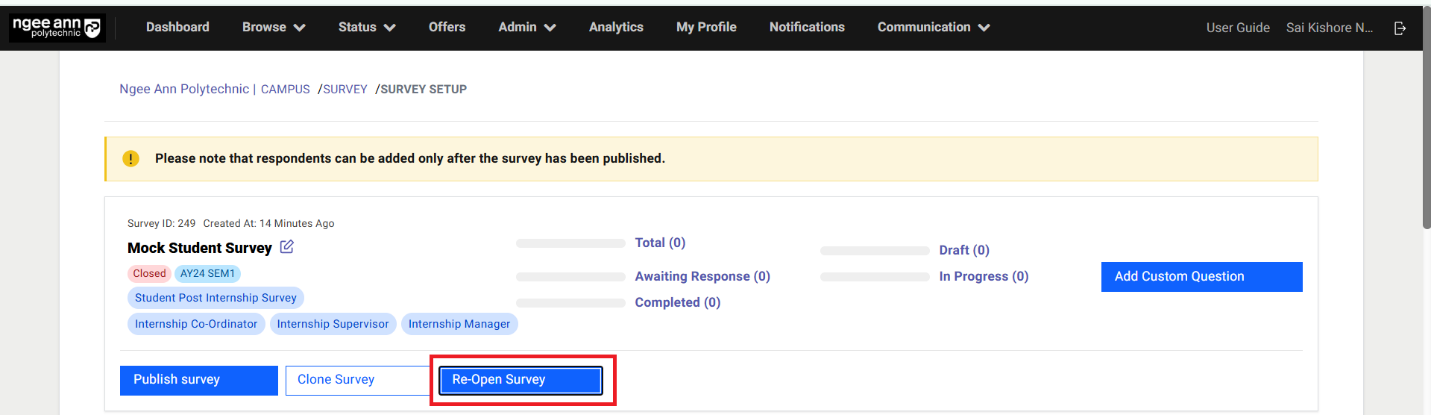
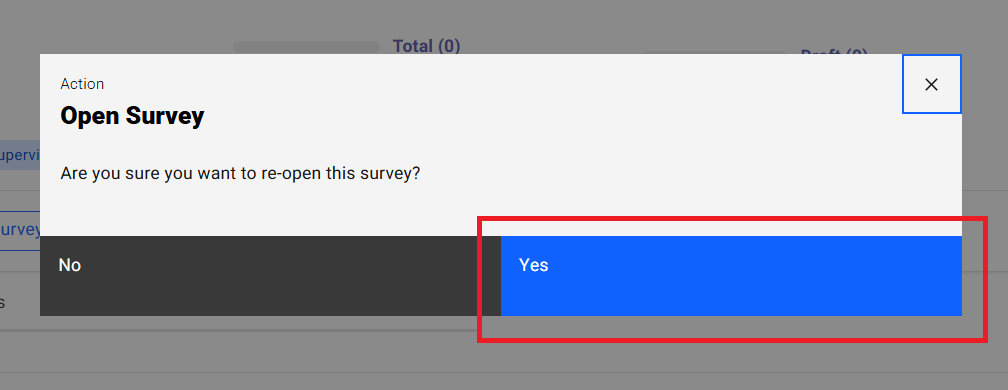
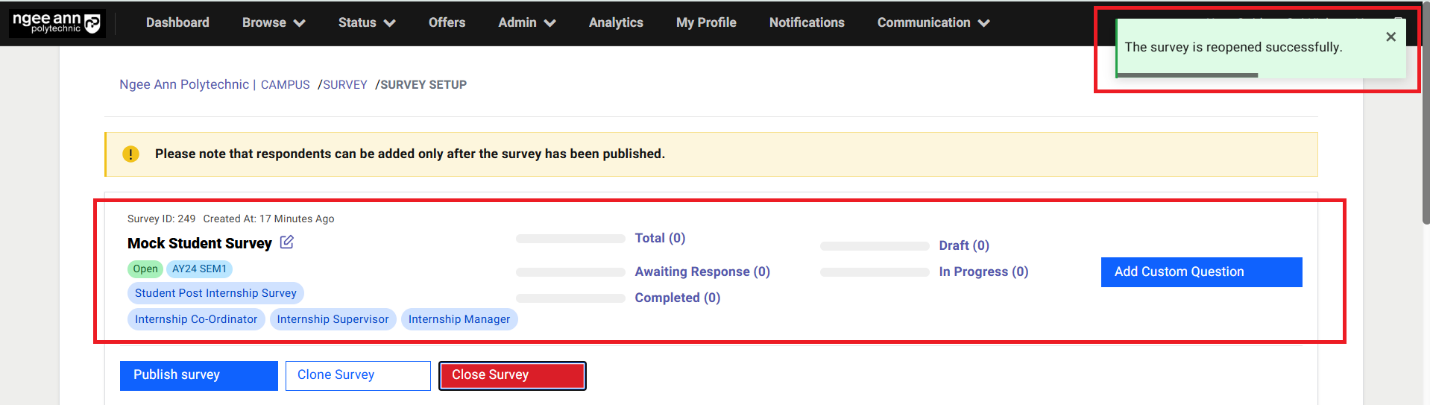
Survey (Respondent)
Survey Invitation Mail:
Step 1:
- Make sure once NP Staff Admins send survey invitation then respective respondent will receive and email notification.
- Click the "Start Survey" button in the notification email to begin the survey.
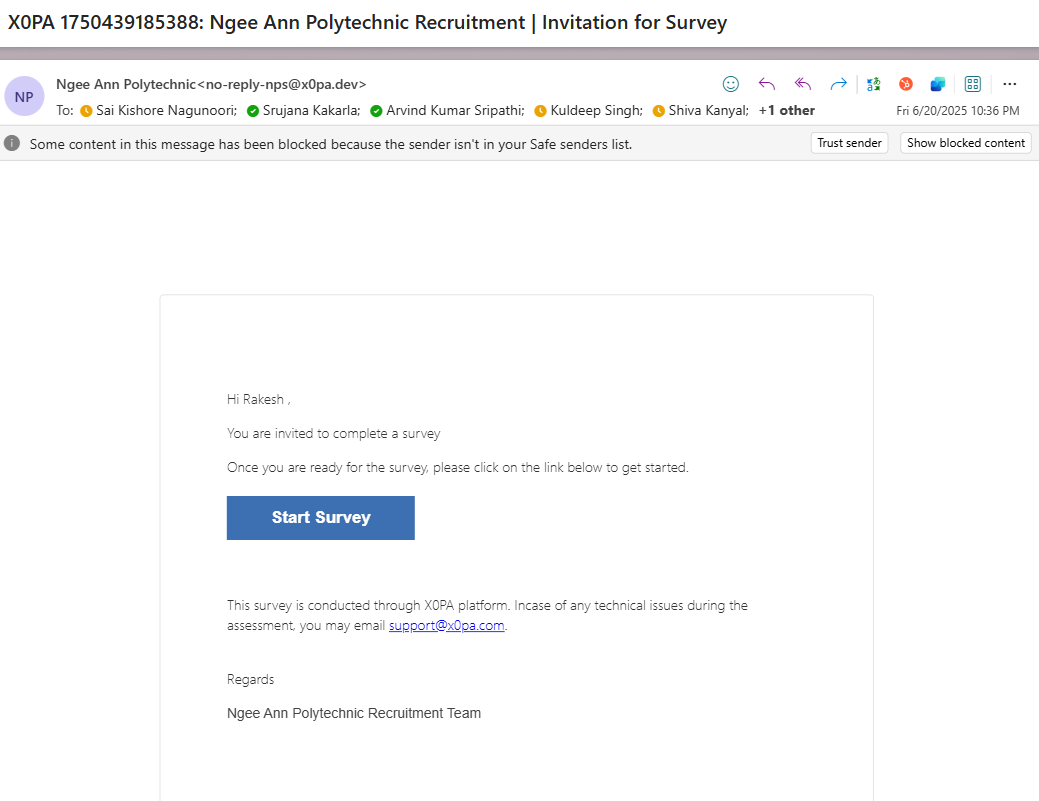
Survey Welcome Page:
Step 1:
- Navigate to the Survey Welcome page.
- Click the "Send OTP" button to request a One-Time Password (OTP).
- Once you receive the OTP via notification email, copy and paste it into the provided field.
- Select the "I agree to the terms and conditions…" checkbox.
- Click the "Start" button to proceed to the survey questions page.
Note: If you open the survey welcome page in the same browser profile where you're logged into the NP platform, you will be automatically logged out of the NP platform. To avoid being logged out, please open the survey welcome page in a new browser profile or in incognito/private mode.

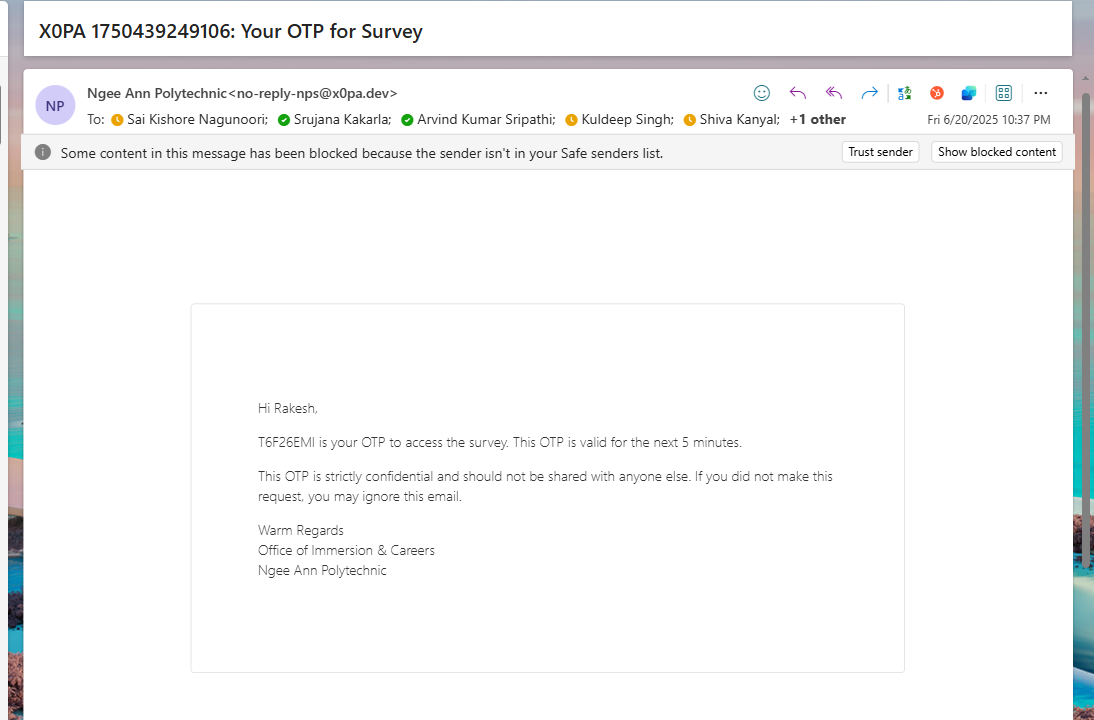
Survey Instructions Page:
Step 1:
- Instructions added by the NP Staff admins for respondents will be displayed in the instruction box.
- Click the "Start Survey" button to begin the survey.
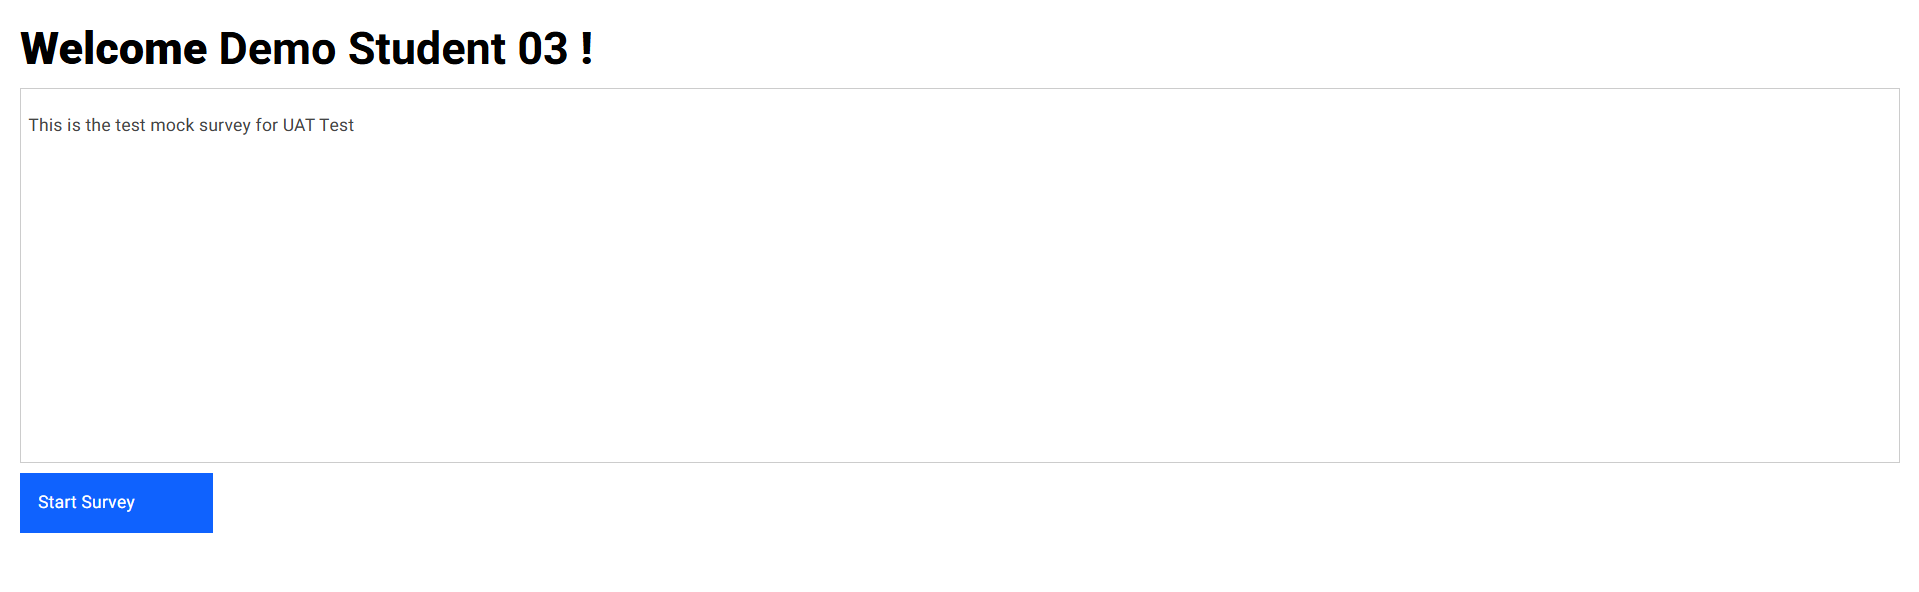
Survey Questions Page:
Step 1:
- A banner displaying the expiration message — "The survey will close on [X Date, Y Time]. You can return and edit your response before the due date." — will appear at the top of the page.
- All questions assigned to the respective survey will be displayed on a single page.
- Respondents should provide answers to each question.
- Responses are automatically saved as soon as an answer option is selected.
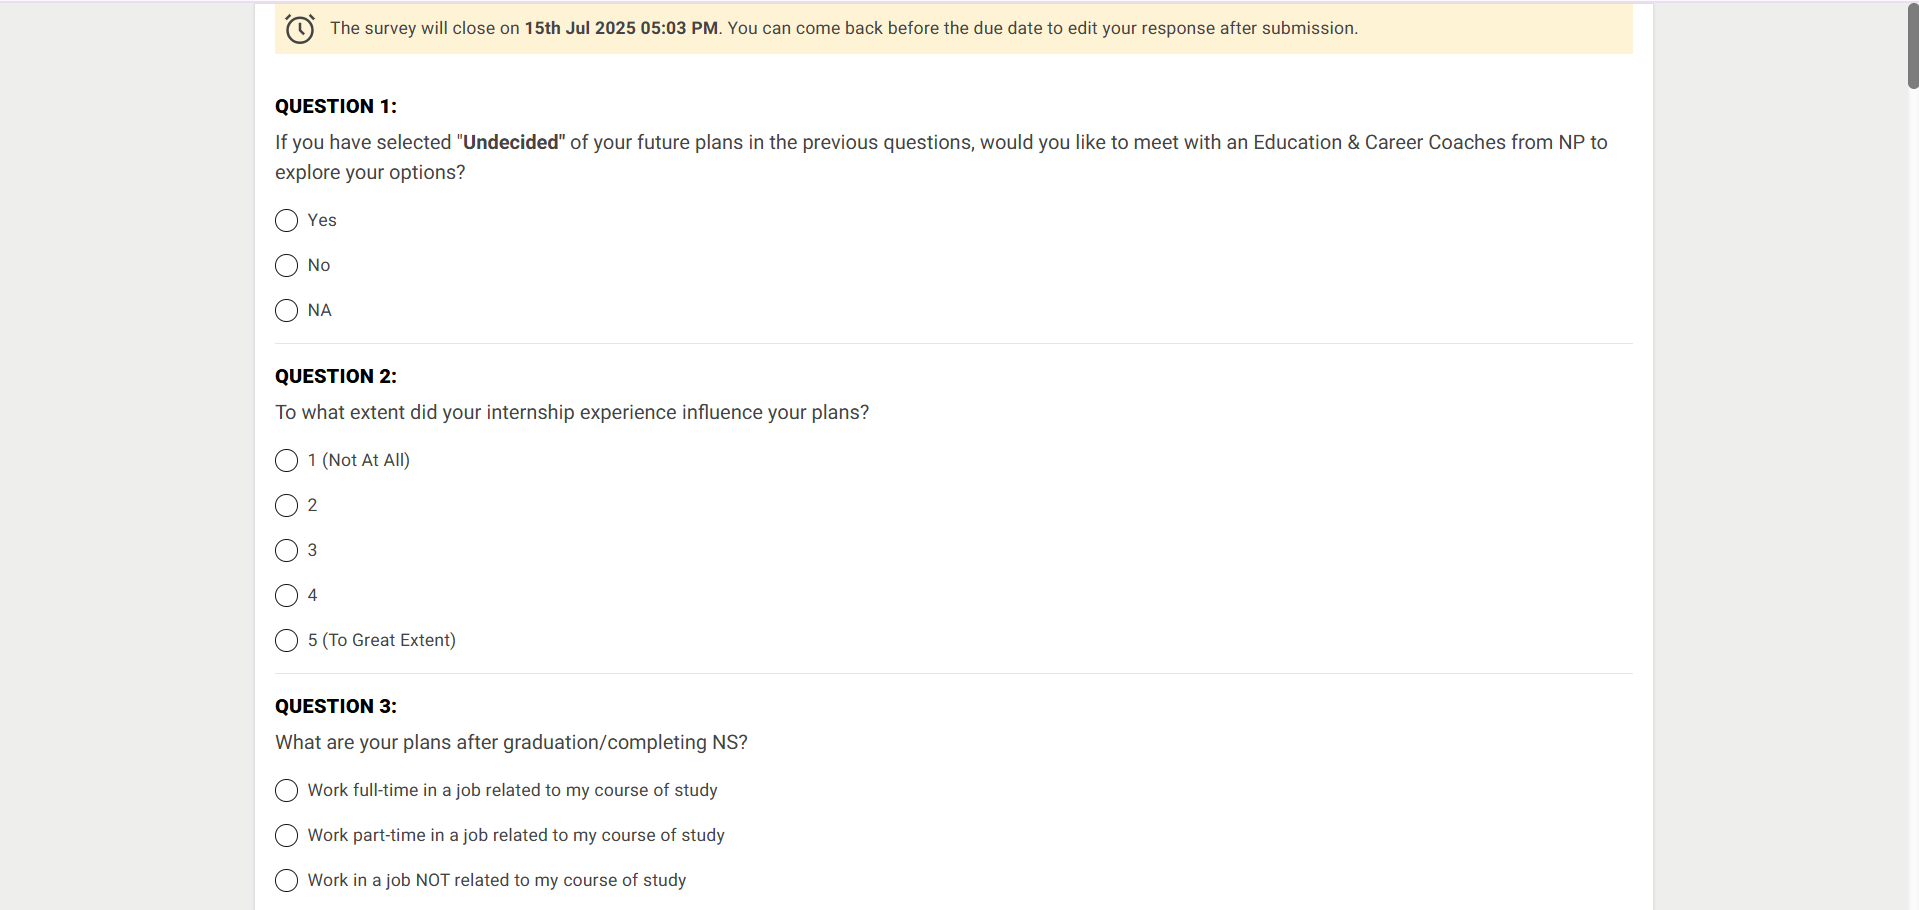

Step 2:
- A "Submit" button will be displayed at the bottom of the page.
- Click the "Submit" button to finalize and submit the survey responses.
Note: Each survey question must be answered by the respondent. If any question is left unanswered or contains invalid input, a validation error message will be displayed, and the survey cannot be submitted until all responses are completed correctly.
- "Congratulations! You've successfully completed the survey." Successes message with "Edit Responses" button will be shown when respondent submitted survey responses.
- Respondents can edit their survey responses until the survey reaches its expiration time.

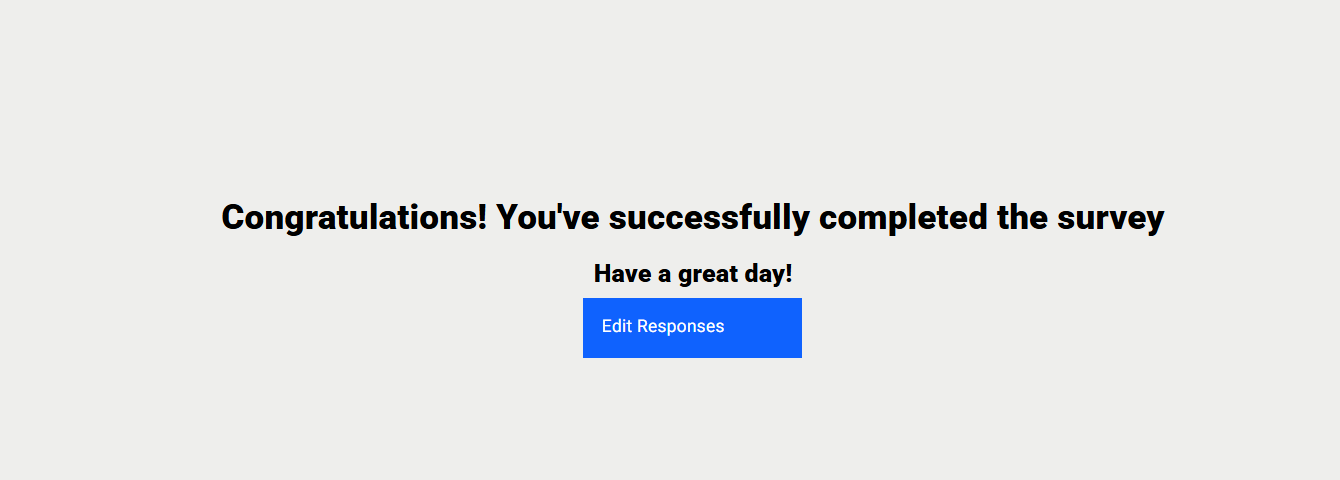
Step 3:
- After submitting the survey responses, a greeting page will be displayed with an "Edit Responses" button.
- Once submitted, the respondent will receive a confirmation email notification.
Note:
- From the Greeting page, respondents can edit their responses immediately after submission. Respondent will be redirected to OTP page
- If a respondent wants to edit the survey later, they can use the same survey invitation email to access and update their responses.